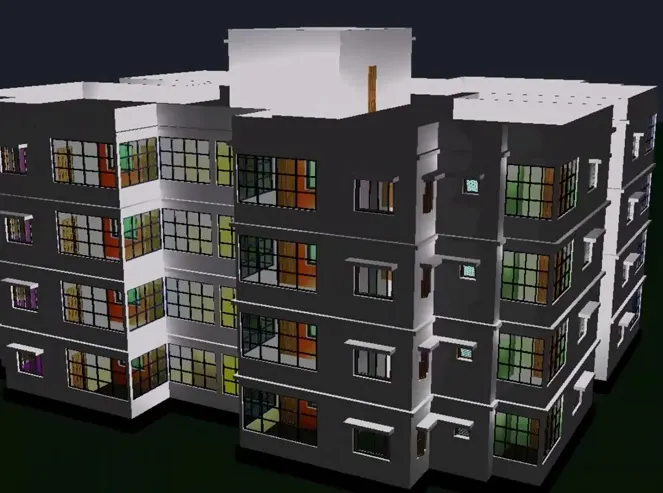
Project 2_Creating a 3D rendered model for a Residential Building in AutoCad
AIM: To create a 3D rendered model for a Residential Building in AutoCAD
Tools used in 2D
- Line: The line object is the most basic and common object in AutoCAD drawings of any discipline. Each segment is a line object that can be edited separately, assigning properties such as layer, line type, and line weight.
- Construction Lines: Construction lines (also known as xlines) are temporary line work entities that can be used as references when creating and positioning other objects or line work. Construction lines are either circles or straight lines that extend to infinity in both directions
- Polygon: Creates an equilateral closed polyline. We can specify the number of sides of the polygon and whether it is inscribed or circumscribed.
- Rectangle: When using the RECTANGLE command, absolute or relative coordinate values are used to define the size of the rectangle. Actual dimension values are preferred to create the length and width of the rectangle. Command used- REC
- Circle: Created a circle Command used - CIRCLE or C
- Erase: The erase command is used to remove or delete objects from the drawing. The selected objects can also be removed with the help of the 'Delete' button on the keyboard. We can also delete faces, vertices, and meshes in 3D with the help of Erase command.
- Copy: Copies objects a specified distance in a specified direction. With the COPYMODE system variable, you can control whether multiple copies are created automatically.
- Trim: Trims objects to meet the edges of other objects. Command used: TR
- Layers: Use layers to control the visibility of objects and to assign properties such as colour and line type. Objects on a layer normally assume the properties of that layer. However, you can override any layer property of an object. For example, if an object’s colour property is set to BYLAYER, the object displays the colour of that layer. If the object’s colour is set to Red, the object displays as red, regardless of the colour assigned to that layer. Command used- LAYER
- Mirror: The mirror command in AutoCAD is used to create a copy (mirror copy) of the selected object. We can also delete the source object after mirroring the object. The objects that represent the same as the half of their object can be mirrored across a center line to create the other half of the object.
- Offset: Creates concentric circles, parallel lines, and parallel curves. Command used: OFFSET.
- Extend: Extends objects to meet the edges of other objects. To extend objects, first select the boundaries. Then press Enter and select the objects that you want to extend. To use all objects as boundaries, press Enter at the first Select Objects prompt. Command used: EX
- Array: Creates copies of objects arranged in a pattern. We can create copies of objects in a regularly spaced rectangular, polar, or path array.
- Move: The move command in AutoCAD is used to move objects at a specified distance and direction. To move the objects with precision, we can use object snaps, grid snaps, coordinates, etc.
- Rotate: Used to rotate objects in our drawing around a specified base point. To determine the angle of rotation, we can enter an angle value, drag using the cursor, or specify a reference angle to align to an absolute angle. Command used: ROTATE
- Dimension: Creates multiple dimensions and types of dimensions with a single command. We can select objects or points on objects to dimension, and then click to place the dimension line. When we hover over an object, the DIM command automatically generates a preview of a suitable dimension type to use.
- Text: We can use single-line text to create one or more lines of text, where each text line is an independent object that you can move, format, or otherwise modify. Right-click in the text box to select options on the shortcut menu.
- Fillet: The fillet tool helps form round corners between any two entities that form a sharp vertex. Command used: FILLETEtc.
Tools used in 3D
- Revolve
- Extrude
- Sweep
- Union
- Subtract
- Intersect
- RENDERING
PROCEDURE:
Step 1: To draw the plan using AutoCAD 2D.
- Set units in architectural feet and inches
- Set lower limits 0',0' and upper limits 100',100'
- Type z enter and A enter
- By layer property set different colors for windows, grills, steps, stairs dimensions and text
- Using line plan layout of a single residential was prepared
- Doors and windows are provided at necessary place
- Using dimlim command dimensions was completed
- Staircase and steps, common corridor was made
- Using mirror command the plan prepared was mirrored to obtain the ground floor of residential flat
- It has same plan throughout 4 floors by using copy command 4 floor are made
Step2) to project walls to convert the plan from 2d to 3d in Autocad
- In setting select 3D modeling and visual style control to 2D wireframe to move to Autocad 3D
- View use is south west isometric view
- Turn off all layers except wall layer
- Using join command join the entire drawing
- Using extrude command create 3D wall with upward direction at a height 9'6"
- Door cut outs of 7'at a height 2'6"
- Select complete drawing to union by union command
- Windows are created and extrude by 4' small toilet windows was extruded by 2' downward
- Using subtract command windows are subjected from walls
- Turn off window layer and turn on grill layers
- In same way balcony is made at plinth level at the grills
- Moved and extruded by 2'6"
Floor level
- Polyline command is used using move command polyline made downloads to plinth level
- Extruded by extrude command
Common corridor and plinth
- Polyline is used to connecting staircase, common corridor, and lift room
- Copy command is used
- Extruded by extrude command Offset command is used outward by 6"
- Join all the polylines by join command
Step3) to design staircase
- Staircase is drawn Turn on staircase layer
- Union option is used
- Move and copy command is used
- To draw steps rectangle is used and then extruded by height 6",12",18"
- Use union command to join steps
Step4)designing and placing of 3D doors,swinging louver, sliding window, normal window and glass grills
Step5) material library is used
Step6)adding lights and coloring of walls
- Select color face tool in the solid editing panel to apply colour to each room faces for wall coloring
- Adding lights diagonal line was drawn in each room by line command
- Create light option and place light at center click on intensity factor click on 20 and click enter twice
- After delete the diagonal lines
Step7) add chajjaand 3D mirroring of the flat
- Polyline and extrude command is
Step8) adding lift room and roof
For lift room: Rectangle, extrusion, union, slice and materials command is used
For roofing: in 2D wireframe polyline and move command is used
Step9) designing and placement of staircase rails
Step10)adding mumty, parapet wall and copying floors
Step11) rendering is done
2D plan of the building
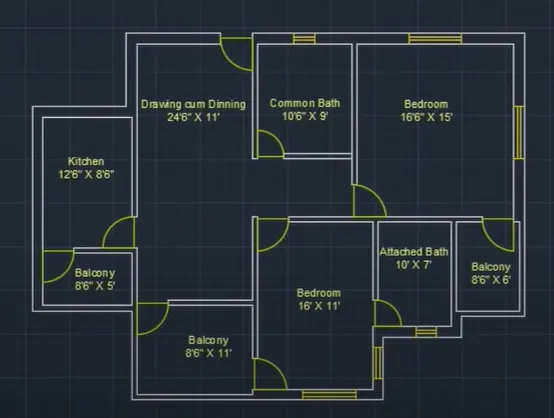
The complete ground floor plan comprising of four residential flats
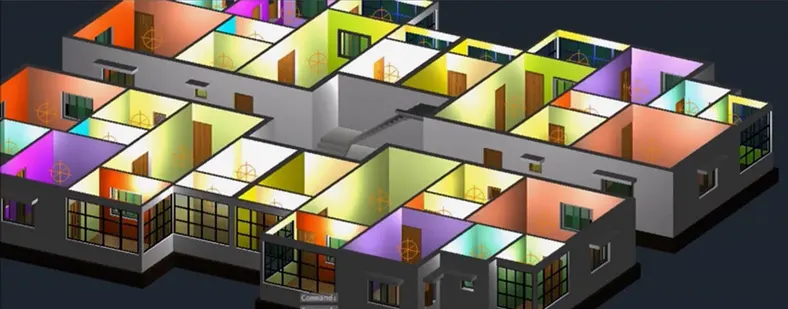
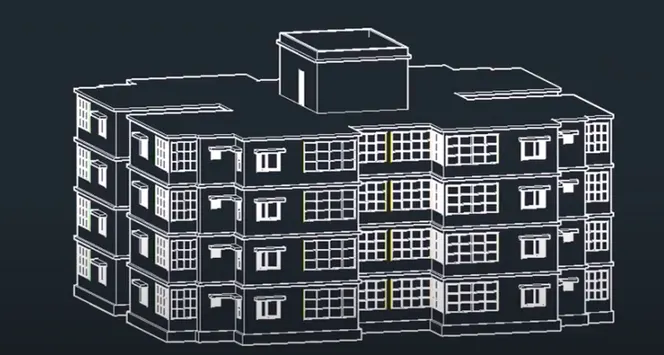
2D wireframe view of the entire building is as shown
Rendered and final image of the building