Project 1 - Interfacing a 16*2 LCD with Arduino using I2C protocol
OFFLINE EMBEDDED BATCH
Project 1 - Interfacing a 16*2 LCD with Arduino using I2C protocol
overview of the Project:
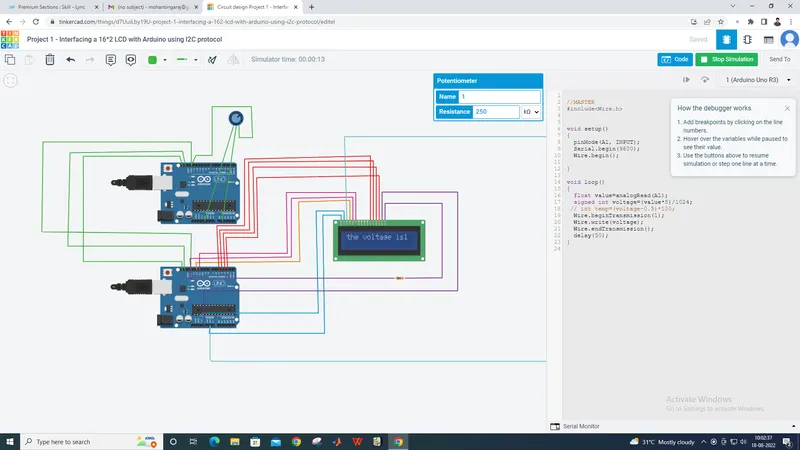
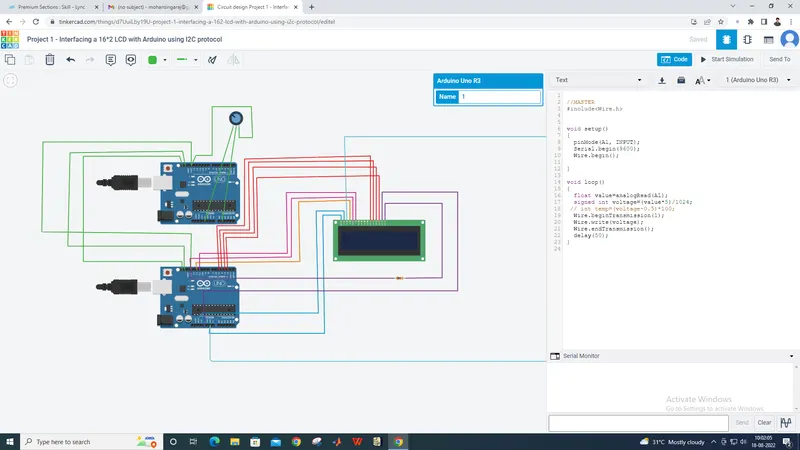
In this project implementing the Code for “Interfacing a 16*2 LCD with two Arduino’s (one for Master and one for Slave) using Inter-Integrated Circuit (I2C) communication protocol” by sending the message to LCD using I2C communication protocol and display the message on LCD screen.
Goals:
- Communication between Arduino and 16*2 LCD using I2C protocol.
- Displaying the message sent by Master and received by slave i.e. LCD display.
Key Highlights of the Project:
- Using the inter-integrated circuit communication protocol, transferring the data i.e. the message we want to display is sent to the LCD.
- Two Arduino’s connected to the LCD display and the communication is executed using I2C protocol between Arduino and the LDC display.
Deliverables of this project:
- Communication between the Arduino’s and LCD using I2C.
- The message passed from master to slave and displayed on the 16*2 LCD.
Expected Outcomes:
- Students will get the Knowledge of I2C communication Protocol and the Arduino.
- The Hardware connection of all components used in this project.
- Displaying the message sent by master (Arduino) and received by the slave (16*2 LCD display).
PROGRAM:
//MASTER
#include
void setup()
{
pinMode(A1, INPUT);
Serial.begin(9600);
Wire.begin();
}
void loop()
{
float value=analogRead(A1);
signed int voltage=(value*5)/1024;
// int temp=(voltage-0.5)*100;
Wire.beginTransmission(1);
Wire.write(voltage);
Wire.endTransmission();
delay(50);
}
//SLAVE
#include
#include
LiquidCrystal lcd(12,11,5,4,3,2);
void setup()
{
Serial.begin(9600);
Wire.begin(1);
Wire.onReceive(ruso);
lcd.begin(16,2);
}
void loop()
{
delay(50);
}
void ruso(int y)
{
signed int voltage=Wire.read();
lcd.setCursor(0,0);
lcd.print("the voltage is");
//lcd.setCursor(0,1);
lcd.print(voltage);
//Serial.print("voltage value\n");
//Serial.println(5);
delay(50);
}
BEFORE:
AFTER: