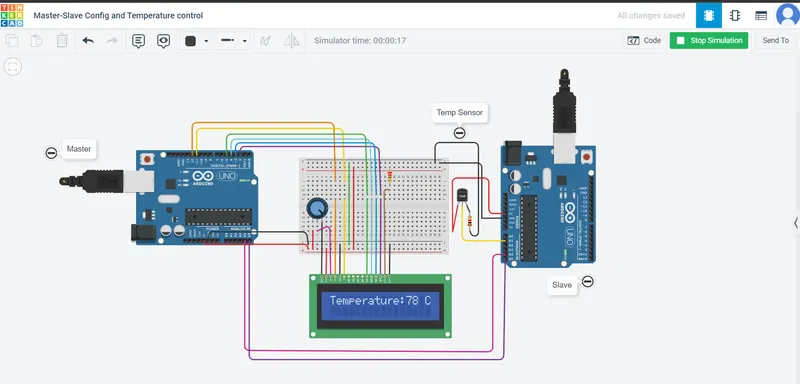
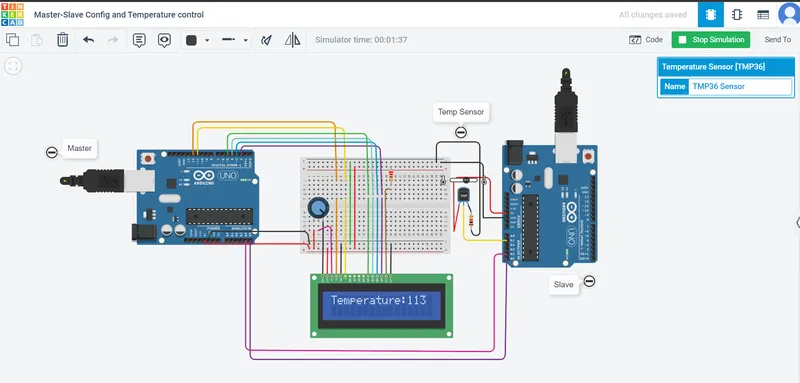
Project 1 - Interfacing a 16*2 LCD with Arduino using I2C protocol
Project -1
AIM : In this project implementing the Code for “Interfacing a 16*2 LCD with two Arduino’s (one for Master and one for Slave) using Inter-Integrated Circuit (I2C) communication protocol” by sending the message to LCD using I2C communication protocol and display the message on LCD screen.
Key Highlights of the Project:
- Using the inter-integrated circuit communication protocol, transferring the data i.e. the message we want to display is sent to the LCD.
- Two Arduino’s connected to the LCD display and the communication is executed using I2C protocol between Arduino and the LDC display
What is I2C Protocol ?
I2C stands for Inter-Integrated Circuit. It is a bus interface connection protocol incorporated into devices for serial communication. It is also known as Two Wired Interface(TWI).
I2C combines the best features of SPI and UARTs. With I2C, you can connect multiple slaves to a single master (like SPI) and you can have multiple masters controlling single, or multiple slaves. This is really useful when you want to have more than one microcontroller logging data to a single memory card or displaying text to a single LCD.
Like UART communication, I2C only uses two wires to transmit data between devices .
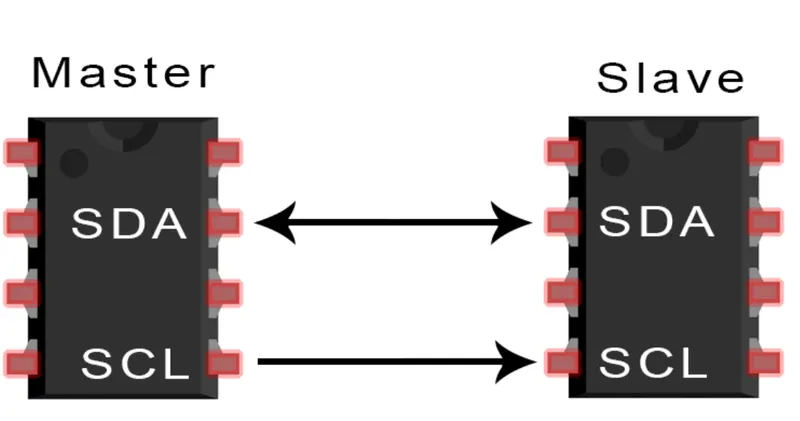
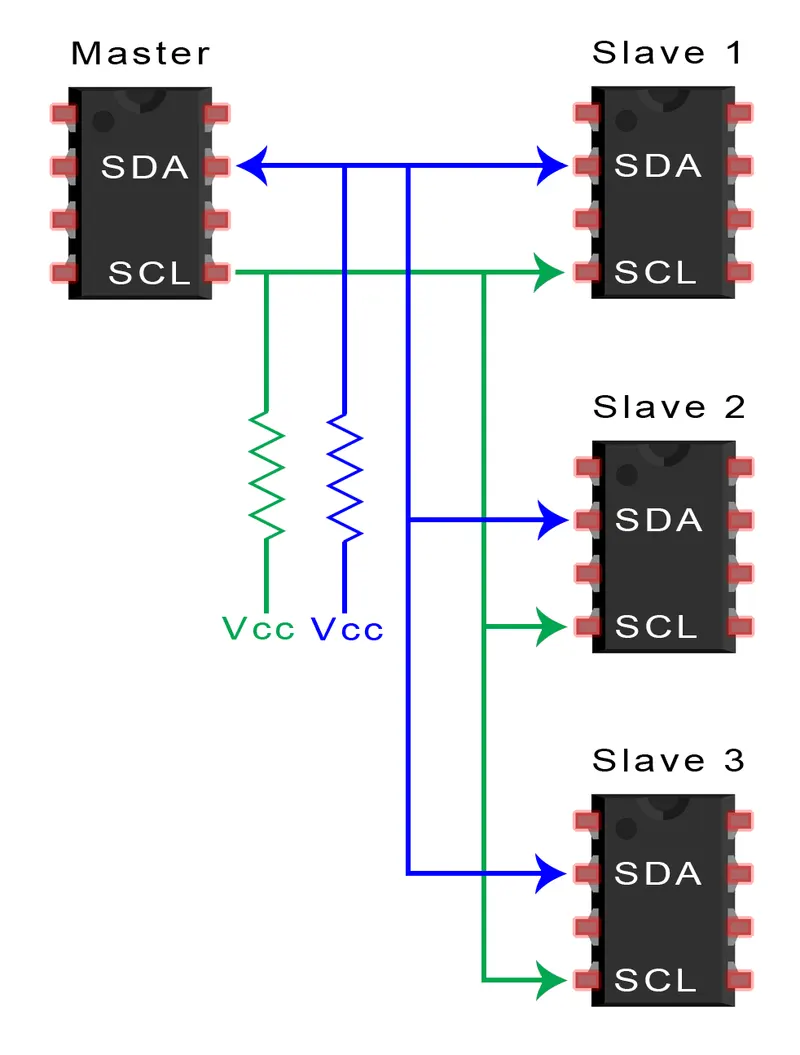
SINGLE MASTER WITH MULTIPLE SLAVES
Because I2C uses addressing, multiple slaves can be controlled from a single master. With a 7 bit address, 128 (27) unique address are available. Using 10 bit addresses is uncommon, but provides 1,024 (210) unique addresses. To connect multiple slaves to a single master, wire them like this, with 4.7K Ohm pull-up resistors connecting the SDA and SCL lines to Vcc:
Arduino Code :
Master Device :
//Master
#include <LiquidCrystal.h> //Library for the lcd display
#include <Wire.h> // Library for establishing the interface between the devices through I2c protocol
int slave; // variable to store data from slave 1 // variable to store data from slave 2
LiquidCrystal lcd(12, 11, 5, 4, 3, 2); // digital pins for LCD
void setup()
{
lcd.begin(16, 2); // Number of columns and rows on the LCD.
Wire.begin(); // For joining arduino to I2C bus
Serial.begin(9600); // Connecting to the serial monitor
lcd.print("Temperature: ");
}
void loop()
{
Wire.requestFrom(5,1); // Requesting 1 byte from slave device having address 5.
while(Wire.available()) // Checking for having any bytes in the wire library.
{
slave = Wire.read();
lcd.setCursor(12, 0); // LCD cursor set at 12 column and 0 row
lcd.print(slave);
lcd.print(" C");
delay(3000);
}
}
Slave Device :
//Slave
#include <Wire.h>
int pin = A1; // initialise A2 pin as integer
float voltage; // initialise voltage as float
int temp; // initialise temp as integer
void setup()
{
Wire.begin(5); // For joining arduino to I2C bus
Wire.onRequest(requestEvent); // function requested byte of data will transfer
Serial.begin(9600);
}
void loop(){
voltage=analogRead(pin); // get analog value from pin
voltage = voltage * 4.8;
voltage = (voltage)/1000.0;
temp = (voltage) * 100;
Serial.println("Sensed Temp") ; // printing the value of temp on serial monitor
delay(500); // wait for half a second
}
void requestEvent(){ // A kind of interrupt handler function
Wire.write(temp); // For writing the requested byte of data
}
Intended Output :