Project 1_Comparative study of different storey buildings for Seismic forces
Project:- Comparative study of different storey buildings for Seismic forces.
Aim:-
TO MODEL AND ANALYZE MULTIPLE BUILDINGS WITH DIFFERENT FLOOR LEVELS AND DESIGN PARAMETERS USING ETABS SOFTWARE AND COMPARE THE RESULTS TO UNDERSTAND THEIR OVERALL SEISMIC BEHAVIOUR.
Introduction:-
The structural configuration of the building give the major role to determining the overall structural response during an earthquake.Different shape and size building act different when it under the same seismic force. Hence, it is very important to understand the response of buildings when the the design is different, because thit is very important for safe design . Therefore in this project, we make a deffent building model with varying geometries using ETABS. Furthermore, their responses are analyzed with the help of the software and the their results are compared the structural behavior of buildings with different storeys.
Objectives:-
- Know how to extract different seismic responces for a structure.
- How to easily alter certain properties in an Etabs model.
- Understand the concept of factor influencing the dynamic characterstic of building.
- know the factor influencing time period of building.
- know the factor influencing model shape of building.
Detail Procedure For different cases of the building as per given data:-
A) Design building with 2 storeys with given data is:-
NO of bays in X direction:-4
NO of bays in Y direction:-3
Column dimension :-400x400m
1 Step:-Open ETABS and Set up the Model
- Open ETABS software from the desktop.
- Once the software is running up , click on the new model option.
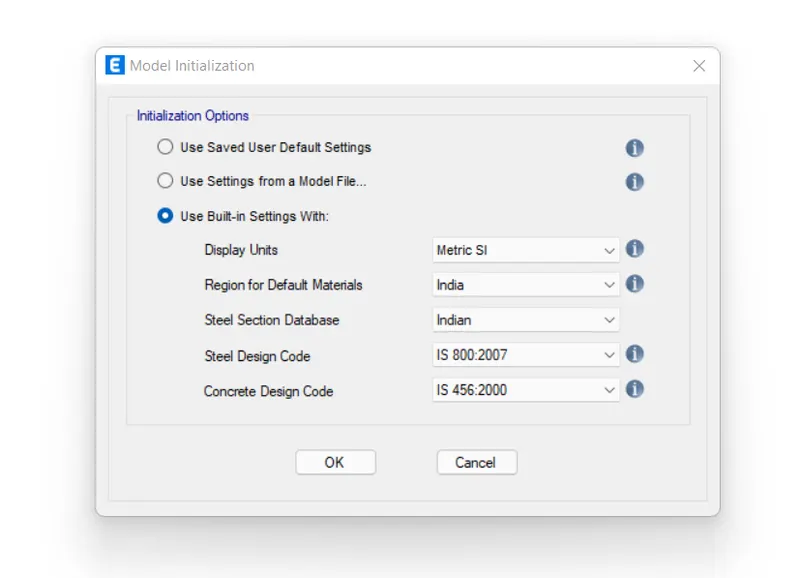
- you click on the new model, a dialogue box is open,where you can set the option "Use Built-in setting with" then enter codes and units to be used in your project.
- Thus, do the needful settings and click ok to start modeling the first building in this project.
2 Step:- Setting up the Grid Data
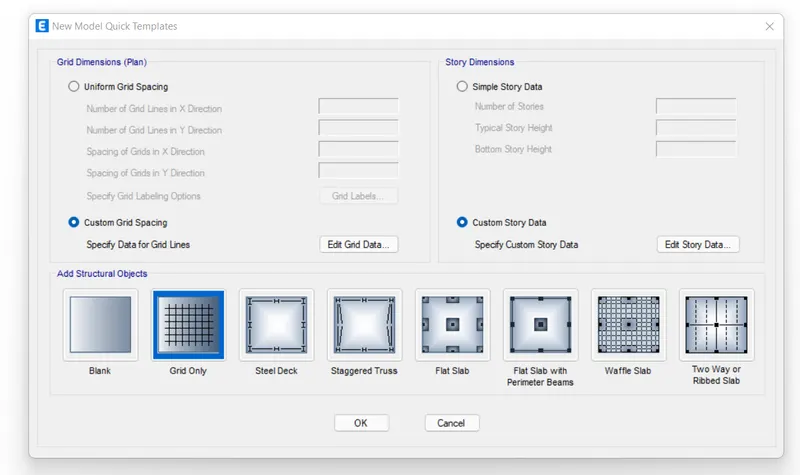
- click on custome gid setting
- After it show the grid sysytem data window .
- In the same menu, you can fix the length, numbers of grids in both the orthogonal directions, spacing between all the vertical and horizontal grids, etc.
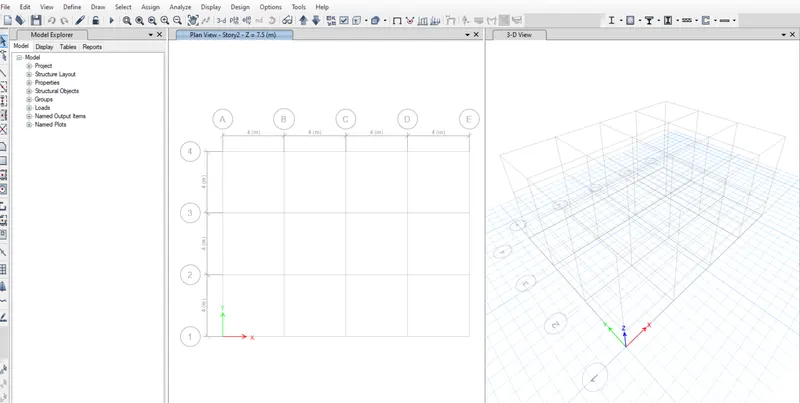
- So, by following the same data , we have set up a 4 x 3 bay grid with 4m center to center spacing in-between.
3Step:-Fixing the Story Data
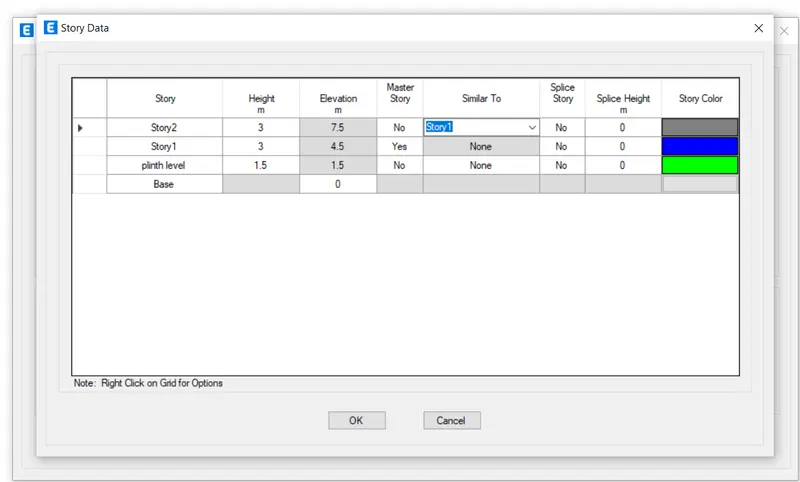
- Similar setting up the grids, click on the custom story data option.
- Then, specify the base level, plinth level, height of each floor, and the number of floors to be included in the model and extra floor should be omitted
- Thus, we have arranged for a G+2 building with a 1.5m plinth height from the base.
- Also, you need to fix a master story and all the similar storeys in the same menu.
- And for our project, story one is the master and all other remaining floors are similar storeys.
- Once, you do this, your model is set to be executed in ETABS with the grid and storeys as specified.
4 step:-Defining the Material Properties
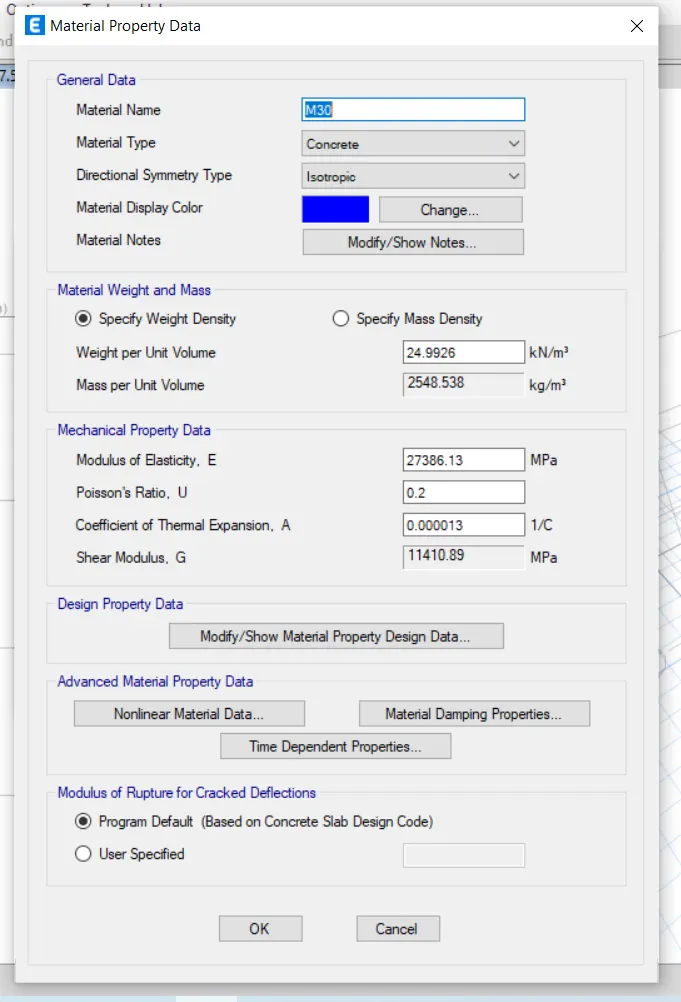
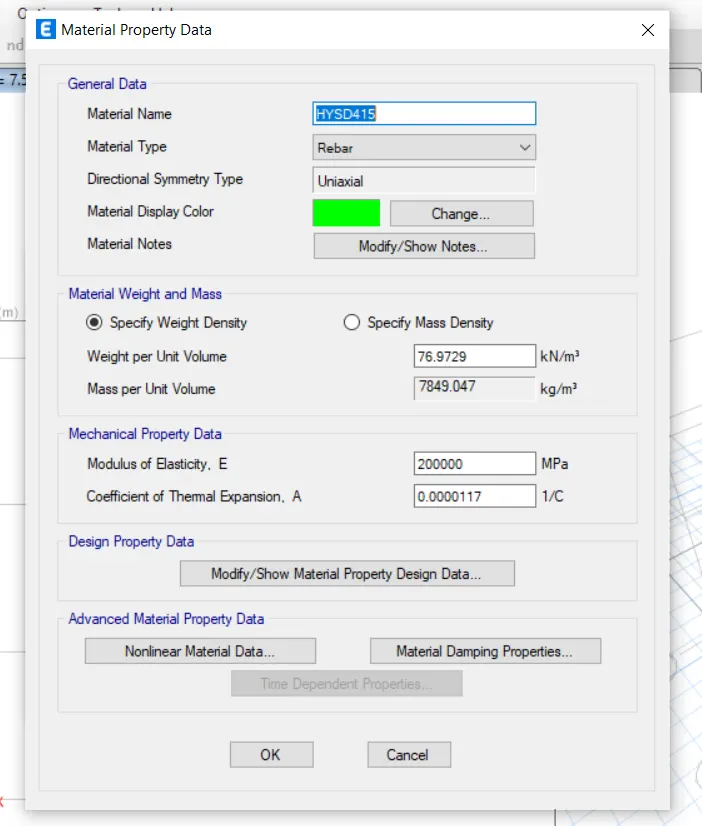
- And for our model, we have to use the M30 grade concrete and Fe415 HYSD steel as per the specifications.
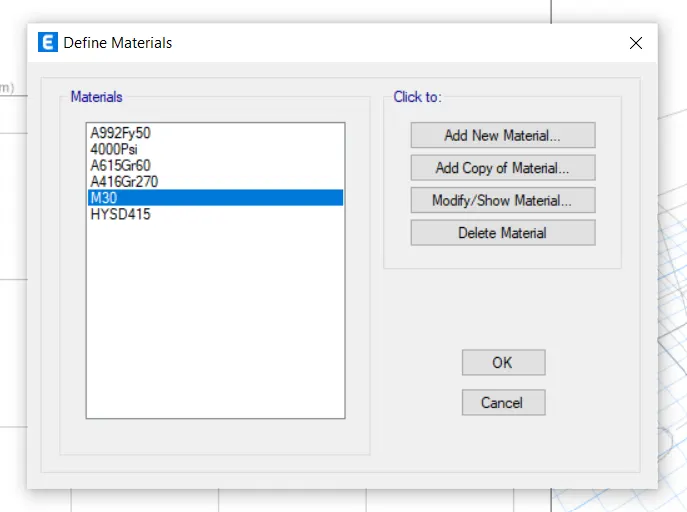
- So, in order to define the same, go to define select materialproperties add new concrete/steel with their specification then ok
- However, since we have already specified the Indian Standard Codes of practices, the M30 concrete and Fe415 steel is added by default in first bultup setting window.
5 step:-Defining Section Properties
- We are select the rectangular concrete sections for all the structural elements like column slab and beam.
- Etab software give us a shape of structural elements which used repetedly in our project.
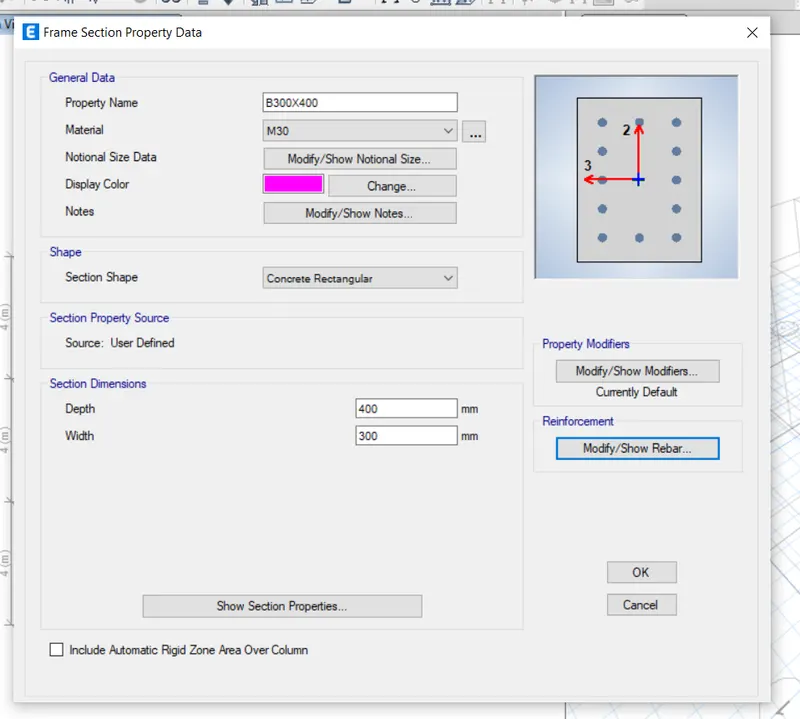
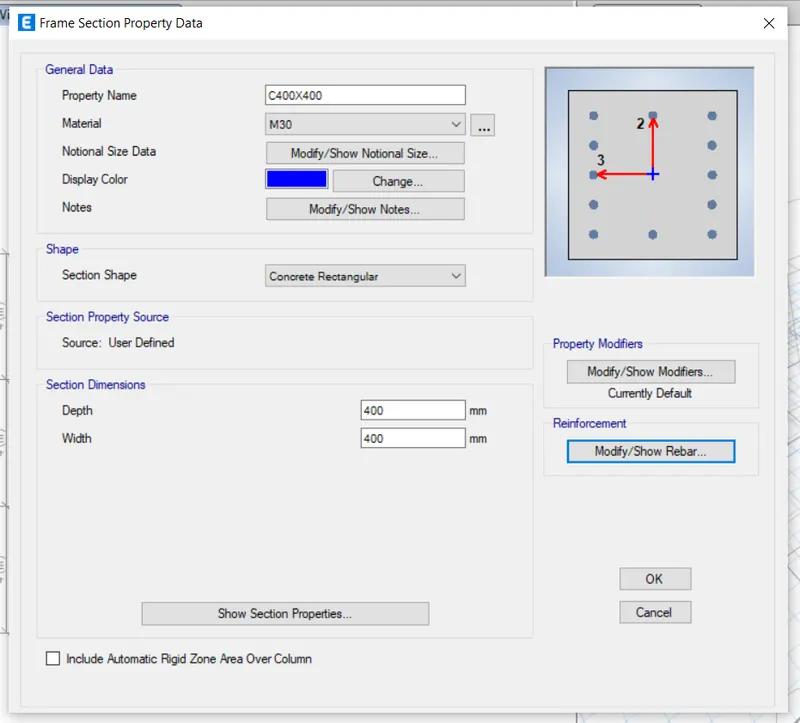
- And again floow tha path, go to define, then section properties,and then frame sectionand select concrete rectangular.
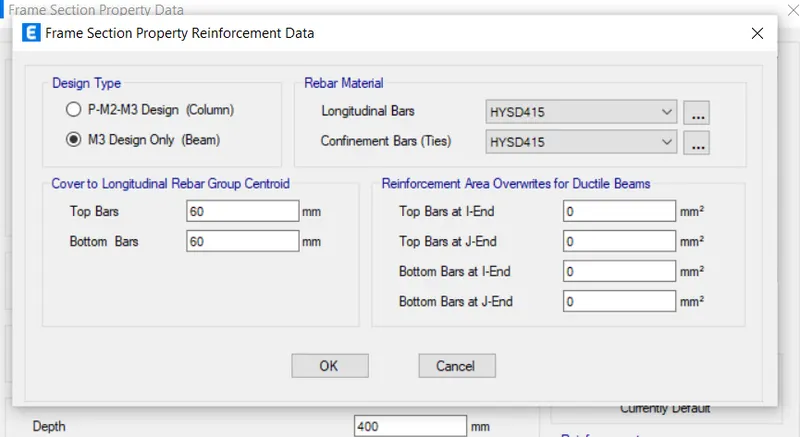
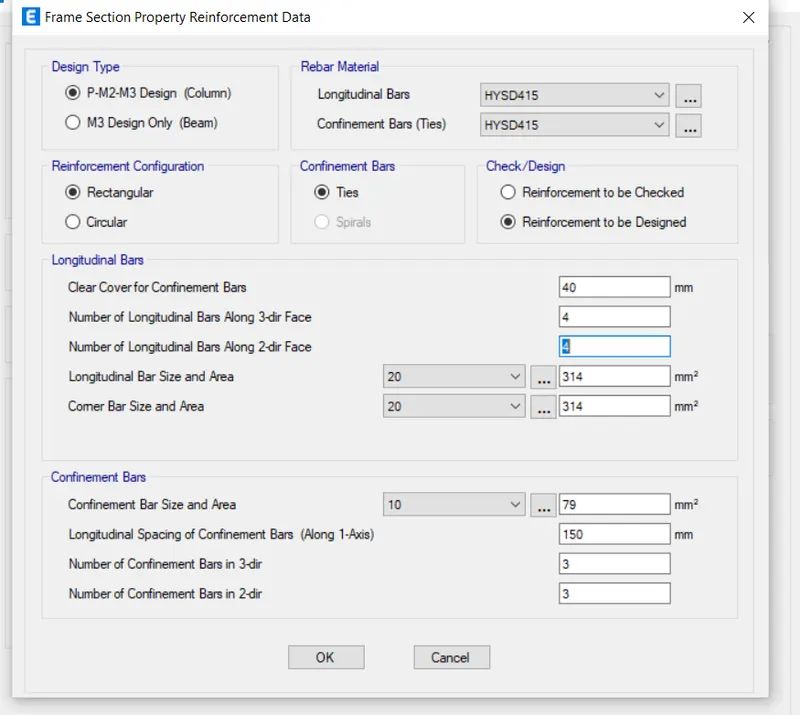
- Then, a dialogue box will appear on your ETABS screen where you can specify the column/beam dimensions and the type of reinforcement (HYSD415) and material M30 to be used in the model.
- So, you can define both columns and beams from the same menu.
- Now, to define the slab section, again go to define then select section slab.
- Again a menu will open where you need to set the slab specifications required for the project.
- Here, we need to specify the slab thickness as 150mm and the section as a membrane.
6 Step:-Define the Load Patterns
- After material details now we need to list down the types of loads that are expected on the structure during its service period.
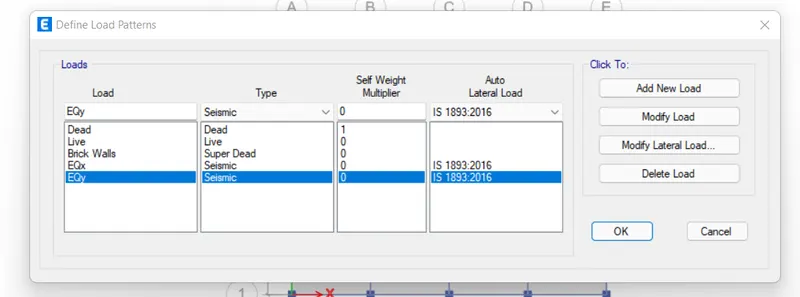
- consider all load with the path define>load patterns>add loads.
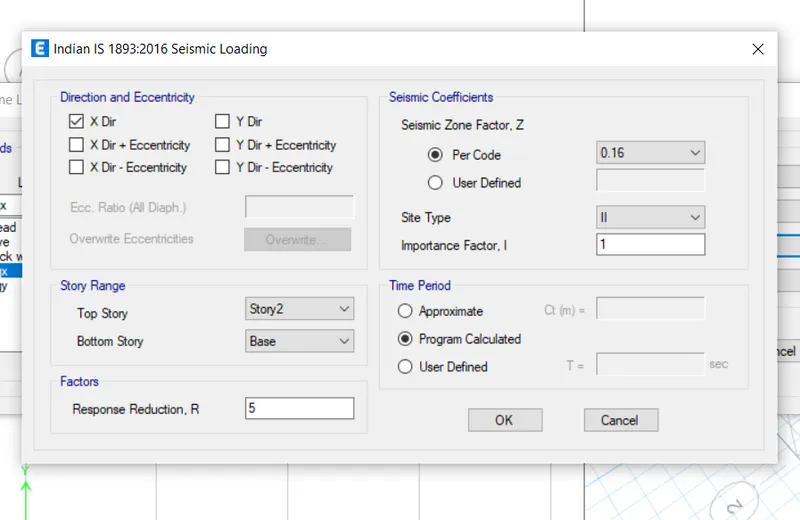
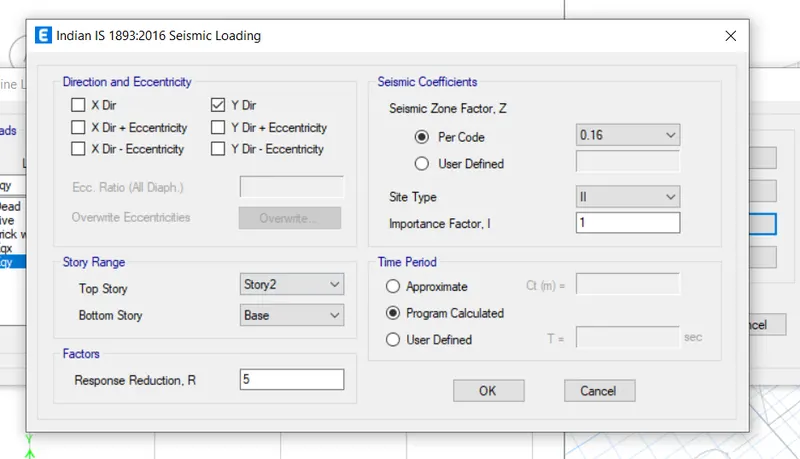
- Here, you can add all the loads and for our project, we are having the dead load, Brick wall load, live load, and the earthquake load in x and y directions.
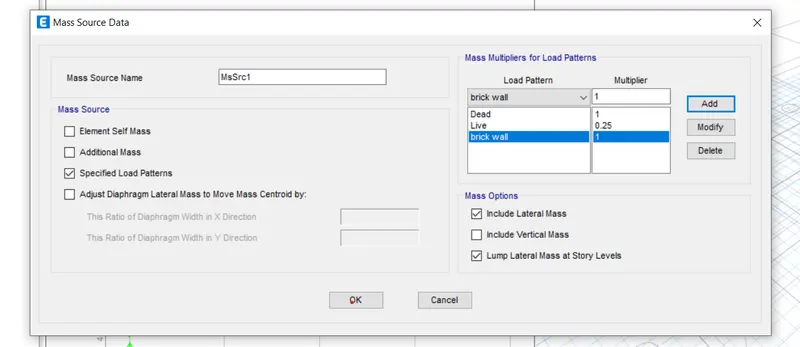
- Also, we need to define the mass source by adding 100% of dead and super dead load as well as 25% of the imposed or live load.
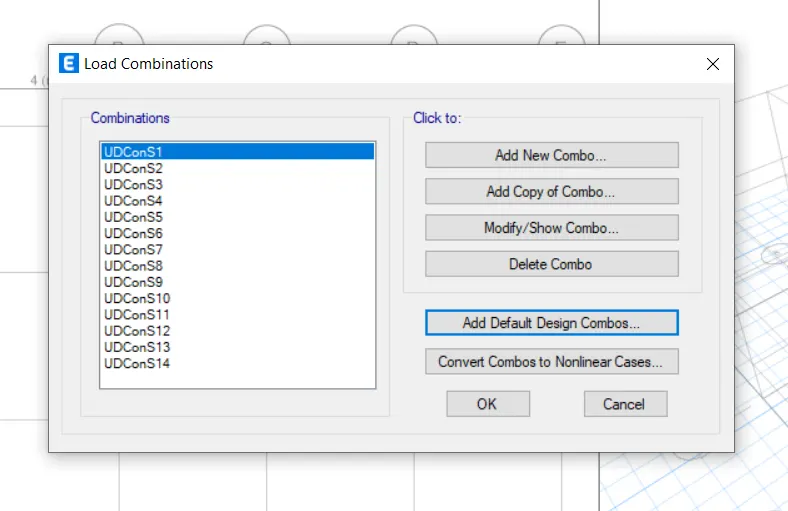
7 step:- Generate Load Combinations
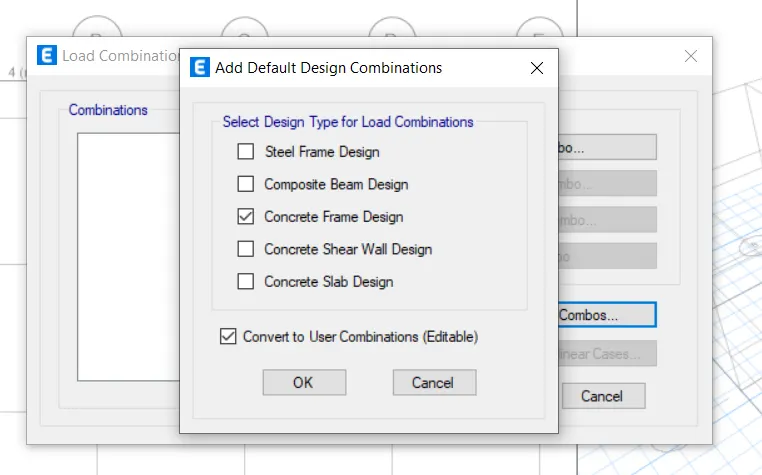
- Go to define- select load combinations- click default design combinations option.
- select Concrete frame design and click on conver to user combinations (Editable) option and ok the dialoge box settings.
- A list of load combinations will display on dialog box which you can verify and modify anytime during the project if required.
8 Step:- Execute the Modeling
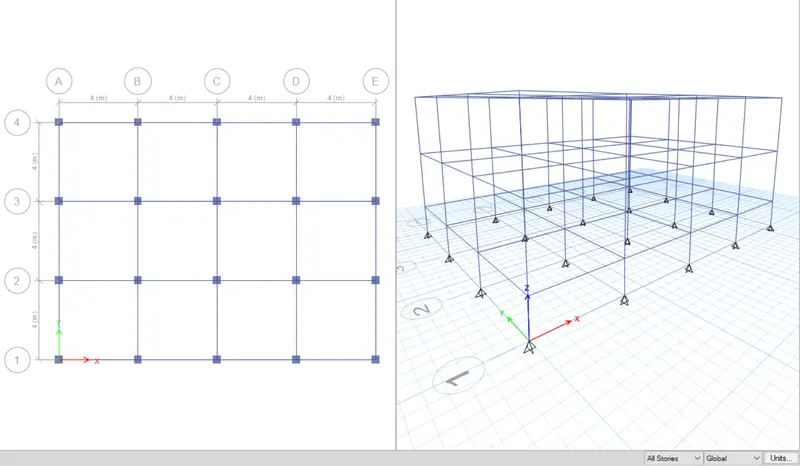
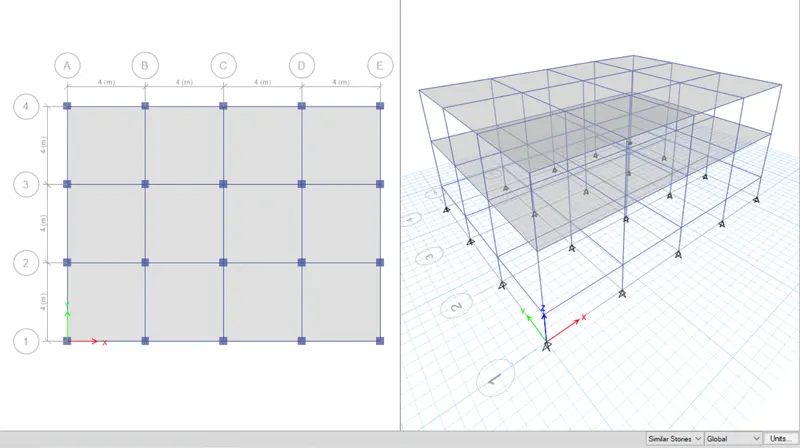
- Now , we have defined everything from materials to beams, columns, and slabs to be needed for our structure, we can go ahead and draw each structural element as per the specifications.
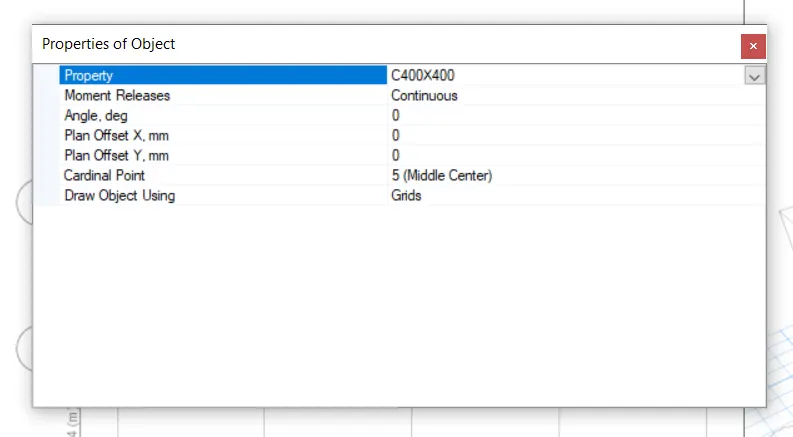
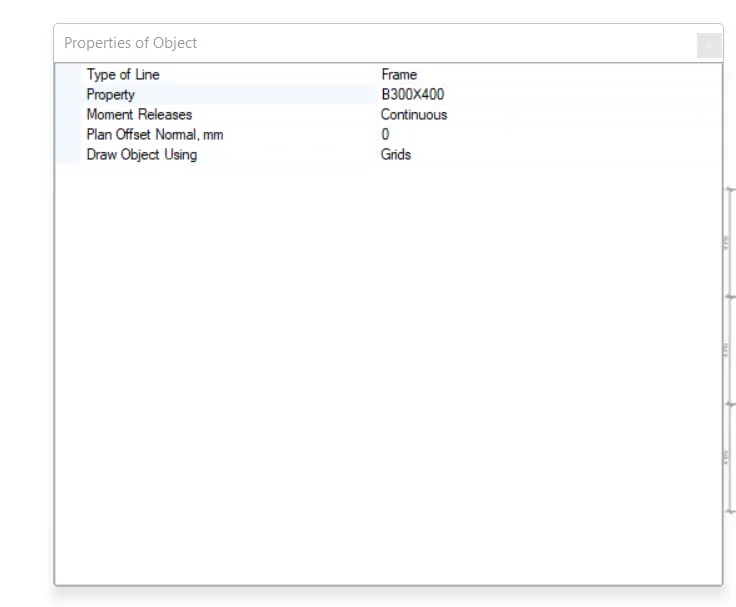
- Next , we can use Quick draw tool in the Etab to draw beam column and slab with their define specificationthe.
- All you need to do is select the relative tool that is quick draw columns for drawing columns and vice versa. Then choose the section from the below property object.
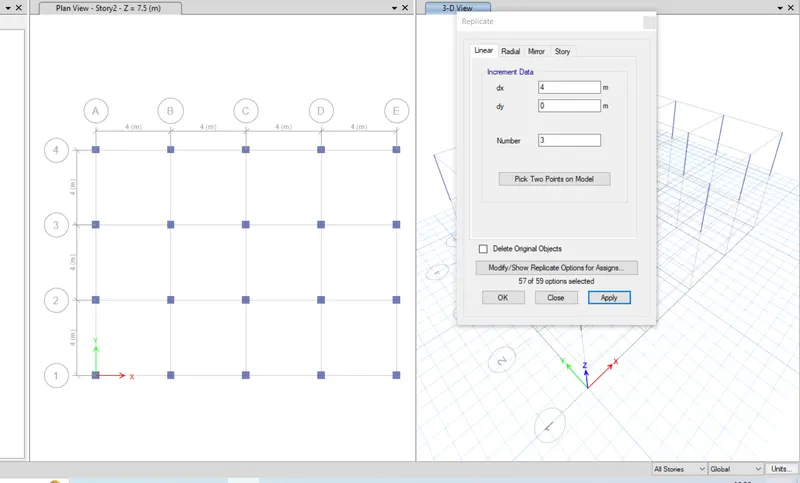
- Then, simply go to the grid system in plan view and start clicking on the grid locations where you want to build these structural elementsand replicate option is used to repete all the position in X and Y direct as per cordinate sysytem
- So, the same approach was followed and the following beams, floors, and slabs were drawn in our ETABS model.
Quick Draw Columns
Quick Draw Beams
Quik Draw Floors
9 Step:-Assign Loads to the Structural Members
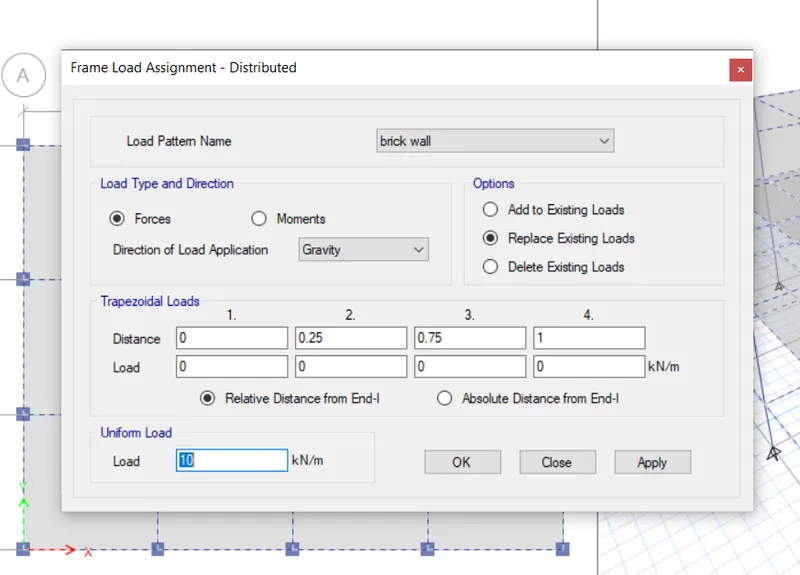
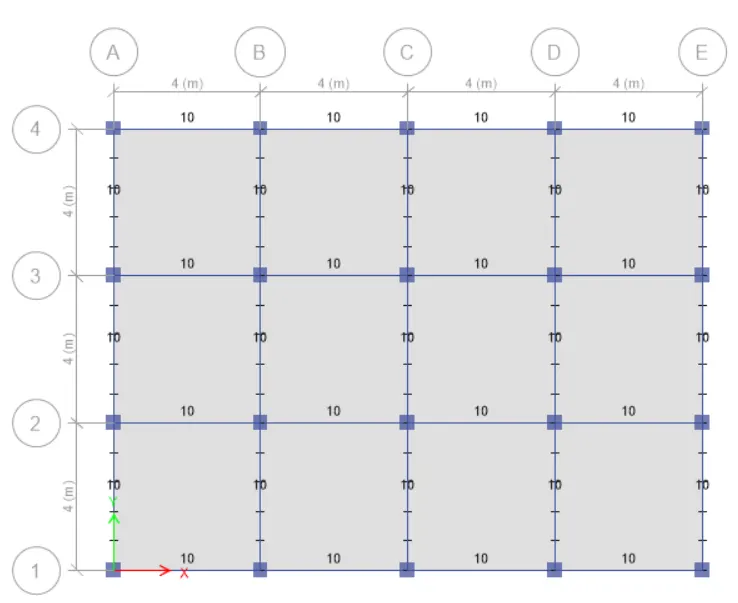
- You can select a particular structural member from the model and assign it the load that is imposed on it.
- For example, select the beam and assign a udl of super dead load due to the brick walls resting upon it.
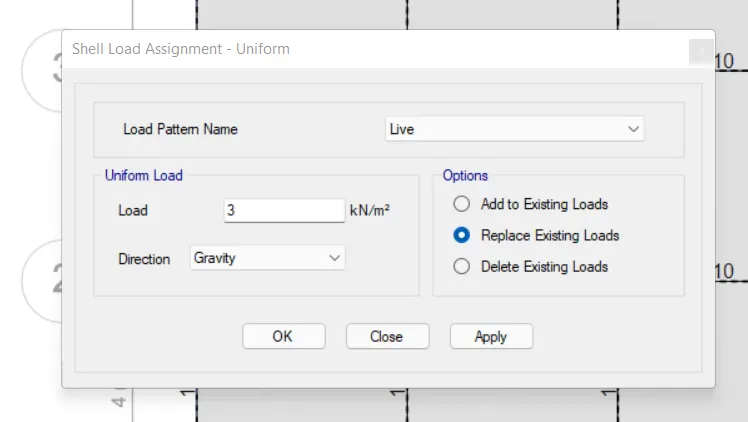
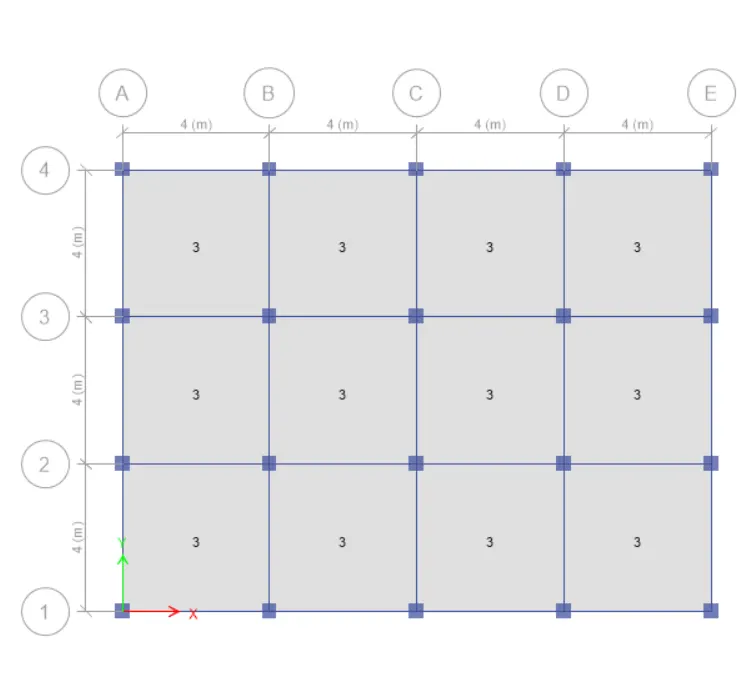
- Thus, a similar technique is used and the loads on beams and slabs are assigned as follows:
10 KN/m brick Wall Load on Beams
3 KN/m^2 Live Load on Slabs
10 step:- Assign the Floor Diaphragm
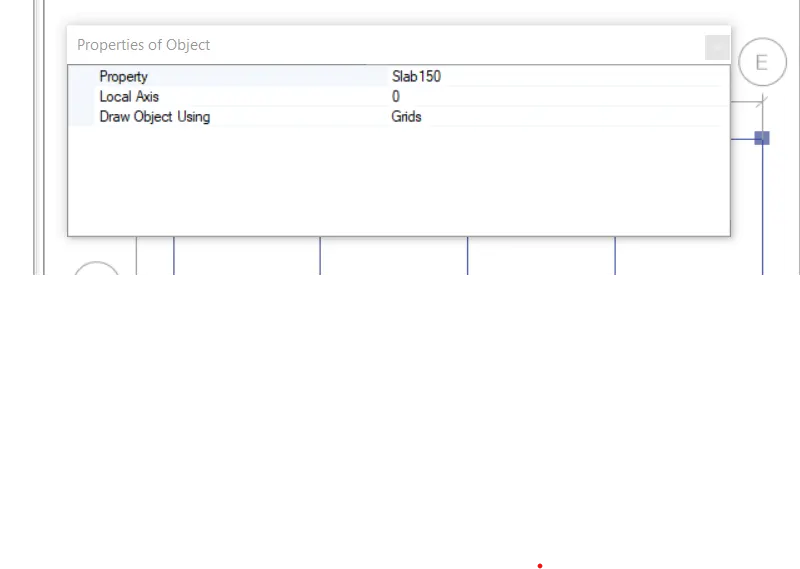
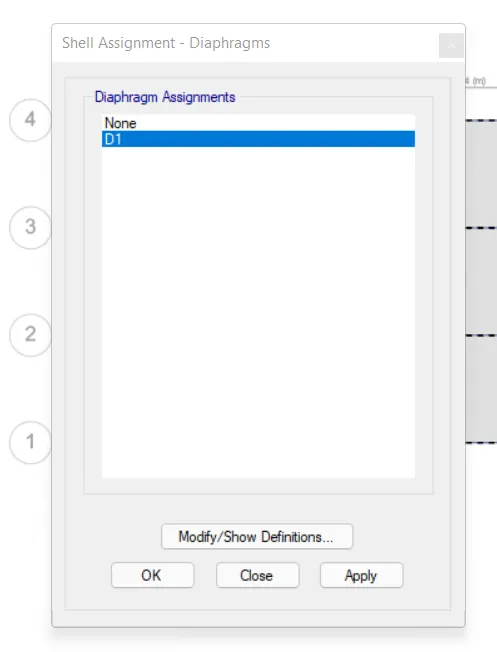
- from the select optionSelect the S150 slab section from the select option.
- Go to assign>shell>diaphragm.
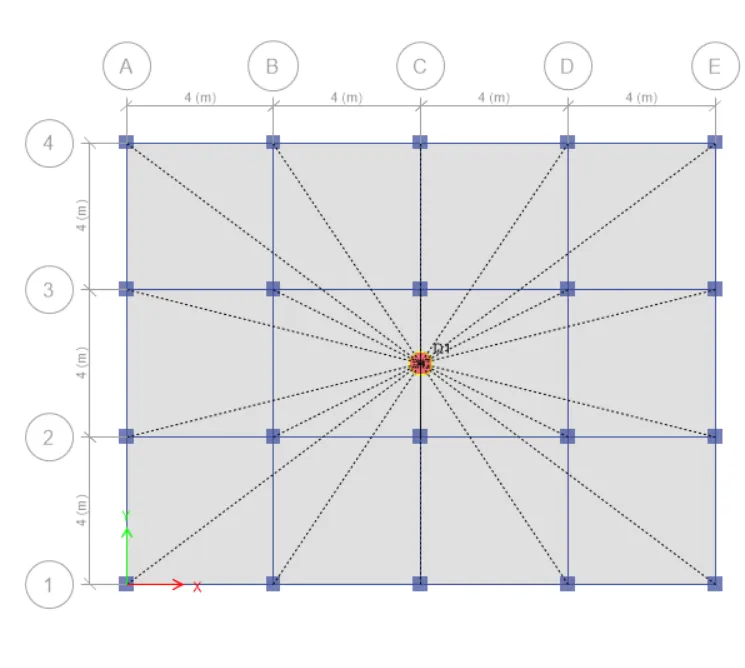
- Select the default D1 diaphragm already incorporated in ETABS and press ok.
- It is now done, and you can see the center of mass for our model has been automatically calculated as we assigned the floor diaphragm.
10 Steps:-Save the Model and Run Analysis
- Now we completed all steps for first model, we can proceed to run the analysis for this building.
- But we'll have to first save our project before running the analysis so do it at the preferred location within your system.
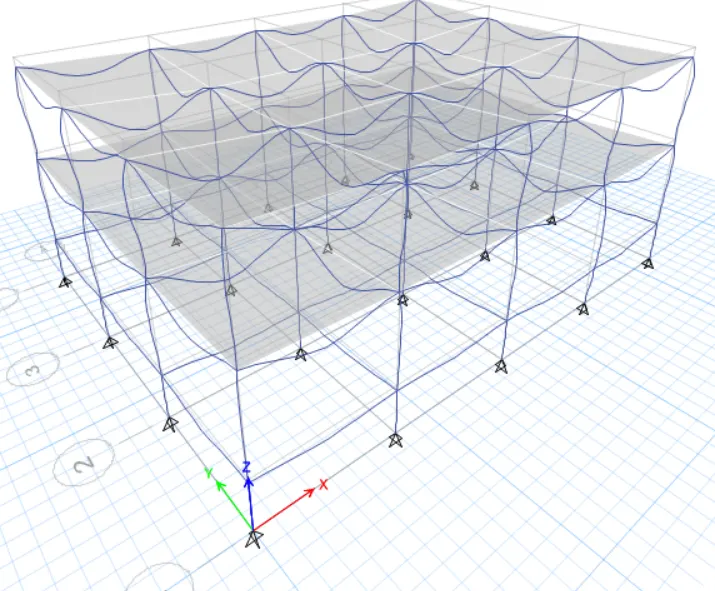
- Then, you can simply press F5 on your keyboard or click on the arrowhead available on the ETABS screen to run the analysis for the current model.
11 Step:- Modal Response for Building A
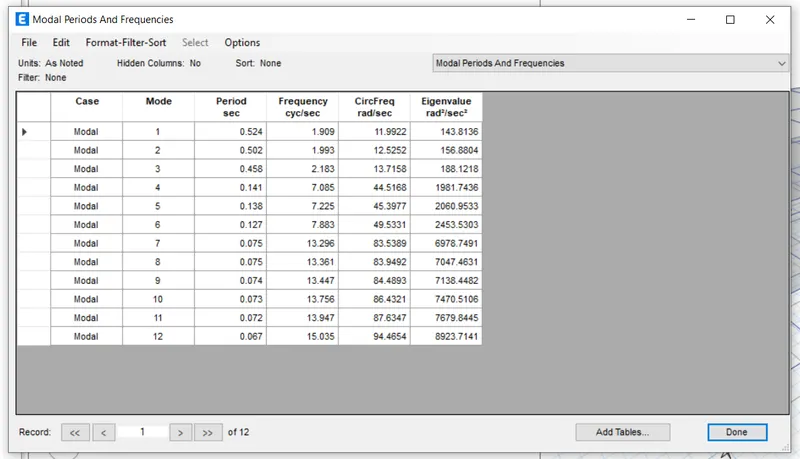
- TO know the model responce for building we can use the model explore window then select the table icon which is present at upper ribbone, then select model information and after right clicking we can open table.
- then as per our requirement verify different factors and their related table.
B) Design building with 5 storeys with given data is:-
Now for model B, we need not create a new ETABS model. Rather we will save a copy of the building A file and do the alterations needed for building B. For example, we can increase the number of stories to 5 by editing the story data within the copied file. now next procedure will explin further.
1) Make a copy file of model A:-
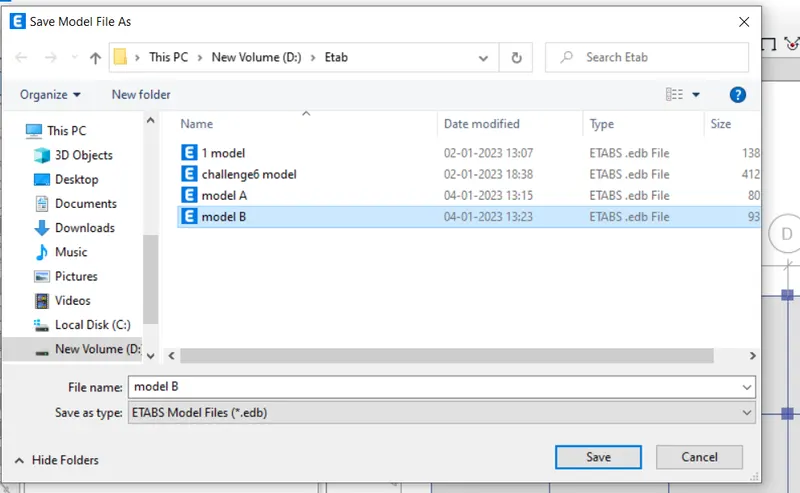
- From model A, go to files and click on the save as option.
- Set the location folder and name it Model B.
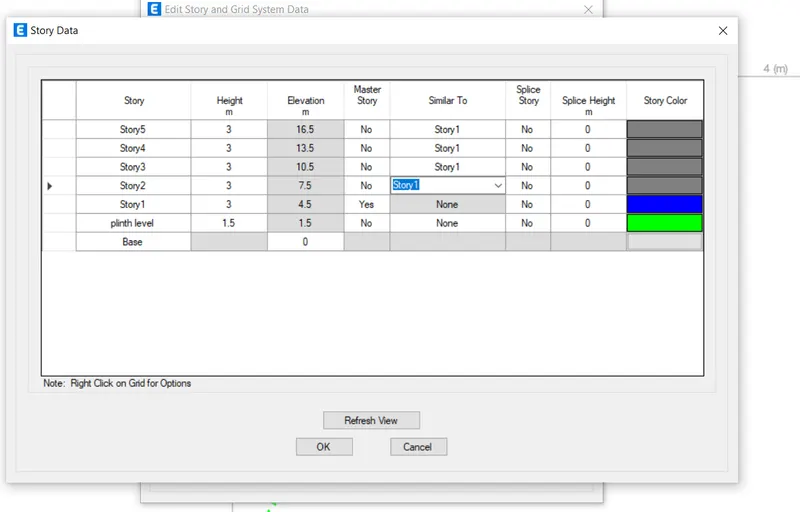
- Edit Story Data
- Open the new model B file, go to edit>story and grid data.
- Click on the modify story data option.
- Then, right-click on the top story and select the add story option.
- Set the height and the number of storeys you want to add.
- In our case, we need to add 3 more floors to convert our 2 story building into a 5 story one.
- Also, make sure to make each story similar to the master story created in Model A.
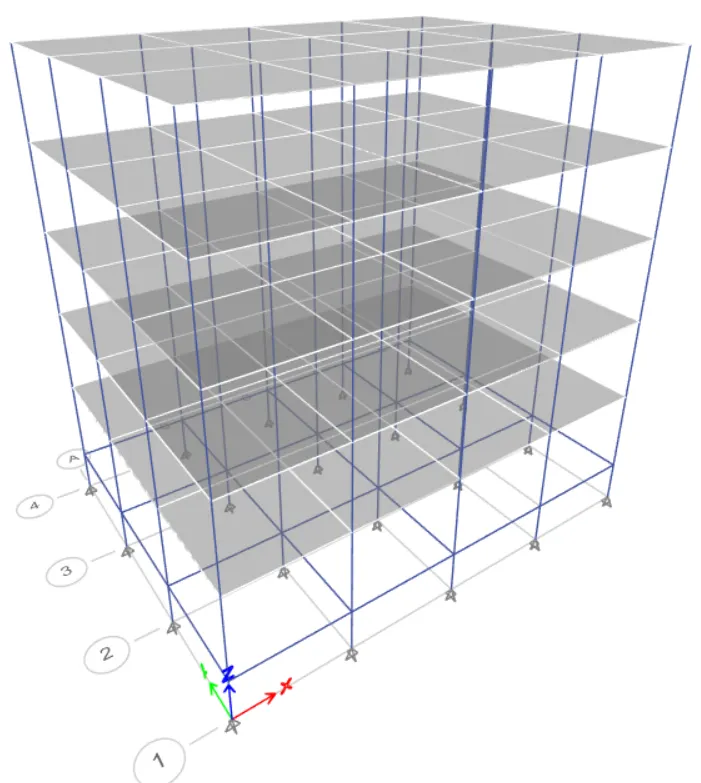
Edited 5 Story Model
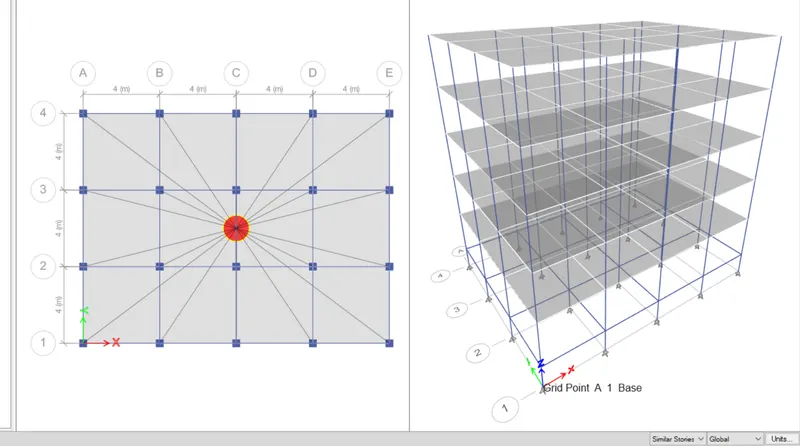
Just check from show shell frame option the load is act on all floors aa well as check frame load too.
check diaphragms with the same thickness of shell.
Run the model and lock the file:-
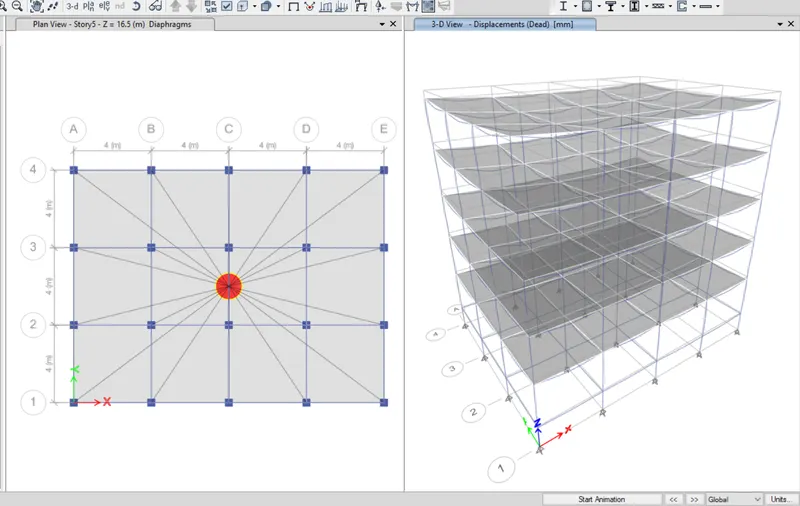
Modal Response for Model B:-
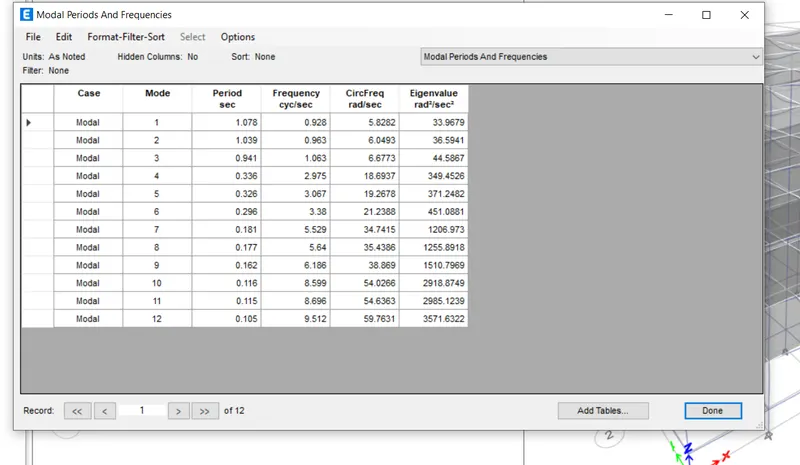
C)Model "C" (G+5 with column orientation in X-direction)
The story and grid data for model c will remain same. However, we just change the column size and orient the same in the X-direction. So, the stepwise procedure will be same which is discuss below:-
Create a Copy Model by Save As
- As a same procedure of model B, now model C is coapied like model B.
- Choose the appropriate path and save the file for model C.
- Now, the model is set to be edited as needed.
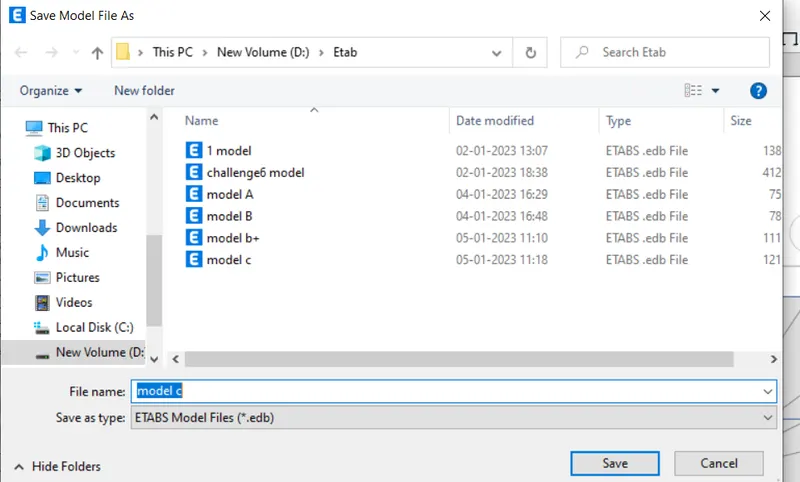
- Edit the Column Size and Orientation
- To edit the column section, go to define>section properties>frame section.
- Now, select the previously created column for model A and B.
- Click on the modify/show properties option.
- Resize the column as needed which is 550x300.
- Then, edit the length and breadt values in the box.
- Now, we need to orient the 550mm in the X-direction.
- to do, select the column section then go to assign then open local axis then click on rotate which is kept as 90 degree.
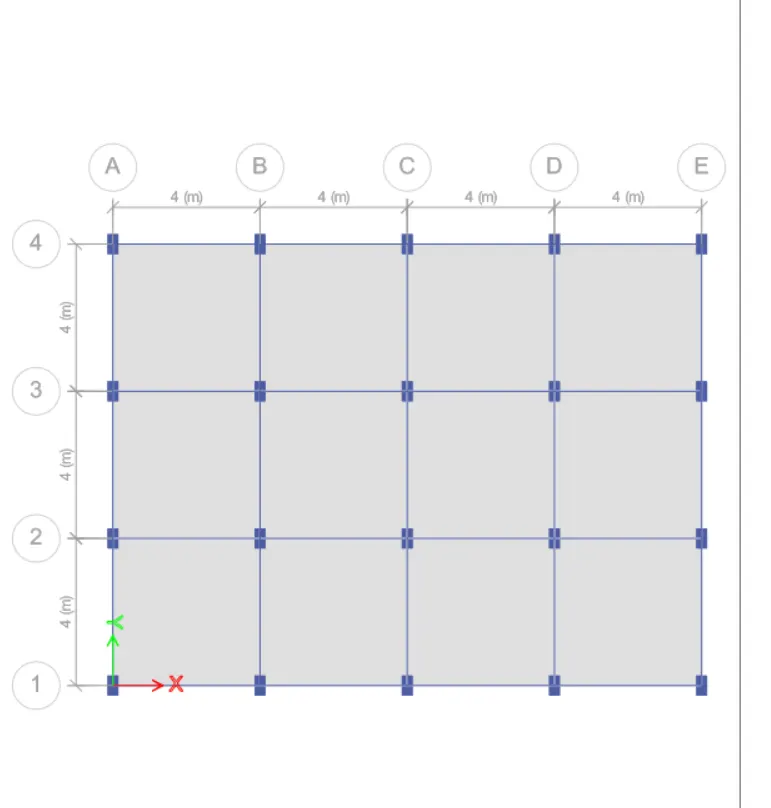
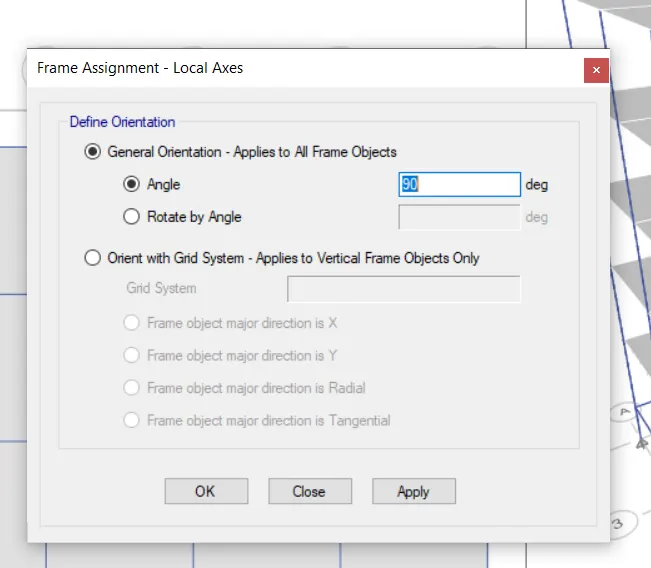
After change the orientation in X direction.
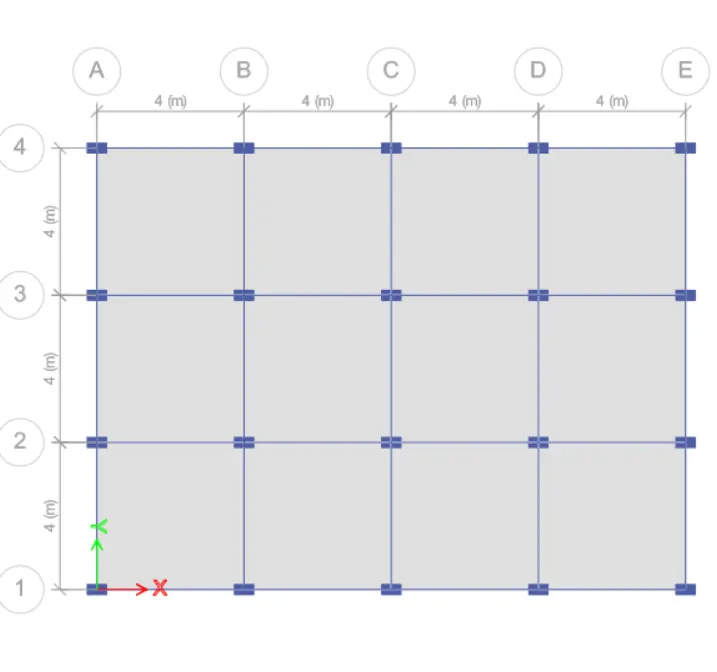
- Checks all the required load Before Running the Analysis
- Like we did for model B, checks for the frame and shell loads are to be same.
- Also, make sure the floor diaphragm has also been assigned before going ahead with the analysis.
Check for the Frame loads
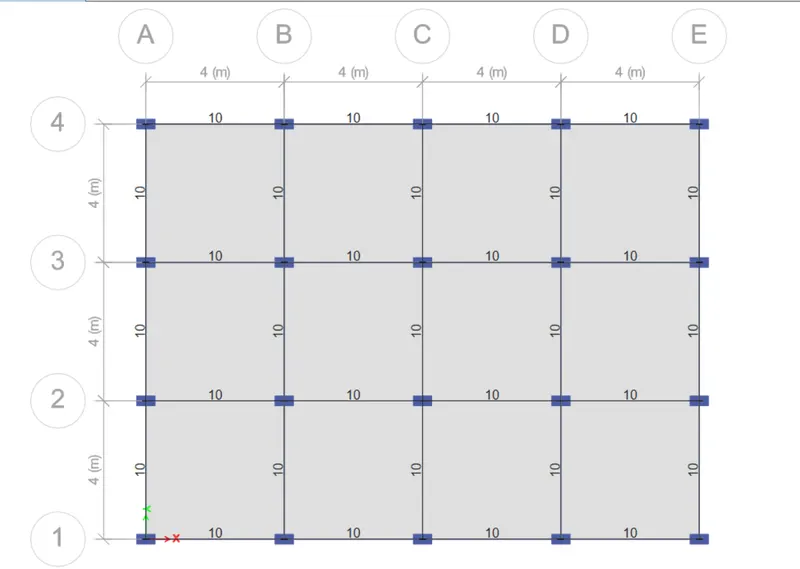
Check for the Shell Loads
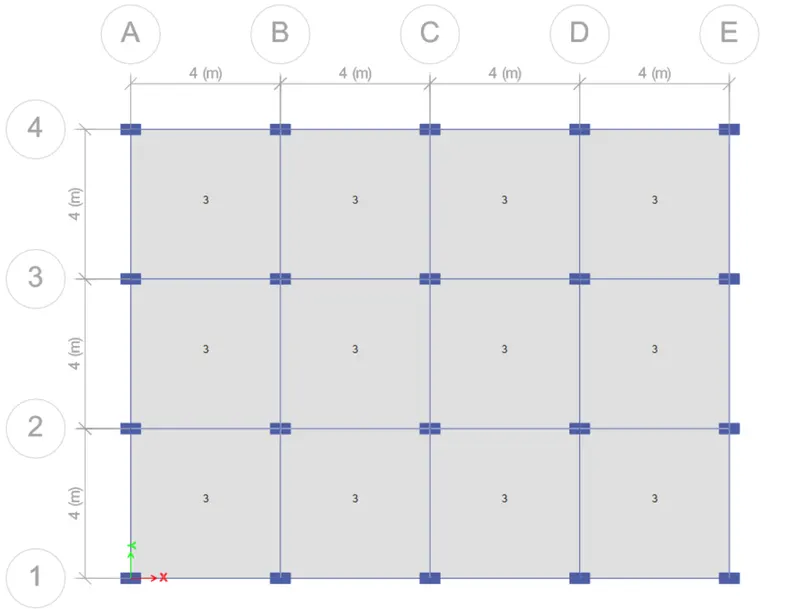
diaphragms check for model C:-
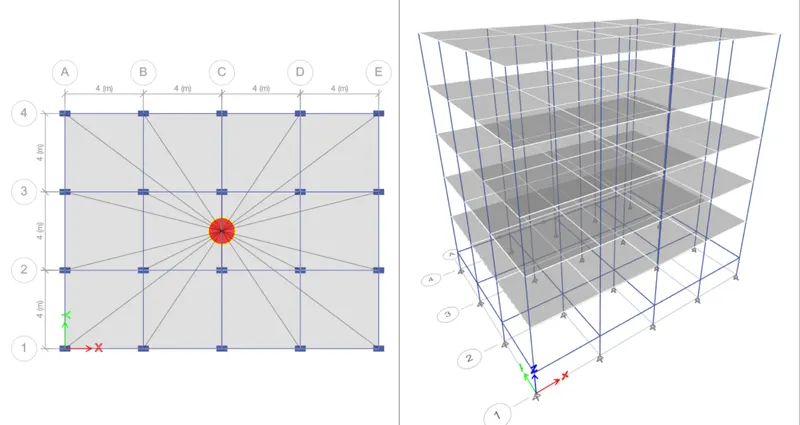
- Run the Analysis
- Select the F5 button on your keyboard and ETABS will automatically run the analysis.
- we can display the modal table when the analysis is completed.
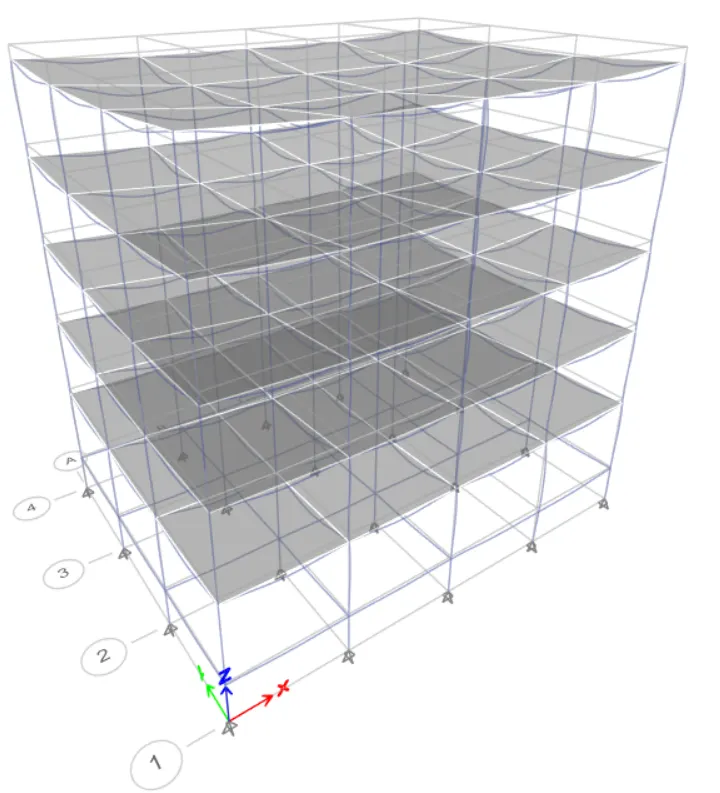
Modal Response for Model C:-
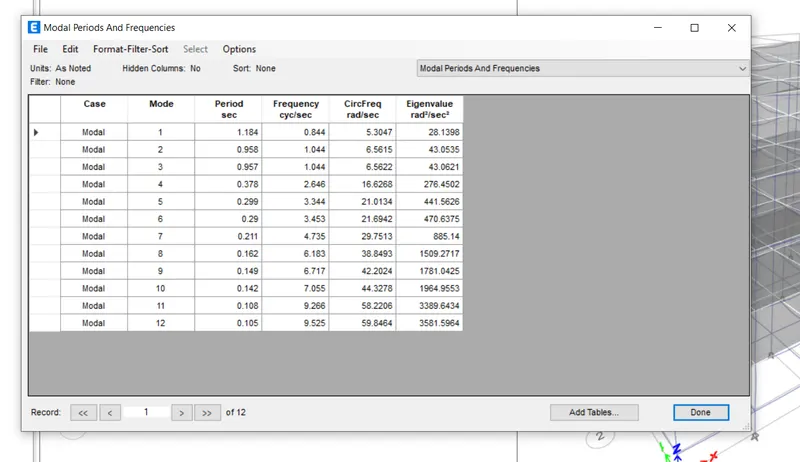
D)Model "D" (G+5 with column orientation in Y-direction)
In this model, we don't need to chane other than the column orientation. The sizes of the column will remain the same, however, we have to shift the column orientation from X to Y direction. So follow the same procedure as we did for the model C . Then, select the column section and assign the local axes and bring the origin back to 0. all the columns shall be oriented in the Y-direction. Like the same previous model, load and diphragm should be checked before running the analysis
So, as explained above, the model was executed for building D and the natural period was noted as inserted below:
- Select the Column Section and Bring the Orientation Back to Zero
(The detailed procedure should has already been discussed for the previous model)
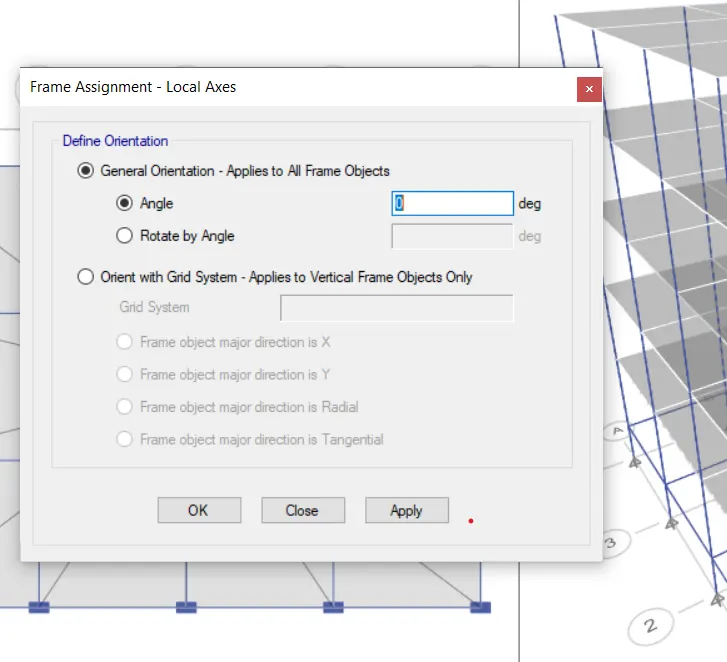
Required Column Section and Orientation in Y direction:-
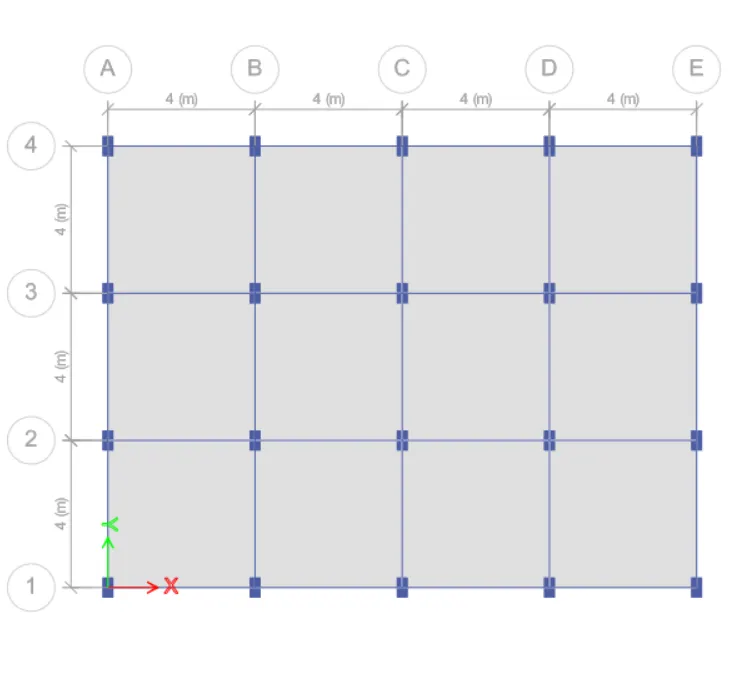
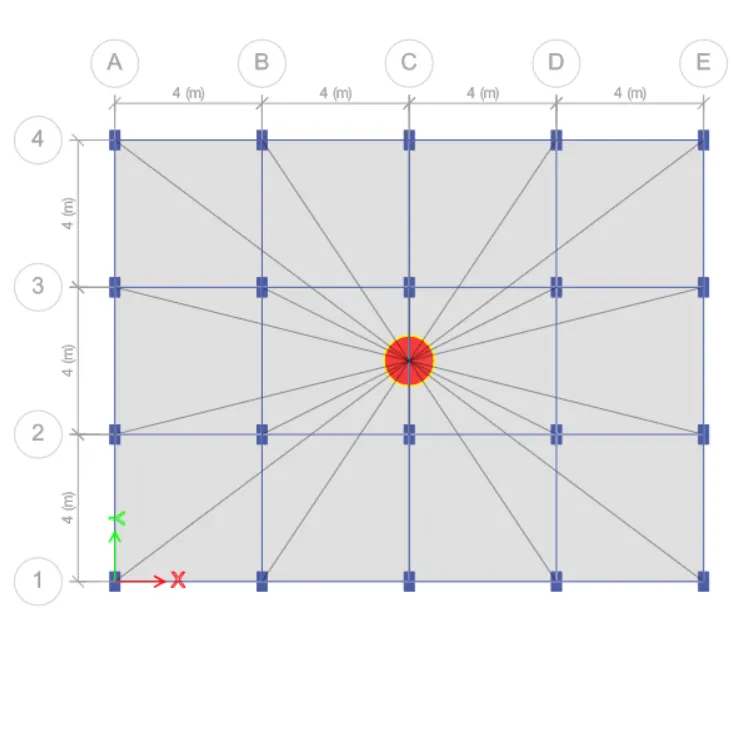
Run the analysis for model D
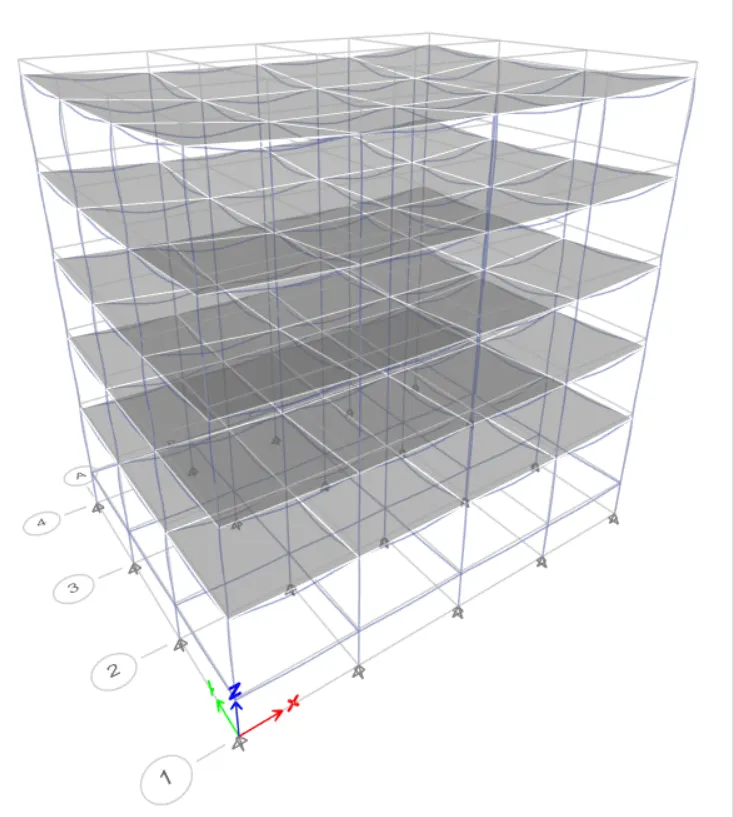
Modal Response for Model D:-
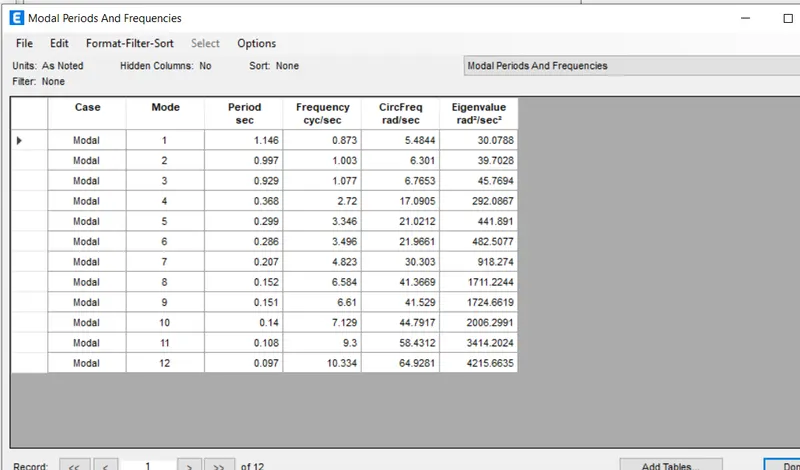
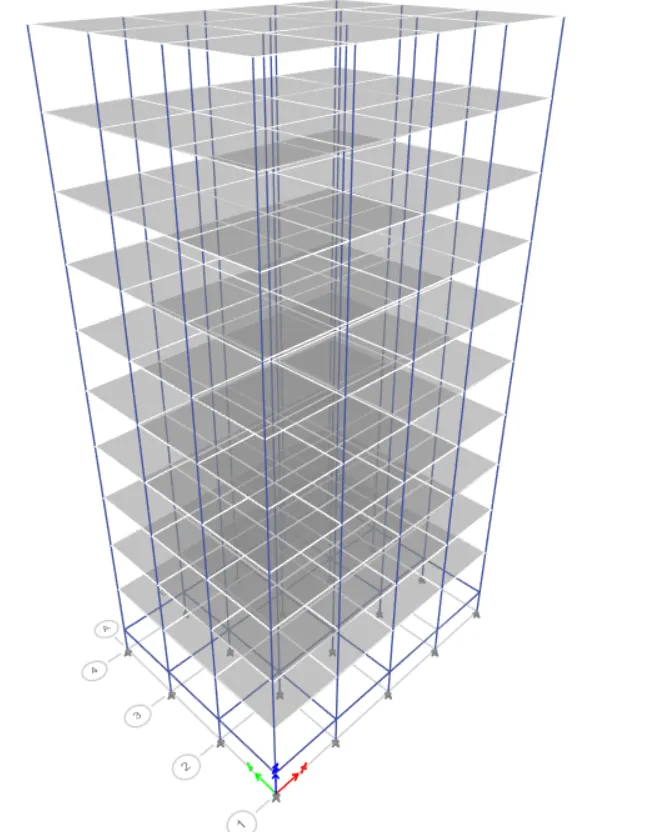
E)Model "E" (G+10) with folloing details:-
Column sizes for top 5 storeys: 400x400
Column sizes for bottom 5 storeys: 600x600
PROCEDURE:
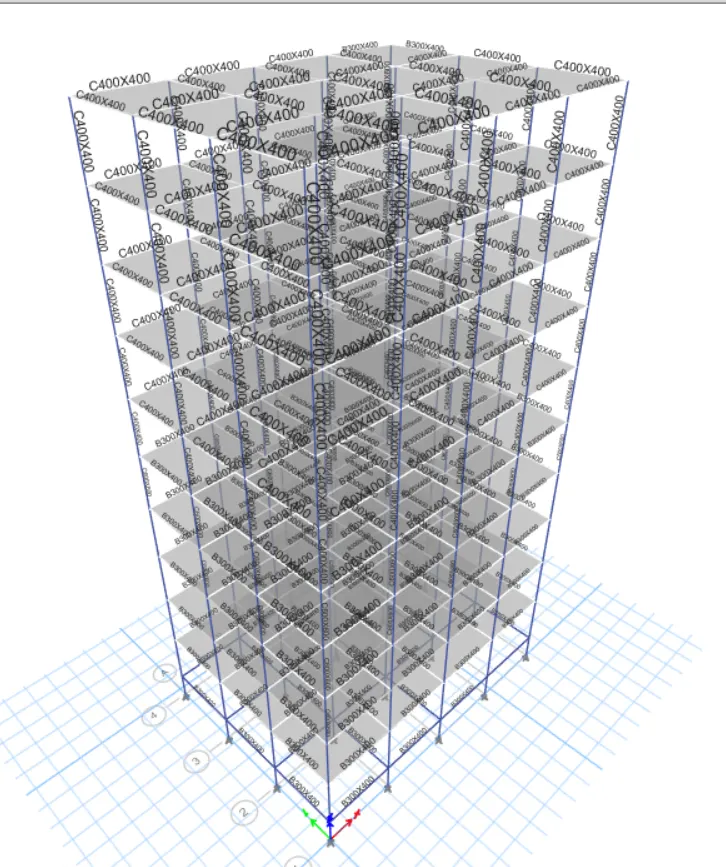
In this model, we required 5 more storeys in the model. In addition, we also need to assign different column sizes on different floors. And to do that, we'll first save the ETABS file for model D as a new model for model E. Then, edit the story data as we have done for our previous models in ETABS. Then, we need to add two new column sections with the required directions and assign them at appropriate floors in our model as specified.
So, the stepwise procedure to assemble new columns size and locate them on required floors is explained below:-
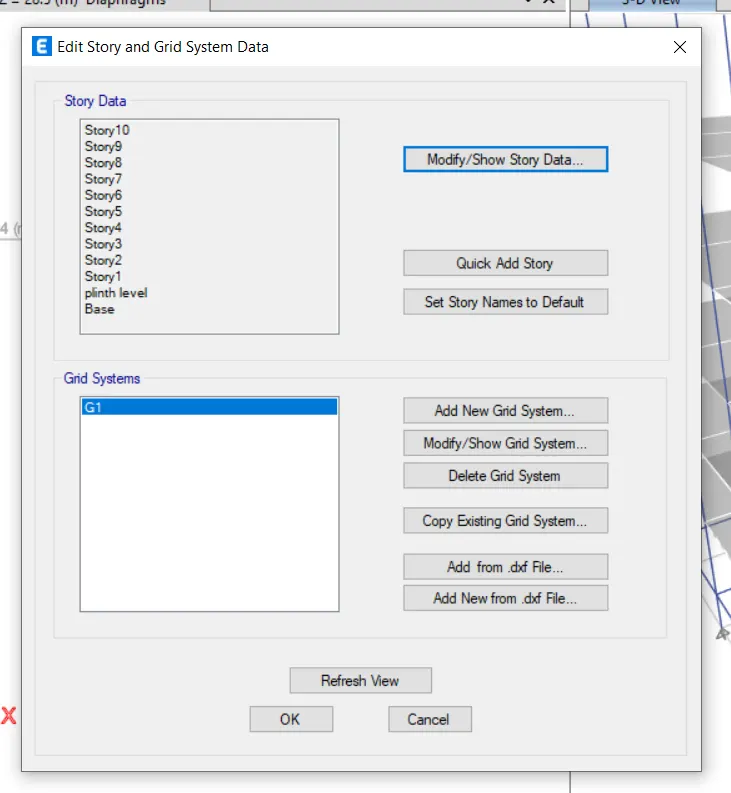
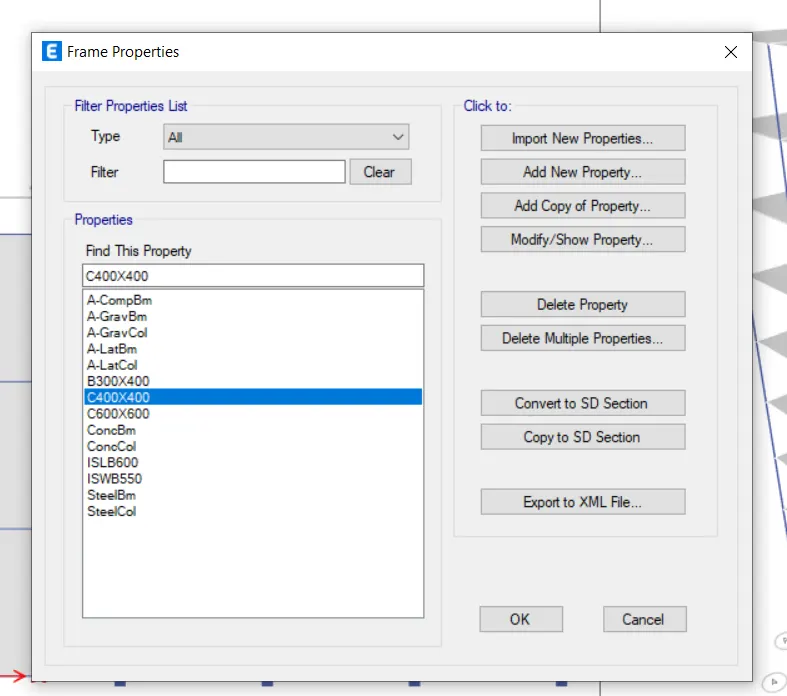
- Set column Dimension with their propert:-
- Now , we change the column size as per privous method .
- By using add option in define> frame propert make a new section of 400X400 size with their properties and material
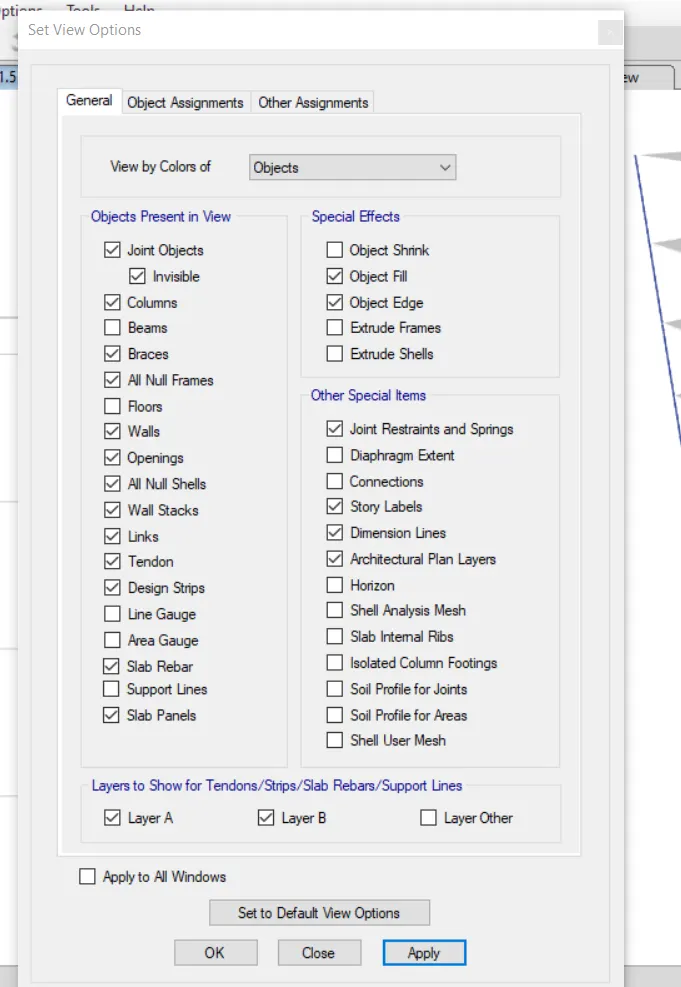
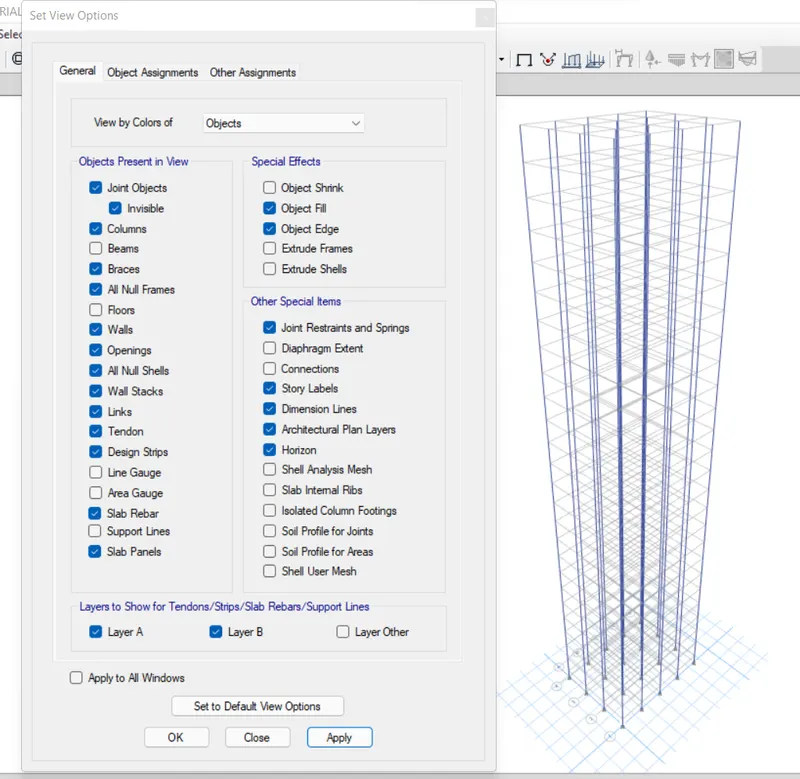
- Change the View Settings of the Model
- There's an option in ETABS that allows users to adjust the model and view he needed objects
- view option settings accessible from the front tool ribbon of ETABS.
- So, We can go to view option settings and uncheck the structural members that you want to hide currently for modeling purposes.
- In our model E the column element is currently required to change the size other elements remein same .
- So, we go to the tool and uncheck beams and floors in order to make the only columns are visible.
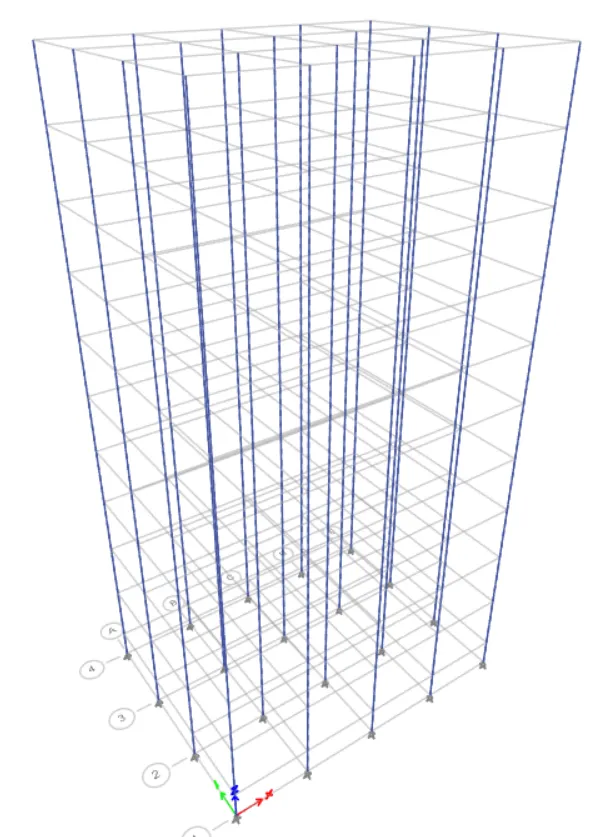
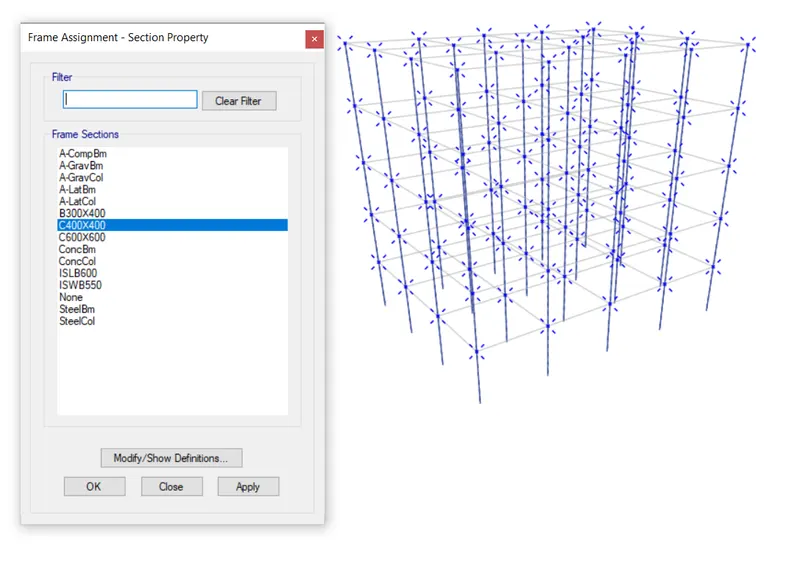
- Set the Building Limit, Select Columns, and Assign them the Required Sections
- Now, since we need different columns for the top 5 floors and different columns for the bottom five floors.
- So, we need first set the building limits up to the top six floors and then vice versa.
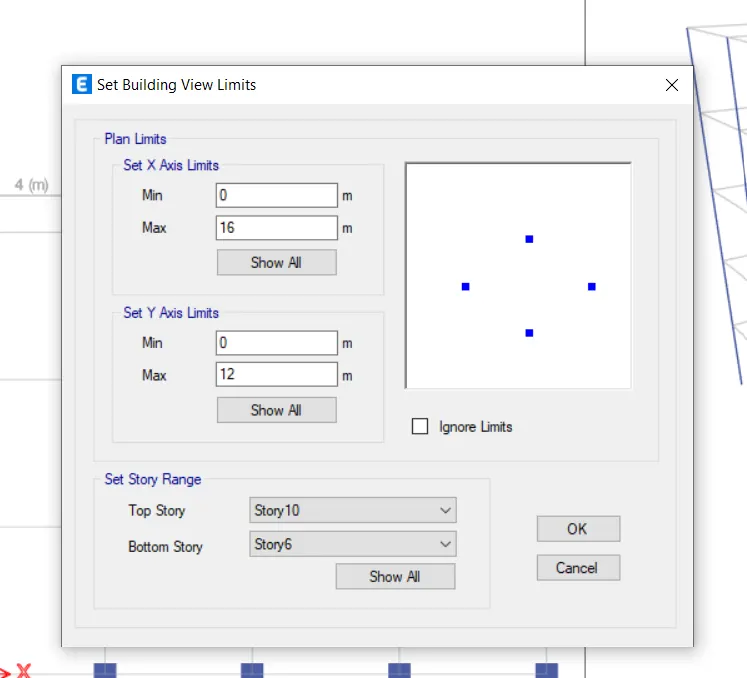
- And to do that, you can go to edit>set building limits. and then edit storey
- The set building limit option in ETABS allows you to view only the floors.
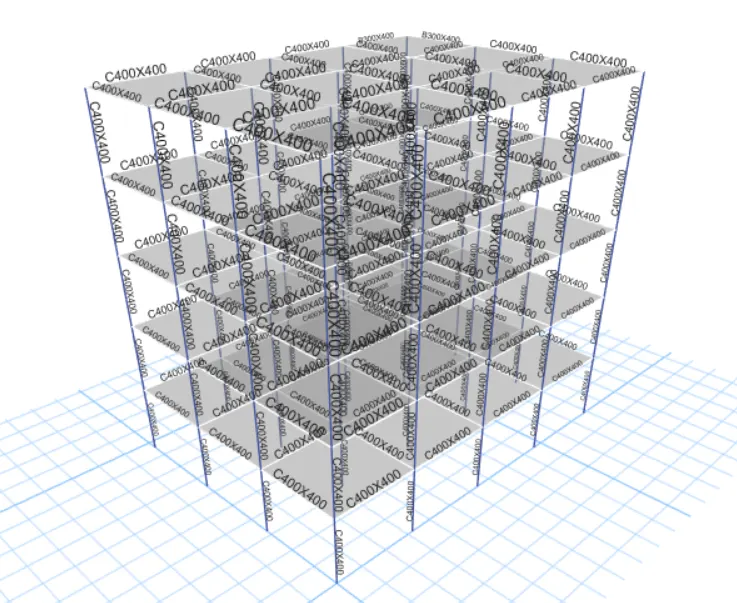
- Hence, first set the limit to top storey 10 to bottom storey 6 select all columns by holding the left-click and making the box around the entire model and go to assign and assign the required section size.
- Repeat the procedure for the remaining bottom columns and complete with the model.
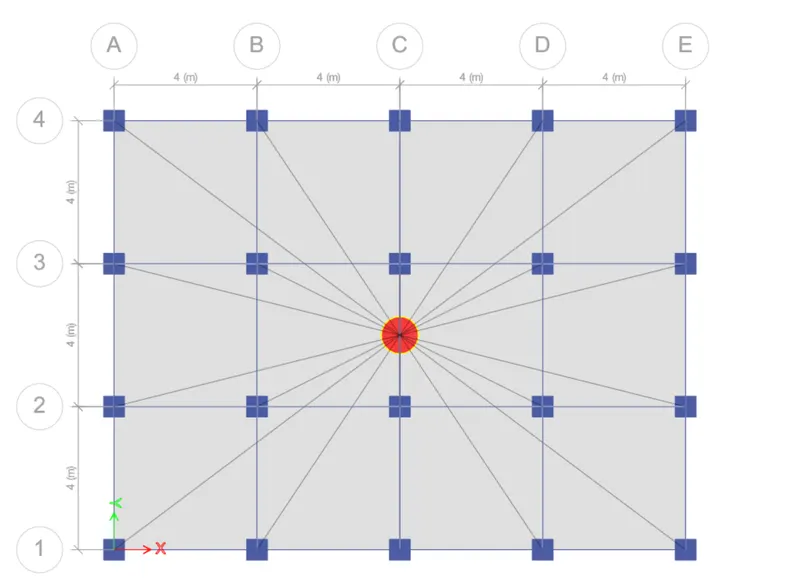
Building Limits:-
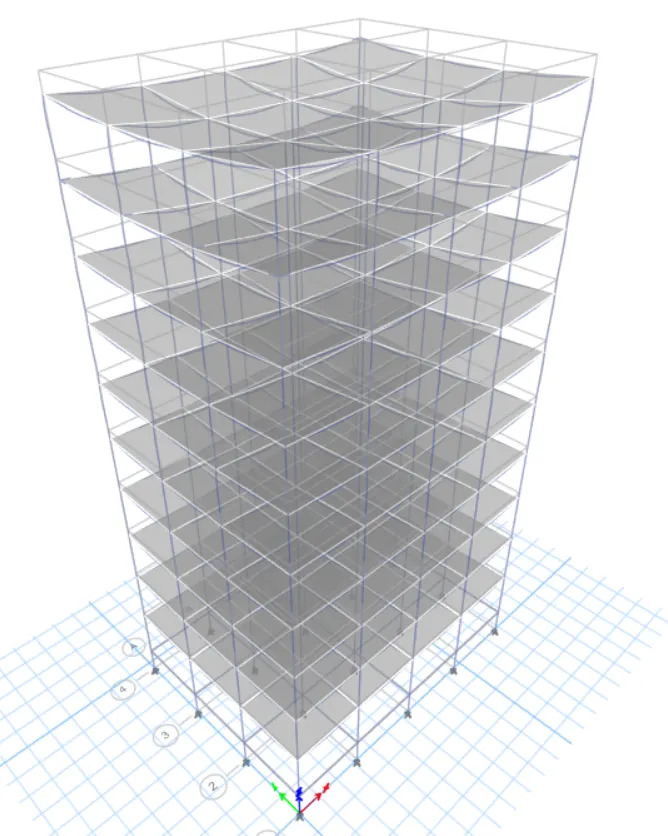
- Run the Analysis:-
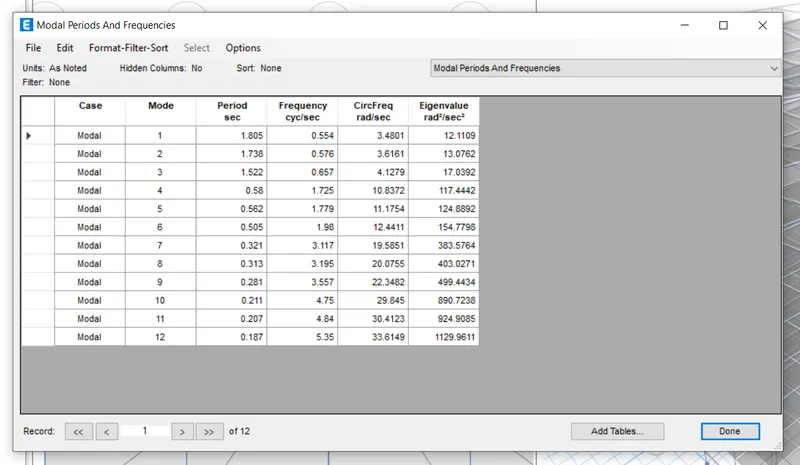
- Modal Response for model E:-
F. Model"F" (G+10)
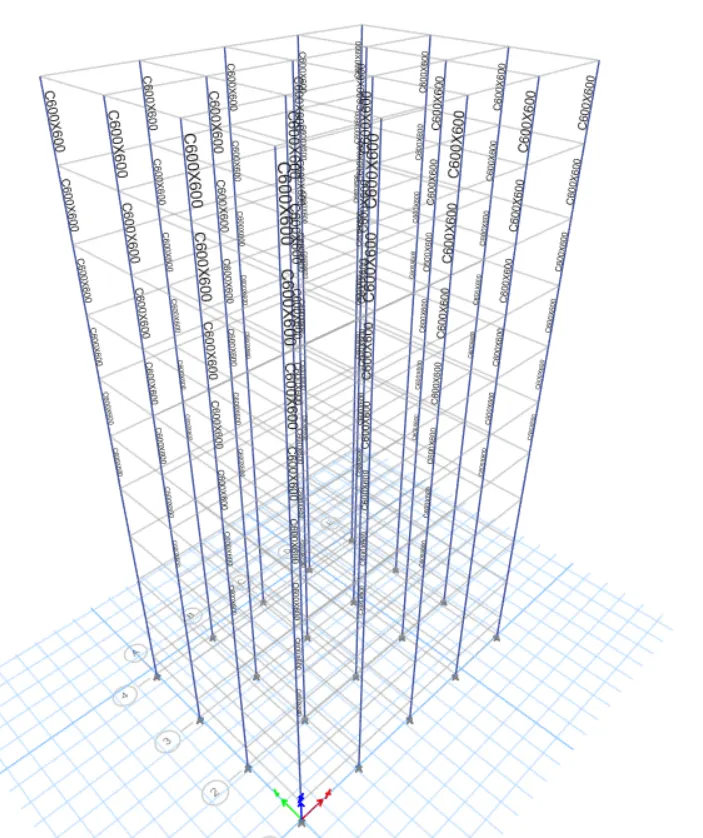
Consistent Column size is same throughout the structure: C600X600
PROCEDURE:
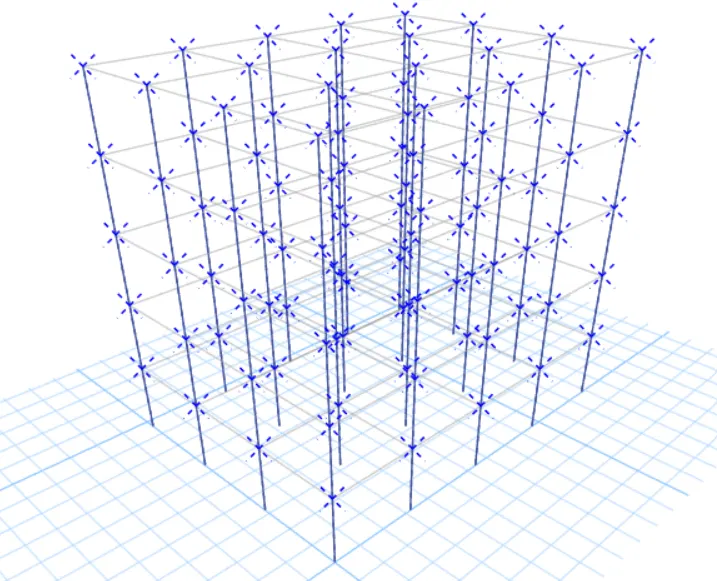
This building has the same columns for the entire structure. Therefore, we don't needed much more editing in model F. We just need to adjust the view settings>hide beams and floors>select all the columns>assign them the frame section properties of C600x600.
- Adjust View Option Settings
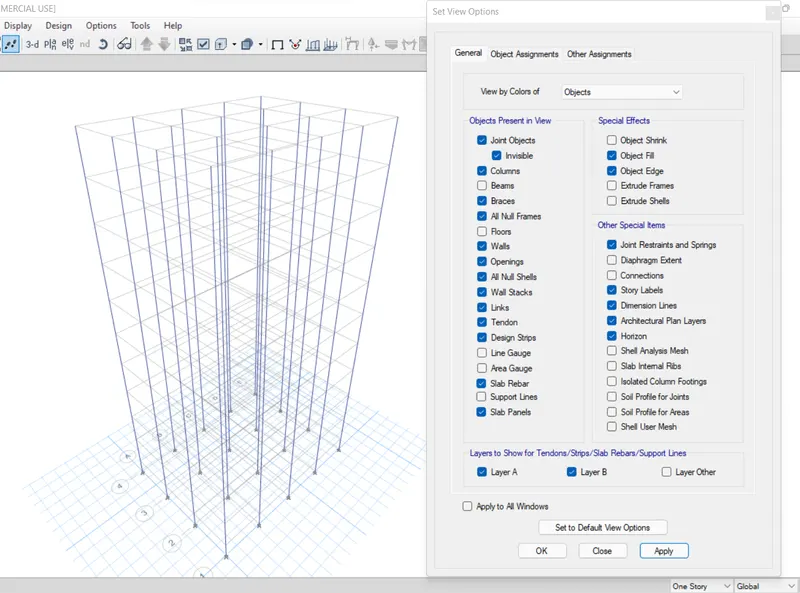
- Select all the Columns
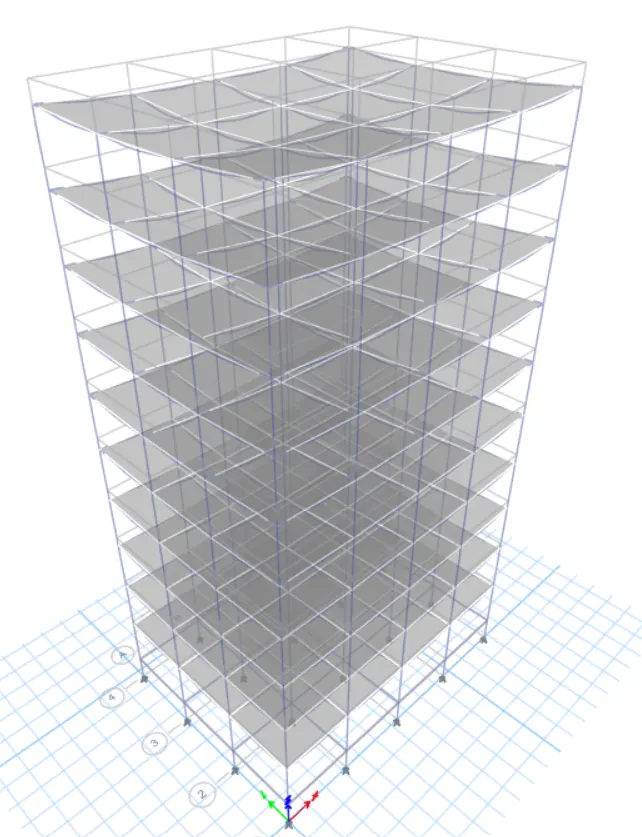
Run the analysis:-
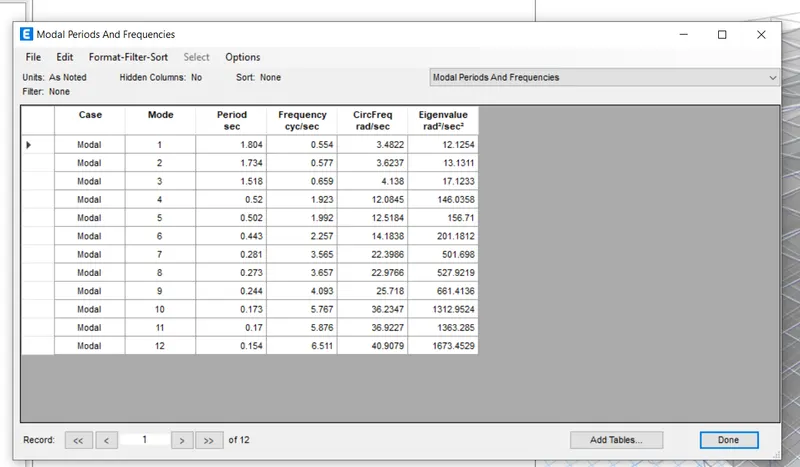
- Modal Response for model F:-
G) model G (G+25)
Columns for top 5 stories: C400X400
Columns for middle 10 stories: C600x600
Columns for bottom 10 stories: C800x800
PROCEDURE:
For this model, we add 15 new stories and assign different column sizes on different levels. We can follow the exact procedure that has already been explained for the previous project to create this model by editing building F. The same is discussed below:
- Edit the Story Data and Add up 15 New Stories
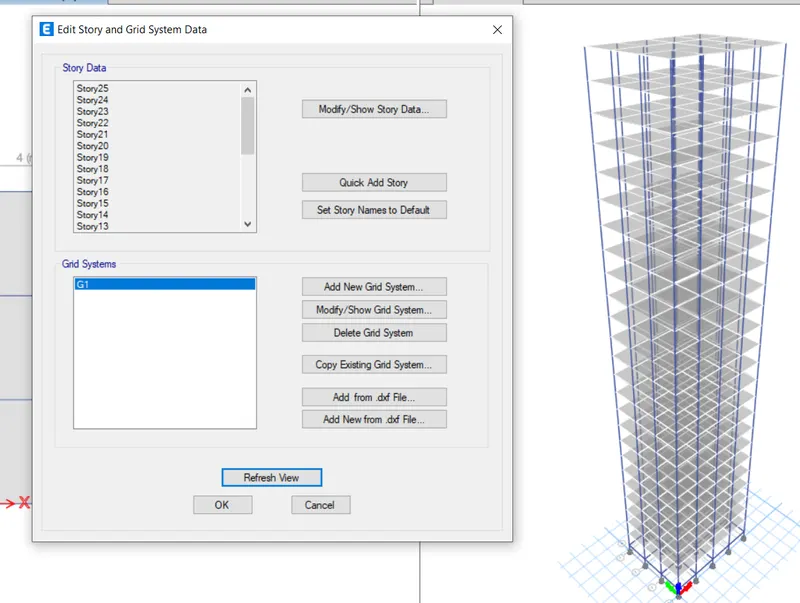
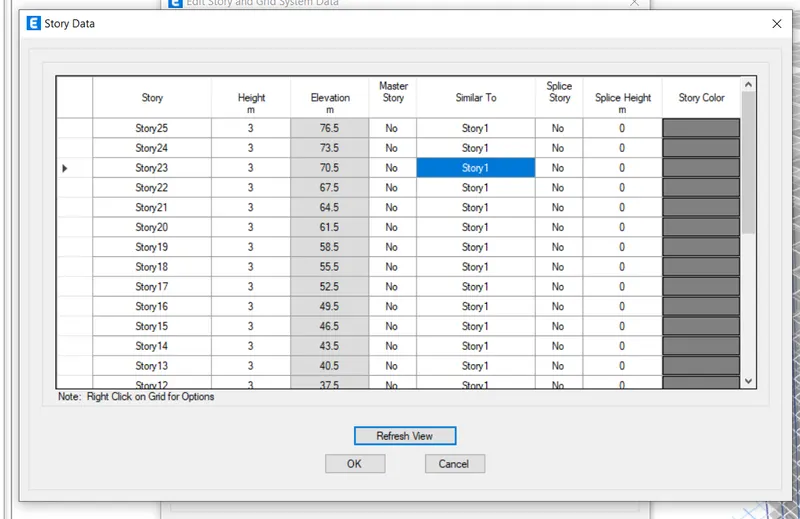
- View Settings
- Set Building Limit from top 25 to 21:-
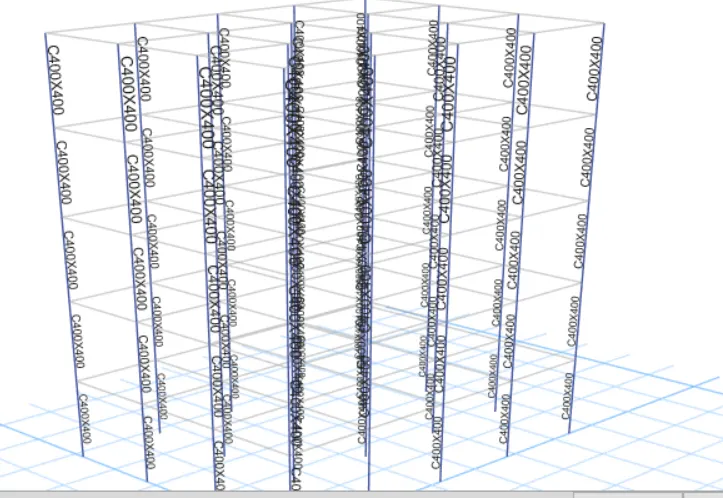
- Set Building Limit from top 20 to 11:-
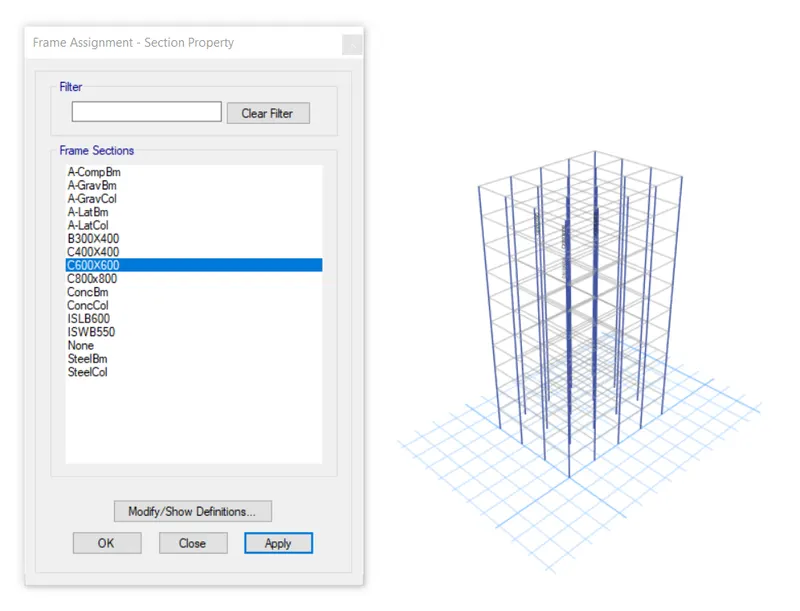
- Set Building Limit from top from 20 to 11 & 10 to 1 are assigncolumn sizes 600x600 and 800x800 respectively.
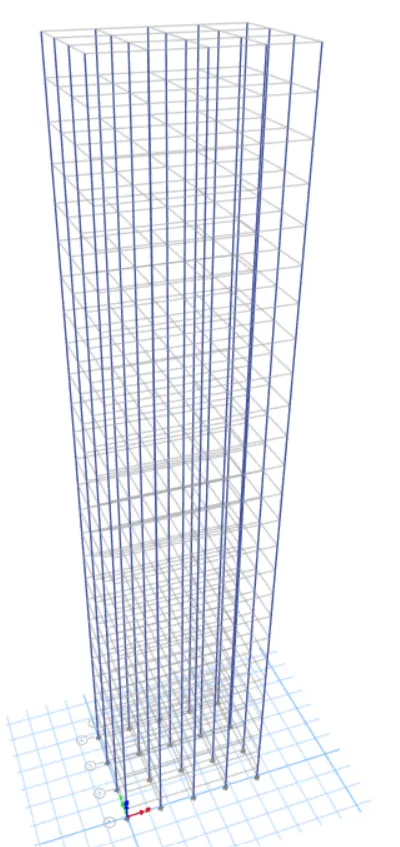
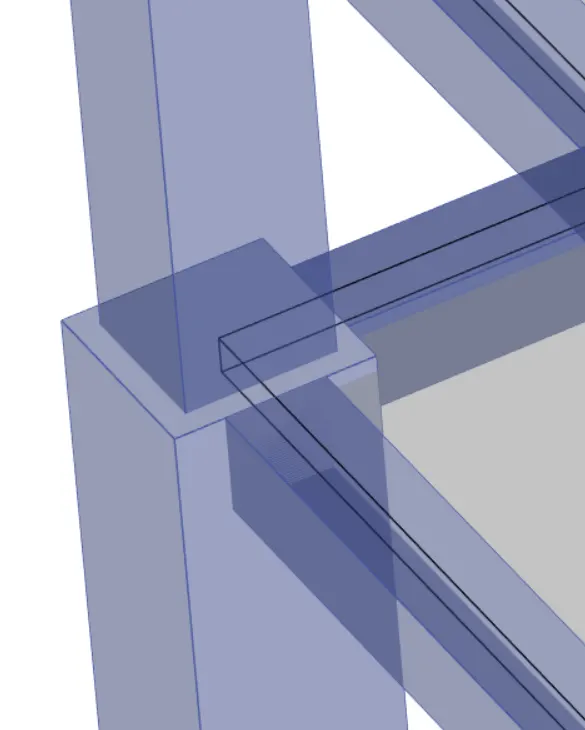
- Run the Analysis:-
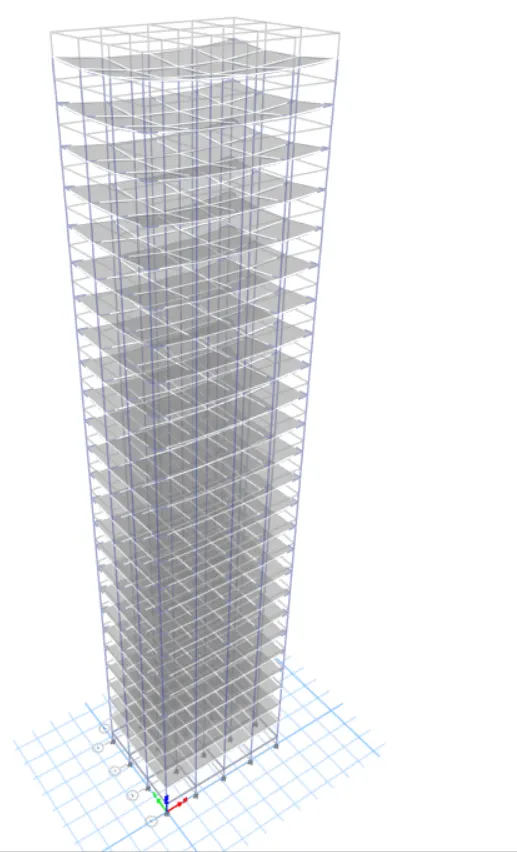
- Modal Response for model G:-
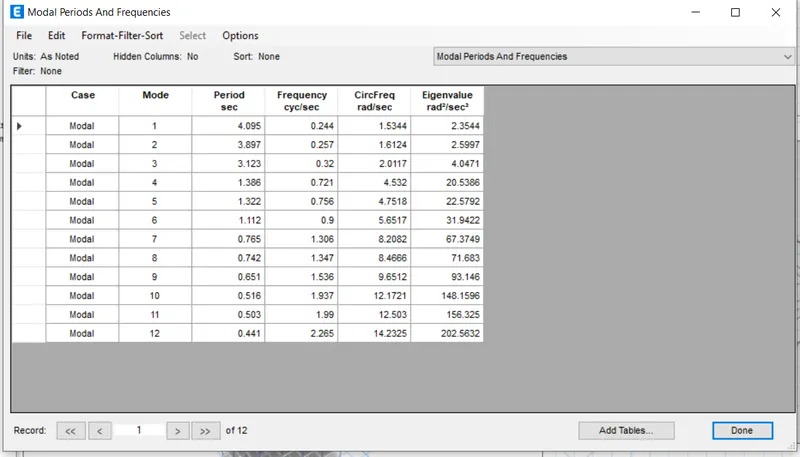
Model "H" (G+25)
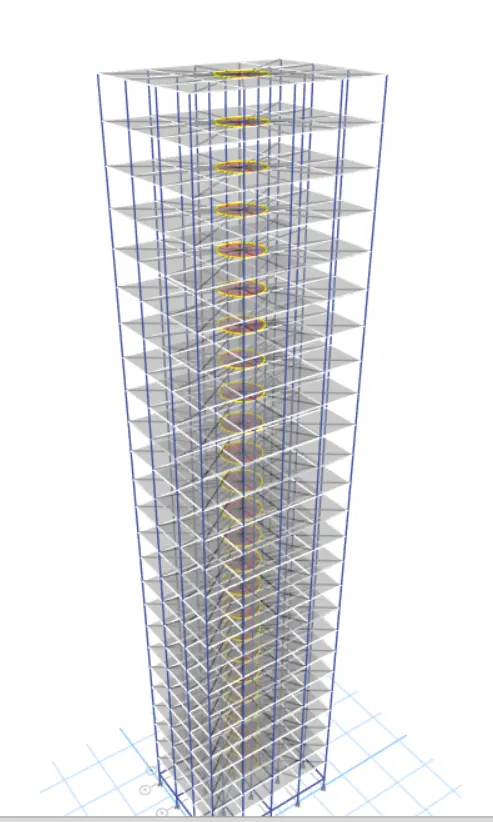
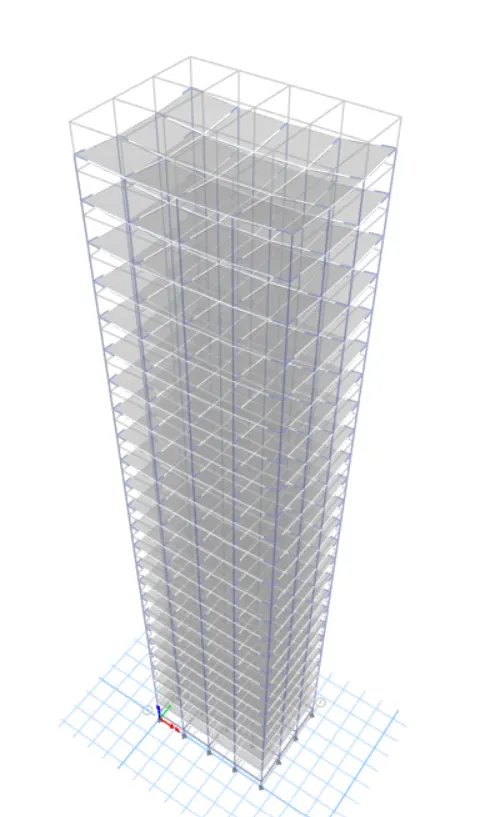
In this model Consistent of a column size throughout the building is same that is: C800X800
PROCEDURE:
This is the same model as the previous one. All we need to do is assign the column section as C800x800 for the entire structure which can be done by simply selecting all the columns>go to assign>select C800x800>click ok and done.
- View Settings to Hide Beams and Floors
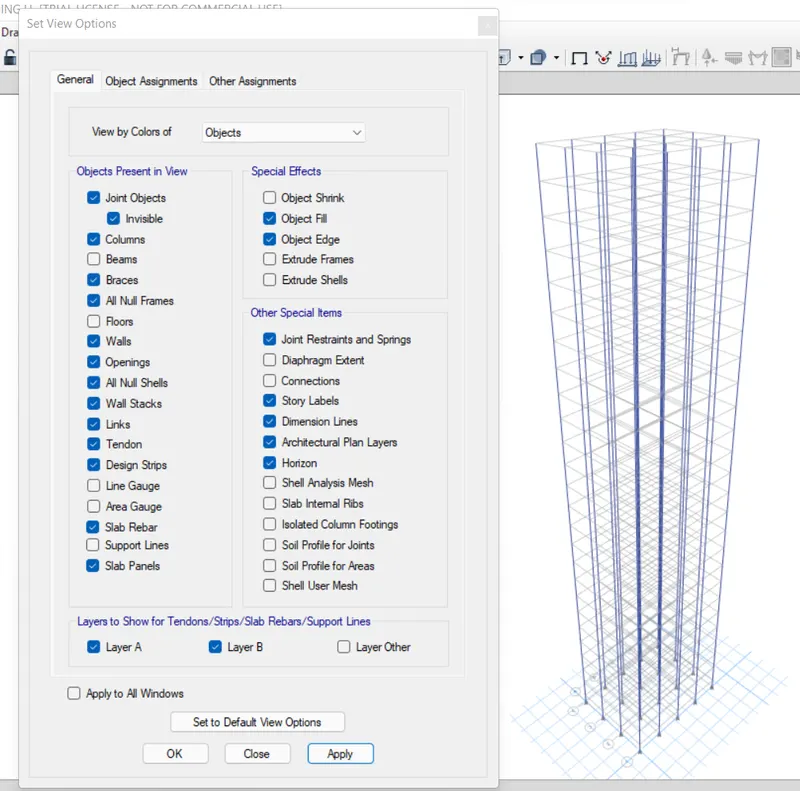
- Select All the Columns and Assign C800x800 Section
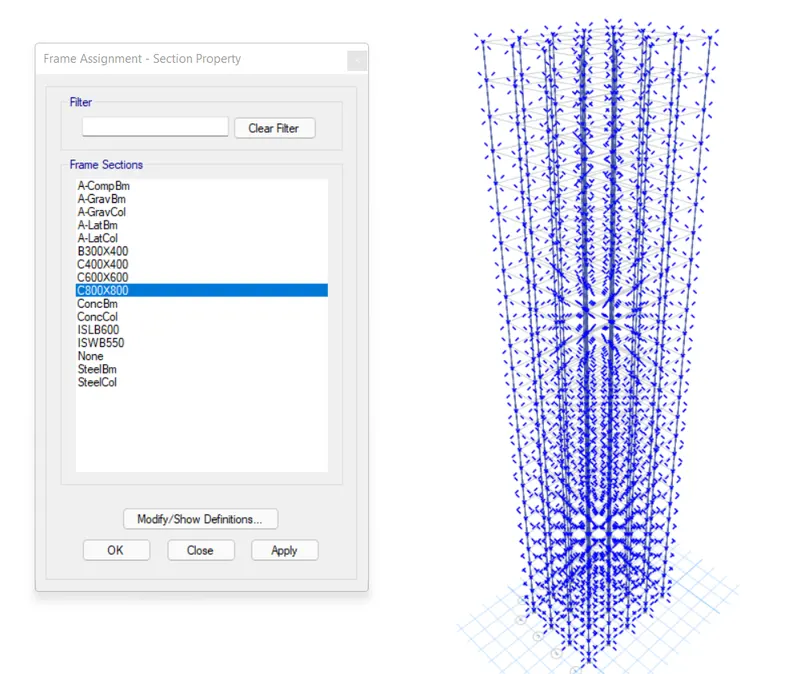
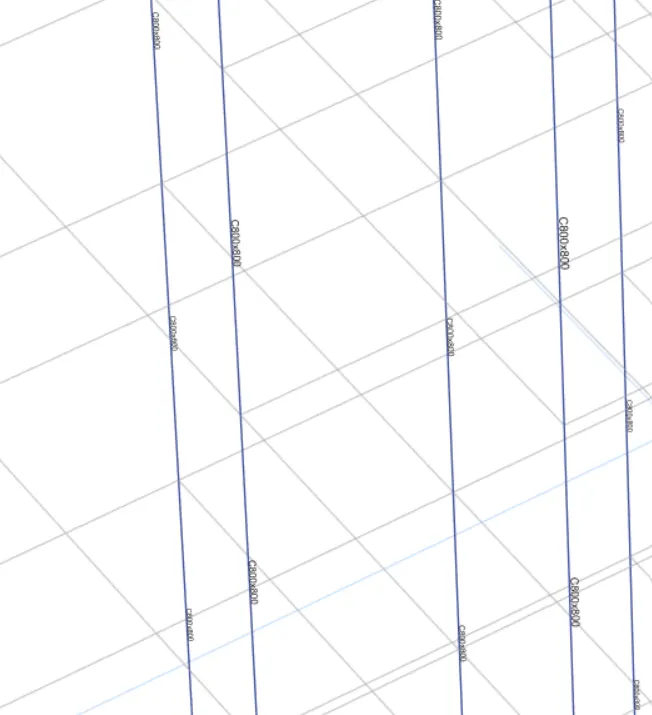
- Run the Analysis
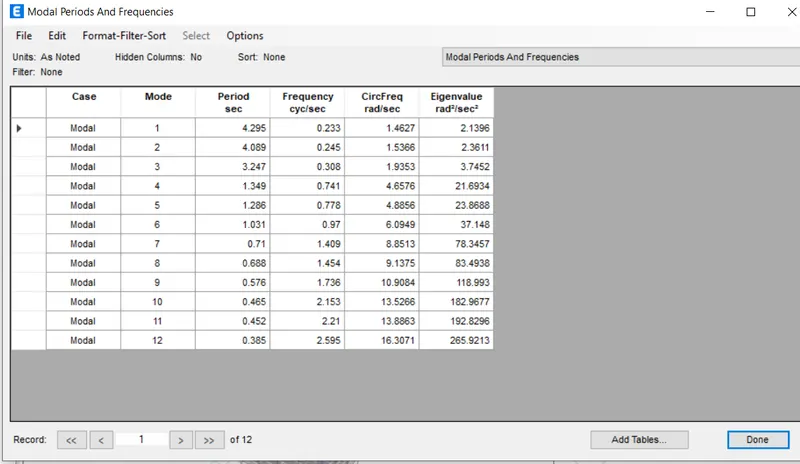
- Modal Response for Model H :-
J) Model "J" (G+25)
10% increment in the imposed loads
PROCEDURE:
model J is the exact copy of the model H and we don't required to change anything related to the modeling. However, we need to increase the imposed load on the building by 10% only which is assigned as 3KN/m^2 on all slabs of the building. So, the proceduresame which is mentioned below:-
- Select the S150 Slab Section
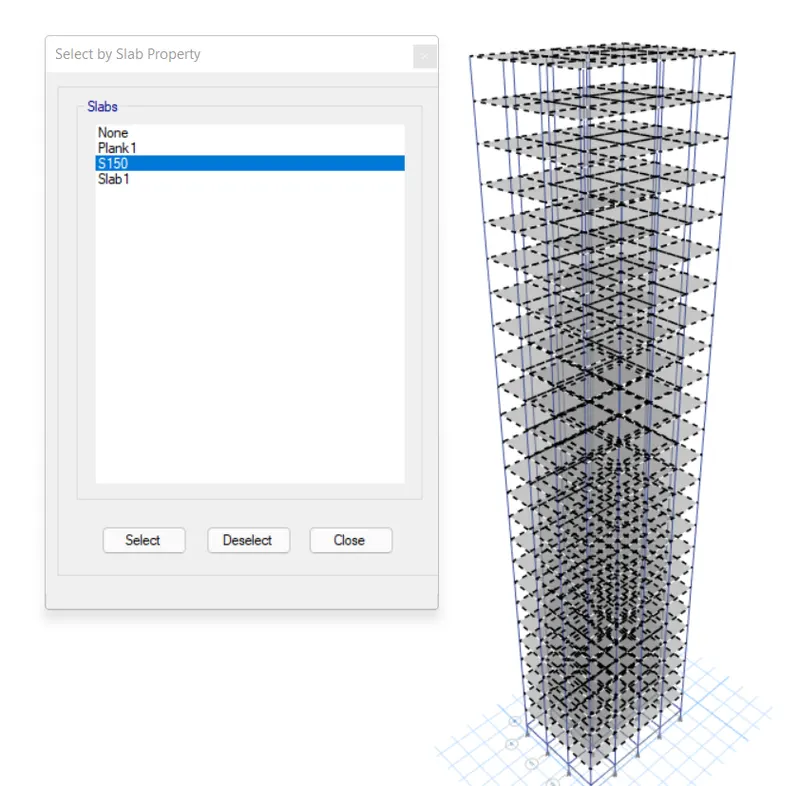
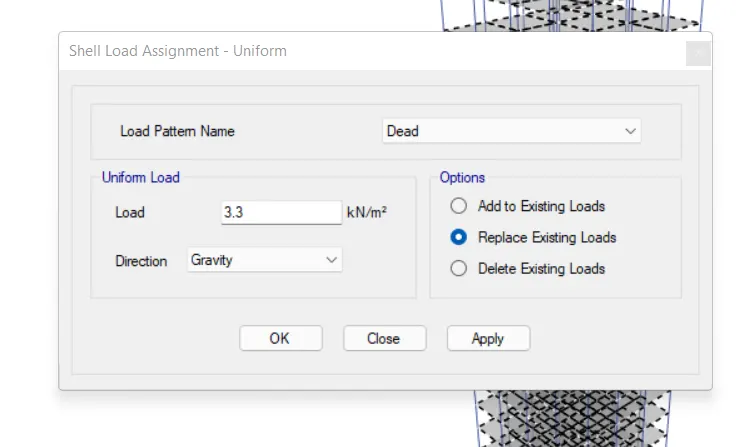
- Go to Assign then click on Shell loads- select Uniform and increase it by 10%
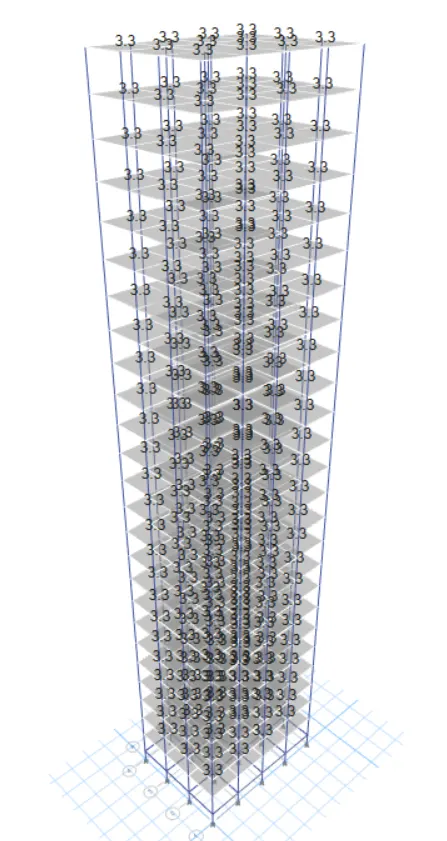
- We have assigned a 3KN/m^2 imposed load on all slabs for all of our previous buildings.
- So, we need to increase that by 10% means we need to replace the existing live load with 3.3 KN/m^2
- Run the Analysis:-
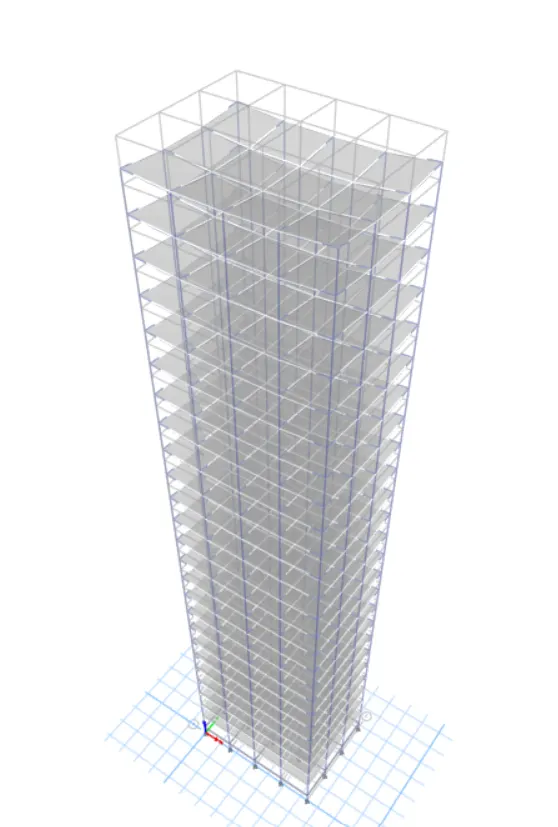
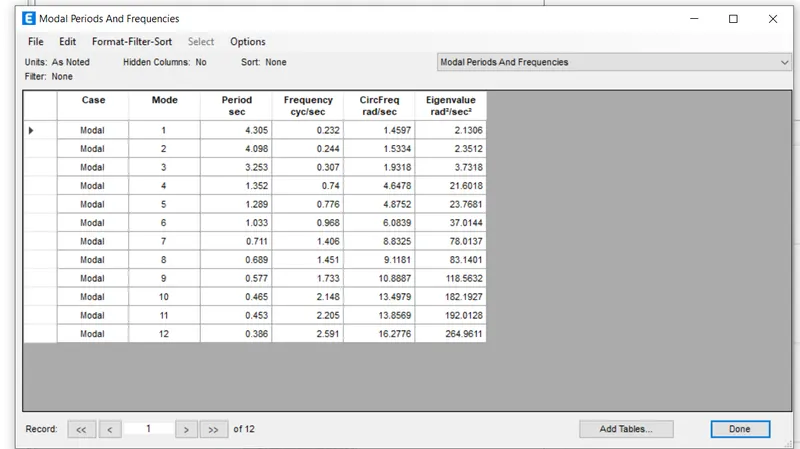
- Modal Response for model J:-
Model "K" (G+25)
In model K imposed loads increase by 20%
PROCEDURE:
For this model, we can follow the same procedure as we did for model j. However this time, we need to increase the live load by 20% . So, the stepwise procedure has been listed down below:
- Select the S150 Slab section
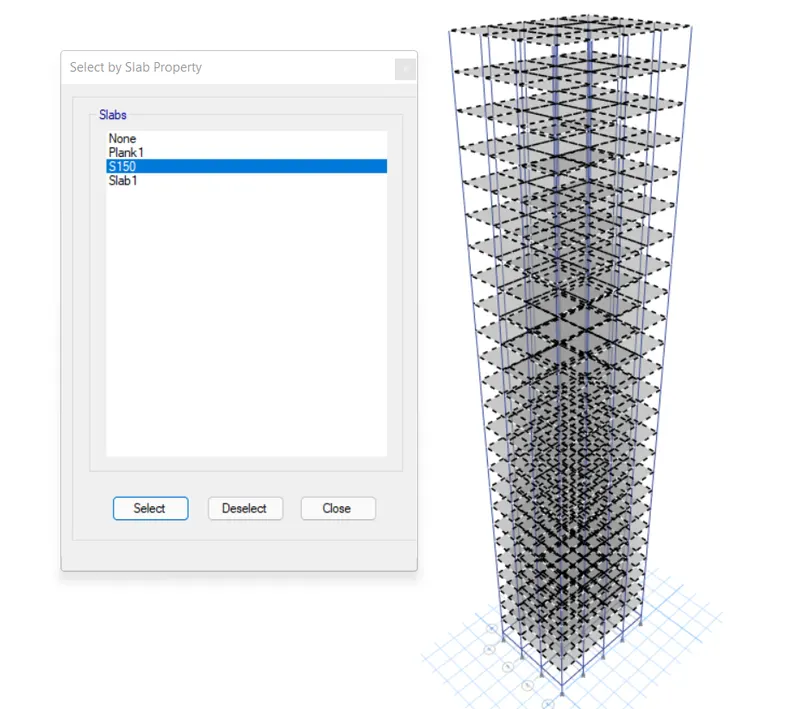
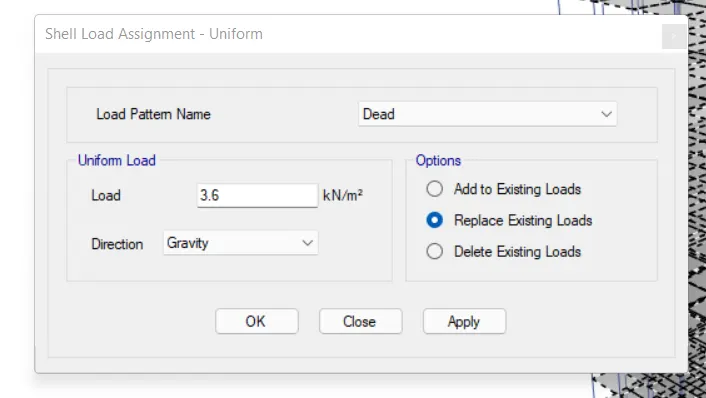
- Assign 3.6 KN/m^2 distributed shell load for a 20% increase
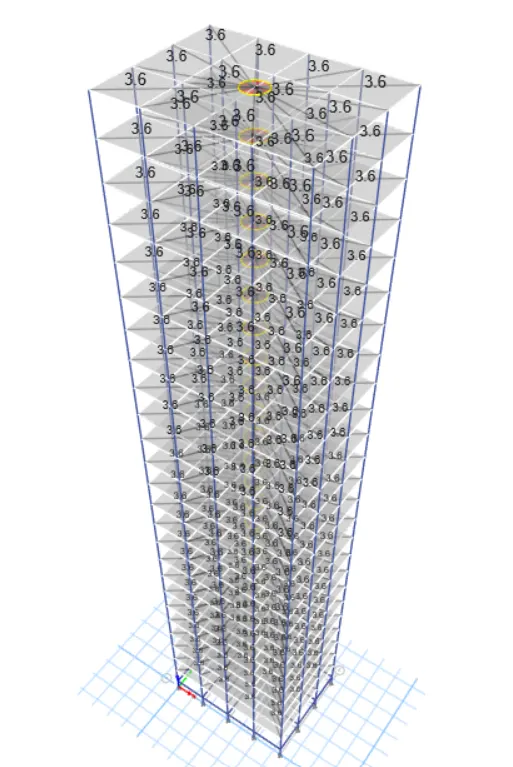
- Run the Analysis:-
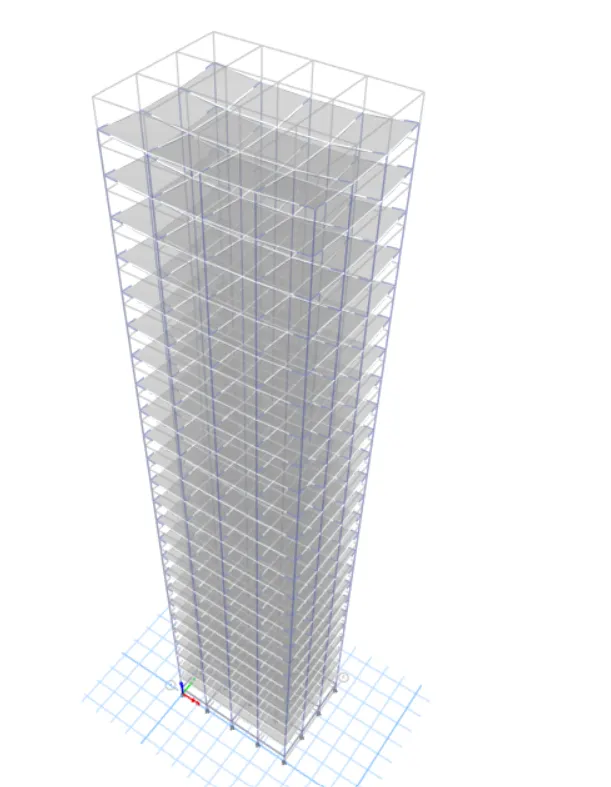
- Modal Response forModel K:-
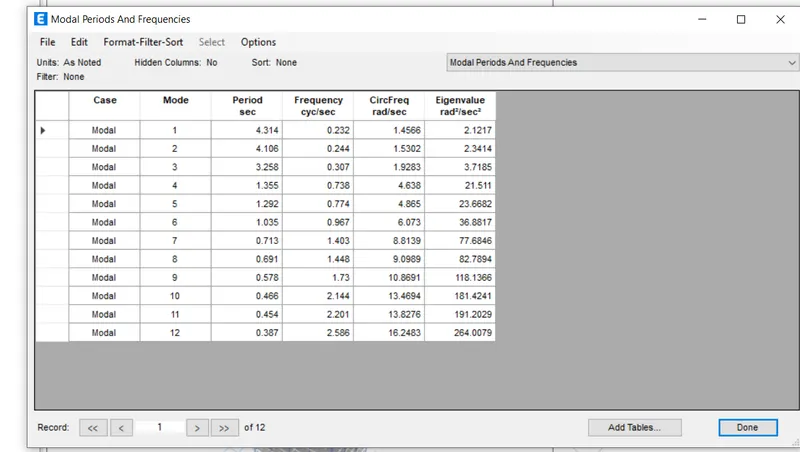
1) Effect of stiffness of Time period:-
For this comparioson Model E,F,G,H are considered in below table
Comparative Table
| Model name | no of storey | column design specification | natural period (Sec) |
| Model E | 10 | upper 5 sturey 400x400 | 1.805 |
| bottom 5 storey 600x600 | |||
| Model F | 10 | Consist column size 600x600 throughout | 1.804 |
| Model G | 25 | upper 5 sturey 400x400 | 4.095 |
| middle 10 sturey 600x600 | |||
| lower 10 sturey 800x800 | |||
| Model H | 25 | Consist column size 600x600 throughout | 4.295 |
Conclusion:
We can compair E and F design a varying column design doesn't make a big difference for only 5 stories. However, we can see that for buildings G and H, the consistent column size throughout the structure causes a more natural period. Therefore, it can be concluded that providing larger columns at the base and then reducing the size on top floors helps to control the natural period 'T' for high rise buildings. the varing sizes of coulmn helps to stable a building.
2) Effect of mass onTime period:-
| Model name | No of storey | % incease in mass | Natural period(Sec) |
| Model H | 25 | % of mass with no increment | 4.295 |
| Model J | 25 | 10% mass increment (3.3KN/M2) | 4.305 |
| Model K | 25 | 20% mass increment (3.6KN/M2) | 4.314 |
Conclusion:
As seen from the table, The mass is directly praportional to the lateral diplacement, It will definetly increase the time period.
3) Effect of building height on Time period:-
| Model name | No of storey | Natural period(Sec) |
| Model A | 2 | 0.524 |
| Model B | 5 | 1.078 |
| Model F | 10 | 1.804 |
| Model H | 25 | 4.295 |
Conclusion:
From the table we concluded that the natural period is more for model H than model A. hence As per Is code Building height is directly praportional to the natural period.
4) Effect of Column orientation on Time period:-
| Model name | No of storey | Natural period(Sec) |
| Model A | 2 | 0.524 |
| Model B | 5 | 1.078 |
| Model F | 10 | 1.804 |
| Model H | 25 | 4.295 |
Conclusion:
When the column cross-section is square, there's not much difference between the lateral displacement in both the orthogonal directions. However, when you orient the column in a particular direction be it X or Y, the lateral displacement in that particular direction will be less than that in the other direction which has a lesser column length.
5) Effect of Flexural Stiffness of Structural Elements on mode shapes:-
| Model name | Flexural stiffness beam mm | Natural period(Sec) |
| Model B | Flexural stiffness of the beam colsed to nil(zero inertia) | 2.652 |
| Flexural stiffness of the beam (Reguler) | 1.078 |
2) Effect of Axial stiffness of vertical member on mode shapes:-
| Model name | Axial stiffness column (mm) | Natural period(Sec) |
| Model H | Axial cross section of column close to nil(zero inertia) | 5.945 |
| axial cross section of column (Reguler) | 4.295 |
Conclusion:
As the axial stiffness give vital role for uplift the structure, the fundamental natural period of the building increases regardless of its structural geometry.
2) Effect of degree of fixity at column bases on mode shapes:-
| Model name | Flexural stiffness beam mm | Natural period(Sec) |
| Model B | column support pinned(reguler) | 1.078 |
| column support fixed | 0.405 |
Conclusion:
It is evident that pinned support offers fewer restraints compared to the fixed one which leads to more movement and thus increased natural period. As a result, it can be concluded that the fixed support will give you better control over the fundamental natural period of buildings. More the fixity lesser the time period.