Project 1
REPORT
AIM:
To Route wiring harness on given V_16 Engine and also to prepare draft after Flattening the same using all required Workbench available in CATIAV5. Needs to be considered all packaging rules and standard industry practices.
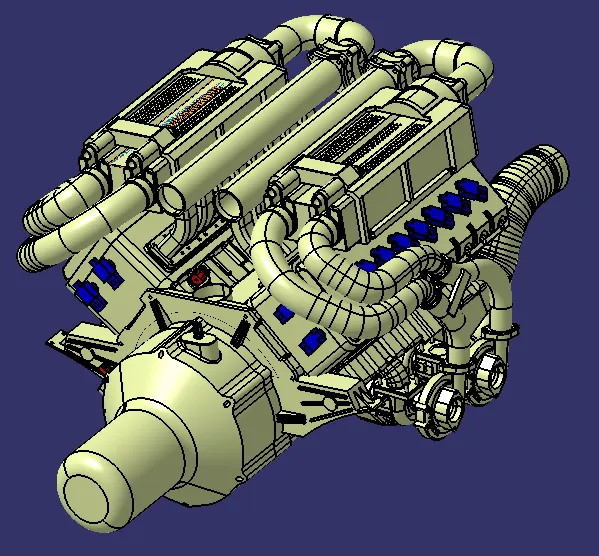
(Input: V-16 Engine CAD Data)
PRIMARY IDENTIFICATION:
The Electrical components available in the given V-16 engine consist of;
- 1-Fuel injector for 1 engine cylinder hence 8 x 2 = 16 Injectors in total which are connected by a 4-Pole connector with the wiring harness.
- 2 camshaft sensors on each engine block (4 camshaft sensors), which are connected by a 4-Pole connector.
- Engine Temperature sensor at the center of the engine between the two blocks, which is connected by another kind of 3-Pole connector.
- 2 Sensors at the Flywheel Covering to measure Engine RPM and Vibration, which is connected by a 3 Pole connector.
- Two interconnection connectors to connect the engine harness system to the vehicle harness system and Control Board Unit.
Other equipments required to complete the wiring harness routing include:
- Guiding channels to protect the harness routing from high heat zones of the engine at specified locations.
- P-clamps to provide positive clamping and ensure clearance management for the routing at specified locations.
- Mounting parts such as L-clips to mount both of the interconnection connectors to the engine body.
- Mounting clips to mount the connectors at specified locations.
- Corrugated protection tubes to protect the wiring harness.
TECHNICAL SPECIFICATIONS NEED TO BE FOLLOWED WHILE ROUTING AND PACKAGING:
- Particular routing must not be made complex until necessary, should provide ease of manufacturing, accessibility, easy removal, and easy maintenance of attached equipment and
- The wiring harness should be routed in such a way that it is easy to assemble and removal on a vehicle.
- Try to keep the Wiring harness away from sharp environments like sheet metal brackets, panel edges, corners, etc.
- Avoid harness routing and clipping in blindspots of the operator during harness during installation.
- Ensure that routing meets the clearance requirements with the different surrounding parts.
- Routing shall provide enough slack for each branch to avoid additional stress on wire and terminal crimping joints but ensure that extra slack does not cause the wiring harness foul with surrounding parts and impact desired clearance requirements.
- Enough clamps should be provided to ensure positive clearance with the surroundings and safety of wiring harness.
- Use of plastic guided channels is recommended to meet the clearances in critical areas if it is difficult to achieve by the use of clamps.
- Avoid passing through high heat zones.
- A branch length of minimum 50 mm is to be kept.
- The minimum distance between clip and nearest branching point should be 25mm.
- Limit the no. of branches from a single branch point to 3-4.
- Ensure that harness protection is provided according to the surrounding temperature, manufacturing ability, and expected reliability.
- The minimum bend radius is to be in the ratio of 1.4.
- Consider min 5% slack in the wiring harness if needed.
- Avoid confusion kind of Branching points and Multi- branchables.
STEPS FOLLOWED :
Step 1. Create context assembly product file.
The context assembly will contain 3D CAD data for the engine and engine harness geometrical bundle assembly. Any sheet metal component such as L-clip required will be added into the context assembly.
Step 2. Define all the required connectors, clamps, clips, and mounting equipments electrically.
=>To define any connector electrically,
- Create required geometrical parameters like bundle connection point, connector connection axis and cavity connection axis (if required) to the connector in theMechanical Part Design Workbench.
- Now define the connector with electrical properties such as connector connection point, bundle connection point and cavity connection point.
- Go to Electrical Part Design Workbench and select connector command and input the Number of terminals as per the available connector.
- Defining connector connection point using connector connection point command and define the parameters.
- Define bundle connection point using bundle connection point command and define the parameters.
- Define cavity connection point using cavity connection point command and define the parameters.
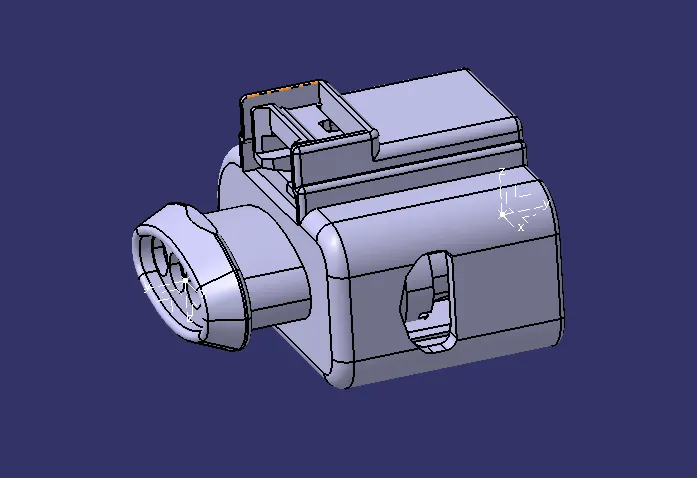
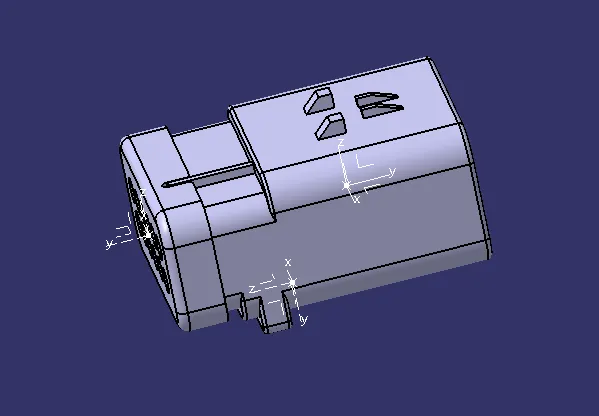
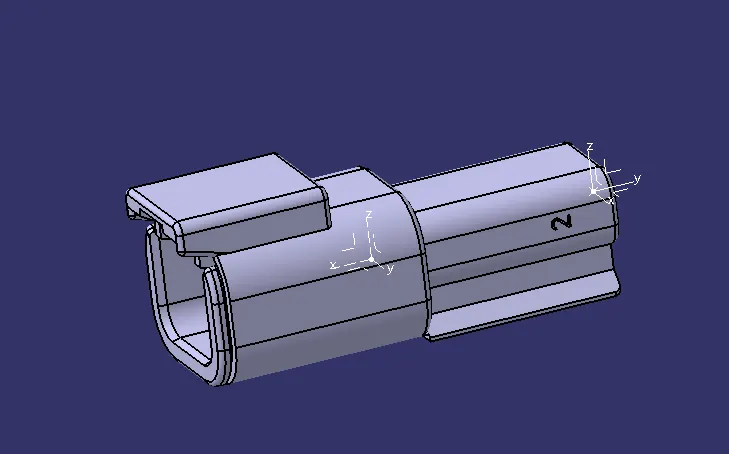
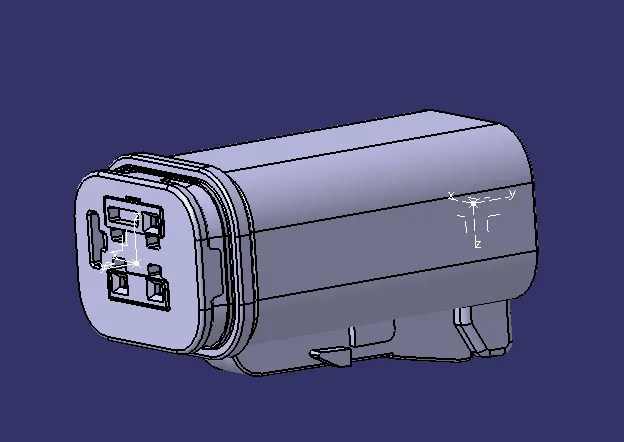
Step 3. Inserting connectors into the geometrical bundle and positioning them.
- The connectors are inserted into the geometrical bundle and positioned onto the fuel injectors, camshaft sensors, vehicle speed sensor, neutral position sensor and engine coolant sensor as shown in the images below.
- Connectors connected to camshaft sensors, vehicle speed sensor, engine coolant sensor.
- All connectors are positioned respectively
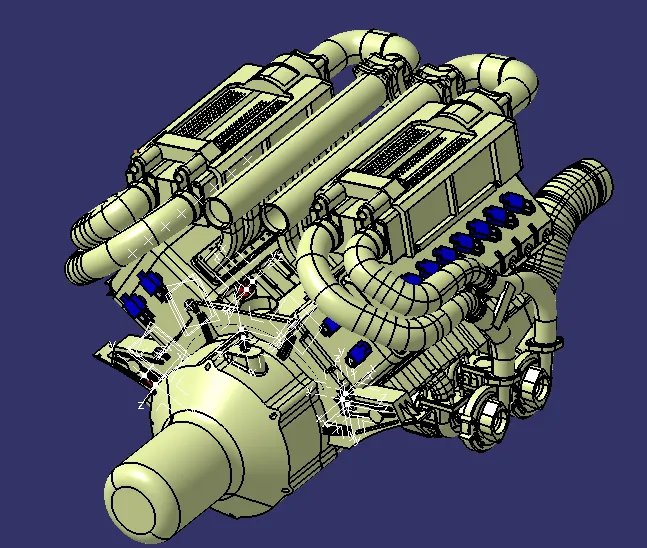
Step 4. Adding sheet metal bracket for the interconnection connector.
- TwoL-clip is added inside the context assembly to mount the interconnection connector.
- The L-clip is added inside the context assembly and not into the geometrical bundle since it is not bought along with the wiring harness.
- The existing bolt on the engine is used to mount the sheet metal bracket.
- The bracket should be provided with a suitable locking feature.
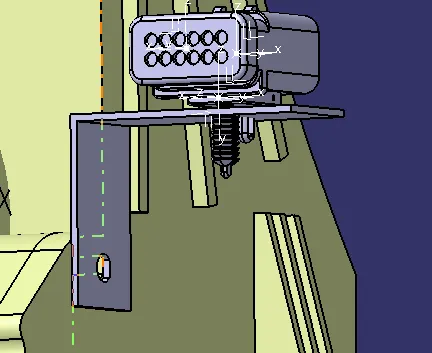
Step 5. Defining mounting clip electrically so that the interconnection connector can be mounted on the sheet metal bracket.
=>To define mounting clip electrically,
- First, define the geometrical parameters which is the cavity connection axis in the part design workbench.
- Defining electrical properties to the mounting clip by going to the electrical part design workbench.
- Define the clip as mounting equipment using the mounting equipment command.
- Select the cavity command and define the parameters.
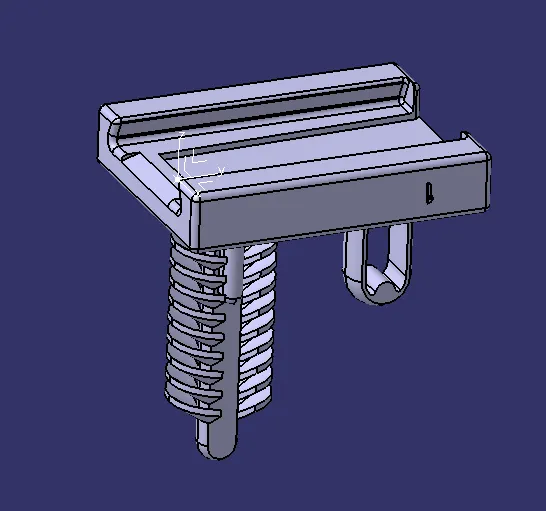
Step 6. Mounting the interconnection connector on the sheet metal bracket.
- To mount the interconnection connector onto the sheet metal bracket, now the mounting clip is mounted on the sheet metal bracket.
- Then the interconnection connector is electrically connected with the mounting clip by using connect electrical devices command in the electrical assembly design workbench.
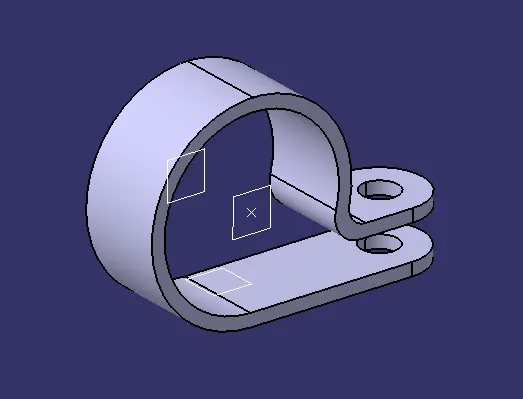
Step 7. Adding P-clamps to provide positive clamping for the wiring harness.
- P-clamps should be defined with electrical properties before inserting into the geometrical bundle assembly. First define geometrical parameters such as entry point, entry plane, exit point, exit plane, and base plane.
- Go to the Electrical Part design Workbench and define the P-clamps as support using the support command and define the parameters as shown below.
- Use the support command again and select first plane definition as an exit point and exit plane, this is done to obtain wiring entry from either side of P-clamps.
- P-Clamps are mounted on the existing bolts and screws to provide positive clamping and ensure proper clearance management for the wiring harness routing.
Step 8. Adding plastic guiding channels.
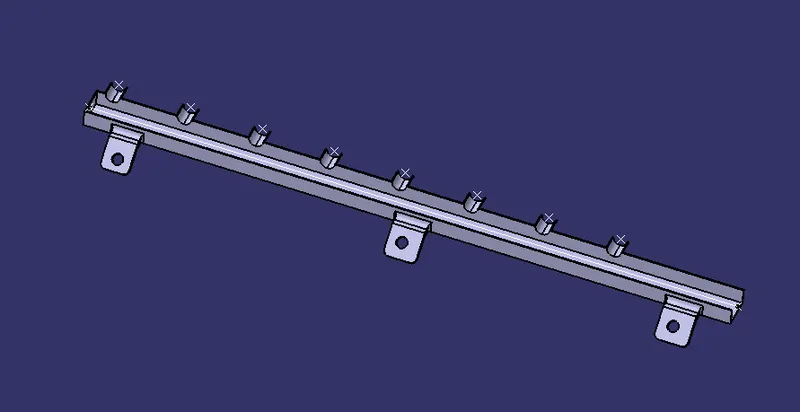
- The given V-16 engine has 8 injectors both on the left and right side of the engine which are close to one another, hence using plastic guiding channels is the best option for easy and proper routing of the wiring harness and maintaining clearance requirement of the wires from the high-temperature parts of the engines.
- Before adding guiding channels into the geometrical bundle assembly it is necessary to define its electrical properties, which is done by the following steps.
- First create geometrical parameters such as bundle entry points, and external reference line in the part design workbench to route the wiring harness into the guiding channel.
- Go to electrical part design and define the part as equipment using equipment command and define bundle connection points using bundle connection point command towards the entry points of the guiding channel.
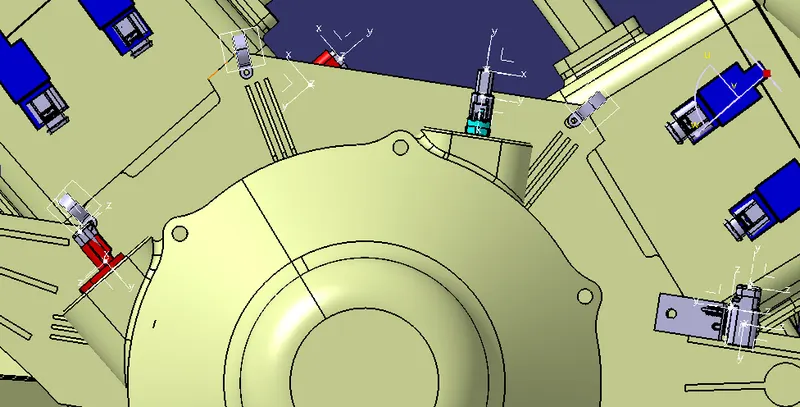
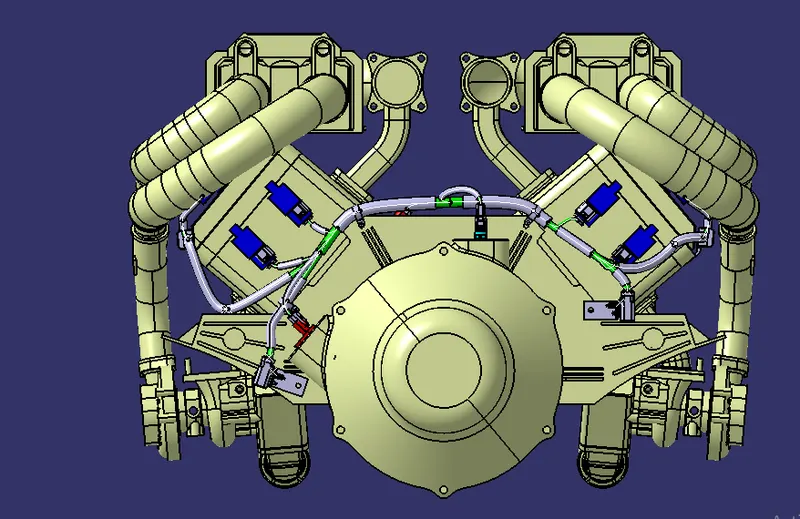
- Now insert the guiding channel into the geometrical bundle and position it accordingly as required, both on the left and right side of the engine as shown in the image below.
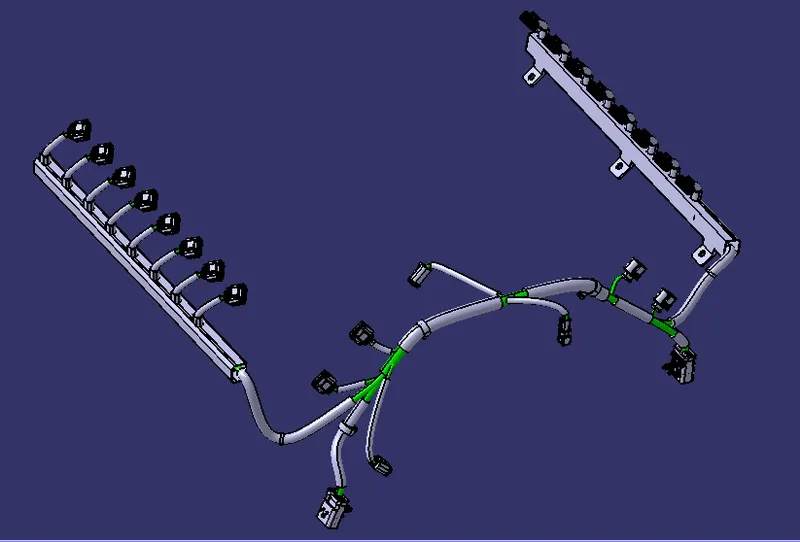
- Now as all the components are inserted and positioned into the geometrical bundle, the assembly is ready to route the harness.
Step 9. Routing the wiring harness to the connectors.
- Go to the Electrical harness assembly Workbench and select the geometrical bundle command and select the geometrical bundle in the model tree.
- Then select the multi-branchable command to start the bundle routing and go to route definition.
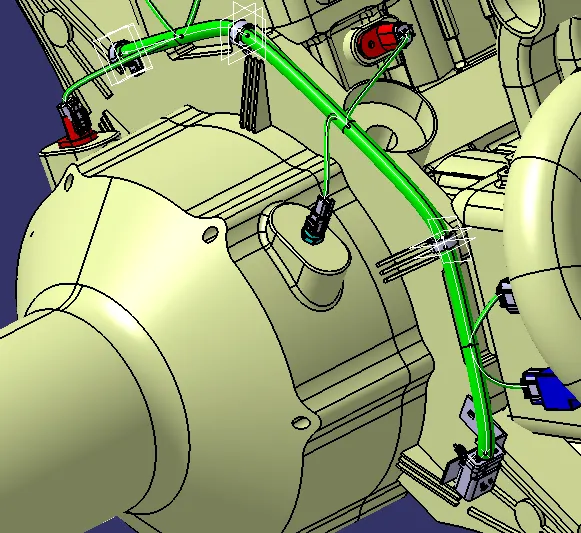
- The bundle routing starts from the interconnection connector and then to the P-clamps and to the guiding channels.
- Adding branching points wherever necessary using add branch point command as shown below.
- Adding branches wherever necessary to connect the various connectors to the main branch as shown below using add branches command and routing definition into it.
- To route the wiring harness through the guiding channels select the external curve and click on the line in the guiding channel.
- Add branching points to the wiring bundle and add branches to connect the wiring to the connectors at the injectors.
Step 10. Add Protective covering to the channel.
- To add protective coverings on the wiring harness, first create a protective covering by using define protection part command in the electrical part design workbench. Select any plane, and define the parameters as per the requirement.
- A corrugated tube is created.
- Go to new and select catalog document, select add family command and define the type as conduit save the file to create a catalog for protection tube.
- A catalog file is created.
- Save the file to create a catalog for protection tube.
- The created corrugated tube can be added into the catalog by store device command and selecting the catalog file created for protection tube which can be used to add protection on the harness as and when required.
- To add protection tube in the wiring harness, select light protective coverings command and select the required size protection tube from the catalog.
- Select the branches where the protection tube is to be applied and the protection tube gets applied on the wiring.
Step 11. Check bundle connectivity.
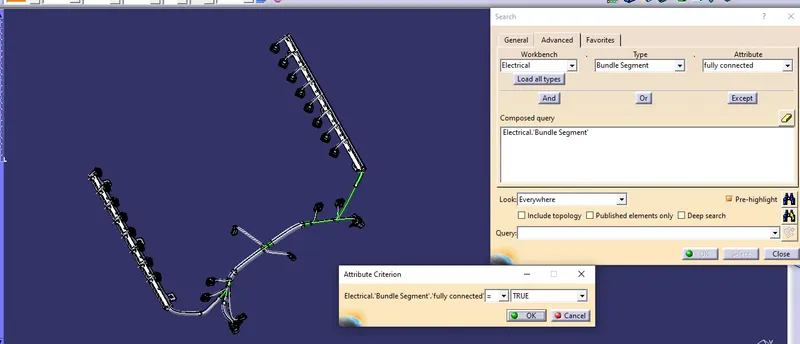
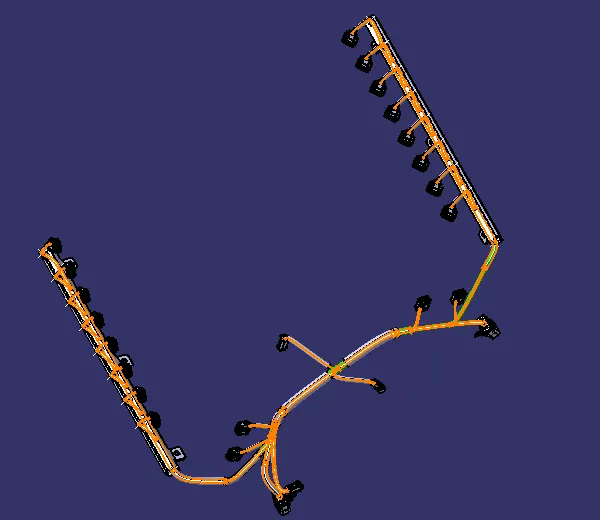
- go to edit> search> advanced tab> select workbench as electrical, type as bundle segment and attribute as fully connected and attribute criteria as true if, you want to check all connected bundle segments and false if you want to check all the unconnected Checking bundle connectivity
- Now as the branches are fully connected we can proceed further for harness flattening.
Step 12. To create flattened view of the engine harness.
- Create a new product file and save it in the same folder where the wiring harness is saved.
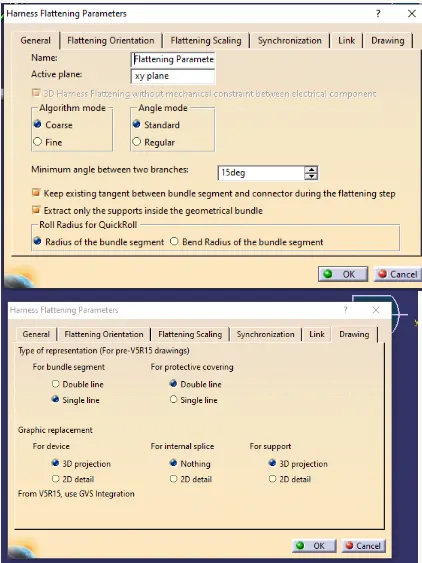
- Go to the Electrical harness flattening workbench and select harness flattening parameters and define harness flattening parameters.
- To import the harness file into the harness flatten file, select extract command and go to harness assembly window, and click on the geometrical bundle.
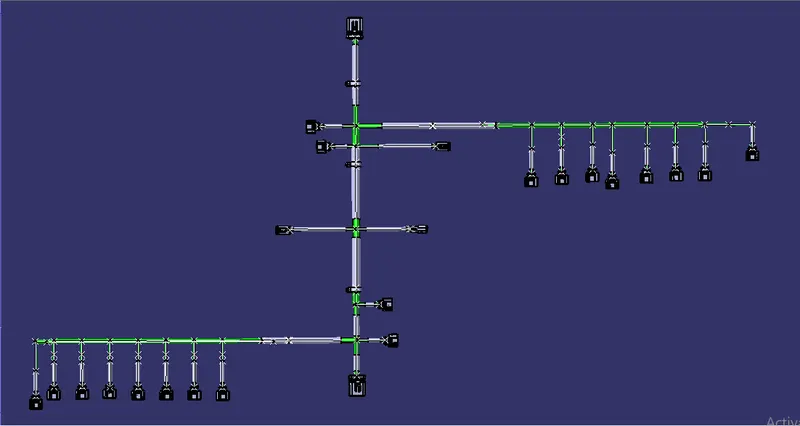
- The harness routing is added into the harness flatten file as shown below.
- Extracting harness into the flattening product file.
- Go to flatten command and select the appropriate face and select all the branches of the wiring harness.
- Use rotate command to rotate the branches and make the wiring harness routing presentable in the drawing sheet.
- Following this, the connectors and other devices are also to be manipulated in the assembly design workbench to give a proper view while drafting on the drawing sheet.
- The flattening view is ready and can be used for drafting.
Step 13. Creation of Drawing file.
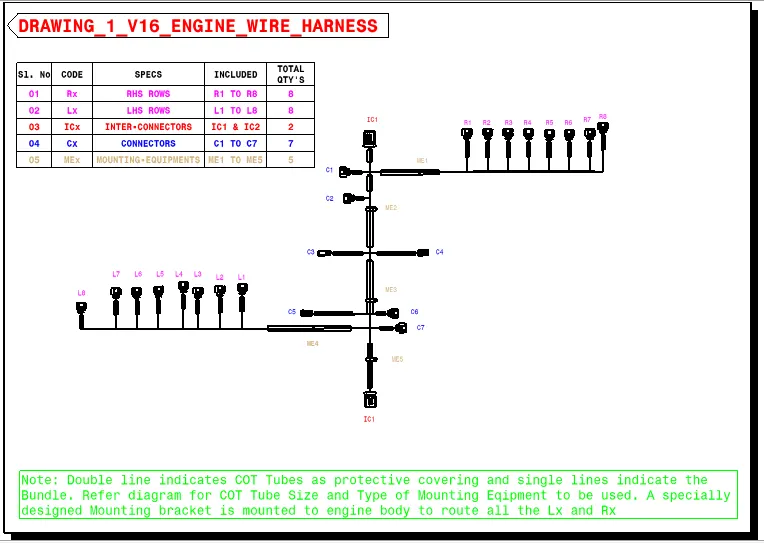
- Go to assembly design workbench, and select view from reference command and select the plane to add plane for the annotation, select flag note with leader and add annotations.
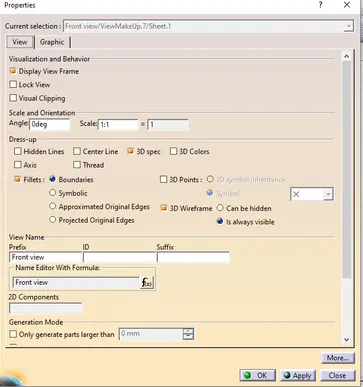
- To make the bundle segments visible right click on the drawing sheet and go to properties, in the view tab, highlight '3D Wireframe' and make 'is always visible' in the dress-up settings.
- At last, add all required Notes Annotations Tables, etc.. to the Drawing sheet.
CONCLUSION:
=>Thus the engine harness routing is completed and the flattened view drawing is created.
=>This Completes our Requirement.