Performing of meshing in Dashboard (IP)
Objective - For the given component (dashboard subparts) check for the geometrical errors and mesh with the given element Quality criteria. After meshing the component the thickness has to be assigned.
Procedure -
1. Geometry cleanup - first step is to import the cad model into Ansa and then perform TOPO operation for the entire geometry for interconnected two faces which are not attched and shows a red cons by FACES >> TOPO. now you can see yellow cons which are double cons.
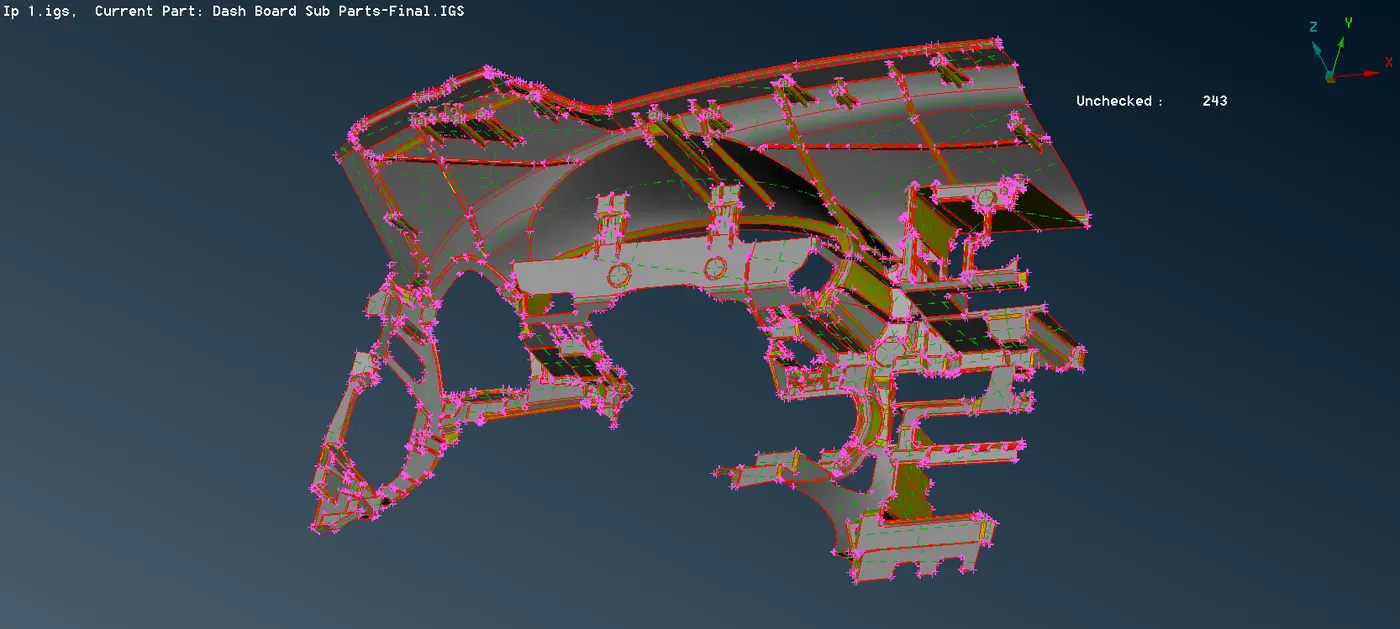
fig. dashboard component
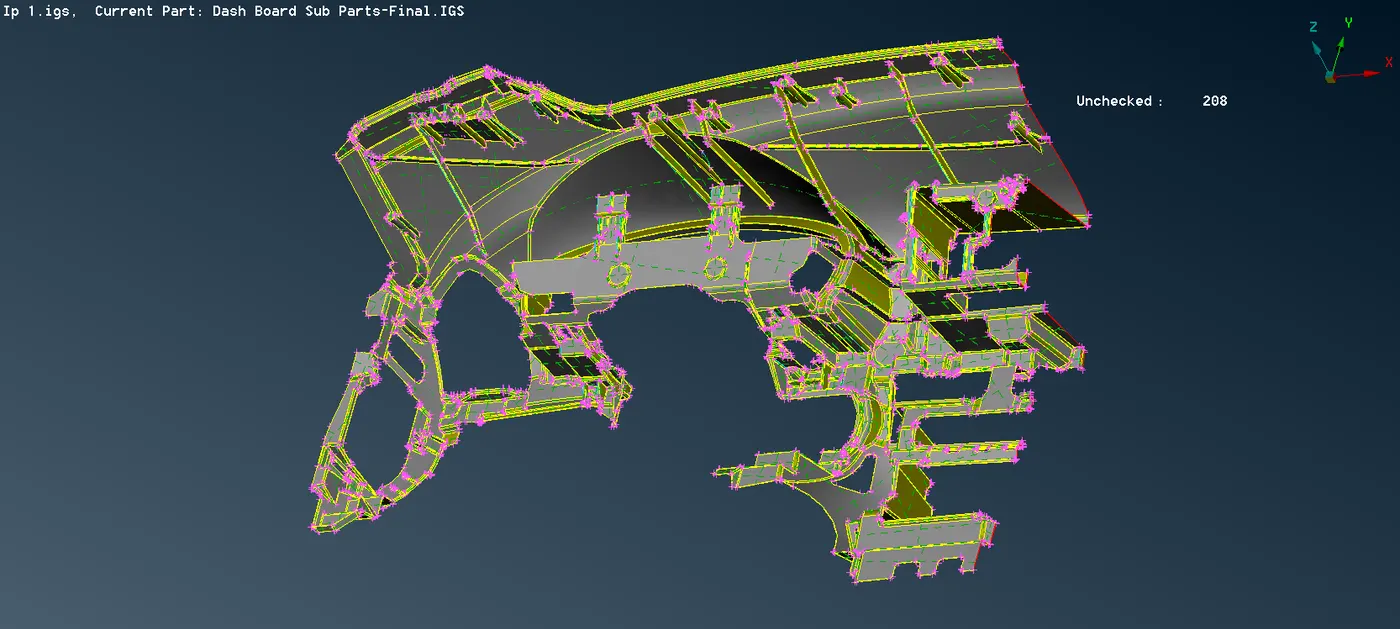
fig. after topo operation perform
now assign a refinement to the component to see all the faces clearly and set a value of 1mm under the Mesh module by PERIMETER >> LENGTH .
now we have to check for the geometrical errors in the geometry by CHECKMANAGER >> GEOMETRY and you can see there are lot of errors like crack, single cons, triple cons,neddle faces etc . Most of the error can be fixed by using auto fix option and others can be fixed manually.
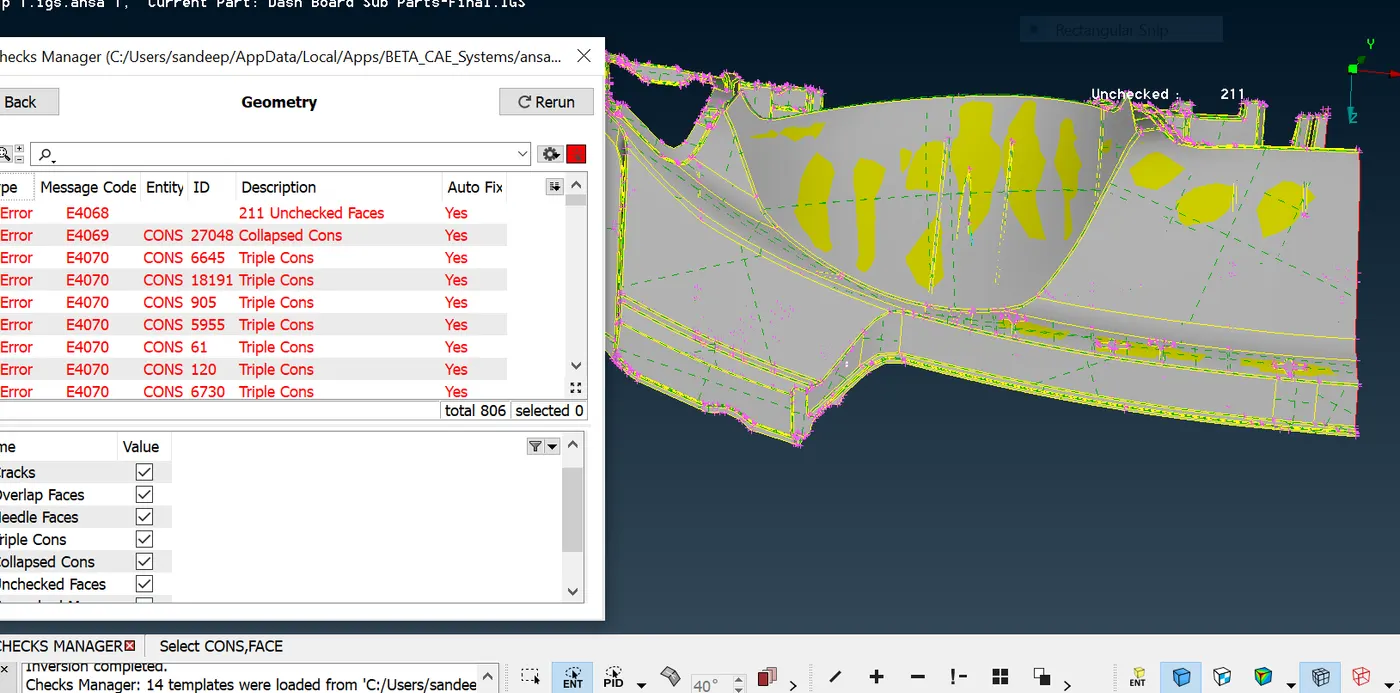
fig. geometry checkup
From face module used - Delete, New, Topo. From Cons module used - Release, Paste. now again we run check manager and now all errors are rectified now we can proceed into further steps .
Orientation is given by FACES >> ORIENT >> VISIBLE. By this we can see only a same color on the whole surface when view in entity mode which help in taking a midsurface.
2. Midsurface extraction - now next step is to extract a midsurface of the model for 2D meshing and for this first we measure the thickness of the each part of the geometry by UTILITIES >> MEASURE .
measuring the thickness of all the part like upper surface of dashboard ,ribs, fixtures etc .
As you can see the thickness of upper surface of dashboard is uniform 0.6 so we choose a offset option for taking a midsurface. TOPO MODULE >> FACES >> OFFSET.
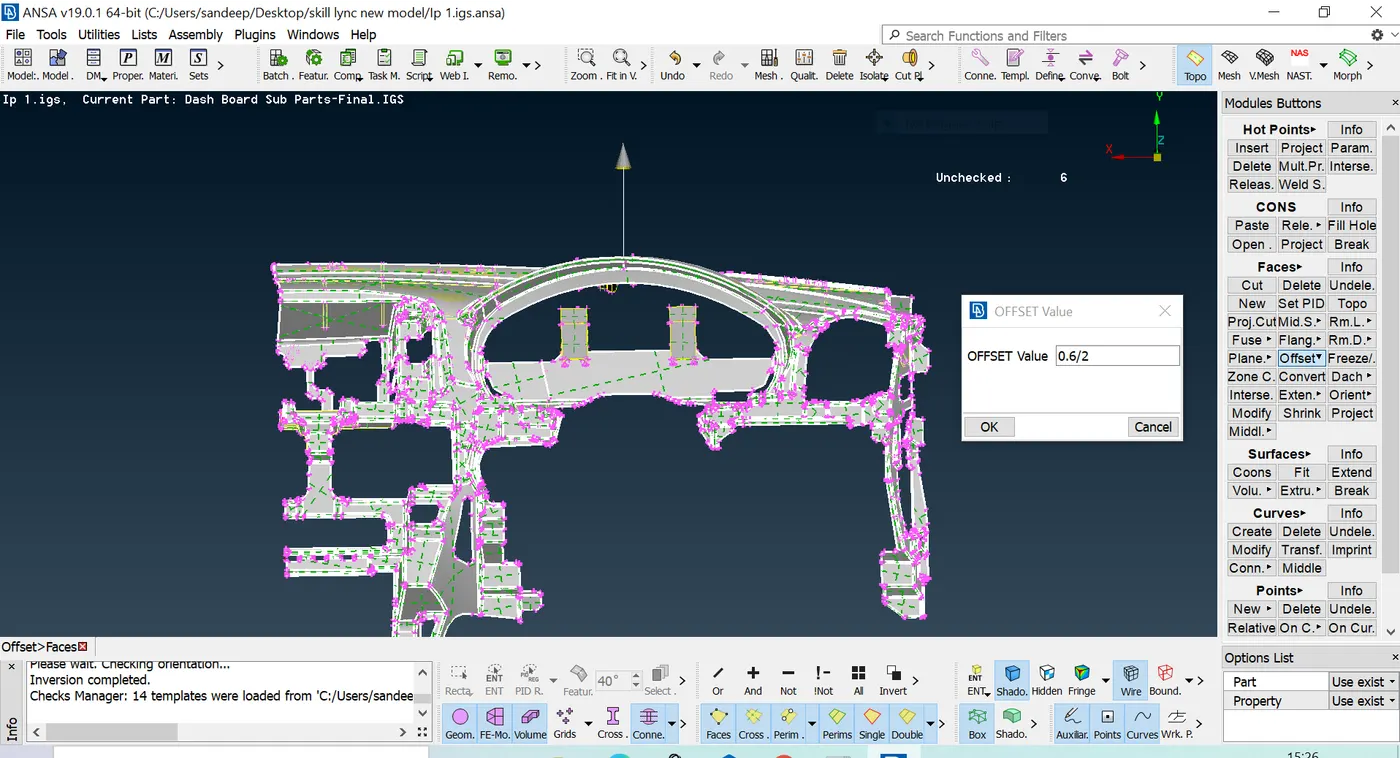
fig. midsurface extraction using offset method
For some faces especially in the rib area, we can use the middle option .we do not need to measure the thickness of particular part by just selecting the opposite faces we can extract the midsurface. this option is only useful when the two surfaces are of the same shape and identical surface on each side. TOPO MODULE >> FACES >> MIDDLE.
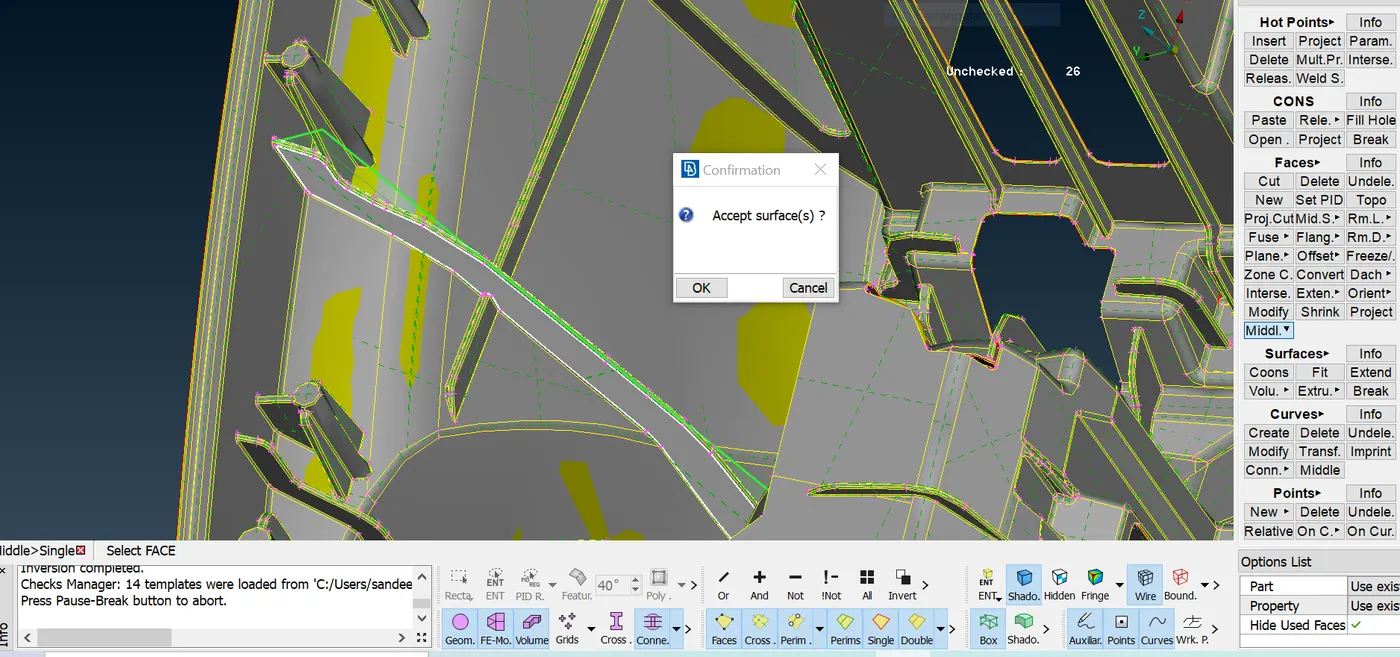
fig. midsurface extraction using middle method
Now the faces which are taken out as a middle surface are connected to each other by making new surface or using Extend tool under faces option in the topo module is used to connect the single cons part which are left hanging are pasted to the base geometry to achieve proper midsurfce of whole geometry. first selecting the cons followed by middle click mouse confirmation and then select the surface on which the cons should be extracted. FACES >> EXTEND.
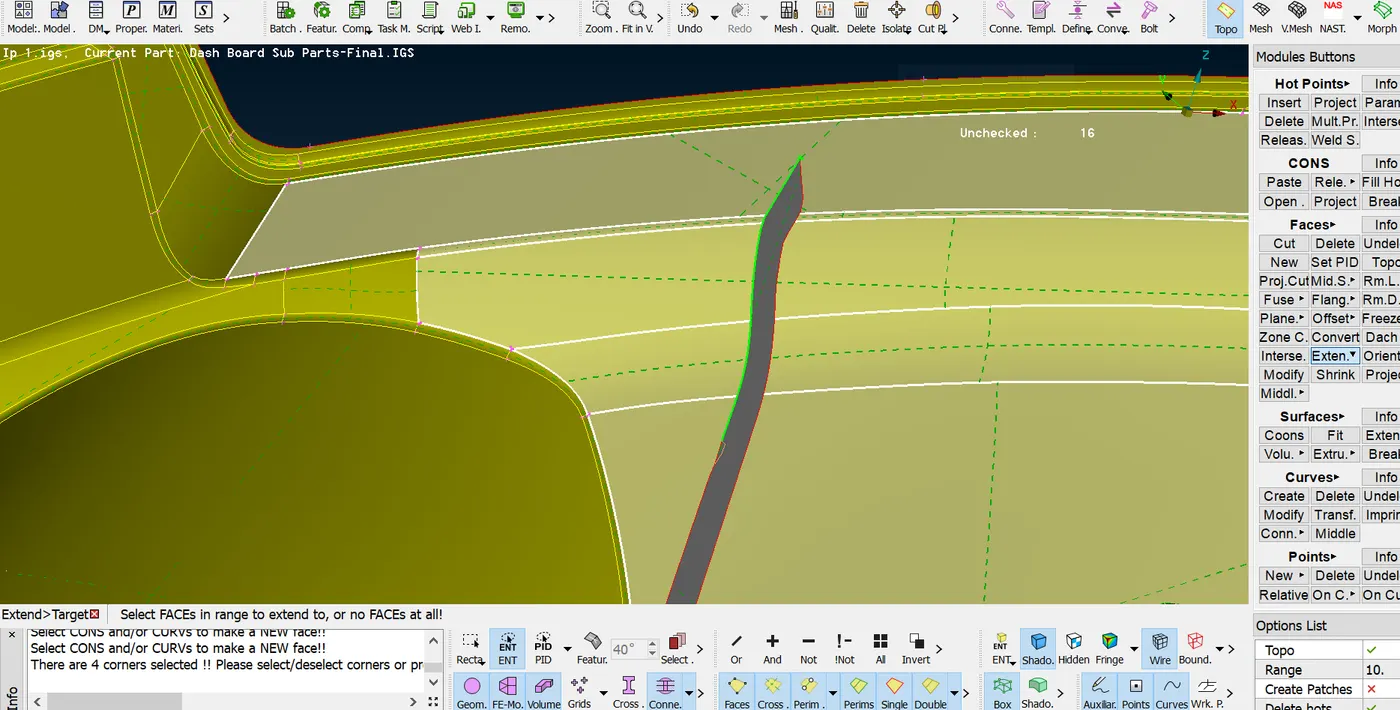
fig. extend the rib portion to bottom face
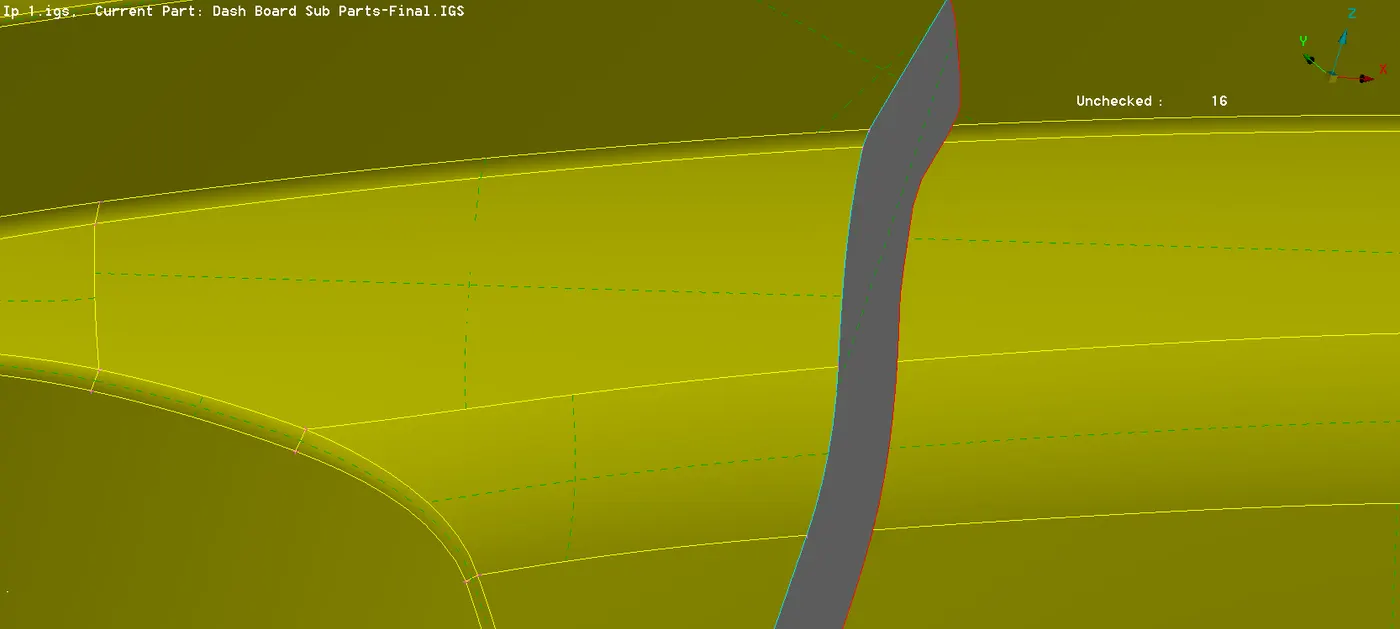
fig. after extended option.
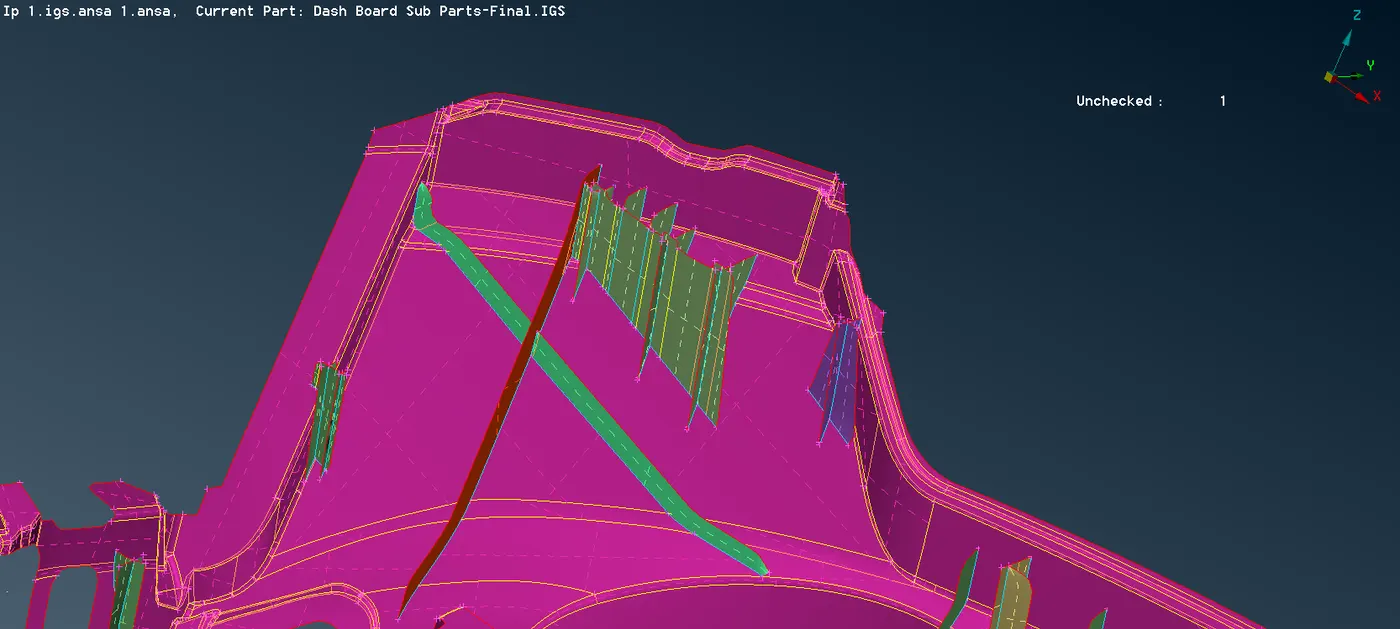
fig. view of rib capture
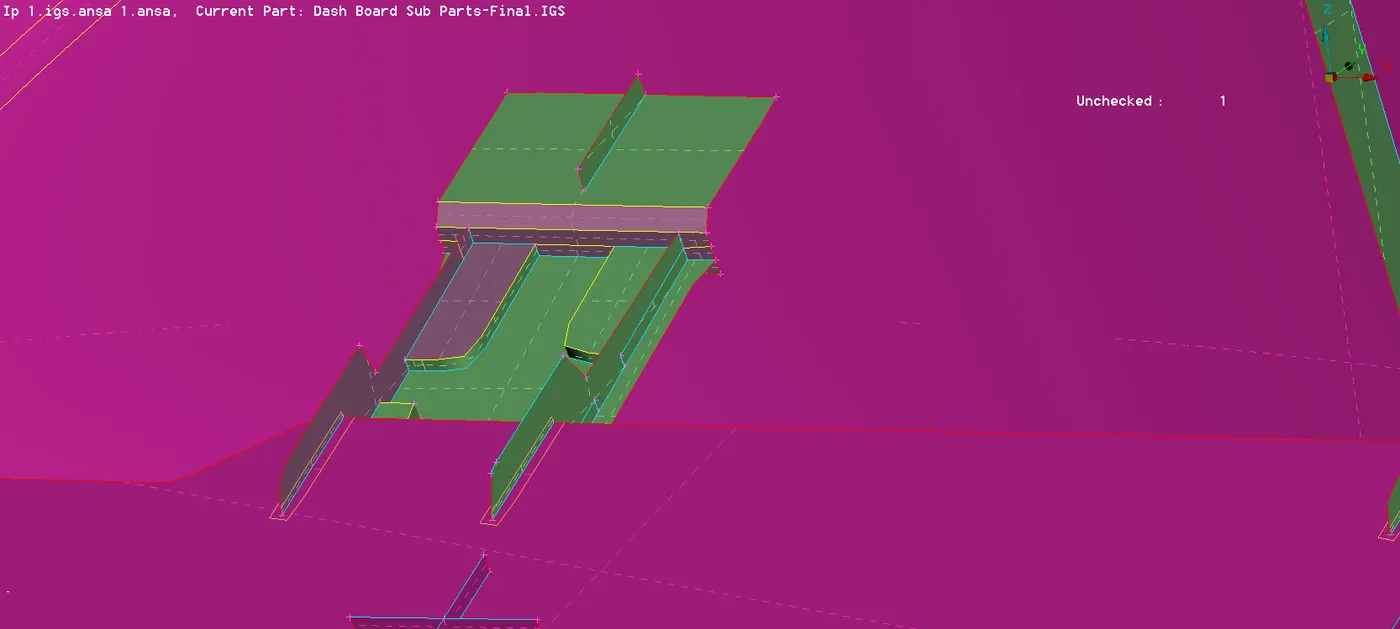
fig. feature capture by middle and extend option
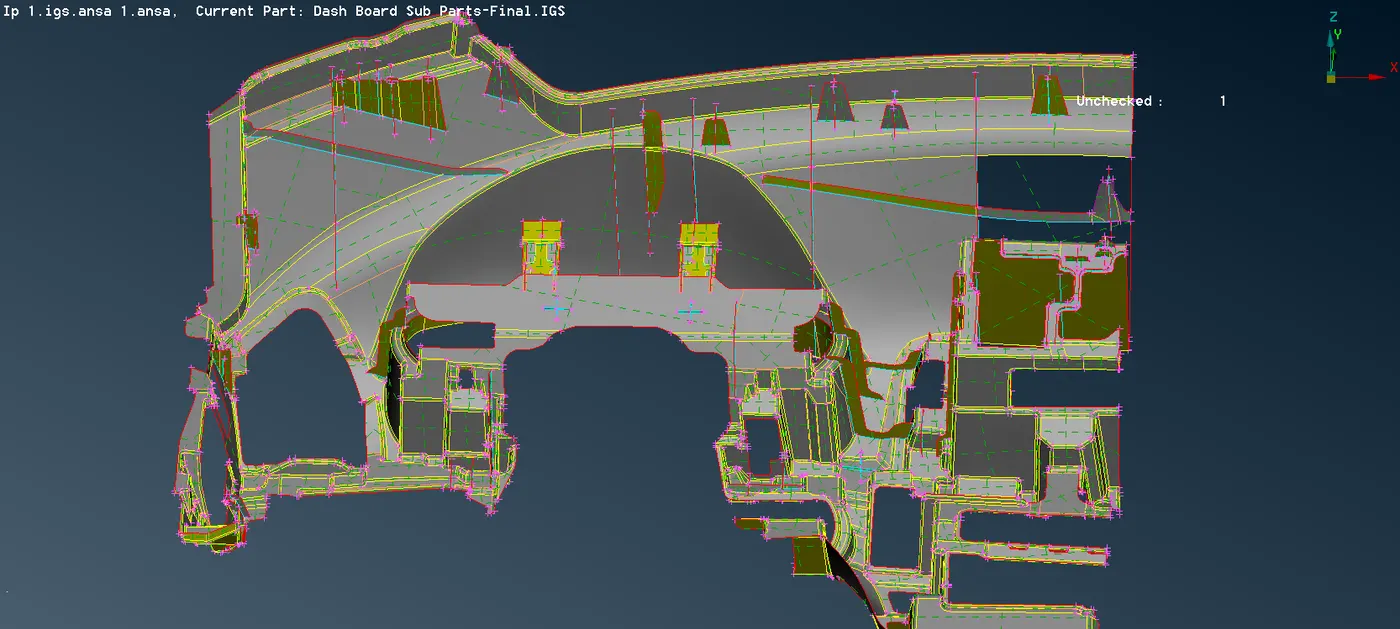
fig . midsurface extracted
After midsurfacing all the part in geometry, the midplane geometry is checked for any error.
3. Assigning new pid - Assign a new pid of different parts of midsurface.
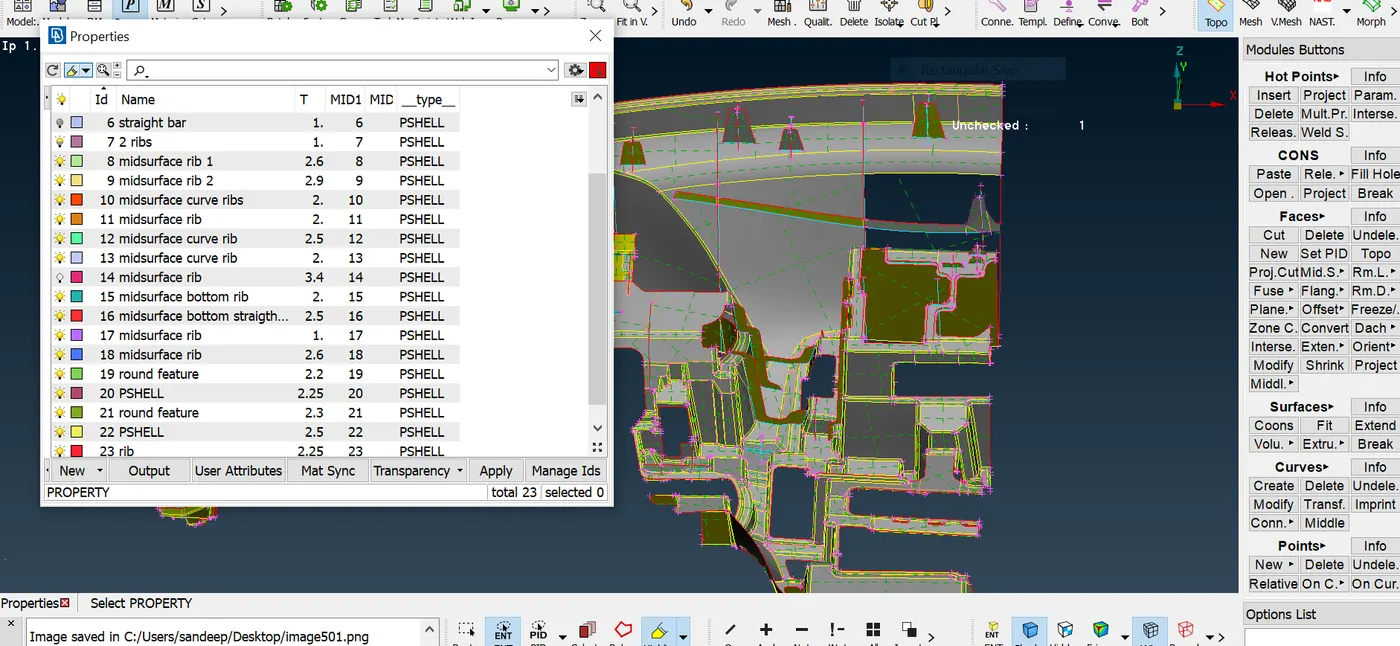
fig. assigning new pid to midsurface
4. Defeaturing - defeaturing is the process of removing all unnecessary edges,fillet radius etc and also maintain distance between two nodes or curve upto minimum length. For defeaturing the small fillet we can use a Dach option in order to get rid off- elements. Topo module >> Faces >> Dach >> Divide faces.
5. Meshing - Before meshing we have to assign a mesh parameter and quality criteria.
|
S.No |
Quality Criteria |
Value |
|
1 |
Target/Average length |
4 |
|
2 |
Minimum Length |
2 |
|
3 |
Maximum Length |
6 |
|
4 |
Aspect |
3 |
|
5 |
Warpage |
15 |
|
6 |
Skewness |
45 |
|
7 |
Jacobian |
0.7 |
|
8 |
Minimum Quad Angle |
45 |
|
9 |
Maximum Quad Angle |
135 |
|
10 |
Minimum Tria Angle |
30 |
|
11 |
Maximum Tria Angle |
120 |
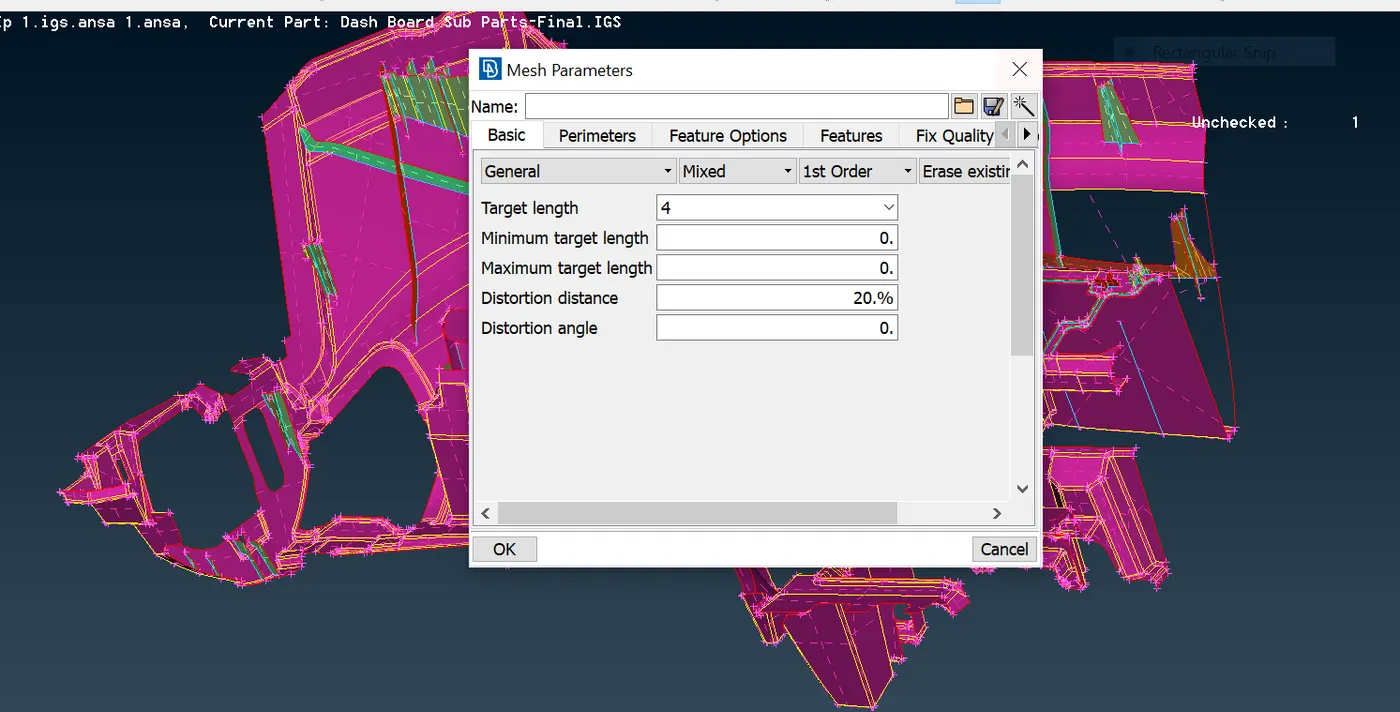
fig. mesh parameter
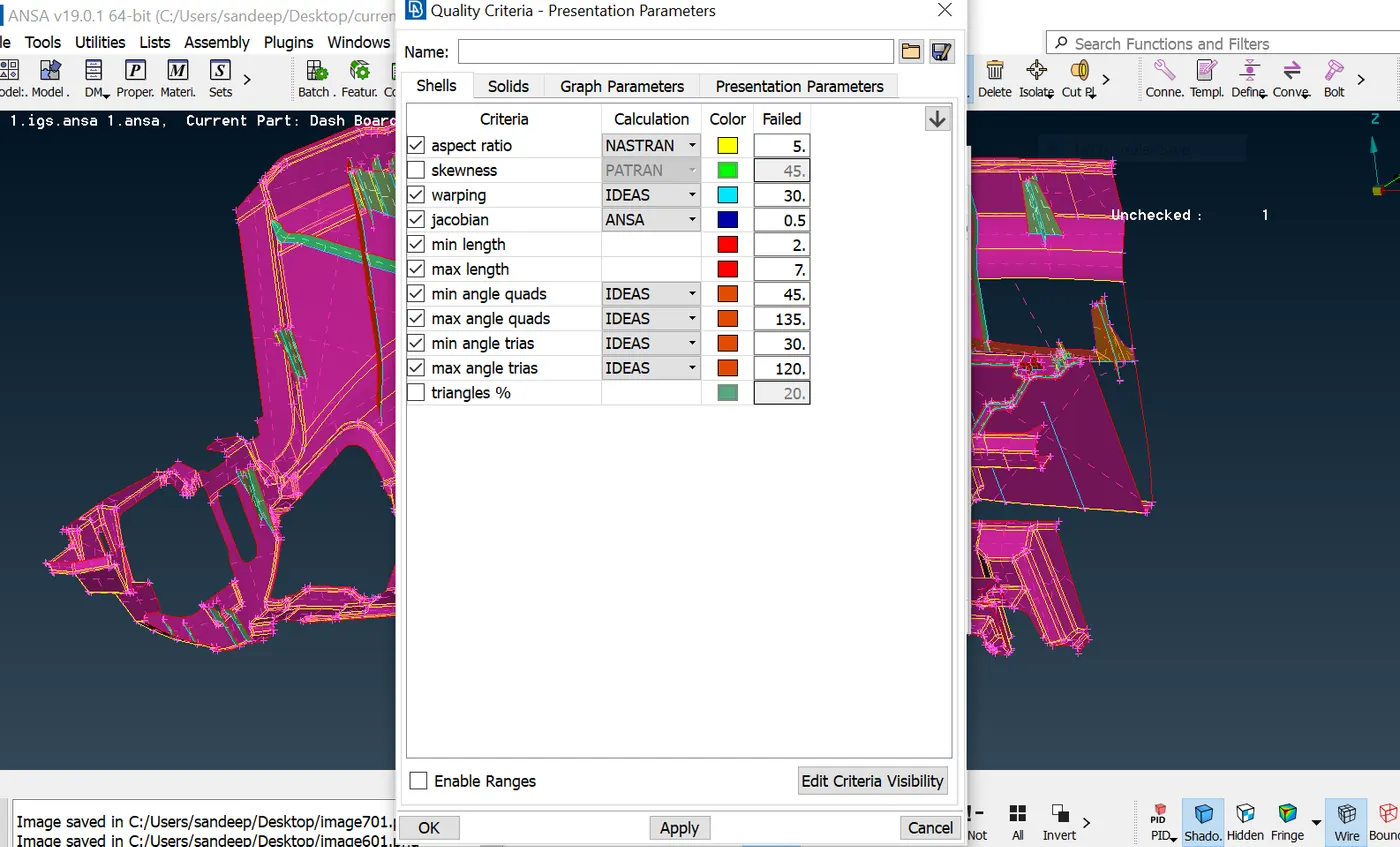
fig. quality criteria
Here we do a manual meshing for better mesh flow and less quality criteria by individual each parts by best and batch option .
MESH MODULE >> MESH GENERATION >> BEST
MESH MODULE >> MESH GENERATION >> BATCH
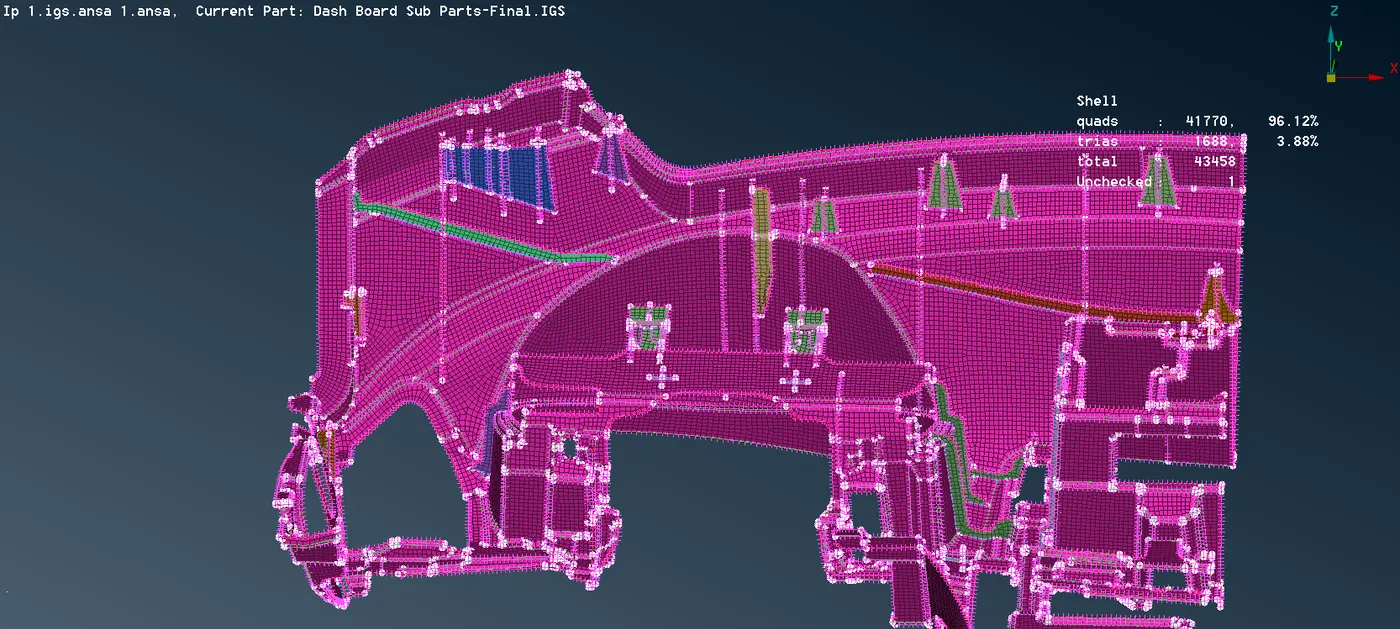
fig. meshed component
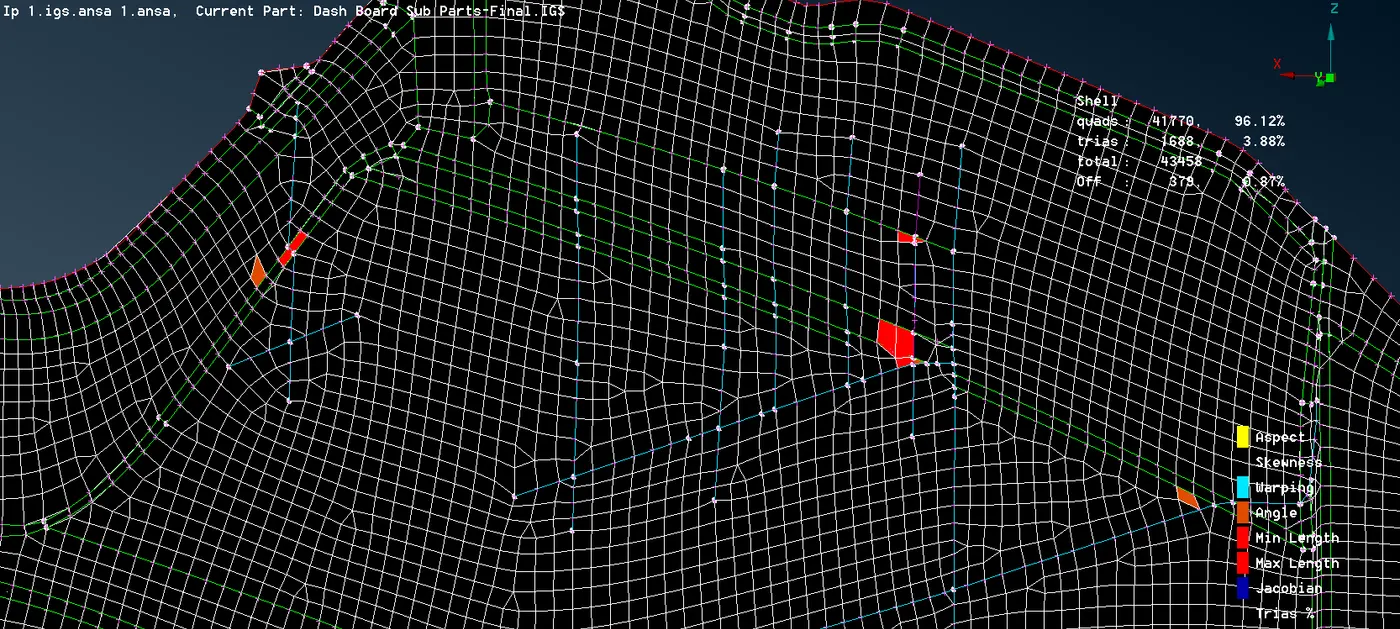
fig. off element present
we can see that, there are still some OFF element ,For a good mesh flow we should eliminate the quality errors.
when the meshing is done on the complex area like features, we need to do some reconstruction and smooth function to properly align a element and to get the best quality meshing which should be a rid of the quality issues.
In the Grid module ,we can find the MV Free which helps in movingthe nodes in order to overcome the quality issues. Mesh module >> Grids >> MV Free.
Other option from the module like paste ,split, swap, cut, join are used in order to do meshing properly.
For a good mesh flow,we need to check there should not be two trias pointing each other, to remove these trias we can use swap , split command and pasting the nodes.
there should not be a trias near to the free edges and minimize the tria as possible.
Still a few number of off element can be seen in the model due to the connection between ribs and the base of dashboard where it is failing for minimum length.
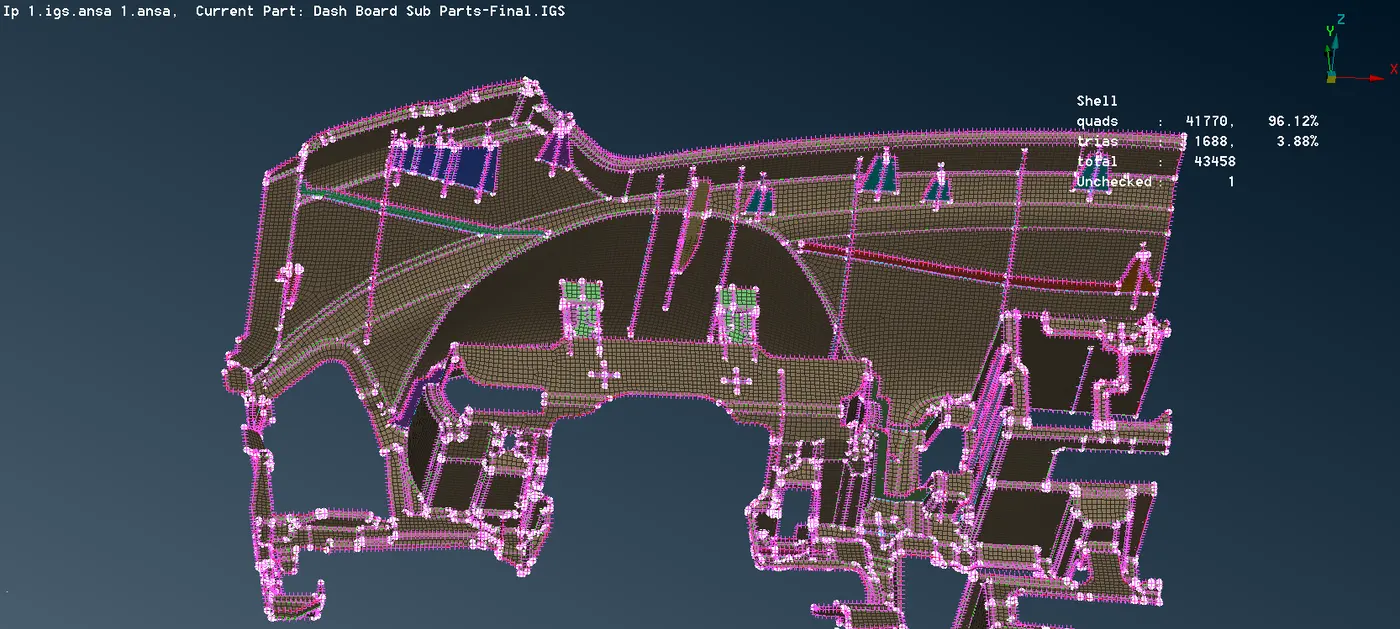
fig . final meshed component
6. Thickness assigning - thickness assigned to the parts by selecting draw shell as solid Utilities >> quality criteria >> Presentation Parameter.
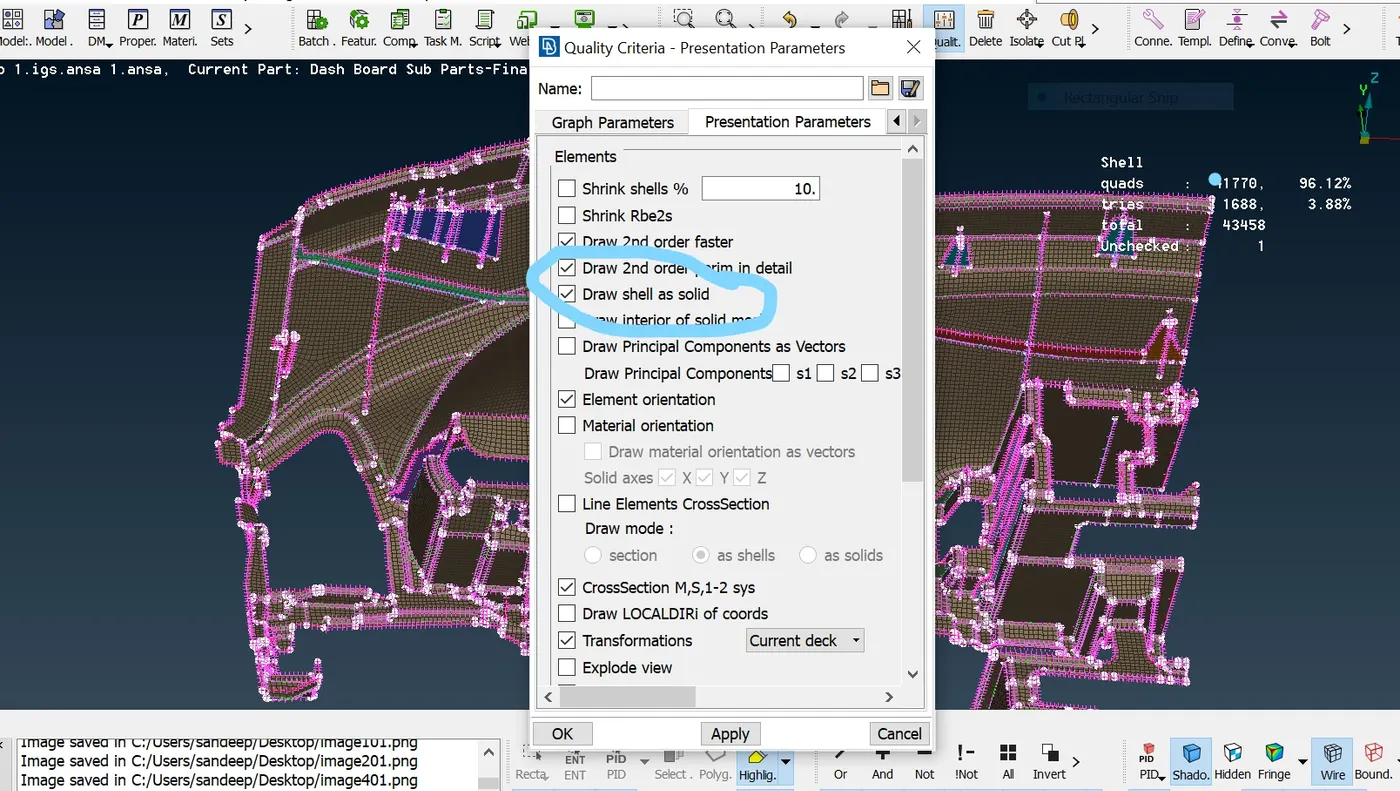
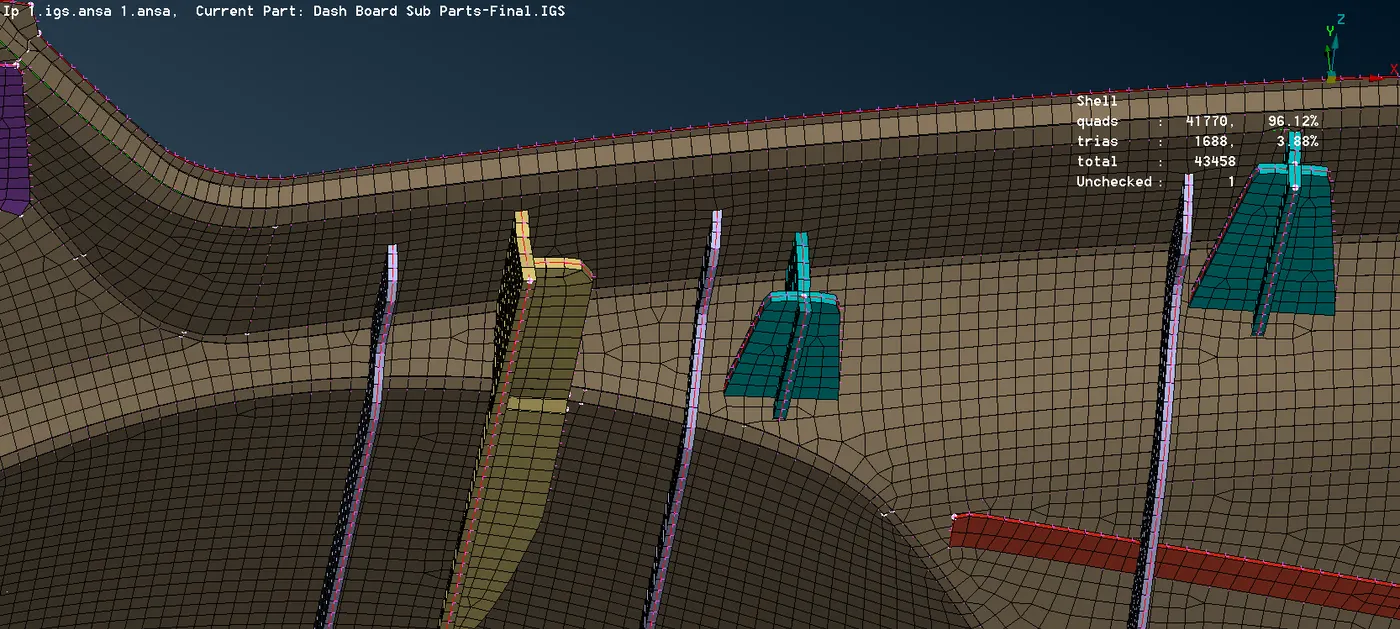
fig. element view in solid representation
Learning outcome -
- Fixing the geometrical error in Ansa by manually.
- learned how to extract the midsurface manually of difficult surfaces.
- learn how to do shell meshing and improve the mesh flow by using split ,swap, join, paste option
- learn how to give non uniform thickness to model.
Conclusion - The dashboard component has meshed succesfully and midsurfacing of critical part is taking carefully. here the elements are visualised in solid representation using the shell as solid option in the quality-presentation parts.