2D meshing on the instrumental Panel
2D meshing on the instrumental Panel
AIM: To perform 2d meshing on the instrumental panel by checking the geometrical errors and mesh with the given element Quality criteria.
PROCEDURE:
STEP 1: Importing the model to the ANSA software.
- To import the model to ANSA we have to have ".ansa or .igs".
- First, open ANSA software and go toFILE and open the file and upload the file to ANSA.
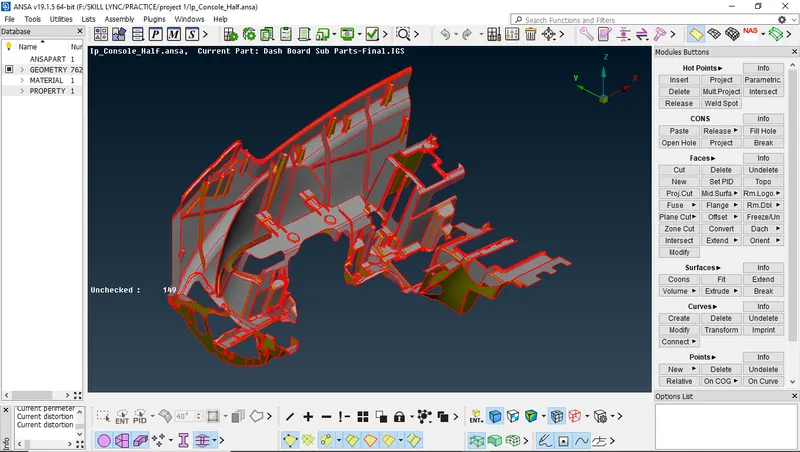
"IMAGE 1: Import the geometry to ANSA"
STEP 2: Performing the geometry cleanup on the model (INSTRUMENTAL PANEL)
- After the model is opened in the ANSA, we have to change the orientation of the model to grey
- After the orientation is done we have to perform the geometry clean up on the model
- After the orientation is done we have to perform Geometry cleanup on the model by using the TOPO option which is in the FACES command in TOPO modulus.
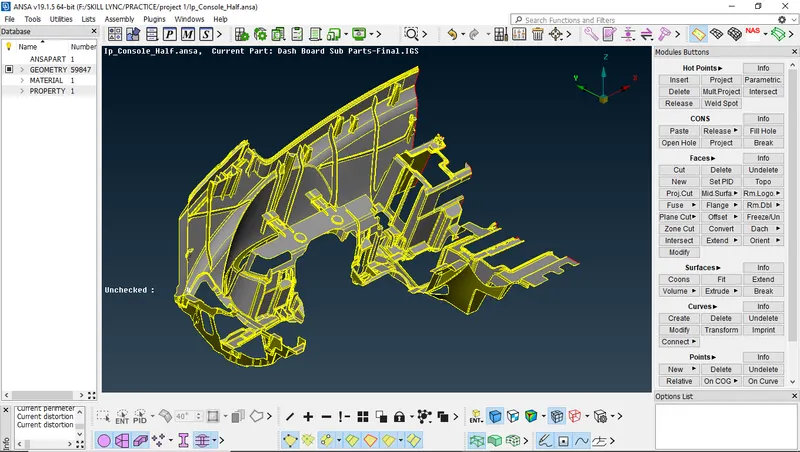
"IMAGE 2 : Topo clean up in the model "
- To Perform geometry clean-up. we have to go to TOOLS <CHECKS<GEOMETRY.
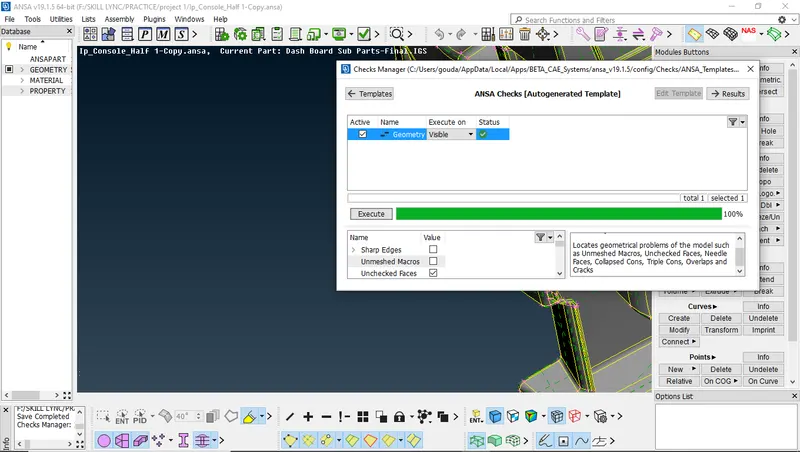
"IMAGE 3 : Geometry clean up on the model "
- After the geometry clean-up is done we have to set different PIDs for the models. LIST<PROPERTIES
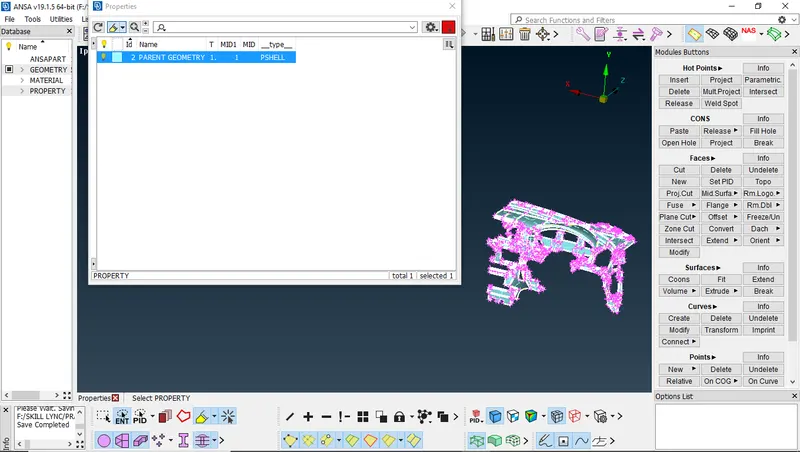
"IMAGE 4:Setting PID for the model "
STEP 3: Obtaining mid surface of the model.
- After the geometry check-up is done on the model. We have to obtain the mid surface of the model.
- We have different methods to get the mid surface like OFFSET option, MIDDLE option, SKIN option, CASTING option in the FACES command in TOPO modulus.
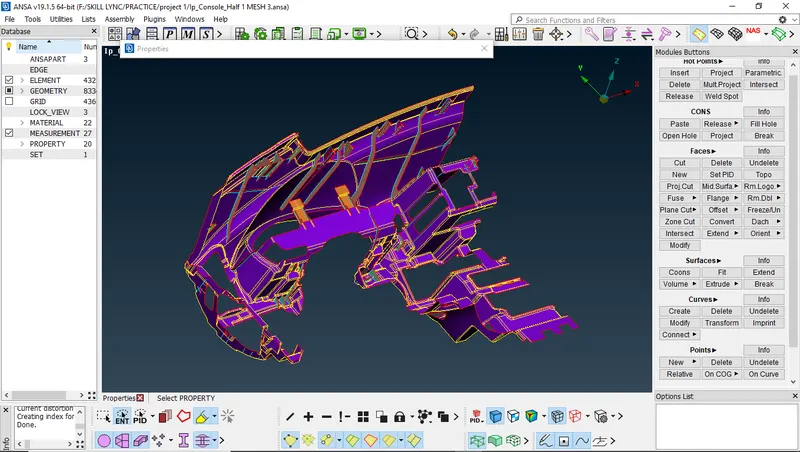
"IMAGE 5: Mid surface of the model "
- Dog houses in this model should be captured as a "Cross pattern" in Mid surface since dog houses are solid (Hollow from inside) and are not having any thickness.
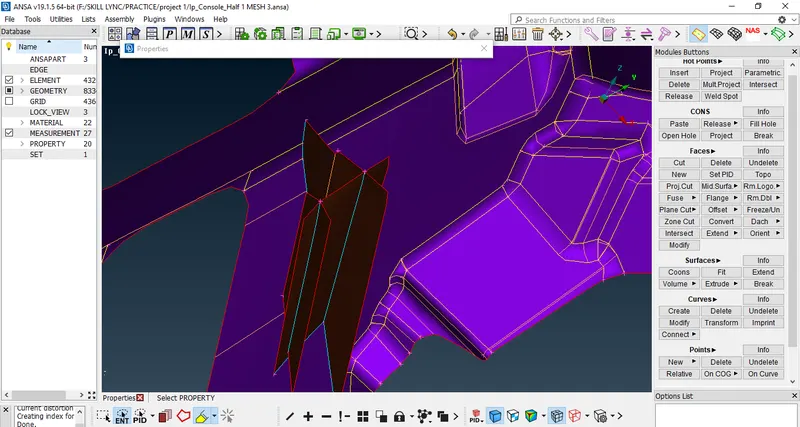
"IMAGE 6: Cross pattern on the dog house in the model "
- Make sure to measure the thickness of the model before using the offset option because the offset distance should be half the original length. so make sure to measure a few areas which are required and store them.
- By using all the options get mid for the model.
STEP 4: Setting the Quality criteria and mesh parameters.
- After the mid surface is generated, we have to set the mesh parameters and the quality criteria.
- To set the quality and mesh parameters we have to go to UTILITIES modulus.
- In the mesh parameters, we have to set the minimum, maximum, average length, and type of mesh.
- In the Quality criteria, we have to set the quality according to the requirements of the customer.
- UTILITIES < QUALITY CRITERIA for setting the quality criteria.
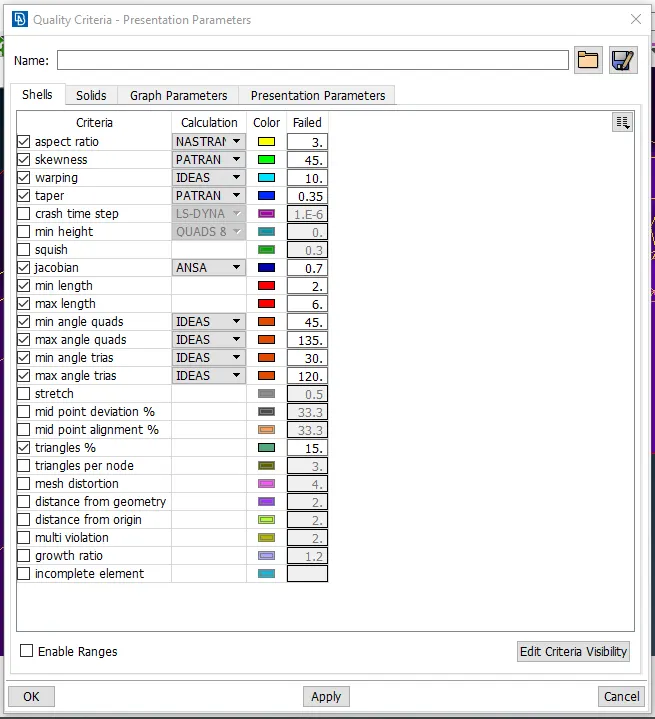
"IMAGE 7: Quality Criteria"
- UTILITIES < MESH PARAMETERS for setting the mesg parameters.
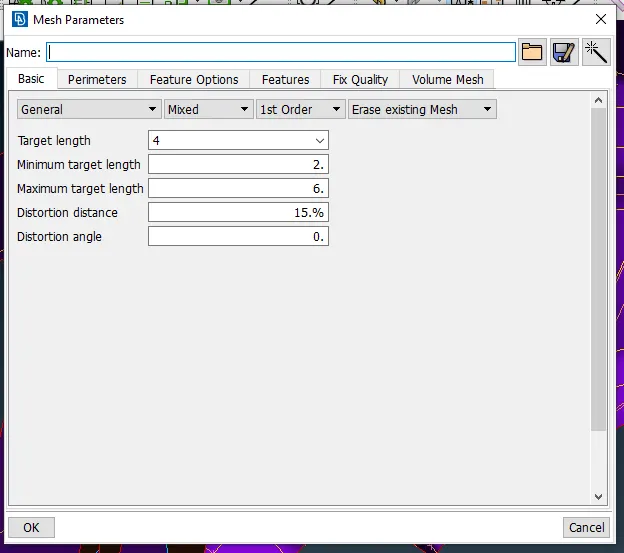
"IMAGE 8:Mesh parameters "
STEP 5: Performing the topological clean-up on the mid surface.
- After the mid surface is generated we have to do some topological clean-up on the model as we will have unwanted double and triple cons on in the model.
- By using the CUT option with a left mouse click, we can remove the double cons. FACES<CUT.
- We have to delete some surfaces and create new surfaces on the mid surface.
- By using the NEW option in FACES we can create new faces. FACES<NEW<(FILLTER,COONS).
- After the topological clean-up is done on the model we have to start modeling the mid surface.
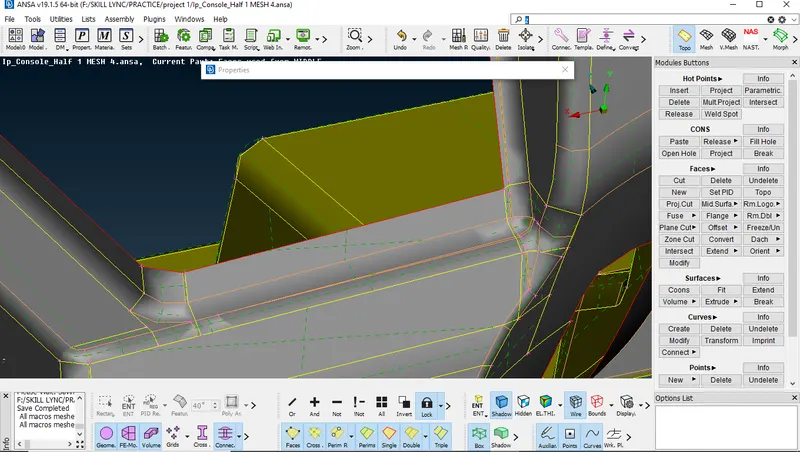
"IMAGE 9:Topological clean up on the mid surface of the model "
STEP 6: Meshing the mid surface.
- After the topological clean-up is done on the mid surface. We have to mesh the mid surface of the model.
- First, we have to set the LENGTH in the PARAMETERS of the model with Average length. MESH MODULES< PARAMETERS<LENGTH<PERAMETERS/MACROS.
- The Trias in the mesh model has to remove or improve by using SPLIT, SWAP option in ELEMENTS Option In MESH MODULE.
- Finally, the mesh needs to have ZERO OFF elements, ZERO UNMESHED SURFACES with minimum TRIA ELEMENTS.
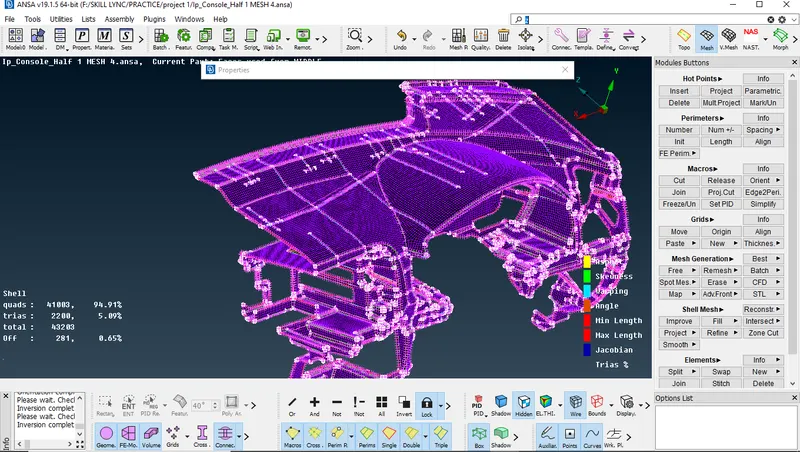
"IMAGE 10: Mesh on the mid surface of the model "
STEP 7: Appling the thickness to the meshed model.
- After the modeling of the model is done we have to apply the thickness of the model as per the parent geometry.
- As we have measured and stored the lengths, refer and apply the thickness on the meshed model.
- Finally, the model has meshed and the thickness is applied to the meshed model.
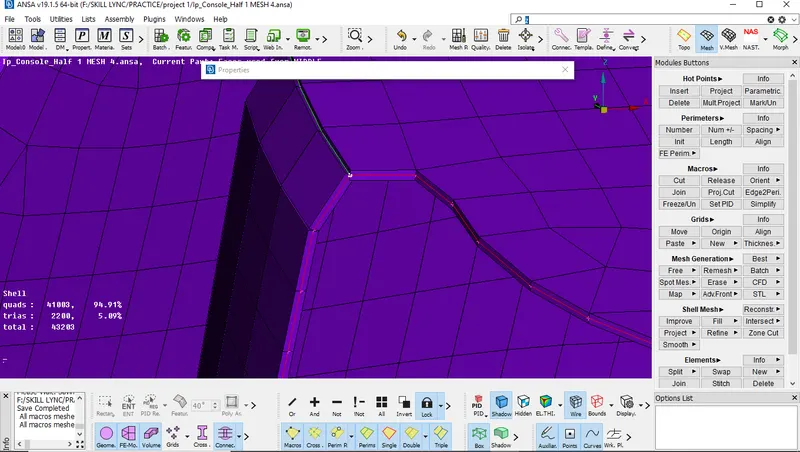
"IMAGE 11: Mesh model after appling thickness "
LEARNING OUTCOMES:
- Learned how to import the geometry to ANSA.
- Learned how to do geometry clean-up.
- Learned how to set up PID for the model.
- Learned how to do mid surfacing.
- Learned how to do the topological clean-up on the mild surface.
- Learned how to mesh the mid surface generated.
- Learned how to improve the mesh.
- Learned how to apply thickness to the model.
CONCLUSION: The modeling and the meshing of the Instrument panel model is performed according to the given mesh parameters and quality criteria.
GOOGLE DRIVE LINK:
https://drive.google.com/file/d/1MqfBTdEKXwQaXZfyy_xVoAHfx5hubevK/view?usp=sharing