Preparing Schedule & Cost Estimation for a building using REVIT
1)
Short Cut Keys in Revit
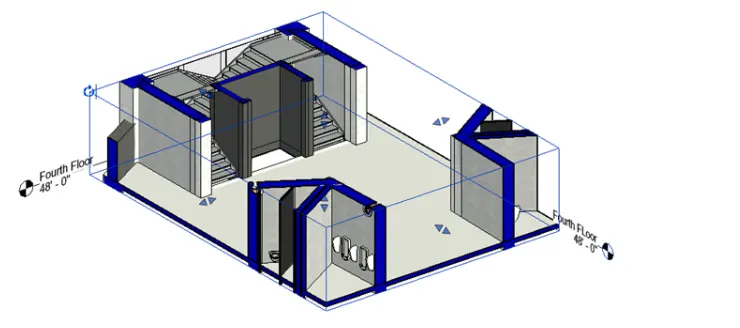
1. BX (Section Box)
- Open Project 2 of Week 7
- Click on one of the staircases
- Press Right click and click on select all instances visible in view
- Press BX to open section box around all stairs
- Adjust the box as per requirement
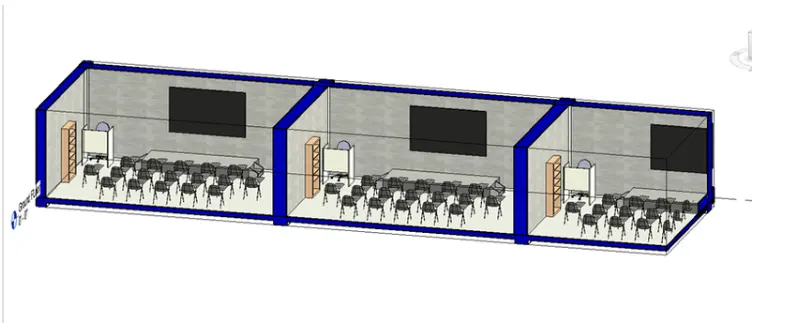
2. Cs (Create Similar)
Select one of the trees in front of the school building
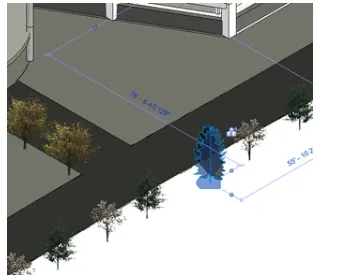
Click CS to create similar tree sections
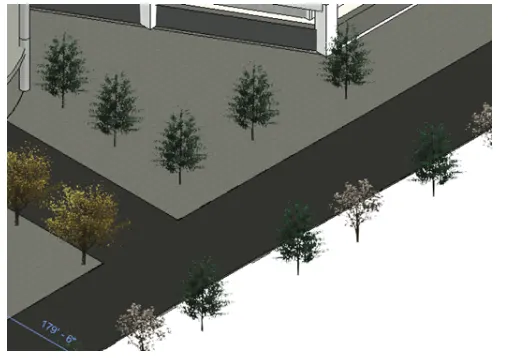
Place the tree where ever necessary
3. TL(Thin Lines/Thick Lines)
Go to Ground Floor plan and zoom in on a part and view thick line/thin lines as follows
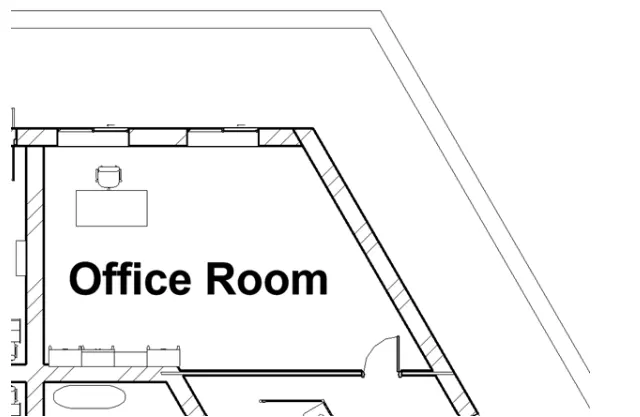
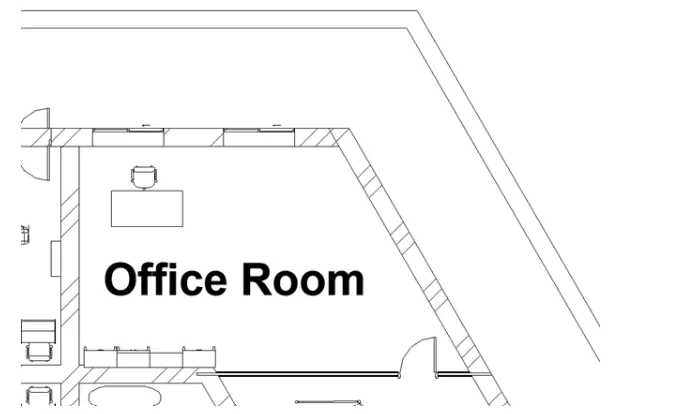
TYpe TL to change the thickness of lines as below
TYpe TL' again to change back to Thick Lines
4.VG(VISIBILITY GRAPHICS)
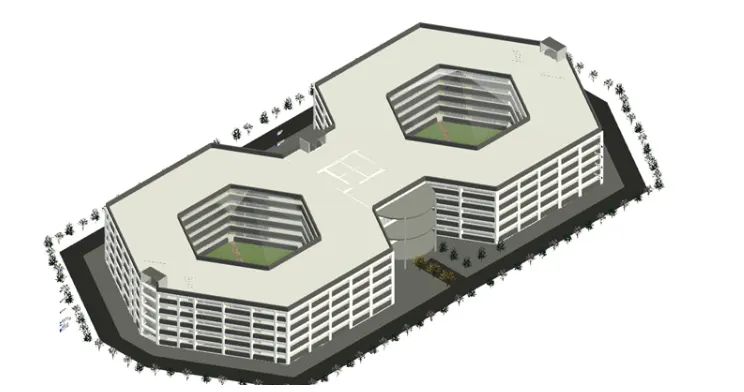
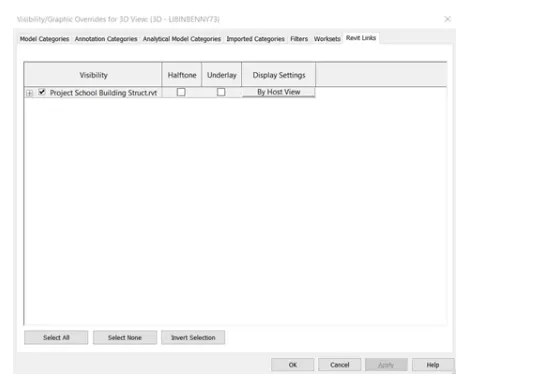
Go to Revit Links and turn off the Imported Structural linked model as shown above
Click on apply and press Okk
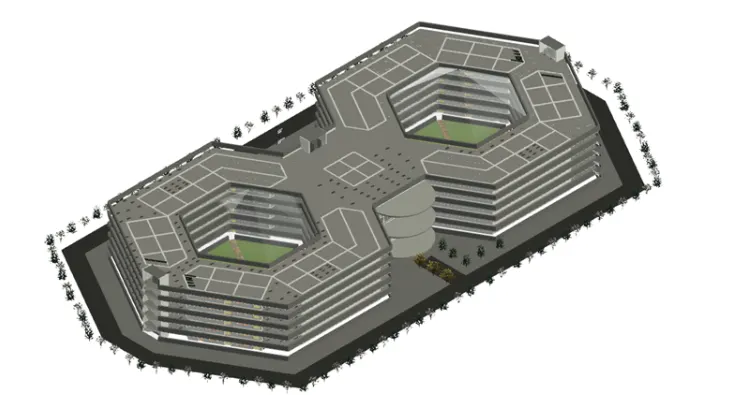
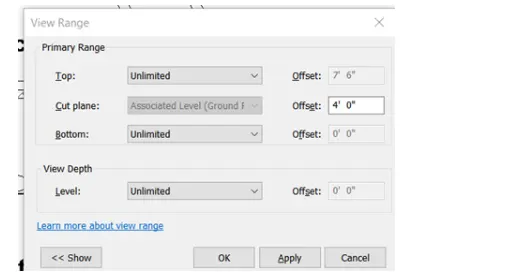
5. VR (Vievw Range)
Go to floor plan view and type VR
Set parameters of the visibility
6 Ctrl+'<'( Reselect)
If previously selected instances got unselected
Press Ctrl +'<' to reselect all the previous instances
7. DI (Dimensions)
TYpe D to instantly draw dimensions to the model elements
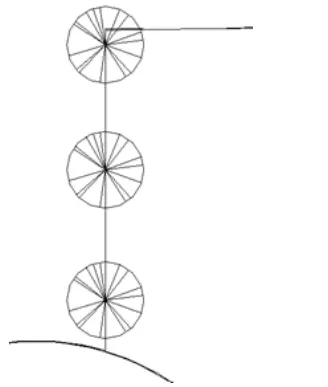
8. AL (AIign)
To align to the required line type AL
First, select the line/element to be aligned with
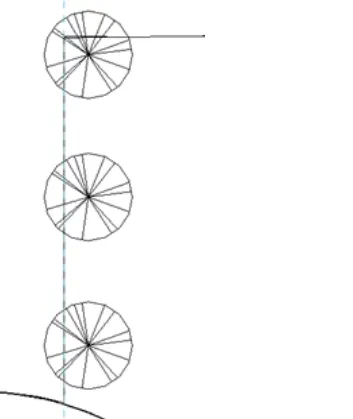
select the object to align with it element
9. RO (Rotate)
To rotate any object/ element along any axis
10. MV (Move)
To move elements from an axis point
11. co (Copy)
To copy selected elements and paste accordingly
12. MM/DM (Mirror)
MM to nmirror elements about an axis line
DM to mirror elements about a drawn axis
13. AR (Array)
To array an element n times with an offset distance
2)
Aim:To Create Schedules for difforent oloments in Projoct 2 of Wook 7
Introduction
A schedule is a tabular dieplay of information, oxtractod from tho proporties of the olomonts in a projoct. A schedule can list overy instanco of the typo of olement you aro schocduling, or it can collapso multplo instancos onto a single row, based on the schodulo's grouping critoria Procedur
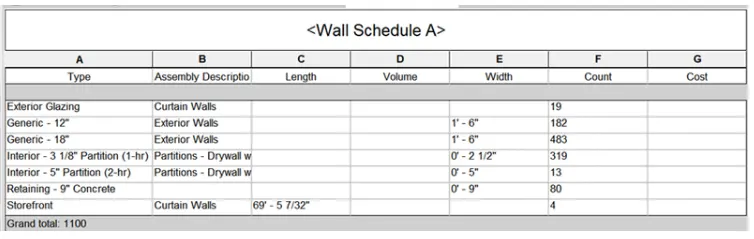
Walls
Go to View Tab and click on Schedules, Schodulos/Quantitlos
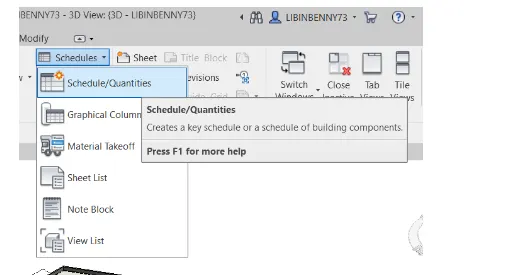
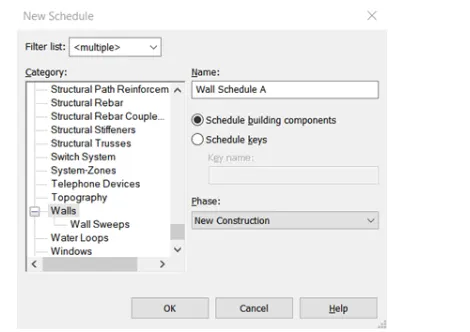
select wall in the popep tab
set the name as wall schedule a
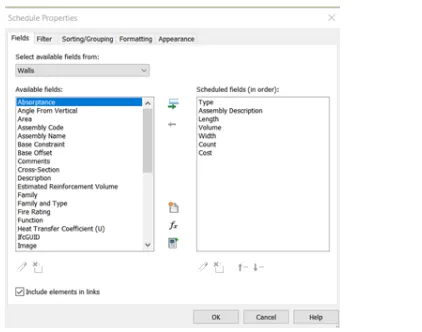
click ok to genarate schedule of quantitys
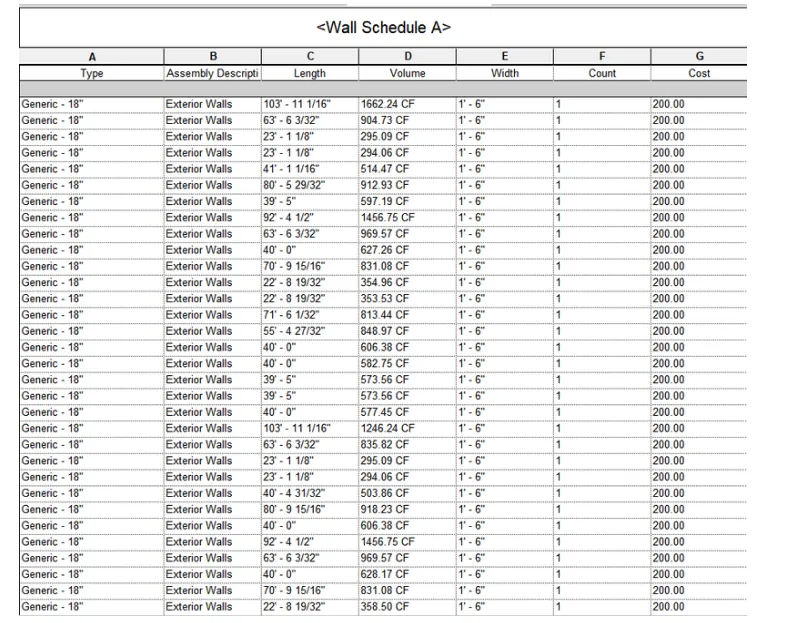
go to the property tab
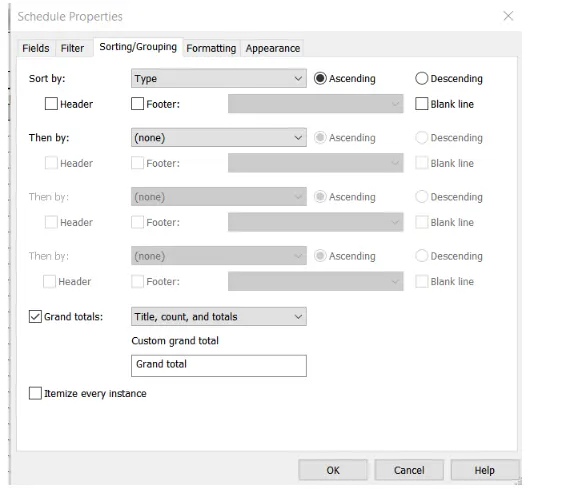
click on shortining
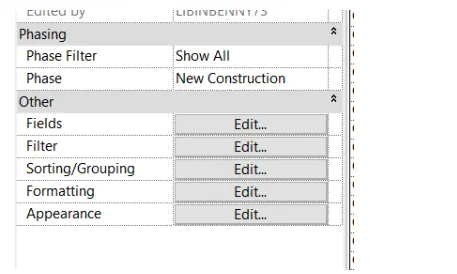
change sort by type
select grand totals and deselect itemize every enstance
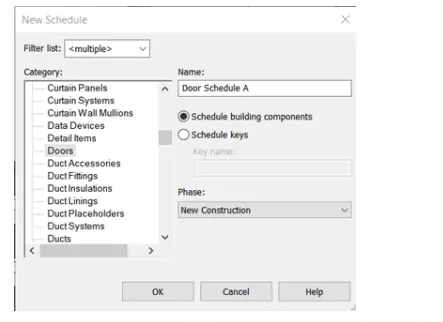
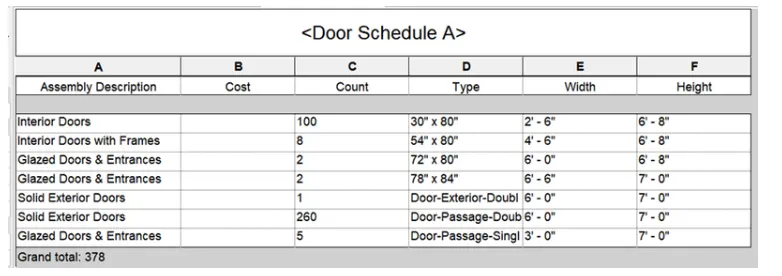
DOORS
- Select door popup tab
- select the name as door schedul as A
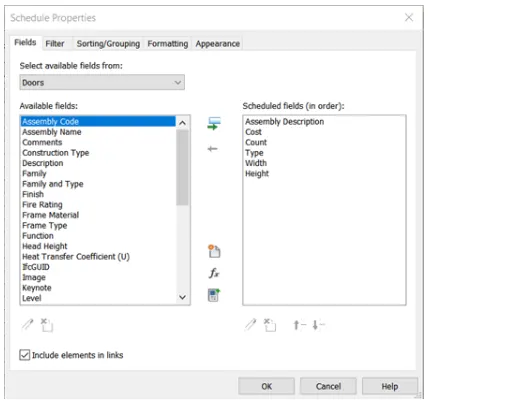
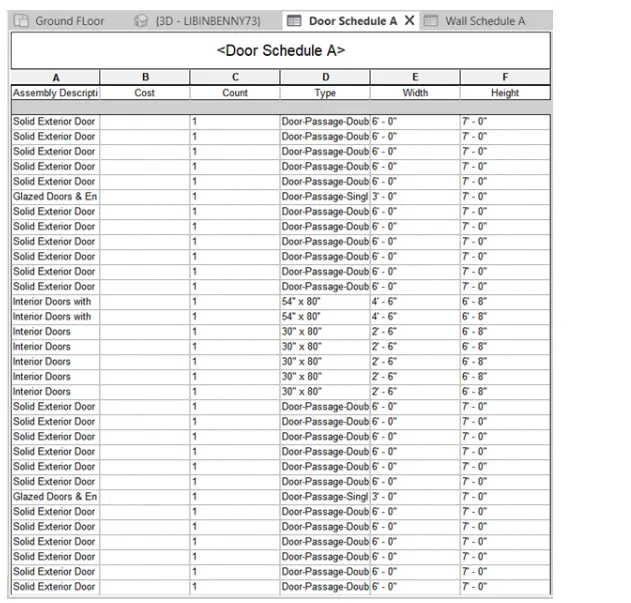
- computing sorting acordingly
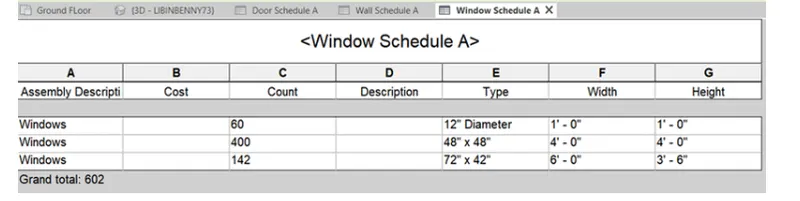
windows
- Select door popup tab
- select the name as door schedul as A
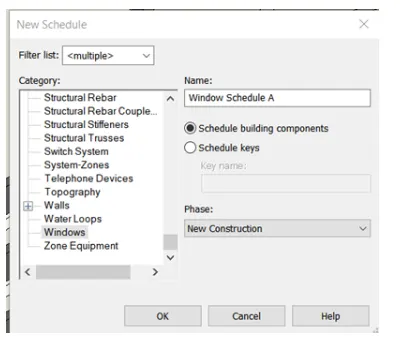
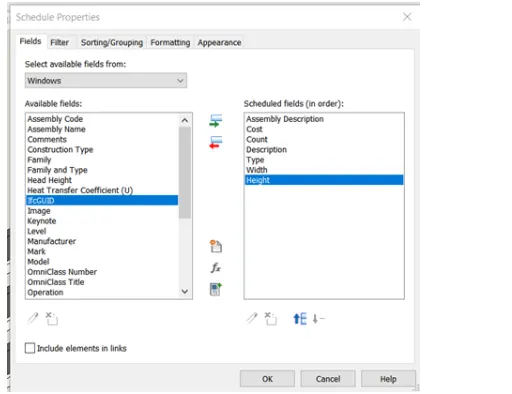
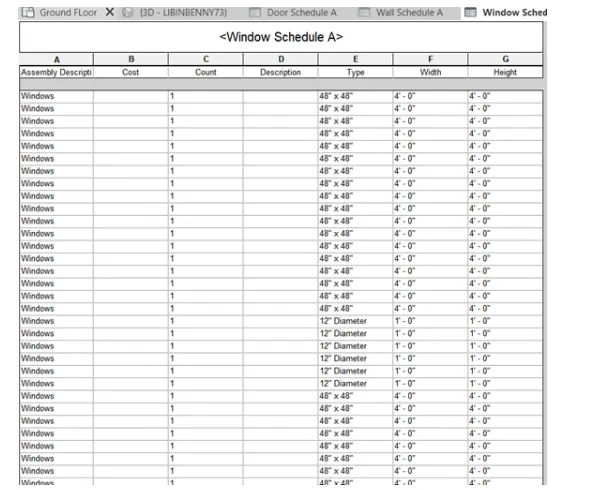
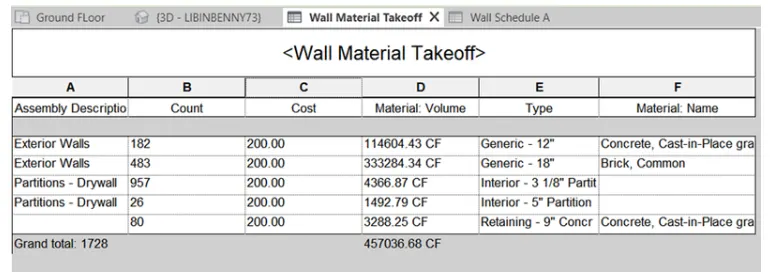
MATERIAL TAKE OFF WALL
go to view tab click on scheduld, material take off wall
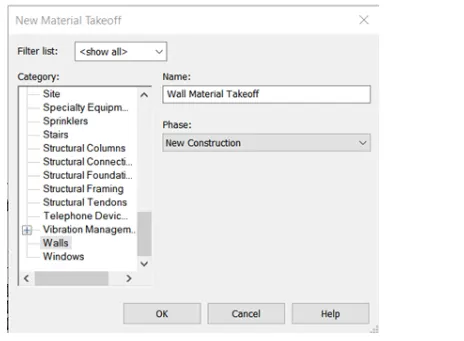
Select Walls
Set name as Wall Material take-of
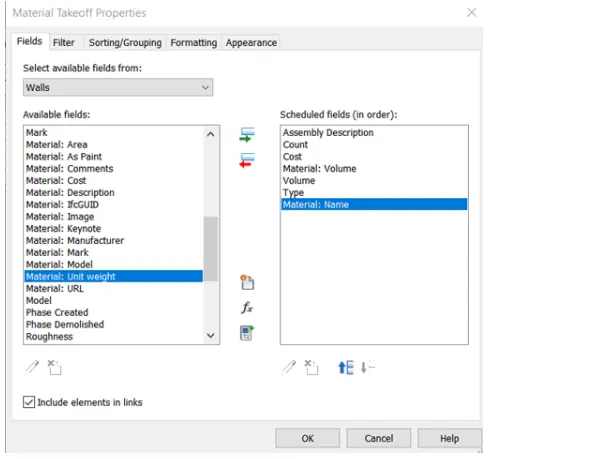
Click Ok to open the Material take-off Properties tab
Add fields Assembly Description, Count, Volume, Material Name, Material Volume, Cost Material lakeoRTODEDeS
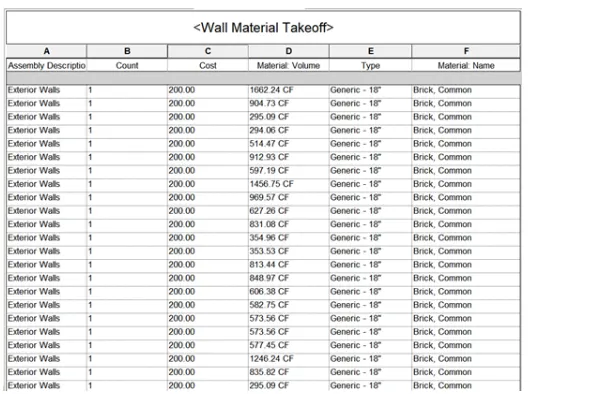
RESULT
WALL
DOOR
WINDOW
MATERIAL TAKE OFF
3)
Alm:To create schedules and calculate the Area and volume of aill the rooms
Introductlon:
Revit can calculate the ared and volume of rooms and display the Information in schedules dnd tags. Room areds
display on the Properties palette, in tags, and in schedules for rooms. Revit measures the perimeter of a room at a
detined distance dbove the base level of the room.
Procedure;
Set all the room tags appropriately
Go to View Tab and click on Schedules, Schedules/Quantities
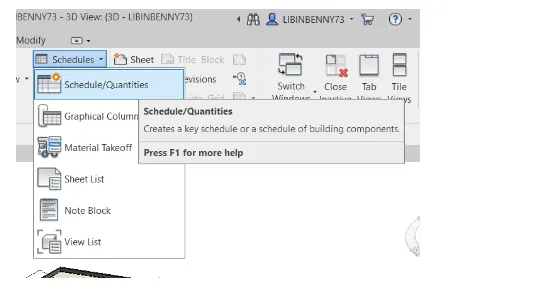
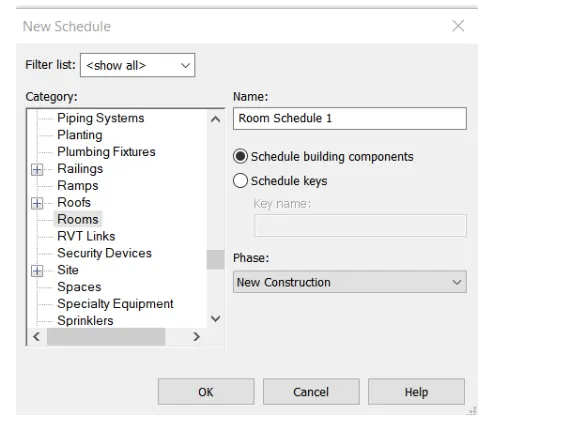
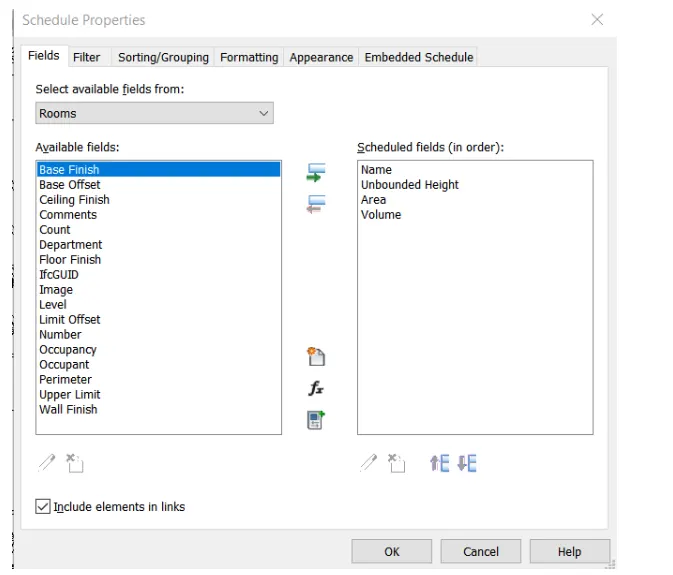
add name unbonded height area , volume to the the list
click on iclude element in links
click on generate schedule of quntities
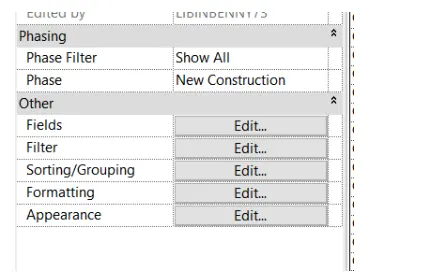
go to the properties tab
click on shorting
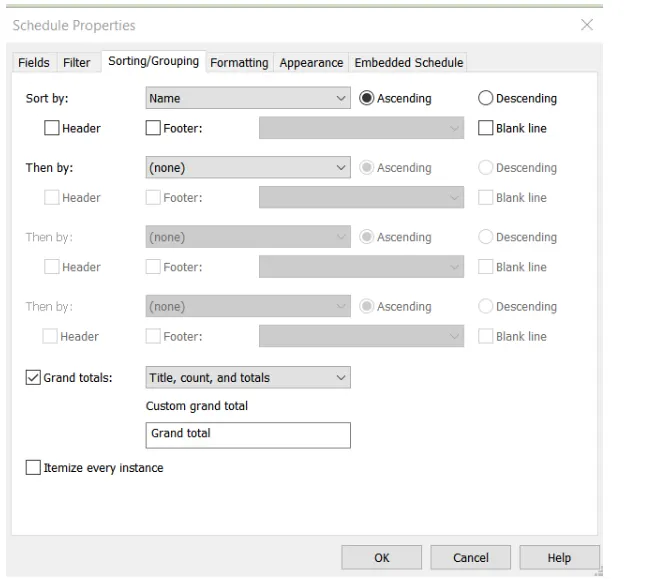
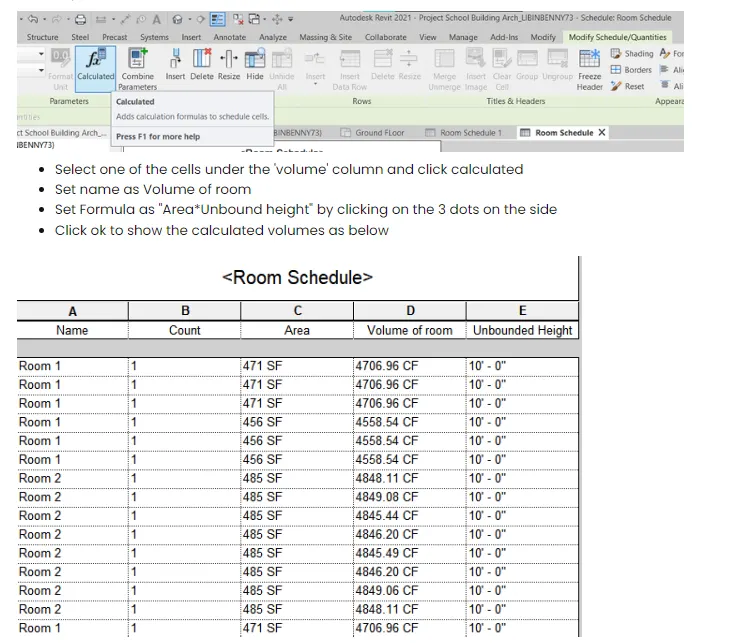
RESULT
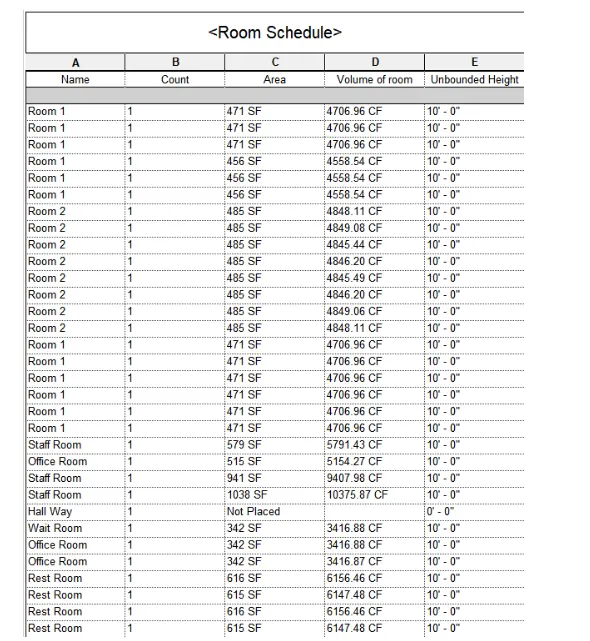
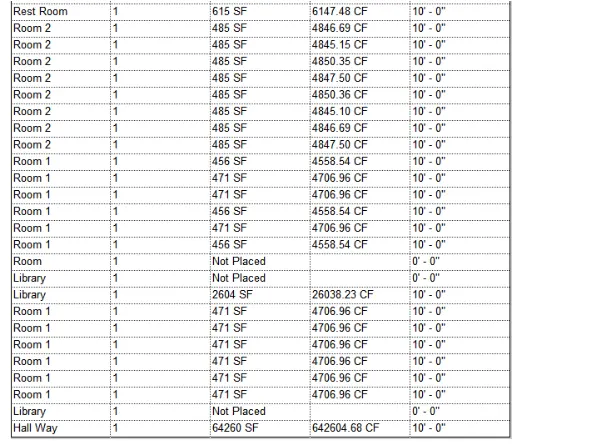
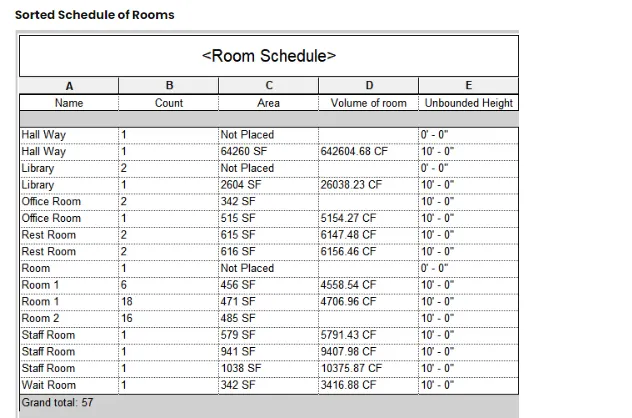
4)
go to view tab click on schedules,schedules/quantites
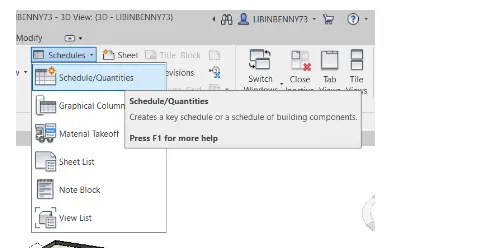
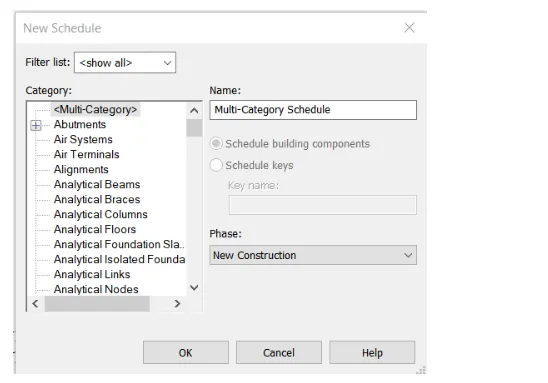
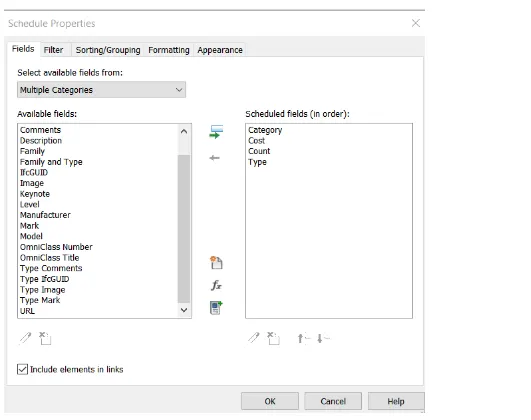
click on generate schedule of quntities
go to the properties tab
click on shorting
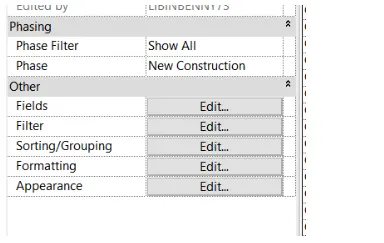
change the sort by catagory
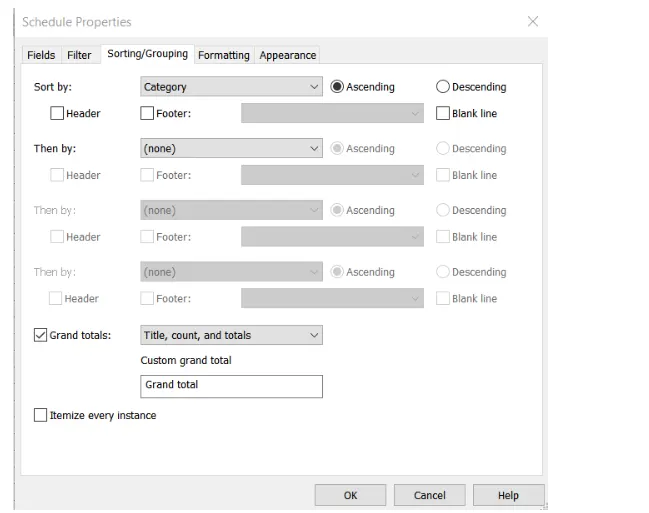
click ok to sort by type
go to feilds in the properties tab and add new parameter
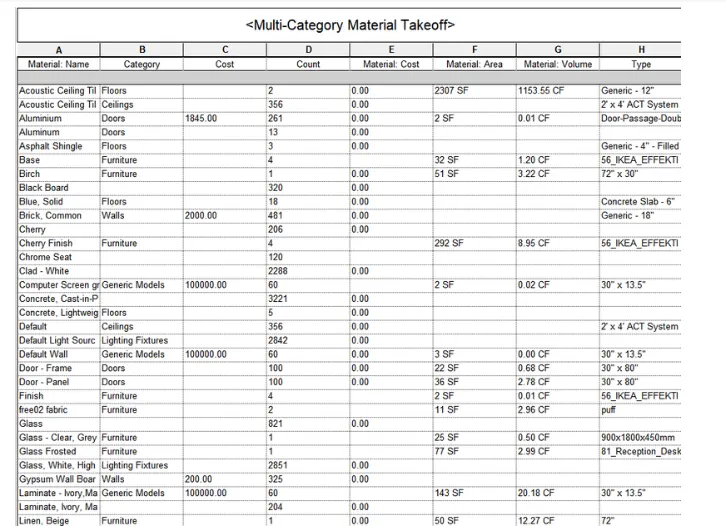
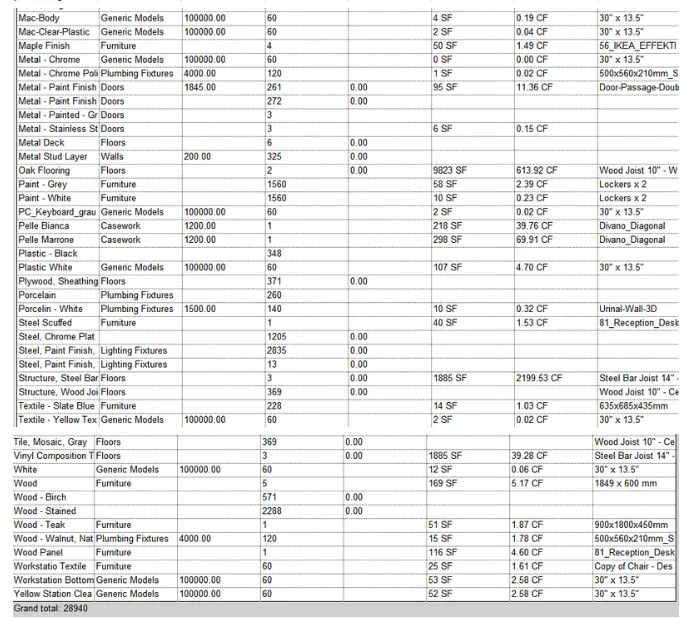
add count, cost
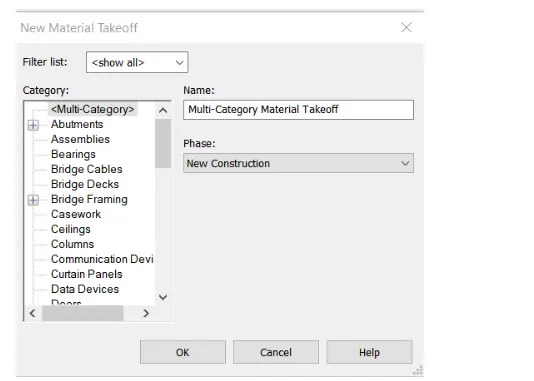
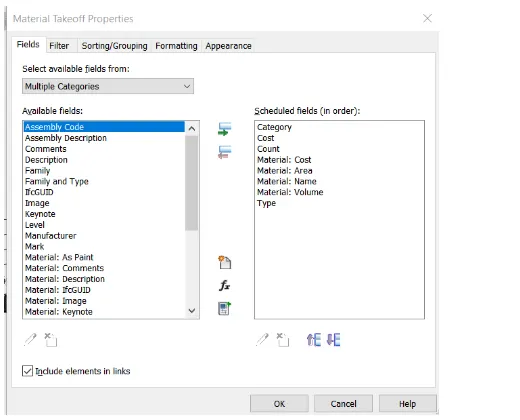
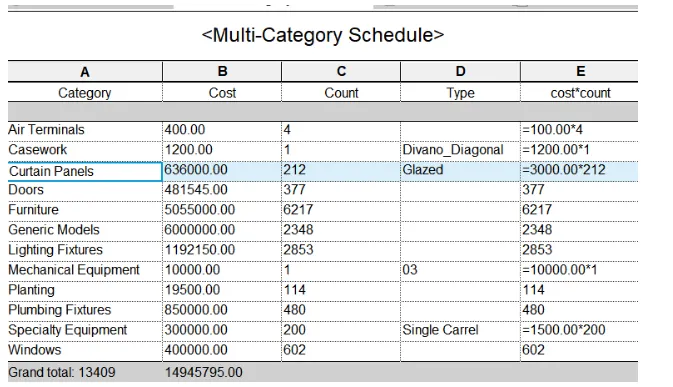
RESULT:
THE SCHEDULE COST FOR ALL ELEMENTS AS FALLOWS
5)
B)
C.
6).
a. Wall:
- TYpe of wall
- MLength
- Width
- Thicknes
- Height
- Material
- Cost
b. Floor:
- Type of floor
- Length
- Width
- Thickness
- Height
- Material
- COst
C. Door
- Type of Door
- Length
- width
- Area
- Height
- Lintel Heigh
- Height of sill Material
d. Windows
- Length
- Width
- Windows
- Area
- Height
- Lintel Height
- Height of sill
- Material
e.TableT
- type of table
- PurOse
- Height
- Length Width
- Building
Type of building
- Number of floors
- Foundation type
- Length
- Width
- Height
- Material used
- Loads of building
- Location of the building