Preparing Schedule & Cost Estimation for a building using REVIT
1) Use the shortcut keys in Revit discussed in class to complete the following tasks and list them below
a. Using 3D model create a section box
b. To create similar doors and windows in a floor plan layout
c. To reduce the thickness of lines visible in plan views
d. To apply override settings to a floor in the model section view
e. To increase the range of visibility in a plan view
f. To select the previously selected items
g. To add annotations to the model views
h. To bring the model elements in line
i. To rotate the model elements
j. To move an object to another location
k. To copy a model element
l. To mirror an element about an axis
m. To create an array of model elements
- Using 3D model create a section box - BX
- To create similar doors and windows in a floor plan layout -CS
- To reduce the thickness of lines visible in plan views - TL
- To apply override settings to a floor in the model section view - EOD
- To increase the range of visibility in a plan view - VR
- To select the previously selected items - CTRL+<
- To add annotations to the model views - DI
- To bring the model elements in line - AI
- To rotate the model elements - RO
- To move an object to another location - MV
- To copy a model element - CO/CC
- To mirror an element about an axis - MM
- To create an array of model elements - AR
2) Using Revit and the project used from week 6 to 8 prepare a schedule for the following
a. Walls
b. Doors
c. Windows
d. Material – Concrete/Wood
AIM :
To create schedule using revit.
PROCEDURE :
STEP 1:
- From the view tab select the schedule option and select the quantities to the view the properties of walls as shown below
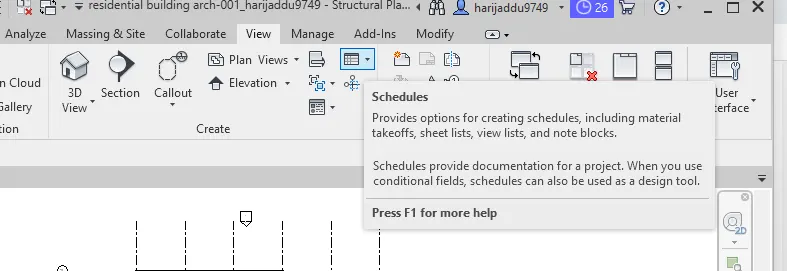
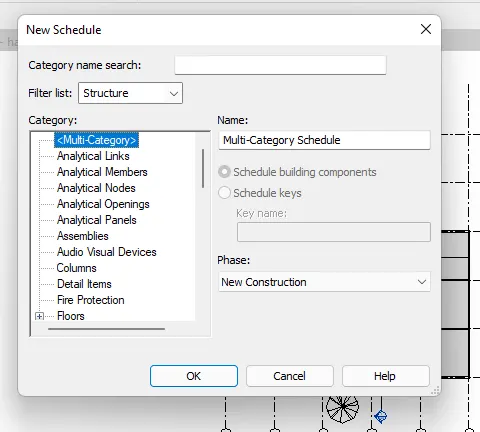
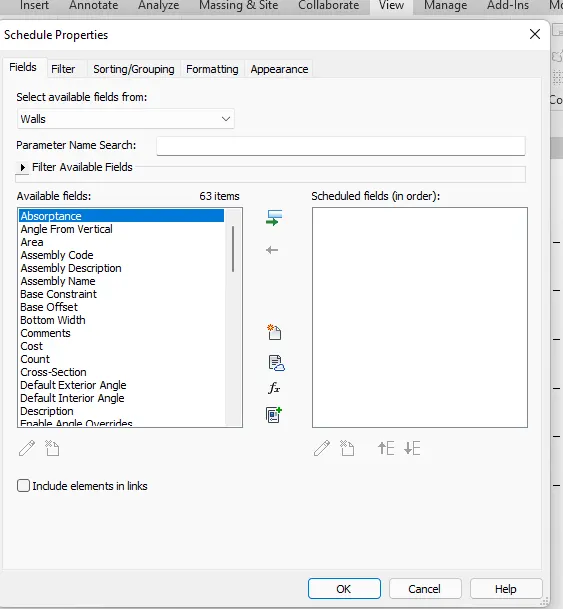
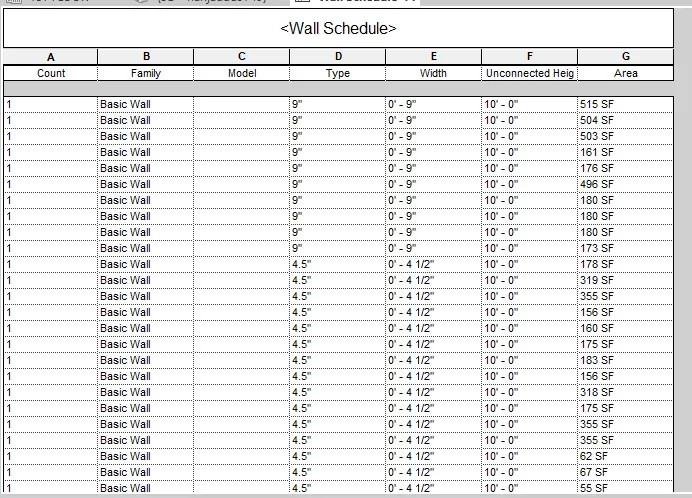
STEP 2:
- From the view tab select the schedule option and select the quantities to the view the properties of Doors as shown below
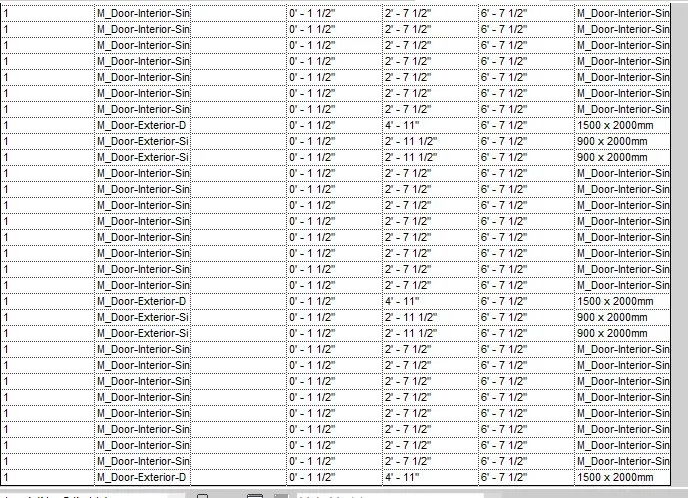
STEP 3:
- From the view tab select the schedule option and select the quantities to the view the properties of Windows as shown below
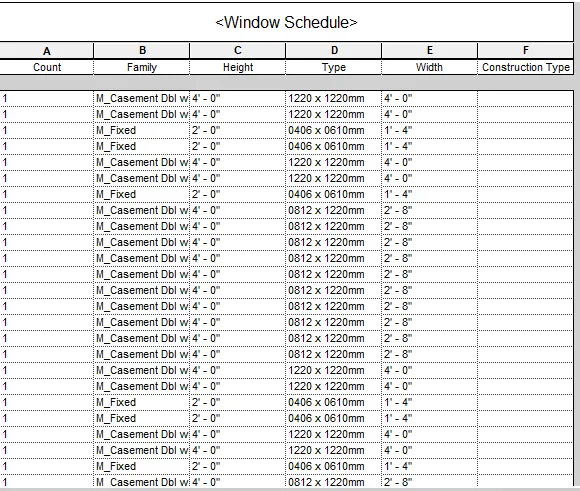
STEP 4:
- From the view tab select the schedule option and select the quantities to the view the properties of Material as shown below
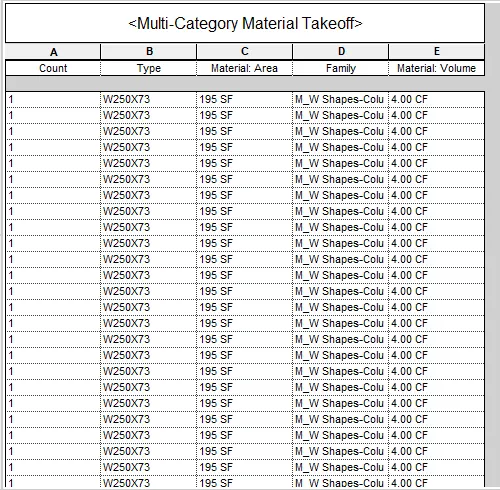
3) Using Revit Calculate area and volume of each room in the model with appropriate room tags applied to each room. Prepare a schedule report for area and volume of each room.
AIM :
To calculate area and voliume of each room .
PROCEDURE :
STEP 1:
- From the same quantities tab, rooms are selected
STEP 2:
- Area and Volume of rooms are calculated and are shown below.
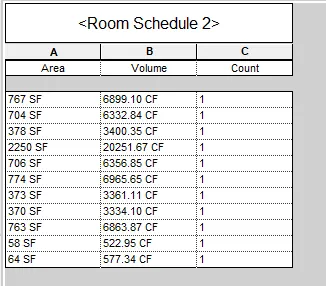
4) Using the same schedule using the unit cost rate for materials available in the internet, prepare total cost of materials used in the project
a. Total Cost of Materials
b. Individual Material Take off
AIM :
To create schedule sheet to calculate the total cost.
PROCEDURE :
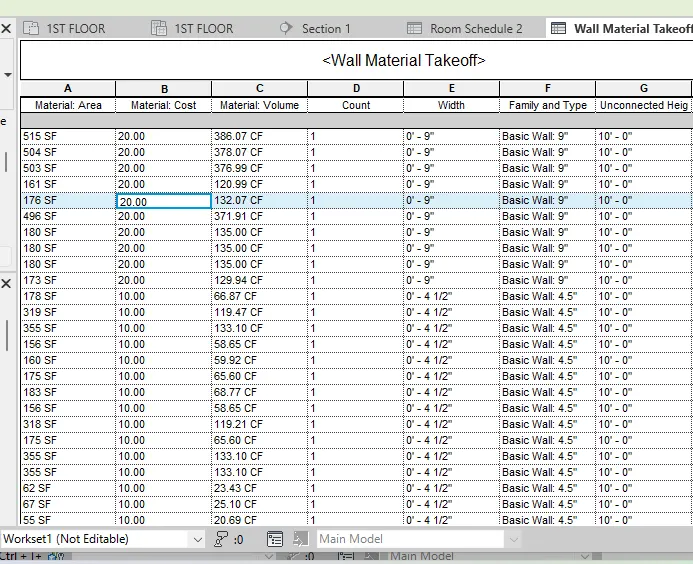
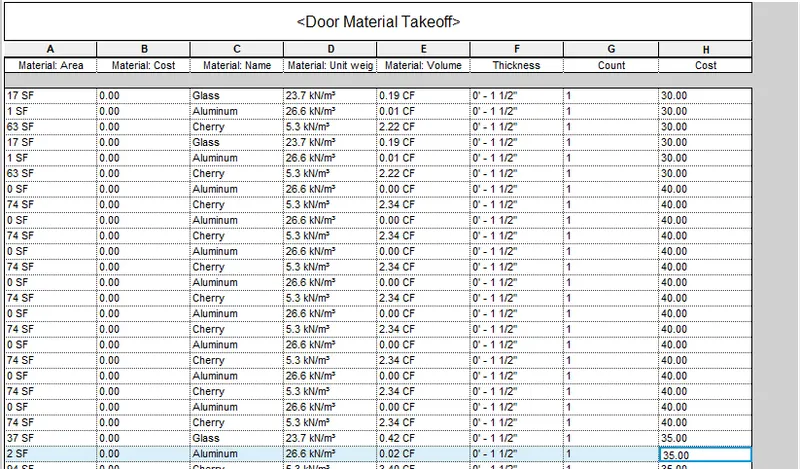
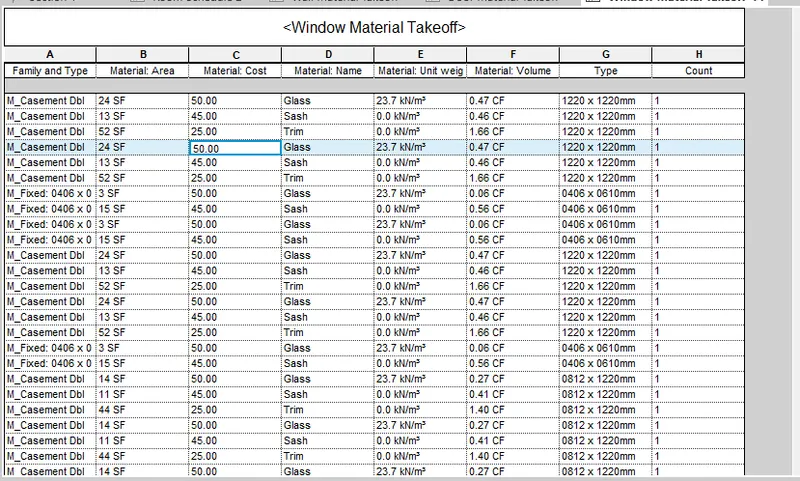
- Under the view tab, the material takeoff option is selected to obtain the material cost and material take off as shown below.
wall material take off,
door material take off,
window material take off,
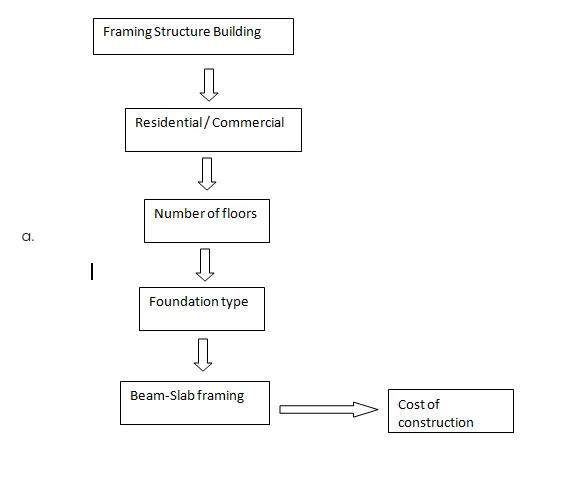
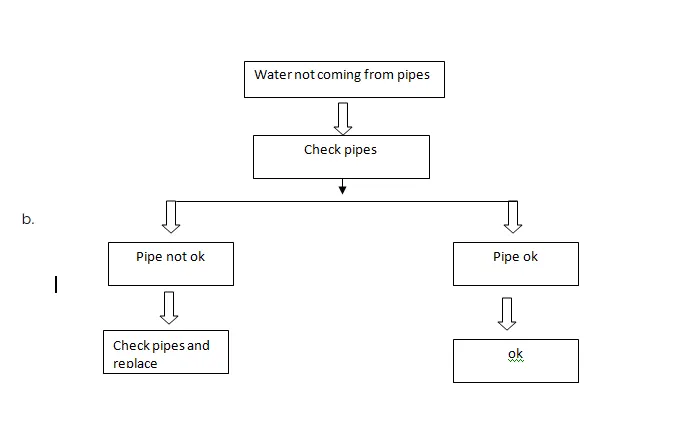
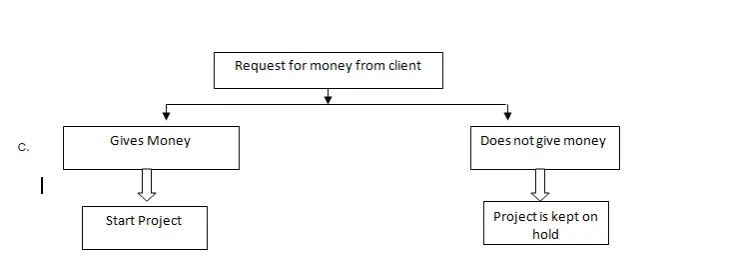
5) Using the concept of Visual Programming discussed in class, list a flowchart for the following scenario
a. How to decide framings for a structure using Dynamo ?
b. If there is no water coming from the pipes
c. If request for money from client has been declined for the project
6) List the parameters associated with each model element
a. Wall
b. Floor
c. Door
d. Window
e. Table
f. Building
- WALLS :
- wall type
- wall description
- wall length
- wall thickness
- wall height
- wall material
- wall location
- material cost
2. FLOOR:
- floor type
- floor description
- floor area
- floor thickness
- floor material
- material cost
3. DOOR :
- door type
- door description
- door height
- door width
- door material
- material cost
4. WINDOW
- window type
- window description
- window height
- window width
- window material
- materail cost
5. TABLE :
- table type
- table length
- table width
- table weight
- table material
- material cost
6. BUILDING :
- building type
- building floor area
- building perimeter
- building location
- building height
- material
- possible loads on a building.