Photo Realistic Rendering
American Chopper Modelling Using Solidworks-
Objective-
- The objective of this project is used to create model of different parts of the chopper using Solidworks.
- Create an assembly of the different parts modelled for the chopper.
- Create a photo realistic model of the chopper and render the model using Solidworks Photoview 360 or Solidworks Visualize.
Introduction-
Product development is a very complex process because modern products are more elaborate since there is a demand of maximum efficiency with minimal consumption of certain means. The development in the automotive industry follows this trend. The use of various modern softwares such as CAD and CAE technologies, enables us to perform various researches very effectively and efficiently. and it is possible to test different modifications on them, the benefits of these systems are that they enable faster and cheaper research and development of the vehicle.
Through this Project I got familiarize with one of the CAD software Solidworks, using this software I modelled an American chopper. A Chopper Is a type of custom motorcycle. The chopper is perhaps the most extreme of all custom styles, often using radically modified steering angles and lengthened forks for a stretched-out appearance. Here we go Through different stages like part modelling, assembly and do photo realistic rendering of an American Chopper.
What is Part Modelling?
Modelling in general means to create a virtual prototype of an item. It can be used for a various purpose. Part Modelling You can create a Part from a conceptual sketch through solid feature-based modelling, as well as build and modify parts through direct and intuitive graphical manipulation. Consider the engine of a car. Each part can be assembled together to get the engines final form. This type of modelling is called Part modelling.
Parts to be modelled for American Chopper:
The following parts of the chopper are modelled in Solidworks and assembled together.
- Transmission belt
- Kick stand
- Front Fender
- Rear fender
- Oil Tank
- Chain
- Pedal
- Front wheel
- Rear wheel
- Front fork
- Chassis
- Engine
- Gas tank
Now we will see each part one by one in detailed manner.
- Transmission belt: - The Transmission belt in the chopper is used to transmit the power from the engine to the Gearbox.
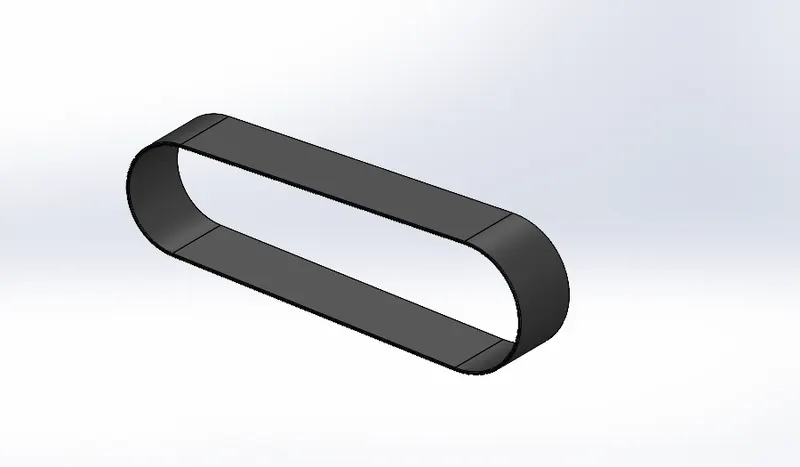
Features used to create transmission belt
- Sketch
- Offset
- Extrude
- Fillet
- Appearances
Whereas,
- Sketch: - Sketch is the two-dimensional representation of the model with respect to the plane /view from the outside of the model. In Solidworks there are different Sketch options available to create a sketch, The following are entities available in Solidworks line, Arc, Spline, Circles, Rectangle.
- Offset: - offset one or more sketch entities, selected model edges, or model faces by a specified distance. For example, you can offset sketch entities such as splines or arcs, set of model edges, loops, and so on.
- Extrude: - Extrude is a type of feature available in Solidworks to convert a 2D sketch into the 3D model.
- Fillet: - Fillet/Round Creates a rounded internal or external face on the part, you can fillet all edges of a face, selected sets of faces, selected edges or edge loops.
Procedures followed to create a model of Transmission belt [summary]
- Initially a Solidworks software is opened. Then, the new part is clicked to create a new model.
- Before Creating the sketch, the default plane names are changed as given below,
- Front plane – Front plane transmission belt
- Top plane – Top Plane Transmission belt
- Right plane – Right Transmission belt
- Then, the front plane is selected to sketch.
- The 2D sketch is created in the plane and dimensional, relations are given to the sketch to fully define a sketch, while sketching the offset command is used to duplicate the sketch to some distance.
- After this process the sketch is closed. Then, the extrude command is used to Convert a 2D sketch into the 3D model.
- Then, the fillet is given to the belt as per requirements. The model of the transmission belt is created.
- The model is saved with the part name i.e., Transmission Belt.
- Kick-Stand: -
It is nothing but a component for supporting a bicycle or motorcycle when not in use. Pivoted to the axle in such a way that it can be kicked down below the frame.
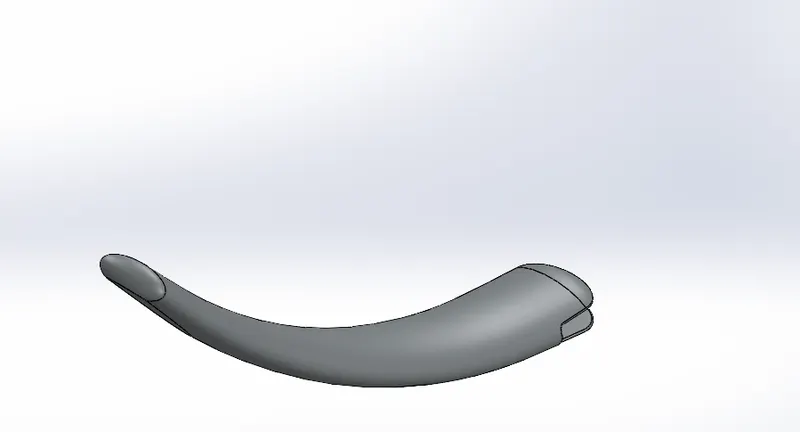
Features used to create Kickstand
- Sketch
- Loft
- Dome
- Extrude boss
- Extrude cut
- Fillet
- Split
- Appearances
Whereas,
- Loft: - The loft feature in Solidworks allows you to generate complex geometry in a single feature. It does this by interpolating surfaces between various cross-section of a model. This cross section can be sketches, faces, or edges. In the loft interface, these cross-sections are considered ‘’loft profiles’’.
- Dome: - Faces to dome. Select one or more planner or non-planner faces. You can apply domes to faces whose centroid lies outside the face. This allows you to apply domes to irregularly shaped contours.
- Extrude cut: - Extrude cut is another cool feature which helps to remove materials from the 3D Model.it used to create holes, channels, slots etc.
- Split: - The Solidworks Split line tool is used to project an entity (Sketch, Solid, Surface, Face, plane, or surface spline on to other surfaces or curved/planer faces. You are also able to split faces on multiple bodies with one command.
- Front Fender: -
The front fender is a part mounted on the fork above the wheel to protect the rider and the chopper other parts from debris and foreign particles.
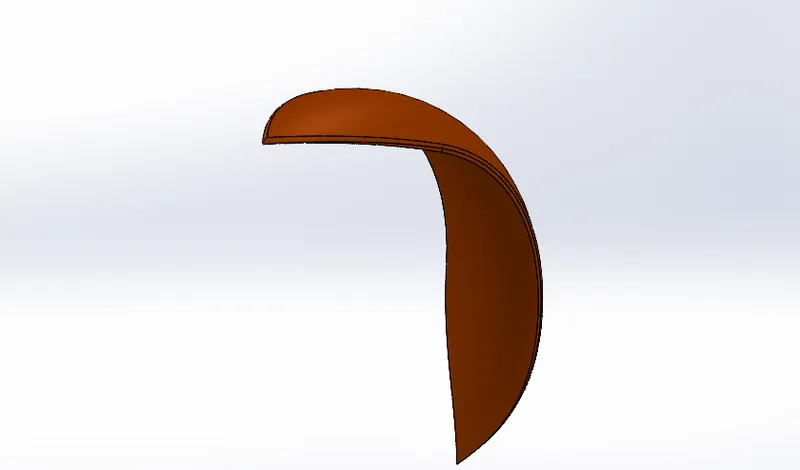
Features used to create Fender
- Sketch
- Offset entities
- Trim entities
- Revolve
- Dynamic mirror
- Split
Whereas;
- Trim Entities: -Select the trim type based on the entities you want to trim or extend. All trim types are available with 2D sketches and 2D sketches on 3D planes. You can use any of the following trim options: Power Trim.
- Revolve: To Create a Revolve feature, create a sketch that contains one or more profiles and a centreline, line, or Edge to use as the axis around which the feature revolves.
- Dynamic mirror: - Dynamic mirror is the important tool in Solidworks. As You Sketch entities, they mirrored about the Pre-selected Sketch entity.
- Rear Fender: -
The use of the rear fender is the same as the front fender. The Rear Fender is Mounted on the chassis of the Rear part above the Rear wheel.
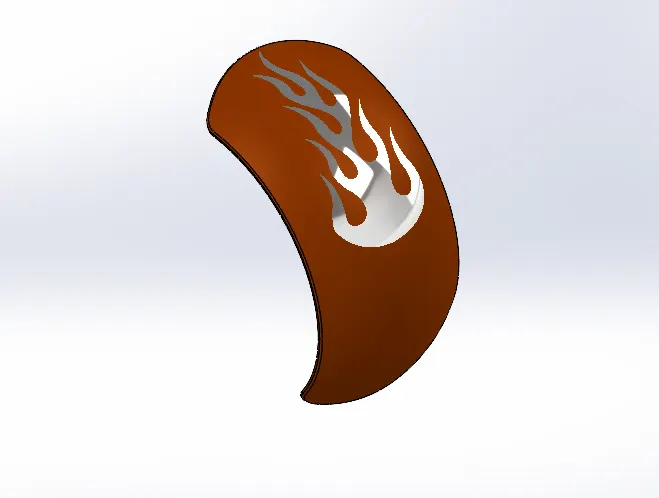
Features used to create a Rear Fender
- Sketch
- Offset entities
- Trim entities
- Revolve
- Appearances
Whereas,
- Appearances: An appearance defines the visual Properties of a Model, Including colour and texture. Appearances do not affect physical properties, which are Defined by materials. Every material is assigned a default appearance that emulates the look of the material.
- Oil Tank: -
The oil tank is one of the parts of the chopper. Oil tank is used to store the oil required to run the engine. Oil tank is the Hollow one. The thickness of the oil tank is given as 3mm in our chopper.
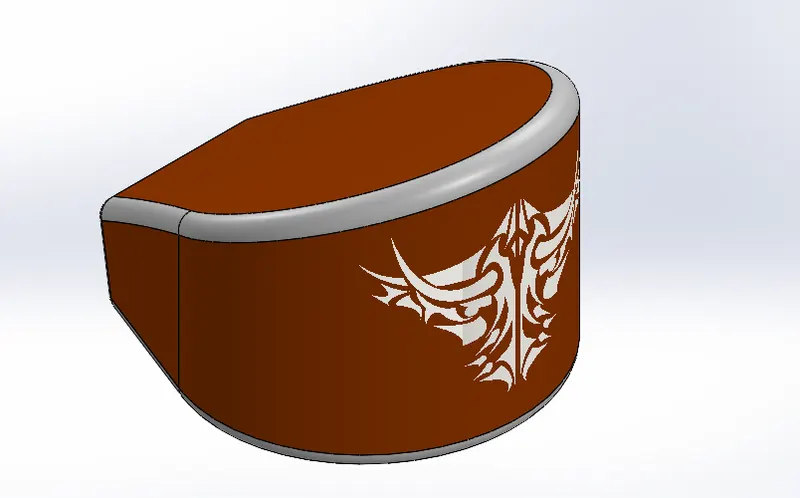
Features to create the oil tank
- Sketch
- Boss extrude
- Combine
- Fillet
- Shell
- Appearances
Whereas;
- Combine: combine is the type of feature available in Solidworks to manually combine the two bodies.
- Shell: The shell Definition property manager is used to define the thickness of thin and thick shell elements.
- Chain: -
Chain is a type of transmission system that is used to transmit a power from the engine to the rear wheel. Chain is made of steel. The sprocket is used to transmit the power to the chain. the sprocket is connected with the shaft with the help of a key.
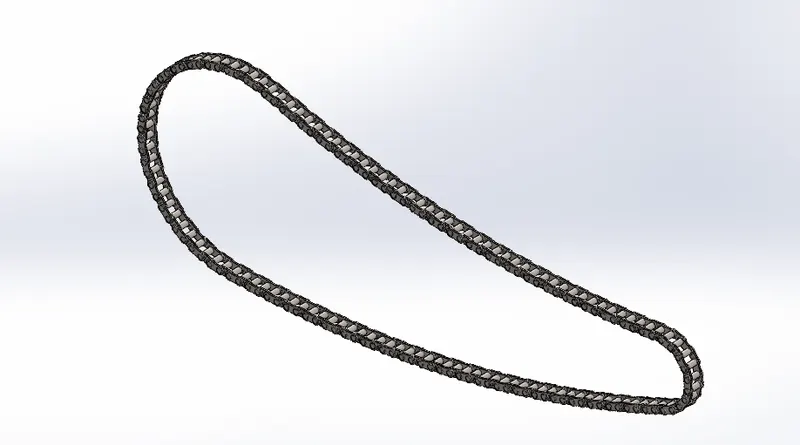
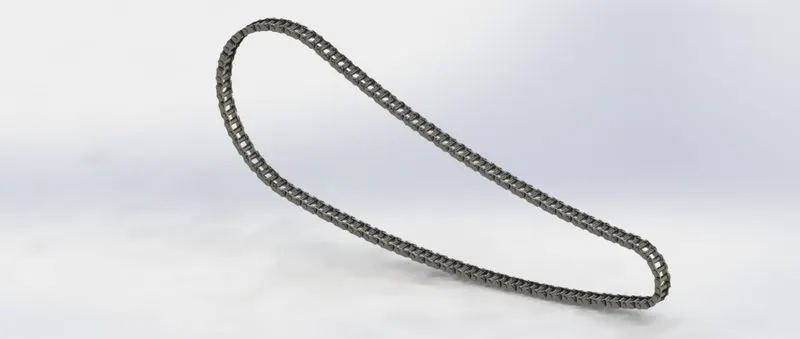
Features to create a chain
- Sketch
- Trim
- Fillet
- Blocks
- Extrude
- Patterns
- Appearances
Whereas;
- Blocks: You can make, save, edit, and insert blocks for drawing items and sketch entities that you use often, such as Standard notes, title blocks, label positions, and so on. You can attach blocks to geometry or to drawing views and you can insert them into sheet formats.
To make blocks: -
- Create a sketch.
- Click make block. (Blocks tool bar) or tools> block>make. …
- Select the sketch entities you want to make as a block for block entities.
- Repeat steps 2-4 for each of the remaining sketch entities.
- With the sketch in edit mode, add the necessary relations.
- Save the part.
- Patterns: The curve driven pattern tool allows you to create patterns along a planer or 3D curve. you can base your pattern on an open curve, or on a closed curve, such as a circle. In the chain part curve driven pattern is used.
- Pedal: -
Pedal is the external part attached to the chassis. The pedal is used to place the leg on top of that. To give comfort to the rider pedal is used.
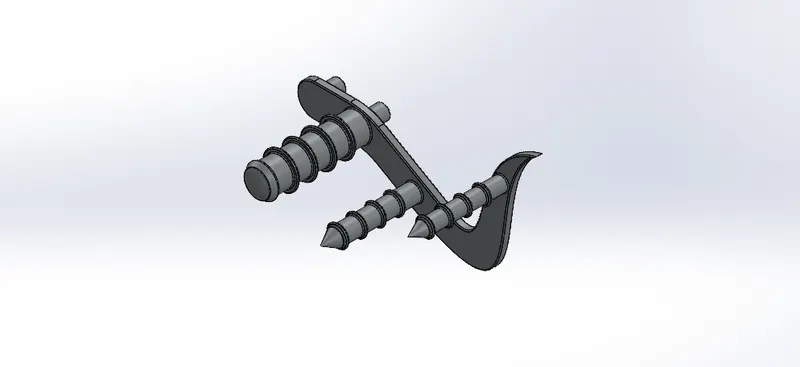
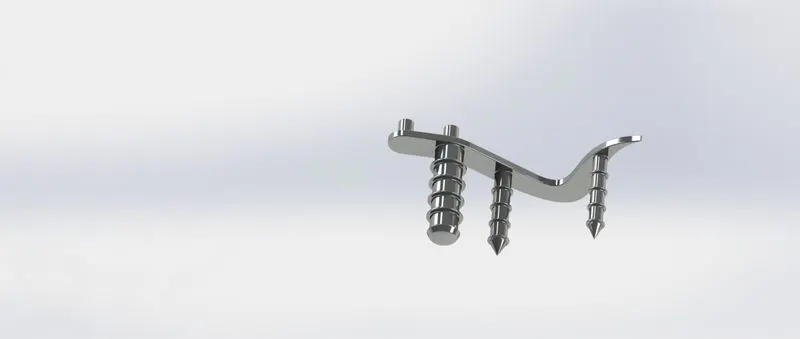
Features used to create pedal
- Sketch
- Extrude
- Fillet
- Linear pattern
- Dome
- Chamfer
- Appearances
Whereas;
- Chamfer: A Cut on the edge or corner of something that makes it slope slightly rather than being perfectly square.
- Linear pattern: Linear pattern is also more like a circular pattern. The feature/bodies are patterned linearly.
- Front Wheel: -
A wheel is a circular block made of the steel/alloy material. On the top of the wheel the tyre Is covered. The tyres are made of Rubber and it has thin wires within it.
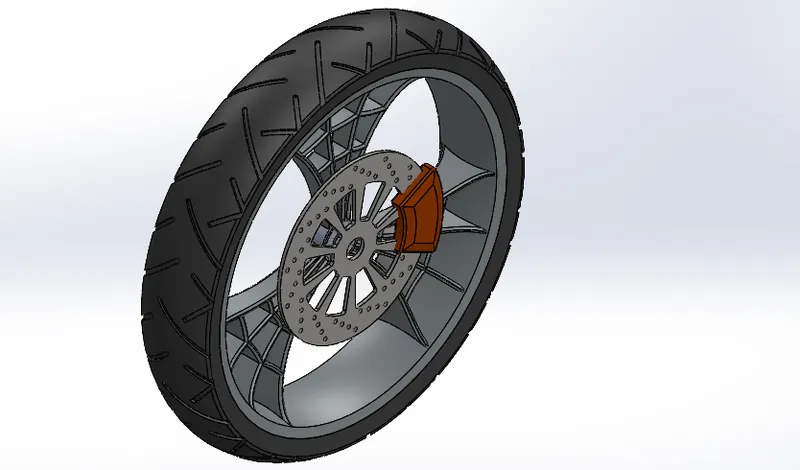
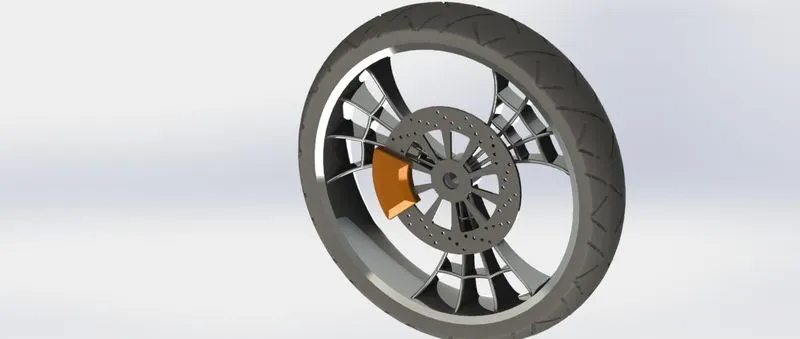
Features used to create Front wheel
- Sketch
- Revolve
- Trim
- Fillet entities
- Boss/base extrude
- Revolve cut
- Linear pattern
- Chamfer
- Fillet features
- Cut extrude
- Circular pattern
- Appearances
Whereas;
Circular Pattern: - circular pattern is used to create a pattern of the sporks and the pattern (Grooves) available in the tyre. Also, it is used to create holes in the discs of the front wheel. The parent bodies/features are used to create a different number of instances required to create the pattern circularly.
- Rear wheel: -
A circular object that revolves on an axle and is fixed below a vehicle or other object to enable it to move easily over the ground. The disc and Sprocket are attached with rear wheel. The chain is connected between the engine and the rear wheel. Chain is a positive drive Compared to the belt it will be more efficient and losses in the chain will be less comparatively.
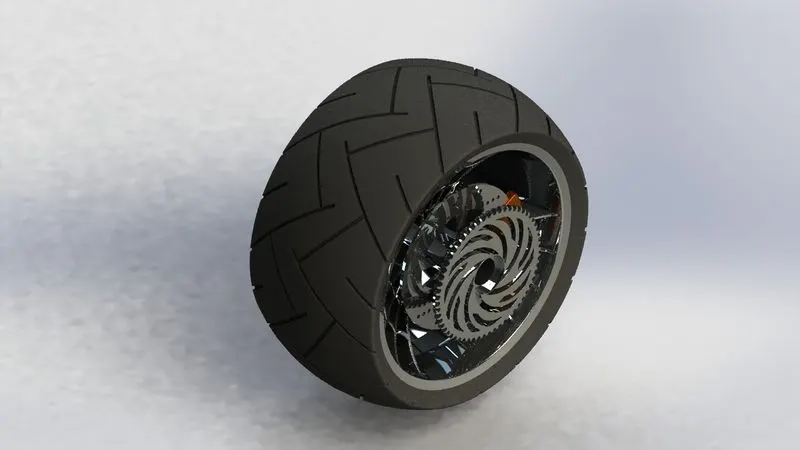
Features used to create Rear wheel
- Sketch
- Revolve
- Trim
- Fillet entities
- Boss extrude
- Planes
- Revolve cut
- Linear pattern
- Chamfer
- Fillet features
- Cut extrude
- Circular pattern
- Appearances
- Front fork: -
Most motorcycles today use telescopic forks for the front suspension. The forks can be most easily understood as simply large hydraulic shock absorbers with internal coil springs. They allow the front wheel to react to imperfections in the road while isolating the rest of the motorcycles from that motion.
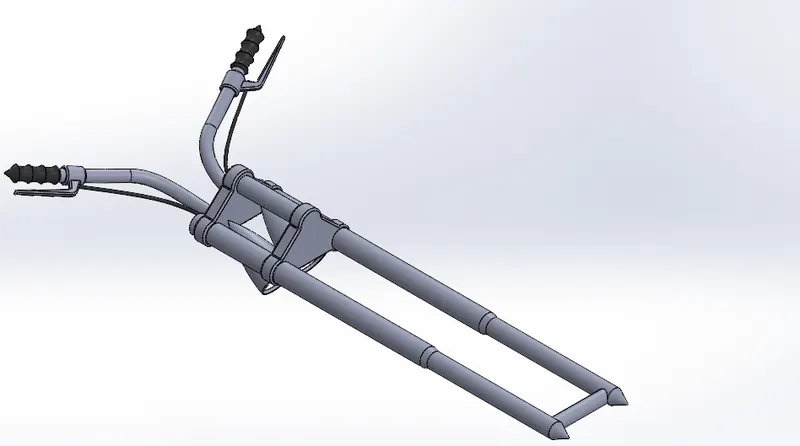
Features used to create Front Fork
- Sketch
- Extrude
- Trim
- Revolve
- Split
- Plane
- Convert entities
- Move/copy body
- Dome
- Mirror
- Combine
- Curve (projected curve)
- Sweep
- Appearance
Whereas;
- Move/copy body: Move/copy body is used to move/copy the body from one place to other places in the fork.
- Mirror: -By using mirror faces with a mid-plane selected only in the chosen faces within the revolve will be mirrored. Mirroring bodies can be used whether in a single or multi body part and allows you to select solid geometry instead of the features and faces in a body. In the fork part the one part of the fork is created and the other part is mirrored. Then The parts are manually combined.
- Project Curve: -Project curve is the kind of 3D curve which is projected on the basis of the two different 2D sketches.
- Sweep: - With the sweep feature we can create a shape by moving a 2D sketch Profile along A 2D or 3D sketch path.
- Chassis: -
A chassis or frame forms its skeleton. All the components of a motorcycle, like the suspension, wheels, fuel tank, seats, handle bars etc, are attached to this base structure which lends a motorcycle its strength and ability to handle well,
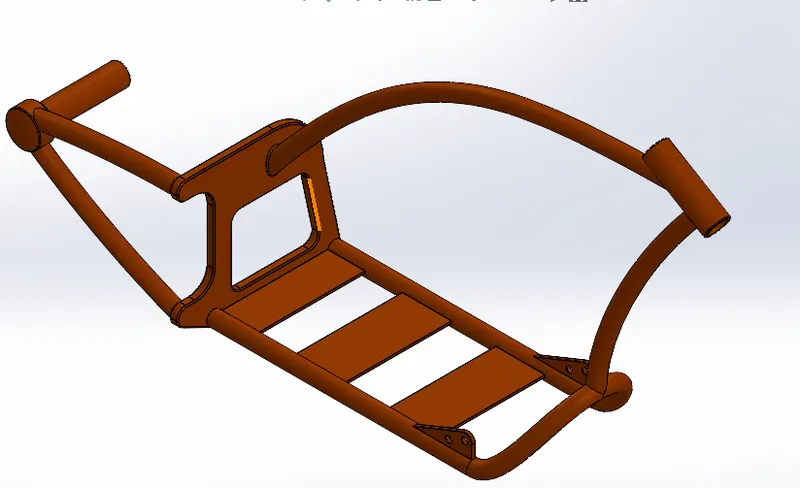
Features used to create chassis
- Sketch
- Offset
- Convert entities
- Projected curve
- Trim
- Plane
- Sweep
- Split
- Revolve
- Cut extrude
- Fillet
- Combine
- Appearance
- Engine: -
Engine is the prime mover for the bike, The engine converts a chemical energy in to the heat energy and then into mechanical energy, The mechanical work in the engine is rotational motion. This rotation is converted to the wheel with the use of chain and sprocket through the gear box and clutch.
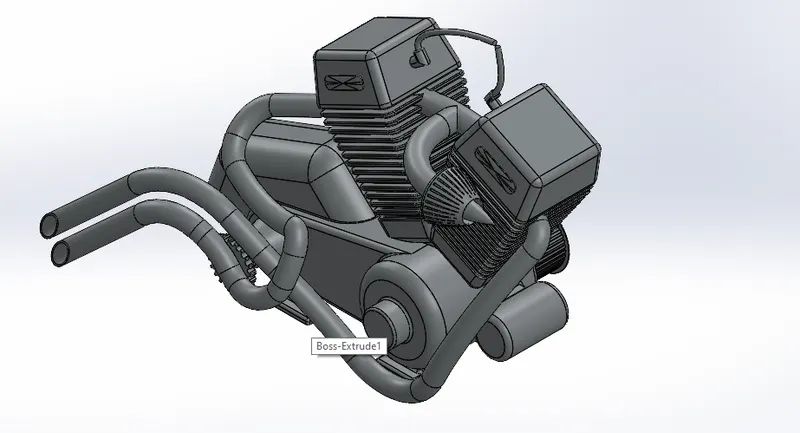
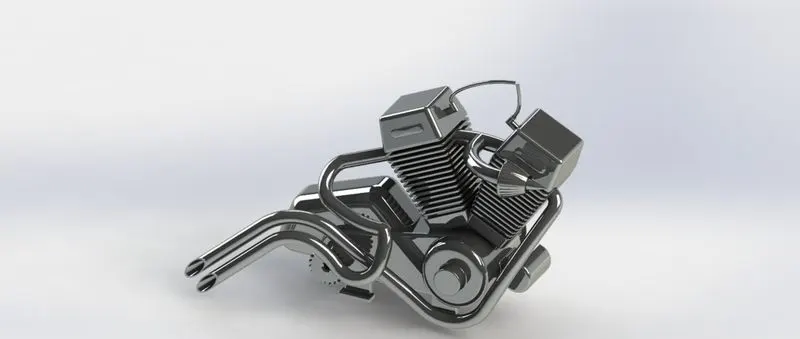
Features used to create Engine
- Sketch
- Convert entities
- Trim
- Revolve
- Boss extrude
- Cut extrude
- Offset
- Dome
- Fillet
- Project curve
- Composite curve
- Sweep
- Mirror
- Circular pattern
- Split
- Gas tank: -
Gas tank are used to store the gas. To give the gas to the engine whenever its required.
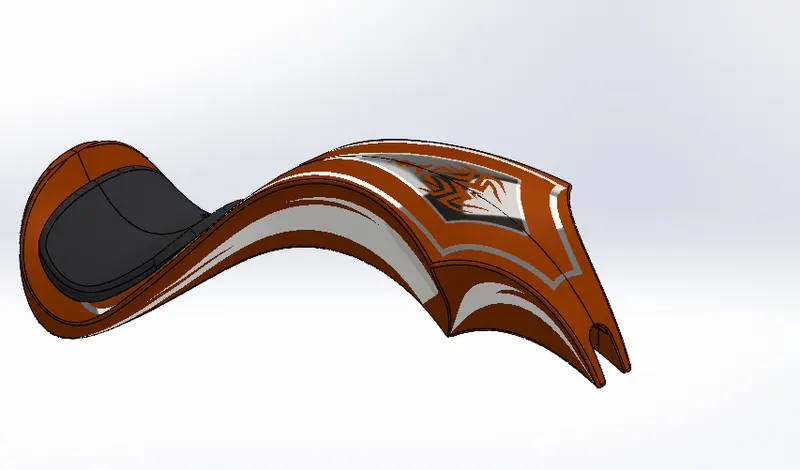
Features used to create Gas tank
- Sketch
- Trim
- Projected curve
- Convert entities
- Sweep surface
- Loft surface
- Fill surface
- Surface trim
- Surface knit
- Sweep cut
- Fillet
- Appearance
Whereas;
- Loft surface: Loft Surfaces are generated by multiple 3D curves or existing edges creating a smooth tangency between the selected curves.
- Sweep surfaces: surfaces that are generated from a section curve positioned along a path.
- Filled Surface: The filled surface feature constructs a surface patch with any number of sides, within a boundary defined by existing model edges, sketches, or curves, including composite curves.
- Surface trim: primarily used to cut away material from a Surface and Provides two modes, Standard and mutual.
- Surface knit: - surface knit is used to knit the two free edges/open edges of the surface together. Also, it reduces the gap between the two edges of the surface.
Assembly of Chopper: -
- Initially the chassis part is inserted in the assembly by using insert parts in the option. After that the part is inserted in the assembly environment and clicked ok to fix the chassis.
- After that the other parts of the chopper are inserted into the assembly and given possible mate conditions.
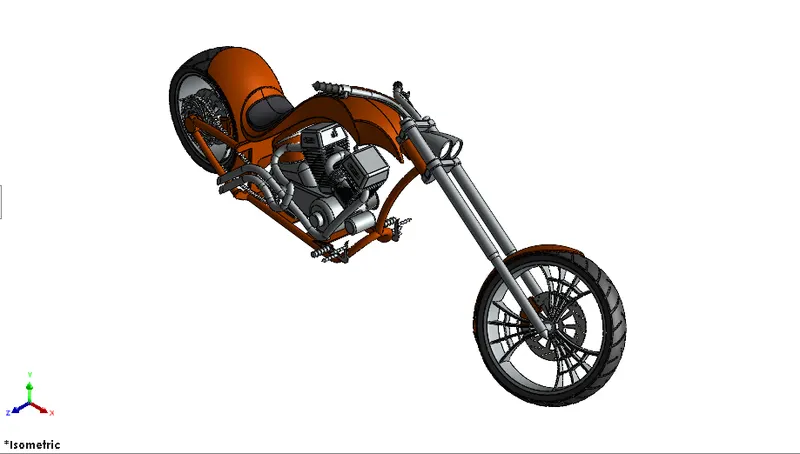
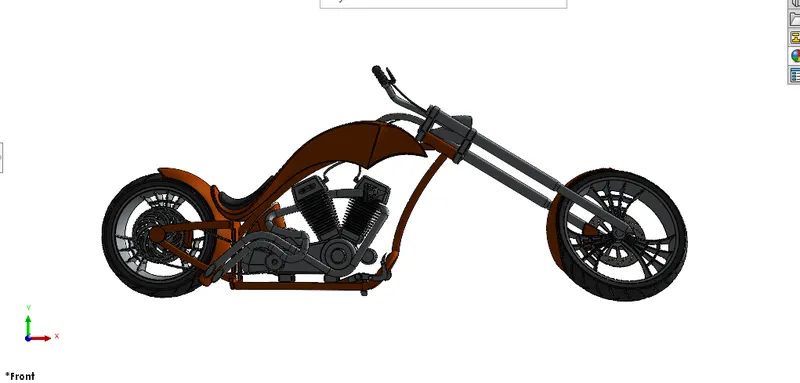
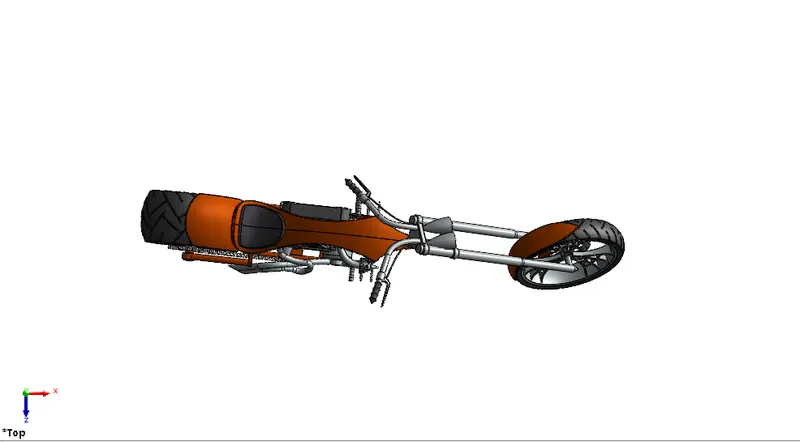
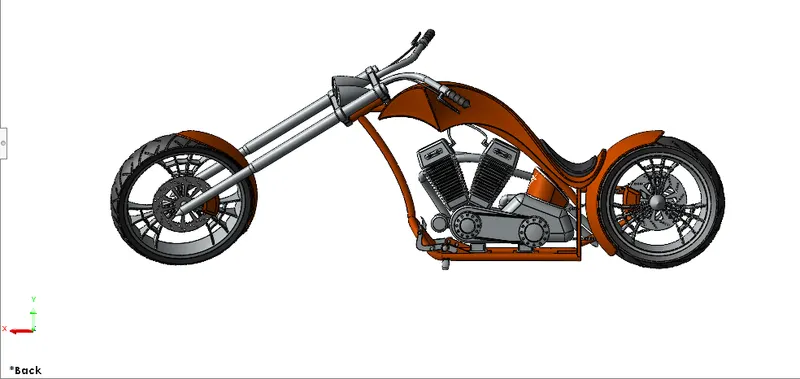
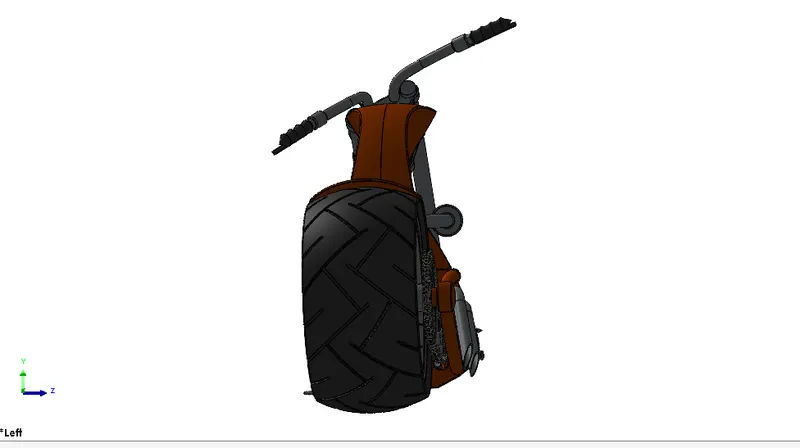
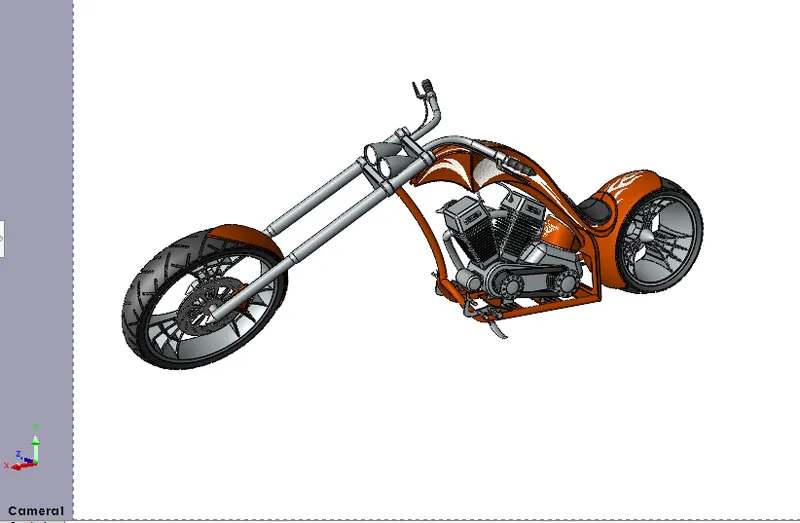
Features used to assemble chopper
- Mates
- Insert part
Whereas;
- Mates: Mates create geometric relations between assembly components, as we add mates, we Define the allowable directions of linear or rotational motion of the components, we can move a component within its degrees of freedom, visualizing the assembly’s behaviour.
Photo Realistic Rendering;
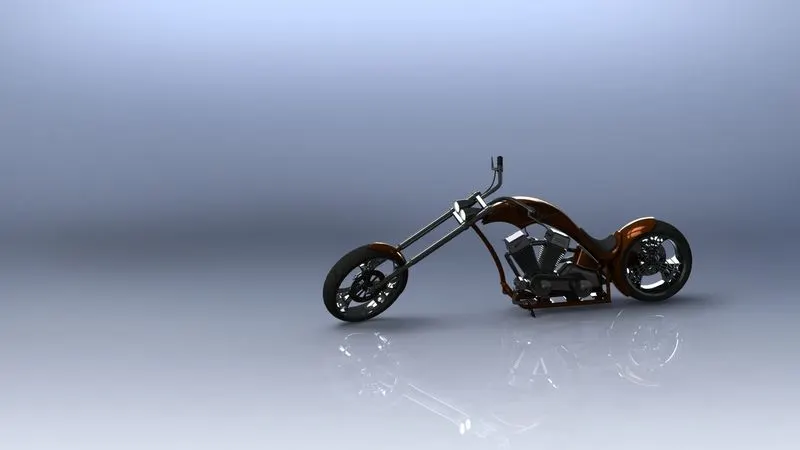
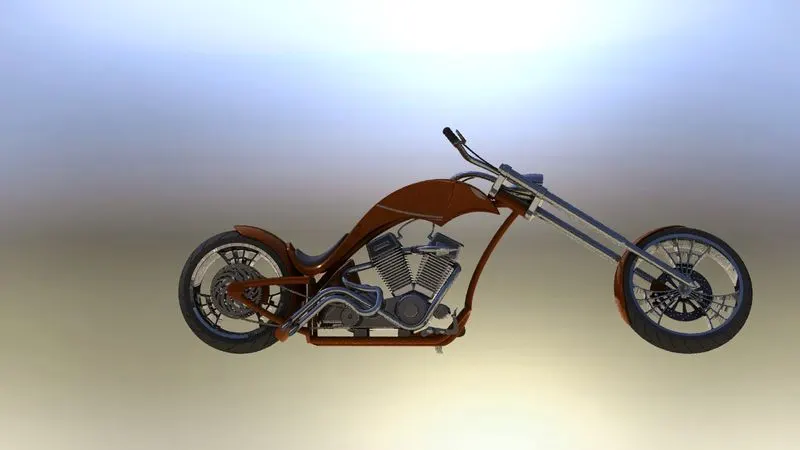
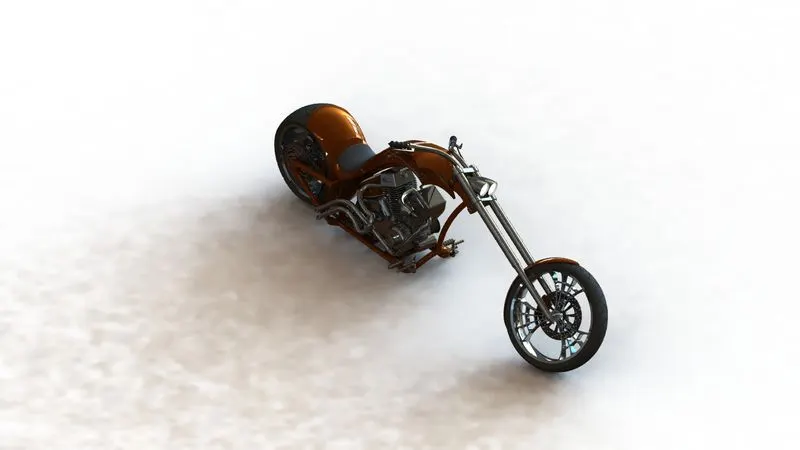
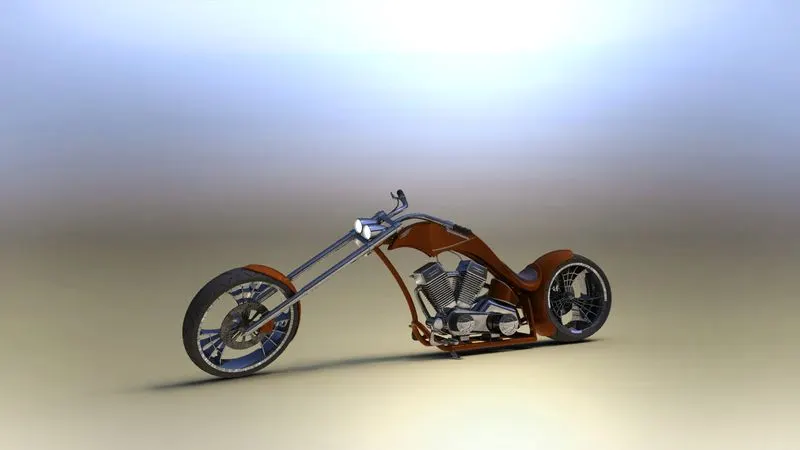
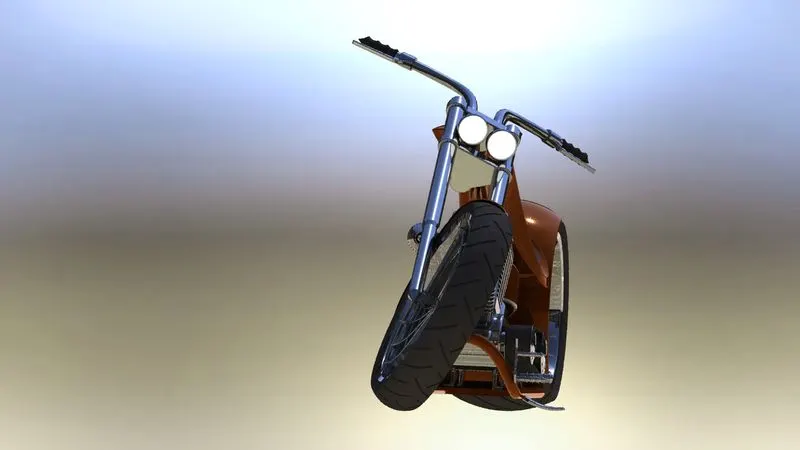
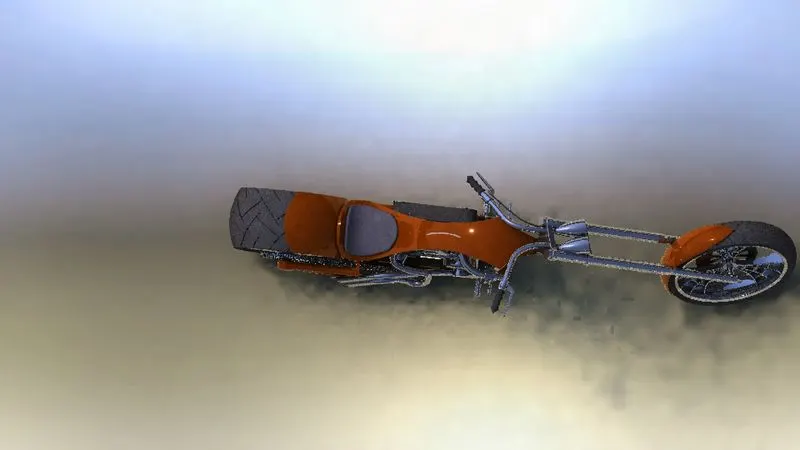
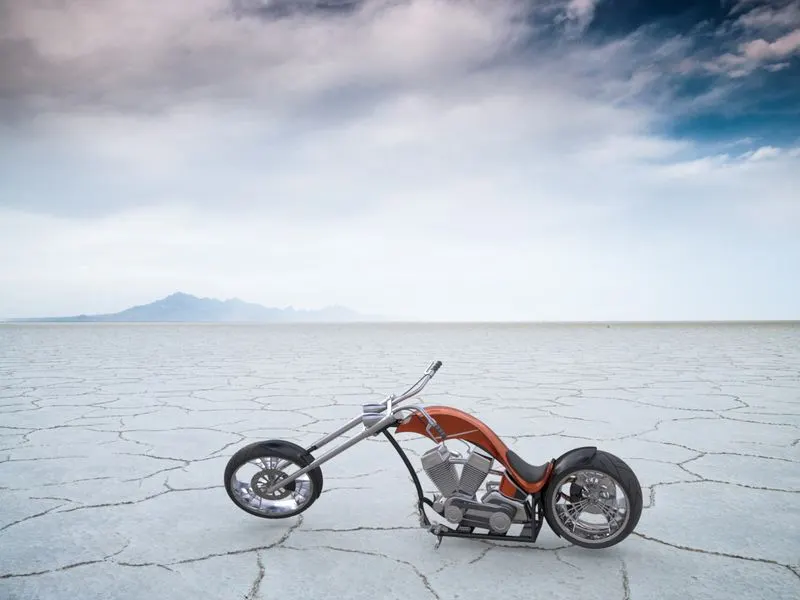
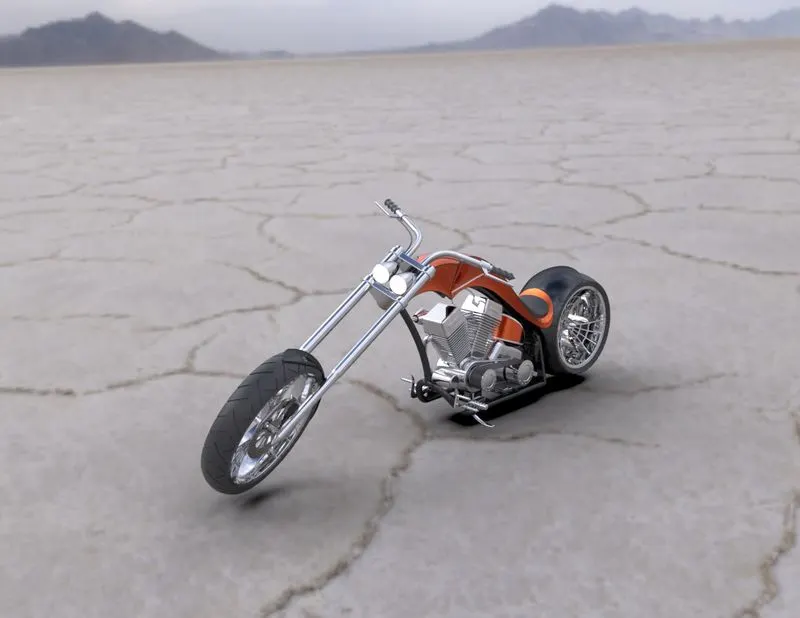
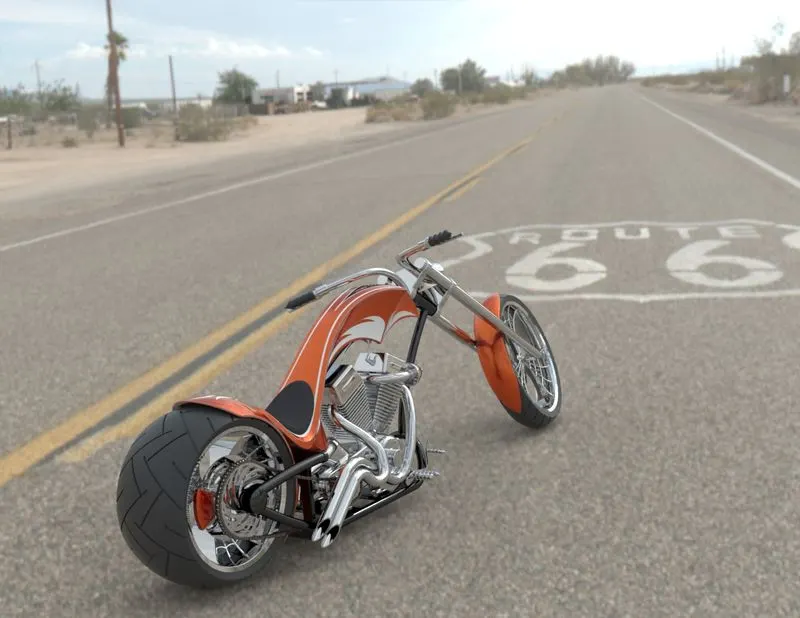
- Rendering is the process of creating realistic images of the model with the environment.
- Rendering has been done in two ways in Solidworks, the following are two ways,
- Photoview 360
- Solidworks visualize
- In the photo realistic model some of mate conditions and positions are changed to render realistic models.
- Then the photo realistic model is rendered into realistic images with different views.
Following are some of the Rendered images.
Conclusion: -
- The parts of the chopper are modelled using most of the solid modelling tools using solid works.
- The parts are inserted into the assembly environment and the Chopper is assembled. Getting used to with Assembly module of Solidworks.
- The realistic images were rendered with the use of the Photoview 360 and solid works visualize. [Due to bug in my Solidworks 2021 SP0 I am not able to render with Decals in some of my images]
Chopper Render
https://drive.google.com/file/d/1saUemj7CrwCKjzh9MNW-99ThtxL1y3Am/view?usp=sharing
Assembly chopper
https://drive.google.com/file/d/1Cngxirq_wFguFhhyabf7VVoS7m6-Auer/view?usp=sharing