Introduction to REVIT concepts
1) From the file menu, create a new project (Structural / Architectural / Construction template ) and name the project appropriately.
Answer
Aim:
To create new project and name the project.
Procedure:
Step-1
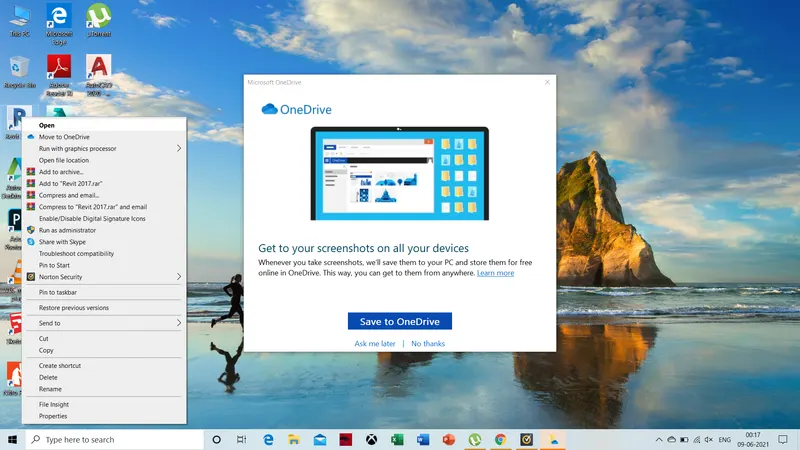
Open Revit.
Step-2
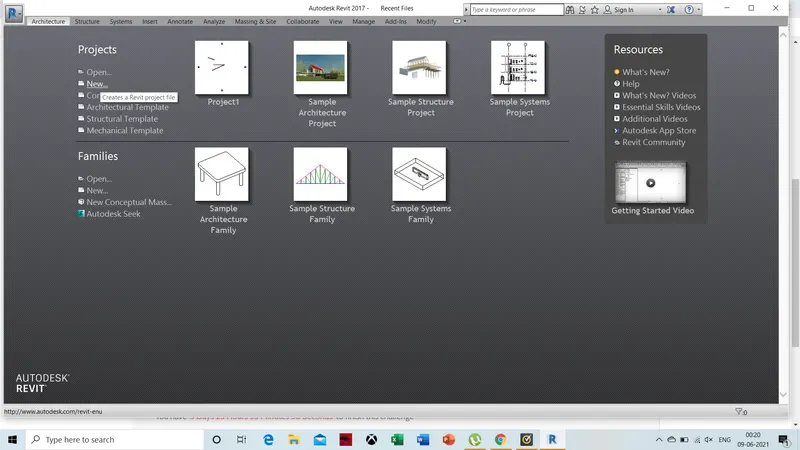
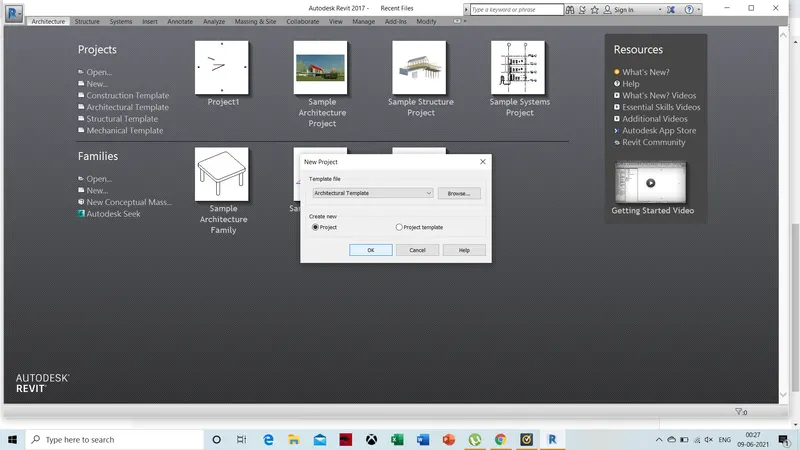
Click on new.
Step-3
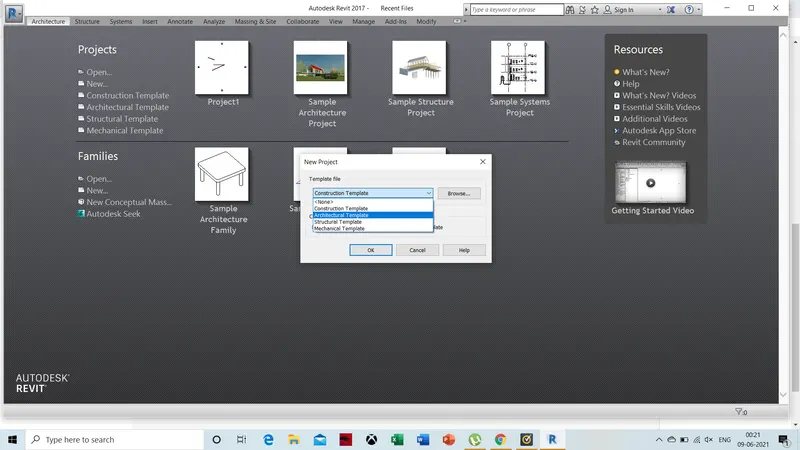
Select Architectural Template.
Step-4
Click on ok.
Step-5
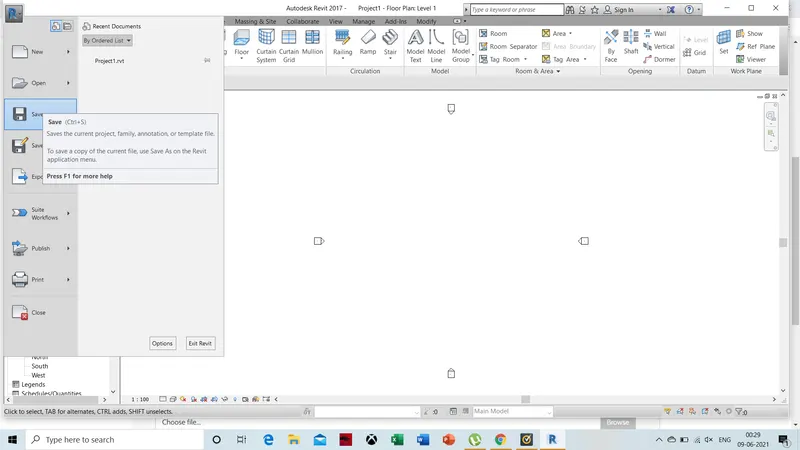
Click on save.
Step-6
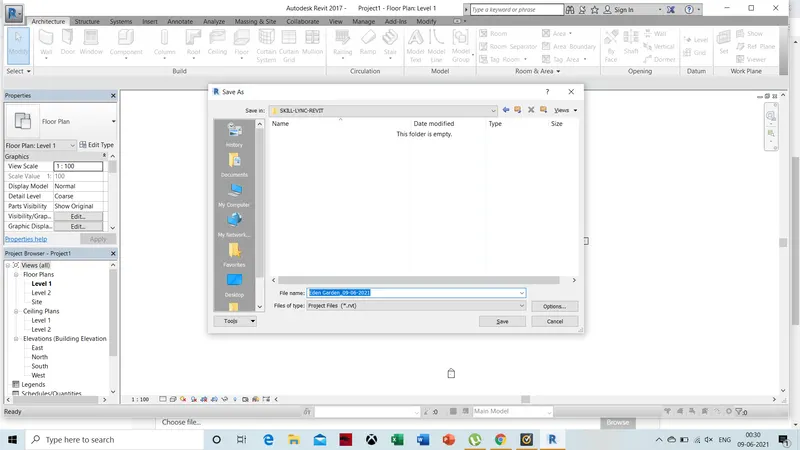
Select location to save project & name as per client,present date.
2) Save the new project file. Close and open using icons from file toolbar.
Answer
Aim :
To save project.Close and open using icons.
Procedure:
Step-1
Name project & click on save.
Step-2
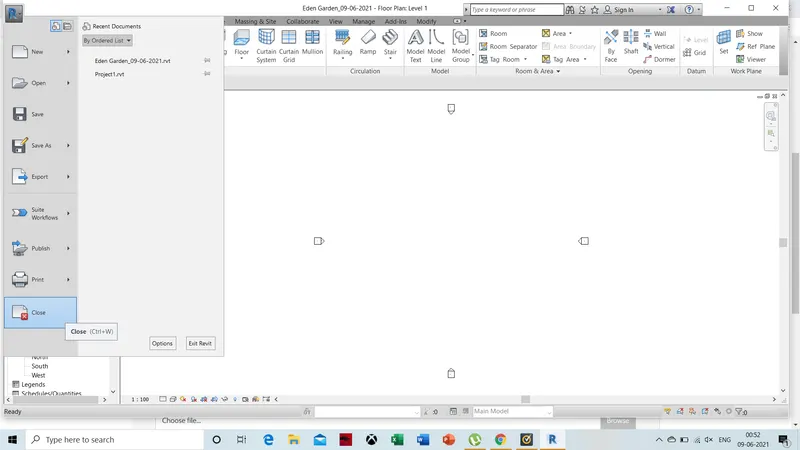
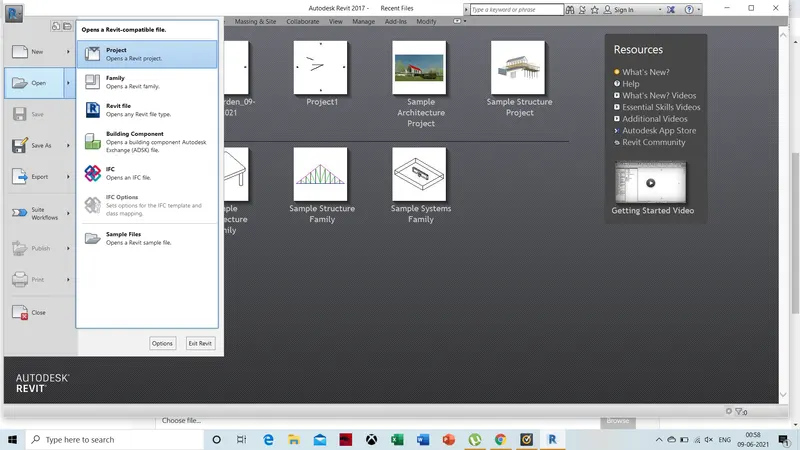
Save project and click on close.
Step-3
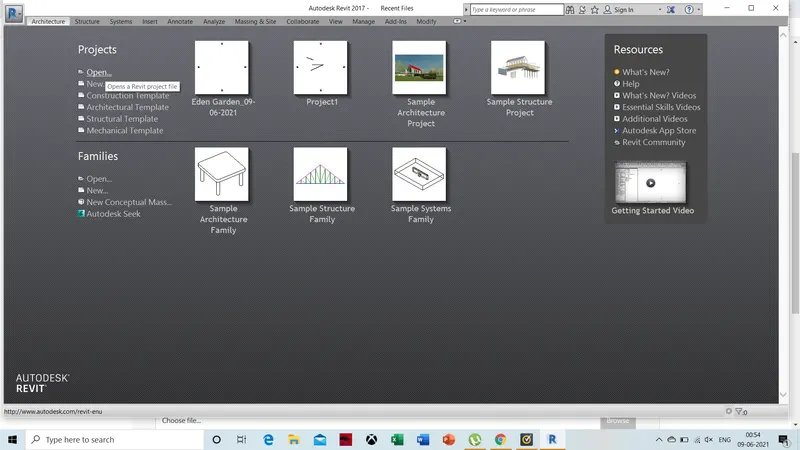
Click on Open.
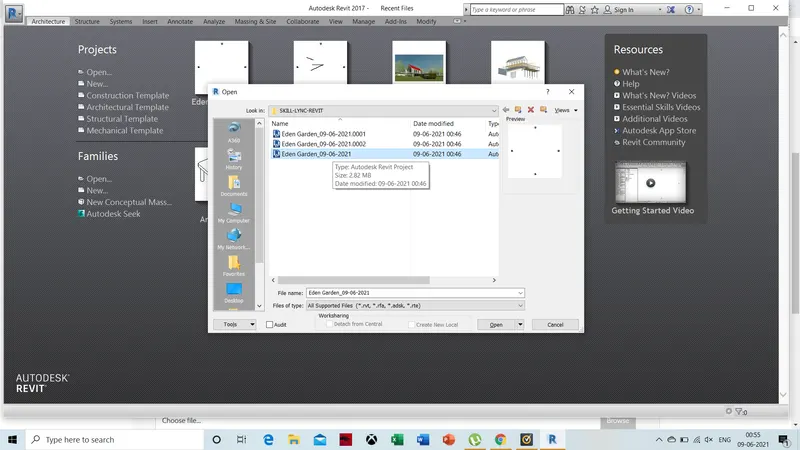
Step-3
Select project you want to open.
3) From the architecture/ structure toolbar familiarize with options to draw a wall. Create a rectangular layout of walls of about 40’-0” X 35’-0”.
Answer
Aim:
To create rectangular layout 40'-0"X35'0".
Procedure:
Step-1
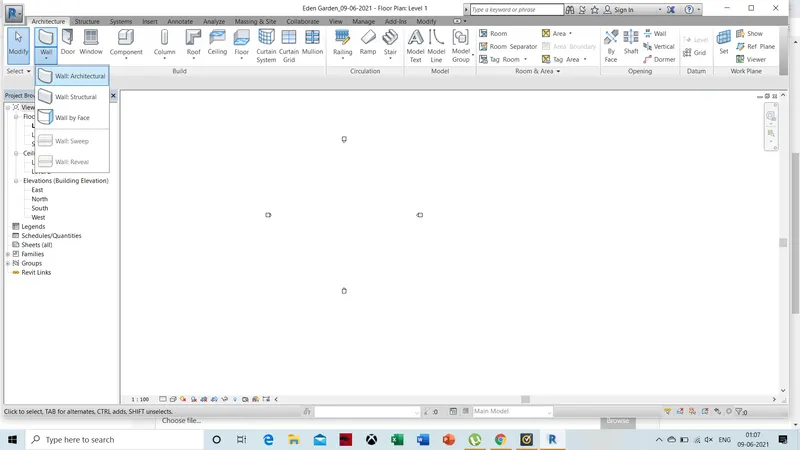
Click on wall in Architecture.
Step-2
Draw 40"-0" length.
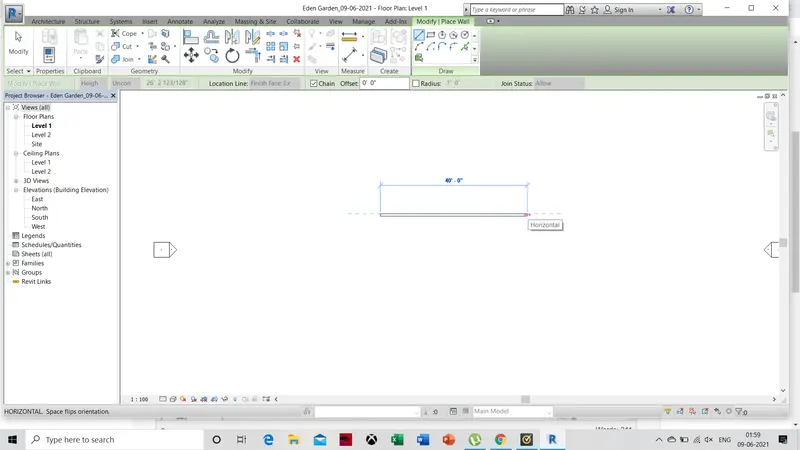
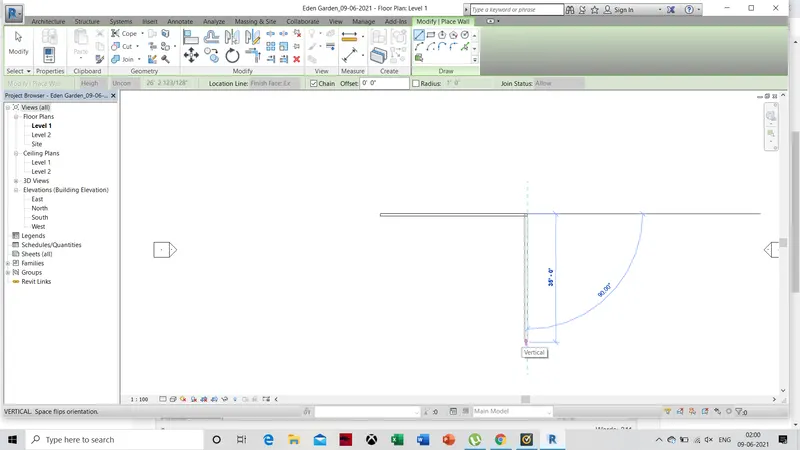
Step-3
Draw 35'-0" width at 90 degree angle.
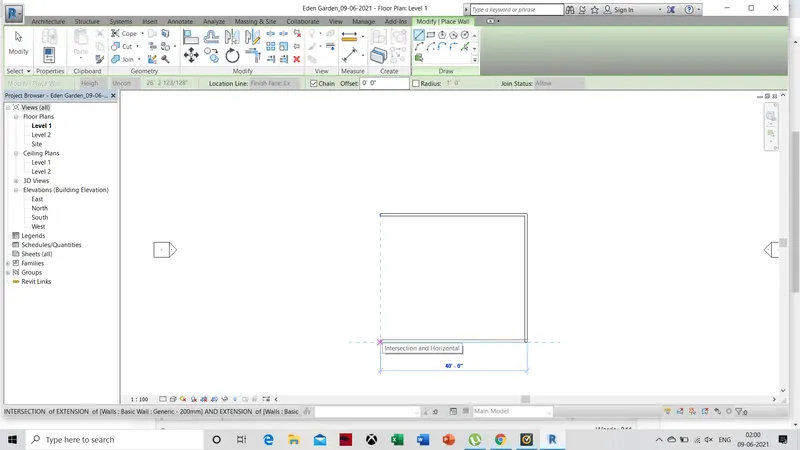
Step-4
Draw 40'-0" length at 90 degree angle.
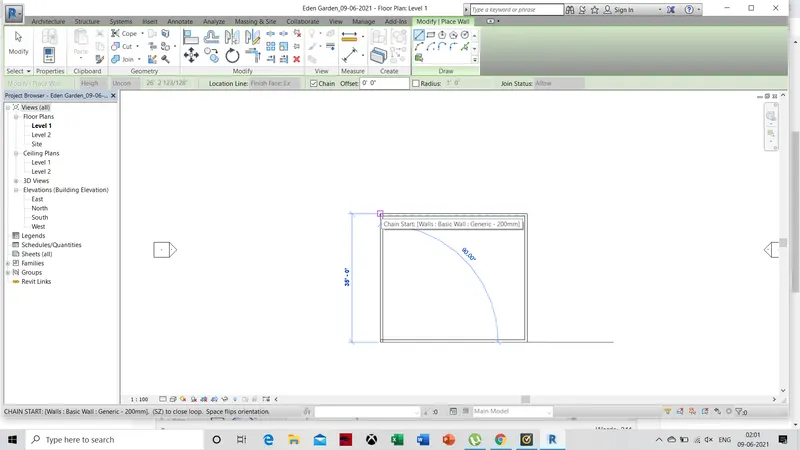
Step-5
Draw 35'-0" width at 90 degree angle.
4) From the Annotate toolbar use the aligned option to add dimensions to the layout.
Answer
Aim:
To Add dimensions to the layout.
Procedure:
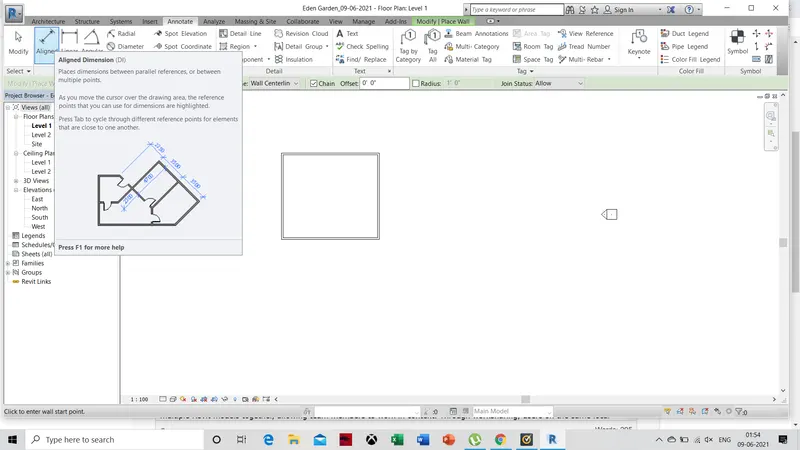
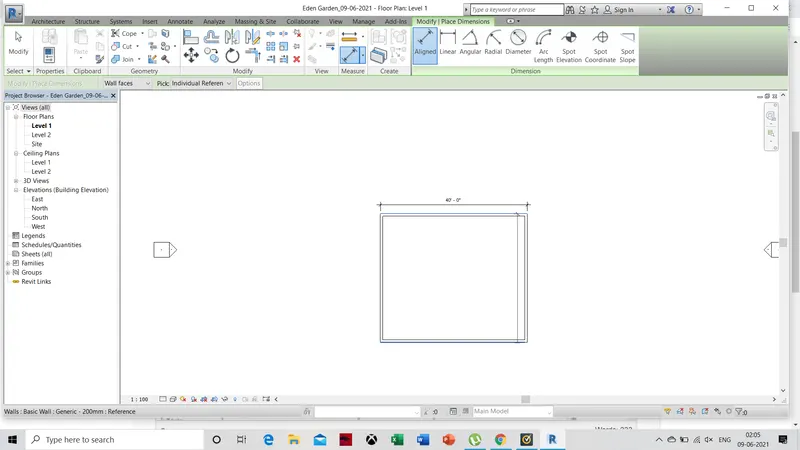
Step-1
Select Aligned dimension in Annotate toolbar.
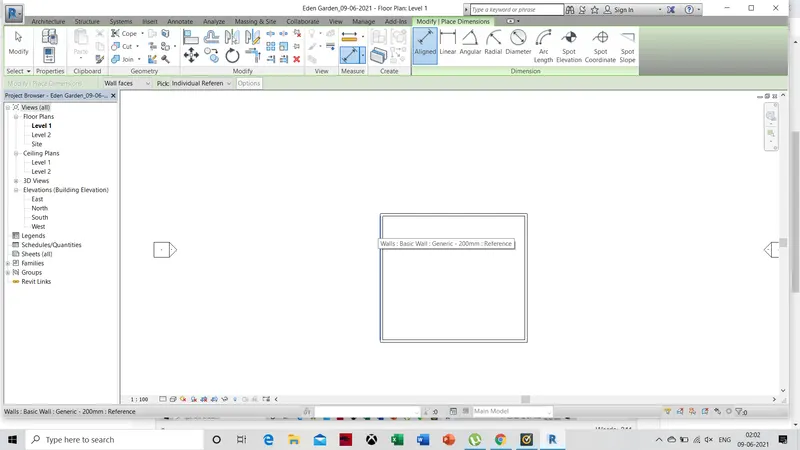
Step-2
Select one side of exterior wall.
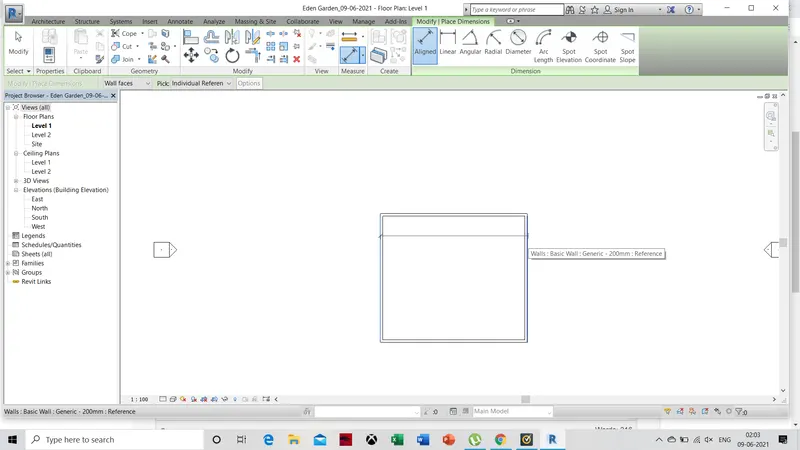
Step-3
Select another side of exterior wall.
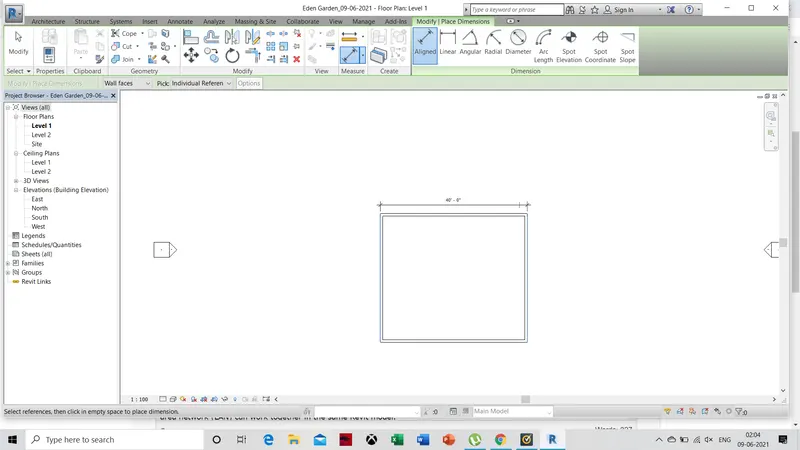
Step-4
Place dimension over length of project.
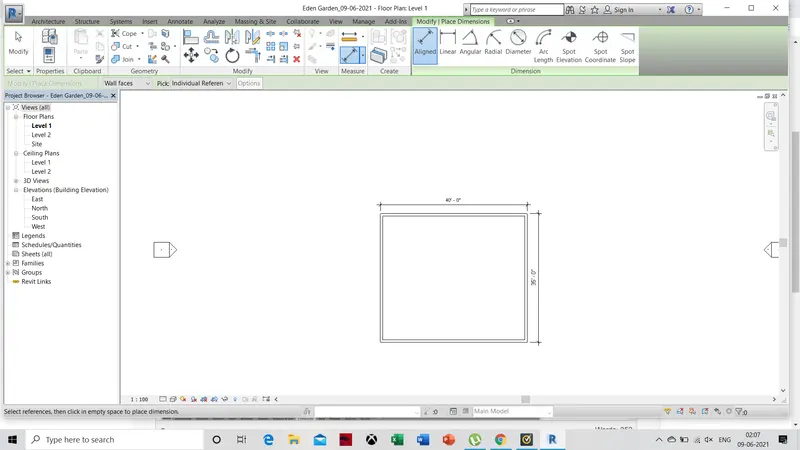
Step-5
Select one to another end of width for dimensions.
Step-6
Place dimension beside width of rectangle.
5) Use the properties browser to switch to different wall types.
Answer
Aim:
To switch different wall types.
Procedure:
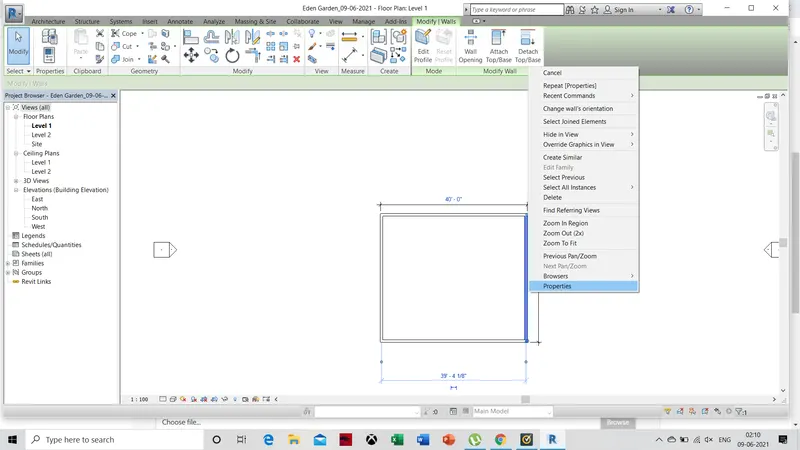
Step-1
To select one of wall and right click to select properties.
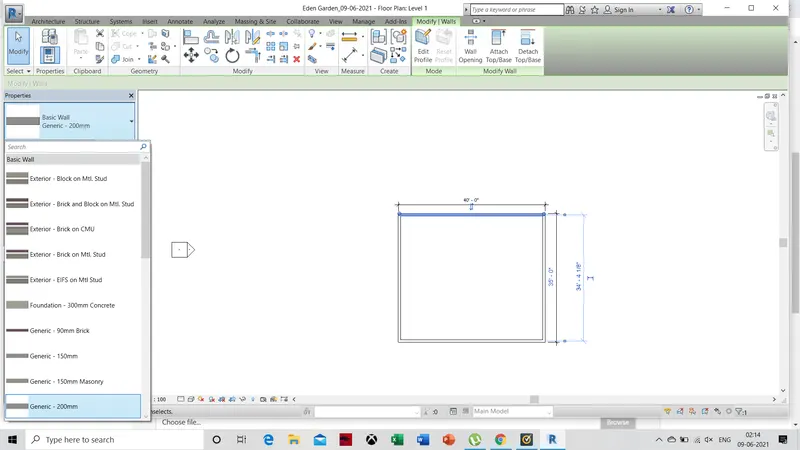
Step-2
Click on Basic wall Generic 200mm to see different wall types.
6) Create a 3D view from the view toolbar and save the view with the appropriate name.
Answer
Aim:
To create 3d view & save view with name.
Procedure:
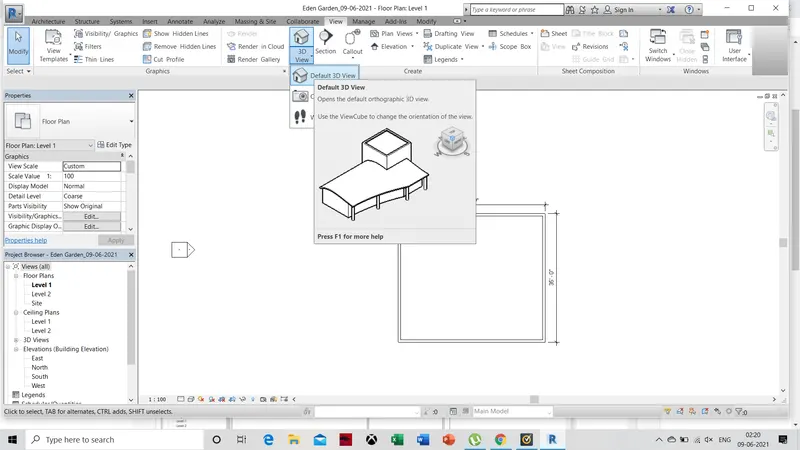
Step-1
Click on 3d view in view toolbar.
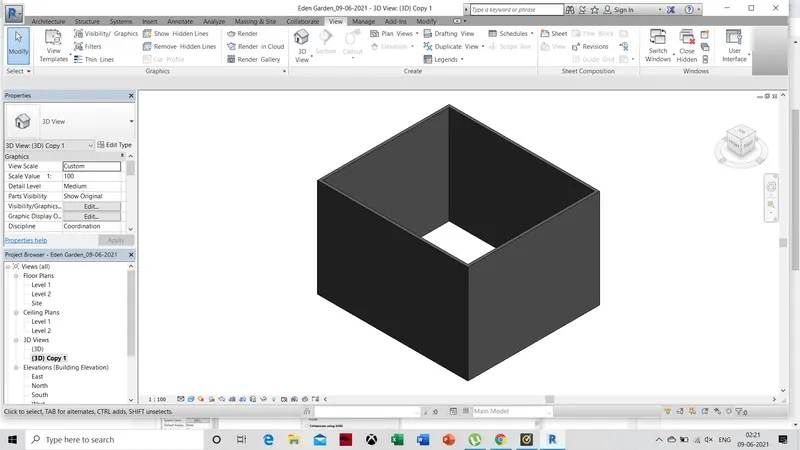
Step-2
3D view will appear.
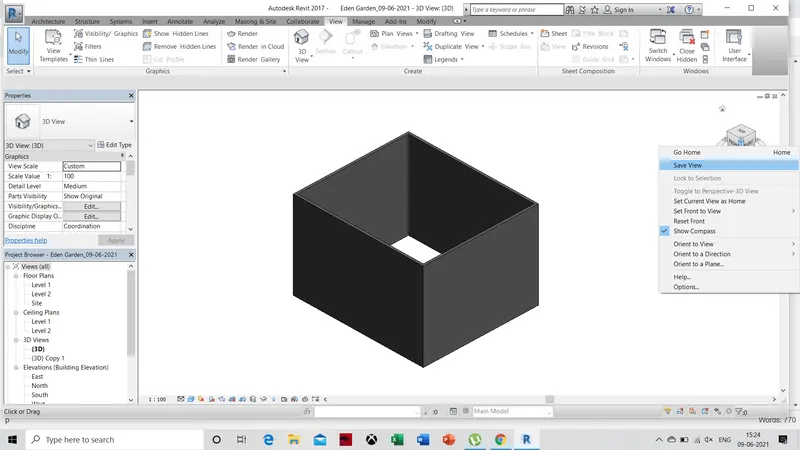
Step-3
Select view cube and right click og mouse to save view.
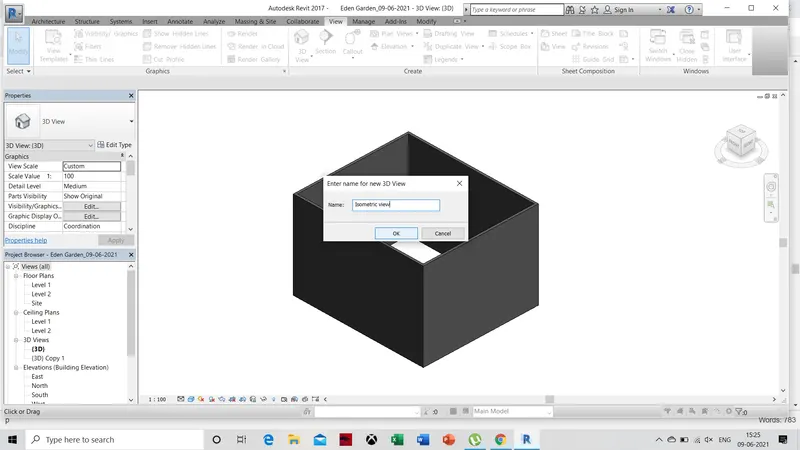
Step-4
Save view with appropriate name.
7) Navigate through the 3D model using the view cube. Orbit/pan through the model layout created
Answer
Aim:
to navigate using 3d view and use orbin & pan in layout.
Procedure:
Step-1
Select view cube.
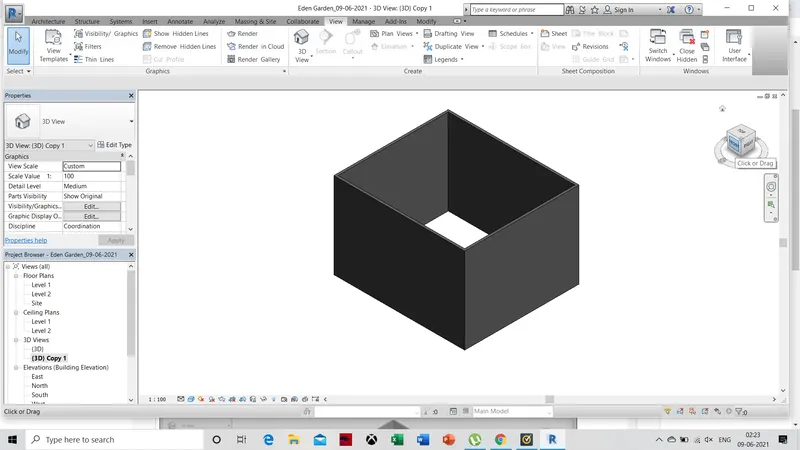
Step-2
select view cube and then Left click on mouse for orbit.
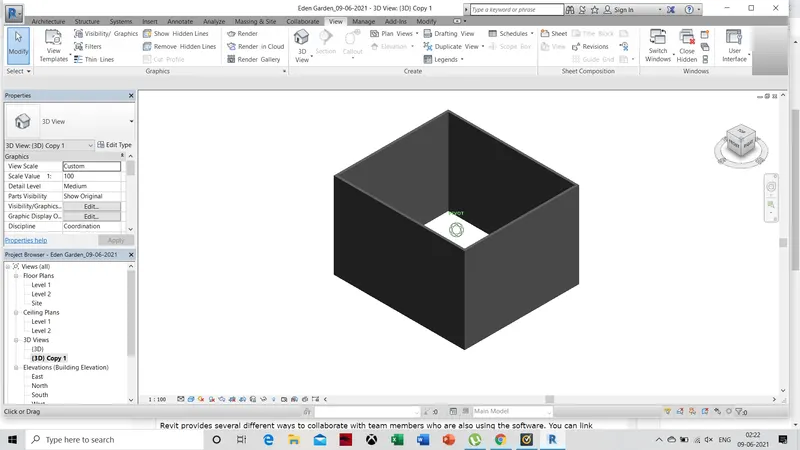
Step-3
Click on centre of mouse for pan.
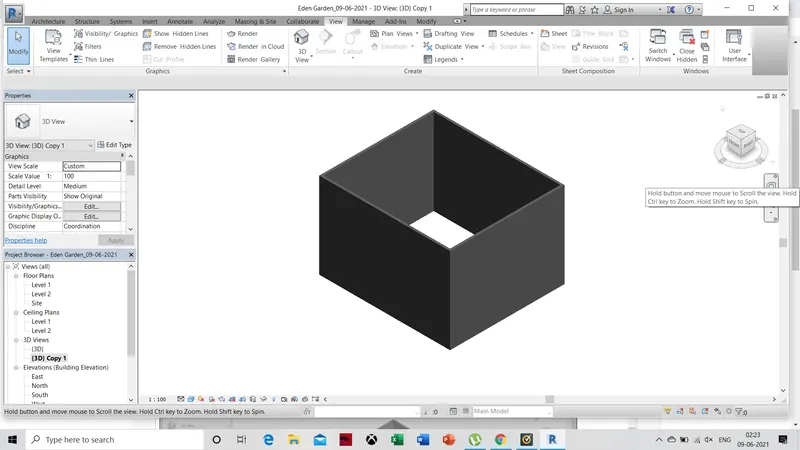
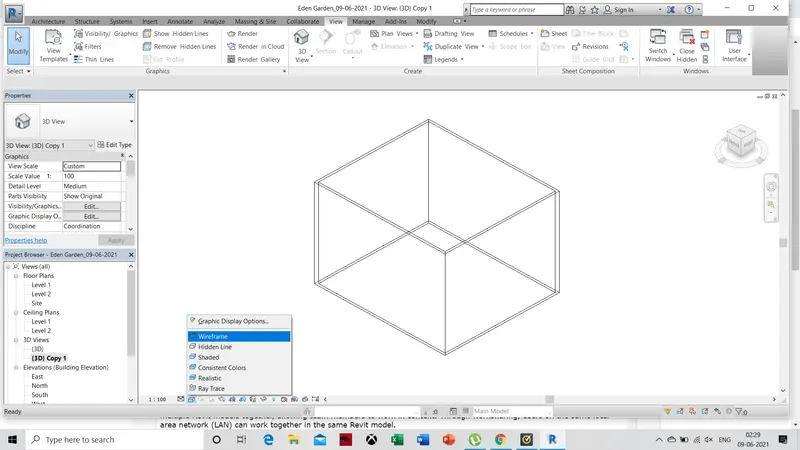
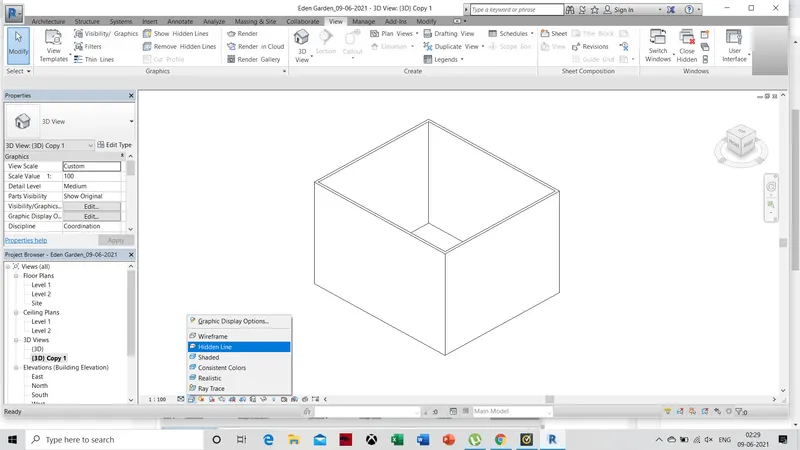
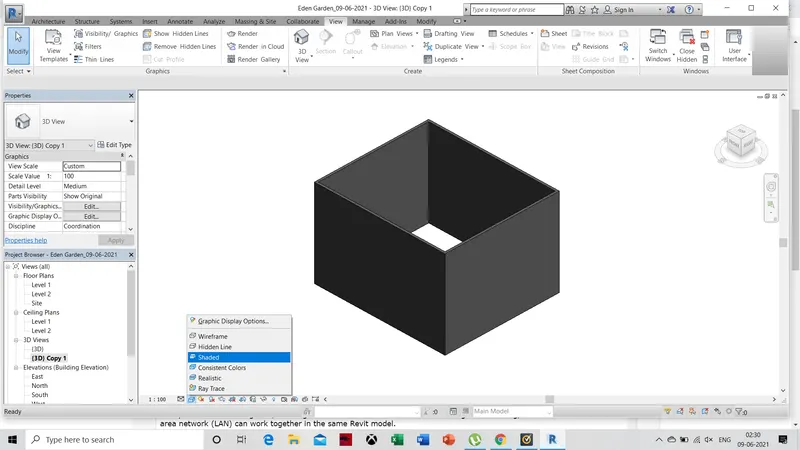
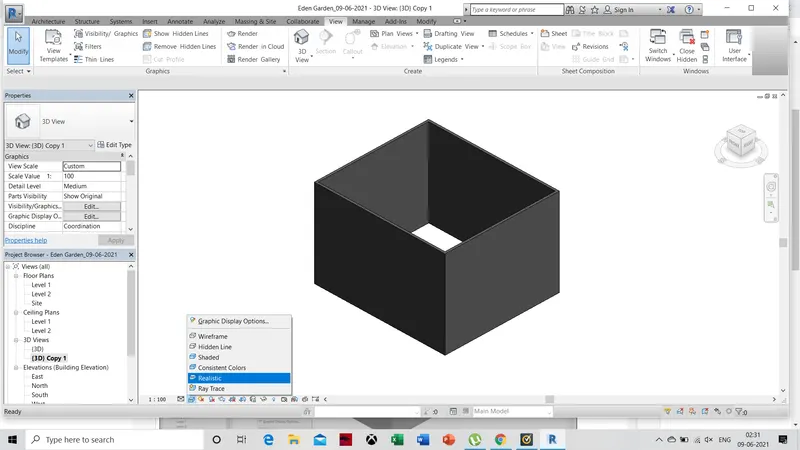
8) Use the visibility settings option below to switch model to shaded, realistic, hidden lines options.
Answer
Aim:
Use the visibility settings option below to switch model to shaded, realistic, hidden lines options.
Procedure:
Step-1
Click on graphic display options.
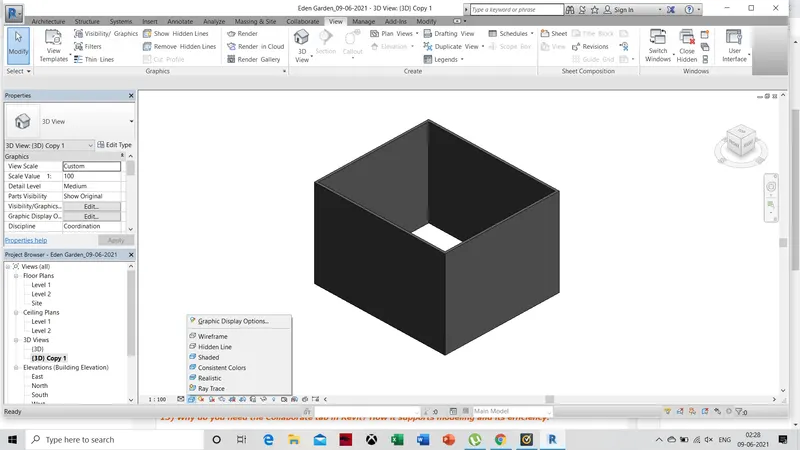
Atep-2
Select on wireframe.
Step-3
Select on hidden frame.
Step-4
Select on shaded.
Step-5
Select on realistic.
9) Turn the sun path on and off to view shadings in the layout created.
Answer
Aim:
Turn the sun path on and off to view shadings in the layout created.
Procedure:
Step-1
Select sun setting in 3d view.
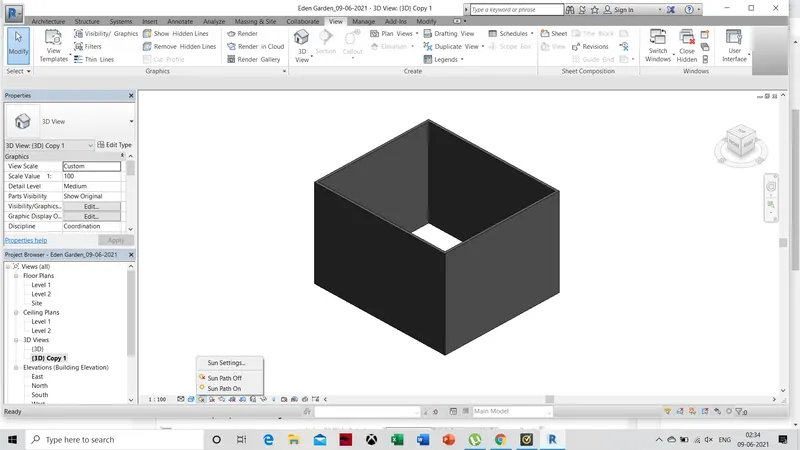
Step-2
click on sun path on.
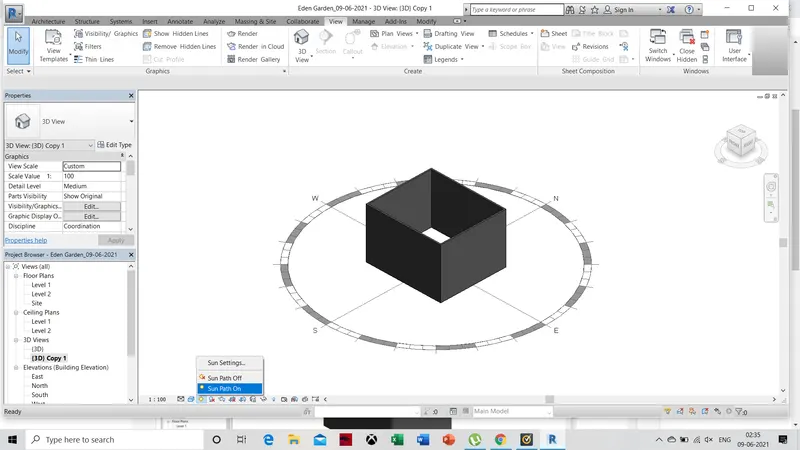
Step-3
click on sun path off.
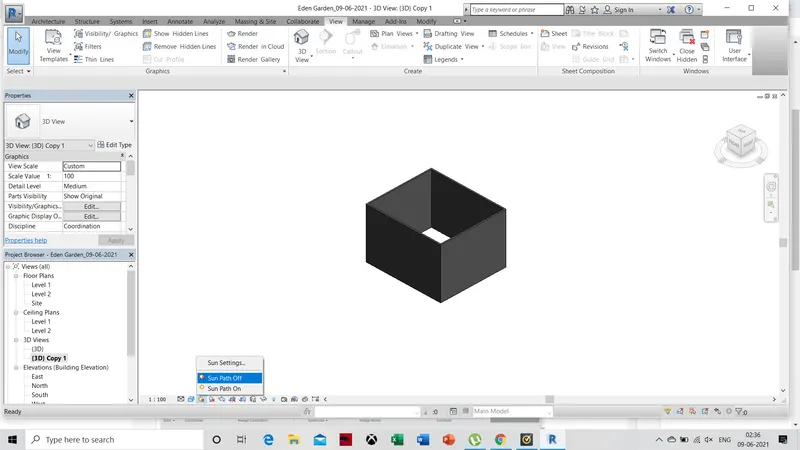
10) Use the Manage toolbar to enter project settings, project name, and project issue date (choose according to your convenience).
Answer
Aim:
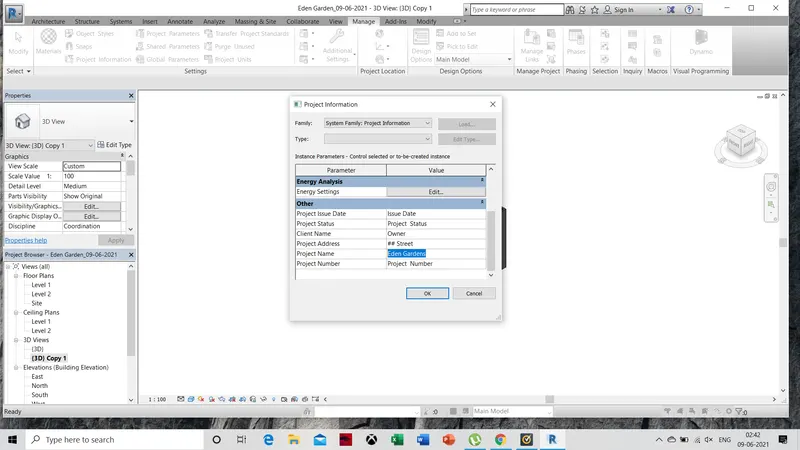
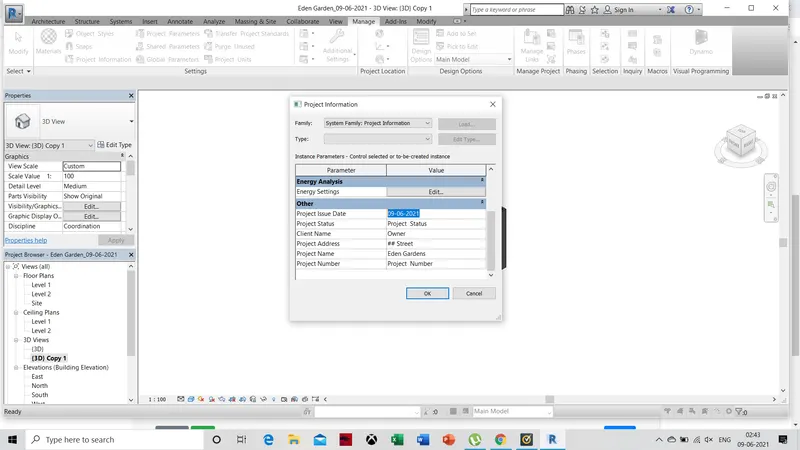
To enter project settings, project name, and project issue date.
Procedure:
Step-1
Click on project information in Manage toolbar.
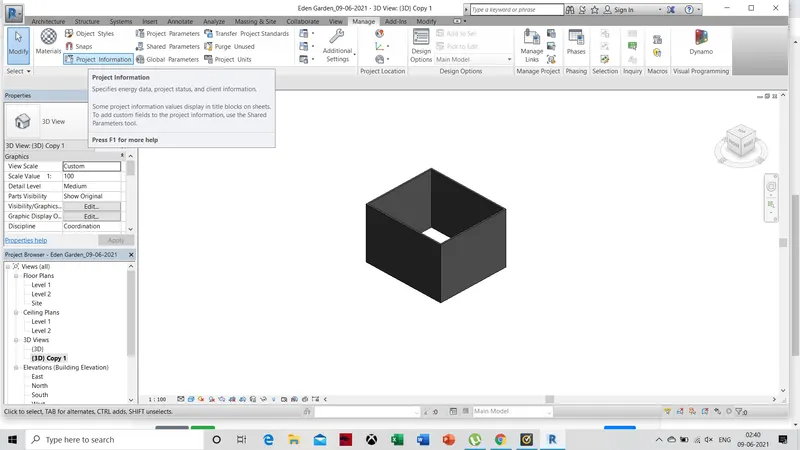
Step-2
Write project name.
Step-3
Type issue date.
11) What is the Analyze toolbar used in Revit? How it is beneficial for design and modeling
Answer
Analyze toolbar used in Revit and beneficial for design and modeling.
Analyse toolbar helps you to perform analysis on our structural building. The boundary conditions enable you to define point line and area boundary conditions in an analytical model.
12) What are the links that Revit supports to be linked to the model?
Answer
Revit can be linked to various design software to transform 2D drawing to 3D / 3D to 2D.
Find below list of various software which revit support.
- AUTO CAD
- SKETCH UP
- LUMION
- REVIT ITSELF
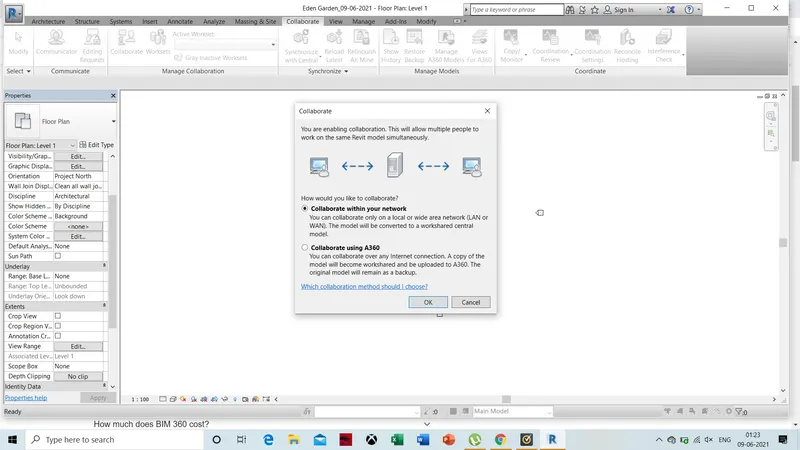
13) Why do you need the Collaborate tab in Revit? How it supports modeling and its efficiency.
Answer
Collaborate tab in Revit Enable you to collaborate same project with diffrent team members to avoid any confusion within team.
Revit provides several different ways to collaborate with team members who are also using the software. You can link multiple Revit models together, allowing team members to work in context. Through worksharing, users on the same local area network (LAN) can work together in the same Revit model.