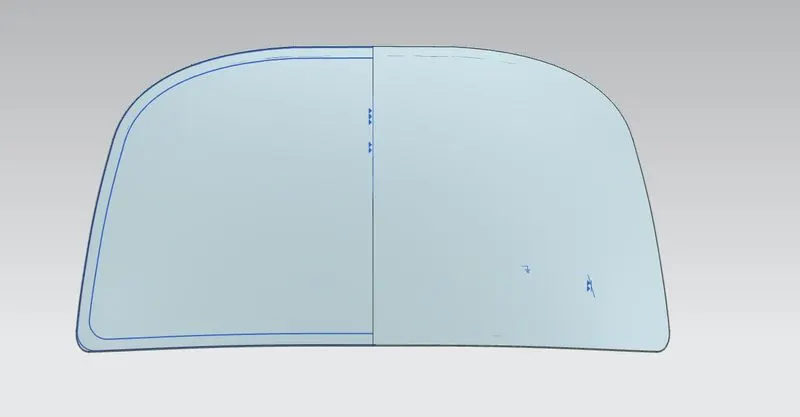
Hood design-Week 2
HOOD ASSEMBLY
AIM:
Design of frontal BIW enclosure of a car( Hood or bonnet)
OBJECTIVES:
- Design hood inner panel by following master section given and creation of emboss
- Creation of embosses in hood inner panel for hinges.
- Assembly creation of inner panel with hinges
- Creation of latch trajectory
- Mounting of assembly and striker with creation embosses on hood inner panel
- Design of hood outer panel with hem creation
THEORY :
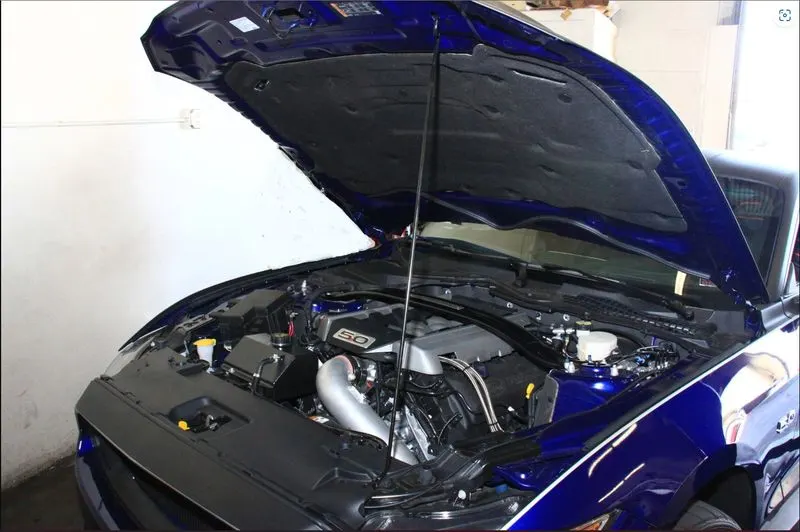
Hood is an opening body part of a vehicle. That covers the engine front engine vehicle.
Basically it consist of inner panel and outer panel. The inner panel provides the strength of hood and outer panel provides the covering part. A car hood is also known as bonnet and hinged cover sites over the front engine vehicle engine. Its function is to allow engine access repair and maintenance.
CAR HOOD PANEL
DESIGN CONSIDERATION IN HOOD DESIGN:
A lot of engineering happens behind the stylish hood design. When a pedestrian is hit by a car he falls on to the hood part. A side reference line is trace of highest contact point between a straight edge inclined at 45 degrees from the ground and the side if the vehicle.
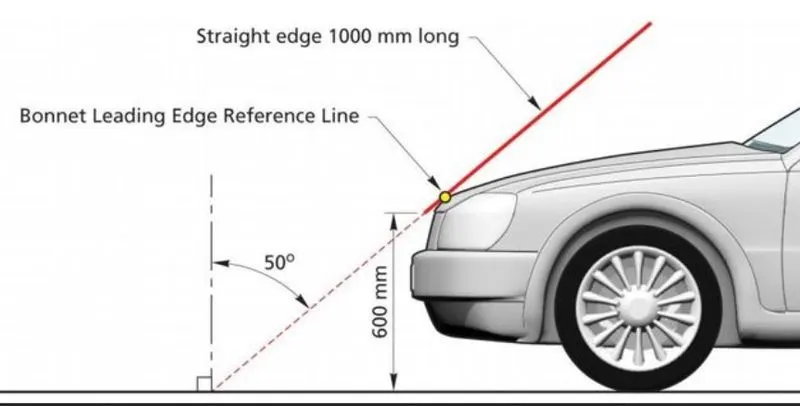
If the side reference line touches the fender of the car and the hood is inlaid type. If it touches the hood the its called a wrap-around hood.
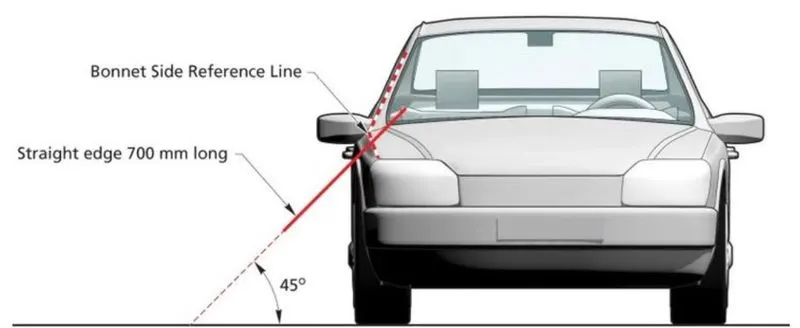
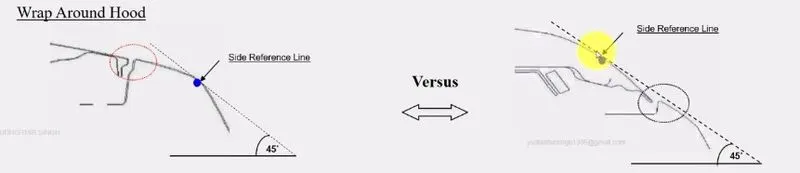
INLAID HOOD DESIGN CAR

WRAP AROUND HOOD DESIGN

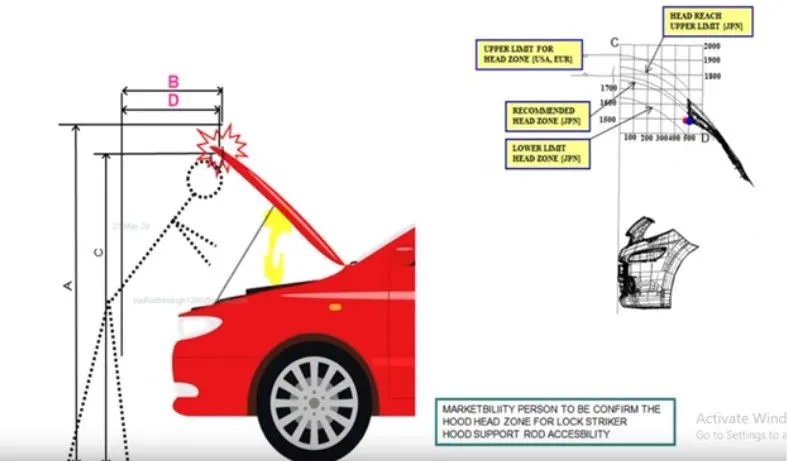
According to different regions, head zones are defined by considering the average heights of pedestrians. The below image shows American, European and Japanese head zone standards. The opening angle of the hood is also decided as per predefined standards.
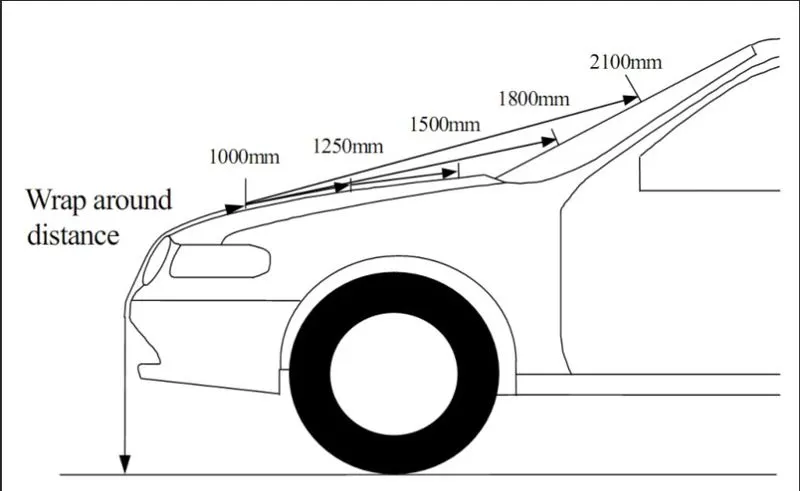
Wrap around distance is the trace of points received on the front structure when one end of the flexible tape of required length is held at the ground reference line and the other end in contact with the front structure.
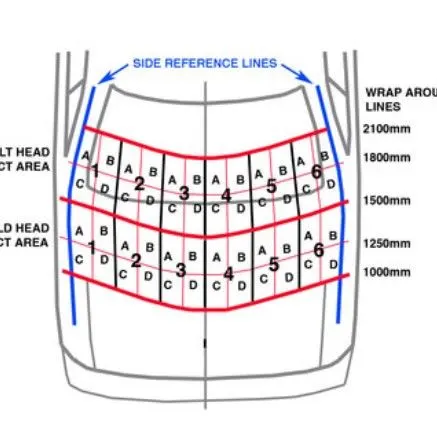
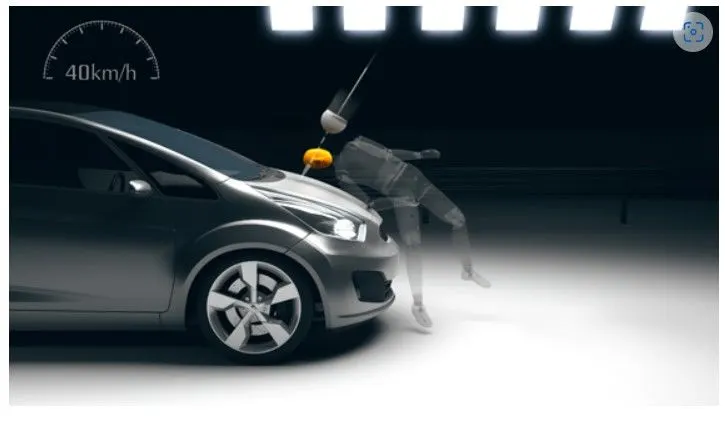
When a child hits on a hood his head will fall between 1000-1500 mm area whereas when an adults hits on hood his head will fall between 1500-2100mm.
EURO NCAO Test
EURO NCAP Test is performed to check the safety of pedestrians by considered by head impact leg impact, etc.
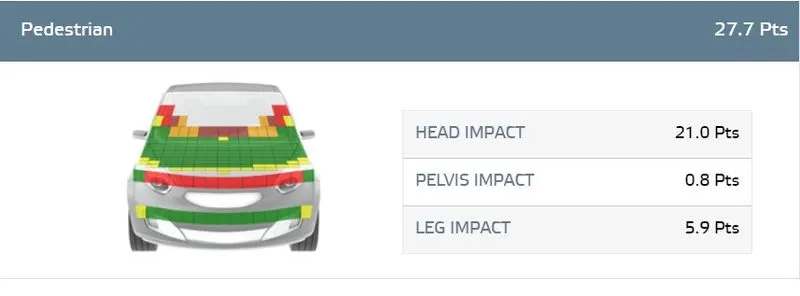
As per head impact criteria should be below 1000 to have a moderate injury. The hood designer’s aim is to develop a hood having major green zone.

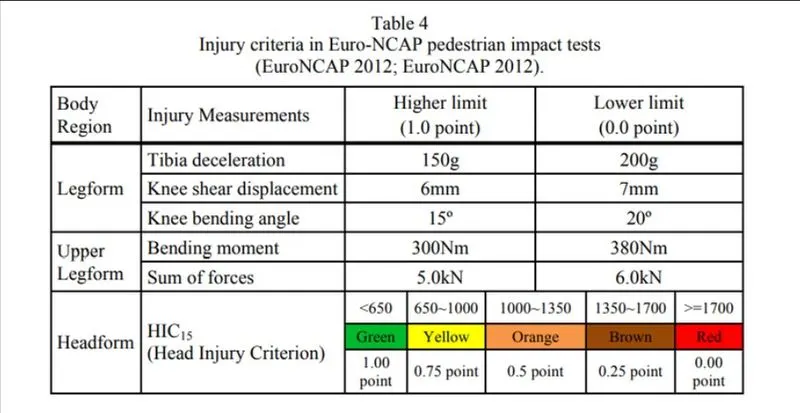
Where t1 and t2 are the initial and final times (expressed in seconds) of the interval during which the HIC attains a maximum value and a(t) is the resultant acceleration expressed in G measured at the head CG.
The time duration (t1-t2) Used in the calculation should be taken as contact time for the impact. However this is often difficult to ascertain in physical evaluation using crash test dummies or headform simulators. In using HIC for assessing the potential of concussion then a max time duration of 15 msec should be used, which was the max time duration for which the original tolerance curve was developed. Longer contact time duration can be used to predict scull fracture.
The highest acceleration, independent of locations or directions, should be used in the head injury criterion, which will therefore be the resultant acceleration measured at the head’s centre of gravity.
After a test, points are allocated to the impact portion (which shows the colour code at impact areas), and accordingly pedestrian safety.
Head impact injury criteria
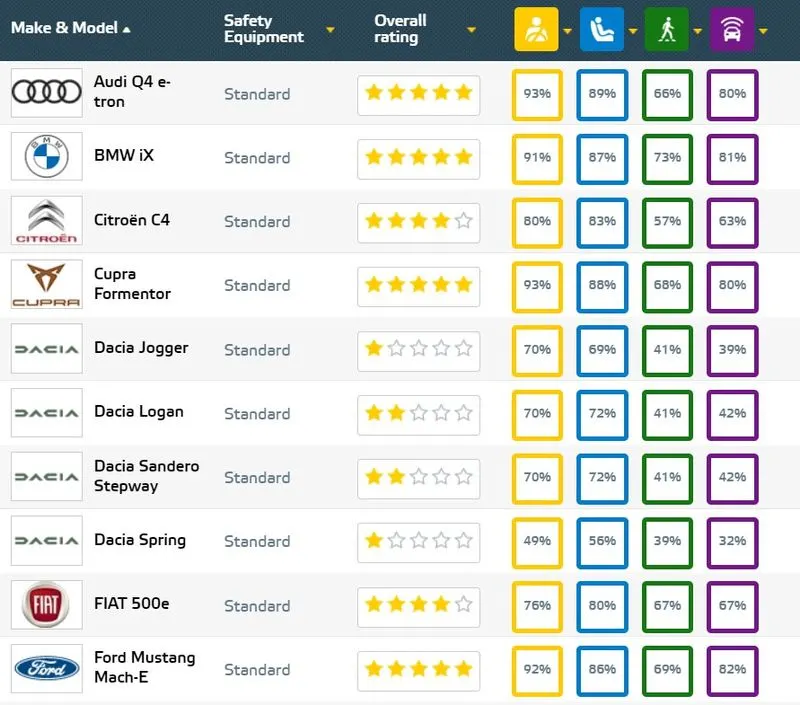
The below image shows different rating is given to the vehicle in 2019 which also consist of pedestrian rating.
Different way to increase Rating
- By removing the excess material from he hood inner panel head injury value can be reduced
- By providing deformable mountings points so that in case of collision they can consume a force by deforming easily leading to an increase in rating
Different parts used in hood
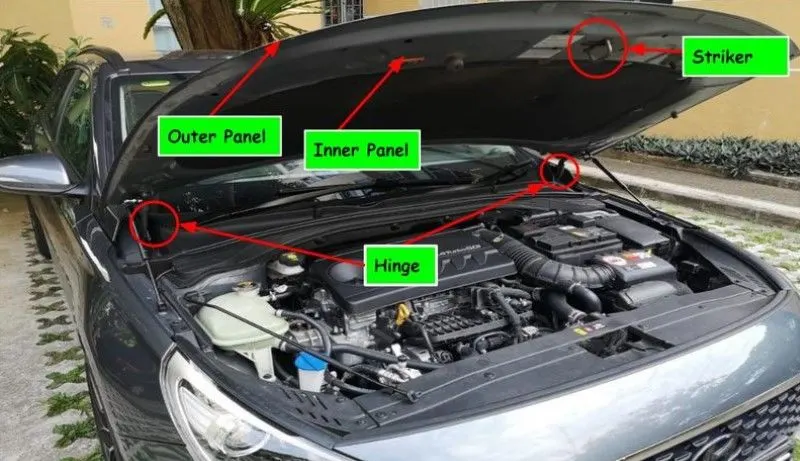
Hood Stay
A hood stay is an apparatus for an engine room of a car which can safely keep an engine hood in an open state even if an external force is abruptly generated due to vibrations, wind and can facilitate an opening/ closing of the engine hood
The hood stay has two types one is a support rod and other is a gas stay
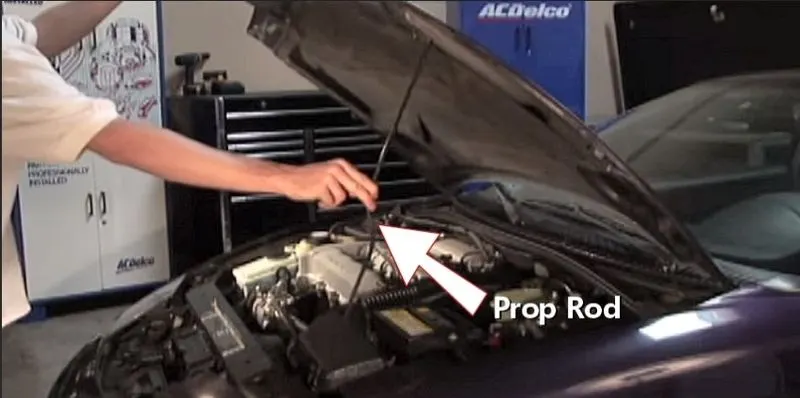
A support rod is a device used for supporting a engine hood of a motor vehicle in its open position by means of a rod
Support Rod: These are designed by providing embosses and holes on them to avoid bending of the rod as compared with straight support rods.
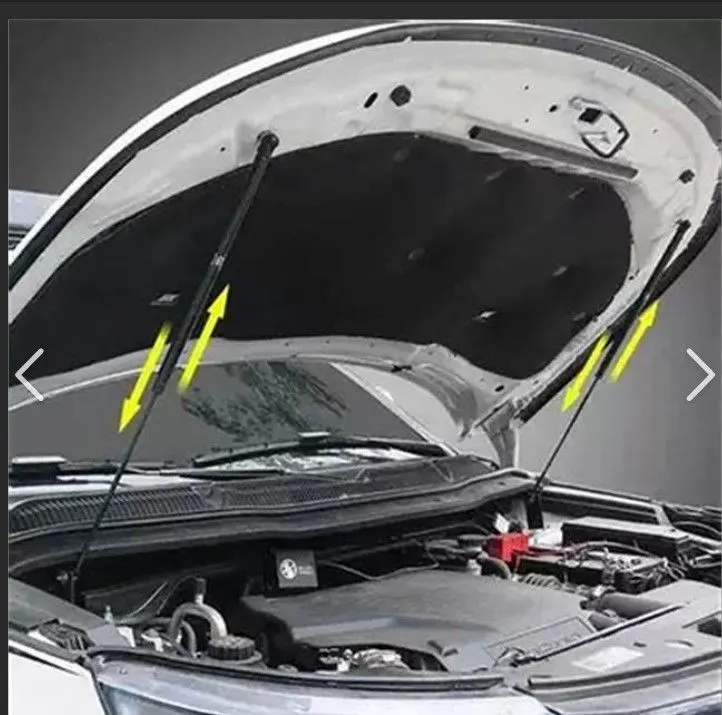
Gas Stay: Gas stay is a device used for supporting an engine hood of a motor vehicle in its open position by means of an actuator that is activated by gas.
HINGES
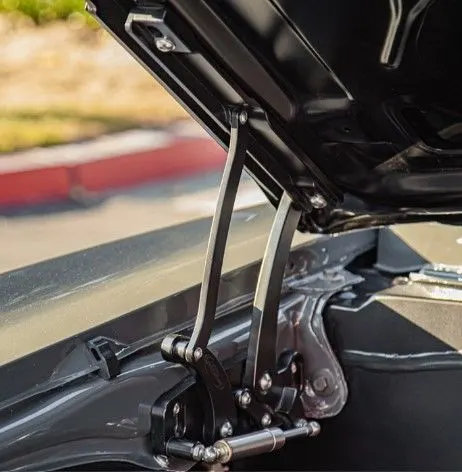
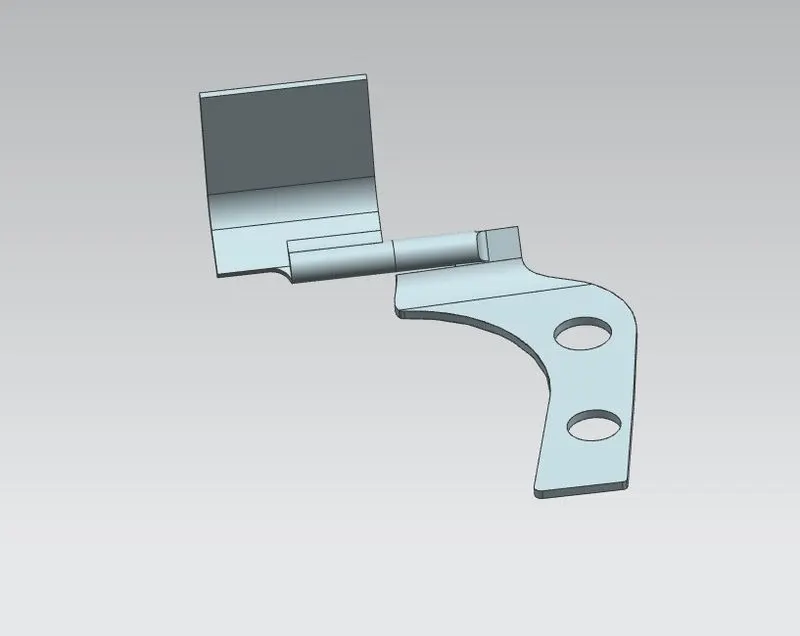
The hood hinge is pivot and bracket mechanism that make its possible for you to open and close your hood.
Each car typically has a pair of hood hinge installed in the front of the vehicle.
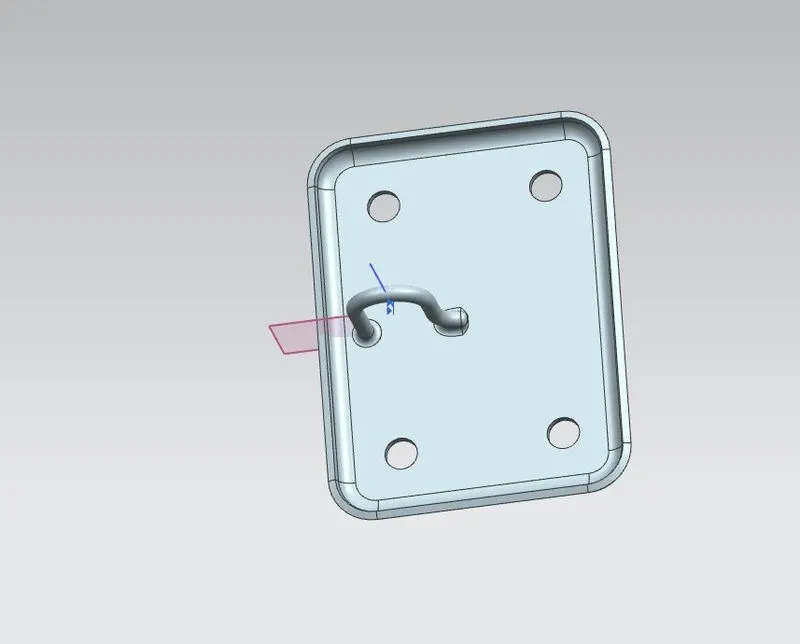
STRIKER:
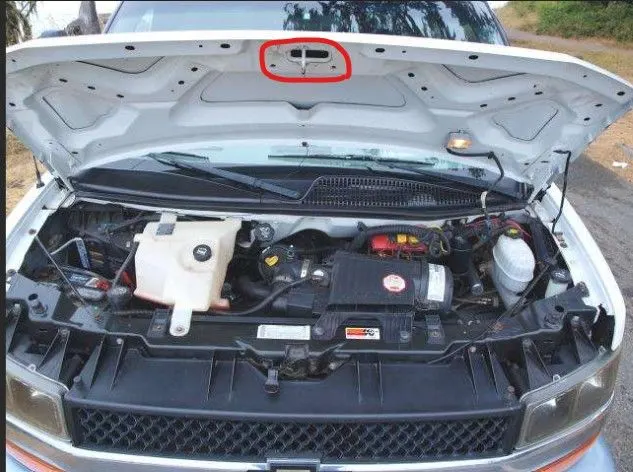
It is attached to the hood and it is used to keep the hood panel in lock position.
Hood latch striker is designed for long-lasting use. It is durable steel construction safeguards against body damage ensuring the vehicle hood won’t unexpectedly open while driving.
Manufacturing processes used in hood design
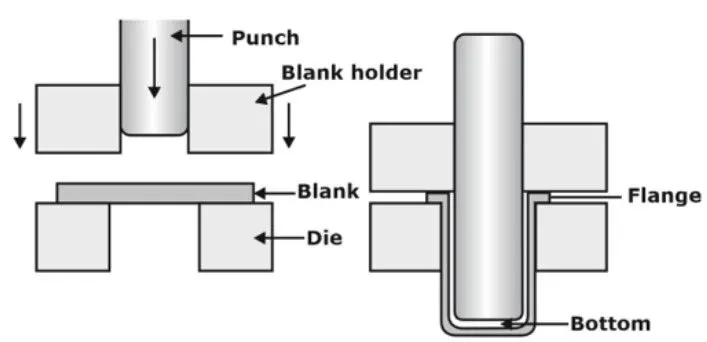
Deep drawing
- The illustration depicts deep drawing technique. A punch, die and a binder is stiff tools. After inserting the metal sheet blank, the plate holder stuffs in deep drawing.
- The sheet is then clamped between the die and binder. This procedure slows the flow of sheet as it is pulled preventing wrinkles from accumulating under the binder
The punch creates the sheet in die by stretching over the die radius. As a result, the amount of punch
The power required for the formation is gradually increased up to the punch’s lower dead centre.
HEMMING:
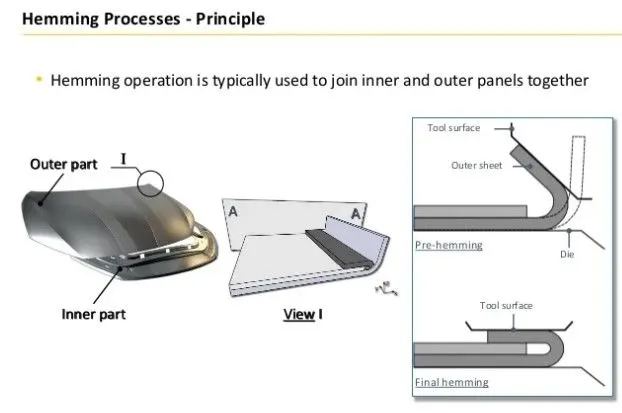
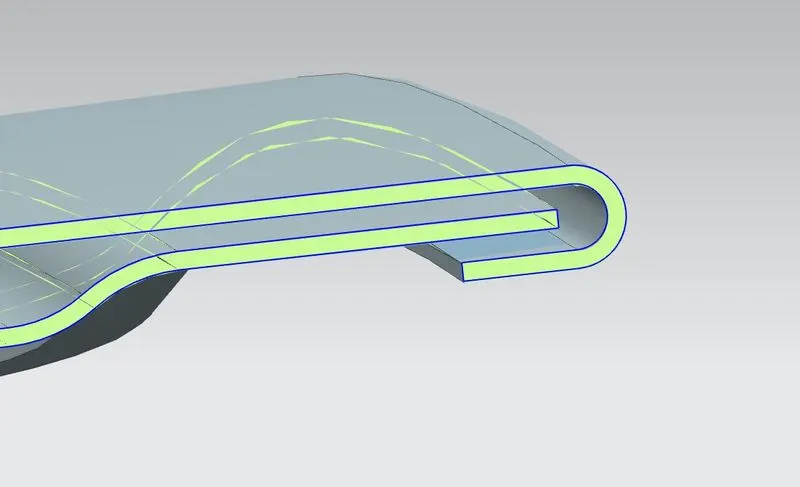
- Hemming is a sheetmetal forming operation that joins sheet by bending them to 180degree
- The hemming technique is used to create automobile
- Body panels and pieces such as deck lids, trunk lids, doors, hoods, and tailgates
MAIN CONTENT:-
Siemens NX 12.0 software was used to create CAD parts and assembly of all surfacing, the majority of all hood is designed
Following comments are commonly used to create the design of hood.
Offset Surface: This command is used to offset the surface to the required distance from the original surface.
Through Curves: By using this command the surface is create between the two different curves.
Trim Sheet : Input for the command is the face of surface and the curve lying on that face using this command unwanted portion f the surface can be removed.
Sew: It is a joining operation performed to knit or join two or more than two surfaces together to create a single surface
Projected Curve: 2D sketch projected on to any flat or irregular face of the surface or body.
Edge Blend: Fillet can be applied on the edges. Edge is chosen where two surface forms the edge
Emboss: With the help of this command any curve can be extruded with some draft.
Mirror Geometry: It is used to mirror the surface
Thicken: Used to give thickness to any surface or converting it into a solid body
Datum Plane: Reference plane which is created on any solid body surface body or with reference of origin.
Extend Sheet :It is used to extend the surface to the required distance by selecting the boundaries of the surface.
Offset Curve in the face: It is used to offset the boundaries of the surface.
Offset: This command is a part of sketch workbench where entities are offset to the required distance.
Design of hood inner panel
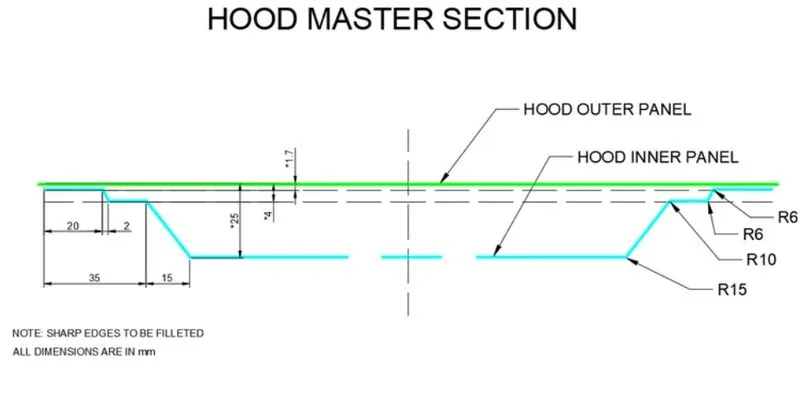
- The below image shows the given master section to create hod inner panel
- Hood thickness and other design parameters information.
1.Outer panel thickness - 0.75 mm
2.Inner panel thickness -0.75 mm
3.Reinforcement thickness - 1.5 mm
4.Minimun fillet radius - 3.75mm
5.No sharp corners inside the component
6.A minimum draft angle 7 degrees
Parts given: Hinge & Striker
Hinge:
Striker:
Emboss Creation:
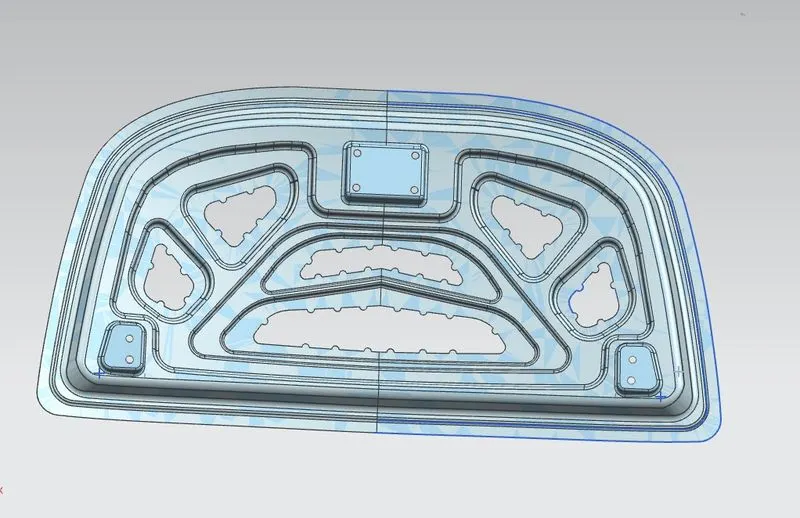
Emboss creation for inner panel
- Sheet metal embossing is a stamping process for producing raised or sunken designs or relief in sheet metal. This process can be made by means of matched male and female roller dies or passing sheet or a strip of metal between rolls of the desired pattern. It is often combined with foil stamping to create a shiny, 3D effect.
- 6 embosses were created into the inner panel which is a type of circular slot.
- The purpose of providing these embosses is to reduce the intensity of the front impact by diverging the forces into different directions rather than in the straight direction.
Embosses Creation for hinge:
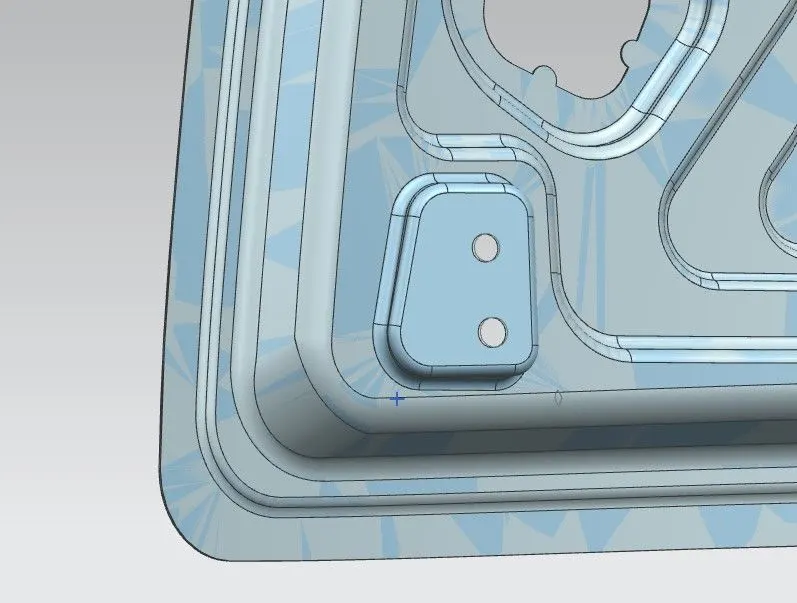
The inner panel surface is not a flat one. It is curvy surface. Hinge will not fit properly on a curvy surface Hence, a datum surface is created at some distance from inner panel and created a emboss parallel to the datum surface and offset the emboss.
Emboss creation for Striker:
The inner panel surface is no flat surface is created at some distance from inner panel, and using law extension emboss is create on to it.
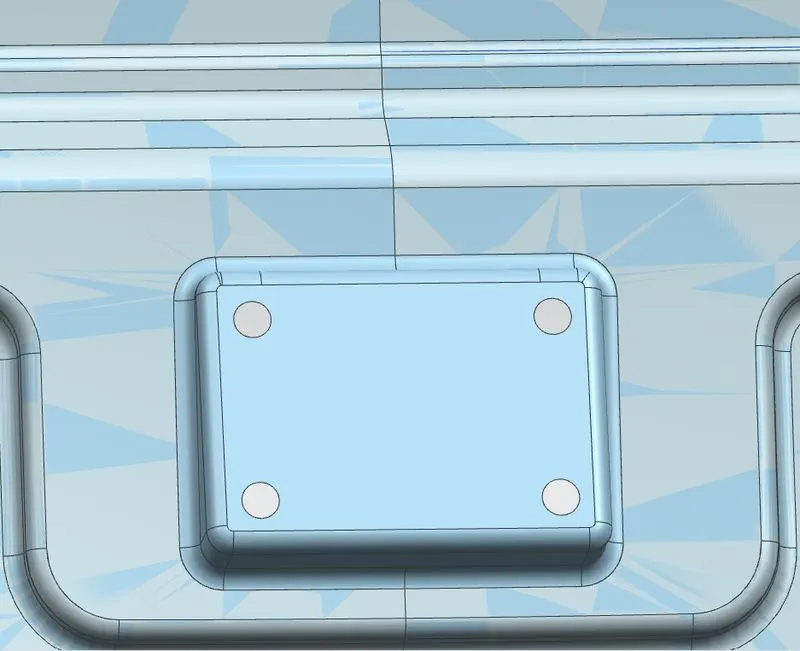
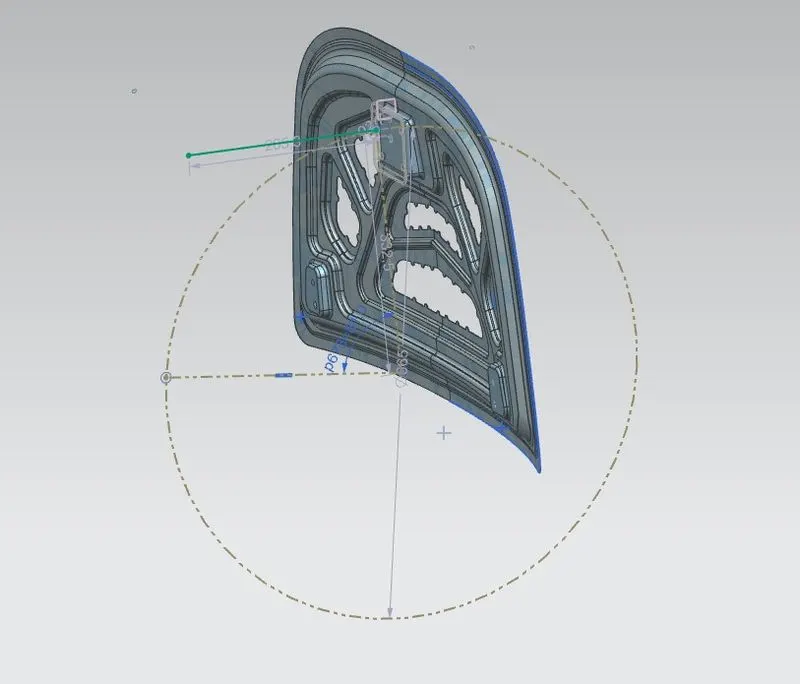
Latch Trajectory Motion
To ensure proper closing and opening of the hood panel, the striker is placed in such a way that its trajectory is perpendicular to the hinge axis (shown in blue)
Reinforcement Creation
Reinforcement are the support given to hinge and latch emboss as direct forces act onto it. To provide extra strength reinforcement have been provided.
1.5 mm plates used as reinforcement at the hinge and latch emboss back face
Mastic Sealant
The mastic sealant, often known as the mastic point is rubber like elastic material. Spots are specified on the inner panel of the hood where the hood may readily distort.
They aid in the restoration of the hood’s outer panel to its original shapes once it ha become distorted. The mastic has an 80mm influence area.
Hem Relief
While performing hemming operation rollers rolles over the outer panel surface to create a hem.
At he corner the portion roller tends to roll the sheet in a nonuniform manner due to the presence of curvature.
Hence the necessary to provide some relief at corners.
Front Relief Hem
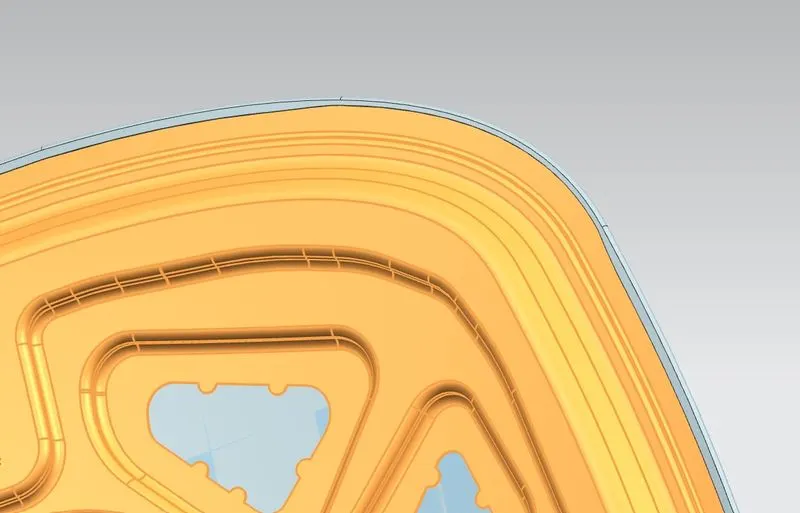
Rear Relief Hem
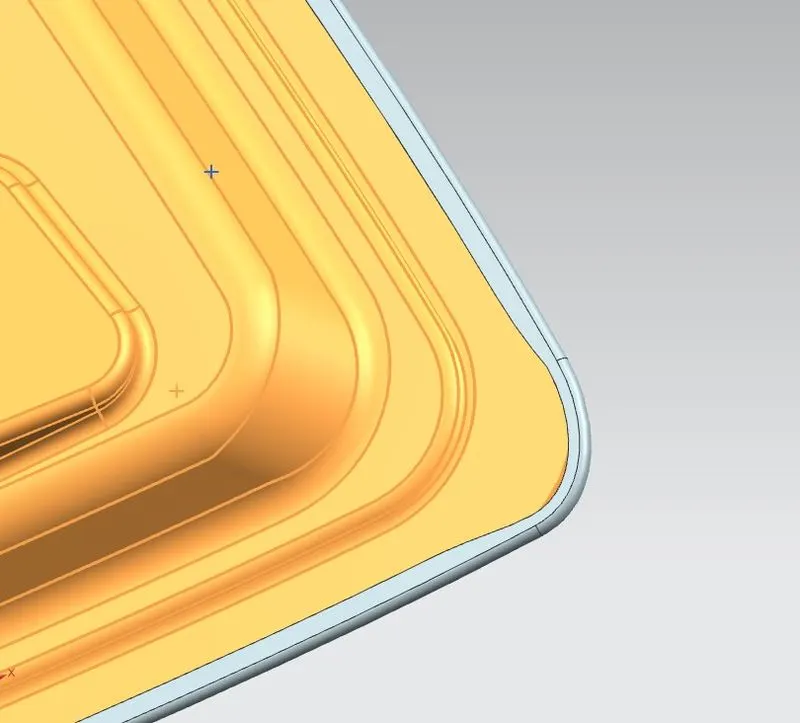
Required Hem
By following the given dimensions of hem is created to join an outer panel with the inner panel.
Using three face blend option hem is formed.
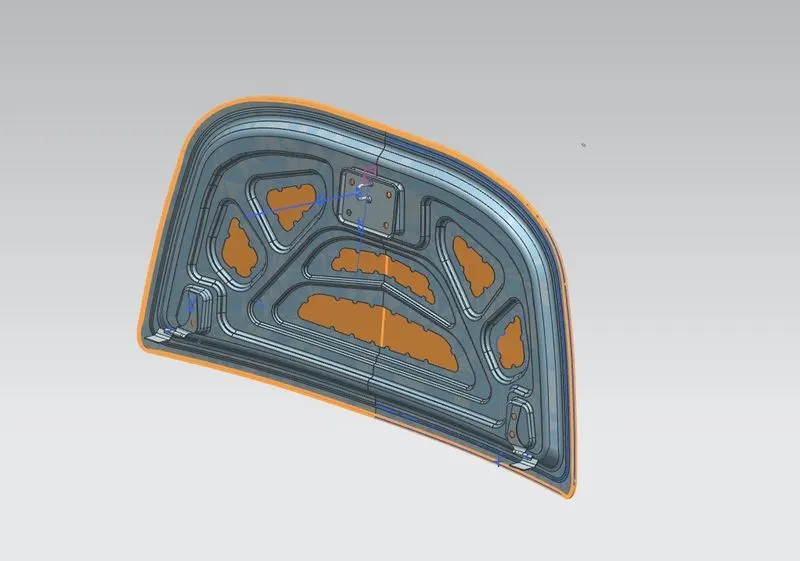
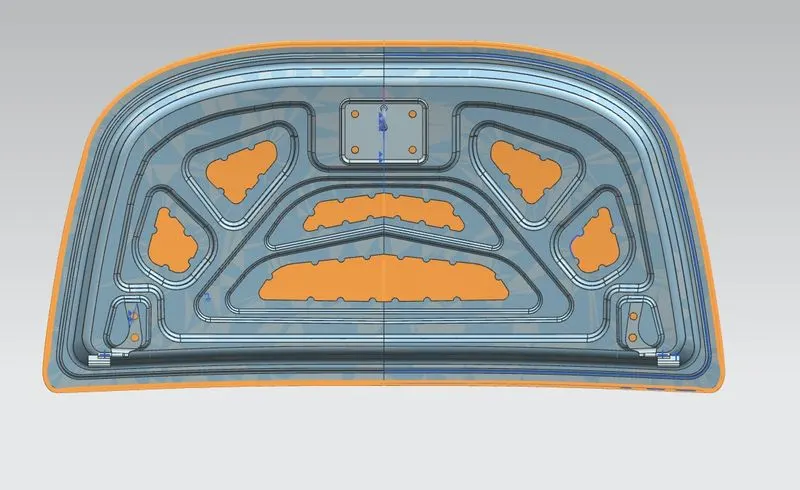
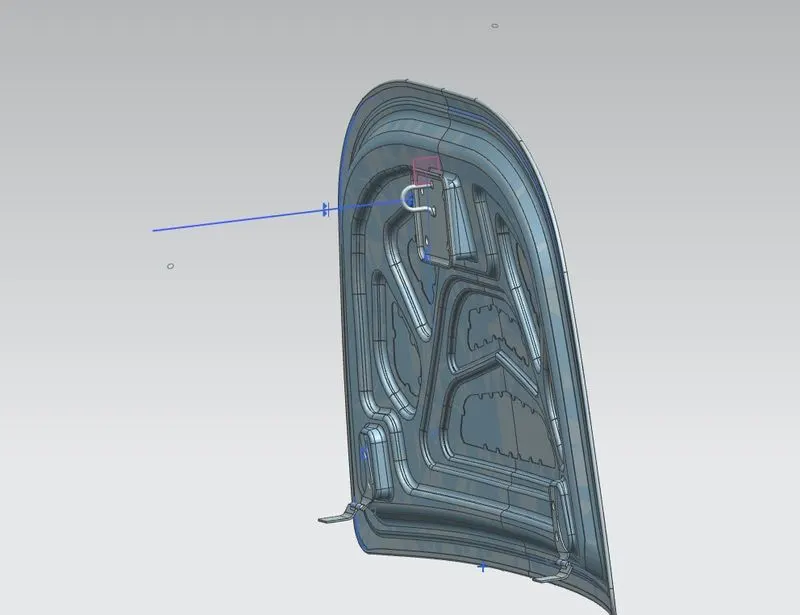
Assembly
Striker is assembled using trajectory sketch point, midplane, and axis alignment constrains.
Hinges are assembled using face alignment and distance contrains.
Isometric View:
Back View:
Side View:
Front View: