Hood design-Week 2
AIM:
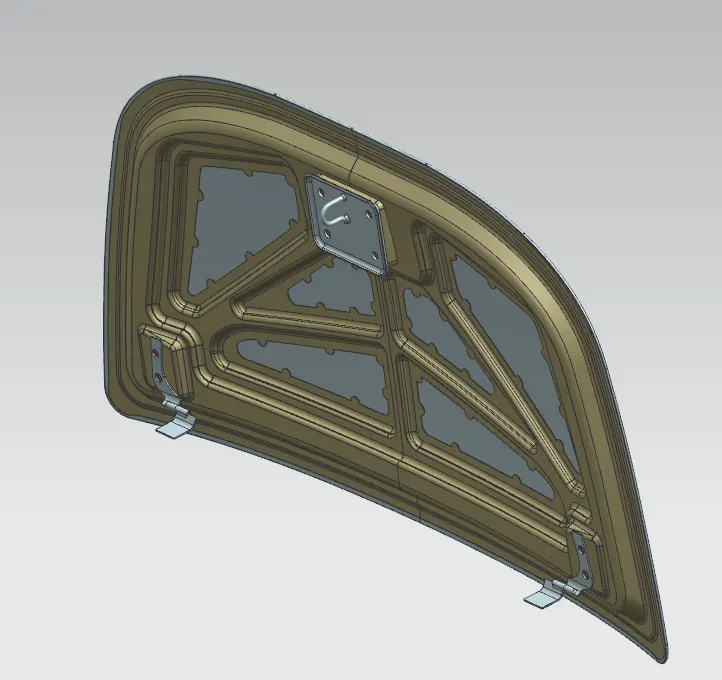
My aim for this project is to create a hood assembly from the hood outer panel which is provided as input surface to us according to the master section sketch.
INTRODUCTION:
- The hood is the hinged cover over the engine of motor vehicles. Hoods can open to allow access to the engine compartment (or trunk on rear-engine and some mid-engine vehicles) for maintenance and repair.
- In design perspective hood should meet some specific conditions like pedestrian safety, hood head zone for the lock striker, force distribution when subjected to frontal collision (occupant safety), manufacturability etc.
- A typical hood assembly consist of hood outer panel, inner panel, latch and striker, hinge, hood stay. Hood stay is an apparatus for supporting the engine hood of a moto vehicle in its open position.
- It is the most critical part of the car as it is always exposed to the frontal crash, climatic conditions, heat generation by the engine compartment, etc.
- This gives access to the engine, battery, and other components which are always needed to be inspected at regular intervals. The time of inspection could be maintenance, repair or replacement of the parts.
- Hood is the combination of an outer and inner panel and as per its design consideration, it also dissipates energy outside the car body.
Components:
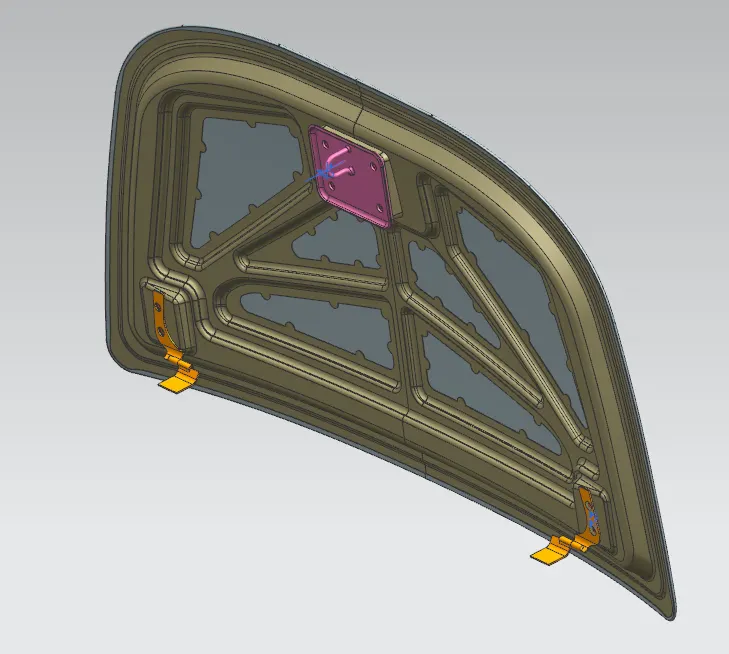
Hood assymbly mainly consists of 4 components
- Outer panel
- inner panel
- Hinges
- Latch striker
DESIGN CONSIDERATIONS FOR CAR HOOD :
- Head clearance zone
- Consideration of Noise Vibration Harshness (NVH): Noise, vibration, and harshness (NVH), also known as noise and vibration (N&V), is the study and modification of the noise and vibration characteristics of vehicles, particularly cars and trucks. While noise and vibration can be readily measured, harshness is a subjective quality, and is measured either via "jury" evaluations, or with analytical tools that can provide results reflecting human subjective impressions.
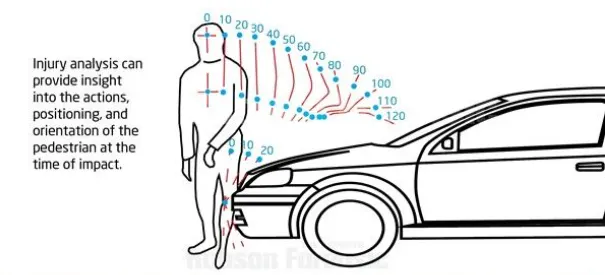
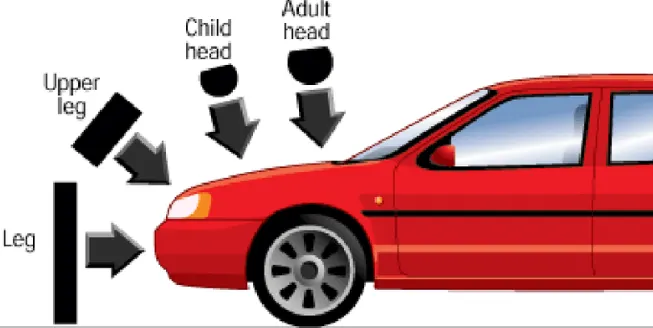
- Pedestrian safety: Pedestrian safety is important consideration while designing the hood. According to the wrap around distance and pedestrian head impact zone hood is designed. Safety is the most important criteria in automobile designs which concentrates on both pedestrian and occupant safety. The pedestrians are the most vulnerable road users and are at high risk of traffic accidents. The major reason for the fatality of the pedestrian in traffic accident is due to the head injury resulting from the hard impact of the head against the stiffer hood or the ground. This leads to the necessity of new inner hood panel which is less stiffer and pedestrian friendly. The area at the head impact zone is made softer to reduce the impact force during accident.
Construction:
1.Hood Outer panel:
- Outer panels are the aesthetic elements of a car.
- It is the styling team who provides the skin for the outer panel.
- The shape, position and size of the hood should satisfy the safety norms.
- So while designing the hood we should give more importance to pedestrian safety.
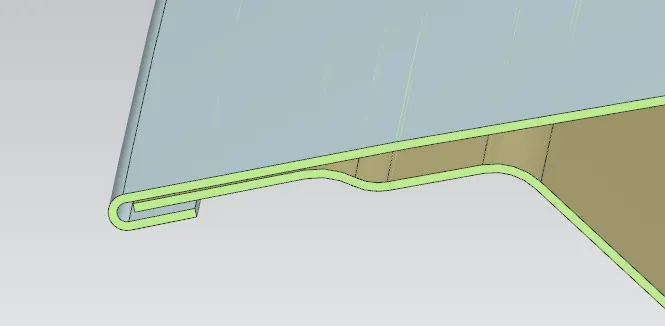
- The outer panel is attached to the inner panel by hemming.
- So, it is necessary to provide required hemming flange and reliefs for the hemming operation.
- We also provide mastic sealants between outer panel and inner panel to reduce vibration
Image of Hood Outer Panel
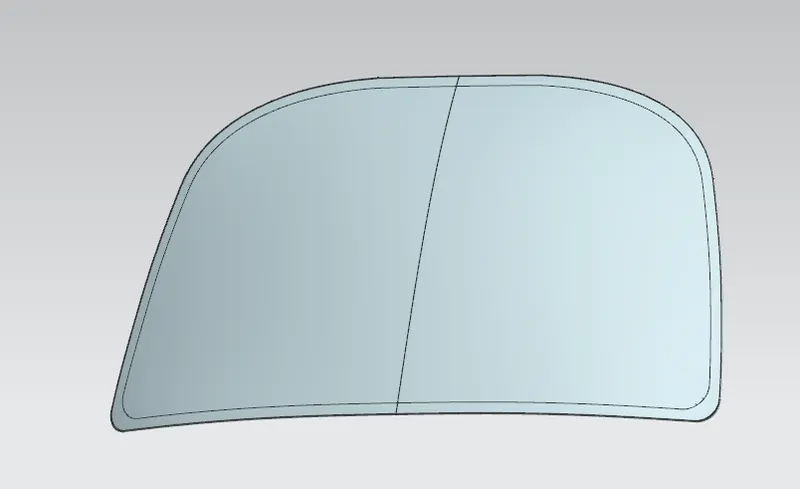
Hood Outer panel consists of as per the given task
- Section view
- Front Relief
- Rear Relief
- Hemming Data
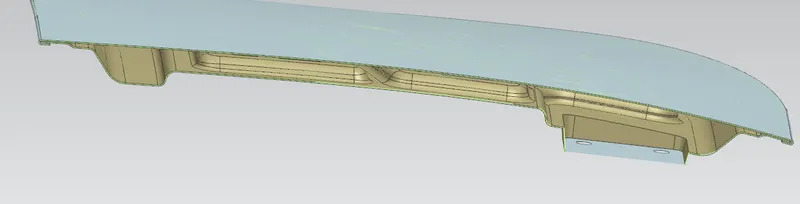
- Section View as per diagram:
The sectional view is given as per the task.
- Front Relief
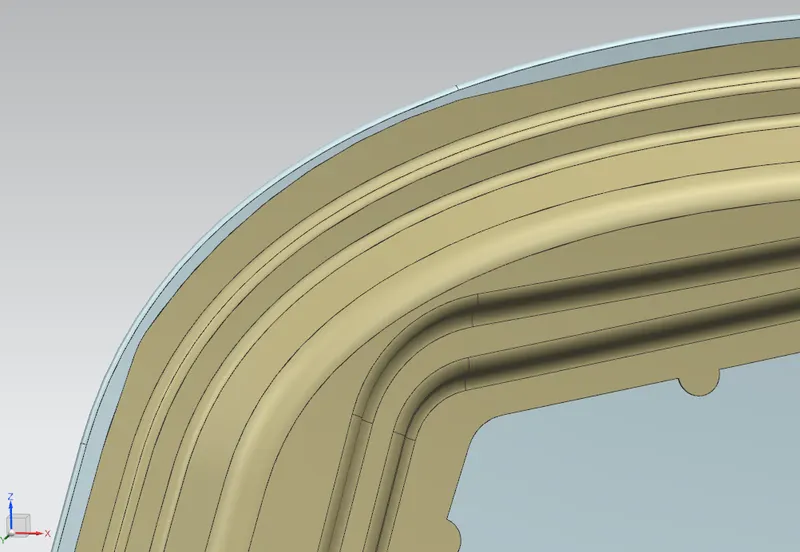
The front relief is about 3mm from edge.
- Rear Relief
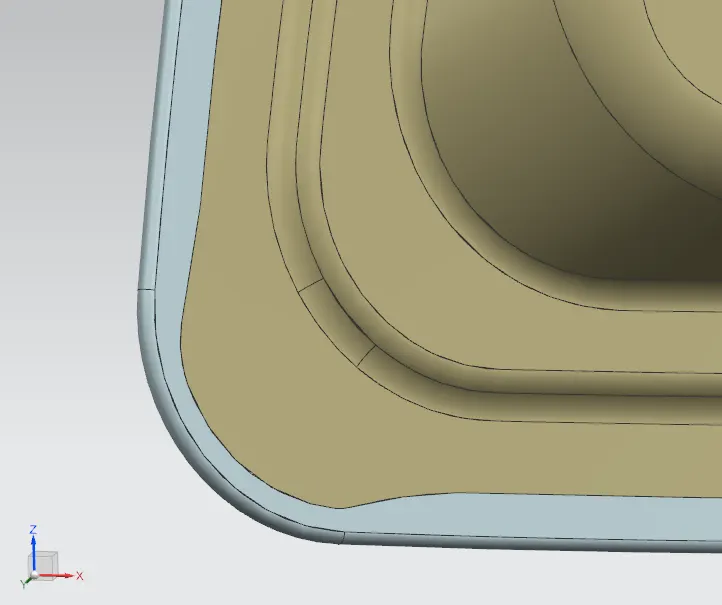
The Rear relief is about 3mm from edge.
- Hemming Data
The hemming Data is shown as per the task
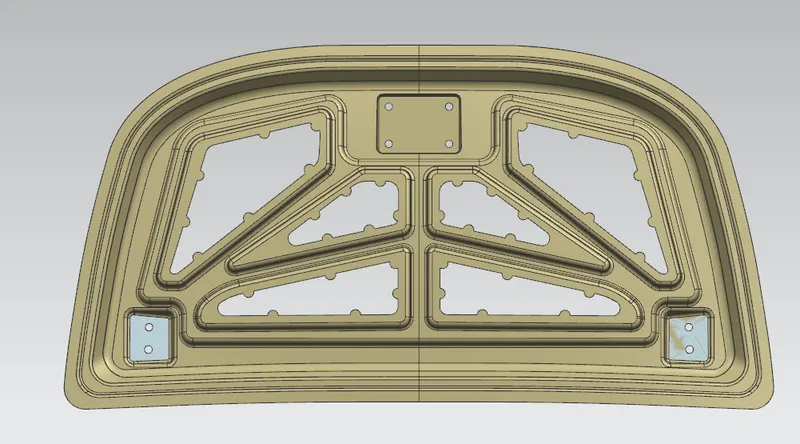
2.Hood inner panel
- Inner panel is the part that gives strength and rigidity to the outer panel.
- The master section represents the initial emboss shape and size.
- Then we provide the emboss for the latch and hinge elements after fixing the location.
3.Reinforcement :
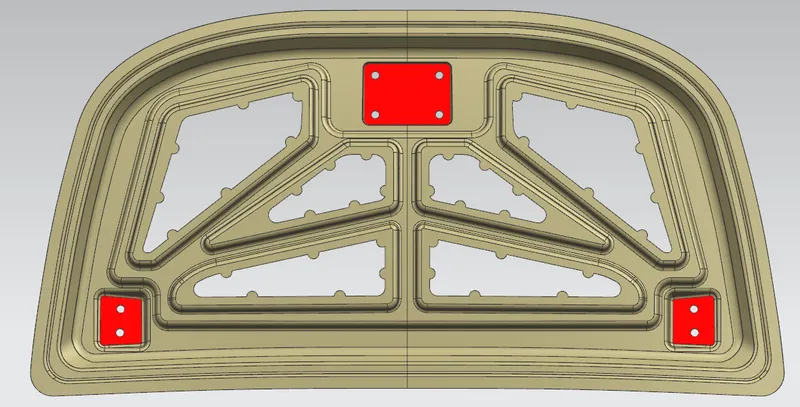
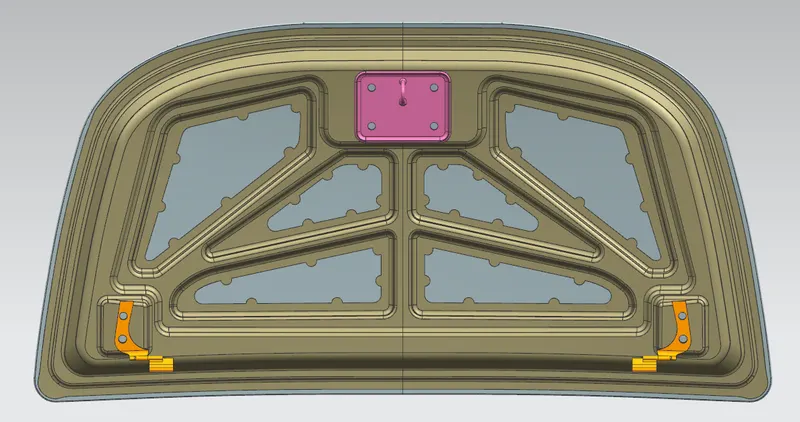
- Reinforcements are provided according to the design requirements.
- Mainly it is provided at the hinge and latch regions to improve the strength locally.
- Usually thickness of reinforcements will be higher than that of the inner panels and the value varies according to cost and requirement.
- According to the design requirement here it is given 1.5mm thickness to both hinge and latch reinforcements.
4.Latch Trajectory :
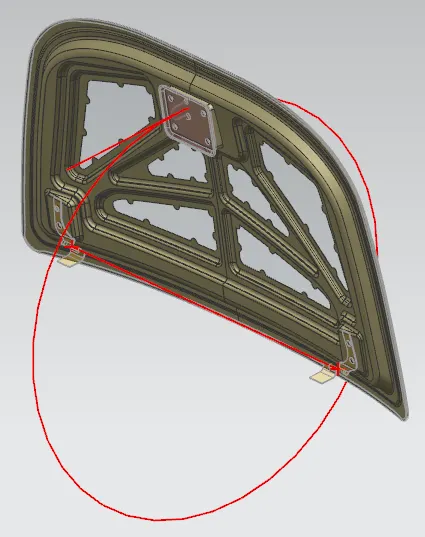
- Latch trajectory is given by the circle drawn from the hinge axis point.
- Hinge axis point is the centre point of the hinge axis. First, we can fix either the latch or the hinge.
- If we have fixed the hinge position then we should plot the Trajectory circle for the latch.
- For proper mating condition the striker axis through the tip of the striker should be tangential to the latch trajectory.
5.Emboss :
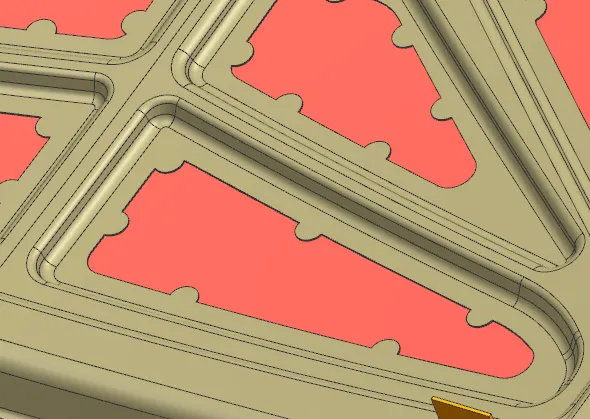
- We provide different embosses throughout the inner panel .
- We can increase the stiffness of the inner panel through these embosses.
- The shape and size of the embosses also determines the direction of the force distribution resulted from frontal collision.
- The force should be always distributed away from the passengers.
- Here in the figure the embosses are designed in such a way that the force is directed to either sides of the car.
- for embos the angle is greater than 17 degree for stamping purpose.
6.Mastic Sealant Data :
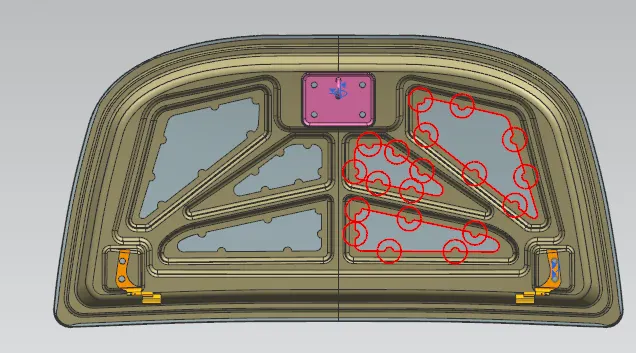
- Hood commonly possess large surface area and hemming can only be provided through its boundary.
- We cannot use other joining techniques like welding, riveting etc because they leave marks on the outer panel which spoil its aesthetic appearance.
- So, mastic sealants are used to stick the inner surfaces of outer panel and inner panel.
- Mastic sealants are elastic compound that behave like rubber.
- It is applied between the inner and outer panels at specified spots.
- Each spot of mastic sealants has its effect around a circular region of 80mm diameter.
- Thus, the mastic points are arranged in such a way that it covers the areas away from the hemming which are more vulnerable to vibrate.
7.Final Assembly:
Conclusion:
In this challenge I learned to design the hood inner panel, outer panel with the help of master sketch and the styling surface. And also learnt the assembly of Hood inner panel, Outer panel, and the reinforcements like latch and hinge assembly