Hood design-Week 2
HOOD DESIGN
AIM: - HOOD Design Using NX CAD
INTRODUCTION
A car hood is also referred to as a bonnet some other countries. Generally, it is used to cover the engine and its accessories. Hood also considered as another door which is used to repair and helped to maintenance engine.
In design perspective hood should meet some specific conditions like pedestrian safety, hood head zone for the lock striker, force distribution when subjected to frontal collision, manufacturability.
A typical hood assembly consists of hood outer panel, inner panel, latch and striker, hinge.
A car hood is meant to protect the performance parts of your vehicle, including the engine, while also providing easy access for repairs and maintenance.
Design Considerations for Car Hood
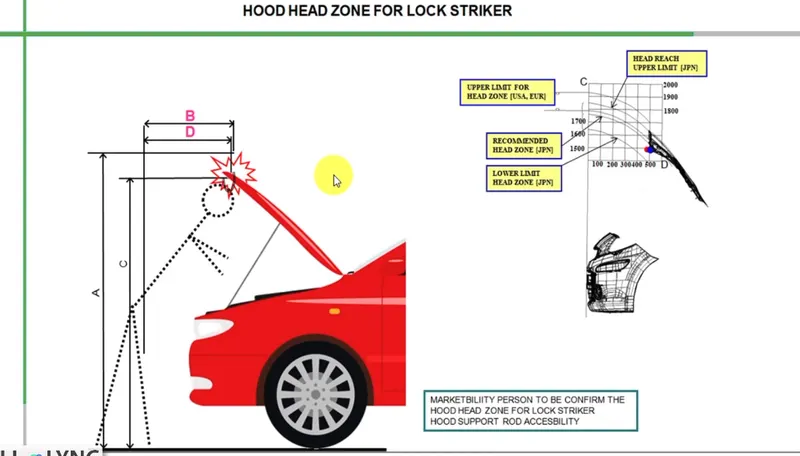
1. Head Clearance Zone
Head clearance zone is the very important when designing the car. Head clearance zone means the hood is open and the person is repairing the engine then the person is stand proper and work is easily. When the Person head and hood gap is less so the person is not work properly and the head touch to the hood so the gap is required between the head and hood this gap is called the head impact zone. Head impact zone decides by the Person height.
In the head impact zone, the opening angle is most important because the opening angle is less then the hood is open less and any worker is not work the properly in the engine compartment so the opening angle is also most important factor.
2. NVH (Noise Vibration Harness)
NVH is the study and modification of the noise & vibration characteristic of vehicles, particularly care and trucks. While noise and vibration can be readily measured, harness is a subjective quality, and is measured either via” jury” evaluations, or with analytical tool that can provide result reflecting human subjective impressions.
3. Pedestrian Safety
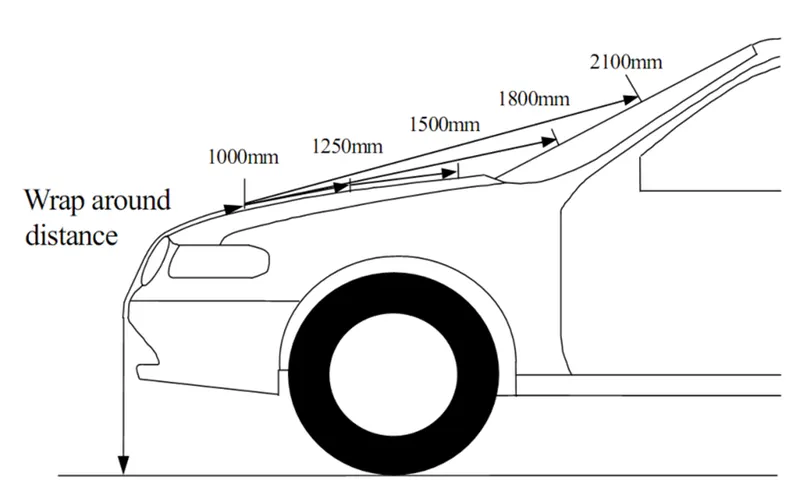
Pedestrian safety is important consideration while designing the hood. According to the warp around distance and pedestrian head impact zone hood is designed. Safety is the most important criteria in automobile design which concentrates on both pedestrian and occupant safety.
4. Warp around distance
When a car crashes on a pedestrian the whole-body wraps around the front shape of the car and the head impact on the windscreen. The distance on which the head impact the car from the ground is called WAD.
5. Force Distribution
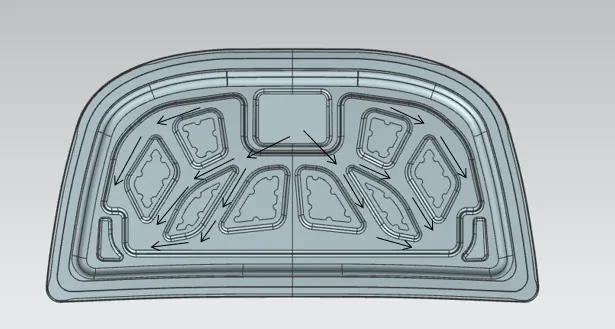
When the force is acting on the center of the hood the force should be spread like a wave instead of a single direction. It will drastically reduce the impact on the passengers
Using the emboss on the inner part on the hood and remove the part on the inner panel the force is distribute and move on the hinges. The part removes then the weight is removed so the performance of the vehicle is increases.
Design Parameter
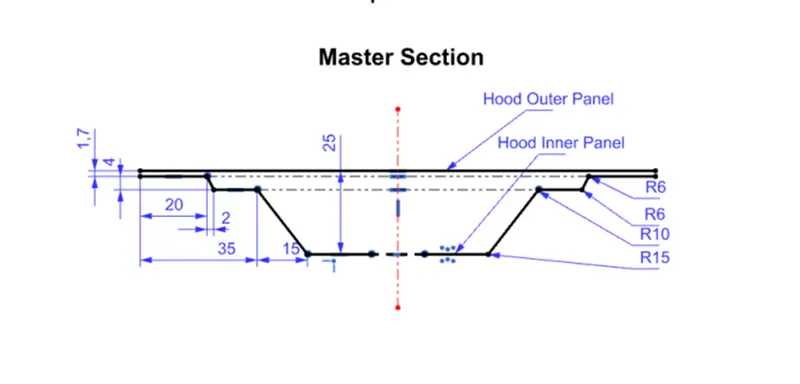
Outer Panel Thickness = 0.75mm
Inner panel Thickness = 0.75mm
Reinforcement Thickness = 1.5mm
Design
Common Command used for the design the Hood
- Offset surface
- Offset curve on surface
- Trim Sheet
- Through Curve
- Law Extension
- Emboss
- Face Blend
- Edge Blend
Outer Panel
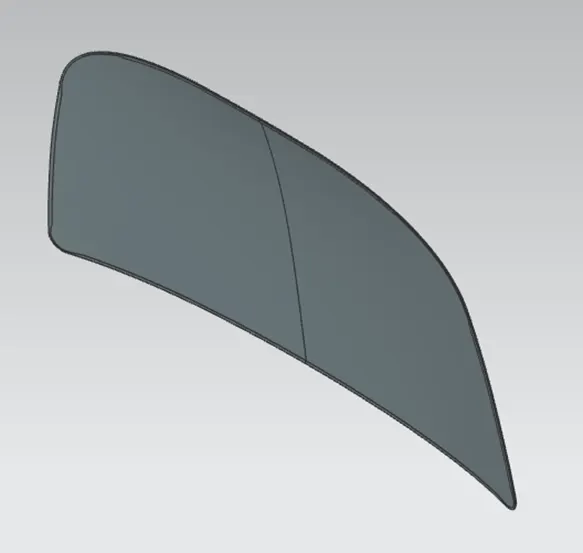
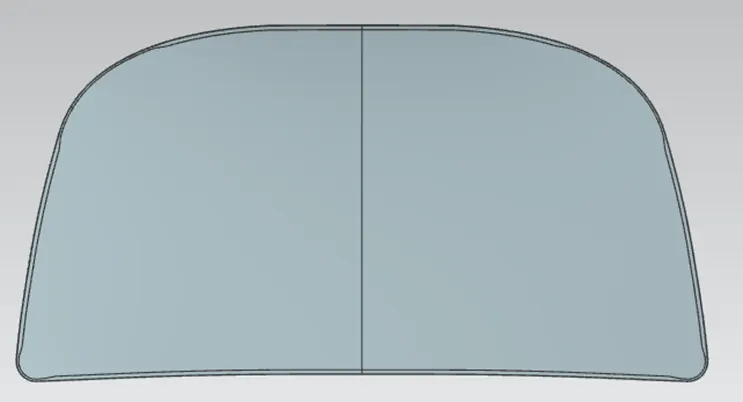
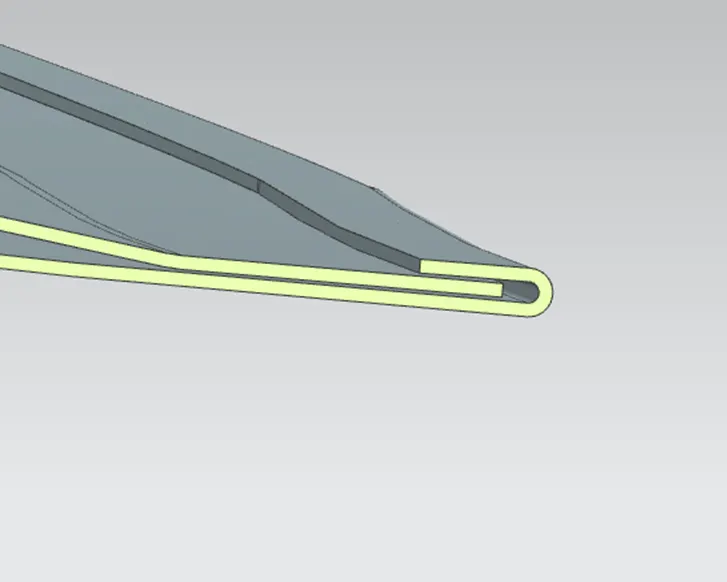
Outer panel is nothing but a outside cover for the engine and it’s a used to make a car looks good. Outer panels are the aesthetic elements of a car. It is the styling team who provides the skin for the outer panel. The shape, position and size of the hood should satisfy the safety norms. So, while designing the hood we should give more importance to pedestrian safety. The outer panel is attached to the inner panel by hemming. So, it is necessary to provide required hemming flange and reliefs for the hemming operation.
We are also providing the mastic sealants between outer panel and inner panel to reduce vibration.
Hood Inner Panel
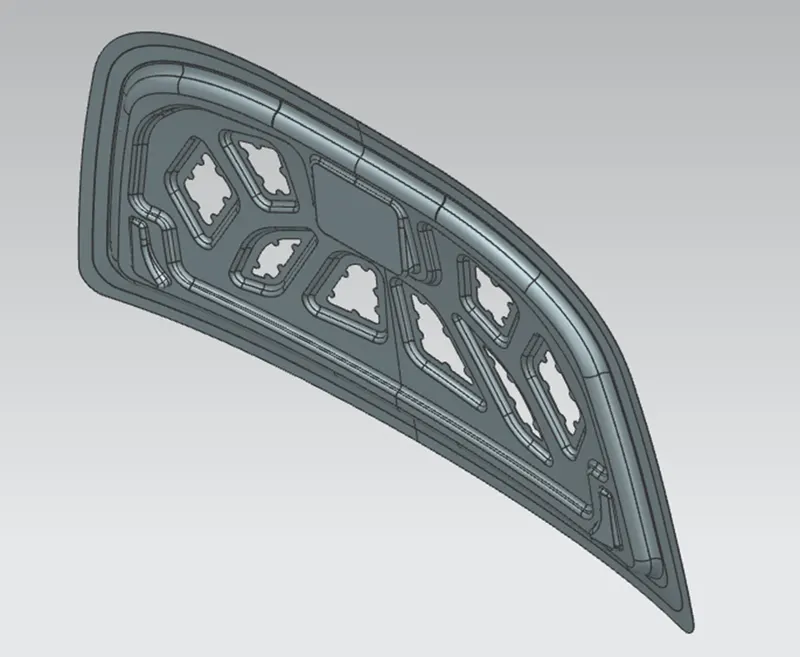
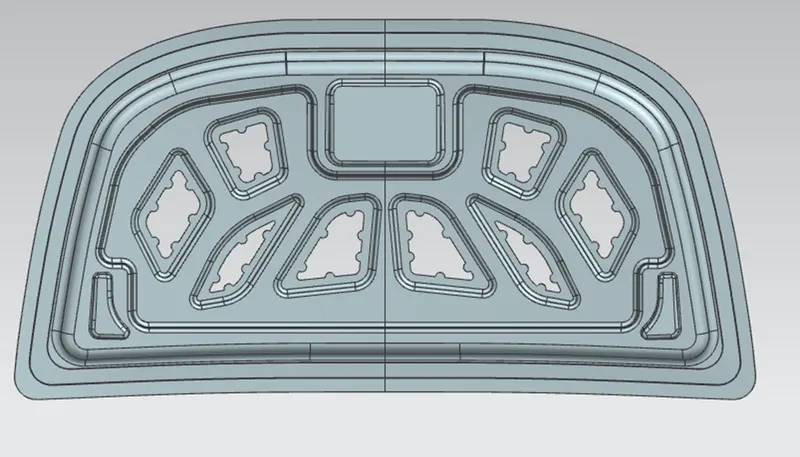
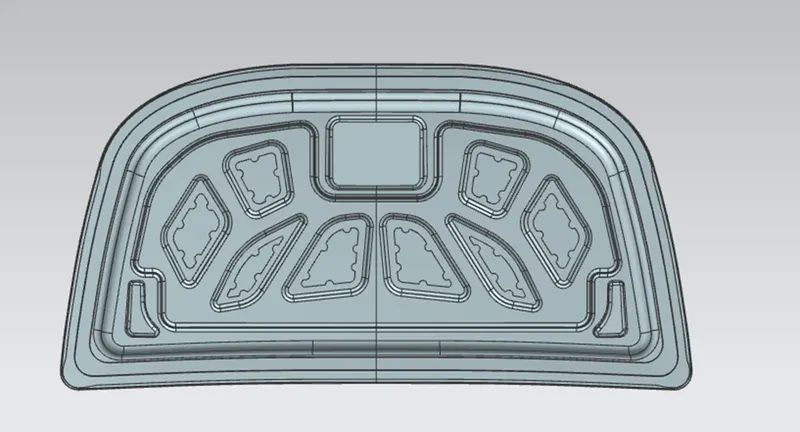
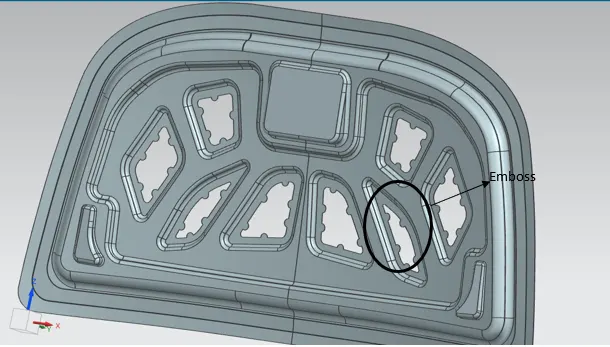
The inner panel supports the outer panel. It consists of embosses & holes. Embosses provide stiffness as well as it dissipates energy towards reinforcement. Inner panel is the parts that give strength and rigidity to the outer panel.
Emboss
We can provide different embosses throughout the inner panel. We can increase the stiffness of the inner panel through these emboss. The shape of the embosses also determines the direction of the force distribution resulted from frontal collision.
Deep Drawing
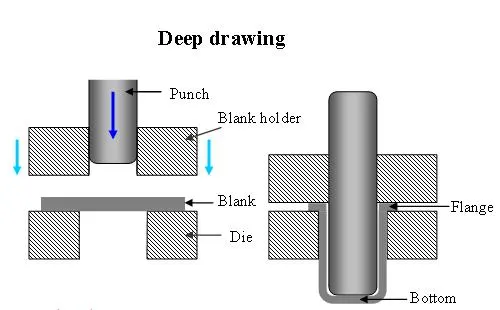
Deep drawing is one of the most widely used processes in sheet metal forming. Apart from its use in many other sectors, it is applied in the automotive industry for the manufacturing of car body parts. The deep drawing process is a forming process which occurs under a combination of tensile and compressive conditions.
Deep drawing is a sheet metal forming process in which a sheet metal blank is radially drawn into a forming die by the mechanical action of a punch. It is thus a shape transformation process with material retention. The process is considered "deep" drawing when the depth of the drawn part exceeds its diameter.
Hemming
Hemming is a forming operation in which the edge of the sheet is folded or folded over another part to achieve a tight fit. In car part production, hemming is used in assembly as a secondary operation after deep drawing, trimming and flanging operation to join two sheet metal parts (inner and outer) together. The accuracy of the hemming operation is very important since it affects the appearance of the surface and surface quality.
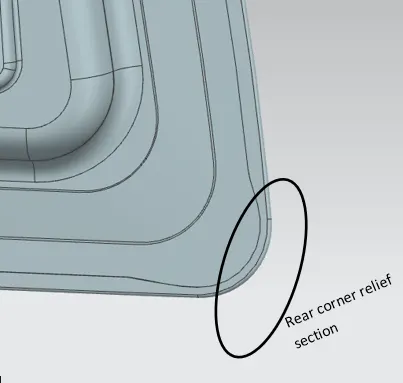
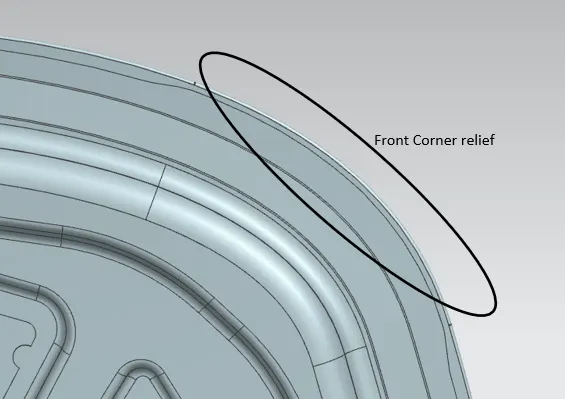
In manufacturing process, rollers are used 3 to 4 times to get a final result. While hemming the sheet metal it is necessary to give a relief area in the corners to reduce the internal stress.
Mastic Sealant Data
Hood commonly possesses large surface area and hemming can only be provided through its boundary. We can not use other joining techniques like welding, riveting etc. because they leave marks on the outer panel which spoils its aesthetic appearance. So, mastic sealants are used to stick the inner surface of outer panel and inner panel.
Mastic sealants are elastic compound that behave like rubber. It is applied between the inner and outer panel at specified spots. Each spot of mastic sealants has its effect around a circular region of 80 mm diameter.
Thus, the mastic points are arranged in such a way that it covers the area away from the hemming which are more vulnerable to vibrate.
The gap between the Outer panel and inner panel is 5mm when the inside gape is more then the 5 mm then the mastic is not work the proper and the joint and strength of the inner and outer panel is also loose.
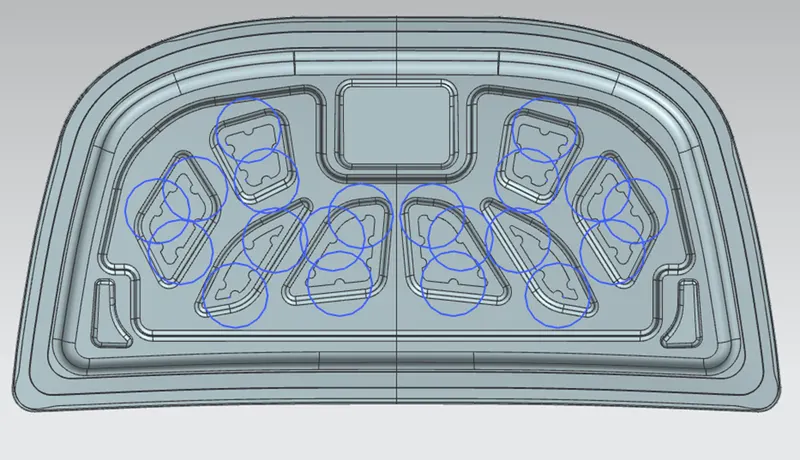
Relief Section
Relief Section is very important in the hood design. In the relief given to the corner of the hood when the hemming process is start then the round shape is not proper hemming so the corner shape and round shape is showing the proper shape with the help of hemming then provide the relief and the relief is also provide for the stress constatation also so it’s very important in for the corner shape.
Rear Relief section
Front Relief
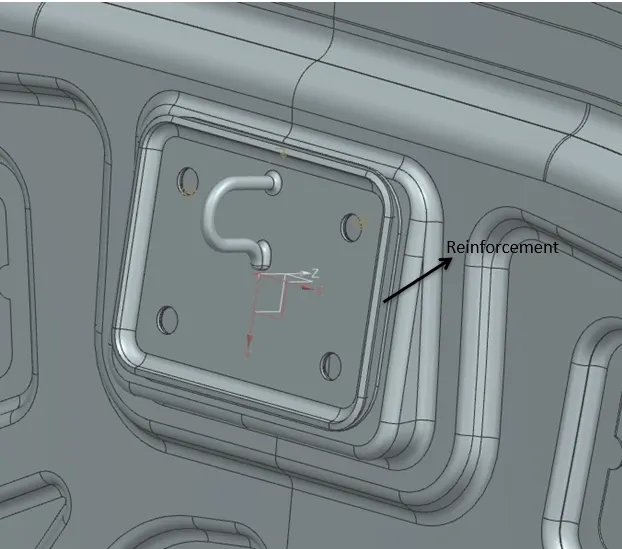
Reinforcements
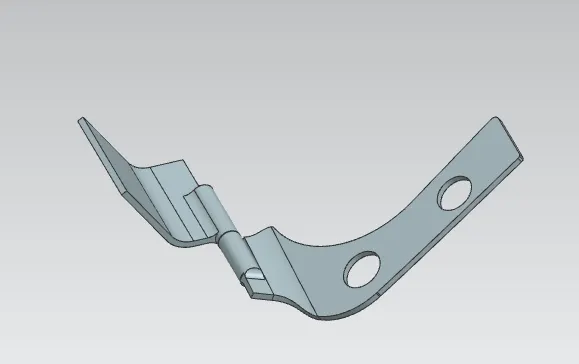
Reinforcements are used for increases the strength of the material and product. Reinforcements are provided according to the design requirement. Mainly it is provided at the hinge and latch regions to improve the strength locally.
Thickness of reinforcements will be higher than that of the outer parts and the values is varies according to cost and requirement.
Position of Hinges and Latch
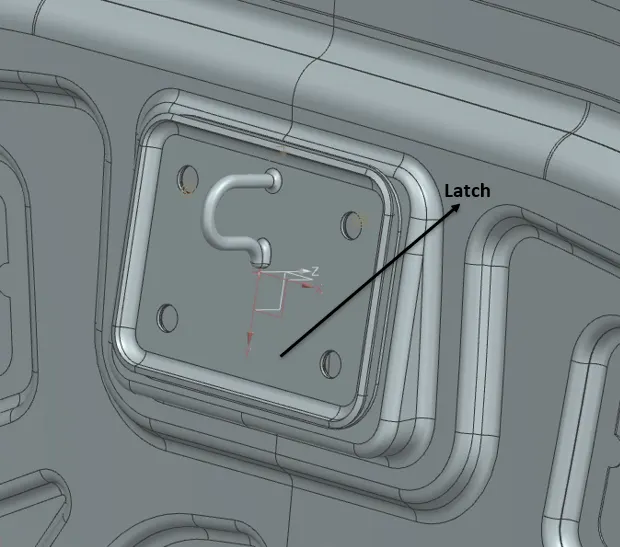
Latch trajectory is given by the circle draw from the hinge axis point. While opening or closing the hood, the latch must be perfectly aligned to the fixing or striker point. For that, the latch trajectory must be perpendicular to the hinge axis.
When the latch and hinge are not placed the proper position and the trajectory must be not perpendicular to the hinges axis then the hood alignment is not perfect. To this is the most important because the hood alignment is not perfect then the look of the car and outer body is show bed.
Latch/Striker
Hinge
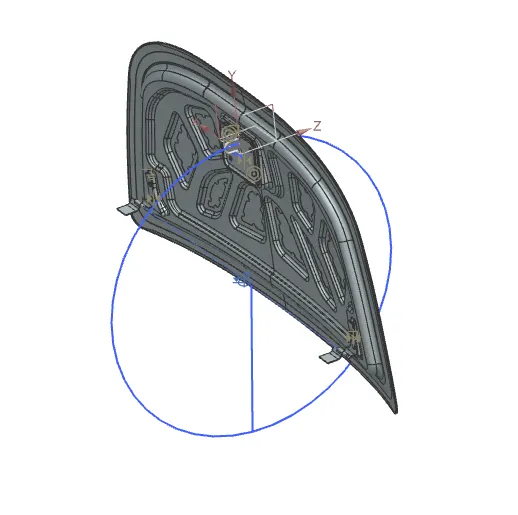
Latch is assembly with the help of circle because the latch is perpendicular to the hinges axis. The latch, Hinges and reinforcement is assembly then the hood assembly is complete.
Conclusion
I have learned the Hood design and all design consideration using in Hood. I have Successfully designed the Hood outer and inner panel using the master sketching and stylish surface. Assembly the Hood inner panel, Outer panel, Latch and hinges then the hood is complete.