Hood design-Week 2
Objective: to Desgin a deatailed hood with all its components using nx cad to learn about automotive sheet metal desgin
Introduction to hood desgin :
In a car, the bonnet or hood plays a vital function. In a front-engine car, the Hood is a body panel that opens to reveal the engine compartment. The hood, often known as the bonnet, is a hinged cover that gives access to the engine compartment or trunk for rear-mounted or mid-mounted engines for maintenance and repairs. It is made up of an inner and an outer panel, with the inner panel providing strength and the outside panel providing the cover. The hood is used to dress up the front end of the automobile and give it a more elegant appearance. The consumer does not see the inner panel of the hood, but it is a technical element of the exterior panel. Although the outside panel has a pleasing appearance, it is extremely fragile and incapable of withstanding force during a collision. This puts the passenger's life at jeopardy, thus the inner panel must be designed to support the outer panel.
The primary focus of this study is on design considerations and functional requirements. Hood Hing and its purpose, Latch and its purpose, and connecting
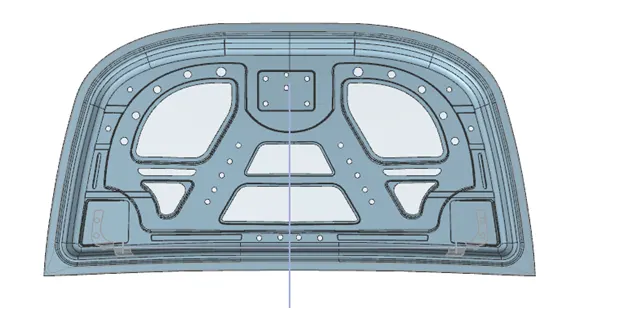
Hood components:
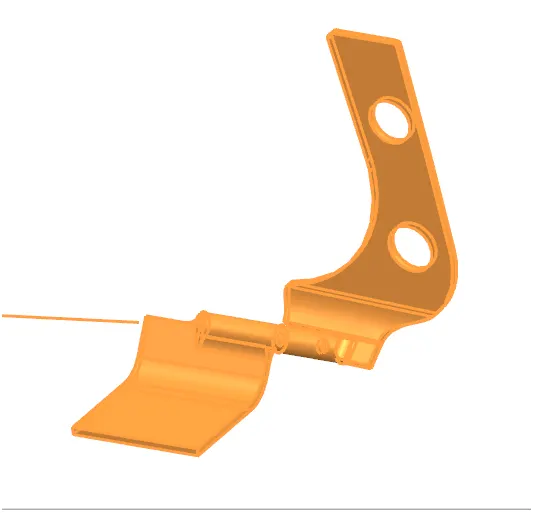
Hinge:- It is used to mount the Hood into the desired position so that it can be easily can closed and open when required.
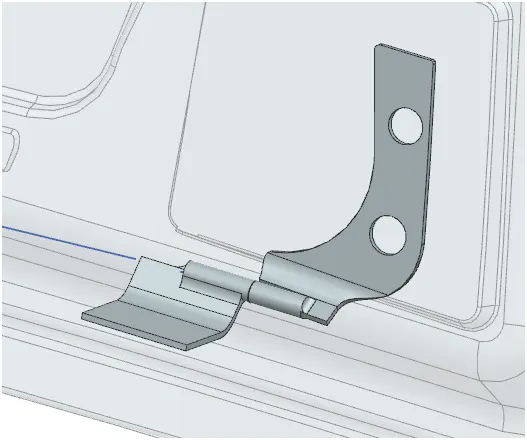
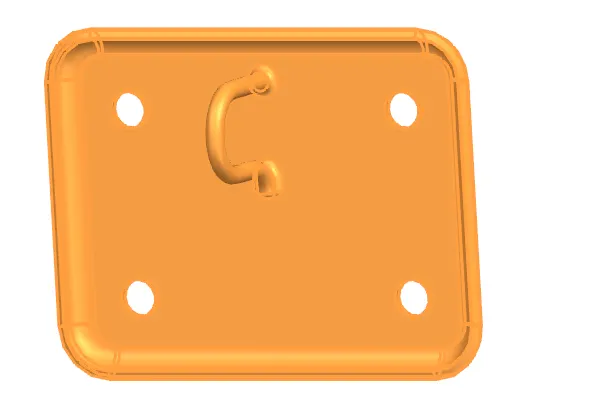
Latch:- A latch is a type of mechanical fastner that joins two (or more) objects or surfaces while allowing for their regular separation. A latch typically engages another piece of hardware on the other mounting surface.It is mounted in inner panel and provides locking system.
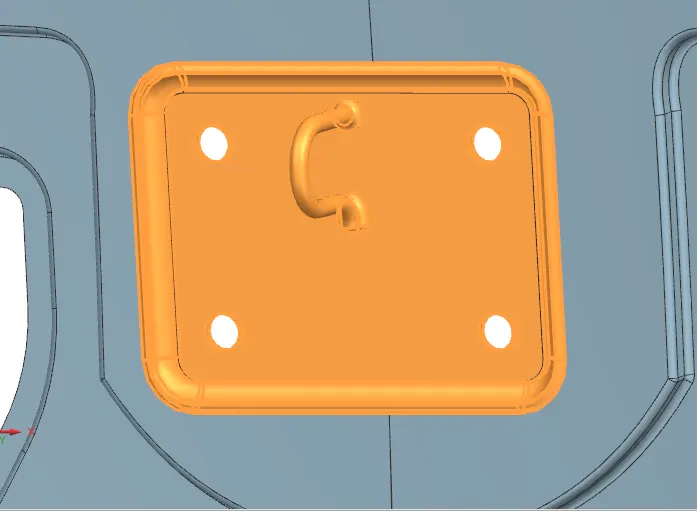
Mastic:-
As the outer panel provides luxurious look so we can’t provides nut & bolts or welding on that. So here mastic sealant is used to pack the inner and outer panel included hamming. It is in the liquid from but when it goes into the hot bath furnace it get hard and provide strength to the hood.
EURO NCAP desgin consideration :
The European New Car Assessment Programme (Euro NCAP) is a European voluntary car safety performance assessment programme (i.e. a New Car Assessment Program) based in Leuven (Belgium) formed in 1996, with the first results released in February 1997. It was originally started by the Transport Research Laboratory for the UK Department for Transport, but later backed by several European governments, as well as by the European Union.Their slogan is "For Safer Cars"
Vulnerable Road User (VRU) Protection
As well as assessing how well cars protect their occupants, Euro NCAP tests how well they protect those vulnerable road users – pedestrians and cyclists – with whom they might collide.
In these tests, the potential risks of injuries to a pedestrian's head, pelvis, upper and lower leg are assessed. Cars which perform well can gain additional points if they have an autonomous emergency braking (AEB) system which recognises pedestrians and cyclists.
DESIGN CONSIDRATION:-
The engine hood should be designed in such a manner that it decreases air effect and makes all maintenance parts simple to do, as well as protecting the engine from external disturbances. When an automobile is involved in an accident, the impact force must be transferred outside in a Y-shape.
Hood should consider safety, quality, styling, and production while designing. The pedestrian safety from front-end collision is the most essential safety criterion to consider while building the Hood. Pedestrian safety is a rule that ensures a person's safety when an automobile collides with them.
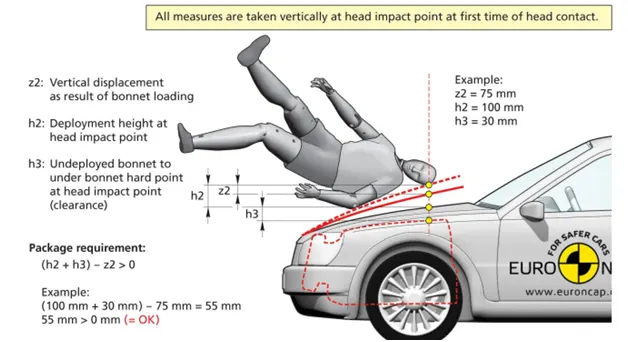
Head impact
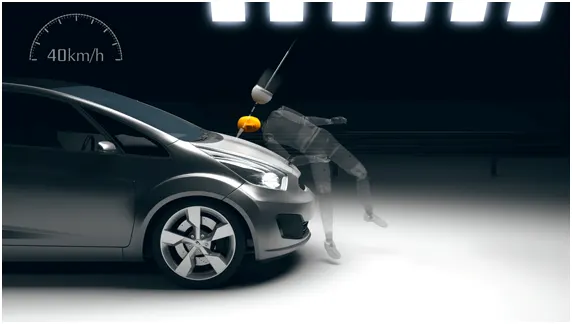
Pedestrians account for around 14% of all traffic deaths in Europe, with youngsters and the elderly being the most vulnerable. Pedestrians are one of the most vulnerable groups of road users, along with bicycles and motorcyclists.
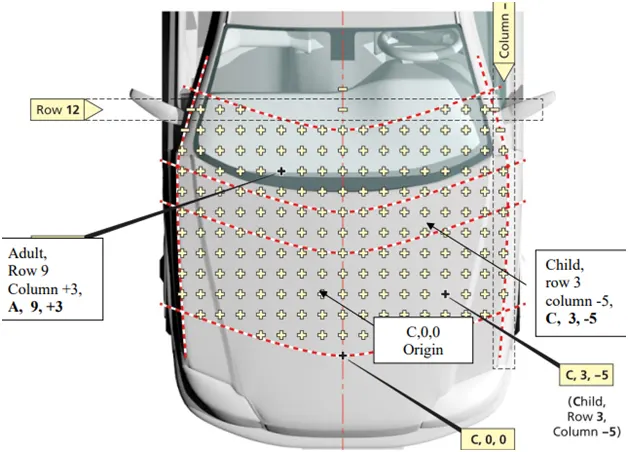
The majority of pedestrian accidents occur in urban areas at modest speeds. The head, lower body, and legs are some of the most commonly damaged body parts. A series of impact tests are carried out at 40 km/h using an adult or kid head form impactor to assess the possible risk of head damage in the event of a vehicle impacting an adult or a child. After that, impact locations are evaluated, and the protection provided is classified as good, sufficient, or marginal.
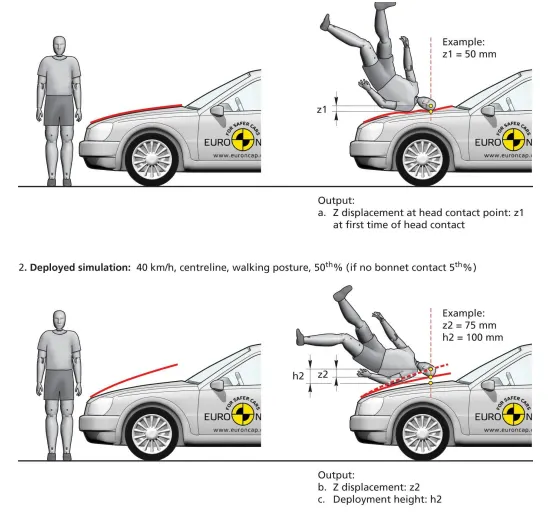
The procedure promotes energy absorbing structures, deformation clearance and deployable protection systems such as pop-up bonnets and external airbags.
Upper Leg Impact
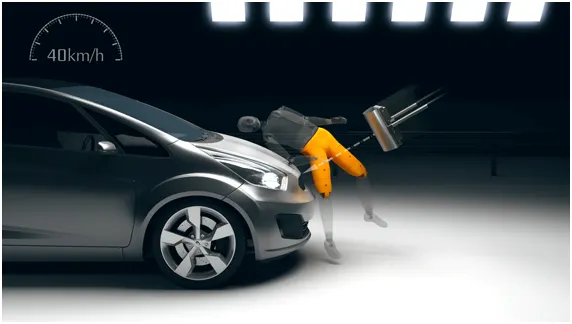
The leading edge of the hood or bonnet can have a significant influence on the result of a vehicle collision with a person, contributing to injuries to the pelvic and femur.
iN THE EVENT OF A VEHICLE IMPACT WITH A PEDESTRIAN, THE SHAPE OF THE HOOD OR BONNET LEADING EDGE CAN BE VERY IMPORTANT.
A series of impact tests are carried out at 40 km/h using an adult upper leg form impactor to evaluate the possible risk of pelvic and upper leg injuries in the event of a vehicle impacting an adult. The protection provided to impact locations is then evaluated as good, adequate, marginal, weak, or bad.
Lower Leg Impact
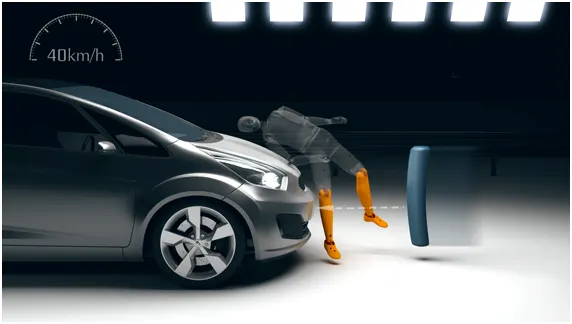
Leg, knee, and ligament fractures are common injuries caused by leg-to-bumper collisions. These leg injuries are seldom deadly, but they are frequently linked to long-term medical problems.
A series of impact tests are carried out at 40 km/h using an adult leg form impactor to evaluate the possible risk of leg injuries in the event of a vehicle impacting an adult. The protection provided to impact locations is then evaluated as good, adequate, marginal, weak, or bad. The technique encourages energy-absorbing structures and a more forgiving shape, which helps to prevent leg injuries.
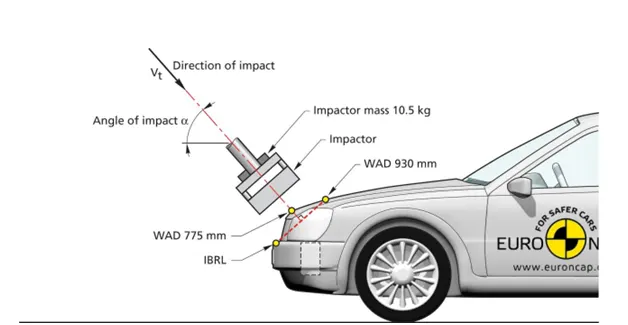
THE DESGIN MEADTHOLOGY
To design the complete hood of acar with all the requirements in nx cad with have to divde this process in certain stages
1.the inner panel and the outer pannel
2.embosses on inner panel
3.the hemming stage and the detailing
Since we have to create a assembly for the project we will be focusing on the individual components and will be assembling it .
1.The Inner panel :
We have been provided with outer panel we can create the embosses to create the inner panel. The whole design would be taking in consideration of the ncap regulations for the pedistrsain safety and cabin safety . we starter by considering the design elements given in the figure .
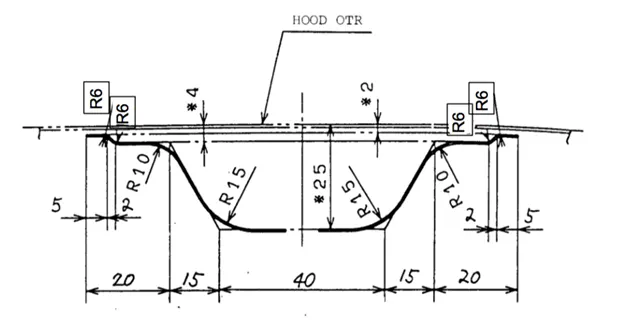
We will use offset surface and trim surfaces to create the structure according to the above figure
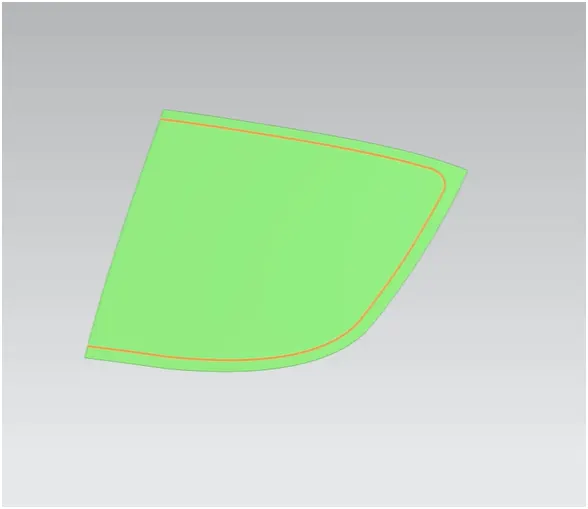
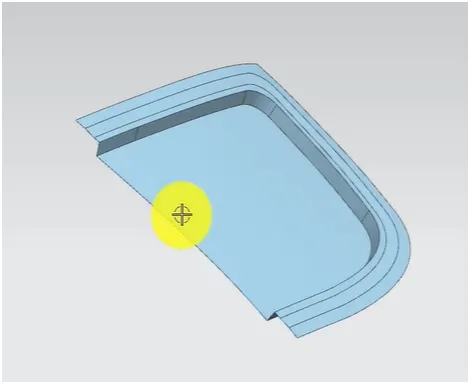
For the outer panel we just need to create a surface offset according to the diagram which will be used in the creation of hemming
2.Embosses on the surface
Embosses on the surfaces are designed to distribute the impact forces on the outside which protects the passenger during a crash. The design is to be such that it provide sturdiness as well as the force goes on to the sideways not in the middle.
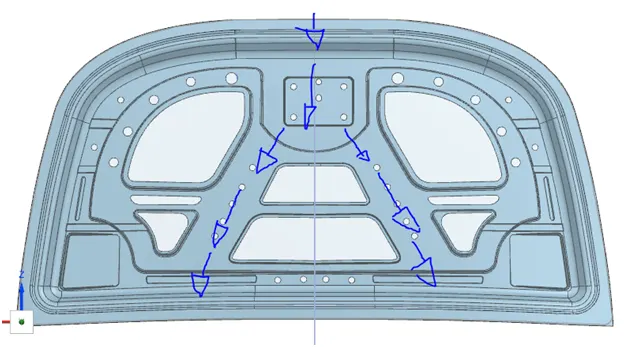
Providing the special features like this which help the front to crumble at a specific area
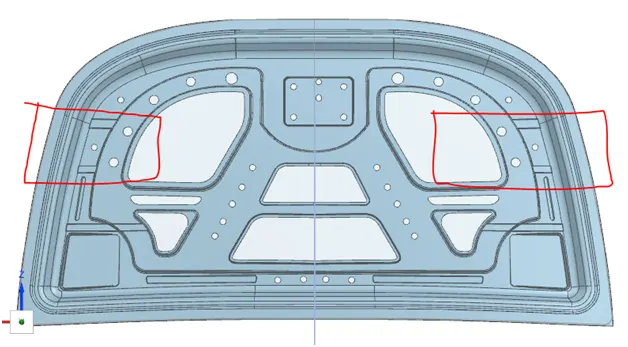
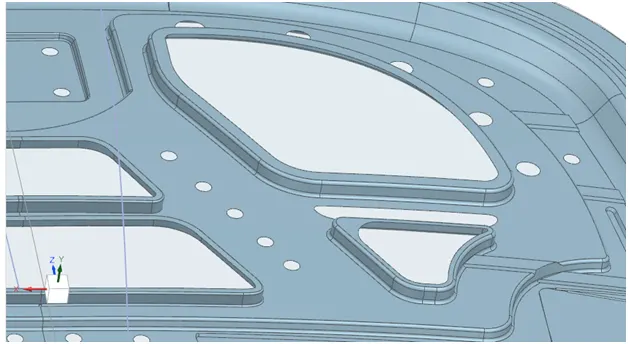
Now we have to crate the latches and the hinge embosement keeping in refrence with the inner panel plane we will be creating a datum plane and then createing a emboss on it
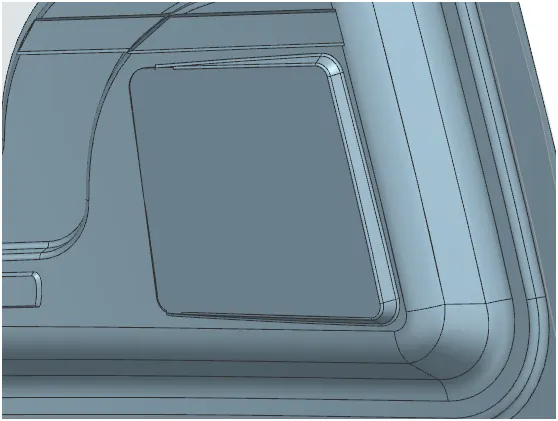
Now we will have to place the hinge assembley on the face of the surface . by using move component command . with the help of the refrence plane on the hinge axis we will be using it to create a mirror of the hinge assembley as zc being the refence plane. We will create a line between two which will give us the axial center of our hood around which the whole hood will rotate a lso by creating a tangent on the top of that particular circle we will be creating the latch enforcement.
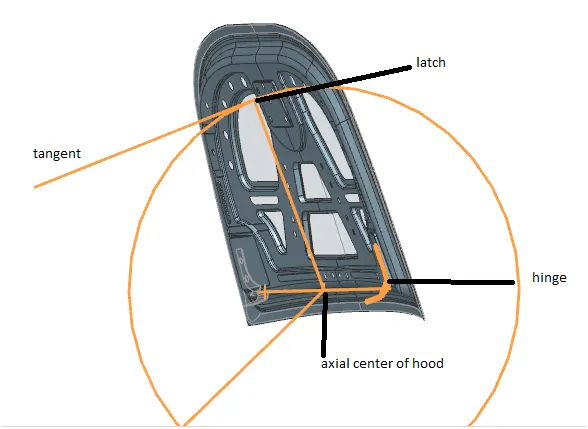
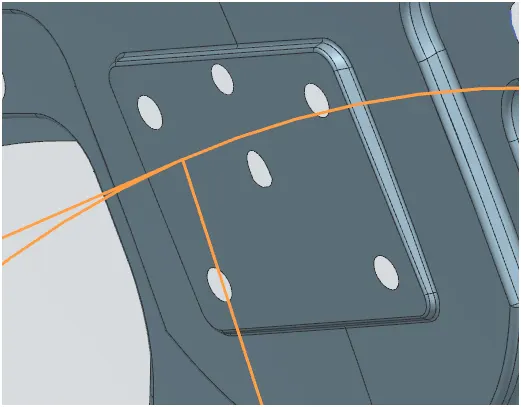
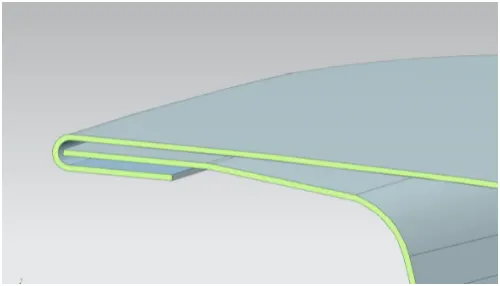
the hemming
Hemming and seaming are two similar metalworking processes in which a sheet metal edge is rolled over onto itself. Hemming is the process in which the edge is rolled flush to itself, while a seam joins the edges of two materials.[1]
Hems are commonly used to reinforce an edge, hide burrs and rough edges, and improve appearance.[1]
Seams are commonly used in the food industry on canned goods, on amusement park cars, in metal roofing (with a roof seamer), and in the automotive industry.
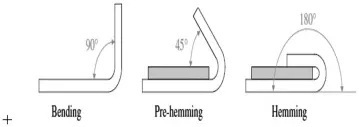
the hemming surface can be created using input provided by the outer panel as well as in the inner panel;l we will be creating a surface that wraps around the whole inner panel without touching it
The relief and detailing part
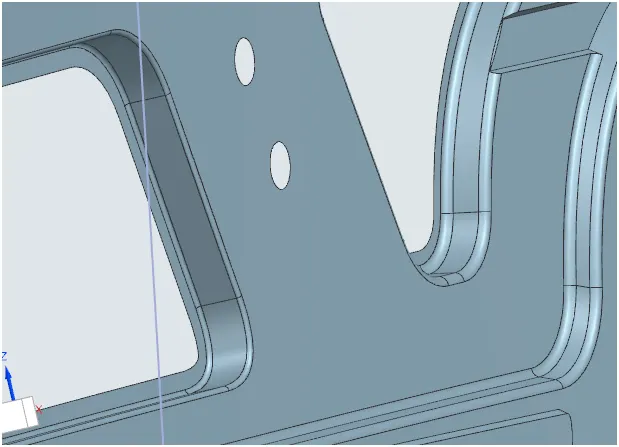
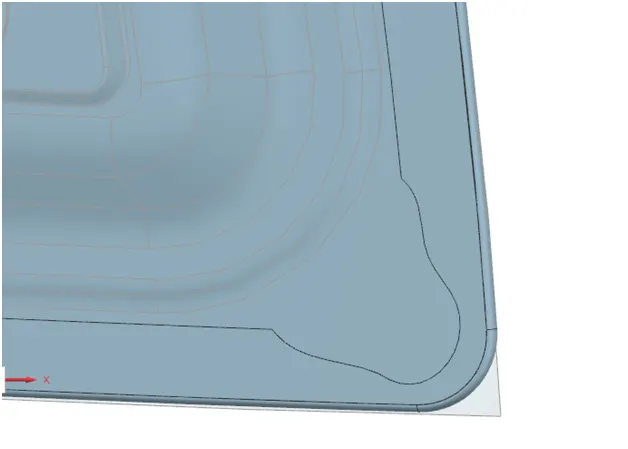
As given in the question we have to design a relief flange on the outer surface according to the required measurements. As for the detailing part we have to provide blends and fillets on all the edges and faces
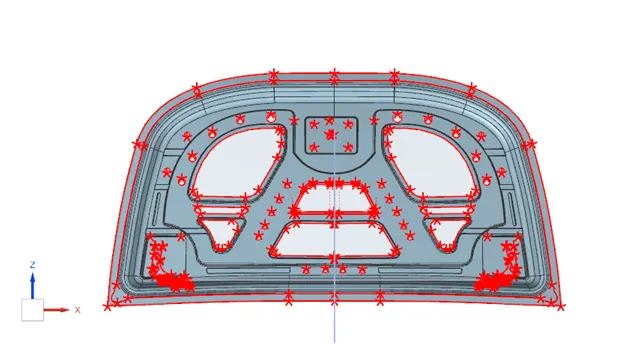
Most importantly after creating the mirror of the geometry we have to check for any gaps. We can heck using the examine command if there are any gaps or not. If there is any gaps we should elimintate using extend and trim command
IMAGES:
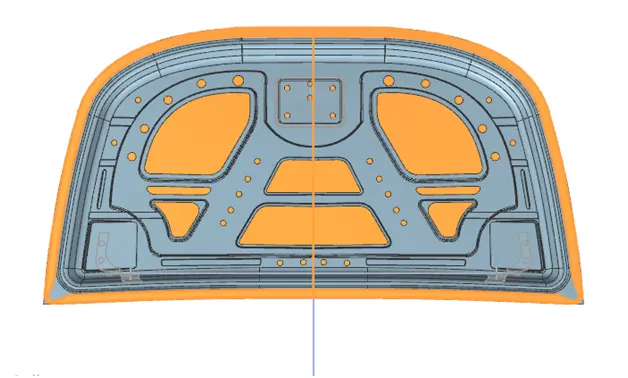
FRONT:
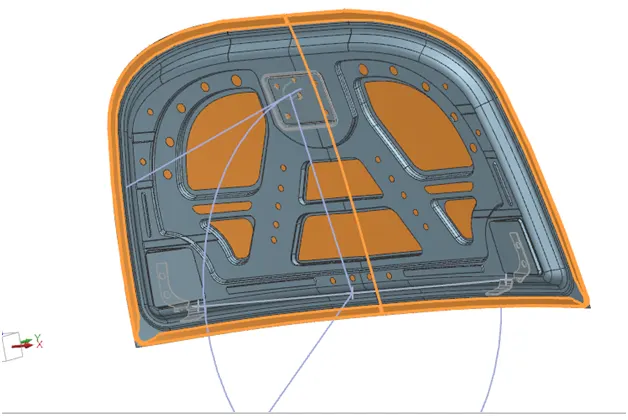
ISOMETRIC:
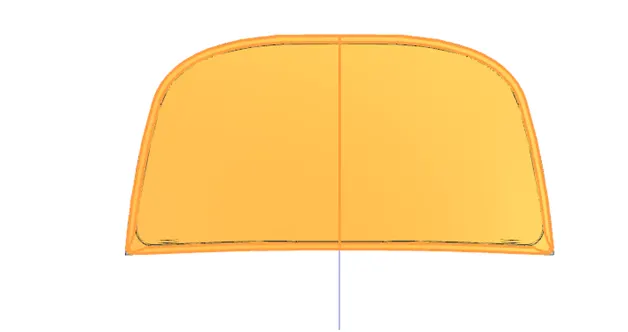
BACK:
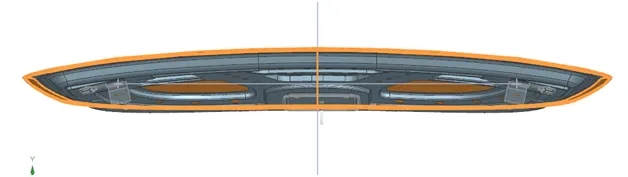
TOP:
Hinge:
latch :
Conclusion:
The inner panel and the outer panel were created using the provided style surface and Euro-NCAP requirements. Using draught analysis, the inner panel's production feasibility was determined. The locations of the latch and striker were investigated. The inner panel received the necessary strengthening.