Hood design-Week 2
AIM:
To design the hood by using NX CAD with the help of given data and learn about the concepts in designing the hood.
HOOD:
Hood is a component used to cover the engine compartment of car. It forms the front part of the car. It is designed in such a way to be weightless, aerodynamic, stiffer and also to ensure pedestrian safety. Hood is also known as bonnet. It can be rotated to some particular angle about the hinge axis. It consists of the following parts.
- Outer panel
- Inner panel
- Hinges
- Latch
- Stiffener pad
HOOD HEAD ZONE FOR LOCK STRIKER:
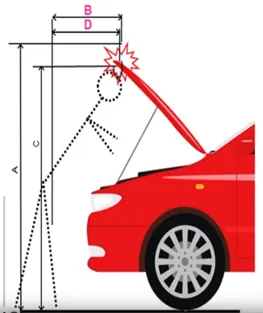
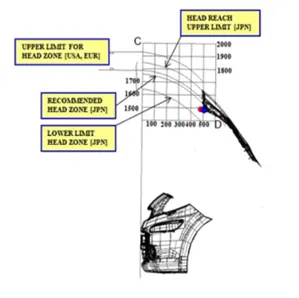
There are some guidelines for the opening angle of the hood that vary from region to region. In India, we follow the guidelines of Japan rather than Europe, as our average height is 5.5 feet that is lesser than that of Europe. We follow these guidelines in order to prevent the head from hitting to the hood and also to easily access the supporting rod.
HOOD SUPPORT:
After hood is opened to some angle, it should be given a support to hold it at the same position. This can be achieved by two methods.
- Support rod
- Gas stay
1.SUPPORT ROD:
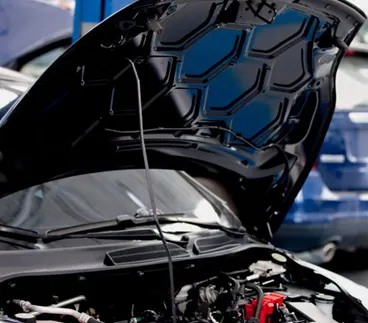
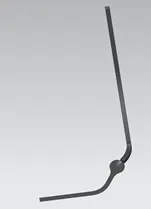
A support rod is used to hold the hood. It is fixed to the engine compartment or hood on one end and the other end is freely moved. In the closed condition, the free end is attached to the same part as the fixed end by using grommet. In the opened condition, the free end is attached to the other part. This rod is placed opposite side to the battery so that battery is changed easily without disturbance. We need to manually open and close the hood.
2. GAS STAY:
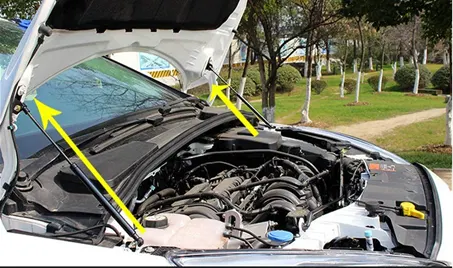
This is another way of holding the hood. It consists of a pneumatic actuator for opening and closing of the hood. It is semi-automatic, such that a minimum force is required to open and close the hood. A separate reinforcement is produced in the engine compartment to hold the gas stay in closed condition. A stud-ball is used in the middle of the gas stay for its movement.
MASTIC SEALANTS:
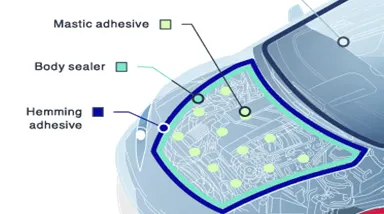
It is a gum like substance used to join the outer and inner panel of the hood. It absorbs and reduces the vibration which results in good NVH (Noise, Vibration and Harshness) values. It has an effective area of 80mm diameter. Initially, the sealant is applied in fluid form and later it spreads and becomes a rubber. For this mastic sealant, 5mm gap is maintained between the outer and inner panel.
DEEP DRAWING:
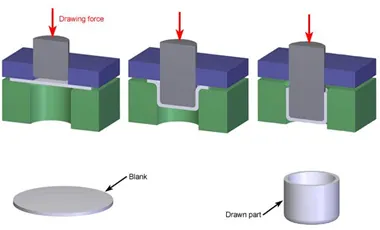
The deep drawing process is a forming process which occurs under a combination of tensile and compressive conditions. A flat sheet metal blank is formed into a hollow body open on one side or a hollow body is formed into a hollow body with a smaller cross-section. In the hood, embosses are created for hinge, striker and in the middle, and some amount of material is removed there to improve the strength and reducing the material weight for increased performance.
HEMMING:
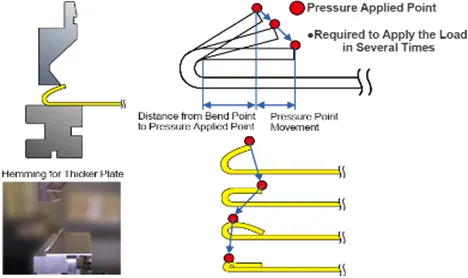
Hemming is a forming operation in which the edges of the sheet are folded or folded over another part in order to achieve a tight fit. Normally hemming operations are used to connect parts together, to improve the appearance of a part and to reinforce part edges. Here, hemming is done on the outer panel to combine to the inner panel using rollers.
DESIGNING THE HOOD IN NX CAD:
1.OUTER PANEL:
The outer panel covers the engine compartment, thus preventing heat and noise from it and also gives attraction to the car. The skin of the outer panel was given while starting the challenge. The hemming was done at the corner of the outer panel by using commands like offset surface, law extension, trim sheet, face blend, mirror and sew. Then corner reliefs were given by drawing sketches and trim sheet command. In this hemming, some tolerance was given between the outer and inner panels to apply sealants in order to achieve the water tightness.
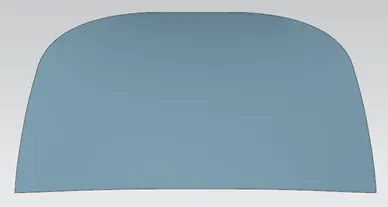
Outer Panel Skin
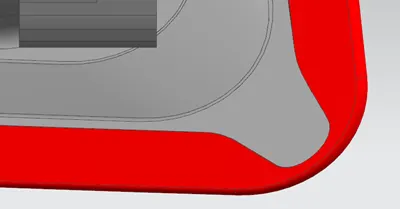
Corner Relief for Hemming
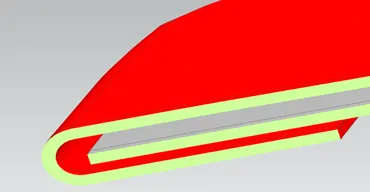
Gap for applying sealants
2.INNER PANEL:
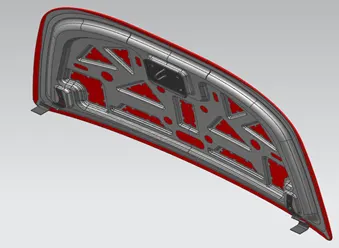
The inner panel was designed using the skin of the outer panel according to the values of the given master sketch. This was done by using commands like offset surface, offset curve on face, trim sheet, through curves, edge blend, emboss, mirror and sew. Embosses were created in such a way to dissipate forces to the hinge and to increase the strength. The gap between the outer and inner panel at the embosses was given as 5mm to apply mastic sealants. Embosses for latch and hinges were created after assembling them.
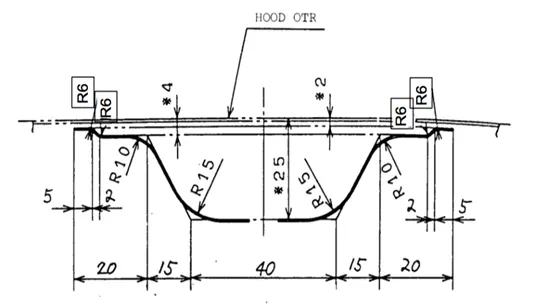
Master Sketch
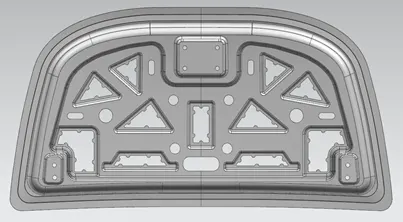
Inner Panel
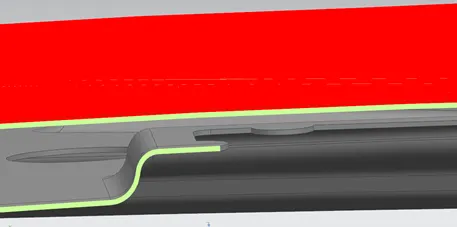
5mm Gap for Mastic Sealant
3.HINGE ASSEMBLY:
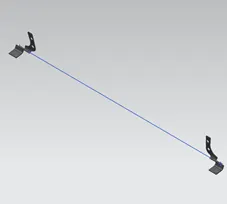
Hinges are used to achieve the rotation of the hood in opening and closing conditions. The hinge assembly was given already before starting the challenge. It was then imported, mirrored and positioned in such a way that both the hinge axes were in a straight line.
4.STRIKER:
Striker is used for locking the hood. Striker was also given already before starting the challenge. It was imported and positioned in a different manner. First, a circle was drawn with approximate diameter using the hinge axis as the center. Then a tangent line was drawn to the circle at a particular angle. Then, a line was drawn perpendicular to the striker and made coincident with the tangent line of the circle. This determines the trajectory path of the striker.
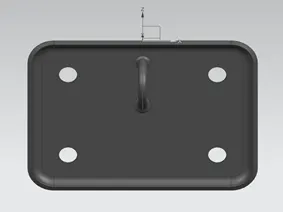
Striker
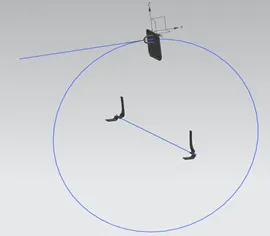
Trajectory Path and Tangent Line
HOOD ASSEMBLY:
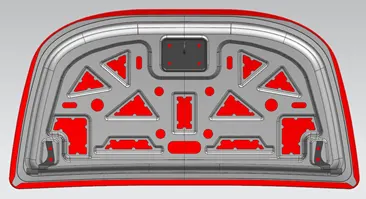
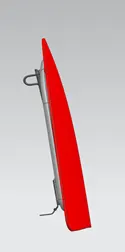
At the initial stage, every components were imported and designed inside the assembly file. Then hinges were positioned by using assembly constraints like parallel, touch align and distance commands. The striker was placed at the center by aligning the mid plane of striker to that of the inner panel.
PEDESTRIAN RATING:
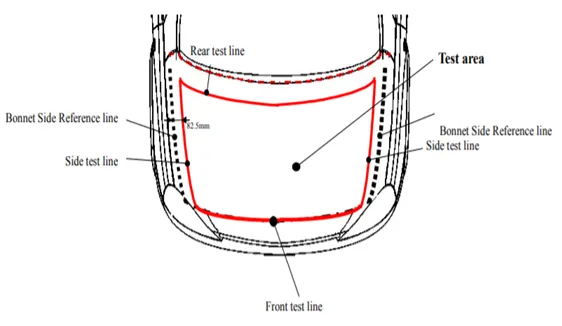
BONNET SIDE REFERENCE LINE:
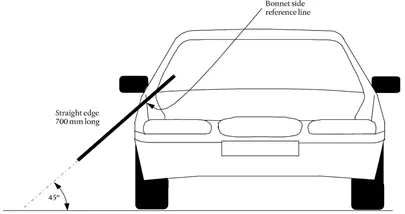
The geometric trace of the highest points of contact between a straight edge, held parallel to the lateral vertical plane of the vehicle and inclined 45 deg. is traversed down the side of the front structure, and the side of the front structure.
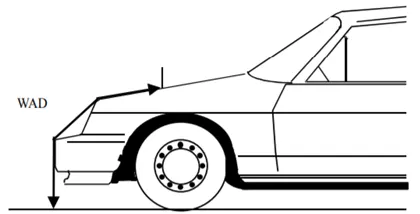
WAD:
WAD (Wrap-Around Distance) is the geometrically traced distance from the contact point with the Ground Reference Plane, vertically below the front face of the bumper, to any point on the vehicle front structure.
TESTING:
The area marked in red color is the testing area where the head of the pedestrian will get impact. The side test line is 82.5mm from the side reference line. For a child, the head impact zone ranges from 1000mm to 1500mm of WAD. Similarly for an adult, it ranges from 1500mm to 2100mm of WAD. So, in these regions, the hood should be light weight and in some cases, these are also flexible. Based on these testing results, safety rating is provided to the car by Euro NCAP, an organization that provides safety standards for automotive industry.