Hood design-Week 2
AIM - To Design and assemble the car hood.
OBJECTIVES –
- Design of Hood Inner Panel by following given Master section with emboss creation.
- Creation of Embosses on Hood Inner Panel for Hinges.
- Assembly of Hinges with Inner Panel.
- Creation of Latch Trajectory.
- Mounting and assembly of Striker with the creation of embossing for it onto the hood inner panel.
- Creation of Reinforcements for Hinge and Striker.
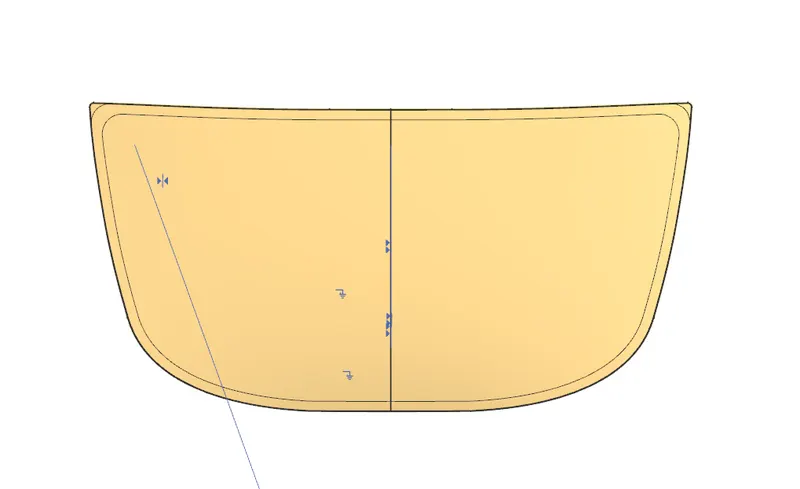
- Design of Hood Outer Panel along with hem creation.
INTRODUCTION –
- The hood is an opening body panel that covers the engine in the front-engine vehicle. Basically, it consists of the inner panel and an outer panel. The inner panel provides strength while the outer panel functions as the metal cover.
- A car hood, also known as a bonnet in certain other countries, is the hinged cover that sits over a front-engine vehicle's engine. Its function is to allow access to the engine for repairs and maintenance. Typically, a hidden latch is utilized to secure the hood.


COMPONENTS OF HOOD –
- Outer Panel
- Inner Panel
- Hinge
- Striker
- Reinforcement
- Gas Spring
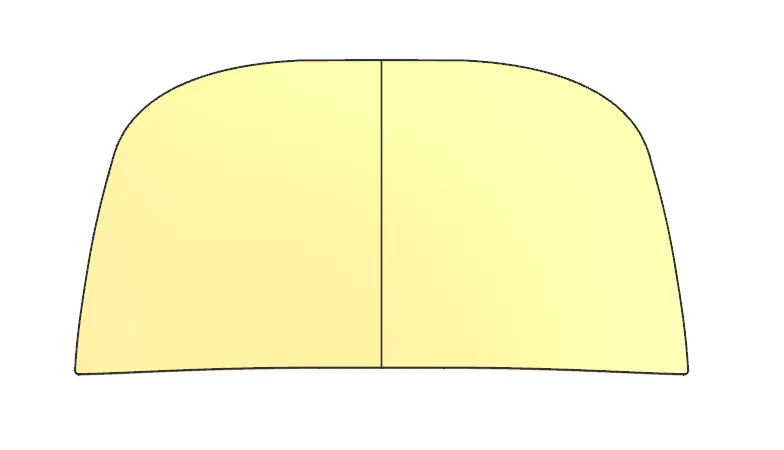
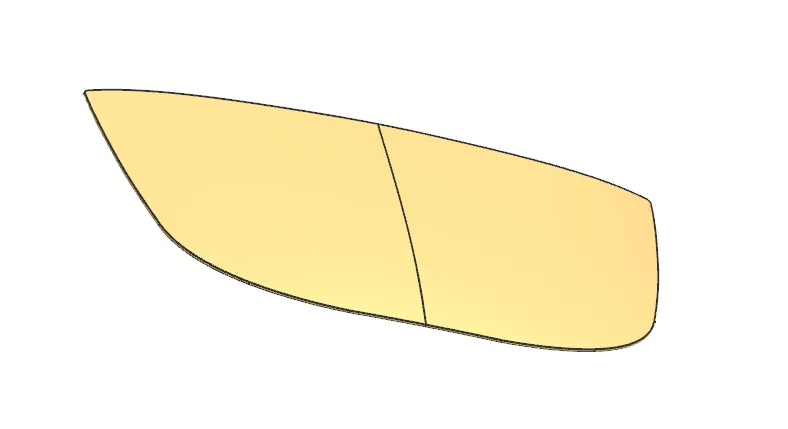
- Outer Panel - A car hood panel is one of the most important components of the BIW (body in white), it is considered the closure sheet-metal component. The outer panel has the aesthetic look to it but on its own is very weak and not capable of handling force during impact. Most automobile hood outer panels are made of traditional steel plates, and their quality does not meet the needs of lightweight development. For this reason, it is necessary to obtain lightweight effects through the application of automotive aluminium sheets. The most widely used car aluminium alloys in the market are deformed aluminium alloys of 6111, 6016, and 5182.
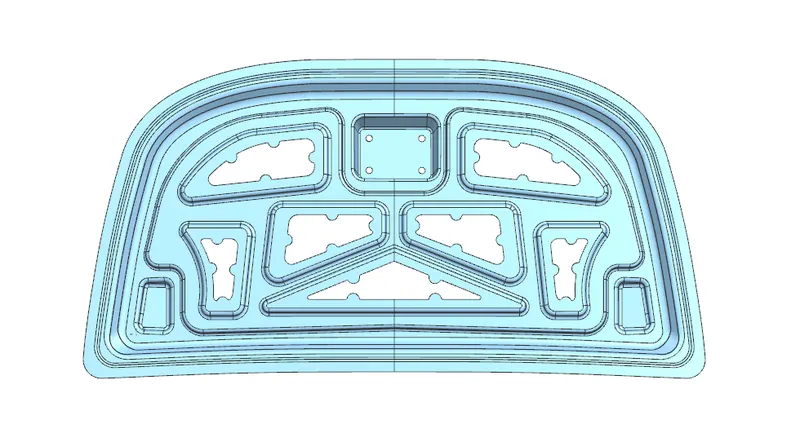
2. INNER PANEL - The inner panel of the hood is not visible to the customer, but this is the engineering feature of the outer panel. The hood panel is required to have a high initial reaction force against the impact exerted on the hood to enhance the energy absorption capacity. The hood is further required to minimize a reduction of a reaction force by deformation in a collision.
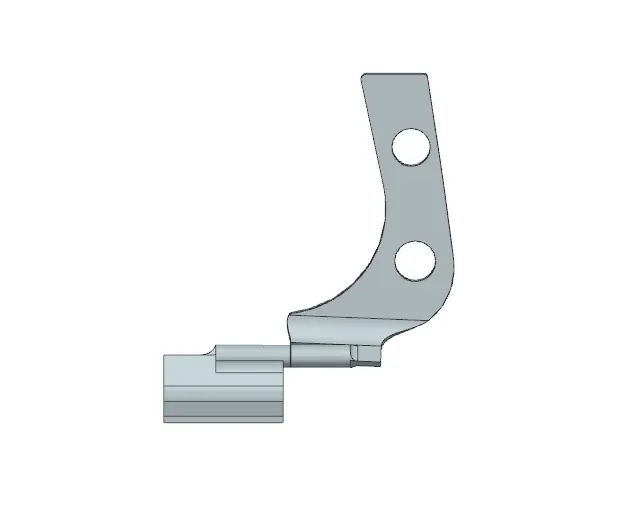
3. HINGES - Hinges is the assembly of components connected to the door and body of the vehicle, linked to each other and capable of rotating around the same axis. Inside the hinge there is a circular pin that allows the hinge to swivel around pin axis.
4. STRIKER - The striker is the part of an approved locking unit which is inserted in the frame. It helps to keep the Hood closed. When the dead bolt and the bolt is pushed into its hole, the Hood keeps closed.
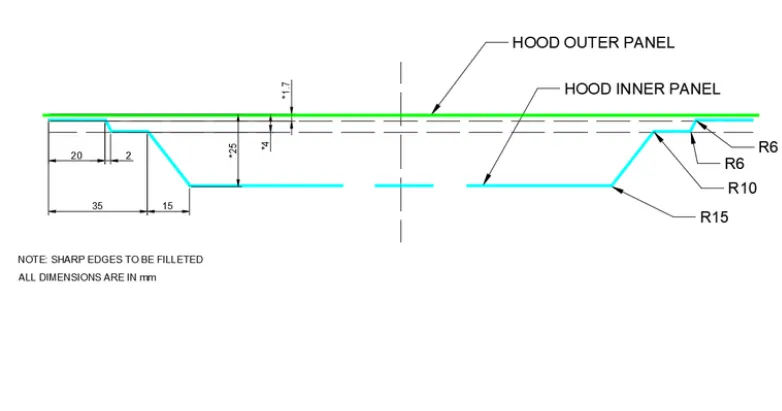
- MASTER SECTION
Manufacturing Processes used in Hood Design
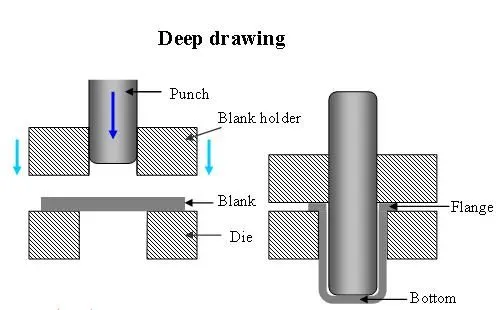
Deep Drawing
- In this corporation, a sheet is pulled into the ideal shape using a punch and pass-on gadget. The sheet is outlined in the condition the pass on by driving the punch down on it. To avoid the sheet wrinkling itself, the sides of the sheet are held someplace close to folios. In the automotive industry, deep drawing is usually carried out using rigid tools.
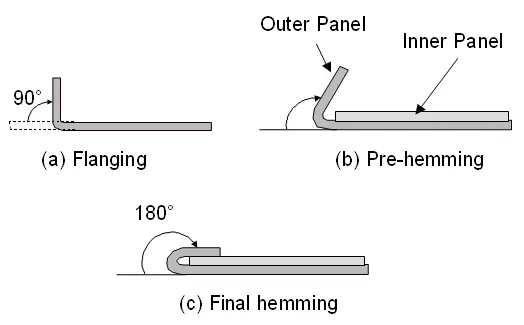
Hemming
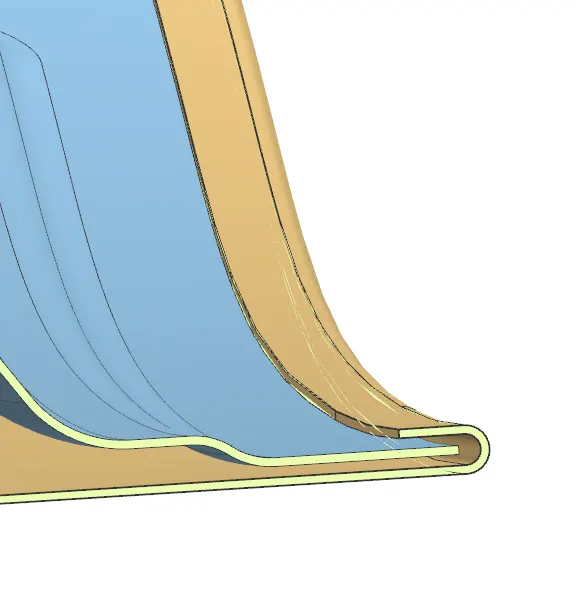
- Hemming is a sheet metal forming operation that joins sheets by bending them to 180°.
- The hemming technique is used to create automobile body panels and pieces such as deck lids, trunk lids, doors, hoods, and tailgates.
MAIN CONTENT -
- Siemens NX 11 software was used to create CAD parts and assembly of all the hood components. Using surfacing, the majority of the hood is designed.
- Following commands are commonly used to create the design of the hood.
- Offset Surface - This command is used to offset the surface to the required distance from the original surface.
- Through Curves - By using this command, the surface is created between two different curves.
- Trim Sheet - Input for this command is the face of the surface and any curve lying on that face. Using this command unwanted portion of the surface can be removed.
- Sew - It is a joining operation performed to knit or join two or more than two surfaces together to create a single surface.
- Projected Curve - 2D Sketch can be projected onto any flat or irregular face of the surface or body.
- Edge Blend - Fillet can be applied to the edges. Edge is chosen where two surface forms the edge.
- Emboss - With the help of this command any curve can be extruded with some draft.
- Mirror Geometry - Used to mirror the surface.
- Thicken - Used to give thickness to any surface for converting it into a solid body.
- Datum Plane - Reference plane which is created on any solid body, surface body, or with reference of origin.
- Extend Sheet - It is used to extend the surface to the required distance by selecting the boundaries of the surface.
- Offset Curve in the face - It is used to offset the boundaries of that surface.
- Offset - This command is a part of the sketch workbench where entities are offset to the required distance.
DESIGN APPROACH
- DATA USED
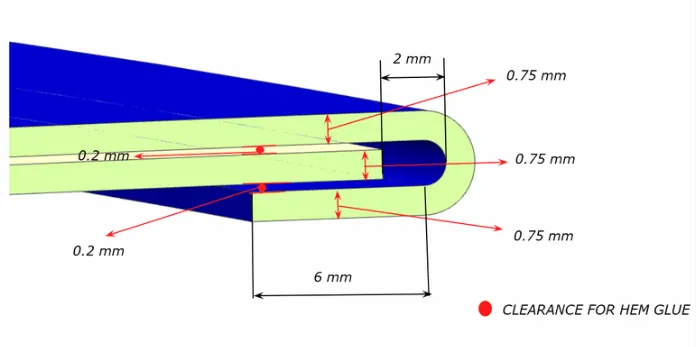
- Outer Panel thickness=0.75
- Inner panel thickness-0.75
- Reinforcement thickness =1.5
- No Sharp Corners
- A minimum draft angle of 7 degrees.
Steps-
The styling surface was provided . So I started with offset surface to create my inner panel and then gave embosses and necessary blends. First I create the half side of the inner panel and create a emboss and using blend to create a smooth edges and also create a flat surface for the hinges and striker so that they easily bolt there and fit perfectly. And then mirror it so we get the complete inner panel.
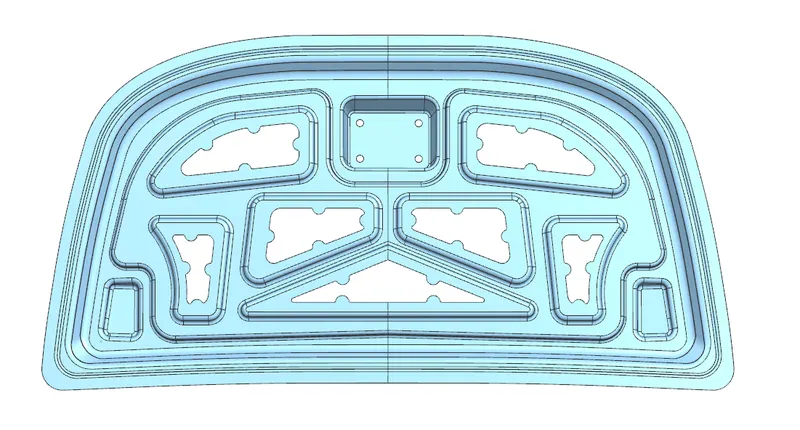
Emboss Creation
Emboss Creation for Inner Panel
- Sheet metal embossing is a stamping process for producing raised or sunken designs or relief in sheet metal. This process can be made by means of matched male and female roller dies or by passing sheet or a strip of metal between rolls of the desired pattern. It is often combined with foil stamping to create a shiny, 3D effect.
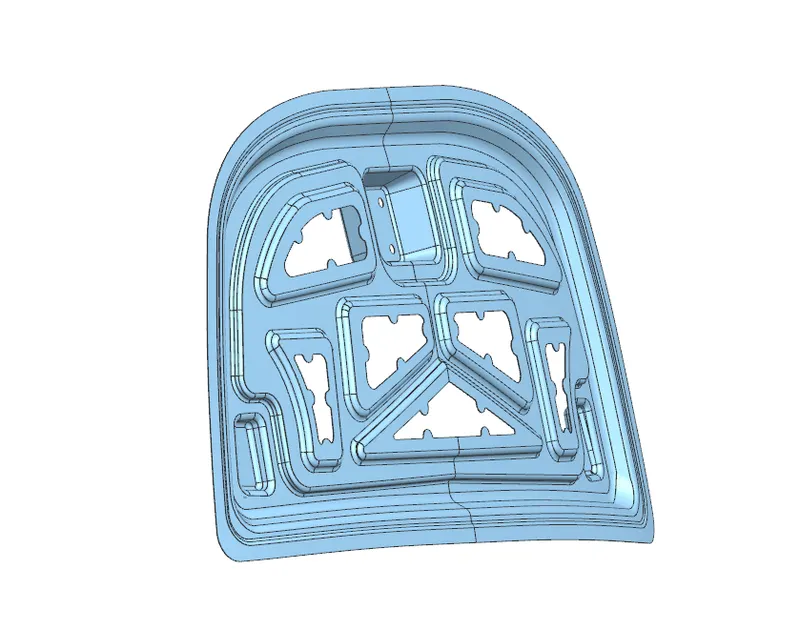
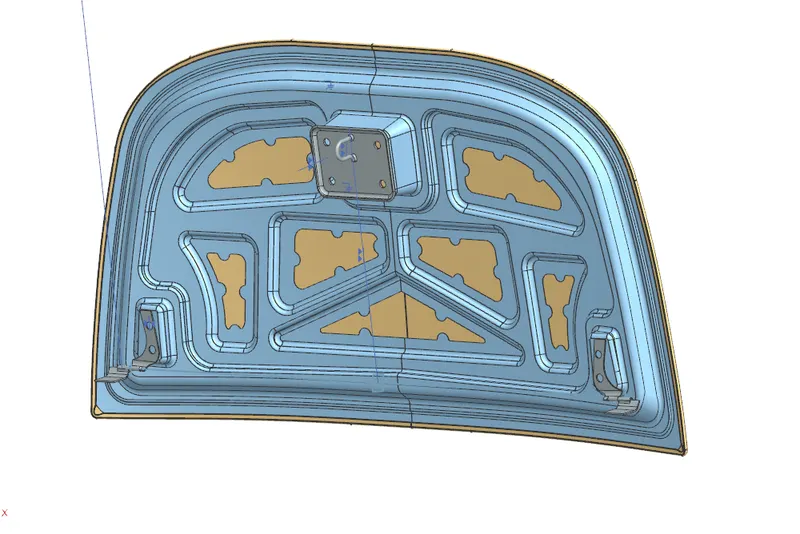
- Several embosses were created onto the inner panel which is a type of circular slot. One triangular emboss was created in the middle of the inner panel.
- The purpose of providing these embosses is to reduce the intensity of the front impact by diverging the forces into different directions rather than in the straight direction.
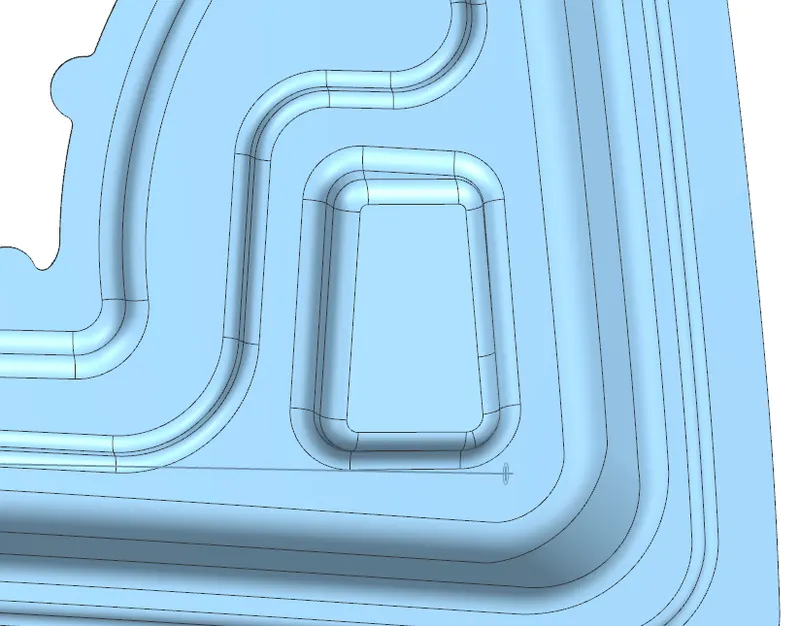
Emboss Creation for Hinge
- The inner panel surface is not a flat one. It is a curvy surface. Hinges will not fit properly on a curvy surface. Hence, a flat surface is created at some distance from the inner panel, and using law Extention, emboss is created onto it.
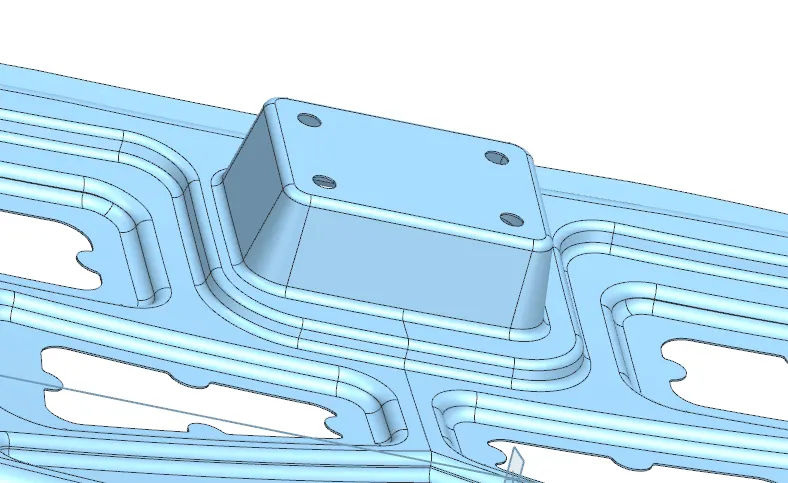
Emboss Creation for Striker
- The inner panel surface is not a flat one. It is a curvy surface. The striker will not fit properly on a curvy surface. Hence, a flat surface is created at some distance from the inner panel, and using law Extention, emboss is created onto it.
Latch Trajectory Motion
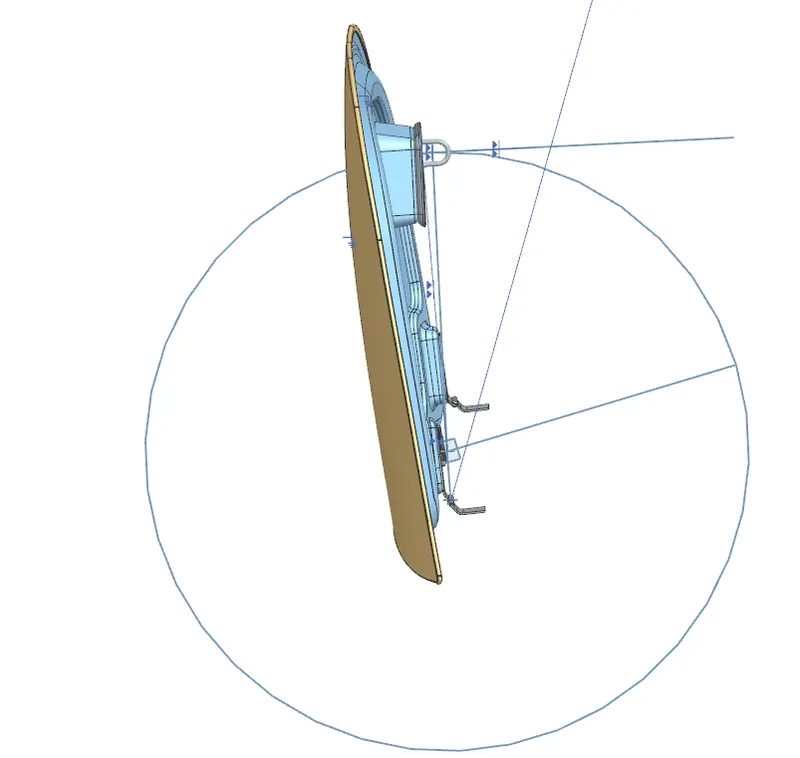
- To ensure proper closing and opening of the hood panel, the striker is placed in such a way that its trajectory is perpendicular to the hinge axis.
Mastic Sealant
- The Mastic sealant, often known as the Mastic point, is a rubber-like elastic material. Mastic spots are specified on the inner panel of the hood where the hood may readily distort.
- They aid in the restoration of the hood's outer panel to its original shape once it has become distorted. The mastic has an 80mm influence area.
Hem Relief
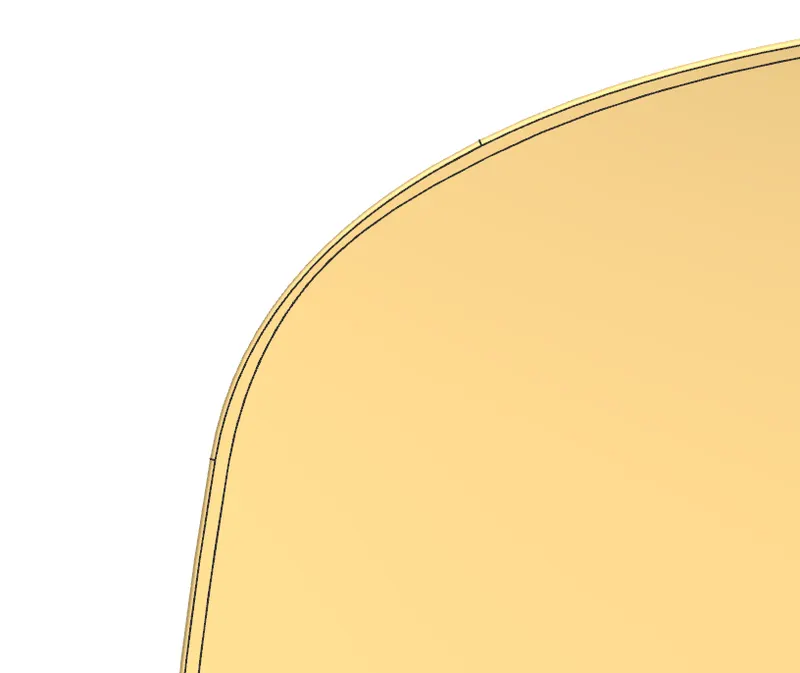
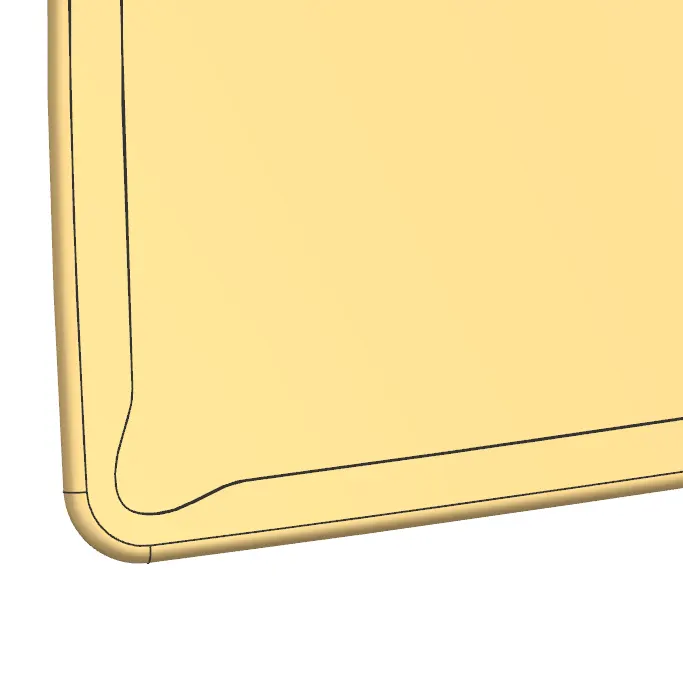
- While performing hemming operation rollers rolls over the outer panel surface to create a hem.
- At the corner, the portion roller tends to roll the sheet in a nonuniform manner due to the presence of curvature.
- Hence it is necessary to provide some relief at corners.
Required Hem
- By following the given dimensions hem is created to join an outer panel with the inner panel.
- Using three face blend option hem is formed.
Assembly
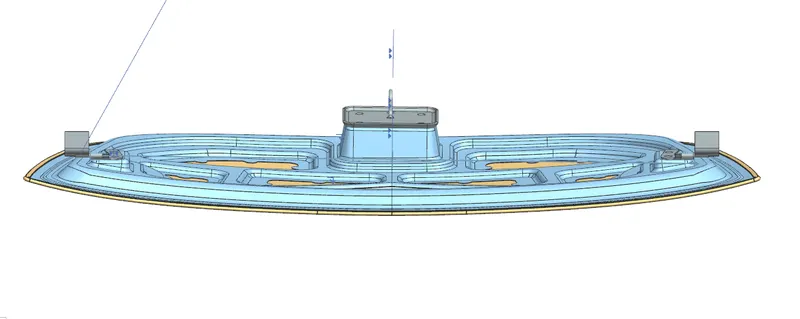
- Striker is assembled using trajectory sketch point, midplane, and axis alignment constraints.
- Hinges are assembled using face alignment and distance constraints.
CONCLUSION :-
The Hood design has been successfully created, considering the design rules as mentioned in the given data.