Hood design-Week 2
TITLE: DESIGN AND ASSEMBLY OF VEHICLE HOOD.
OBJECTIVES:
- To design and assemble the vehicle hood.
- Develop the inner panel and outer panel from the given styling surface according to the given data
- Develop the necessary reinforcements for the inner panel.
- Develop the necessary embosses on the inner panel
- Develop the hem for the outer panel
- Check the manufacturing feasibility of the inner panel by draft analysis
- Check the position of the latch with respect to the hinge axis
INTRODUCTION:
- The Hood is used as an engine cover for motor vehicles. The Hood is connected by two hinges to the engine compartment. The hood can open to allow access to the engine compartment for maintenance and repair.
- While designing a hood in an industry-specific manner hood should meet the following conditions.
- Pedestrians safety,Force distribution when subjected to frontal collision (Passenger Safety)
- Placement of latch on latch trajectory
- Manufacturability
Car Hood has the following components:
- Outer Panel
- Inner Panel
- Striker and Hinge asm
- Reinforcement
- Hood Support
- Mastic's sealen
Hood has designed by the process of using the following Sheet Metal Operations:
- Hemming
- Embossing
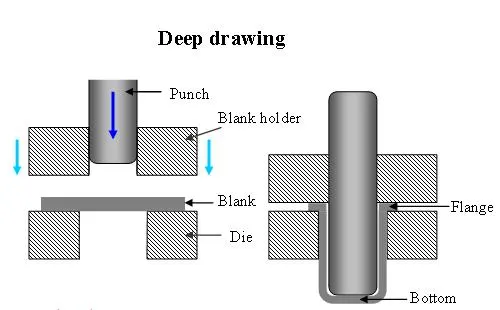
- Deep Drawing
- Piercing
Given :
- Master-section of the hood panel.
- Hood Hem data
- The thickness of the inner panel, outer panel, and reinforcements
- Styling surface
Car Hood Components:
Outer Panel:
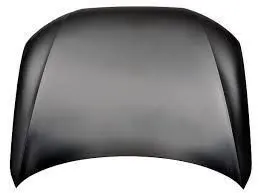
Outer Panel is the most important part of the hood to makes the car in a very good aesthetic proportion. So that the Outer panel is perfectly made insense to achieve the aesthatic requirement. So that, the sheet metal operation result which is visible on the outer panel or it reduces the aesthatic value means, those operations are strictly not to be followed to make the outer panel. That's why the hemming process is used to join the outer panel with the inner panel, instead of using welding methods.
By considering the given Outer Panel thickness(0.75mm) and using the outer panel styling surface the outer panel has been made
Inner Panel:
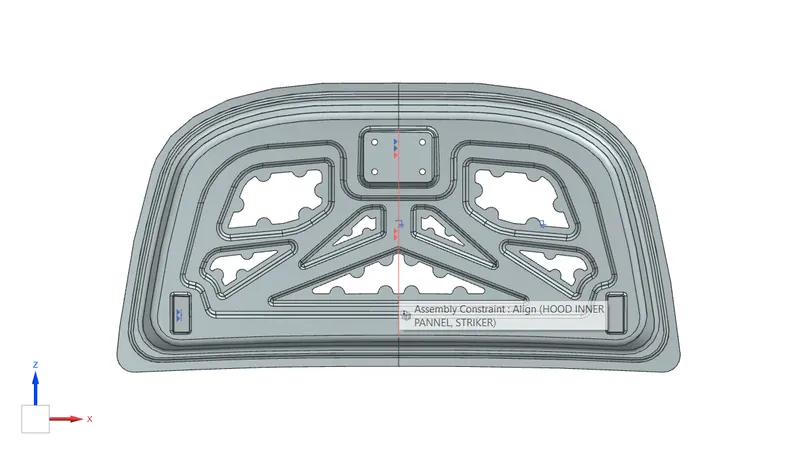
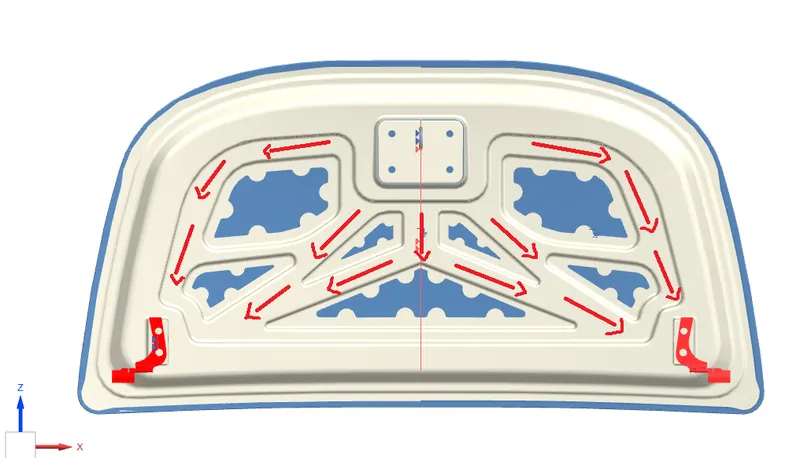
Inner Panel is the major part that ensures the rigidity of the hood and It is used to diverts the impact to outwards of the hood however possible when the collision occurs. It is can be achieved by the good inner panel design and the emboss direction in the inner panel.
Lot of design changes and researches are done and being carried out in the inner panel only to achieve the pedestrain safety and the passenger safety to make the standards.
In this inner panel, the required holes are made to transport the hood from one station to other and fix the hood in fixture by using this hole as budding holes. Also the inner panel has the embosses and mastic points.
By considering the given Inner Panel thickness(0.75mm) and offseting the outer panel styling surface with the given offset data, the Inner Panel has been made with the embosses and mastic points
Reinforcement:
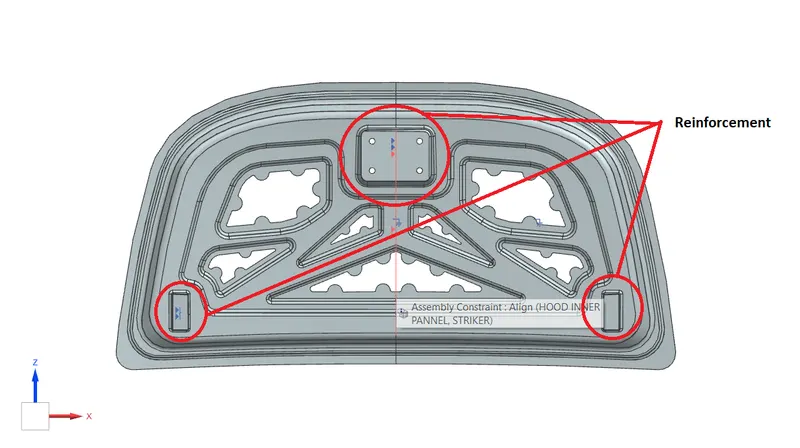
The Striker and Hinges are attached at the lower side of the inner panel. It it can be done by directly then more stress can act at the particular area in the inner panel, it may cause deformation of the inner panel at that particular region. So that the reinforcement comes in and placed between the striker and the hood, hinge and the hood. It can able to reduce to deformation and strengthening the inner panel at that particular region.
Striker-Latch and Hinge Asm:
Striker-Latch
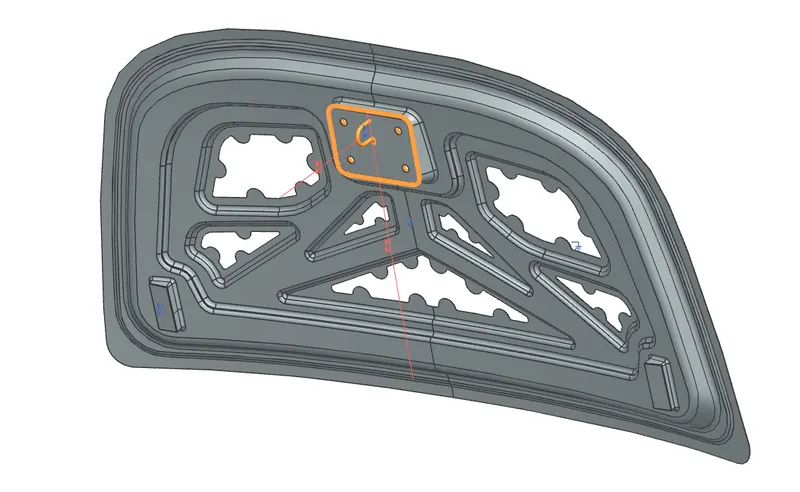
Striker is the part which is used to hold the hood with the engine compartment by using the latch which it is attached in the engine compartment, when the hood not require to open up. The striket is attached to the bottom of the inner panel and it hits the latch and locked with it, when the hood is dropped down.
There is lever which is provided inside the cabin to the driver to release the latch pressure. Once it can be done, the hood will opens up in a inch, then we can able to open the hood more.
Hinge Assembly
It is used to fix the hood to the engine compartment.
For any component has to be open and close with an axis, then hinge plays a major role. It has two simple parts(one is hood side hinge, another one is engine compartment side hinge) and assembled with the single axis.
Hinge Assembly is attached at the each Outwards end of the hood and the engine compartment.
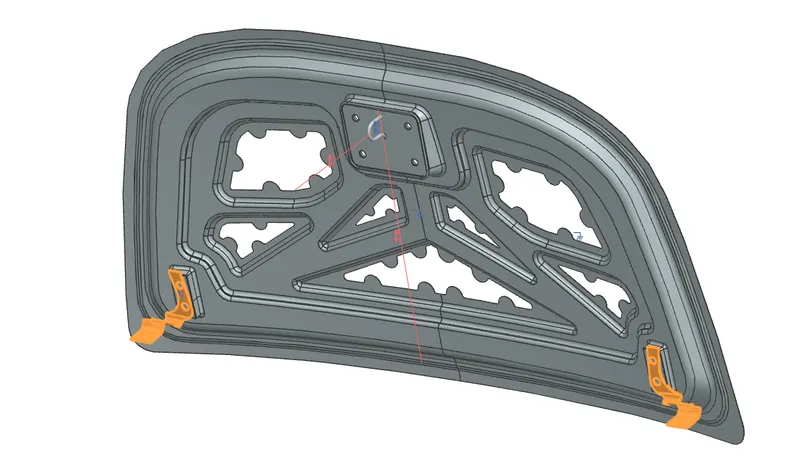
Position of Striker and Hinge Assembly
The attachment of striker to the inner panel of the hood is done by following the certain steps.
For that Initially the the hinge is roughly attached/assembled to the each outwards end of the inner panel throught the hinge reinforcement. Then a line is created along the axis of the two hinges.
A circle is created at the midpoint of that line and another line is created tangent to this circle and then the ref line has created within the circle with particular angle. After that based on the required striker position the circle diameter and the linge angle has been changed. Also an another line has been created parallel to the striker hook from the striking point of the striker.
Then the assemble the both lines and striker to the inner panel through striker reinforcement using the assembly constraints.
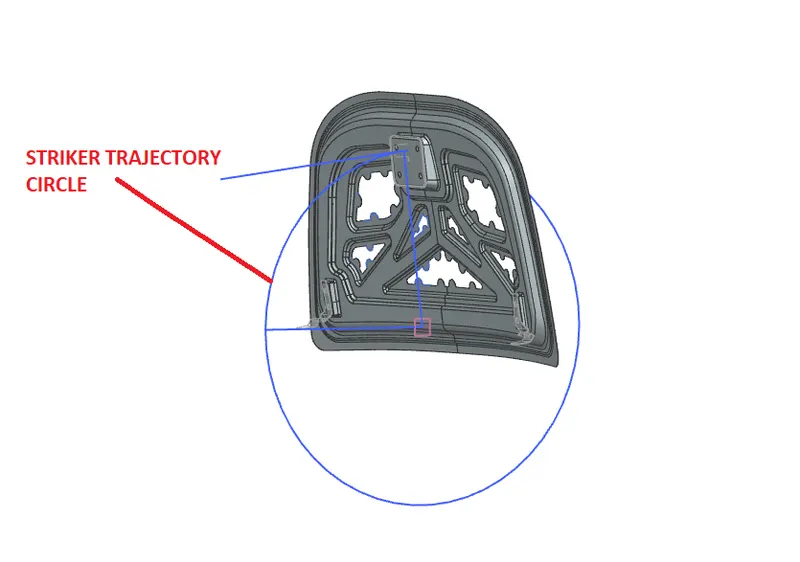
Mastic data:
As we know the main purpose of the outer panel is for aesthetic looks. Thus, we cannot use bolts or spot welding because they will leave marks on the outer panel. Hood commonly possesses a large surface area and hemming can only be provided at the boundaries. So, mastic sealants are used to stick to the inner surface of the outer and inner panels. Mastic sealants are elastic compound that behaves like rubber. Initially, they are in pastel form, but after the hot furnace bath, it gets hardened thus joining the outer and inner panel. It is applied between the inner and outer panels at specified spots. Each spot of mastic sealants has its effect around a circular region of 80mm diameter.
The main function of the emboss is to provide stiffness to the inner panel and direct the forces to the side of the hood in case of a frontal collision. The shape and size of embosses are decided by the design engineer while deciding the shape force distribution should be taken into account. Mostly Y and V-shaped embosses are preferred.
I first created a large base emboss with a depth of 10mm. after this large emboss I created different small embosses according to the requirement. Then I applied the blends at the edge of the embosses to reduce stress concentration.
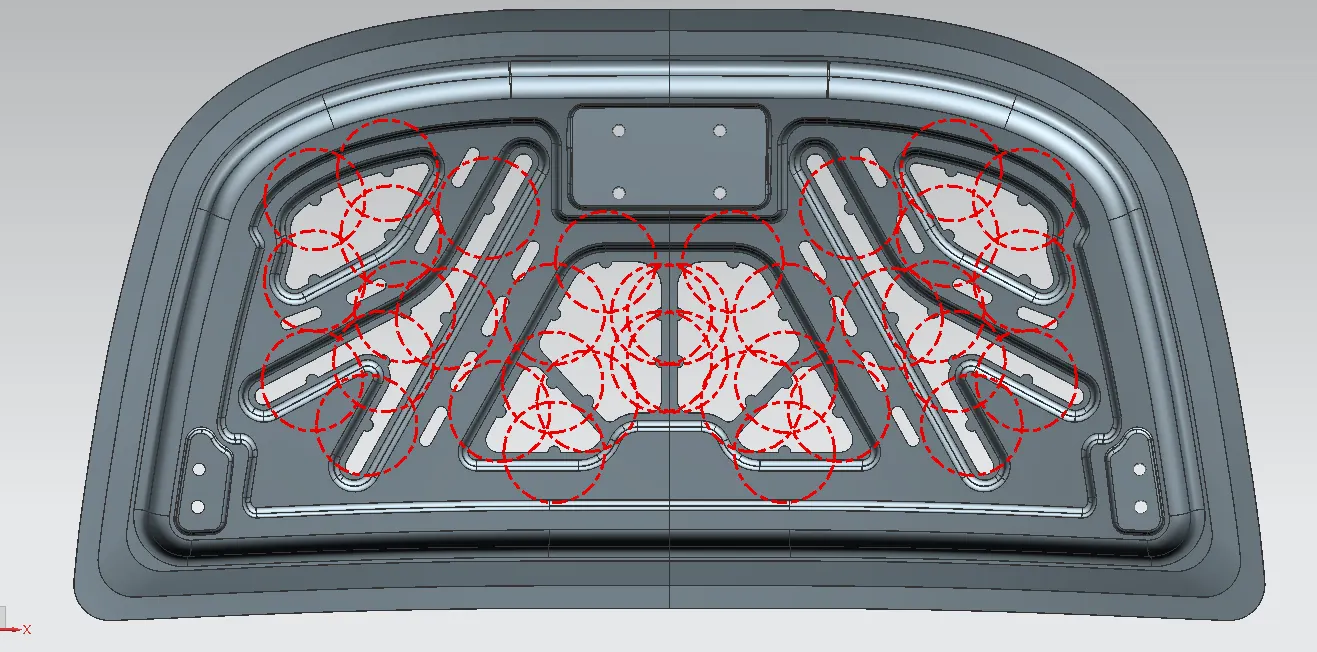
Hemming:
Hemming is used to fit the parts together. It can be done by the edges of one part is to be folded over the other part to fix within it. This operation is done by using the roller.
Hoods, Doors, Boot lids of the automobile components are made by the hemming operation.
There are two types of hemming process are there,
Conventional die hemming - In this method the hemming process is done by using the hemming die to fold the sheet metal edge by the entire length.
Roll Hemming - In this method Rollers are used to done the process and at the same time two or more rollers are fold the sheet metal from the different location of the sheet metal edge to achieve the hemming which is close to accurate. Most of the automobile manufacturer are following the Roll hemming method due to its easier method when compare to the conventional die hemming.
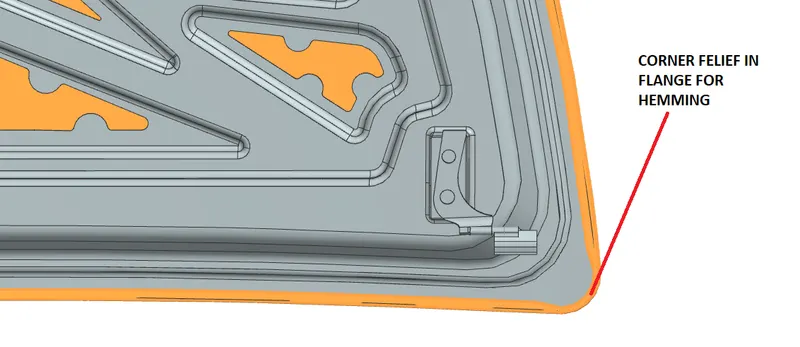
In Hood, the outer panel is subjected to the hemming operation which means that the outer panel edges is folded and roll it back to the underneath of the inner panel. The corner of the outer panel edge has to be trimmed, Because while hemming process the roller transfer pressure to the outer panel edge to fold it and roll it back, so that it may cause the problem that the sheet metal may break.
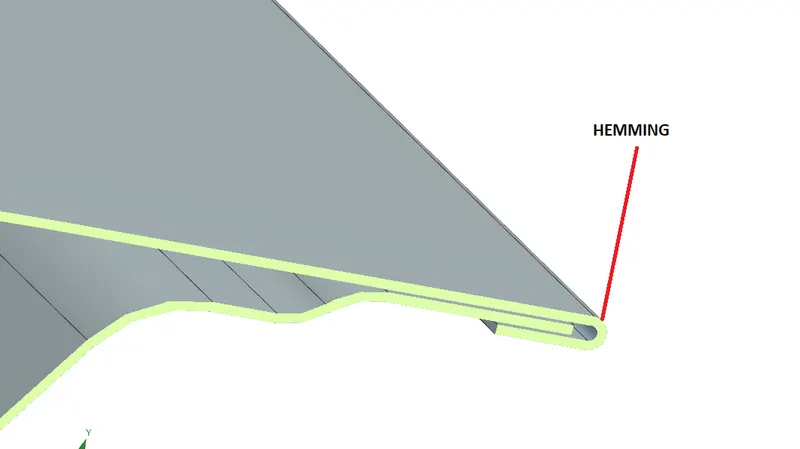
Embossing:
Emboosing is kind of stamping process. It is the process of appliying the pressure to the flat sheet metal by the forming tool to create the projection on that sheet metal wherever required.
In Hood design, the inner panel of the hood has more embosses to improving the strengthening of the panel. Based on the design structure, the embosses are created or we can say projected on the inner panel sheet metal.
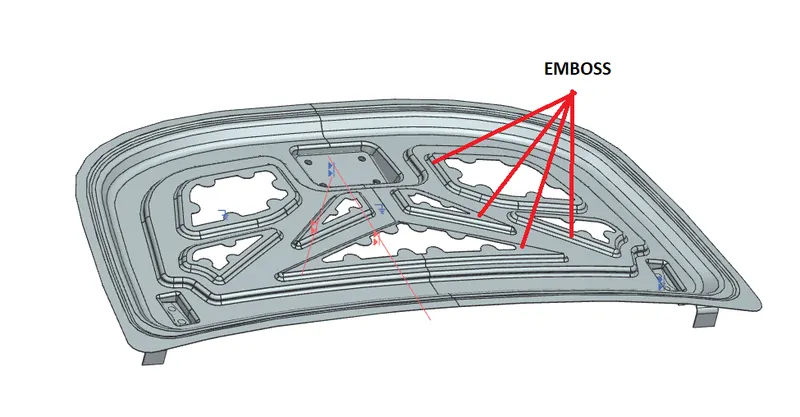
Embosses in the inner panel has ensure the inner panel as strengthen by try to distribute the impact force on outwards of the hood when collision occurs. As per this hood design the impact distribution directions are mentioned in the below picture.
Piercing:
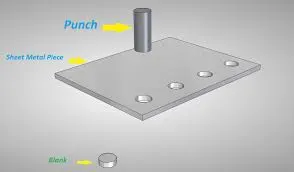
Piercing is the kind of shearing process in which the unwanted material with a particular shapes are removed from the sheet metal by using the blanking punch and dies.
Sheet Metal Bending
Deep Drawing:
Deep Drawing is the sheet metal forming process. It is quite similar as punching process.
Deep Drawing - The required sheet metal is to be clamped and the die with the required shape has to be kept below the sheet metal, then the sheet metal blank is drawn into that forming die by the pressure applied by the punch.
Deep Drawing Operation in Sheet Metal - SMLease Design
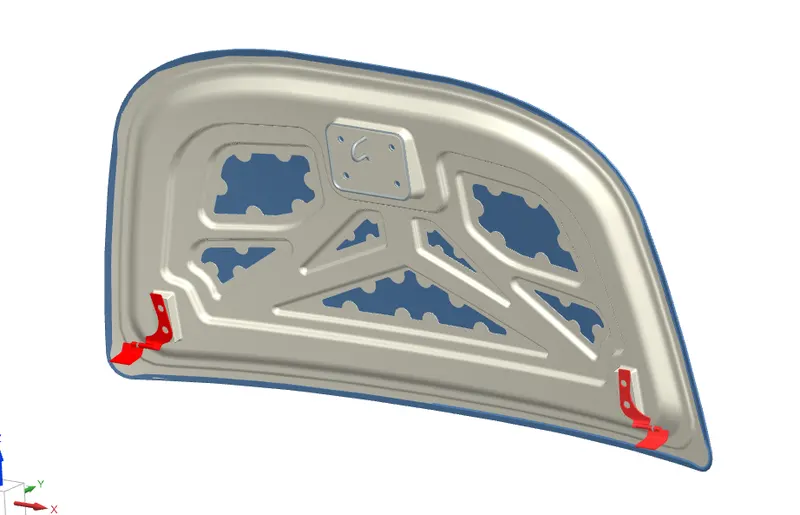
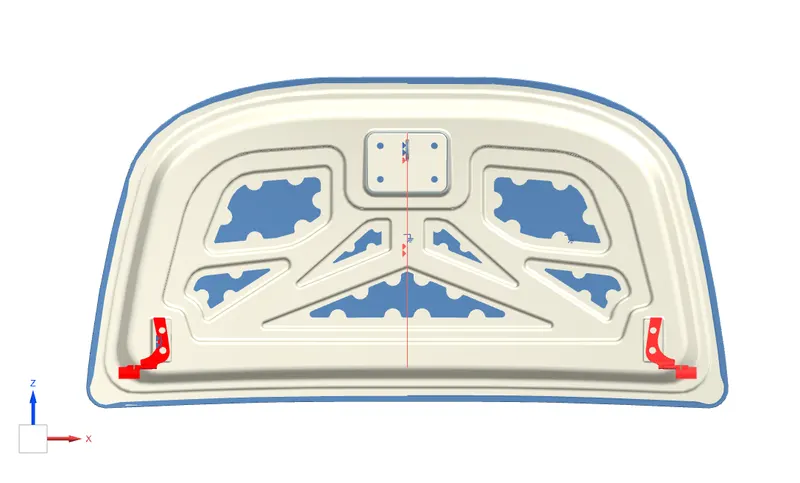
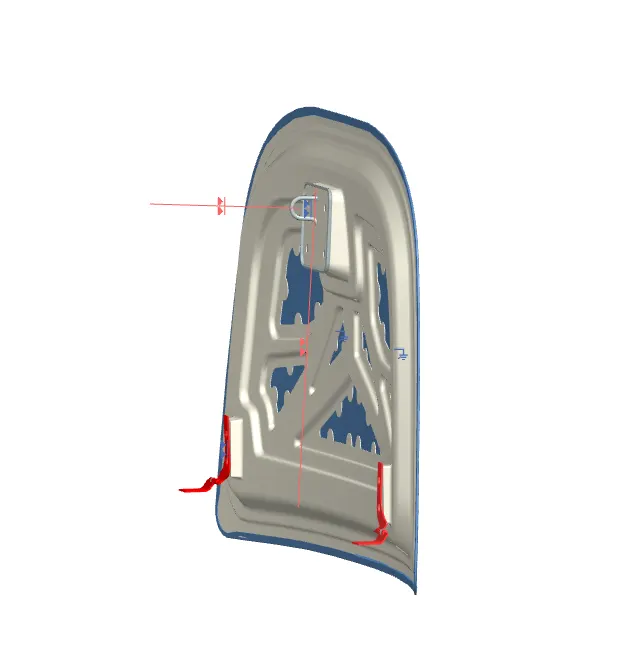
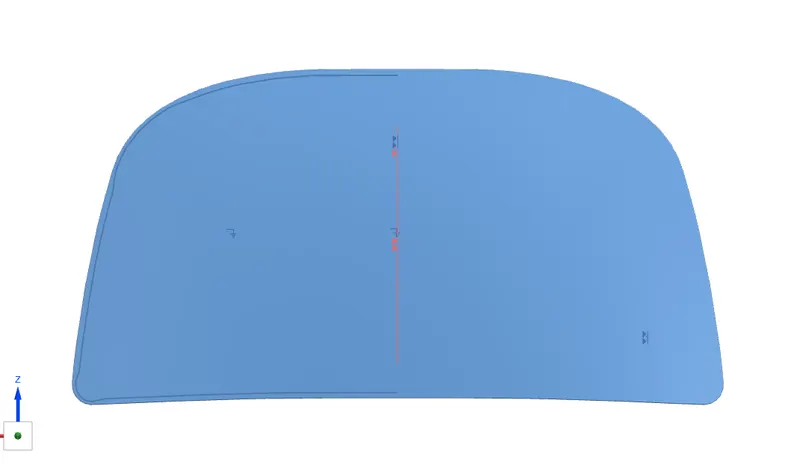
HOOD ASSEMBLY VIEW
Conclusion:
Finally, the hood design has been completed by considering the criteria, dimensions, procedures and standards. By the process of this design, have learnt about the hood mountings, sheet metal operations like hemming, embossing, deep drawing, piercing, Pedestrain safety and its ratings.