Hood design-Week 2
AUTOMOBILE HOOD DESIGN
Here we are going to learn how to design a hood or the bonnet of the car by using the NX CADD and what are all the parts that
required to complete the hood as per the desigin constraints and the regulation and what are all the process that will require to
complete this challenge.
DEFINITION OF THE HOOD.
Hood is nothing but also called as a"BONNET" . the hood are the bonnet is the hinged the covered over the engine of the vehicles. hood can allow the access the engine compartment quick and also it prevents the engine of the car from the various damages.
on the front engined cars the hood may be hinged at the either front or the rear end of the car or in the eariler models the hood may be split in to two section refer FIG:1
FIG:1
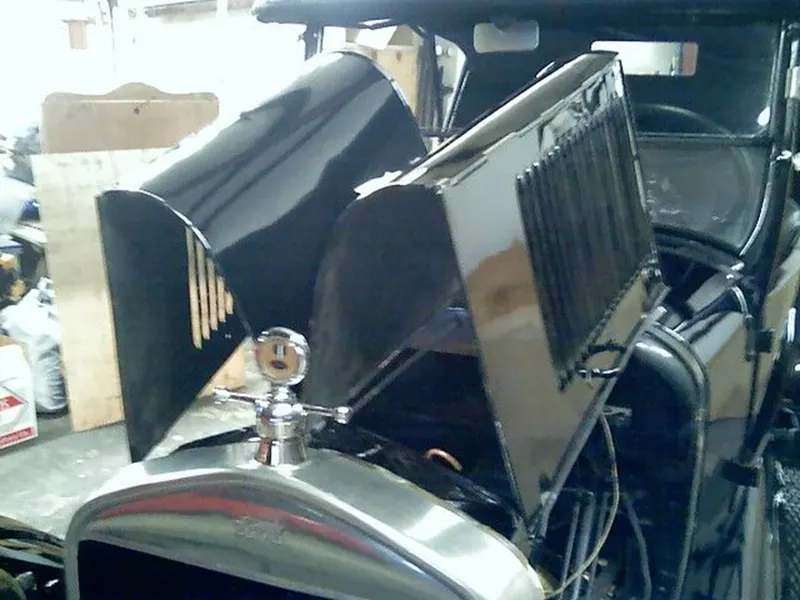
Hood are made out of the same materials that used to make the other outer parts of the body.
PEDSTRAIN SAFETY
Many pedstrain crashes are happen during the frontal moving of the car in such crash the standing or the walking person was draged to the speed of the the car and then continous forward till the car breaks to halt. because of this the pedstrain is impcated twice first be hitting the hood of the car body and after then by slamming in to the ground after the break but most of the injuries come when the pedstrain hits the hood.
so the vehicle designeers tried to replicate the car- pedstrain impact to the car by placing the mannequin by following events.
first the bumper contacts the lower portion of the body of the pedstrain,the edge of the hood hits the pelvis,and the head and the chest area are struck by the top surface of the hood and the windshield.
here is an example of how an pedstrain hits the car. refer FIG 2,FIG 3
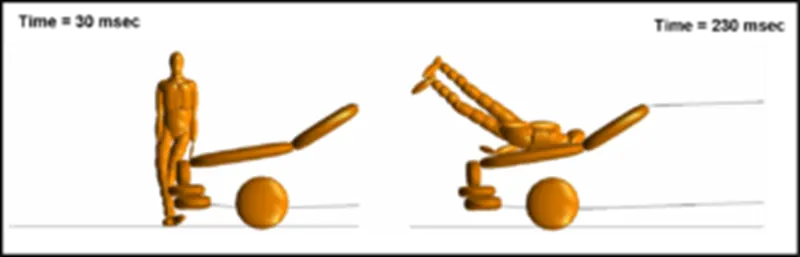
FIG:3
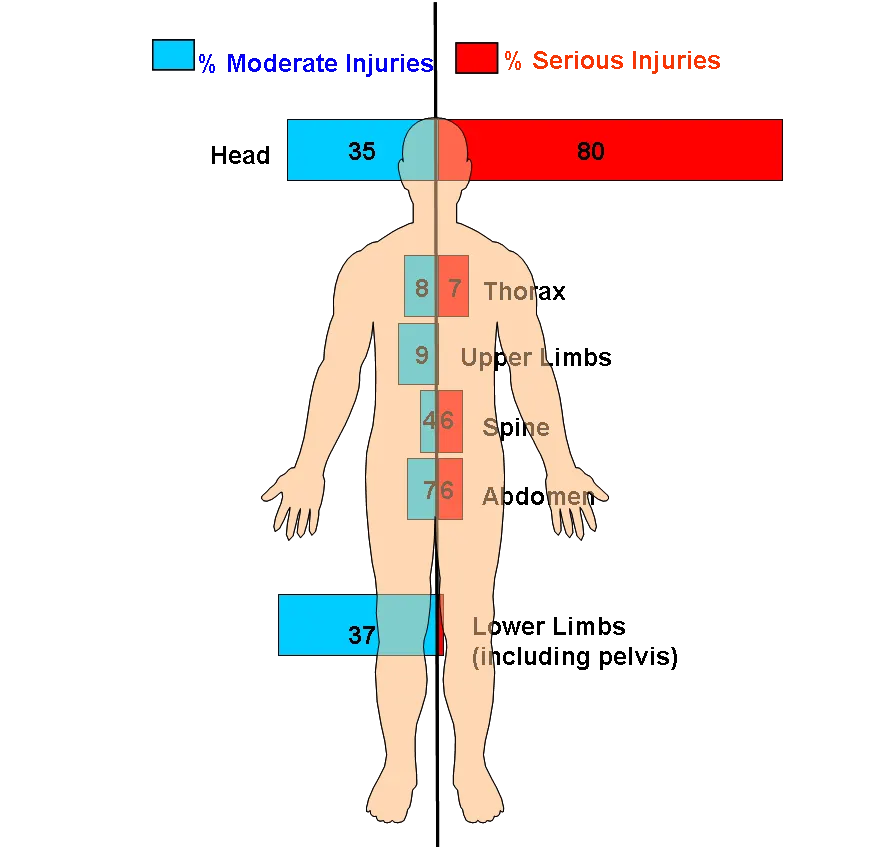
concerns the severity of a potential pedstrain head injury during a collision with the motor vechicle have led to advanced hood design on many models
such design may have include a multi cone inner hood pannel design an active structure that is capable of pushing the surface of the hood away from the vechicle hard motor components in the event of the pedstrain crash is also in use.
DESIGIN OF THE HOOD
we are going to design the hood using the TOP DOWN APPROACH
with the top down approach user start the design of the hood byh defining but not detlaing its first level of the components
each of the component are refined in more details by defining its sub components the process is countined till the low level components are defined and detailed
where as we are designing the hood this is how it comes fro topdown assembly
HOOD ASSEMBLY
OUTER PANNEL
INNER PANNEL
HINGE
STRIKER
The Top down approach is used because the hood outer pannel is a styling surface and it has be designed already and all the reinforcment as done. hence by creating the assembly then the hood inner pannel was designed and the embosses for positioning the hinge assembly,latch and the striker.
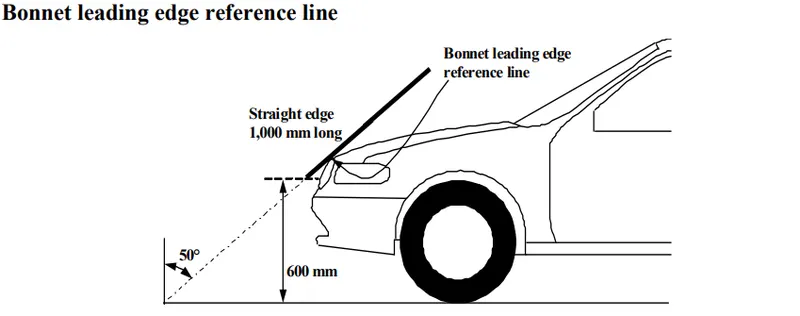
A small definition about the (WAD) WRAP AROUND DISTANCE means the geomentric trace described on the outer surface of the vechicle front structure by one end of a flexible tap when its is held in a vertical longitudinal plane of the vechicle and traveresed across the front structure the tap is held taut throughout the operation is one held at the same level as the ground reference plane vertically below the front face of the bumber and the other end held in the contact with the front structure and the vechicle is positioned at the normal ride altitude.( refer FIG:4)
fig:4
MASTER SKETCH
The master skecth is provided is created based upon the requirements that are recived from the marketability team and the manufacturing requirments that we saw below image is the master section that is used to design the hood.(refer fig:5)
fig:5
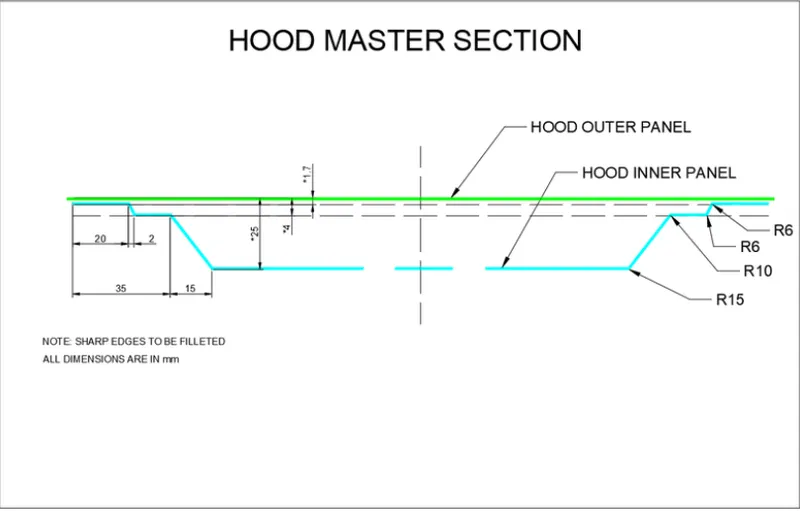
These are all the process involved in designing the hood as a sheet metal operation.
- blanking
- deep drawing
- hemming
- punch cutting
- piercing
- embossing
DESIGN OF THE HOOD INNER PANNEL
fig:6 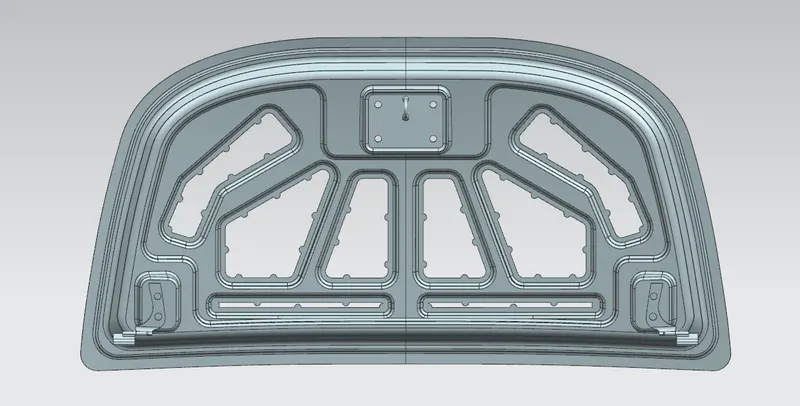
HOOD INNER PANNEL
- First the hood outer pannel which has been given by the styling team is opened and by using the wave geomentry linker the surface of the outer pannel has been extracted as a linked body
- the surface was trimmed in to half along the coordinate
- then the surface was offset to 0mm were generated and one as a feature group as a parent file and whereas the other one is used as a working surface
- by using the master sketch the three layer were off-set as per the given dimension after that three layers has joined by using the through curve option and to avoid the sharp carners the face blend option is used.
- a minimum angle of 10 degree as given to satsify the tooling directon.
- after completing the design all the sharp corners are smoothend and blended as per the manufacture requirments(refer fig:6)
HINGE ASSEMBLY:
- For fixing the hinge assembly there should be a flat surface which is excatly parallel to the x-cordinate and the hinge reinforcment has been created and to avoide the sharp corners the edge blend option is used. (refer fig:7)

fig:7
STRIKER ASSEMBLY:
- after completing the hinge assembly a line has been drawn excatly from the center of the hinge and at the mid point of the line a cirlce as drawn along the y axis at excatly the center that interfers with the center of the striker
- after that using the wave geomentry linker the back side of the striker as taken to create the emboss of the striker and it has extened all sides to create the strong emboss after creating the emboss to avoid all the sharp corners edge blend is used.(refer fig:8)
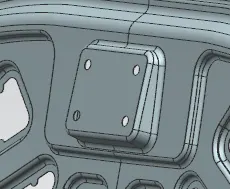
fig:8
MASTIC SEALENT
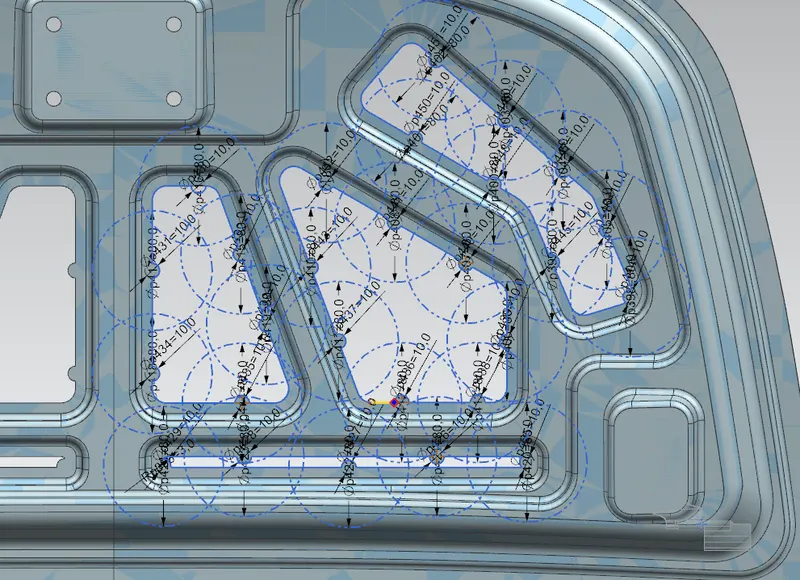
- the mastic sealent or the mastic point is an elastic compound that behaves like a rubber the mastic points are defined in the hood inner pannel where the embosses are created so that the hood can easily deform while collision.they help the hood outeer pannel to come to its orginal shape after its deformation
- and the Mastic has an influence area of 80 mm in diameter
- And the main creation of the mastic point was to reduce the NVH(noise, vibration,and Harshness)that created on the hood.
- the mastic point will reduce will reduce the NVH for around 80mm in diameter so providing the many no of the mastic will improve the performance of the car (refer fig:9)
(fig:8)
HOOD OUTER PANNEL
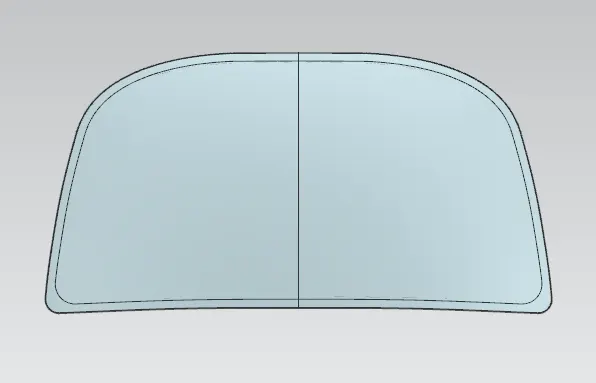
HEMMING DATA
- hemming is the process of joining the both outer panel and the inner panel. the hemming is the process of rolling the two sheets
- the hemming process roles and wraps the hood outer panel around the hood inner pannel and hold it tightly together.
- the edges of the hood outer pannel hemming cannot be done because of the while flodinf the sheet there will be some wrinkels around the edges of the sheet to avoid that a relif as been given for smooth rolling. (refer fig:9,fig:10)
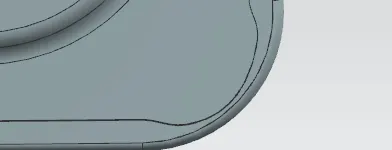
(fig:9)
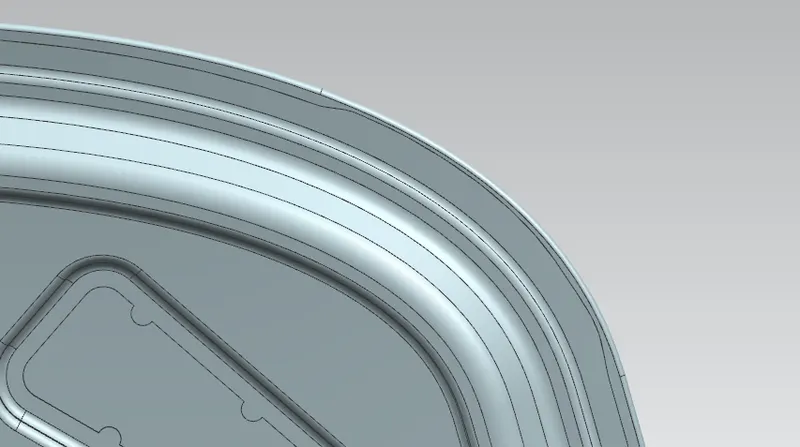
(fig:10)
- the hood outer pannel was created by creating the offset surface from the styling surface and then trimed in to half.
- then for creating the hem flange about 6mm around the hood outer panel to hold the inner panel..
- then law extension are used on the outside of the curve and generated surface was offset to 6mmand the remaning portion was trimmed
- by using the face blend the hemming flang was created and by using the curve on surface and the trim sheet the required corner relif was given.now the other half was mirrored and sewed together.
- below image shows the section view of the hood which explains the tolerance smoothness and the face interctions were achived as per the manufacturing requirments. (refer fig:11)
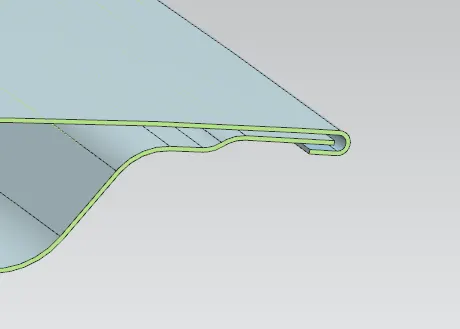
(fig:11)
POSTIONING OF THE LATCH AND THE STRIKER (REFER FIG:12)
(FIG:12)
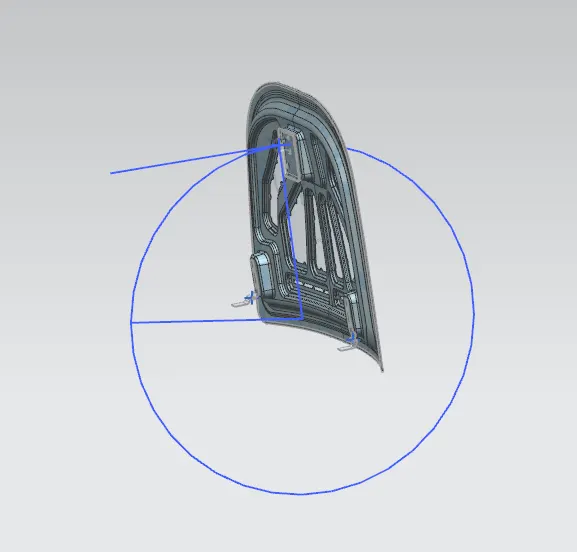
IMAGES OF THE MODEL FROM DIFFRENT ANGLE
(FIG:13)
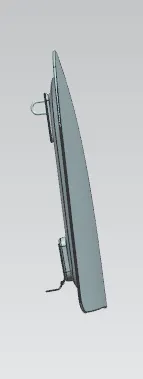
(FIG:14)
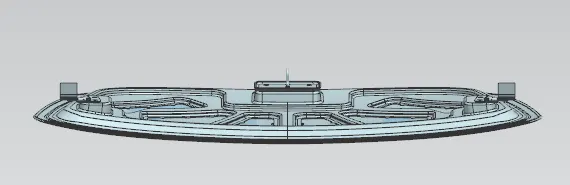
(FIG:15)
CONCLUSION:
hence the model as been created as per the given requirments.