Hood design-Week 2
AIM:
Design Hood Outer Panel, Inner Panel and the necessary reinforcements by following the Master Section mentioned with the Design parameters
Procedure:
- Open all the (.igs) & (.stp) file and save it as cat prt file.
- Create an Assembly part file.
- Open all the cat part file, Create tooling axis and copy the Outter pannel and paste special as link as inner pannel.
- According to the given master section, start creating the Hood inner pannel.
- Create Primary emboss, secondary embose and Mastic.
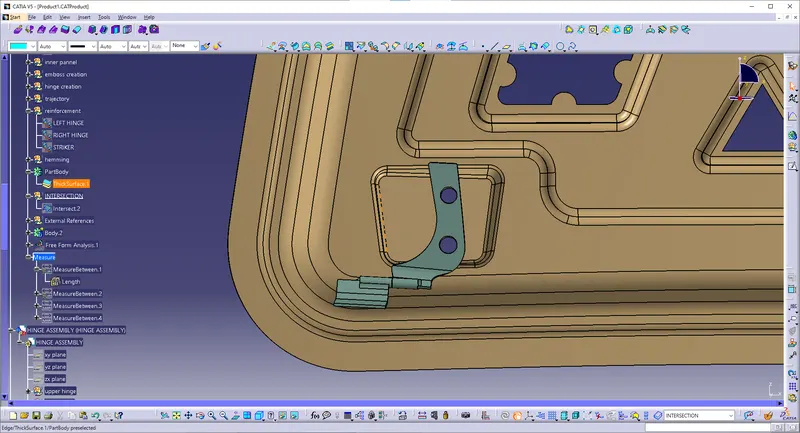
- Create Deboss for Hinge.
- Convert the Hinge part from Surface to solid.
- Using the Trajectory method Align the striker according to the primary emboss and secondary emboss.
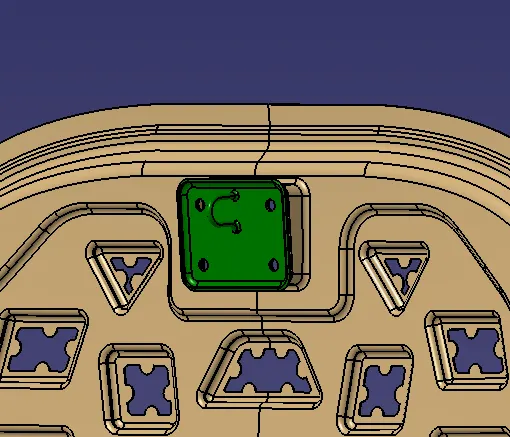
- Create the deboss for striker.
- Create reinforcement for hinge and striker.
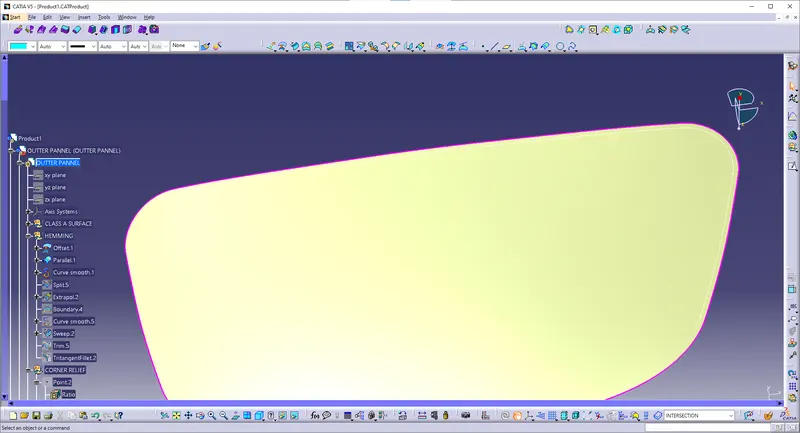
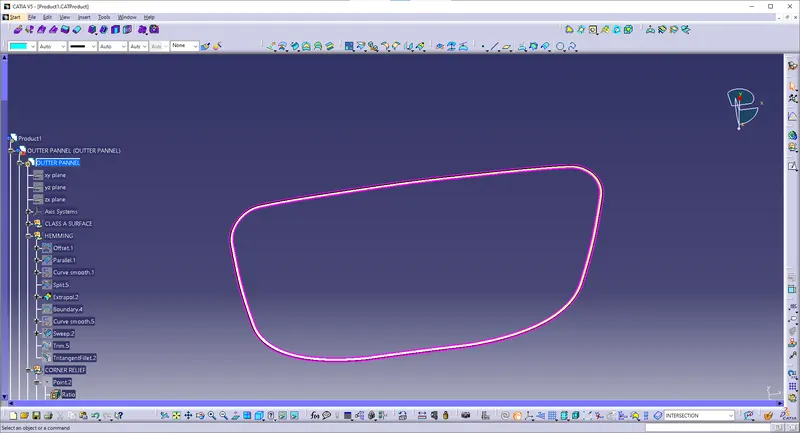
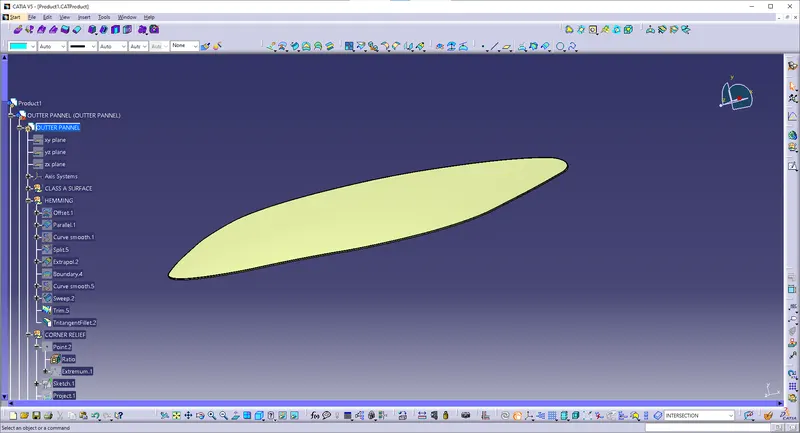
- Create Hemming operation for outter pannel.
- Create corner relief at the bend.
- Finally make it as solid using thicken method.
- And create intersection for both inner pannel and outter pannel. verify using the intersection.
What are BIW Closure?
An excellent body in white (BIW) should be structurally stiff, overall light weight and manufacturing wise cheaper to produce. And these are the factors which our engineers always trying to balance while designing each sub-system or each individual component.
Catogery under the BIW Closure.
- Bonnet.
- Tail Gate.
- Roof.
- Side Doors.
- Fender.
HOOD -
The hood or bonnet is the hinged cover over the engine of motor vehicles. Hoods can open to allow access to the engine compartment, or trunk (boot ) on rear-engine and some mid-engine vehicles) for maintenance and repair. It generally covers the engine and other essential accessories of the car. The Hood consists of Hood Outer Panel and Hood Inner Panel. The Inner panel provides the strength and support and the Outer Panel provides the aesthetic look. while designing the Hood a Design enginner needs to make sure that the following design parameters are followeed.
- Pedestrian Safety
- Occupant Safety
- Styling
- Manufacturibility
Points to be consider while designing the hood:
- Opening angle of Hood
- N CAP crash Test
- Wrap Around Distance (WAD)
- NVH (Noise, Vibration, Harshness)
Parts under the hood:
- Engine. Let's start with one we hope you know. ...
- Alternator. If your car won't start, it's important to determine if it's an issue with the battery or alternator. ...
- Battery.
- Belts.
- Cylinders and Spark Plug Wires.
- Piston and Crankshaft.
- Oil Fill Cap and Dipstick.
- Radiator.
- Components –
The car hood consists of following components,
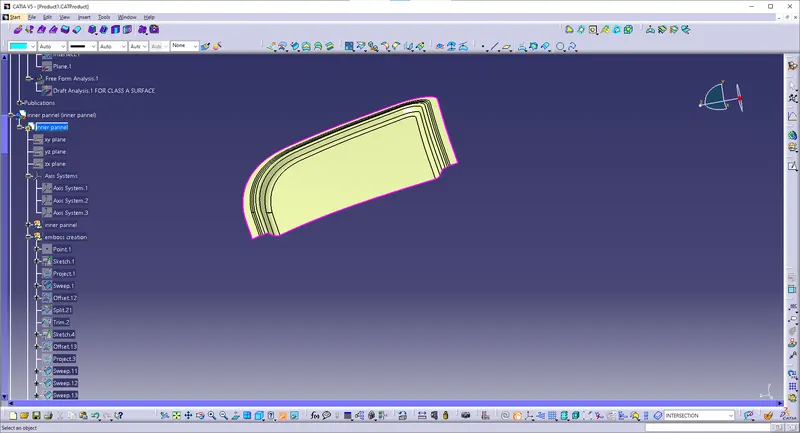
CREATING INNER PANNEL :
1) Hood Outer Panel
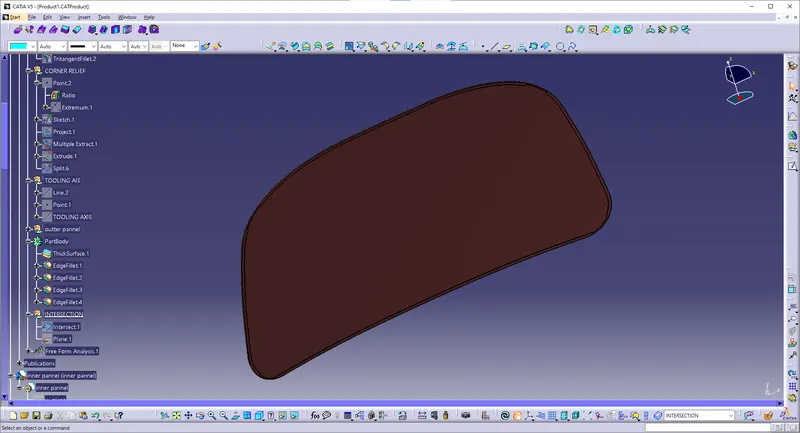
- The outer panel works as a metal cover. It is responsible for aesthetics of the vehicle.
- We can also call it as cover of inner panel. It is the part, which gives luxurious look to the hood or bonnet. Outer & inner panel can not join by any welding process like spot welding or rivet, which spoil the outer look of a car. The outer panel is generally extracted model from the prototype design.
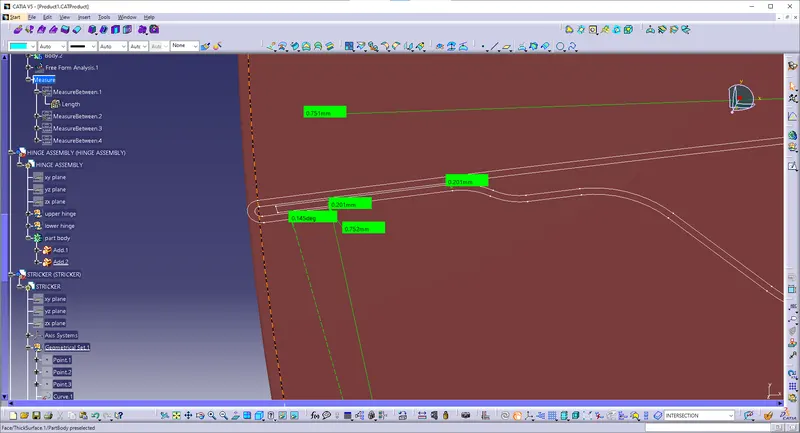
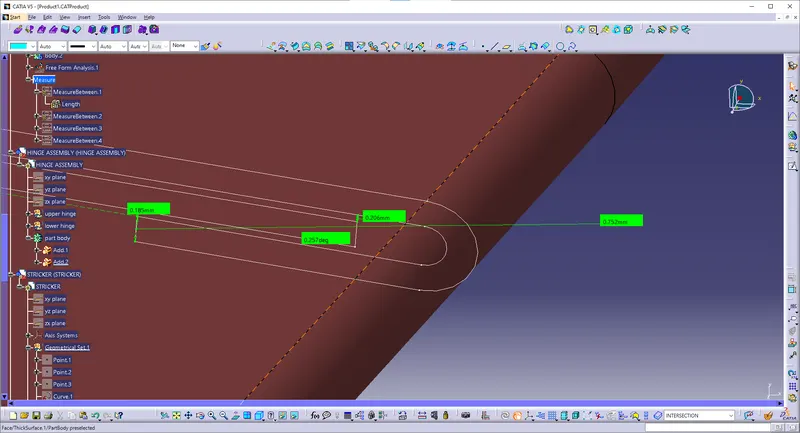
- Outer Panel is the most important part of the hood to makes the car in a very good aesthetic proportion . So that the outer panel is perfectly made insense to achieve the aesthatic requirement . So that , the sheet metal operation result which is visible on the outer panel or it reduces the aesthatic value means , those operations are strictly not to be followed to make the outer panel . That's why the hemming process is used to join the outer panel with the inner panel , instead of using welding methods .
- By considering the given Outer Panel thickness ( 0.75mm ) and using the outer panel styling surface the outer panel has been made as below.
2) Hood Inner Panel
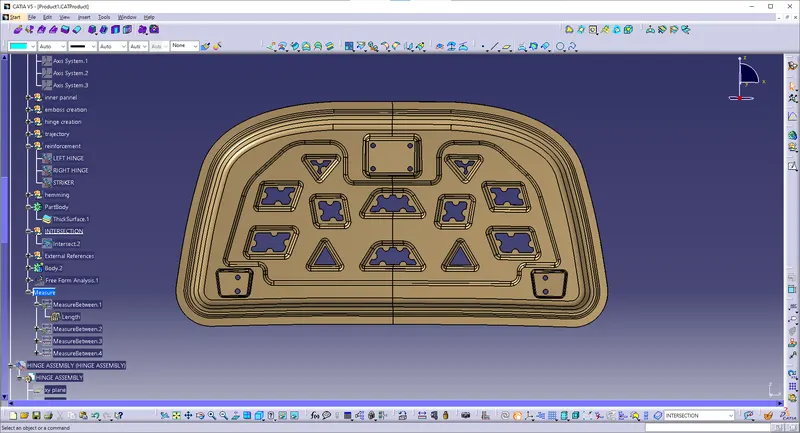
The inner panel provides strength and supports the outer panel. It is where hood balancer and hinges are attached.
- In the inner panel only we can research & implement the safety of pedestrians & as well as the driver. In this panel only we can attach the reinforcement, embossed, mastic points etc.
- It is an object of the present invention to provide a hood inner panel capable of reduction of a reaction force of the hood inner panel even if a level of deformation of a hood of a vehicle increases, & ensuring a sufficient energy absorption capacity.
- Inner Panel is the major part that ensures the rigidity of the hood and it is used to diverts the impact to outwards of the hood however possible when the collision occurs . It is can be achieved by the good inner panel design and the emboss direction in the inner panel .
- Lot of design changes and researches are done and being carried out in the inner panel only to achieve the pedestrain safety and the passenger safety to make the standards .
- In this inner panel , the required holes are made to transport the hood from one station to other and fix the hood in fixture by using this hole as budding holes . Also the inner panel has the embosses and mastic points . By considering the given Inner Panel thickness ( 0.75mm ) and offseting the outer panel styling surface with the given offset data , the Inner Panel has been made with the embosses and mastic points as below.
TOOLING AXIS:
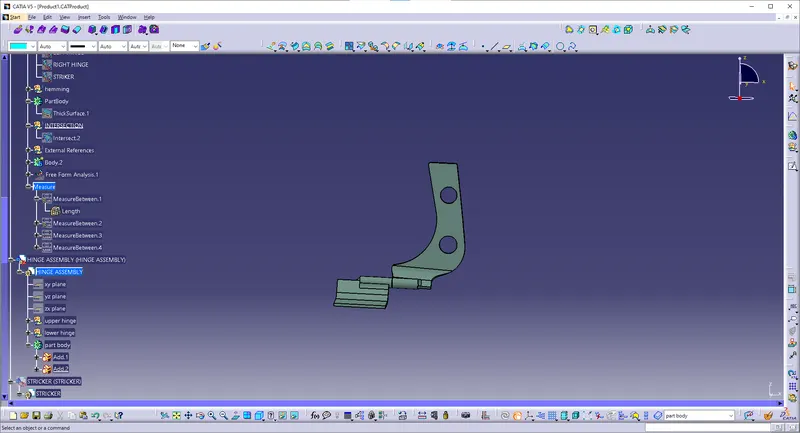
Hinge Assembly
- It is used to fix the hood to the engine compartment .
- For any component has to be open and close with an axis , then hinge plays a major role . It has two simple parts ( one is hood side hinge , another one is engine compartment side hinge ) and assembled with the single axis .
- Hinge Assembly is attached at the each Outwards end of the hood and the engine compartment .
- Hinge is a component that fixes the hood to the fenders of the car. The latch must be fixed perpendicular to the hinge axis so that the hood opens or closes properly.
Striker - Latch
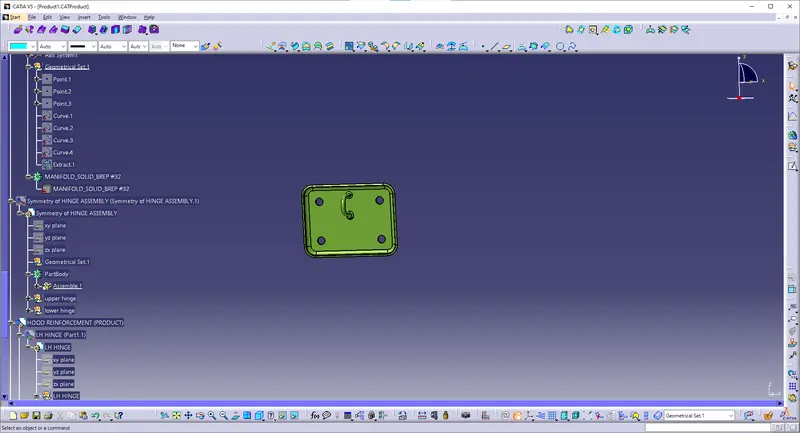
- Striker is the part which is used to hold the hood with the engine compartment by using the latch which it is attached in the engine compartment , when the hood not require to open up . The striket is attached to the bottom of the inner panel and it hits the latch and locked with it , when the hood is dropped down .
- There s lever which is provided inside the cabin to the driver to release the latch pressure . Once it can be done , the hood will opens up in a inch , then we can able to open the hood more .
Striker Assembly-
Latch & striker is used for locking the hood with the car. It is usually placed on the space provided on the inner panel.
The process involved in designing hood as a sheet metal operations is
- Blanking
- Hemming
- Punch cutting or piercing
- Deep drawing
- Embossing
Hemming-
- Hemming is a sheet metal forming process in which sheets are joined by bending it usually to 180 degree. Automotive body panels & parts such as deck-lids, trunk-lids, doors, hoods & tailgates are formed by hemming processes.
- Roll hemming is carried out incrementally with a hemming roller. An industrial robot guides the hemming roller & forms the flange. Roll hemming operation can also be divided into several pre-hemming & final hemming process steps.
- Coventional die hemming is suitable for mass production. In die hemming, the flange is folded over the entire length with a hemming tool. Normally the actual hemming is a result of a forming operation in which the flange is formed with a hemming tool after the drawing & trimming operations have been completed.
Reinforcement :
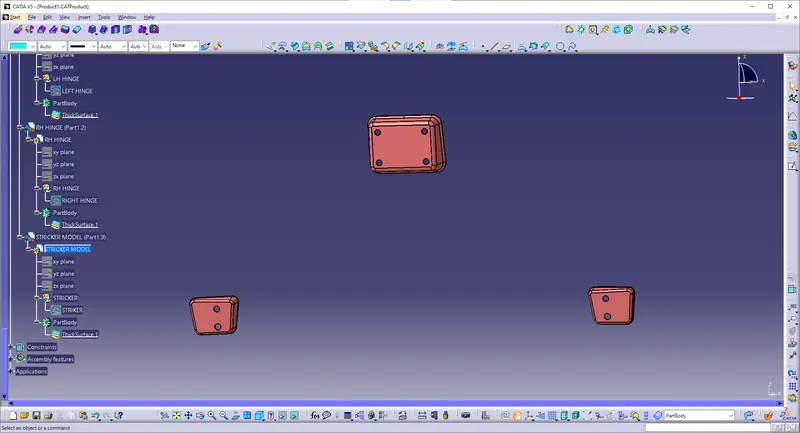
Reinforcement is used to add strength to the striker and hinge part in the hood. Since the hood thickness is less and those part sholud face lots of collision while clossing the hood. So to add the strength we have to give 1.5 mm thickness.
- The Striker and Hinges are attached at the lower side of the inner panel . It it can be done by directly then more stress can act at the particular area in the inner panel , it may cause deformation of the inner panel at that particular region . So that the reinforcement comes in and placed between the striker and the hood , hinge and the hood . It can able to reduce to deformation and strengthening the inner panel at that particular region .
Corner Relief:-
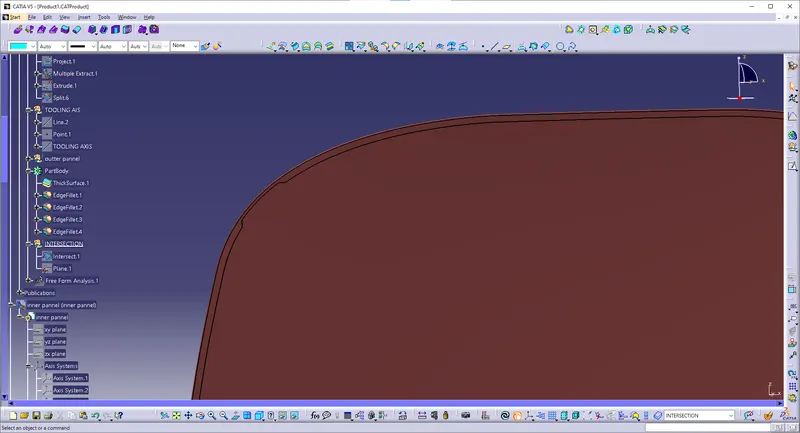
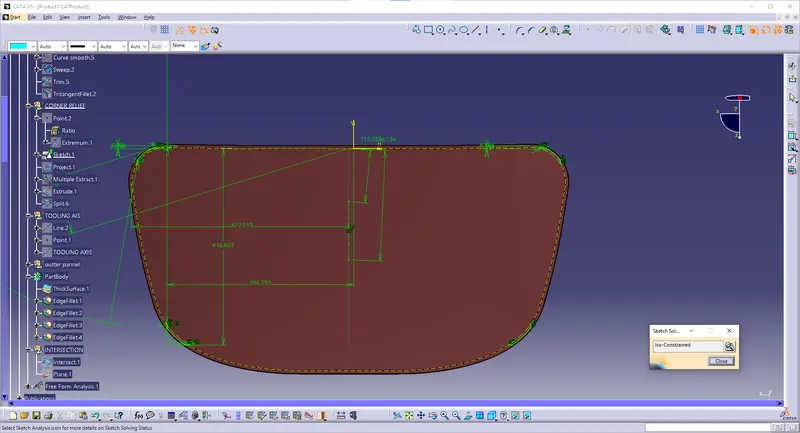
- A bend relief is nothing more than two small incisions cut into a piece of sheet metal to free the metal between the two. It separates the material you want to be able to fold from the rest of the part. You only need it when there is material on either side of a bend.
There are many types of Hemming process but in Hoods Roller hemming is used. In this process the roller will be rolling over the edges of the Outer panel to close it with the inner panel. These roller will be rolling over 2-3 time for perfect closing. so, the certain force is being used by rollers to all the corners but there are some areas where the roller cannot tighten the part properly so thats why we give some relief to the corners.
Mastic sealant:-
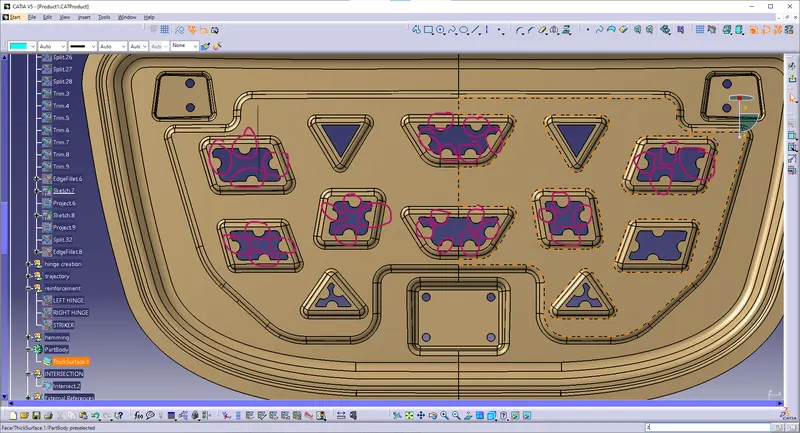
- The sealant is applied around and inside the doors, hood, trunk, and front dash, and onto the exterior and interior of metal joints and outer area of the back wheel well; application of the sealant is accomplished either manually or with robots and prevents air and water ingress and inhibits rust formation. It is used (NVH) Noise Vibration Harness.
- The Mastic sealant or mastic points is a elastic compound that behaves like a rubber. it is applied between Hood's outer panel and inner panel. it have an influence area of about 80mm.
Reinforcements:-
Reinforcements are used to provide more strength to the assembly.
1. Latch & striker
2. Hinge
LATCH & STRIKER:-
Latch & striker is used for locking the hood with the car. it's usually placed on the space provided on the inner panel.
HINGE:-
Hinges are used to connect the hood & cowl panel of an automobile. it enable the opening & closing operation of the hood. the hinge should be made strong enough to to handle the weight of the hood and also to handle the force action on it during the collision.
TRAJECTORY
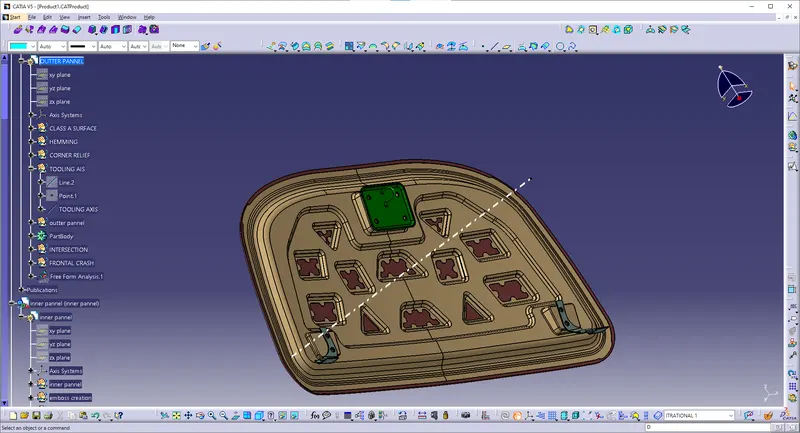
Striker trajectory is given by the circle drawn from the hinge axis point. Hinge axis point is the centre point of the hinge axis. First, we can fix either the striker or the hinge. If we have fixed the hinge position then we should plot the Trajectory circle for the striker. For proper mating condition the striker axis through the tip of the striker should be tangential to the striker trajectory.
Position of Hinge & Striker:-
The hinges should be usually placed on both sides of the hood in such a way that the strike fits exactly into the hole provided.
To ensure this the followning conditions are follow:-
1. Both the hinges should be on the same axis.
2. The centre of the striker's circular trajectory should be always perpendicular to the hinge axis.
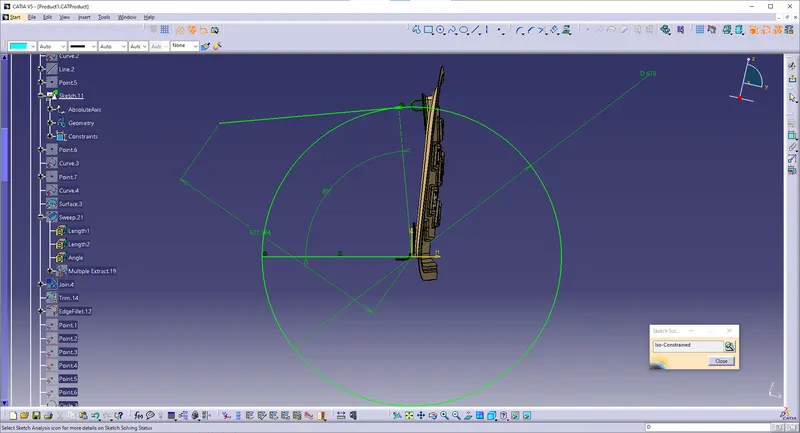
co insedent for two lines
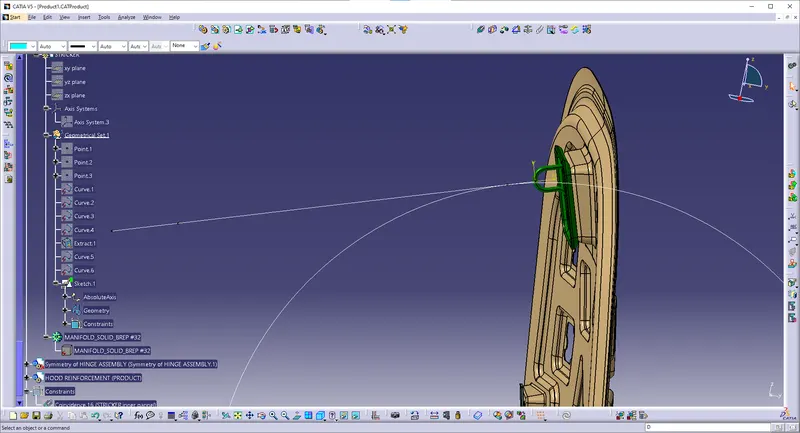
EMBOSS:-
Embosses are the projections made on sheet metal using deep drawing techniques. the operation is carried out the mostly for the purpose of stiffening flat surface and design in the inner panel. the major function of embossing is to dissipate the force acting on the hood during the collision of the car toward the hinges as early as possible. this helps to reduce the impact of the force on the passenger sitting inside.
PRIMARY EMBOSS:
- Primary emboss - Primary Emboss is created by offseting the outter pannel to 15.75 mm. The sketch should satisfies the 6-8 mm gap between the fillets and followed to this we have to also consider the space allotment for striker and hinge.
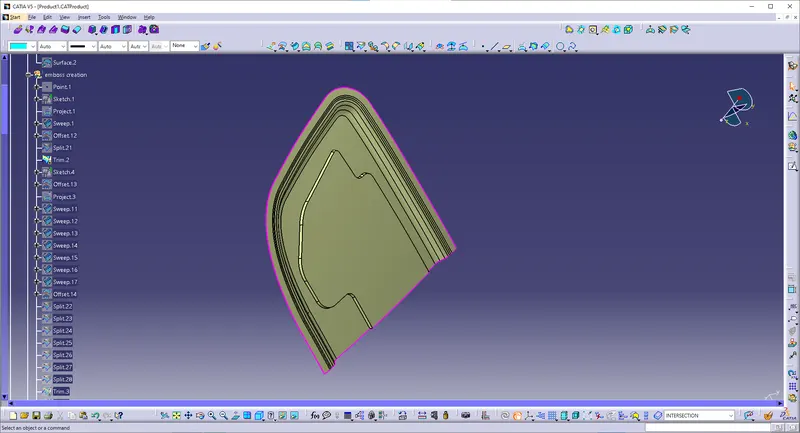
SECONDARY EMBOSS:
- 6unj6u6u6u6uSecondary emboss - Secondary emboss is created by offseting the outter pannel to 6.5 mm. It can be made using different Shapes such as, Parallelogrom, rombhus, etc... It should also maintain the 6-8 mm gap between fillets.
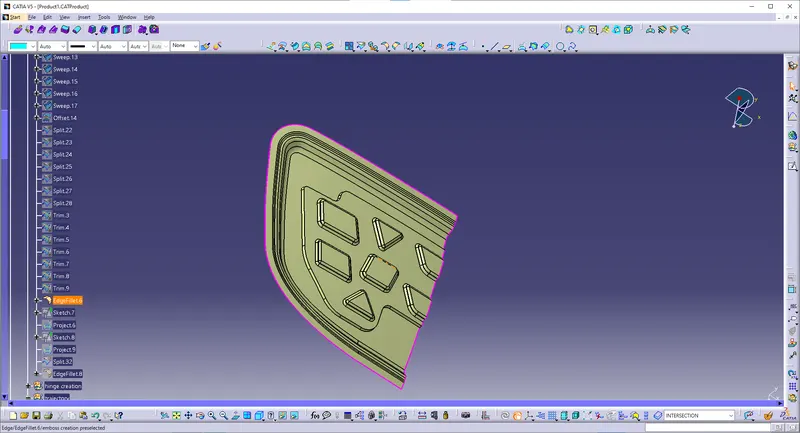
DEBOSS:
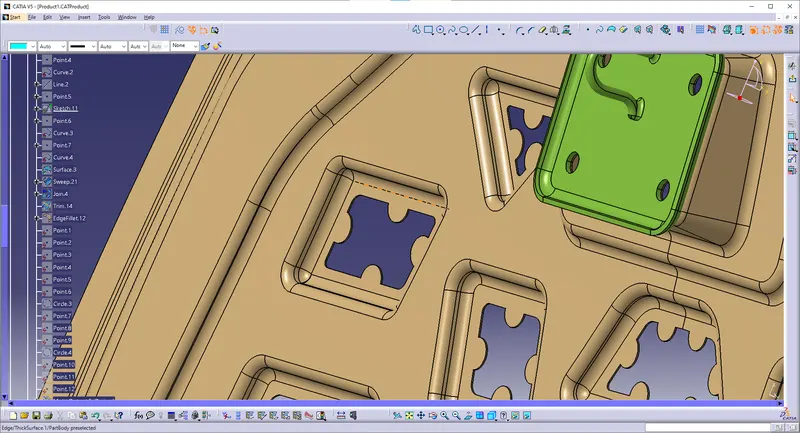
Debossing is when an image (logo, text, etc.) is imprinted into your print piece, creating a depressed effect. Just like embossing, you can choose to leave the debossed area untouched or fill it in with ink or foil stamping.
Deboss in Hinge - Just like creating a sketch without distrubing primary emboss. The sketch should maintain the enough space to place the hinge on it. It mandatory to maintain 6-8 mm gap between fillets. And then we sweep and trim along with the offseted surface.
Deboss in striker - First we have to align the striker with the help of trajectory method. And then we have to take extract of the striker bottom surface. Followed to the striker we have to take sweep with the edge of the extracted surface and then we have to trim with the inner pannel.
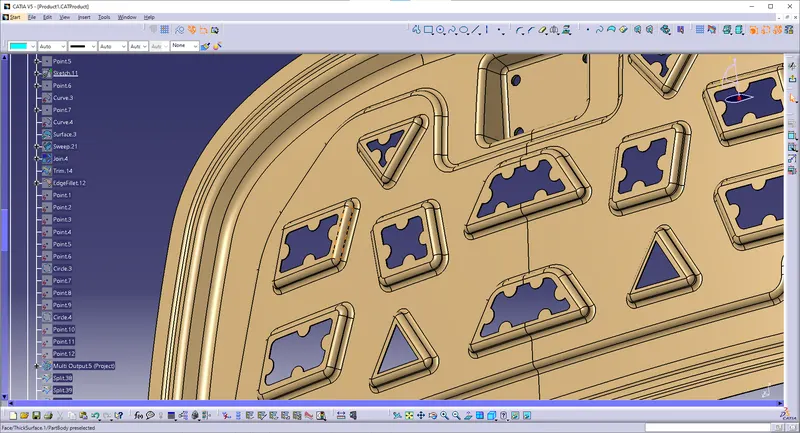
HEM FOR OUTTER PANNEL TO JOIN THE INNER PANNEL TO CURVE THE SURFACE
DESIGN PARAMETER:
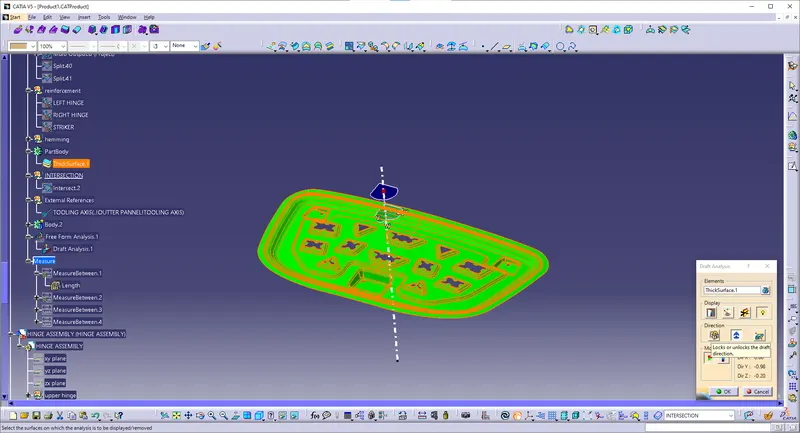
DRAFT ANALYSIS OUTTER PANNEL:
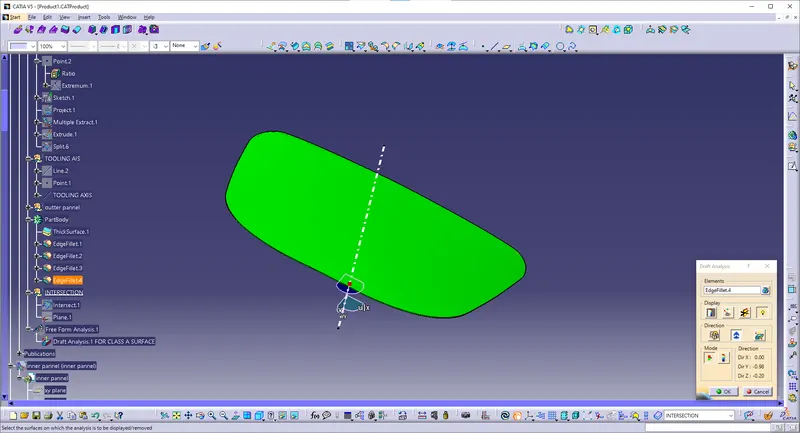
DRAFT ANALYSIS FOR INNER PANNEL:
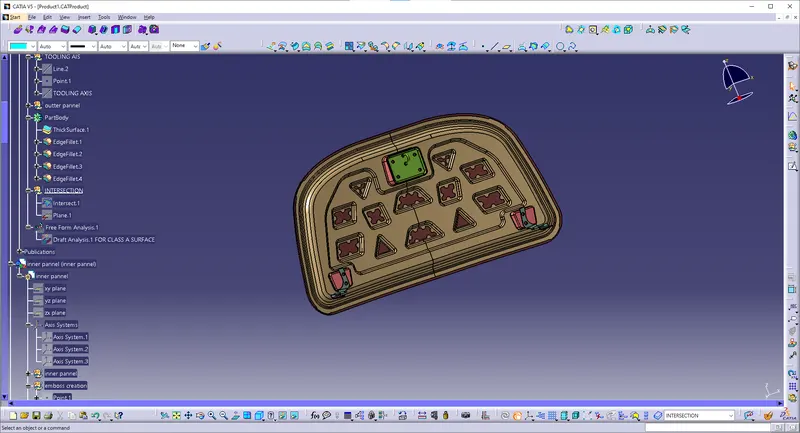
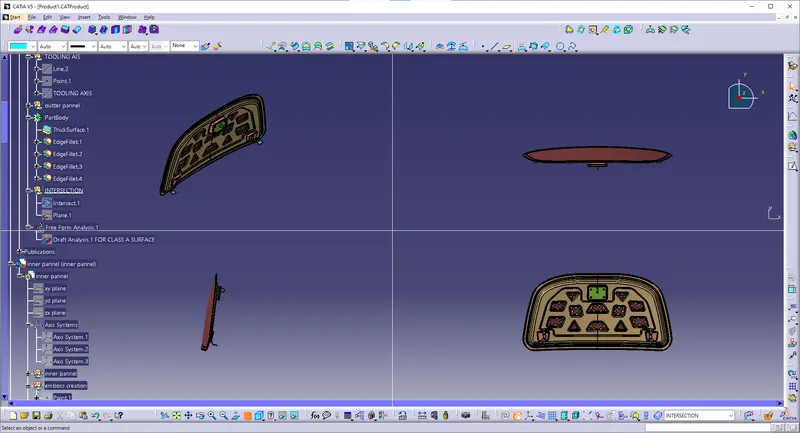
FINAL BODY OF CLOSURE SURFACE:
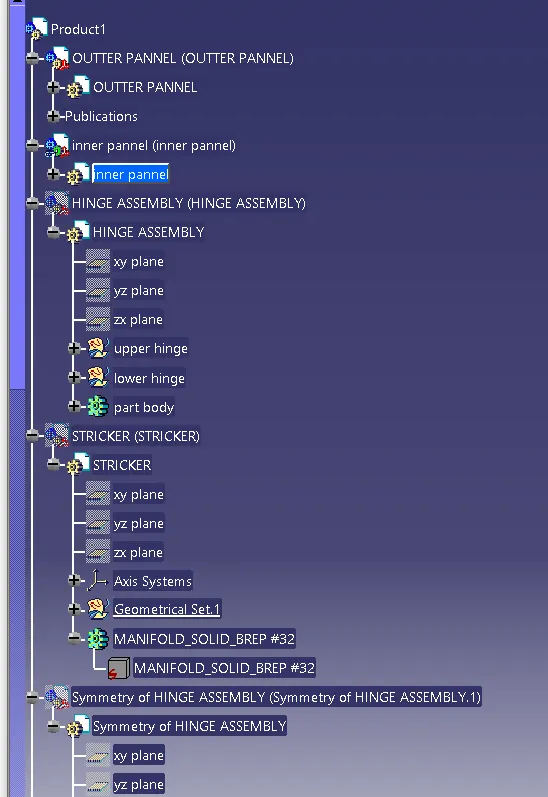
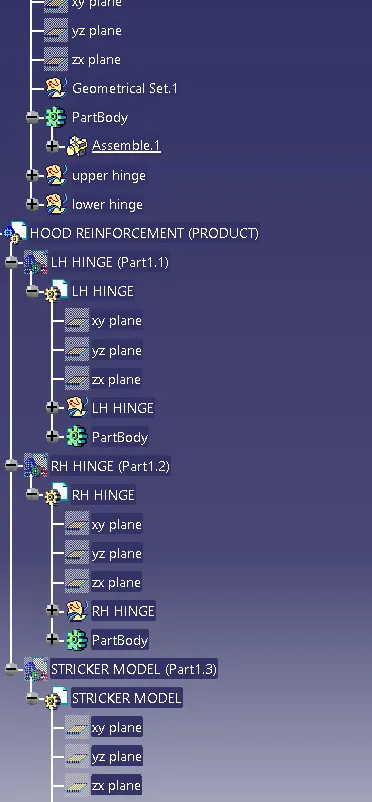
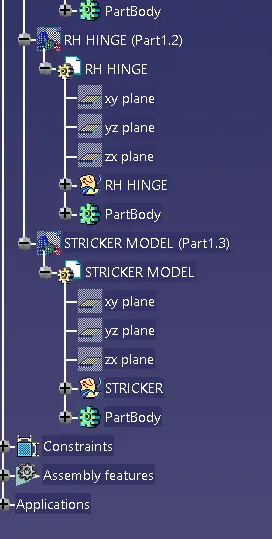
FAMILY TREE:
CONCLUSION:-
ALL the parts of the hood are designed based on the required conditions & given dimensions. With the completion of hood design & analyzing for successful manufacturability. we can conclude that the hood can be utilized for the vehicle.
Also, considering the safety of occupants & pedestrians the hood has been designed under the EuroNCAP safety regulations.