Hood design-Week 2
HOOD DESIGN
Here we are going to understand about the HOOD & ITS DESIGN PARAMETERS WITH MANUFACTURING PROCESS.Basically hood is one of the part in automobile BIW which plays the important role in asthetics of the car.Hood also helps to insulate the sound produced by the engine.Now a days people consider more on safety of the car in hood also some design standards we have to follow to make the passenger & pedestrian safe.
A car hood, also referred to as a “bonnet” in some countries, is the hinged cover that rests over the engine bay of a front-engine vehicle.
PARTS IN HOOD :
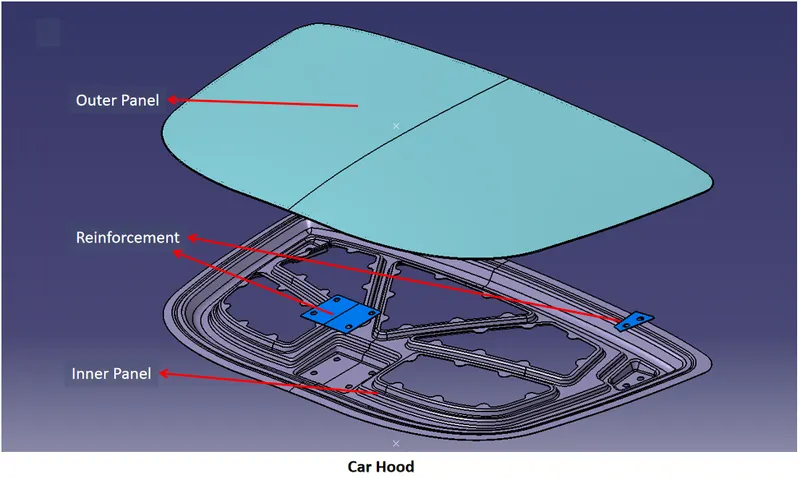
Fig.1
Outer panel :
Outer panel is full responsible for the car asthetic it is technically called as class A panel it wrap&cover the all components of hood assembly Fig.2
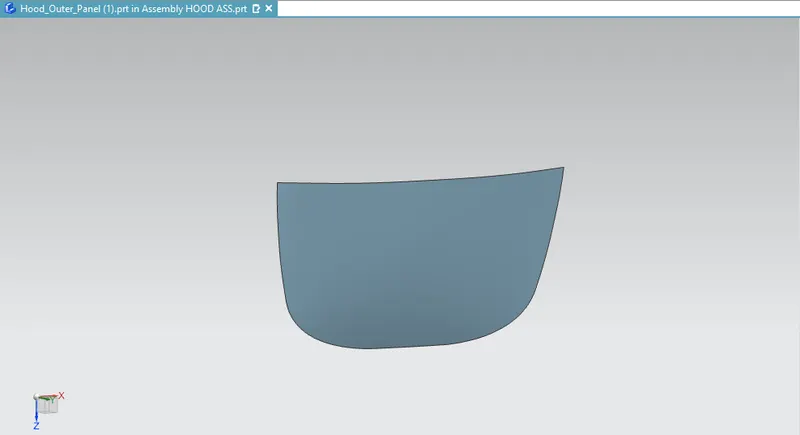
Fig.2
Inner panel :
Inner panel is a sheet metal with different shapes of embosses acts as skeleton of the hood assembly.All other child components are get fitted in this inner panel only.It is designed in that manner to reduce the force which is entering in to passenger cabin during collision.
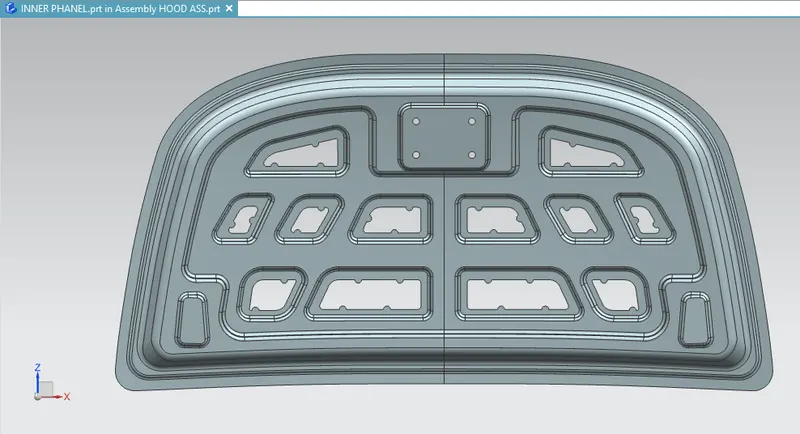
Fig.3
Hinges :
Hinge is a movable joint or mechanism on which a door, gate, or lid swings as it opens and closes or which connects linked objects.Here we are using two hinges @ two rear edges of the hood which is going to decide the opening & closing angle of the hood.
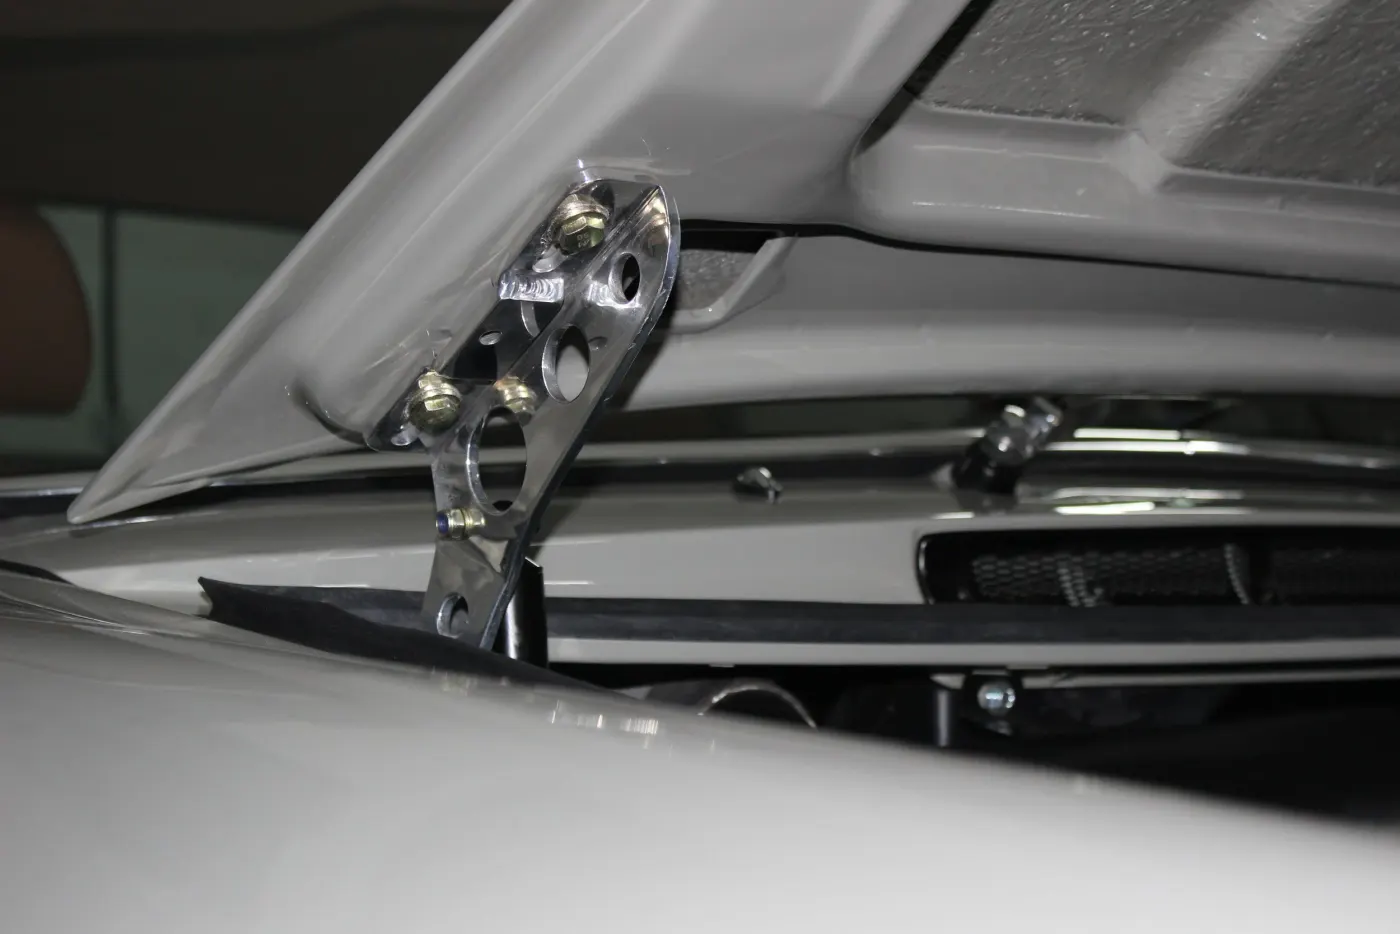
Fig.4
Striker :
Striker is a locking mechanism used in hood with the combination of latch in car body.
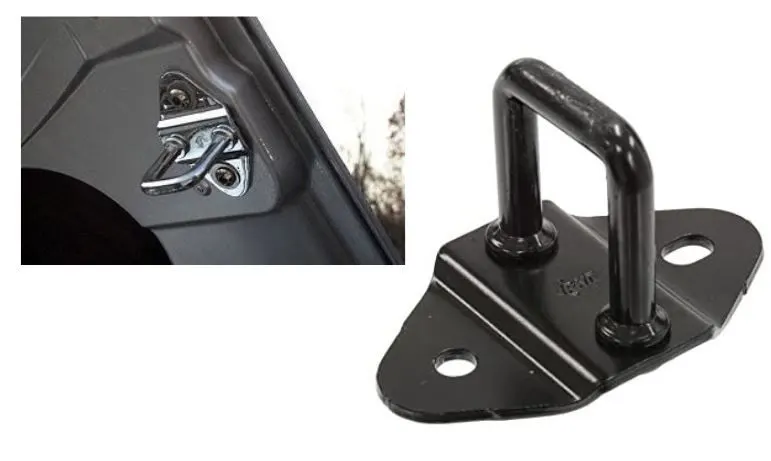
Fig.5
SOFTWARE USED :
- UG NX 12
MASTER SECTION :
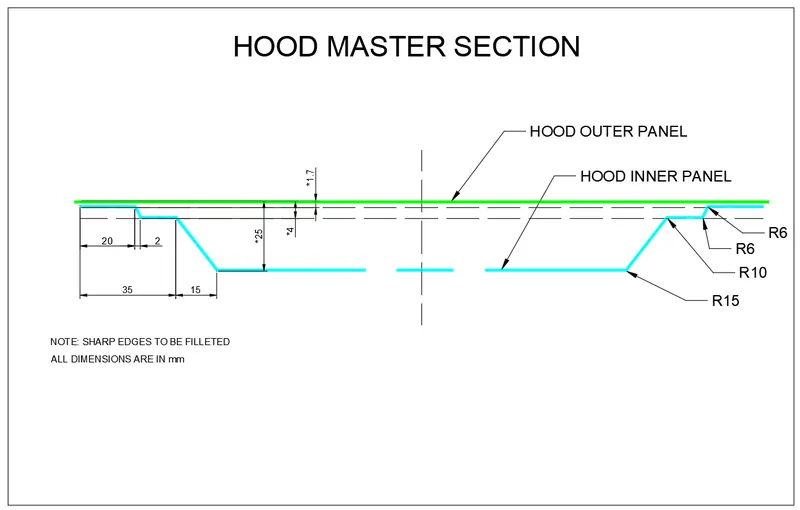
Fig.5
- Outer Panel Thickness = 0.75mm
- Inner Panel Thickness = 0.75mm
- Reinforcement Thickness = 1.5mm
DESIGNING METHOD OF HOOD :
The procedure followed for designing the hood and its components is as follows,
- First the inner panel is designed from the given master section using the various commands and features. We create the embossing using the offset surface from the original master section. Similarly we create the cuts on the emboss by sketching and using trim surface option.Then the outer panel is designed from the same master section. Here we are supposed to provide the hemming to outer panel. The parameters of hemming are taken as per given values.
- Now, on the inner panel, the embossing for hinge and striker are produced by considering their respective dimensions and assembly positions. First the emboss for hinge is created and then by fixing the hinge into its position, we draw an axis passing through both side hinge axes to form a common axis. And then we position the striker such that it will move along circumference of a circle whose center is at midpoint of the common axis. Thus, position of striker is decided and we can create emboss for the same.
- Using the hinge emboss we created, we can create our hinge reinforcements by creating new parts in the assembly itself.
COMMANDS USED :
- TRIM SHEET
- EXTEND SHEET
- TRIM BODY
- OFFSET SURFACE
- OFFSET CURVE IN FACE
- SEW
- THICKEN
- EDGE BLEND
- FACE BLEND
- LAW EXTENSION
- WAVE GEOMENTRY LINKER
- EMBOSS
- THROUH CURVES
- DRAFT ANALYSIS
- PROJECT CURVE
LATCH TRAJECTORY :
The major functional of the hood is the opening and closing of the hood. This is done with the help of the latch and striker. To position the latch and striker effectively, we position the hinge and draw the hinge axis. Now, using the hinge axis as the center we draw a big circle to the position where we need the latch to be placed. Then, we draw a tangent line to the circle at that point and place the latch in that region ( Ref Fig.6)
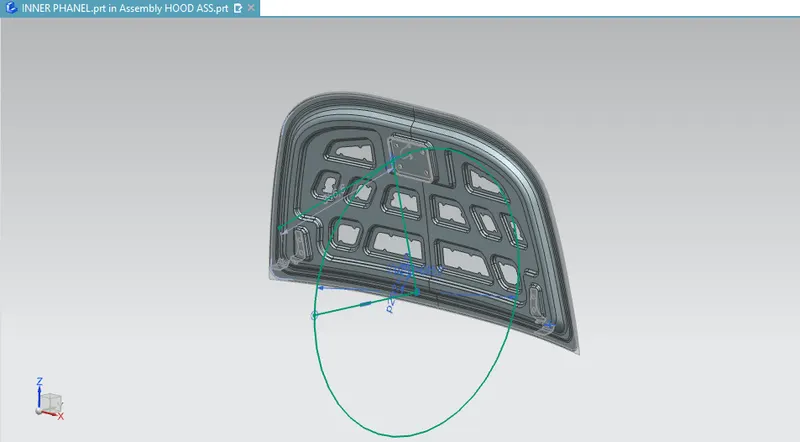
Fig.6
MASTIC DATA :
Mastic is an adhesive that, along with thin-set mortar.We have to give data points where we are going to apply these mastics.After the mastic get healed fully it will expand upto 5mm & 1 mastic poitn will give strength for 10mm r.
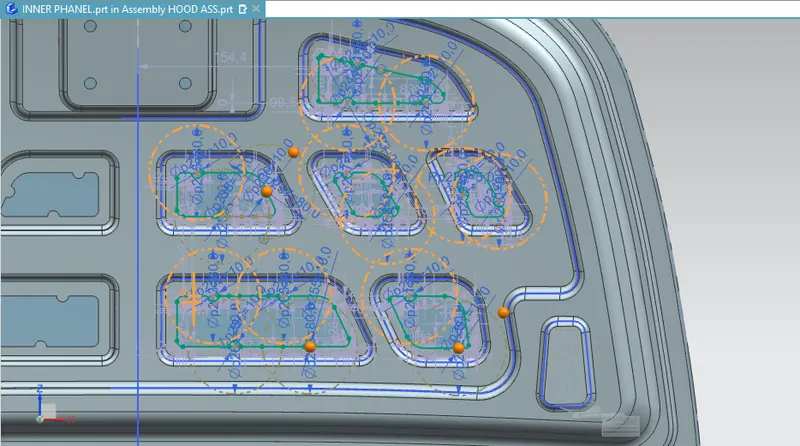
Fig.7
EMBOSS DEFENITION :
The geometry is created based on the master section that was designed above. After performing the initial stages of design, we will provide local embosses to strengthen the component. The emboss is designed in such a way to divert the force away from the passenger cabin to hinges to increase the occupants safety, as shown in the fig.8
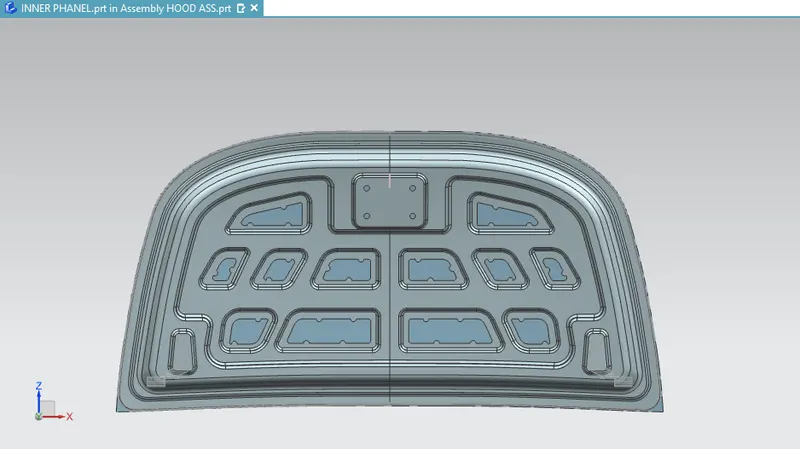
Fig.8
DEEP DRAWING METHOD :
Deep drawing is a sheet metal forming process in which a sheet metal blank is radially drawn into a forming die by the mechanical action of a punch. It is thus a shape transformation process with material retention. The process is considered "deep" drawing when the depth of the drawn part exceeds its diameter.We are using this method to make embosses with min draft angle of 7 degree.
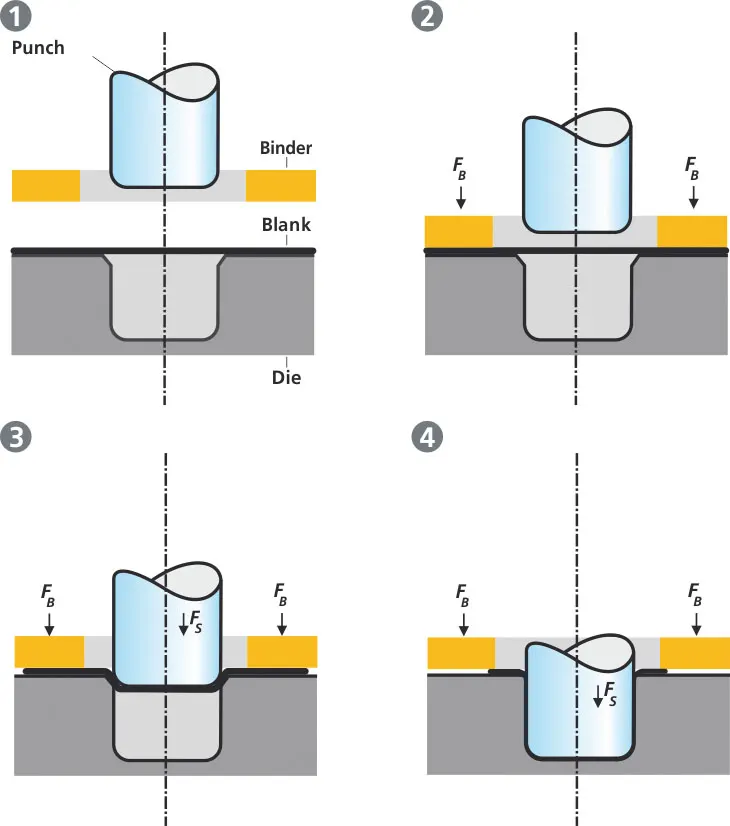
Fig.9
HEMMING :
Hemming is a forming operation in which the edges of the sheet are folded or folded over another part in order to achieve a tight fit.Normally hemming operations are used to connect parts together, to improve the appearance of a part and to reinforce part edges.
Fig.10
All the parts of the hood are designed based on the required condtions & given values and assembled together to complete the hood design.