Hood design
Aim
To create and assemble the inner and outer panel of hood and fixed reinforcement of hood by following design rules and master section.
Introduction:
Hood:
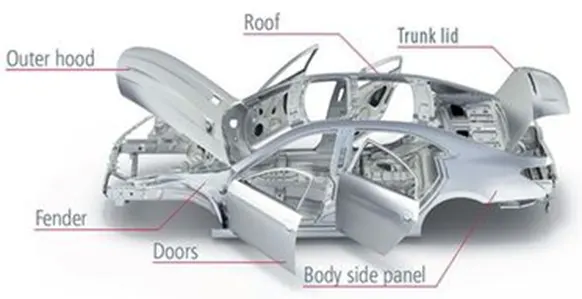
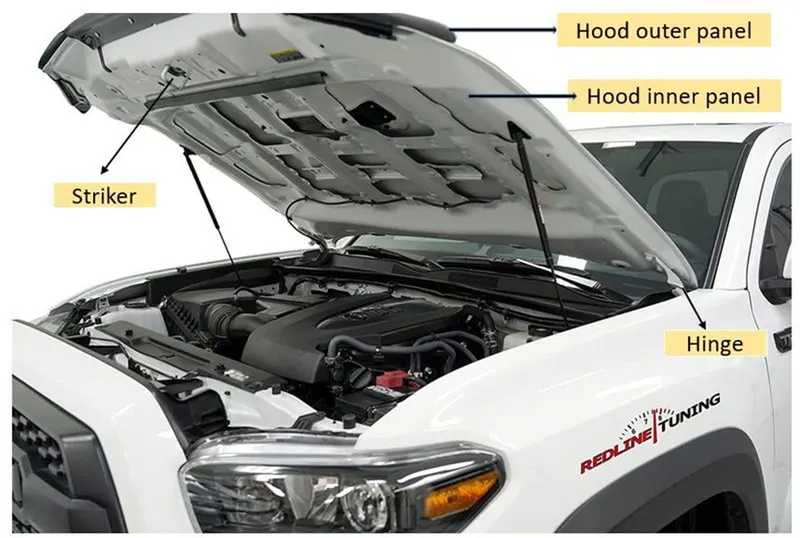
Hood is also called as bonnet. It is one of the BIW part of car. It consists of inner and outer panel. Hinge system and striker. Inner panel gives strength and outer panel is cover and gives appearance to the car. Hood beside part is covered with sound absorbing material. Hinge gives rotation to the hood. It is rotating in one axis. Two hinges fixed in two corner side of hood. Striker locks the hood with main body.
Hood main purpose is which covert the engine component of car. It is designed by open and closing system because of maintaining the engine parts and services and other purpose. Sometime hood scoop, wiper jet and hood ornament are fixed on the hood. It is fixe for good appearance and other purpose.
Typically, hood is made out of aluminium or steel although in market manufactures manufacture the hoods out of different composites such as fiber glass, carbon fiber or dry carbon.
SAFETY FACTORS IN HOOD:
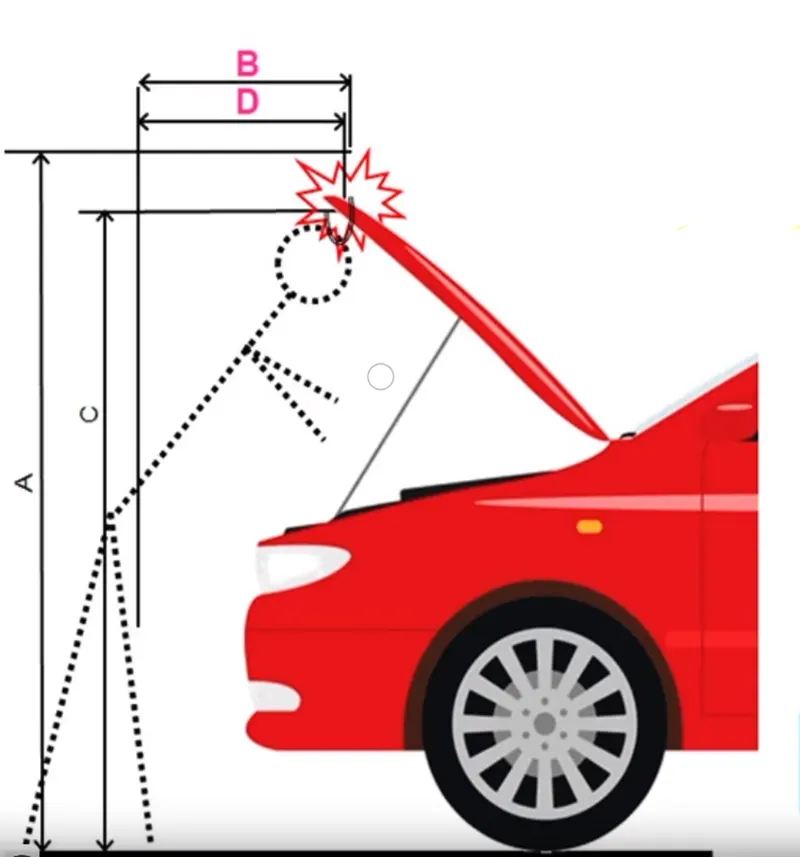
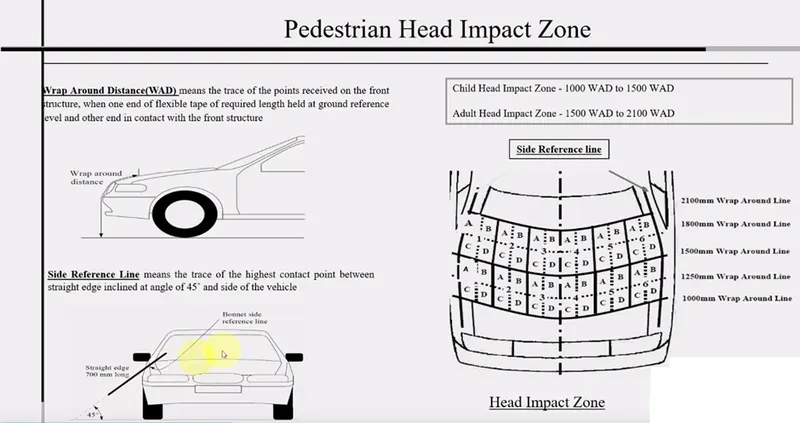
Safety is most important criteria for designer to create the automobile parts who should concentrate on both occupant safety and pedestrian safety. Pedestrian safety is very important because of lot of traffic and accidents. Mostly there is head injury in accident because of hood and ground. So, this is necessary to develop new inner and outer panel with stiffer and more pedestrian friendly. So, head impact analysis is done by different location with adults and children hight. In hood design mostly focused and worked for this factor. Then hood design also compared with previous model and check stiffness and other factors. This stiffness also compared with global stiffness and finalized the new design of hood. And also, analysis the probability of impact in different parts of adults like lower leg and upper leg.
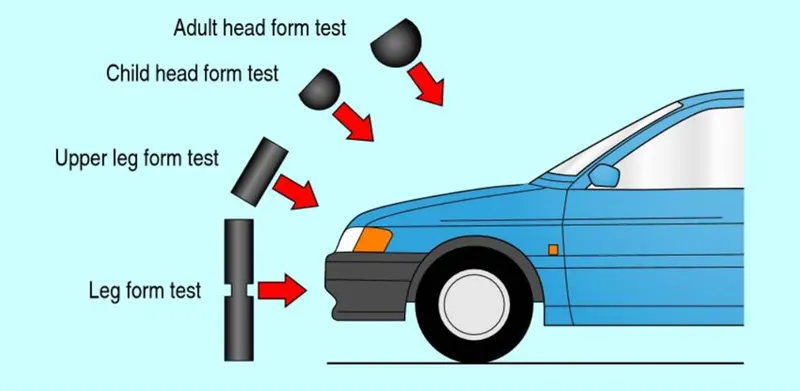
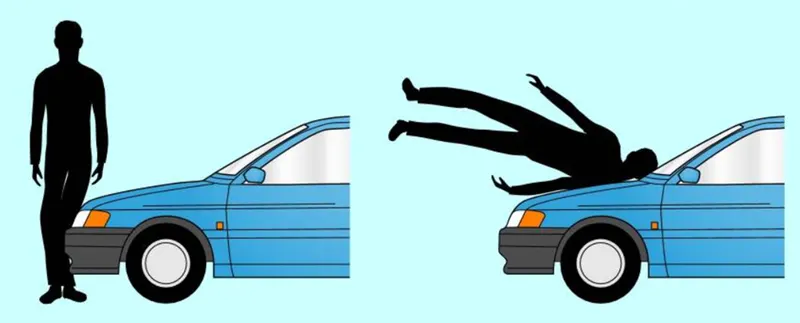
When the hood is in open condition check the probability of head impact also checked. Hood wide distance front side flange also consider in designing.
COMPONENTS OF HOOD:
1.Hood outer panel:
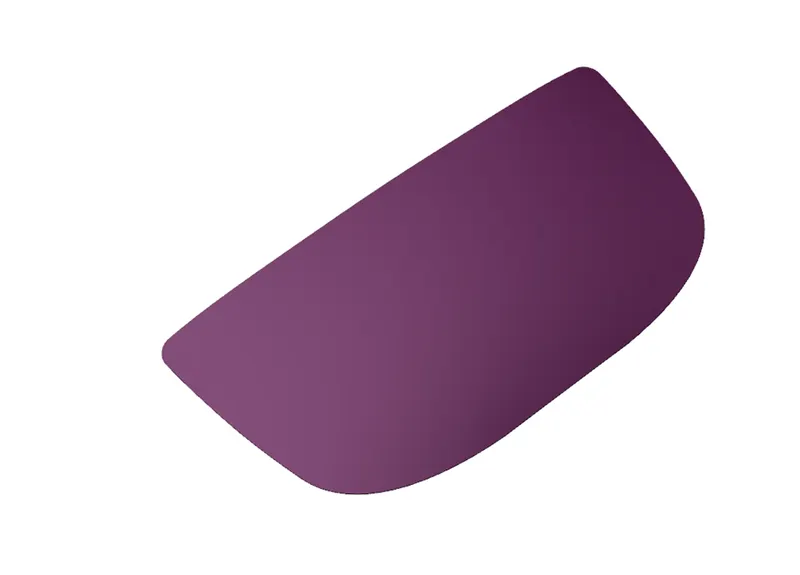
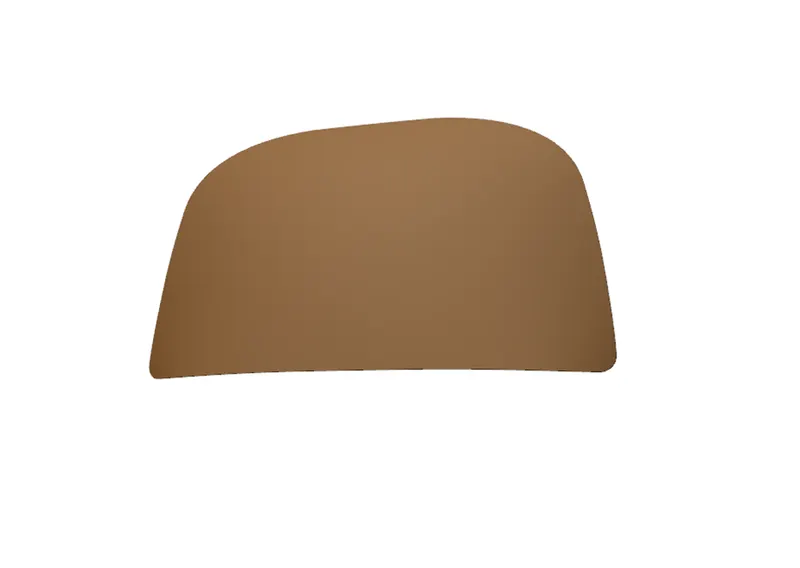
Outer panel is designed by the styling team to give good look. It is actually called the skin of vehicle. It is hemmed with inner panel and cover the inner panel. This part isn’t welded with inner panel. Using of the sealant and mastic points are connected them and hood get good stiffness. hood scoop, wiper jet and hood ornament are fixed on the hood. Hood ornament is fixed for good appearance and give individual look. Wiper jet is used for clean the outside hood part. Hood scoop is used to allow air to the engine.

Hood inner panel:
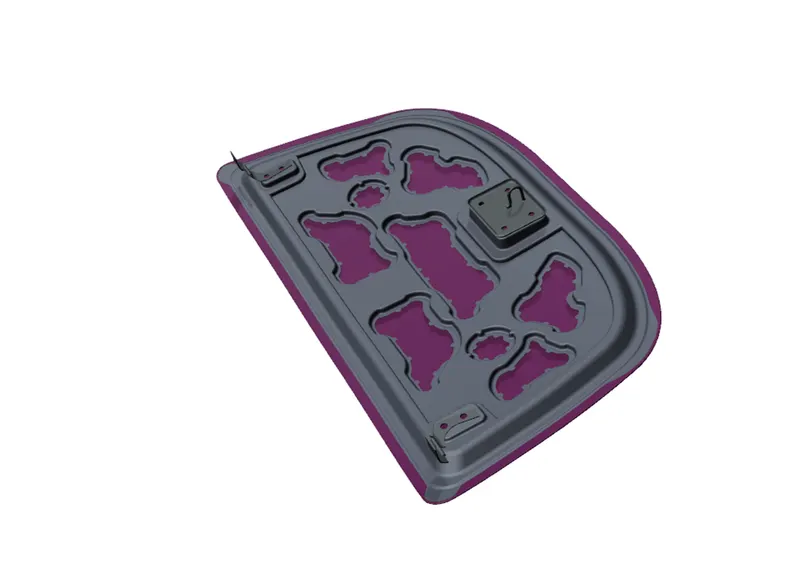
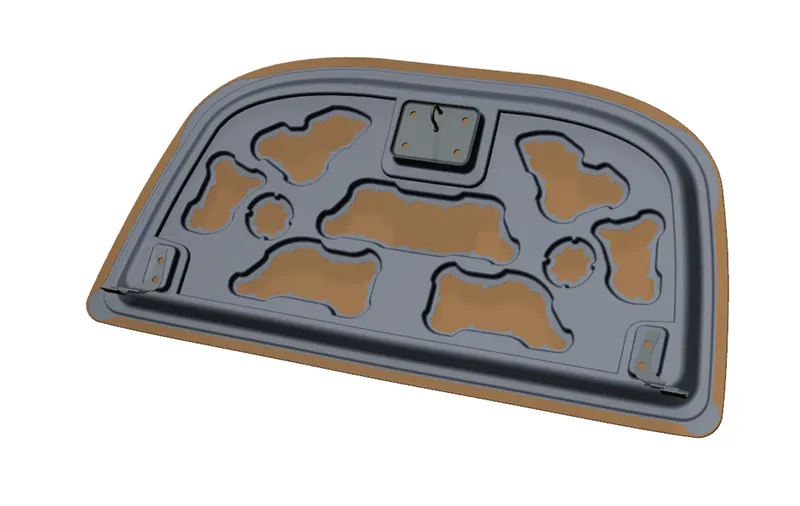
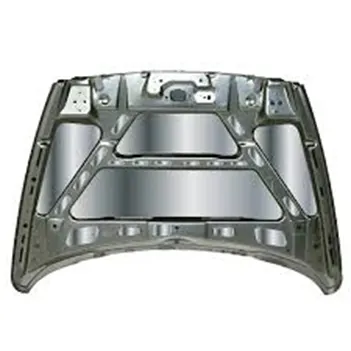
It gives stiffness to the hood and support the outer panel of the hood. Its emboss parts and holes dissipates the force in different directions while vehicle takes crashes. So, very less injures the human and car.
Striker:
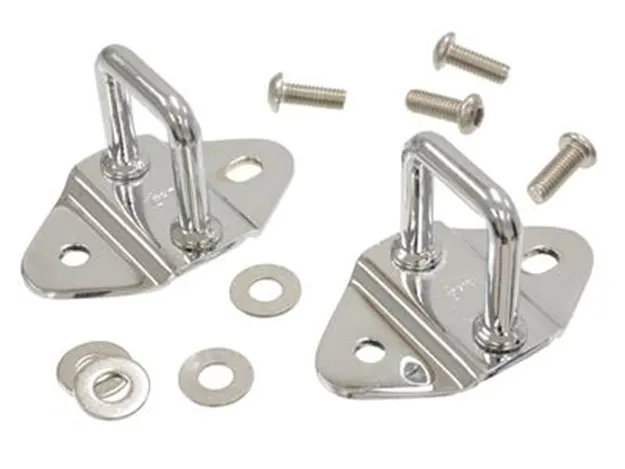
It is lock and unlock the hood in main body of car. It is one type of hook. It is assembled with hood by nuts.
Hinge assembly:
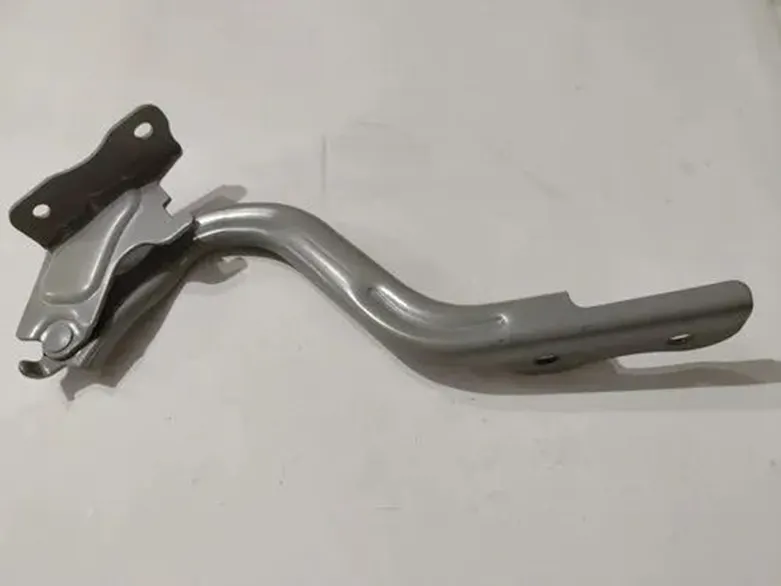
The hinges are placed inside panel of hood. It is used to hood move upside and down side. It is rotating in an axis by rod or fixer. Striker and hinges are also called reinforcement. It increases strength also.
Support rod:
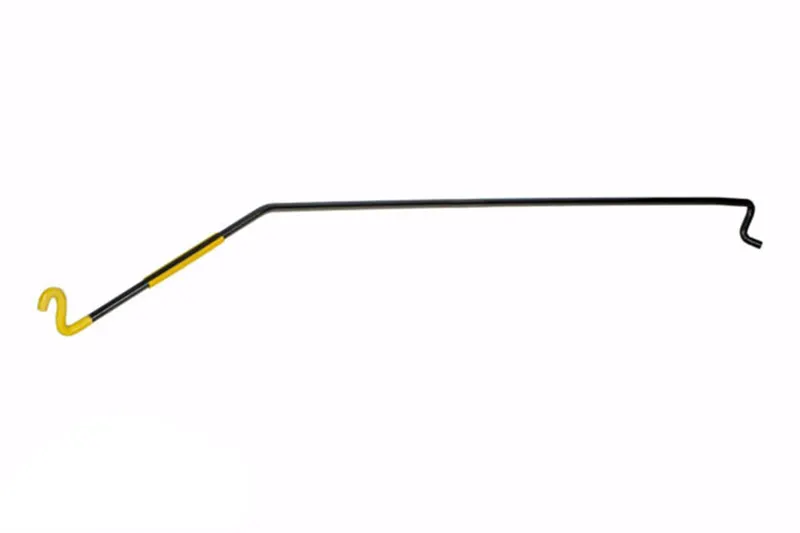
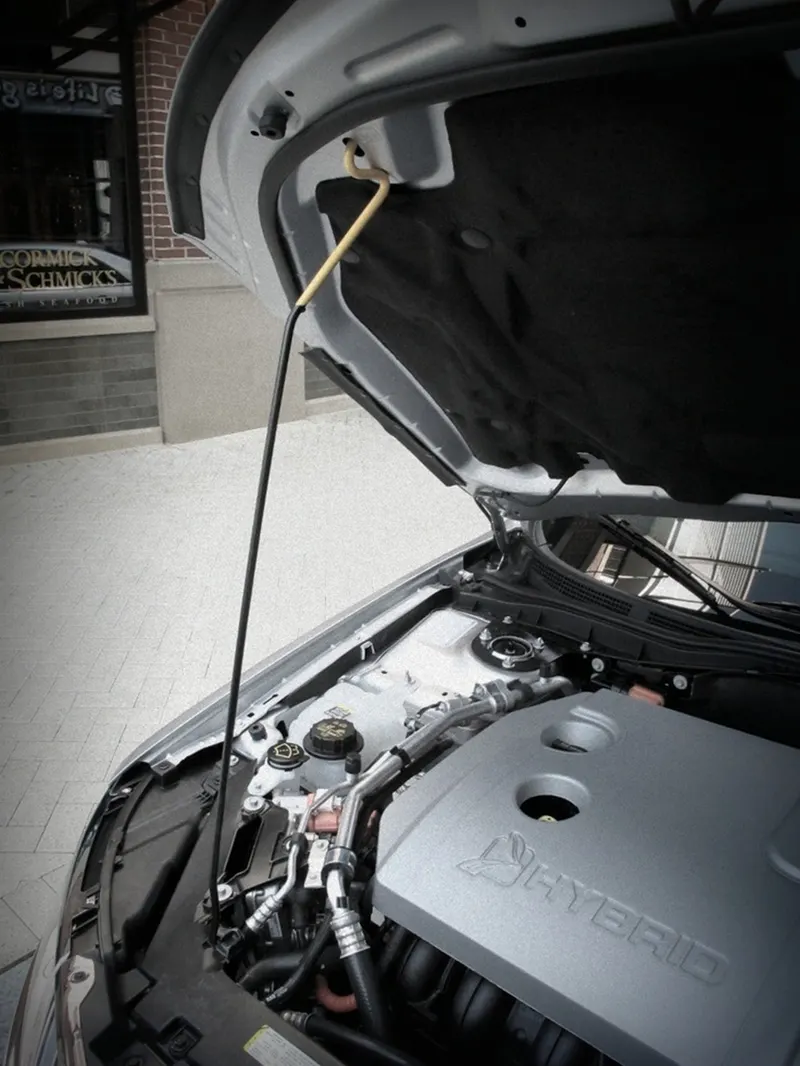
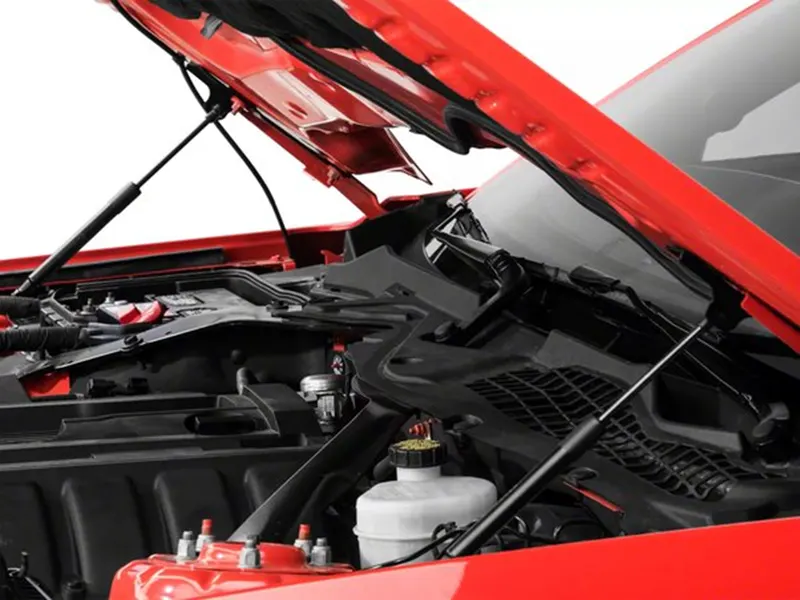
It is places on the engine components. It keeps the hood or support the hood while hood open condition. One end of the rod is fixed with inside assembly of engine component and other side is in free. When hood is opened, manually take support rod and give support to the hood. It is not in straight rod. It has some bands to increase stiffness and strength. Support rod is generally mounded opposite side of engine to avoid disturbance while manage battery.
Gas stay:
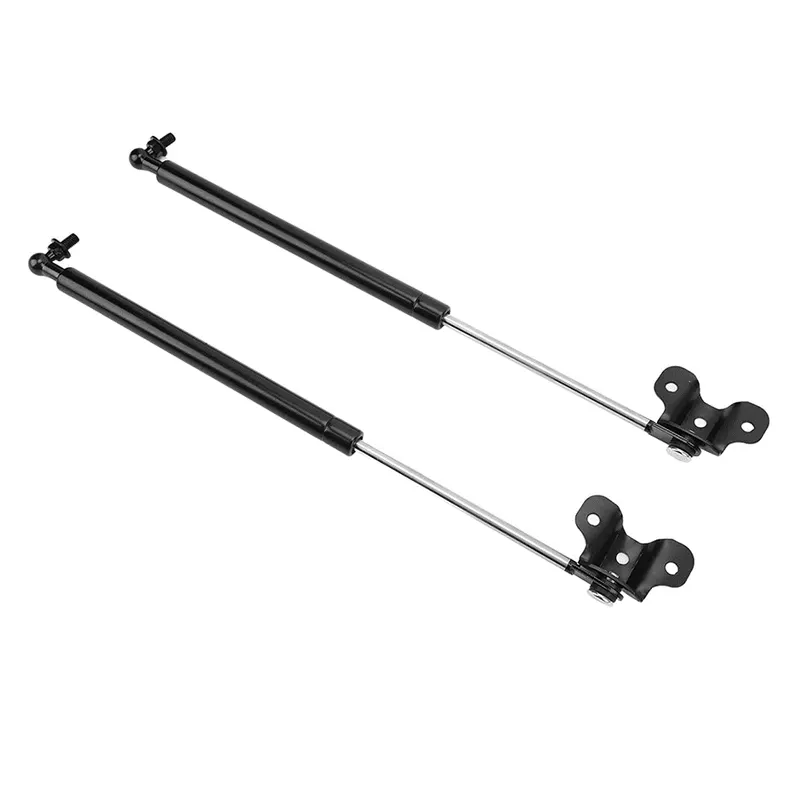
It is uses to open and close the hood automatically. When the gas compresses this bonnet is open. It has rod type of arrangement. It is mostly used in high weight bonnets. Its cost is high. So, this type of arrangement is mostly fixed in high budget cars.
Manufacturing process of hood:
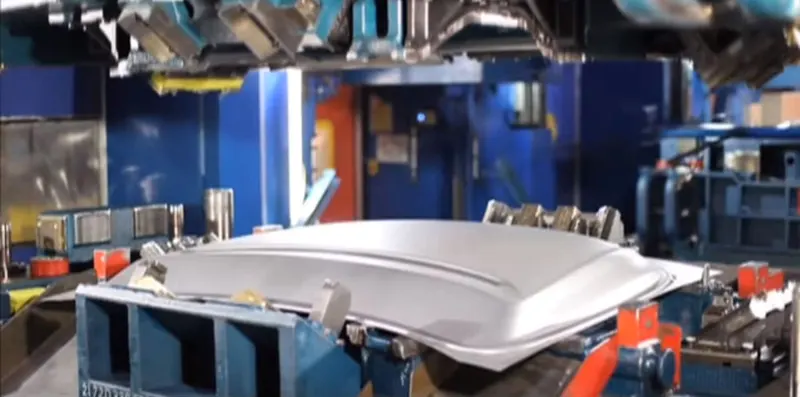
Deep drawing method is widely used to sheet metal forming.
Deep drawing:
It is one of the forming processes in which process combination of tensile and compressive pressure is given to change flat sheet to hollow sheet bodies.
It is basically classified into three types depend on load application.
- Deep drawing using tools
- Deep drawing using active media
- Deep drawing by means of active energy
Deep drawing using tools method is mostly used in sheet metal forming.
Process of deep drawing:
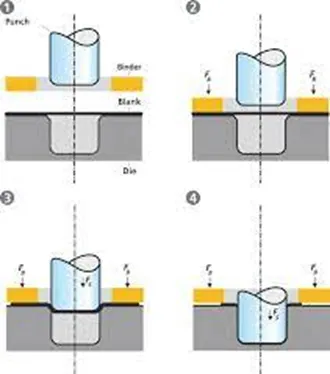
- The rigid tools consist of a punch, die and binder. This punch and die will be the product replica.
- In this process the holder closes after the sheet has been inserted.
- Then sheet is clamped on the die and binder hold the sheet
- The process will do slowly to prevent wrinkles forming under the binder.
- The punch pushes the sheet slowly get and the sheet gets die shape.
- The amount of punching force continually increased to lower dead centre of punch.
- In this process achieved in stretch purely decreased the thickness of the sheet metal.
- This is forming process in which only forming slightly curved and low depth product.
- This process is combination of stretch and deep drawing involved. So, in which process should stretched the sheet metal as well as possible without reaching material limits. If give low stretching in complex parts sometime it will give defects such as wrinkles and splits.
EMBOSSING:
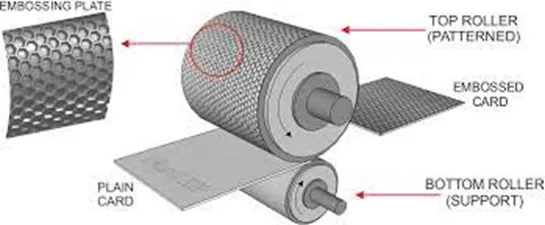
It is one of the forming processes which is used to form raised, sunken and relief design. In this process male and female rollers are passed on both sides and give desired patten. This design is fully depended on the dies of the male and female rollers. There is no thickness reducing in this process.
Characterises:
- Ductile sheet metal also formed in this process
- Production rate is medium to high
- Same thickness is got after processing
- Varity of Parten is available in this processing.
- Reproduces also done without variations.
HEMMING:
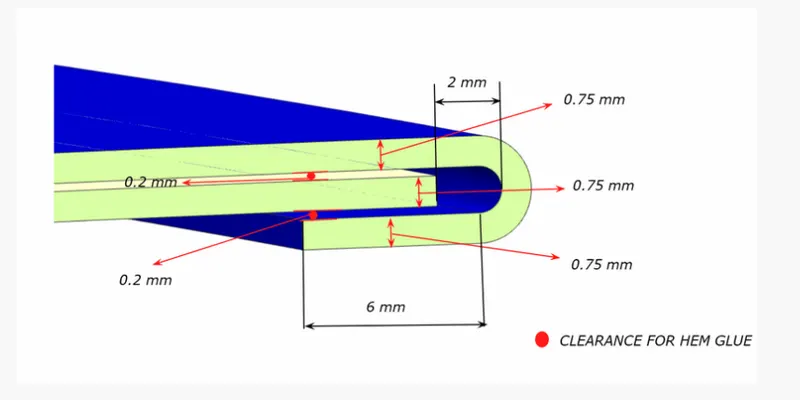
Hemming is one of the cold joining processes which is used to join a sheet metal part on another part. Outer panel has flanges which flanges will fold on the inner panel bottom side which is permanently joined. It is done by traditional press or robotically controlled roller. This process mostly used for doors, hoods and decklids.
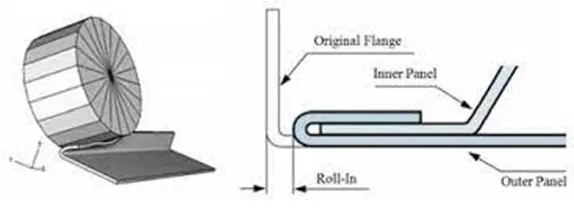
Types of hemming:
- Open hemming
- Flattened/closed hemming
- Tear drop hemming
- Rolled/ rope hemming
BLANKING AND PIERCING:
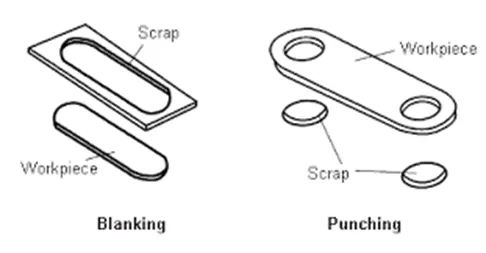
- These two processes are used to cut the sheet metal to get desired hole features.
- In the blanking process push the punch and get required part. This final part is called blank which is separate from work piece and tool fixture. Remaining part in tool fixer which is called scarps.
- In the piercing process push the punch and unwanted part. It is called scarps. Final part is kept in the fixing tool. It is called washer.
MASTIC SELANTS:
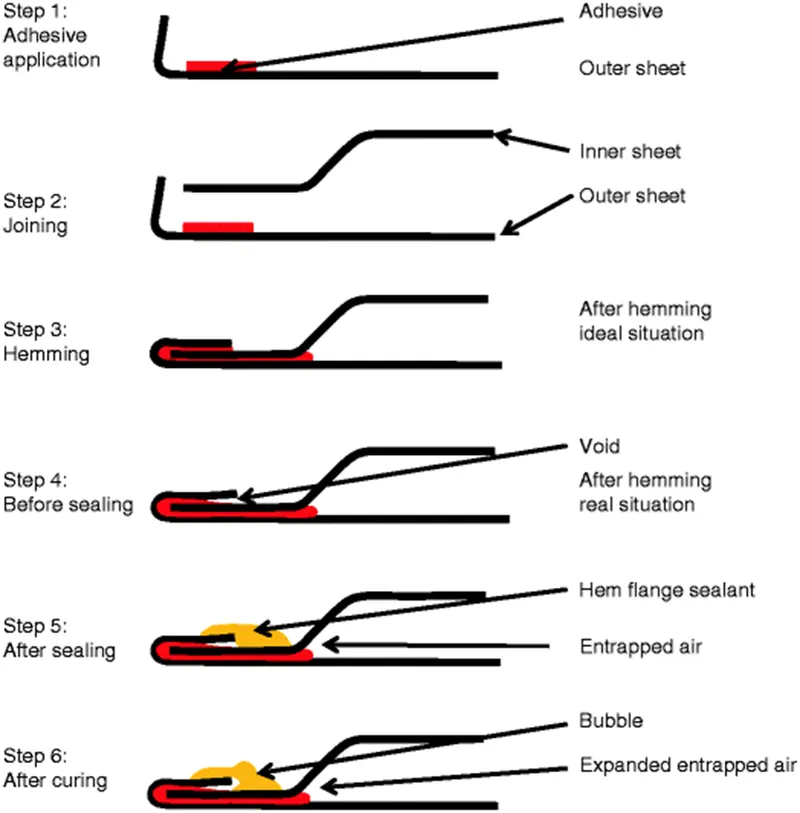
Mastic sealant is a type of liquid sealant that cures an in elastic state. It gives bonding between two surfaces. It is one type of adhesives. In the hood model hood outer panel is aesthetic look. So, we can’t use fasteners. So, we use hemming and mastic sealant. Hemming only joined with outside part. But this sealant is used in the rest of part. It is one type of elastic component. Initially it is in semi solid form after curing it will come solid form additionally, which increases strength of the panel.
Designing of hood:
Designing software:
In this project we use NX CAD software which is one of the Computer Aided Designing software which is used to create 3D modelling, assembly the parts and drawing etc. It supports the product developing and manufacturing at all stage of life cycle.
METHODOLOGY:
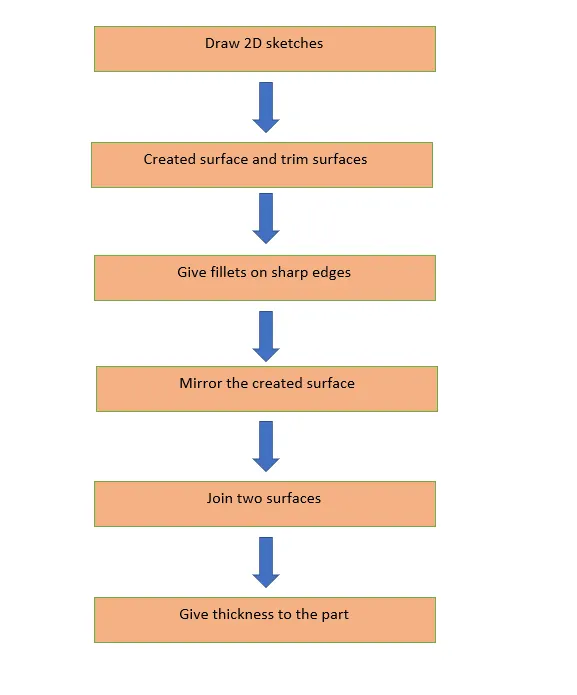
Metod for hood creation:
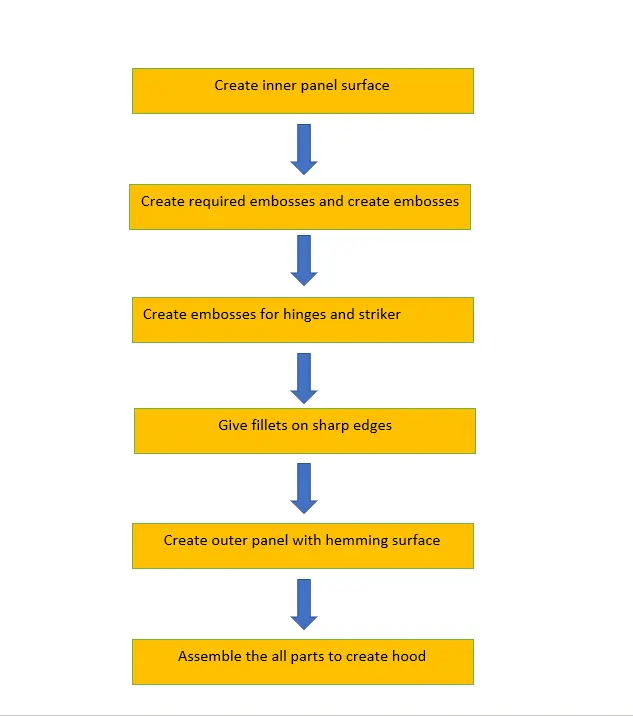
Method for individual part creation:
MASTER SECTION:
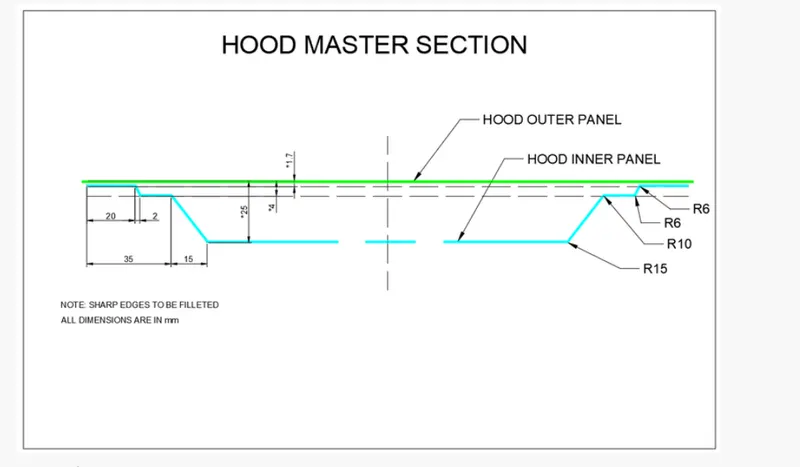
They have given master section of part which is used to create inner panel, outer panel and created parts and given hinges and striker are assembled.
TOOLS:
- Trim sheet:
It is used to the sheets by curve or another sheet as tool.
- Offset Surface:
It is used to create copy of surface from a surface in required distance.
- Law Extension:
It is used to extrude the surface with required angle and length.
- Trim and extend:
It is used to trim two surfaces by which intersecting line. We can decide which part we keep or discard.
- Through curves:
It is used to create a surface between two curves or surface edges.
- Emboss:
It is used to create emboss feature which give offset surface and joined wall. We can modify wall draft angle also.
- Curve on face:
It is used to draw curve on the required face.
- Projection curve:
It is used to project an exciting curve on required part like surface, plane etc.
- 3D profile:
It is used to draw 3D curve between two points with tangency.
- Face blend:
It is used to create blend edges or faces between faces.
- Edge blend:
It is used to create blend edges from sharp edges
12.Extend sheet:
It is used to extend the sheet to required length.
13.Mirror geometry:
It is used to mirror a part by reference like plane or surface which means create another part as well as given part on another side of reference.
- Sew:
This tool is used to combine the two surfaces to for a single surface part.
- Extrude:
It is used extrude the required profile and create surface or solid part.
- Thicken:
This tool is used to give thickness to the surface to create solid body.
- Wave geometry linker:
It is used extract the required part from another part which extracted part is used to create feature. It is mostly used for two components perfectly aligned in assembly.
Procedure:
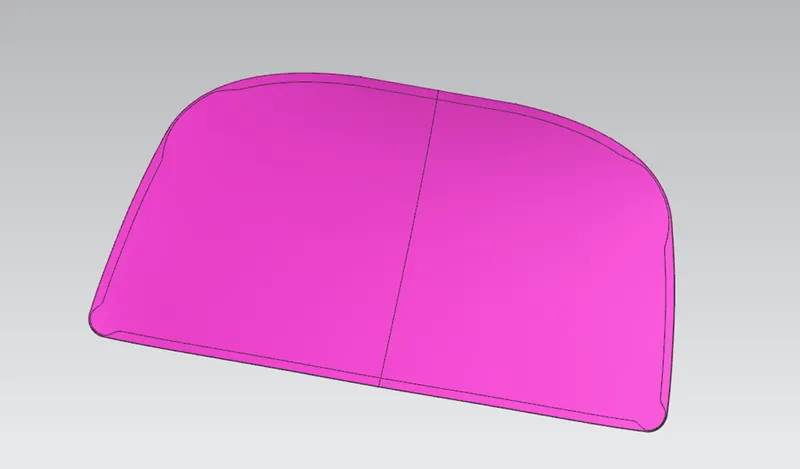
Outer panel:
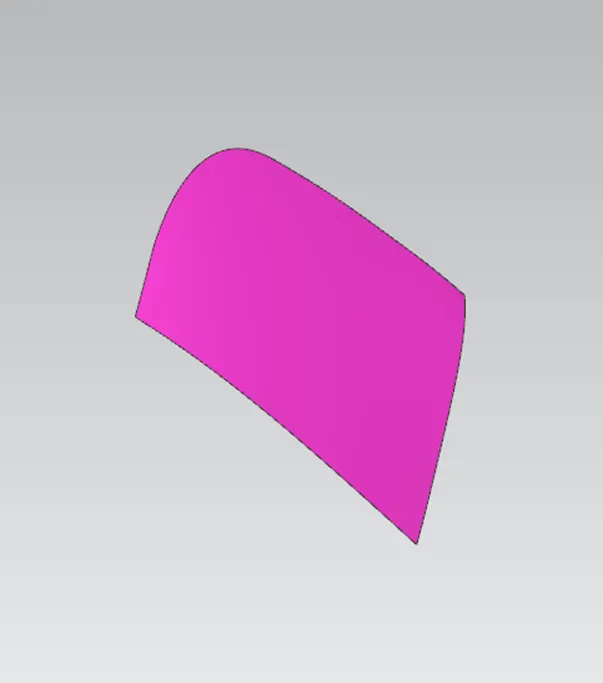
- They have given surface of outer panel. Which is used to create outer panel. First take it copy by offset comment at 0mm.
- Cut the half of surface to work easy by trim sheet comment by the help of plane.
- First offset surface is used to offset the side edge at 2mm and law extension used to extrude the edges
- Then offset the top surface by offset comment in required distance for hemming flanges
- Offset the law extension part at 5mm and trim the offset surface as tool offset law extension surface by trim sheet and hide the offset law extension surface.
- Face blend is used to blend top, trim and law extension surface.
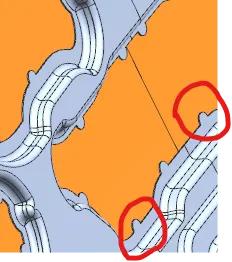
- Then we should give stress relief in corner. So, we cut some portion in two corners with the help of 3D curve and trim sheet
- We have half of the part. So, mirror geometry tool is used to mirror and get full part.
- Finally give thickness value 0.75mm to create solid part by thicken comment
Inner panel:
- Same previous method is used to take copy and trim half of surface.
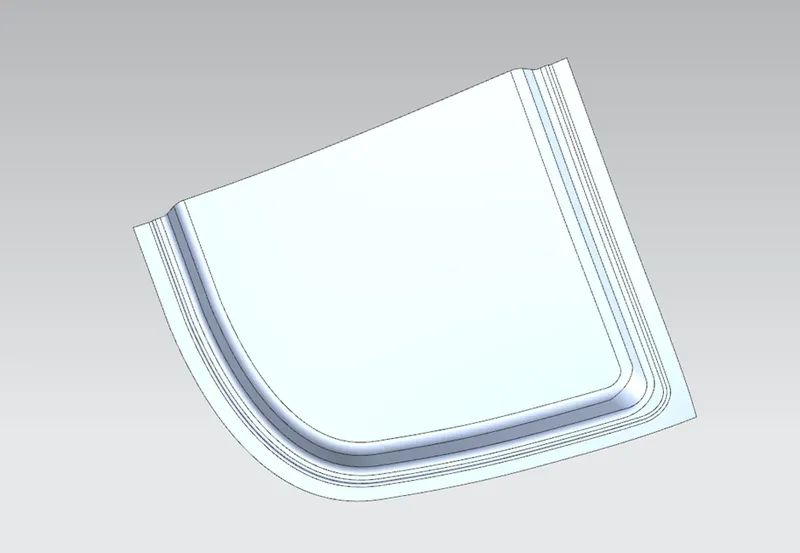
- By following master section offset and trim the sheet by offset curve.
- Through surface and law extension use to join surface layers.
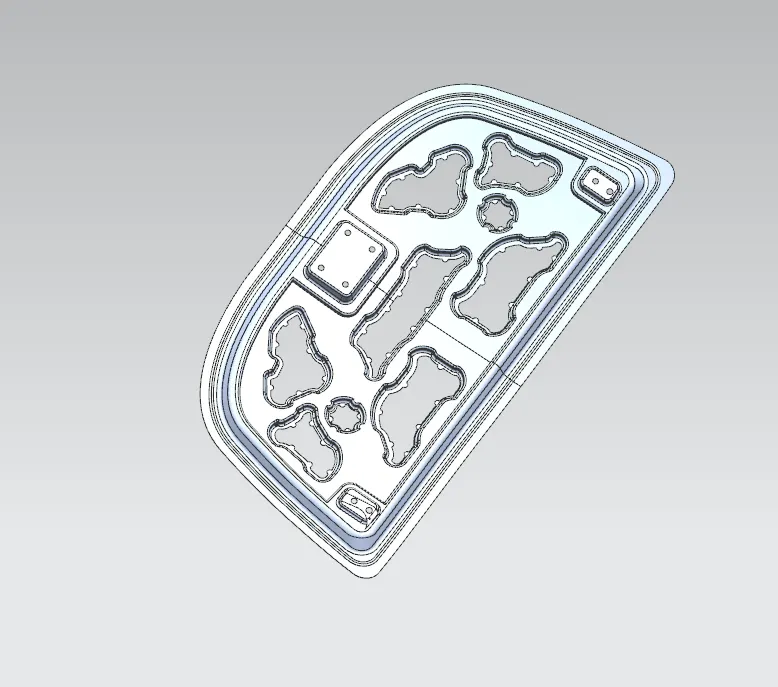
- Sketch required design and create the emboss portion by emboss comment.
- Outer panel and embossed inner panel distance will be maintained 5mm. Because, sealant is applied in this distance. Adjutant of outer panel emboss give circular design because of sealant applying.
- Then create emboss for hinge assembly and give required fillets by face blend
- Mirror geometry and sew used to joined original and mirror part.
- Wave geometry linker is used take extract surface from striker part bottom surface. which is used to create emboss for striker.
- Create holes with the help of wave geometry part of striker and hinge surface.
- Give fillets for all sharp edges and given thickness 0.75mm to the component by thicken
ASSEMMBLING:
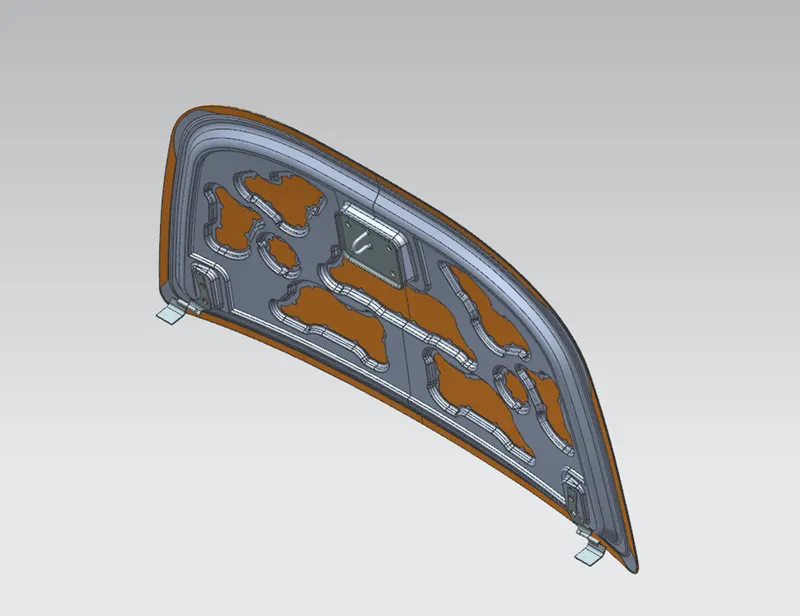
- Our assembly objective is that they have given reinforcement such as striker and hinges which are assembled with inner panel and fix inner and outer panel.
Hinge assembling:
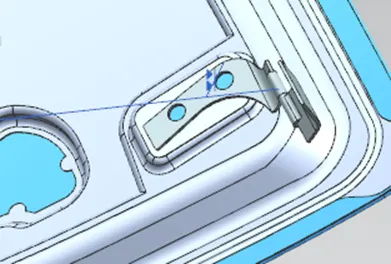
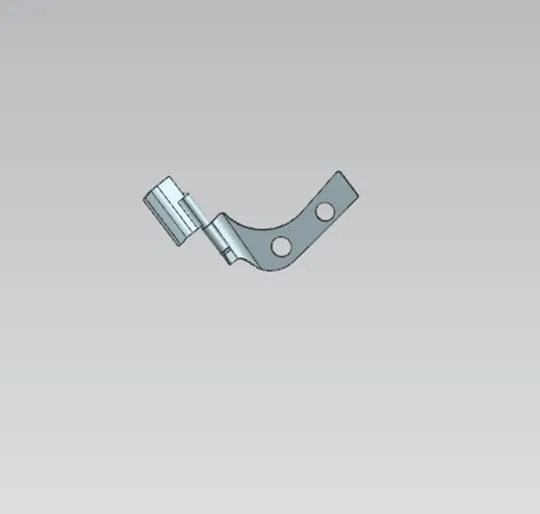
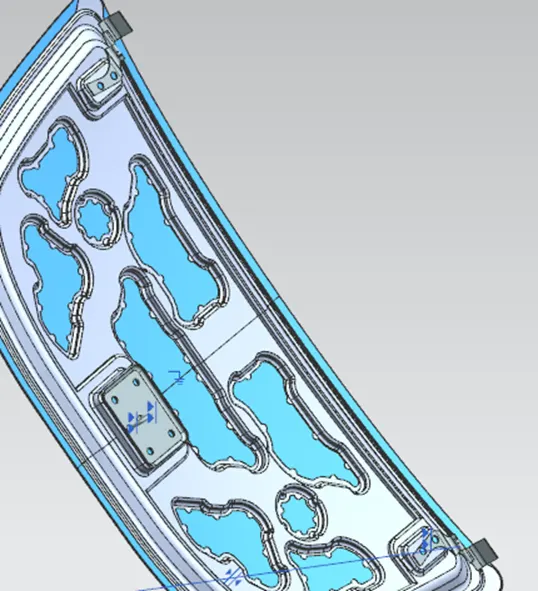
- First hinge bottom face and inner panel emboss face for hinge are fitted by touch Then hinge axis and inner panel axis paralleled by parallel constrain because mirroring and hinge rotation. We have assembled one hinge. So, mirror assembly is used to mirror the hinge assembly in which tool mirror the part and get parent part constrain. We have assembled the hinges with inner panel.
Striker assembling:
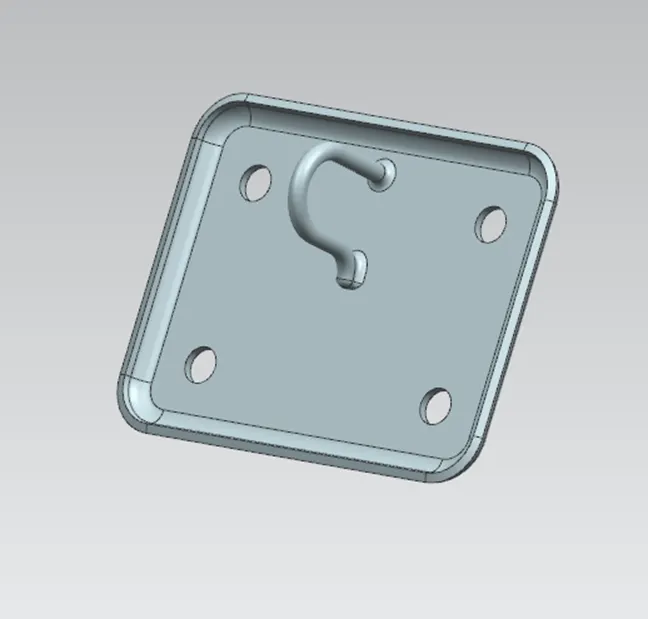
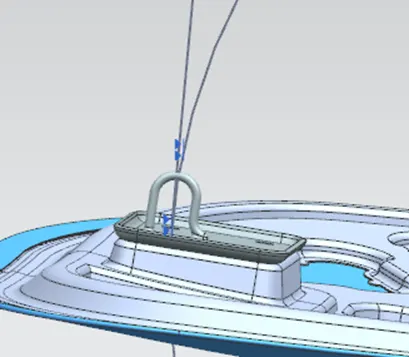
- Create a circle in canter of inner panel and create tangent to this circle. Then create perpendicular line centre of striker. Then align circle and line of striker by align constrain. The give alignment between striker endpoint and tangent point of circle and line by align constrain. Now, we got fully constrain assembly between inner panel and striker.
Outer panel and inner panel fixing:
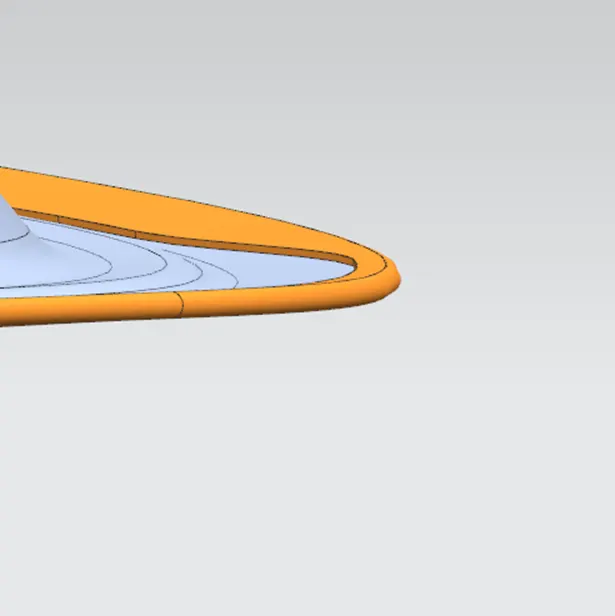
- Outer panel and inner panne are fixed in zero orientation position. Then they will have been got aligned. We don’t give constrain between outer and inner panel because those are fixed by mastic sealant and hemming process.
CONCULASION:
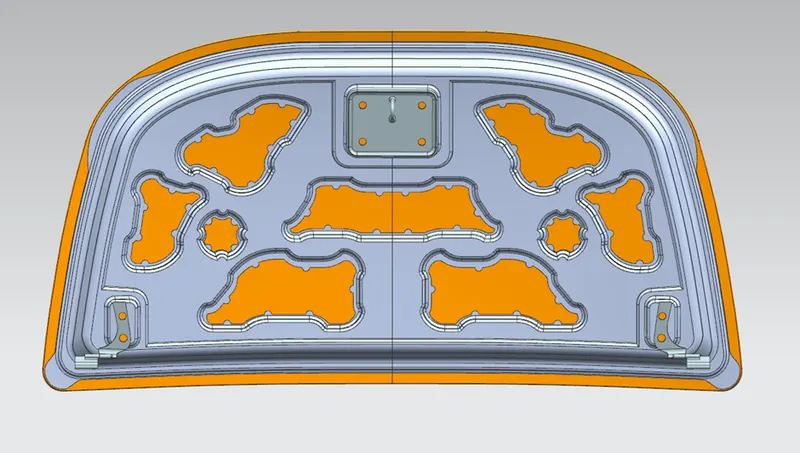
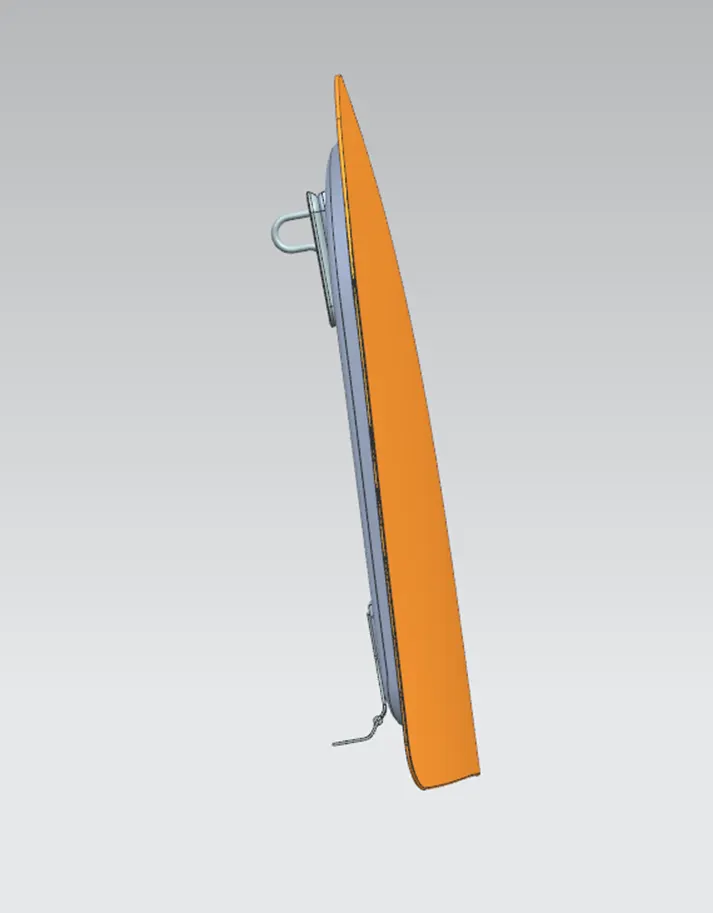
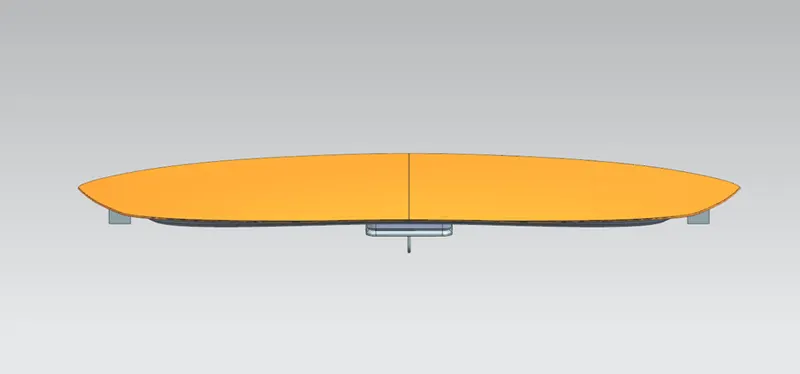
Hood outer panel and inner panel are successfully created with the help of master section. Then created parts, hinge and striker are assembled by NX CAD.
Different types of views:
Rendering image: