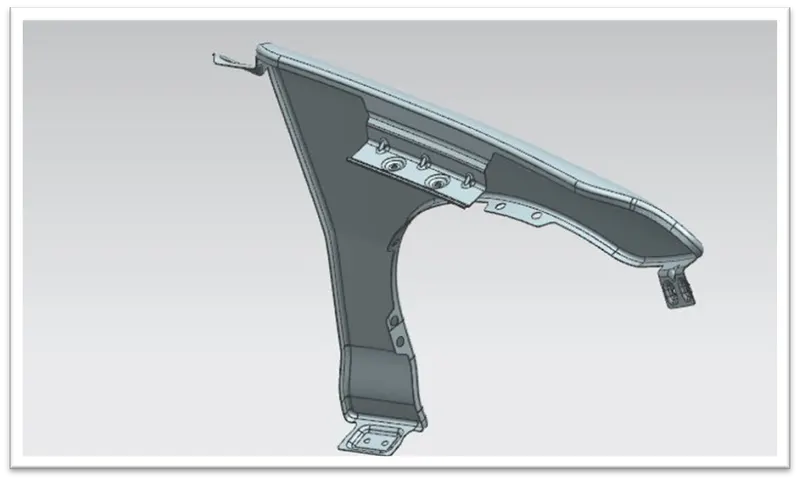
Fender Design
AUTOMOTIVE SHEETMETAL FENDER DESIGN USING NX CAD
OBJECTIVE:
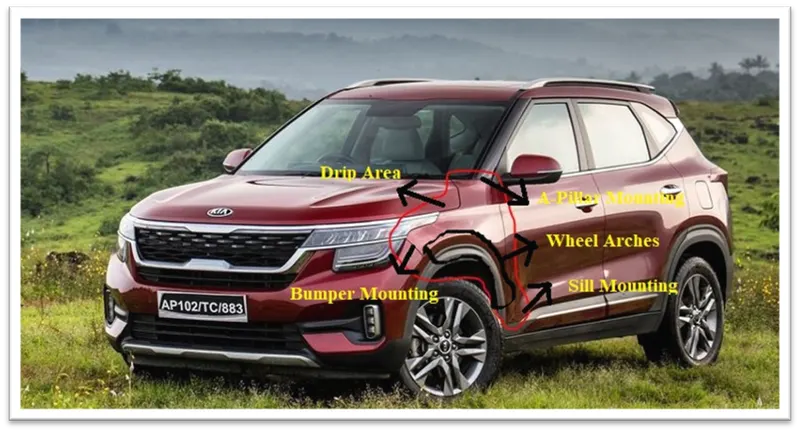
Main objective of the project is to create the Fender Sheetmetal design in NX cad, and creating necessary mountings (sill mounting, bumper mounting, A-pillar mounting and drip area) for fitting the Fender in car.
SOFTWARE USED: NX 12.0
- To design the Sheetmetal FENDER in NX by using Surface & Solid features.
- NX Software is a flexible and powerful integrated solution that helps you deliver the products faster and efficiently.
- NX Cad software is widely used automotive, aerospace, thermal power station. Because of it is having modelling, drafting and manufacturing platform.
INTRODUCTION:
The fender car part is the body kit or body part installed on the left and right sides of the vehicle. Manufacturers usually attach fenders to the wheel arches. There are different reasons why they are a requirement in vehicles. One obvious reason is to improve the aesthetics of the vehicle. So, which cannot be welded to the car. Then, we provide the fasteners, retailer clip for mounting the fender in front and rear side of the car.
Fenders also enhance the car’s aerodynamics. The main purpose, why there are fenders on cars is that they shield the wheels and they protect the passengers, the pedestrians, and the other vehicles from stones, mud, liquid, and other debris that can fly in the air because of the speeding rotating wheels while the car is running.
There are two types of fenders available,
1.Full Bumper Type
2.Half Bumper Type
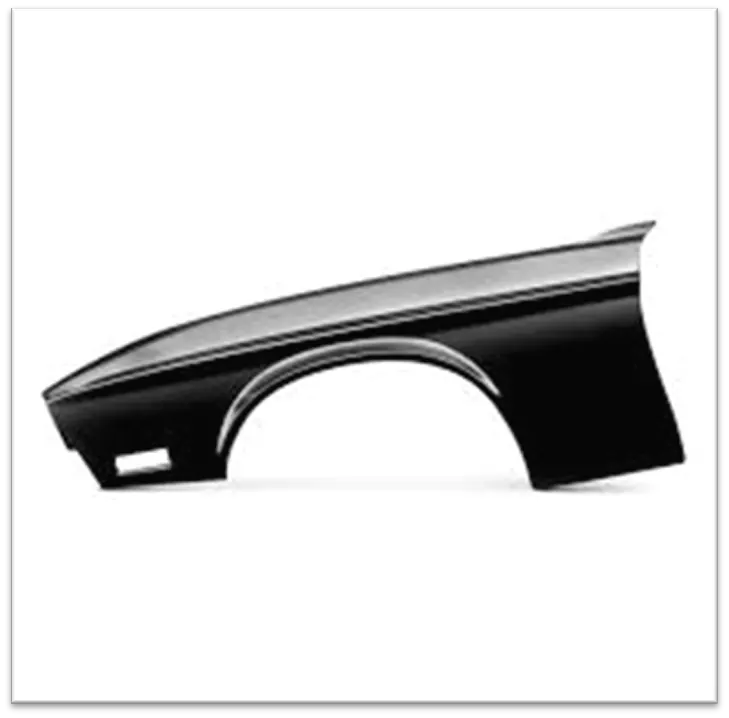
1.FULL BUMPER TYPE:
This kind of Fender was used in 80’s car. So, generally fenders are used for protect the mud, stones thrown into the air. But, this type of fender required large amount of material compared to Half bumper and also it gives the lots of weight to the vehicle. That, why nowadays it cannot be used.
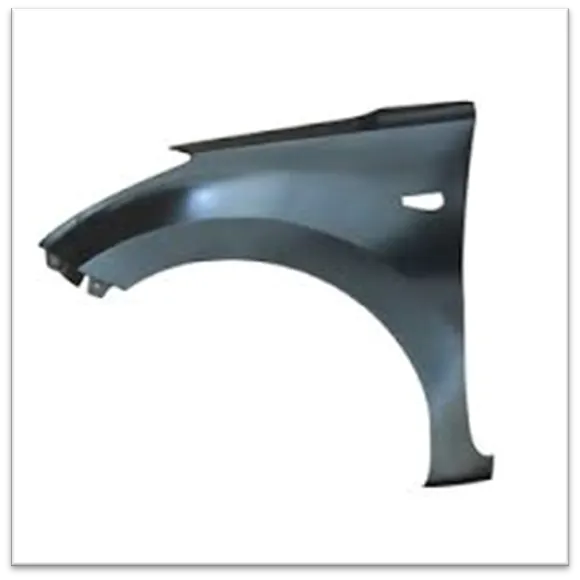
2.HALF BUMPER TYPE:
Half Bumper type fenders are widely used. Because, it doesn’t require large amount of material and it drastically reduces the weight of the vehicle.
DESIGN DATA:
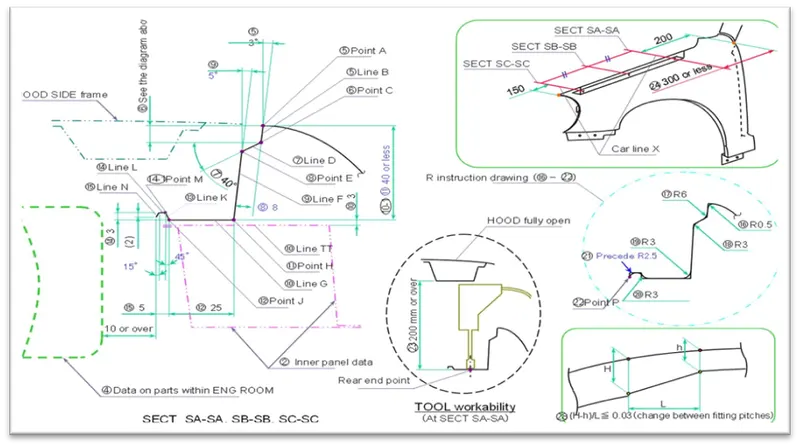
Design Consideration:
- Emposses are provided to compensate the loss of strength for some areas.
- Blend radius minimum 3mm, if it’s less than 3mm it will create stress on the place.
- In drip area, you will give the dimension as per master section sheet, if you change the value. It will create the spring back effect.
- In sometimes you cut the sheet you have to provide the smooth corner, because it will create deformation of the material.
- Uniform thickness 0.75mm is maintained.
- Darts are provided some places, to ensure the stiffness of the material and avoid the NVH issues.
- Wheels are must to be inside the fender, because it go outside direction it will create the chipping on car panel. Also dangerous for passenger and pedestrian.
FENDER MOUNTINGS:
- Drip Area Mounting
- A – Pillar Mounting
- Sill Mounting
- Splash Mounting
- Bumper Mounting
1. DRIP AREA MOUNTING:
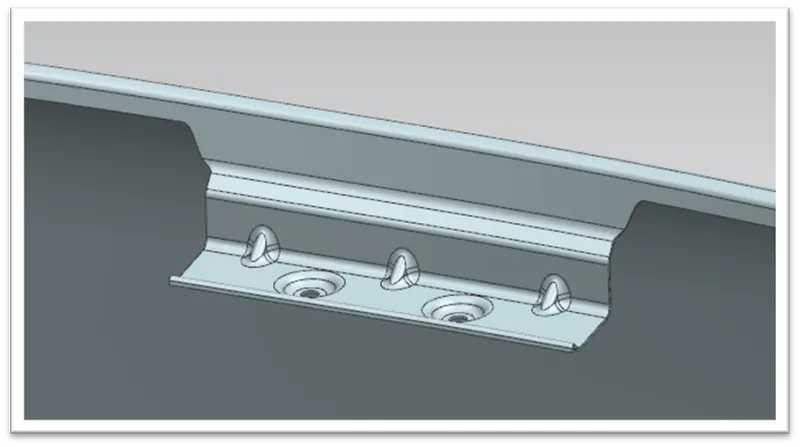
- In Drip area (Front Fender) region we have take some considerations for design, there are Fender front side give the minimum 150mm clearance for fixing the Headlight of the car. And also give the 200mm clearance for back side of the Fender.
- If we have work to the Engine Compartment, minimum clearance for hood fully open condition 200mm bottom of the engine compartment.
- In top of the fender surface to flat surface for mountings, we have to give the 40mm (or) less. If it’s higher than 40mm, it will create the spring effect to Panel.
- Last one, end of the fender area to starting area of engine compartment clearance value is minimum 10mm (or) higher. Because, it will not physically touch to the engine compartment for safety purpose.
2. A – PILLAR MONTING:
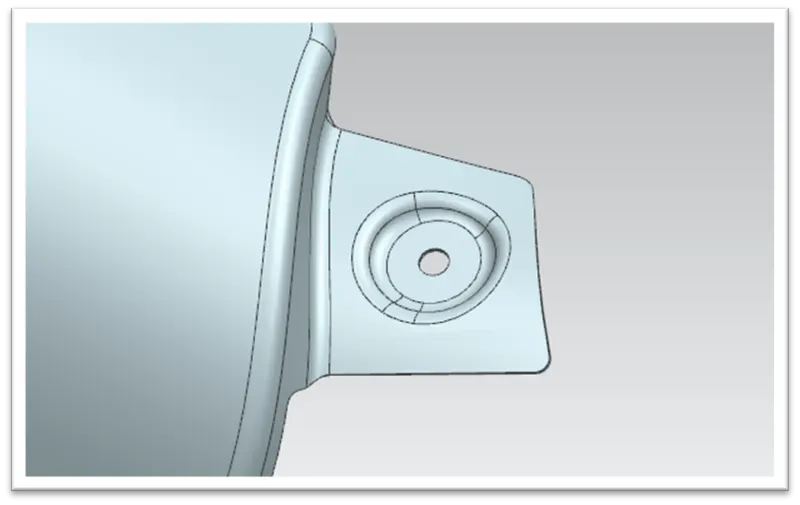
- In A – Pillar Mounting area we have to give the Mounting to fix the fender. It fix the A – Pillar and fender rear side.
3. SILL MOUNTING:
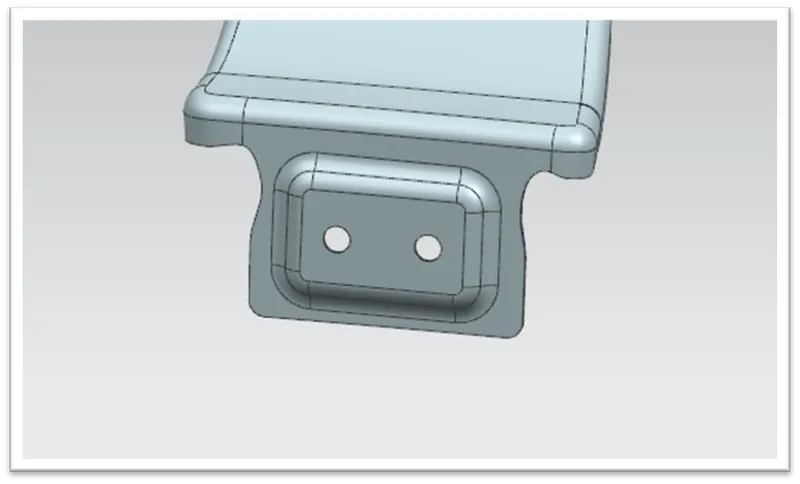
- In this sill mounting area we have give some relief here. Because of length of the sheet is long. In order to overcome the stress on the corner area.
- Sill mounting is fixing the fender and sill area. Sill area located at the bottom of the exterior door frame.
4. SPLASH MOUNTING:
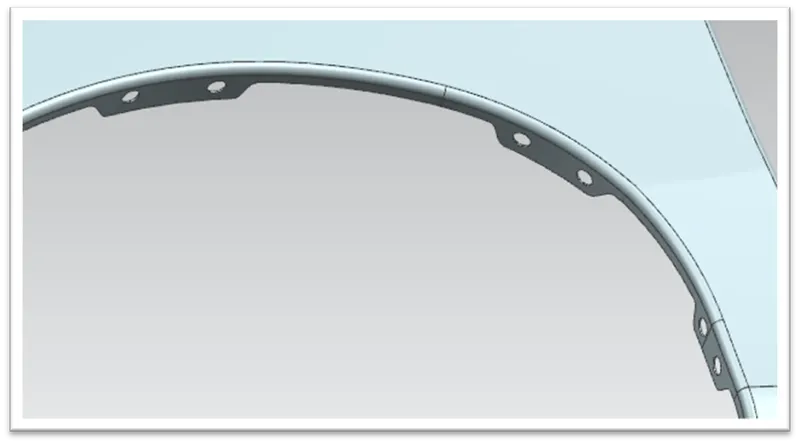
- Splash guards minimize the projecting of water and rocks by your vehicle on to other vehicles. They don't affect the aerodynamics of your vehicle. Splash guards will not lower your vehicle's gas mileage.
- In splash area, we have some holes only give. Because it just fixing the splash material and fender using fasteners or retailer clip.
5. BUMPER MOUNTING:
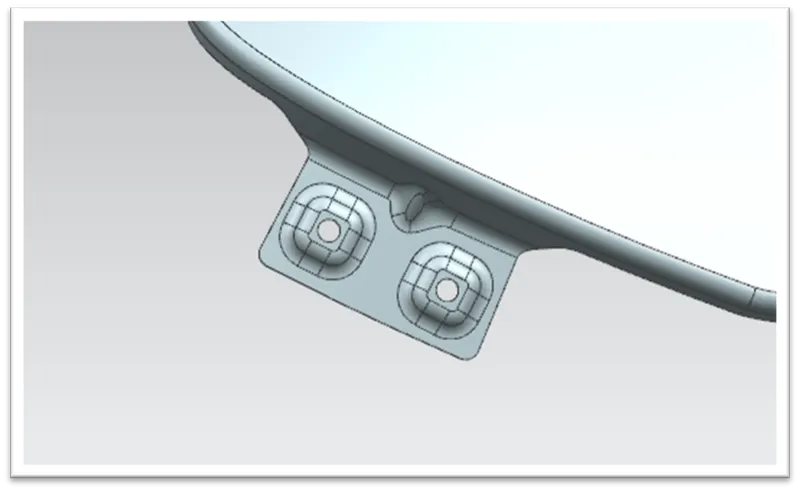
- Bumper mounting is used to fixing the fender and bumper using fasteners or retailer clip.
- Bumper area is designed to absorb impact to the front and rear of vehicles and minimize low-speed collision damage.
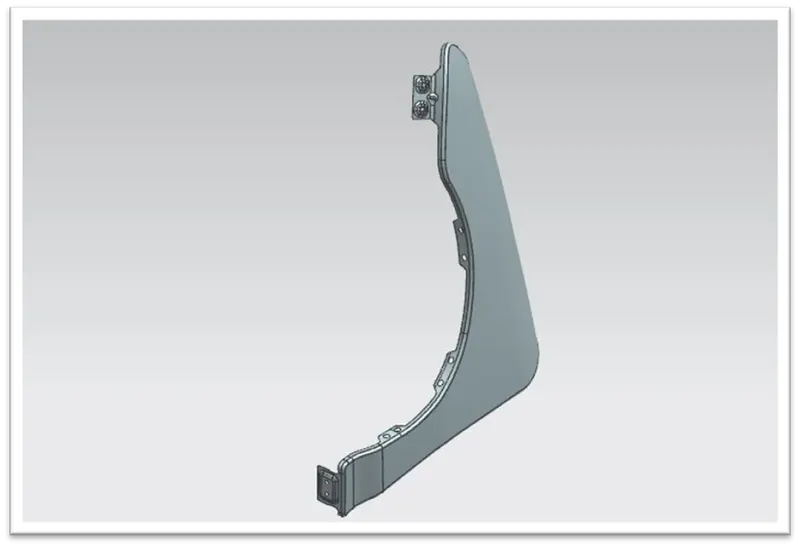
FENDER DESIGN VIEW:
FRONT VIEW:
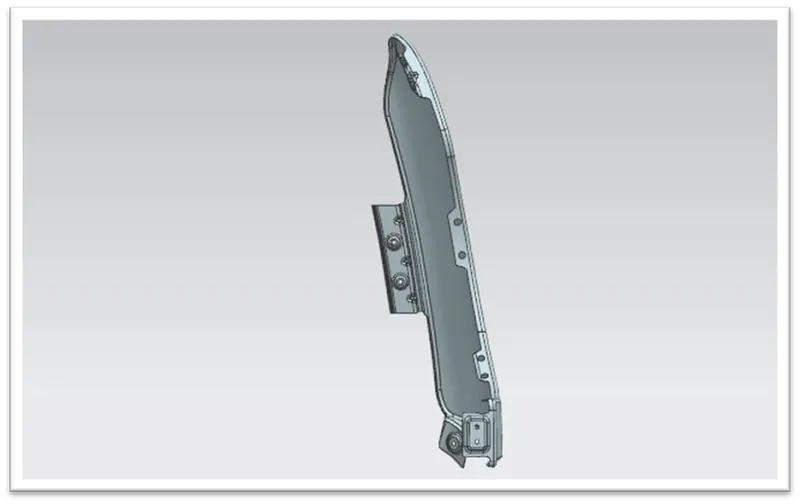
TOP VIEW:
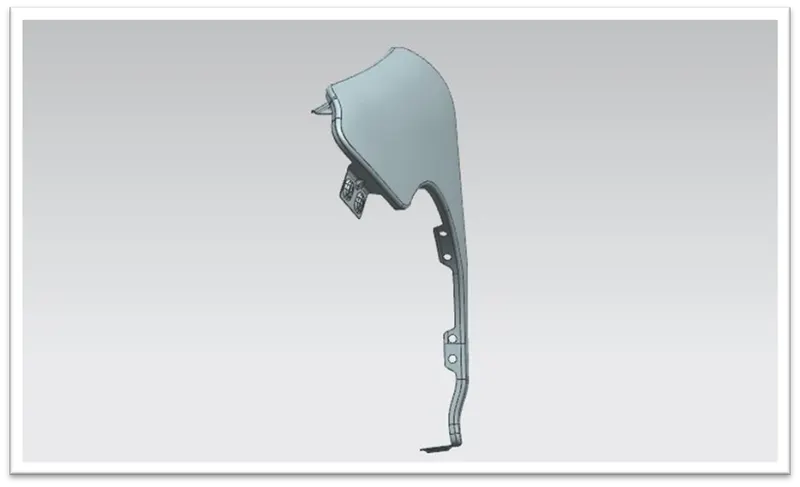
RIGHT VIEW:
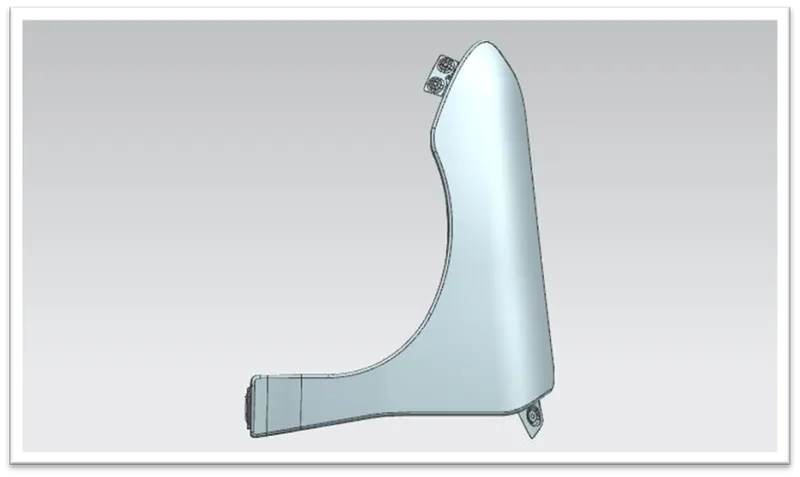
ISOMETRIC VIEW:
CONCLUSION:
In this project we have work with the Fender design in Drip area mounting, A – Pillar mounting, Sill mounting, Bumper mountings are created with help of the master section data and Some Engineering standards.
We have to follow the necessary design consideration for creating the Fender design like relief in the sill mounting area, emposses for mounting area, darts in the mounting bend area.