Fender Design
Question:
Follow the given Master section to create the Drip Area
For the Sill, Bumper, Baffle(Splash), and A-Pillar mount create your own design according to the Engineering standard that you learned.
Prepare a report with all the relevant images included for the mounting points created.
Solution:
THEORY :
FENDER
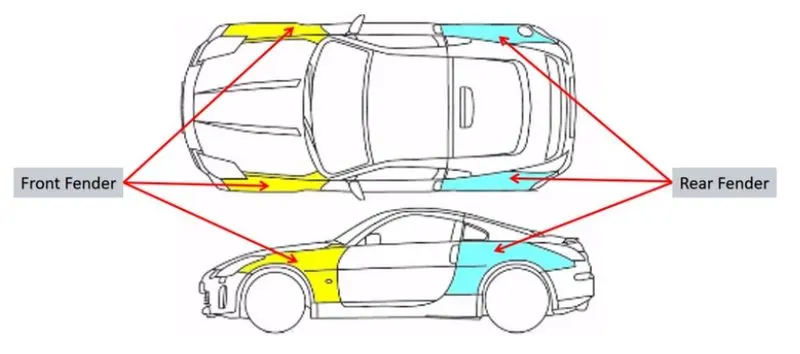
The fender is the car body part that frames the wheel. Its purpose is to prevent sand, dirt, rocks, and other road spray from being thrown into the air by the rotating tire and close the engine component. When a vehicle is moving, tires pick up stones and others and hurl them in all directions. Fenders are basically present to prevent any injuries to pedestrians and contain the motion of these particles. A pair of front and rear fenders can be found on each side of a vehicle.
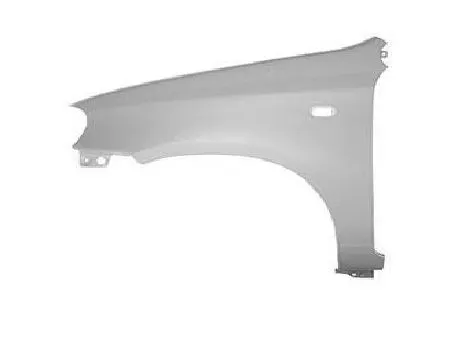
- Fender is the part of the bedy of vehicle which covers the wheel and the engine compartment.
- The fender is provided in such a way that it will protect the padestrians from the high impact from the engine comapartment.
- The fender is also the cover made in such a way that the customer won't see the internal ugly areas of the engine compartment.
- It is made up of pastic or softer material so that the impact of the fender on the pedestrians is less.
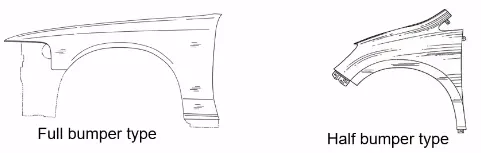
- The Fender part is of two types:
- Full Bumper Type
- Half Bumper Type
-
FENDER LOCATION
- Generally full bumper type fenders were used but to reduce the waste material half type fenders are used in most of the cars.
- There are 5 areas of mouting:
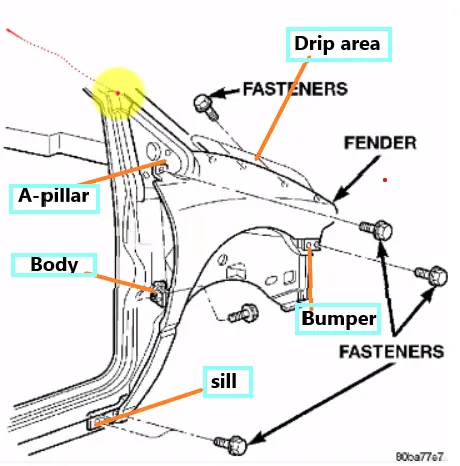
- A-Pillar Mounting
- Body Mounting
- Sill Mounting
- Bumper Mounting
- Drip Mounting
Design Methodology:
Master Section to create the Drip Area Mounting
MANUFACTURING OF FRONT FENDER :
- Process planning: The purpose of process planning of automotive panels is to identify the number of operations, the tasks in each operation, and the content of each task. This research proposes an automatic reasoning procedure based on expert experience and the laws of physics.
- Blank size calculation.
- Trimming task: The trimming task is separated into two parts.
- Restriking task: The restriking task is necessary when surfaces deform because of springback after drawing and trimming, or the accuracy requirement is high because a surface overlaps another surface of another panel during assembly. To overcome the springback of sheet metal restriking is required.
- Piercing task: Each hole feature requires a piercing task. Hole features can be classified as basic holes, lock holes, and enlarge holes based on their different functions during assembly. A basic hole is for locating the panel, and a lock hole is for locking panels.
- Burying task: Removing the sharp edges and harmful burs from the component.
PROCEDURE TO CREATE DRIP AREA :
- While designing the drip area, a 150mm clearance is maintained from the front-end for headlight fittings and 200mm clearance from the rear-end for the wiper motor assembly (Cowl top area)
- The depth of the drip area is maintained at less than 60mm so as to avoid the spring-back effect.
- Ribs are provided at the fender drip area to increase strength in that area.
STEP 1 : Use law extension from the given flanges of the fender following the master section.
STEP 2 : Give face blends to all the law extended flanges.
STEP 3 : Sketch the mounting area face and holes of 5 mm dia, holes should have 10mm dia flat surface.
STEP 4 : Project the sketch on the drip area surface.
STEP 5 : Create a datum plane to give emboss to that respect.
STEP 6 : Give emboss of 3.5mm.
STEP 7 : Trim sheet for holes.
STEP 8 : Give face blends to emboss.
STEP 9 : Create Dart in the middle of two emboss.
STEP 10 : Give edge fillet and make sure there are no any sharp edges and should have smooth transition of surfaces.
- Mounting on The Drip Area
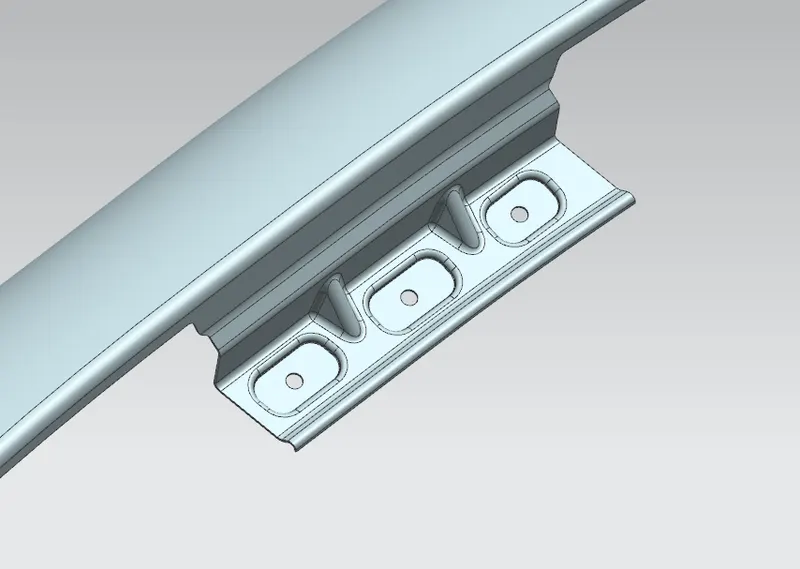
- It is the important mounting uni of the fender. It is connected with the engine compartment, therefore the lot of design constraints are to be followed while designing the fender
- While designing the drip area we have to initially leave 200-300 mm for cowl top
- For placing the headlamp we have to leave at least 150 mm at the front while designing the fender.
- Cowl top part consists PF wiper motor and its instruments.
- Two darts are added on the longer side of the drip area in order to provide the stiffness and adds strength to the part . This helps the fender to not to vibrate and impact the forces outside of the fender during motion of the vehicle.
- Embossing are provided on the mounting to strengthen them during fastening.
-
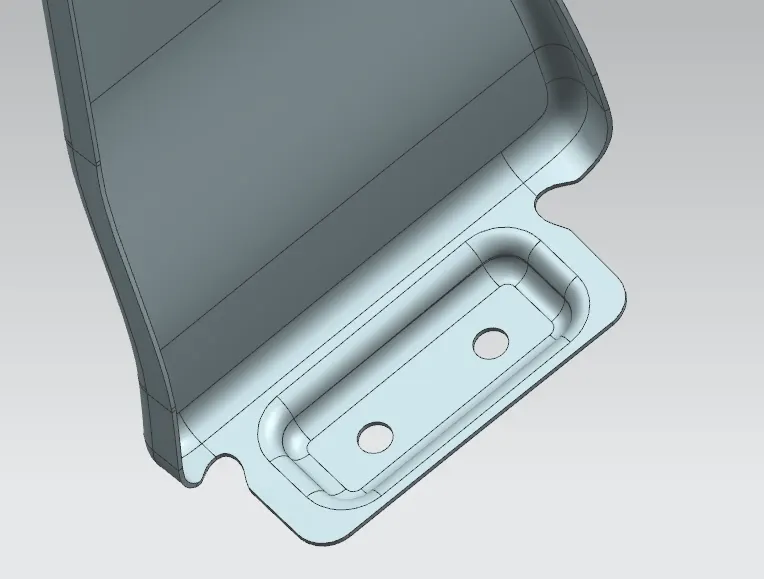
PROCEDURE TO CREATE SILL AREA MOUNTING
STEP 1 : Extend the sheet of the fender from its edge of the sill area.
STEP 2 : Create a datum plane with respect to the extended surface.
STEP 3 : Sketch the mounting area face and holes of 5 mm dia, holes should have 10mm dia flat surface.
STEP 4 : Give an emboss of 3.5mm with an end cap as the plane we created earlier.
STEP 5 : Trim sheet for holes.
STEP 6 : Give face blends to emboss.
STEP 7 : Sketch relief area on both sides of the sill mounting area.
STEP 8 : Trim the sheet for the relief area.
STEP 9 : Bridge curve on sheet to remove sharp edges.
STEP 10 : Trim the sheet with bridge curves making sure that there are no any sharp edges and should have smooth transition of surfaces.
-
ROCEDURE TO CREATE BUMPER AREA MOUNTING
STEP 1 : Use law extension to the 90 degrees of the face and 20 mm length.
STEP 2 : Bridge the curve to the both corners of the extended sheet.
STEP 3 : Trim the sheet to avoid sharp corners.
STEP 4 : Create a dart in the middle of the extended sheet and fender flange.
STEP 5 : Give an edge blend of 3mm.
STEP 6 : Create a datum plane with respect to the extended surface.
STEP 7 : Sketch the mounting area face and holes of 5 mm dia, holes should have 10mm dia flat surface.
STEP 8 : Give an emboss of 3.5mm with an end cap as the plane we created earlier.
STEP 9 : Trim sheet for holes.
STEP 10 : Give face blends to emboss making sure that there are no any sharp edges and should have smooth transition of surfaces.
Bumper mounting area is used to fix the plastic bumper to the fender with the help of the fasteners.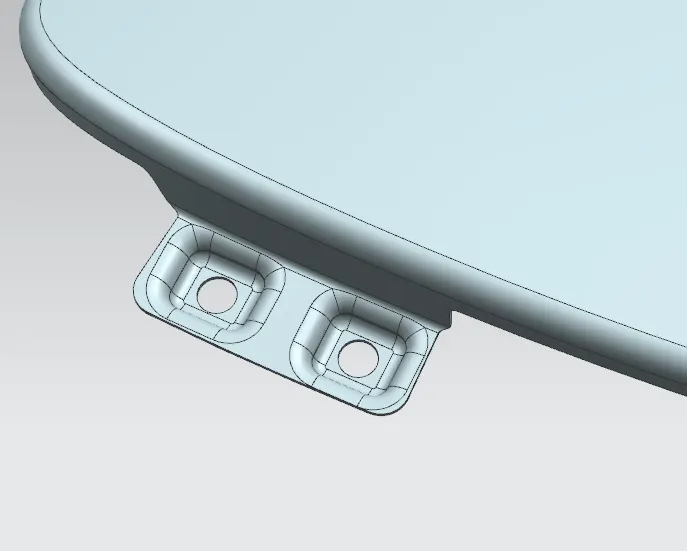
-
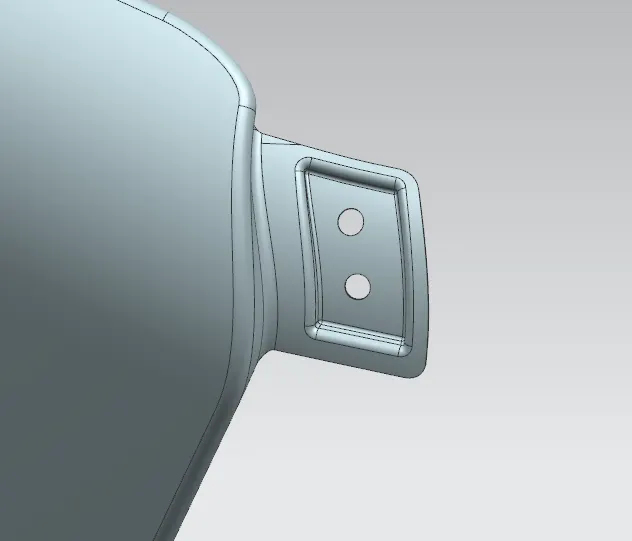
DESIGN OF A-PILLAR MOUNTING AREA :
The A-Pillar is the structural pillar that combines the body to the roof. This make the sides of the windshield rest. Front fenders are fastened to the A-Pillar to form a robust structure.STEP 1 : Bridge the curve to the both corners of the extended sheet.
STEP 2 : Trim the sheet to avoid sharp corners.
STEP 3 : Create a datum plane with respect to the extended surface in offset of a few millimeters above the surface and select the sketch orientation.
STEP 4 : Sketch the mounting area face and holes of 5 mm dia, holes should have 10mm dia flat surface.
STEP 5 : Project the sketch on the A pillar area surface.
STEP 6 : Create another datum plane with respect to the extended surface.
STEP 7 : Give an emboss with an end cap as the plane we created earlier.
STEP 8 : Trim sheet for holes.
STEP 9 : Give face blends to emboss making sure that there are no any sharp edges and should have smooth transition of surfaces.
-
DESIGN OF BAFFLE MOUNTING AREA :
-
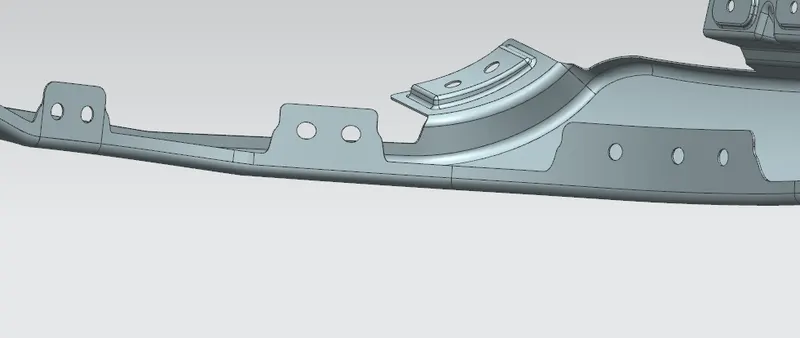
Baffle mounting or mudguard are clip fit type of mounting on the inner side of the fender arch over the Tyre.
-
It protects the car engine compartment and pedestrians from causing injuries from chip out debris on the road when the car is in motion.
-
They are mounted on the fender using a special type of locking clips which are made up of plastics.
-
APPLYING OF THICKNESS TO THE SURFACE .
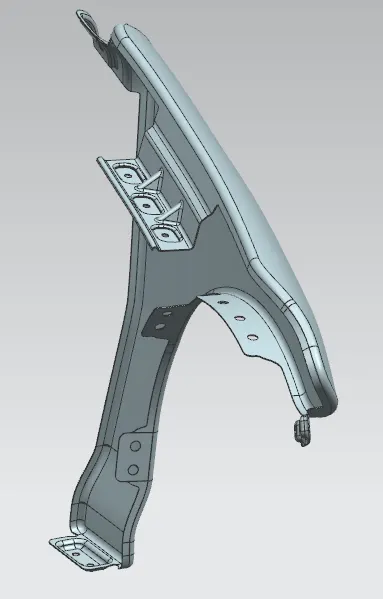
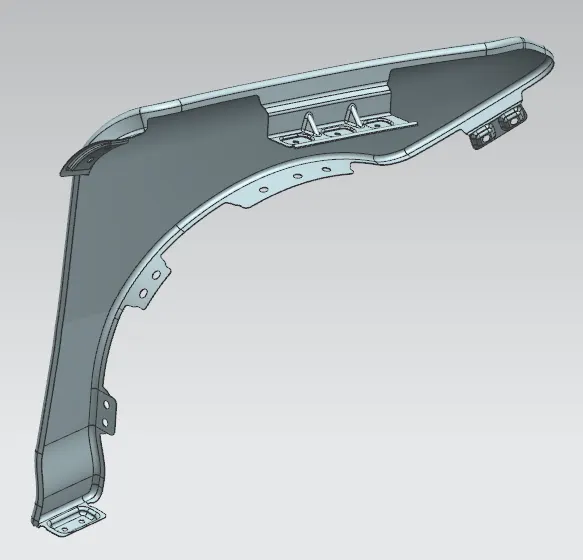
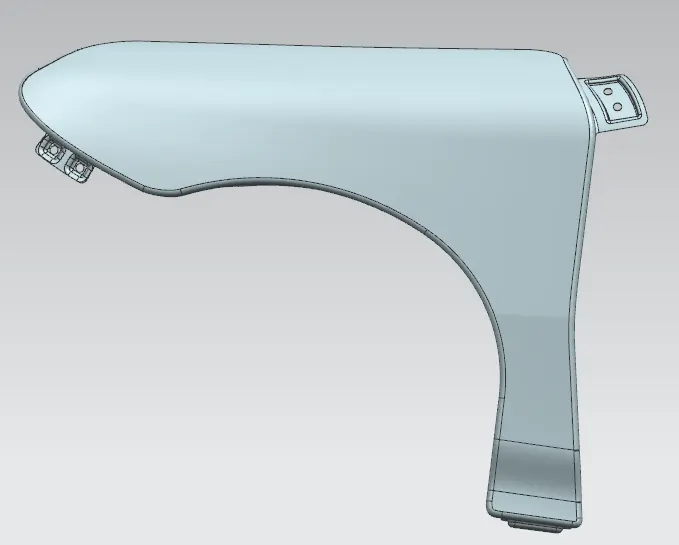
The thickness of 0.75 mm inward on the final sewed surface of the fender to the sheet metal parameters.
CONCLUSION :
Finally design of fender is done with the help of NX-CAD software by following the master section.