Fender Design
Fender Design:
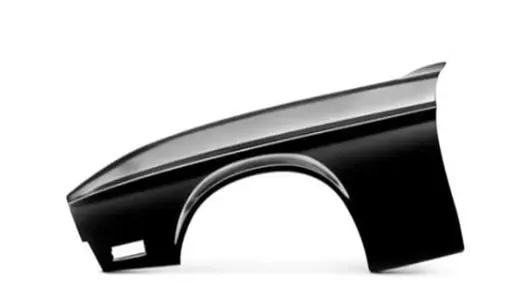
The fender is the curved part of the car’s body that sits on top of the wheels and holds them in place. It is not only a safety component but also enhances the overall look of your vehicle. Its primary function is to shield and protect the passenger compartments by preventing sand, mud, rocks, liquids, and other roads spray from being thrown into the air by the rotating tire.
Fender A-surface given as input given below.
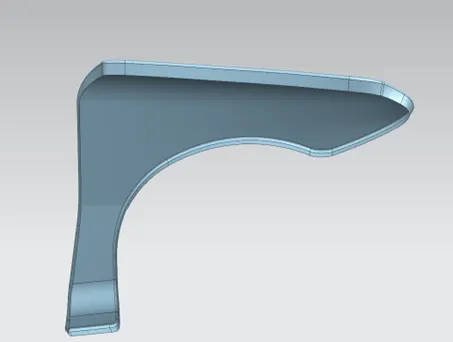
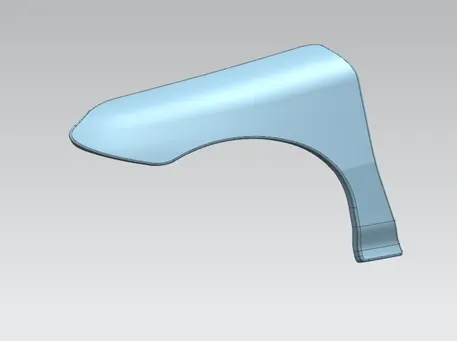
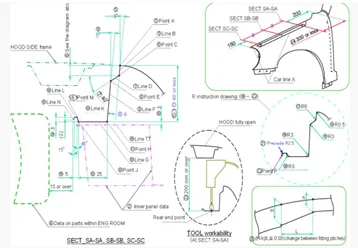
the given Master section to create the Drip Area:
INTRODUCTION:
Fender is the US English term for the part of an automobile (vehicle body) that frames a wheel well (the fender side). Its primary purpose is to prevent sand, mud, rocks, liquids and other road spray from being thrown into the air by the rotating tire.
When the vehicle is moving, tires pickup stones and others and hurl them in all directions. Fenders are basically present to prevent injuries to pedestrians and constrain the motion of these particles.
Most passenger automobiles have four fenders, one over each wheel. For Vehicles with a narrow car body that exposes the tire, the fender is an exposed curve over the top of the tire. For wide body vehicles that cover the tire, the fender forms the wheel well surrounding the tire and is not directly visible from above the car body.
TYPES OF FENDERS:
- Full Bumper Type:
Full Bumper type is traditional type of fender where more material consumption is observed. This type is used in old design of automobiles where it increases the overall weight and thus reduces performance. The maintenance also relatively more due to more surface.
- Half Bumper Type:
Half Bumper type is modern design where less material consumption is observed. So productivity increases by reducing size of blank and thus providing more performance. The maintenance also relatively low compared to full bumper type.

MOUNTINGS OF FENDER:
In order to fix the Fender, mountings were essential. In our design we classified these mountings in 5 areas.
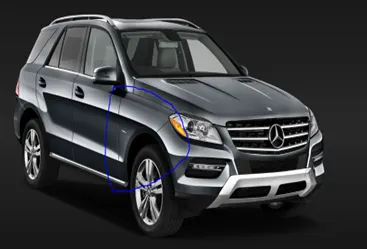
- Drip mountings area
- Sill mountings area
- Bumper mountings area
- A - Pillar mountings area
- Splash/Baffle mountings area
FUNTIONS OF FENDER:
- Car fender limits the exposure of your body and engine to external elements that are harmful.
- It provides safety to the driver and passengers at the time of accidents or collisions. They are manufactured in a way to provide bend during front and side collisions.
- Fenders flares are attached to eensure that both the body and engine have minimal contact with corrosive elements.
- It helps to avoid wind resistance and make your car more aerodynamic
- DRIP MOUNTING:
Firstly, the basic design of a fender involves in developing the drip area as it is a major mounting region and requires certain considerations to meet the standard values. This design takes a vital role for maintain proper gap between hood and the fender which shouldn't be visible for human eye.
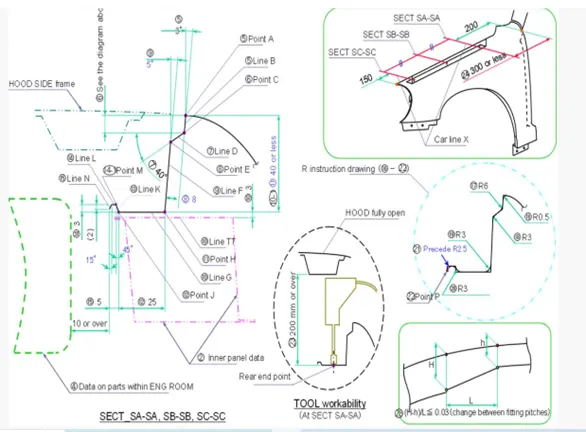
Master section for the drip to follow is shown in above snap.
Procedure:
- dump body imported and extracted with non-associative.
- for drip area, spacing from cowl is taking 150 mm because it is too near if I take 200mm and it says 300 or lesser in challenge.
- for drip emboss, edge blend taking as 2mm due to overlapping.
- we have the flange before so we are considering it and proceeding after the first flange in the question with 3degrees.
- using this flange we will use law extension to create 8mm distance flange with 40degrees.
- from here we take 5degrees flange with 8mm wide from first flange.
- 25 mm horizontal flange taken here.
- 3 flanges with 45, 0, 15 degrees flanges taken with length of 5mm and 3mm width. We use 3 face blend for this.
- now the drip area corner blends radius will be given as per the master section above 3.75 and below taken as 3.75 radius.
- emboss are taken by assuming all dimensions and the blends.
- distance from blend to blend are also not followed because of overlapping.
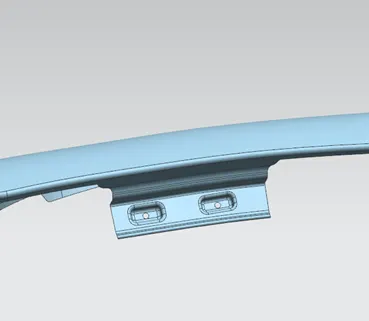
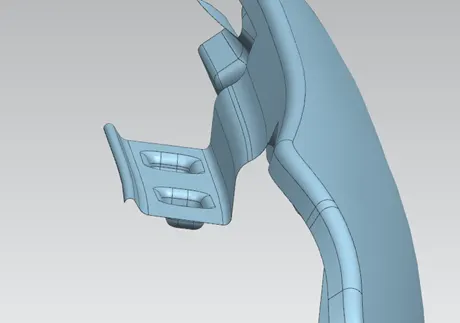
2. Sill mountings area:
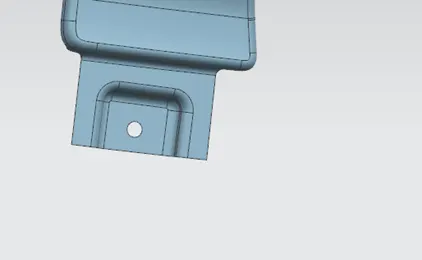
- Sill mounting area shown above and it is taken as assumption because master section not provided.
- emboss are taken by assuming all dimensions and the blend is 3.75mm.
3. Bumper mountings area:
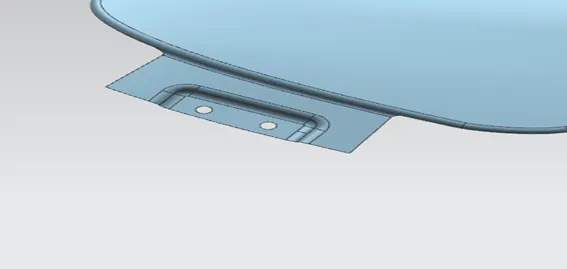
- Bumper mounting area shown above and it is taken as assumption because master section not provided.
- emboss are taken by assuming all dimensions and the blend is 3.75mm.
4. A - Pillar mountings area:
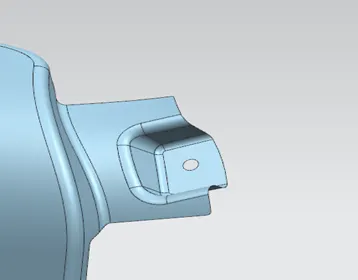
- A - Pillar mountings area shown above and it is taken as assumption because master section not provided.
- emboss are taken by assuming all dimensions and the blend is 3.75mm.
5. Splash/Baffle mountings area:
- The area shown in blue colour is Baffle mountings in snap given below.
- emboss are taken by assuming all dimensions and the blend is 3.75mm.
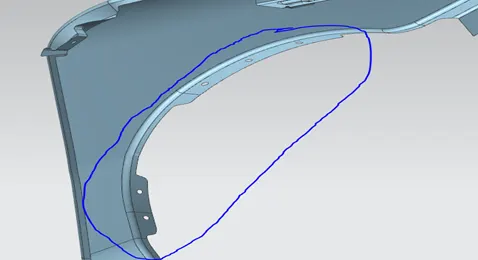
Here emboss are not taken because plastic material will come in this place.