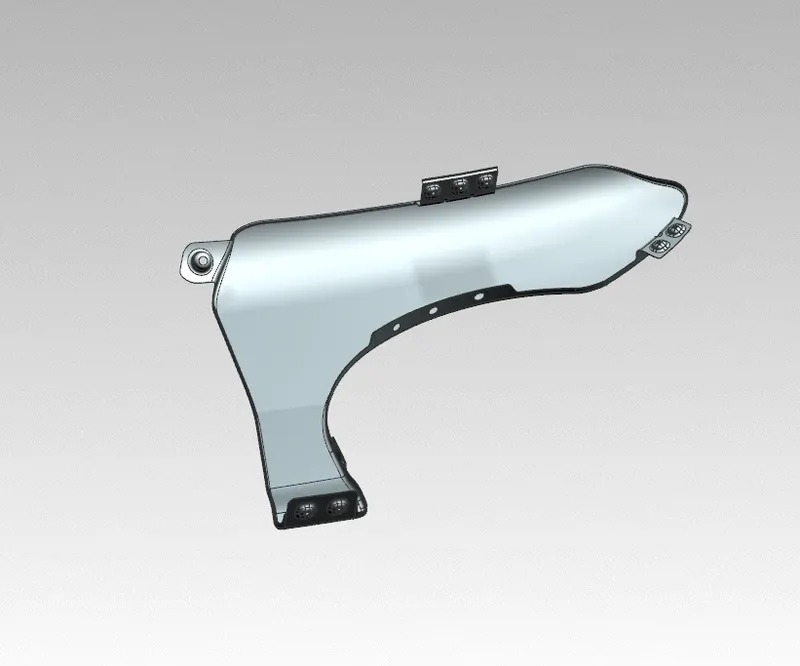
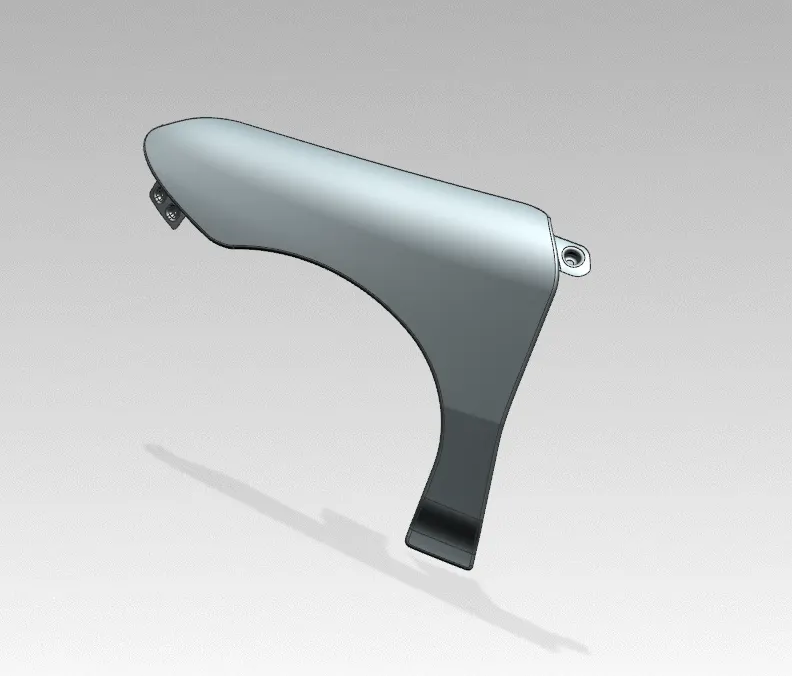
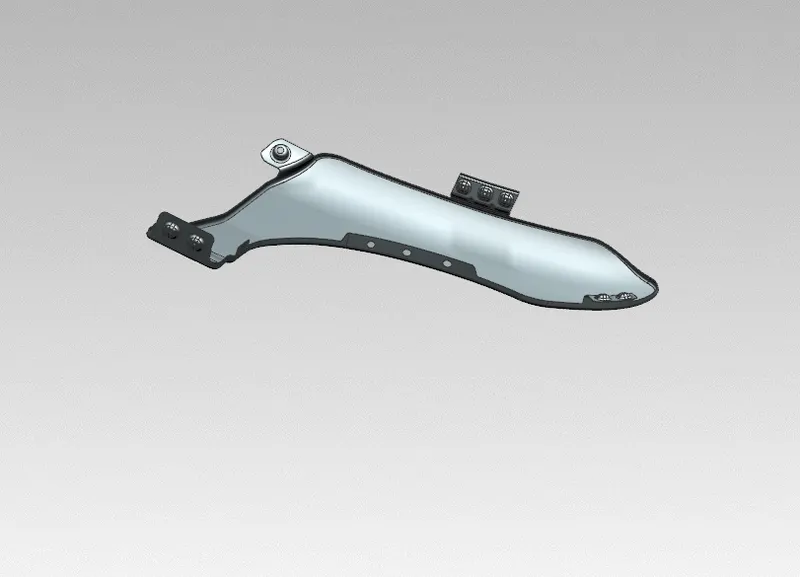
Fender Design
OBJECTIVES:
Our main objective is that create a fender from given class A surface and create mounding flanges.
INTRODUCTION:
Fender:
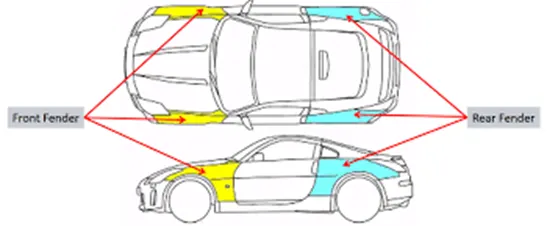
- Fender is one of the automobile parts which is in all types of vehicles which products the vehicle. The fender products the vehicle from sand, mud, rocks, liquids and other road spray from being thrown into the air while the tyre rotating.
- Car has four fenders. Rear side has two fender which comes with main body. Front two fender only separately manufacture and mounding with main body.
Purposes:
- Product the vehicle from dust particle during wheel rotating.
- It also be shield of wheel
- Product the passengers and pedestrians and near vehicle from stone and other dust particles.
Types of front fenders:
Full bumper type fender:
- This type of fender is not mostly used now.
- Full tyre is covered in this type.
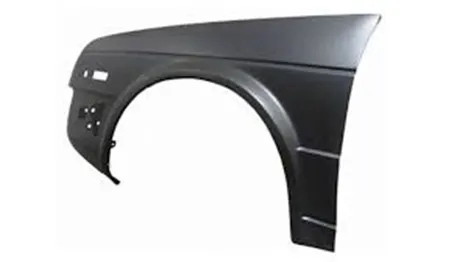
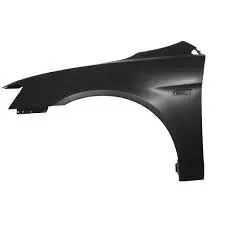
Half bumper fender type:
- In this model is mostly used now.
- One half of tyre only covered in this type. Another half covered by bumper.
- Less amount of material is need to produce the fender compare with full bumper type.
- When we reduce the amount of sheet material, BIW wight is reduced. So, vehicle efficiency is increased.
Mounding areas of front fender:
Fener is mounding with the main body by five mounding. And baffle is mounding under the fender.
- A pillar mounding area:
A pillar is in one top edge of the fender. One side of mounding in done in this location.
- Drip area:
Drip area is engine house area. It is in top of the fender. This area has large flanges. In this flange is different compare with others. Because this area is holding the fender.
- Sill area:
This area is under the front door. Downside part of the fender is mounded in this area.
- Bumper area:
Front side of fender is mounded with bumper. Fender and bumper are joined to cover the top side of wheel.
- Body mounding area:
This area is ahead of front door and between the A pillar and the sill area.
FENTER MANUFACTURING:
Manufacturing materials:
Fender is generally made by finer glass, steel, aluminium and other materials.
Manufacturing process:
Manufacturing process depend on the materials
Sheet metal manufacturing:
- Deep drawing:
It is one of the forming processes in which process combination of tensile and compressive pressure is given to change flat sheet to hollow sheet bodies.
It is basically classified into three types depend on load application.
- Deep drawing using tools
- Deep drawing using active media
- Deep drawing by means of active energy
Deep drawing tools method is mostly used in sheet metal forming.
Process of deep drawing:
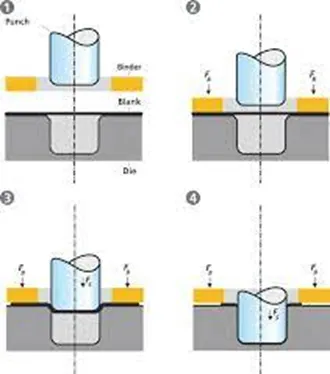
- The rigid tools consist of a punch, die and binder. This punch and die will be the product replica.
- In this process the holder closes after the sheet has been inserted.
- Then sheet is clamped on the die and binder hold the sheet
- The process will do slowly to prevent wrinkles forming under the binder.
- The punch pushes the sheet slowly get and the sheet gets die shape.
- The amount of punching force continually increased to lower dead centre of punch.
- In this process achieved in stretch purely decreased the thickness of the sheet metal.
- This is forming process in which only forming slightly curved and low depth product.
- This process is combination of stretch and deep drawing involved. So, in which process should stretched the sheet metal as well as possible without reaching material limits. If give low stretching in complex parts sometime it will give defects such as wrinkles and splits.
- Hot blow forming:
This process is recently used to manufacture the aluminium front fenders. Hot blowing air is passed under the aluminium sheet and form the front fender. This type of fender is low weight compare with other. It is increasing the fuel efficiency of the car. But this manufacturing and material cost is very high. So, mostly it is not used.
- Reaction injection moulding:
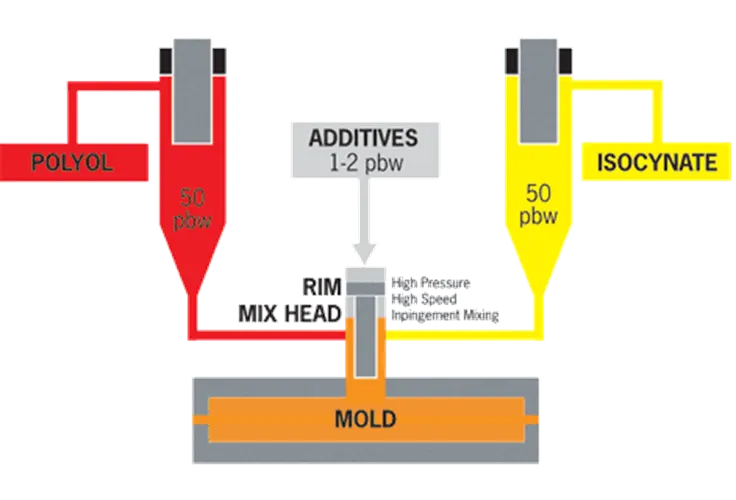
This process is similar to injection moulding process. But in this process thermosetting plastics are used. Two liquid materials are sedately filled in two separate camper the two liquid materials are go and mixed in another chamber curing agent also added in this chamfer after mixing which is injected into the closed mould. The it is cured and formed the product. Polyurethane material is used two forming the front fender. Polyol and isocyanide are adding to form the polyurethane. This method is used to manufacture other automotive products such as bumper and air spoilers.
BLANKING AND PIERCING:
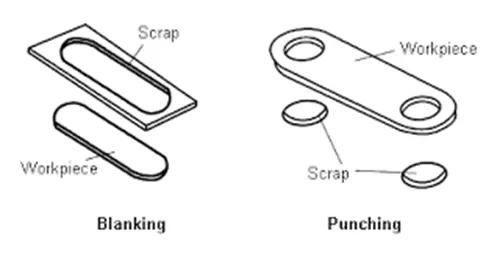
- These two processes are used to cut the sheet metal to get desired hole features.
- In the blanking process push the punch and get required part. This final part is called blank which is separate from work piece and tool fixture. Remaining part in tool fixer which is called scarps.
- In the piercing process push the punch and unwanted part. It is called scarps. Final part is kept in the fixing tool. It is called washer.
DESIGNING:
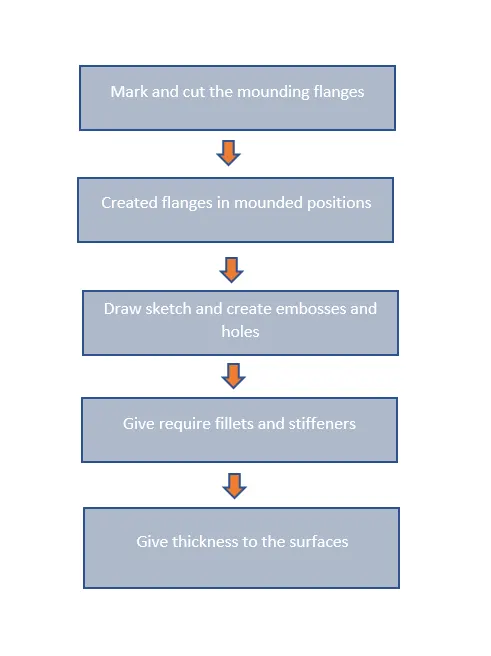
Methodology:
Tools:
- Trim sheet:
It is used to the sheets by curve or another sheet as tool.
- Offset Surface:
It is used to create copy of surface from a surface in required distance.
- Law Extension:
It is used to extrude the surface with required angle and length.
- Trim and extend:
It is used to trim two surfaces by which intersecting line. We can decide which part we keep or discard.
- Through curves:
It is used to create a surface between two curves or surface edges.
- Emboss:
It is used to create emboss feature which give offset surface and joined wall. We can modify wall draft angle also.
- Curve on face:
It is used to draw curve on the required face.
- Projection curve:
It is used to project an exciting curve on required part like surface, plane etc.
- 3D profile:
It is used to draw 3D curve between two points with tangency.
- Face blend:
It is used to create blend edges or faces between faces.
- Edge blend:
It is used to create blend edges from sharp edges
12.Extend sheet:
It is used to extend the sheet to required length
13.Sew:
This tool is used to combine the two surfaces to for a single surface part
14.Thicken:
This tool is used to give thickness to the surface to create solid body.
Process:
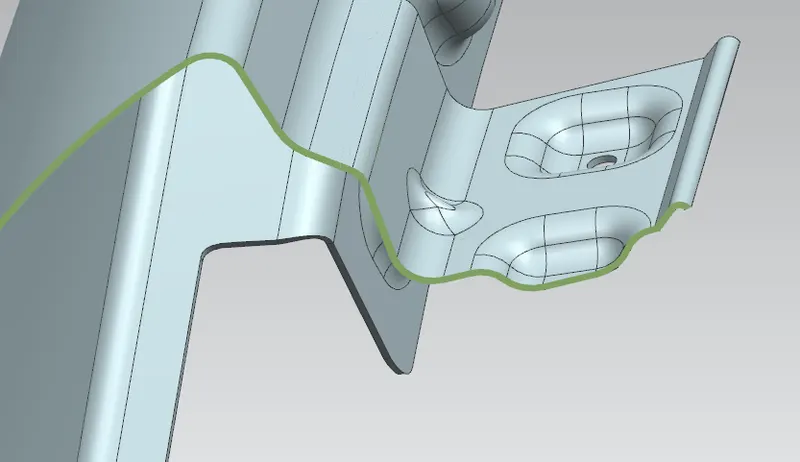
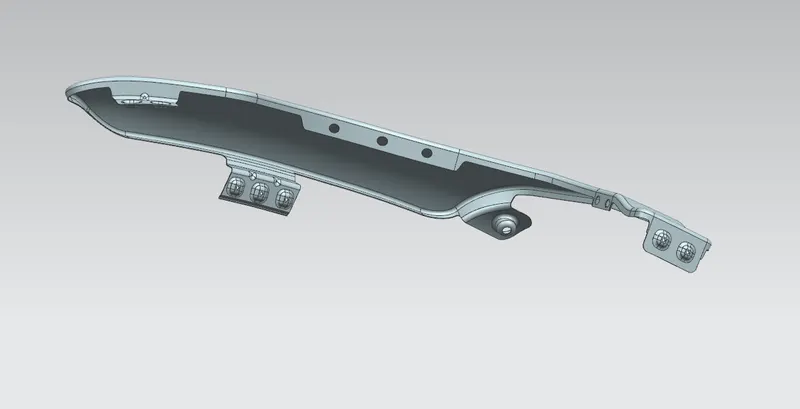
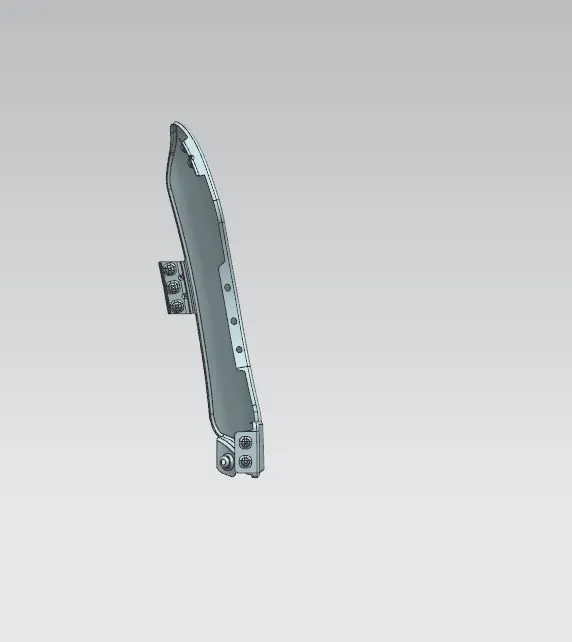
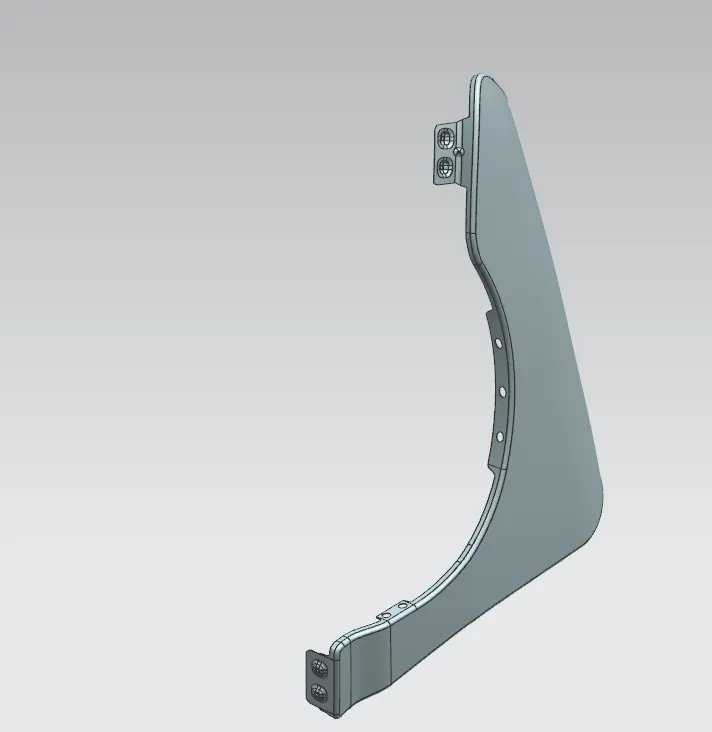
They have provided the class A surface of the front fender which is used to create the mounding flanges. Offset a curve 5mm. In this fender we are going to create four flanges and create holes for baffle fixing. First cut some ununiformed part by trim sheet tool and joined by through curve mesh tool. Flanges of given fender is large. So, Mark the mounding areas and cut the rest of flanges with the help of created offset curve and trim tool.
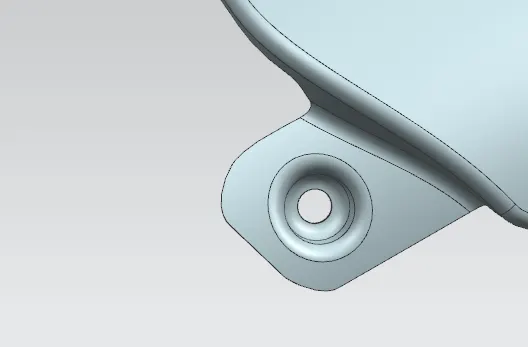
A pillar mounding flange:
- This flange is created top one side corner of the fender. Law extension used to extrude the flanges.
- Then draw create the embosses and give fillets requiring areas.
- Then create a hole in centre of emboss to give fastener.
Drip area flange:
- This area flange’s master section only they have given. It is used to create the flange.
- Law extension is used to extrude the sheet. It is step flange which is created by the help of master section.
- Then draw create the emboss by the help of emboss tool
- Then create a hole in the centre of the emboss.
- It is large flange. So, it will give spring effect. So, we should create stiffener.
- Dart tool is used to create two stiffeners.
- Finally give fillets required areas by edge blend.
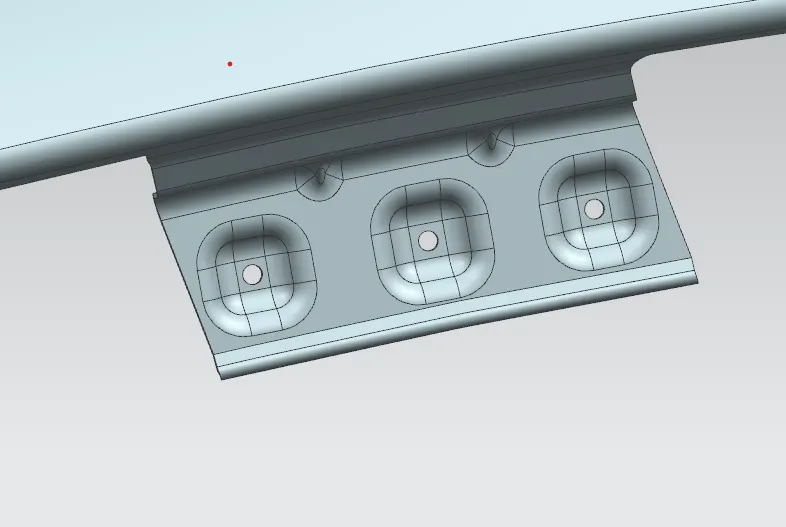
Bumper mounting area:
- This flange is created bumper mounded side of the fender.
- Law extension used to extrude the flanges.
- Then draw and create two embosses
- Then create a hole in centre of emboss to give fastener.
- Create a stiffener is by dart tool.
- Finally give required fillets by edge blend.
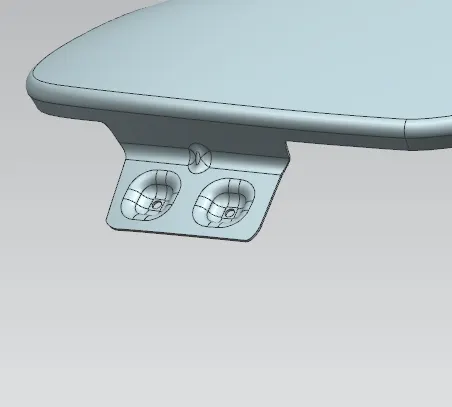
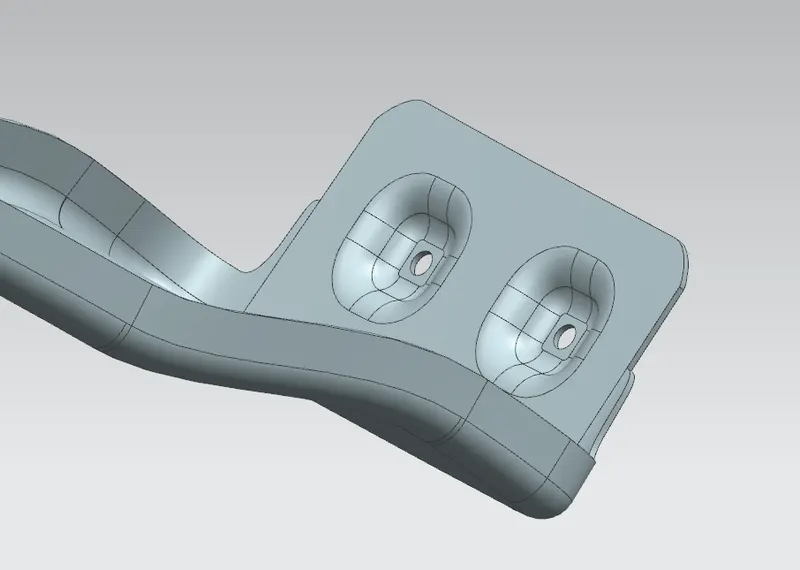
Sill mounding area:
- This flange is created down side of the fender.
- Extent sheet tool is used to extend the down side sheet
- Then draw and create two embosses
- Then create a hole in centre of emboss to give fastener.
- Finally give required fillets bny edge blend
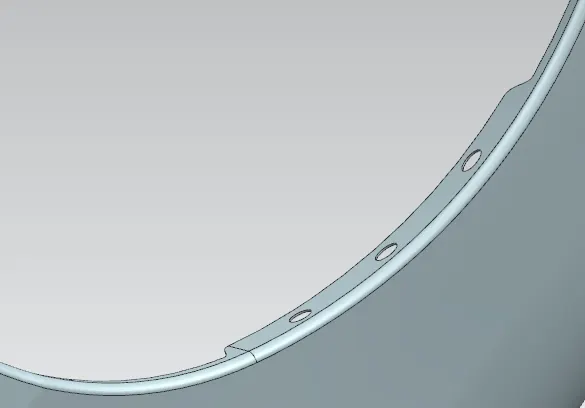
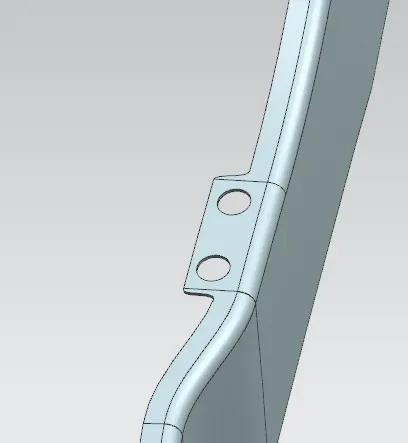
Baffle mounding holes:
- Baffle are fixed in down side of the fender.
- Cut two flanges in downside of fender for baffle holes in which flanges on flange is large another is small.
- Then create two holes in small flange and create three holes in another large flange.
Thickening:
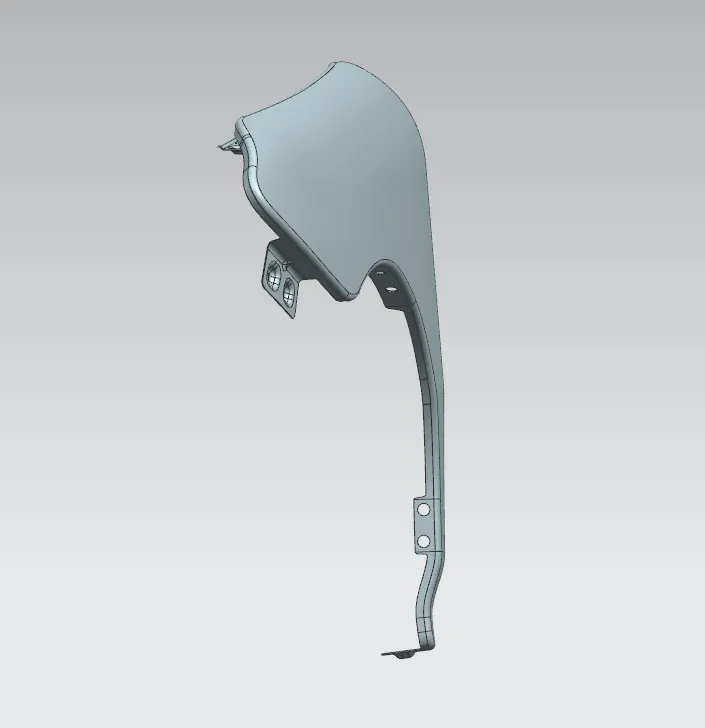
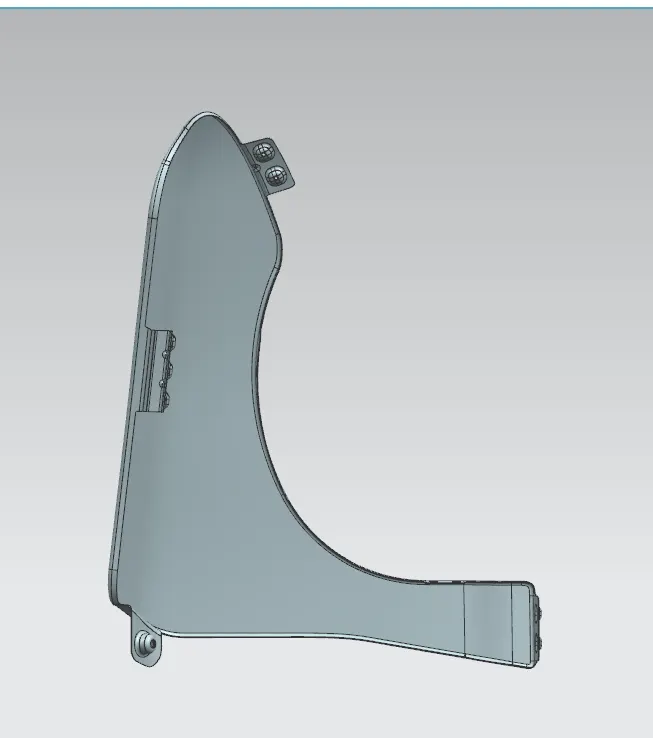
- We have created class A surface of fender with flanges.
- So, we give thickness 0.75mm by the help of thicken tool
CONCLUSION:
We have successfully created fender with mounding flanges and baffle holes by NX CAD software.
Different views:
Render image: