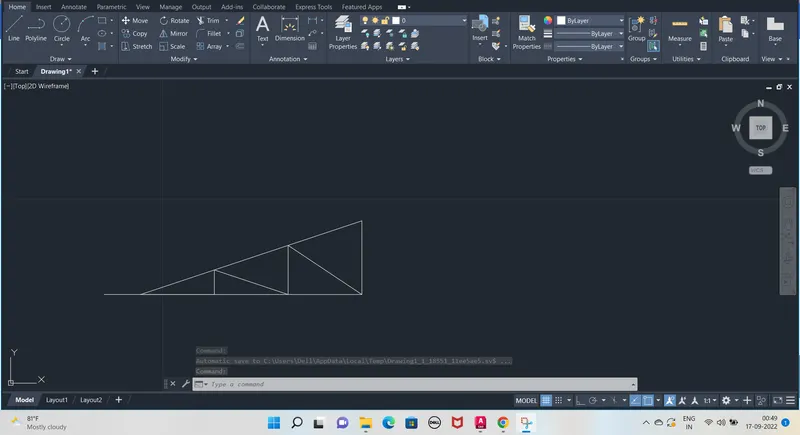
Creation of geometries by Coordinate system methods using AutoCad
Aim :- The aim is to draw all the objects using absolute rectangular and polar coordinate system
Introduction:-
we will draw all the objects using different cordinates system.
- In this we have absolute cordinate system in which we will use the origin point as a refrence to give the various commands.
- In rectangular system we will be using @ command to provide the command with respect to the previous command.
- In polar command will wil be using @ as a refrence command and < to provide an angle to our objects.
1.Absolute cordinate system
- step 1:- use line command and give a cordinate 2,1
- step 2:-then use 8,1
- step 3:-then use 8,2
- step 4:-then use3,2
- step 5:-then use 3,7
- step 6:-then use 8,7
- step 7:-then use 8,8
- step 8:-then use 2,8
Relative rectangular cordinates system
- step 1:- use line command and give a cordinate 2,1
- step 2:-then use @6,0
- step 3:-then use @0,1
- step 4:-then use @-5,0
- step 5:-then use @0,4
- step 6:-then use @5,0
- step 7:-then use @0,1
- step 8:-then use @-6,0
Polar cordinate system
- step 1:- use line command and give a cordinate 2,1
- step 2:-then use @6<0
- step 3:-then use @1<90
- step 4:-then use @5<180
- step 5:-then use @4<90
- step 6:-then use @5<0
- step 7:-then use @1<90
- step 8:-then use @6<180
now, the figure is complete.
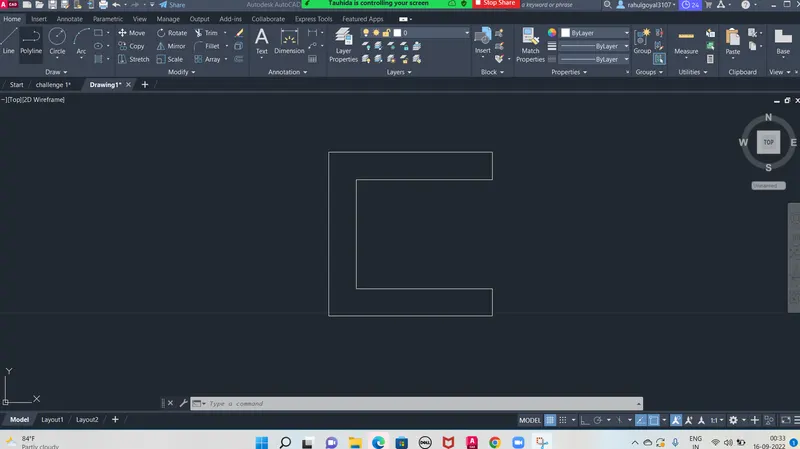
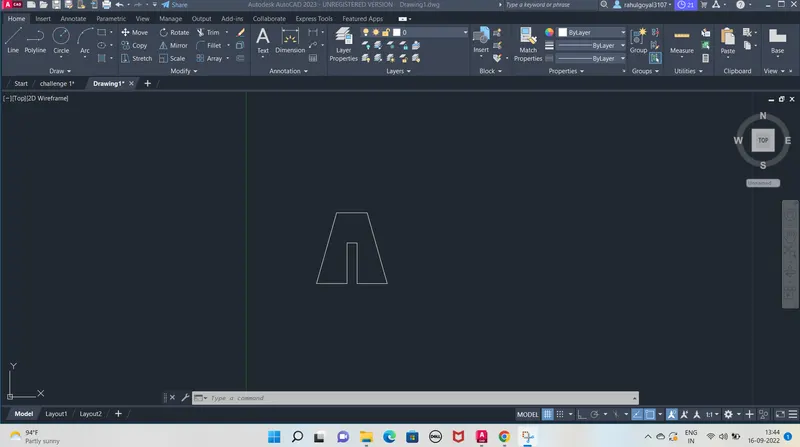
2.Absolute cordinate system
- step 1:- use line command and give a cordinate 2,1
- step 2:-then use 5,1
- step 3:-then use 5,4
- step 4:-then use 6,4
- step 5:-then use 6,1
- step 6:-then use 9,1
- step 7:-then use 7,7
- step 8:-then use 4,7
Relative rectangular cordinates system
- step 1:- use line command and give a cordinate 2,1
- step 2:-then use @3,0
- step 3:-then use @0,4
- step 4:-then use @1,0
- step 5:-then use @0,-4
- step 6:-then use @3,0
- step 7:-then use @-2,7
- step 8:-then use @-3,0
Polar cordinate system
- step 1:- use line command and give a cordinate 2,1
- step 2:-then use @3<0
- step 3:-then use @4<90
- step 4:-then use @1<0
- step 5:-then use @4<270
- step 6:-then use @3<0
- step 7:-then use @7<106
- step 8:-then use @3<180
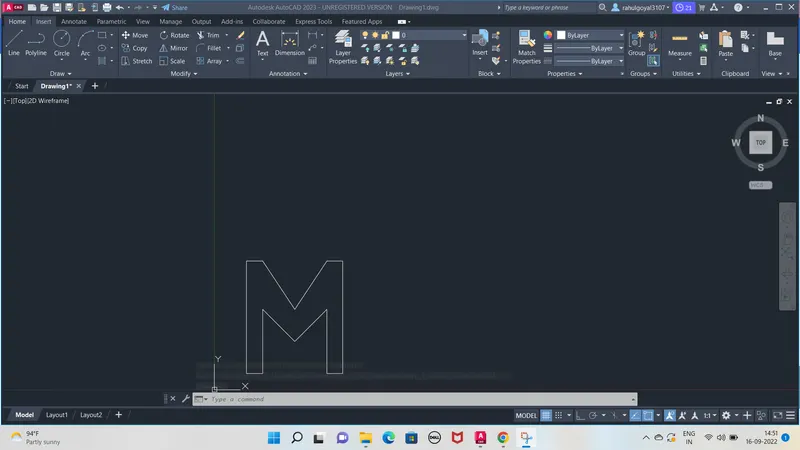
3.
Relative rectangular cordinates system
- step 1:- use line command and give a cordinate 2,1
- step 2:-then use @0,7
- step 3:-then use @1,0
- step 4:-then use @2,-3
- step 5:-then use @2,3
- step 6:-then use @1,0
- step 7:-then use @0,-7
- step 8:-then use @-1,0
- step 9:- then use @0,4
- step 10:-then use @-2,-2
- step 11:-then use @-2,2
- step 12:-then use @0,-4
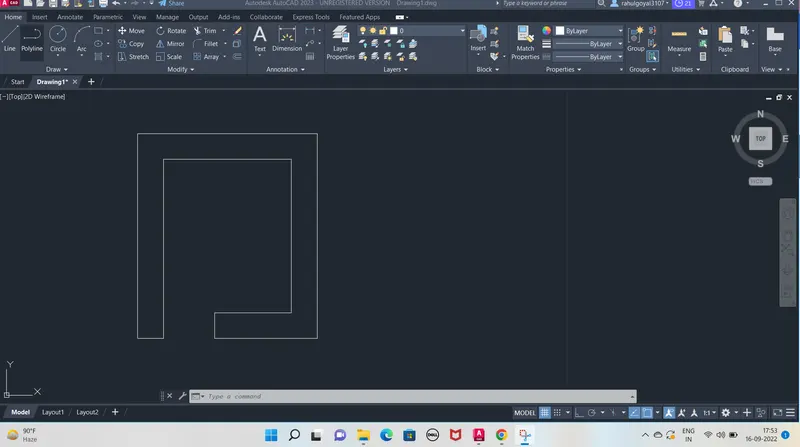
4.Relative rectangular cordinates system
- step 1:- use line command and give a cordinate 2,1
- step 2:-then use @0,8
- step 3:-then use @7,0
- step 4:-then use @0,-8
- step 5:-then use @-4,0
- step 6:-then use @0,1
- step 7:-then use @3,0
- step 8:-then use @0,6
- step 9:- then use @-5,0
- step 10:-then use @0,-7
Result:-
5.Relative rectangular cordinates system
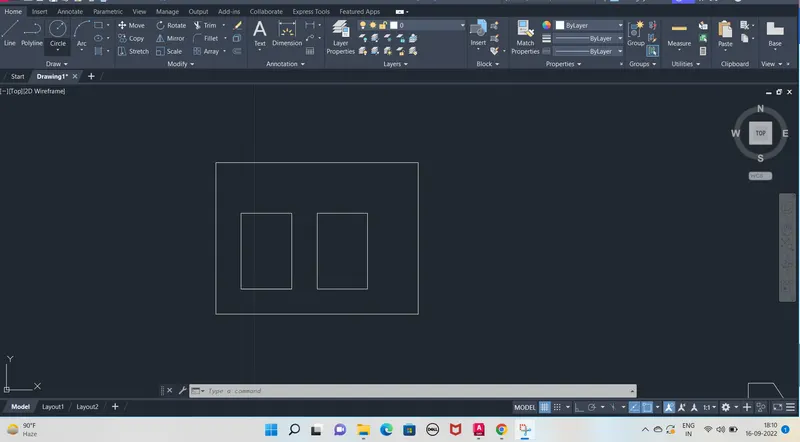
- step 1:- use line command and give a cordinate 2,1
- step 2:-then use @8,0
- step 3:-then use @0,6
- step 4:-then use @-8,0
- step 5:- use line command and give a cordinate 3,2
- step 6:-then use @2,0
- step 7:-then use @0,3
- step 8:-then use @-2,0
- step 9:- the close the figure
- step 10:-then use line cordinate and give a cordinate 7,2
- step 11:-then use @2,0
- step 12:-then use @0,3
- step 13:-then use @-2,0
- step 14:- the close the figure
Result
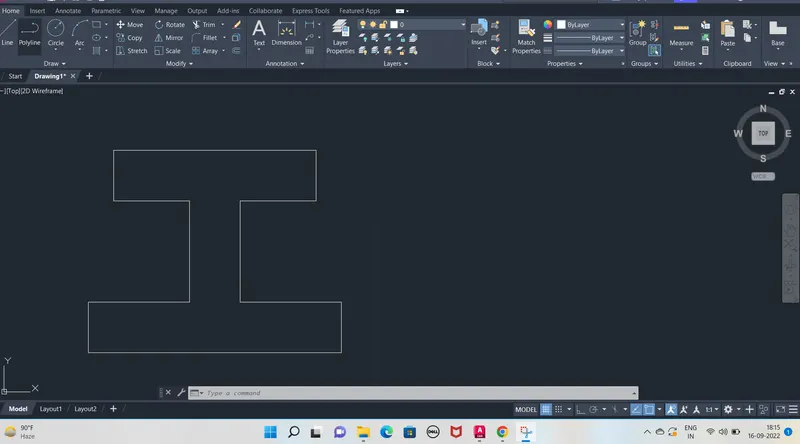
6.Relative rectangular cordinates system
- step 1:- use line command and give a cordinate 0,0
- step 2:-then use @10,0
- step 3:-then use @0,2
- step 4:-then use @-4,0
- step 5:-then use@0,4
- step 6:-then use @3,0
- step 7:-then use @0,2
- step 8:-then use @-8,0
- step 9:- then uee @0,-2
- step 10:thne use @3,0
- step 11:-then use @0,-4
- step 12:-then use @-4,0
- step 13:-then close the figure
7.Relative rectangular cordinates system
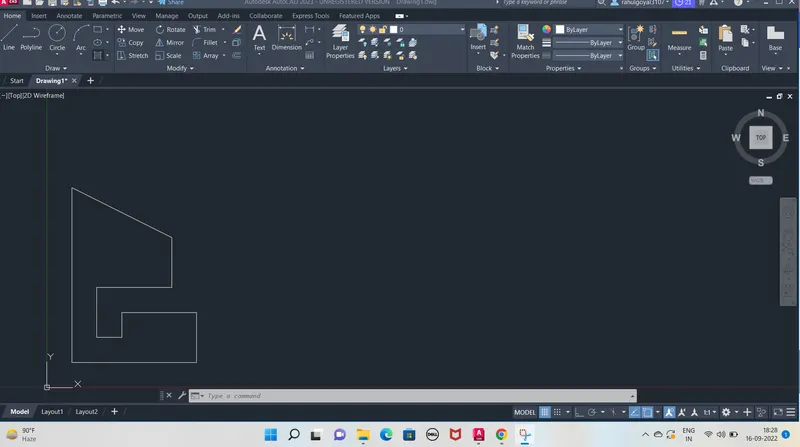
- step 1:- use line command and give a cordinate 1,1
- step 2:-then use @5,0
- step 3:-then use @0,2
- step 4:-then use @-3,0
- step 5:-then use@0,-1
- step 6:-then use @-1,0
- step 7:-then use @0,2
- step 8:-then use @3,0
- step 9:- then uee @0,2
- step 10:then use @-4,2
- step 12:-then close the figure
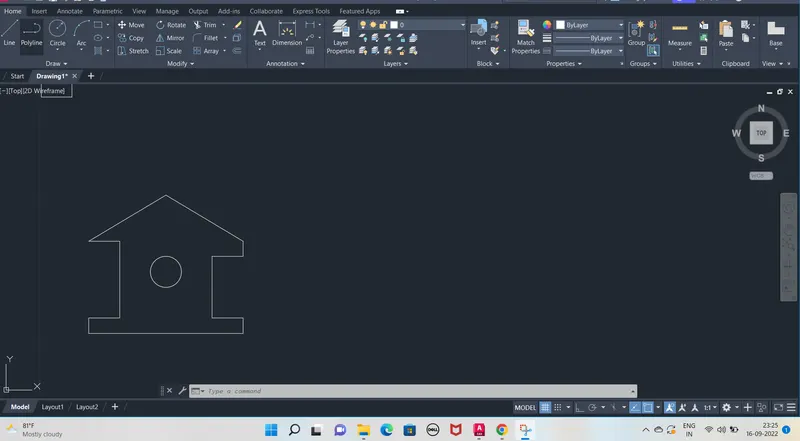
8.Relative rectangular cordinates system
- step 1:- use line command and give a cordinate 0,0
- step 2:-then use @10,0
- step 3:-then use @0,1
- step 4:-then use @-2,0
- step 5:-then use @0,4
- step 6:-then use @2,0
- step 7:-then use @0,1
- step 8:-then use @-5,3
- step 9:- then uee @-5,-3
- step 10:then use @2,0
- step 12:-then use @0,-5
- step 13:-then use @-2,0
- step 14:-then close the figure.
Result
9.Relative rectangular cordinates system
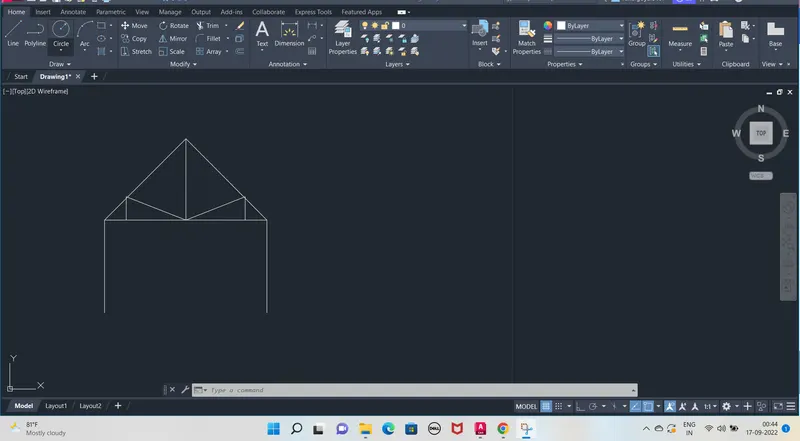
- step 1:- use line command and give a cordinate1,1
- step 2:-then use @0,4
- step 3:-then use @7,0
- step 4:-then use @0,-4
- step 5:-then use the line comand and give ordinates 1,4
- step 6:-then use @3.56,3.56
- step 7:-then use @3.56,-3.56
- step 8:-then draw a perpendicular line from the top intersection point to the base line of 7 units
- step 9:- then from there draw similar triangles using respective ordinates.
- step 10:then close the figure.
10.Relative rectangular cordinates system
- step 1:- use line command and give a cordinate1,1
- step 2:-then use @7,0
- step 3:-then use @0,2
- step 4:-then use @-6,-2
- step 5:-then use @2,0
- step 6:-then use @0,.667
- step 7:-then use @2,-.667
- step 8:-then use @0,1.333
- step 9:- then close the figure.