Creating Walls, Partition walls and Floors for a residential layout using REVIT
1. AIM: To draw the floor to the layout I created in week 2 and to select the floor with appropriate material and thickness using
the property browser in the Ground floor level.
Also to align the floor plan with grids.
Procedure To align the floor plan with grids:
First open the project which I created with the name Project A in week 2
Now go to GRID tool in ribbon tab
Click on Pick Lines tool
Select the lines from the current project A
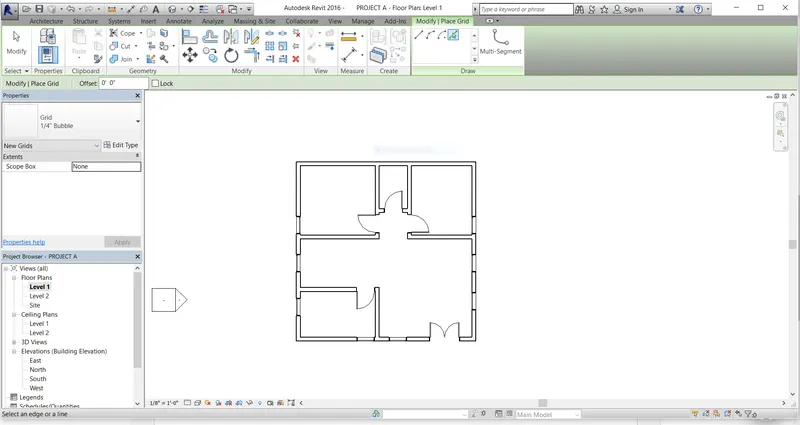
Now drag the transverse grids and longitudinal grids to a level
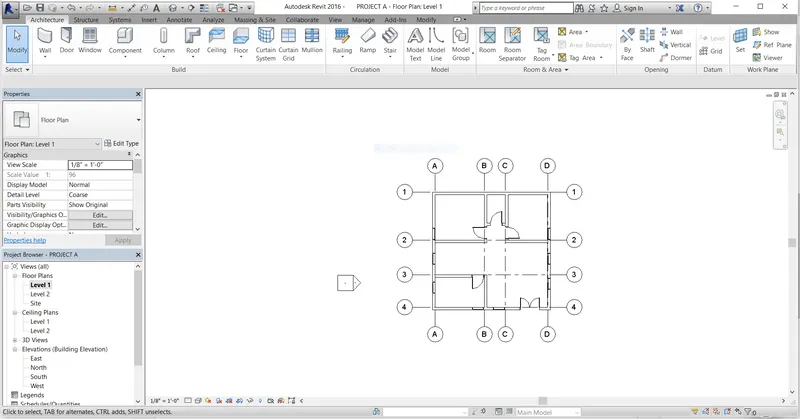
Finally grids have been placed in the project A with numbers and alphabets.
Procedure to place the floor to the layout with appropriate material and thickness in ground floor level:
First rename the level 1 to Ground Floor Level
Go to project browser
Right click on level 1
Click rename option
Give the name Ground Floor Level
Click Yes button
Then a dialog box like would you like to rename corresponding level and views will be displayed
then click YES in the dialog box
Then level 1 name is changed to Ground Floor Level in the project browser.
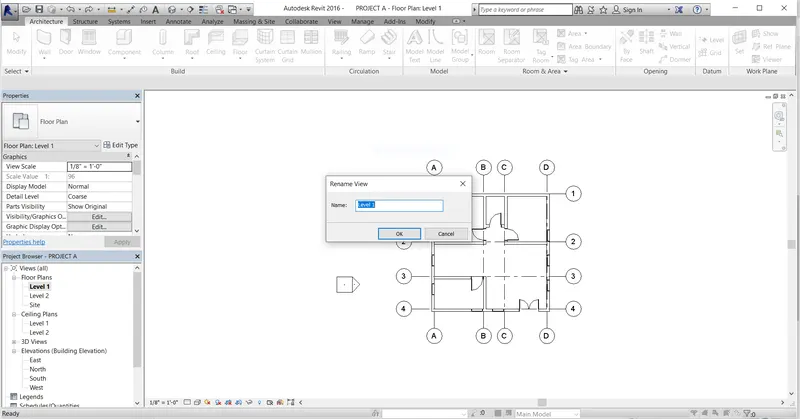
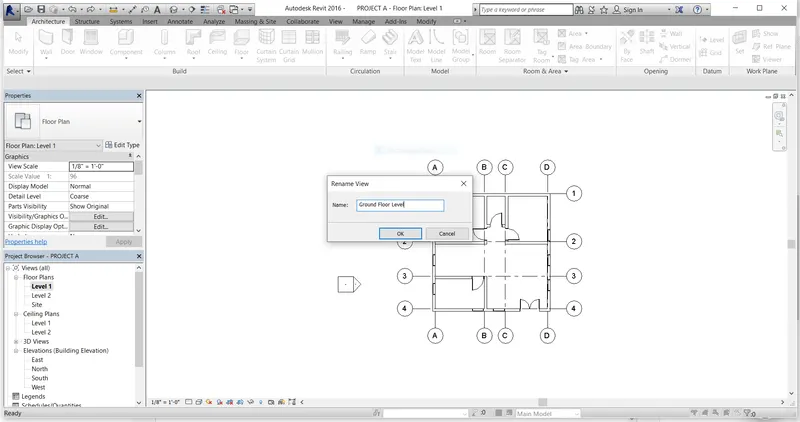
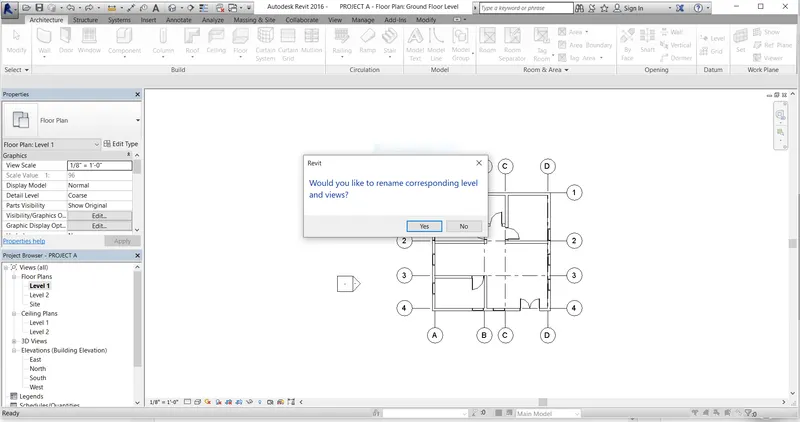
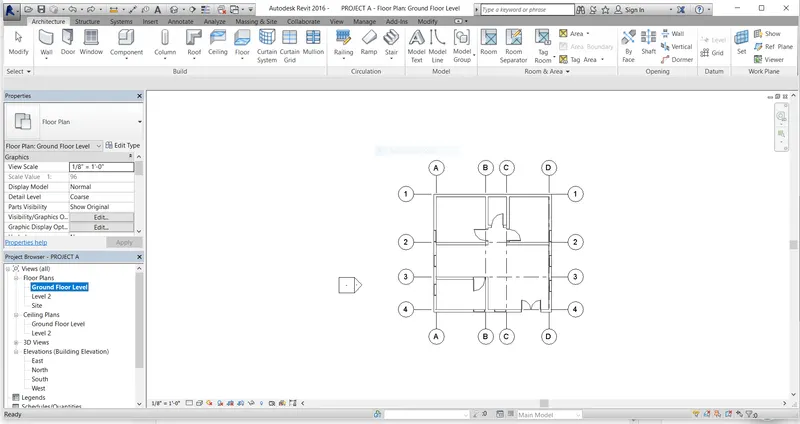
Now to place the floor with appropriate material and thickness
First Go to Floor tool in Architecture tab
Select Floor Architecture
Now Go to properties browser
Click Edit Type
Click Duplicate option
Edit the name Generic 12 inch to Generic 4 inch
Press OK button
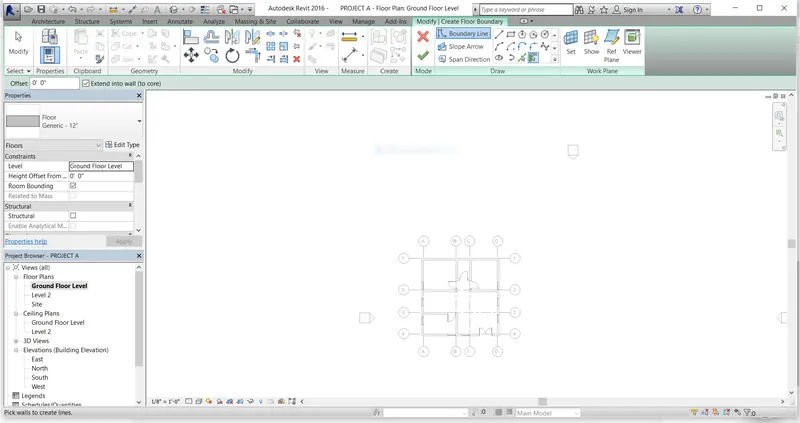
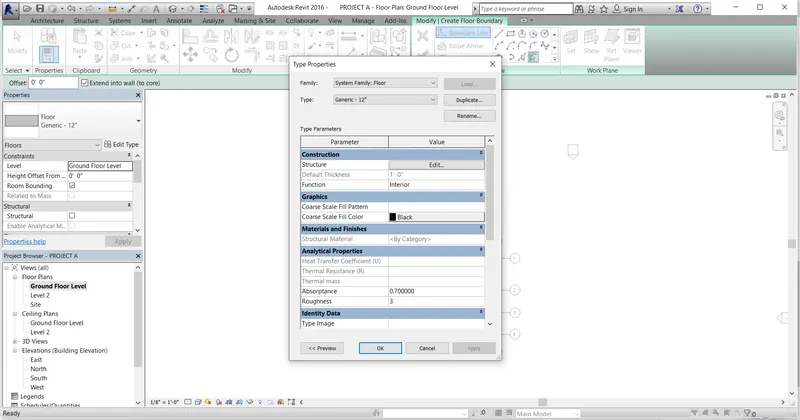
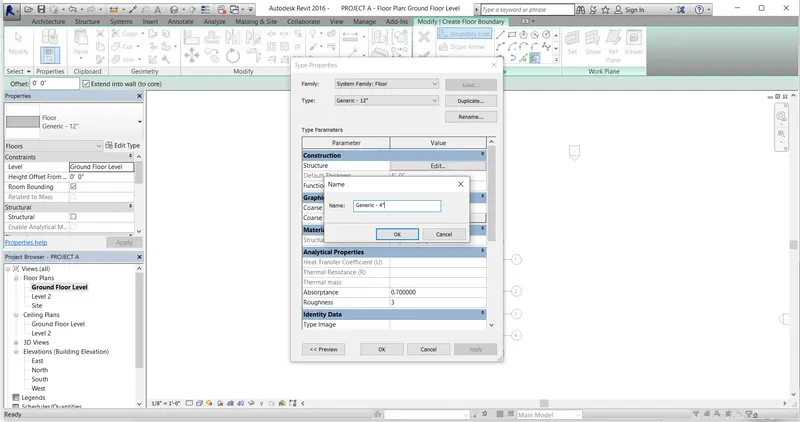
Now click on Edit option in Structure parameter
Click on Category option
Select appropriate material for floor like Tile,procelin 4 inch
Press OK button
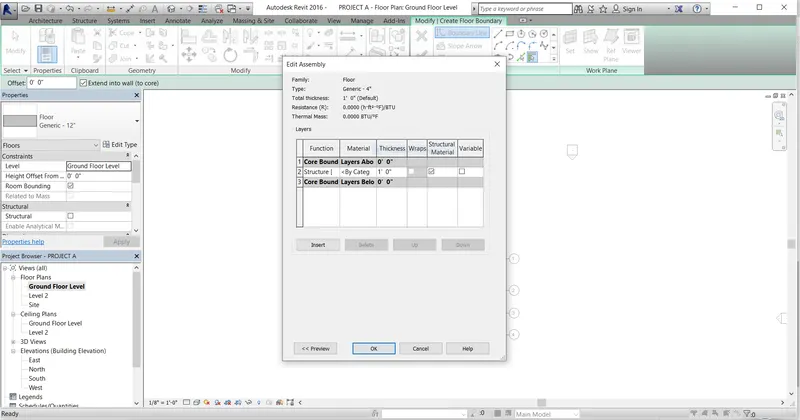
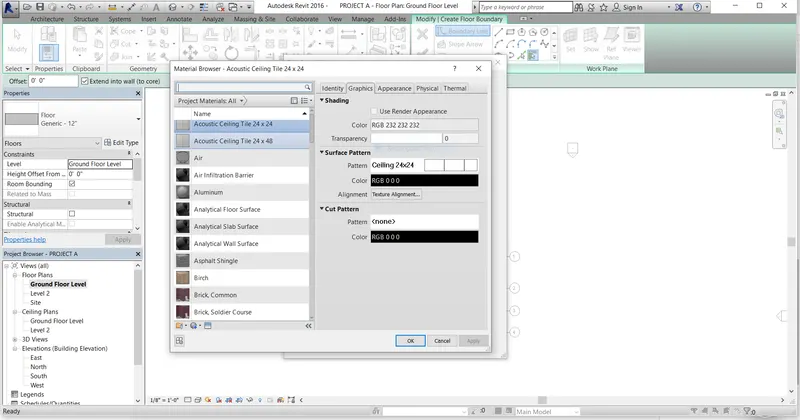
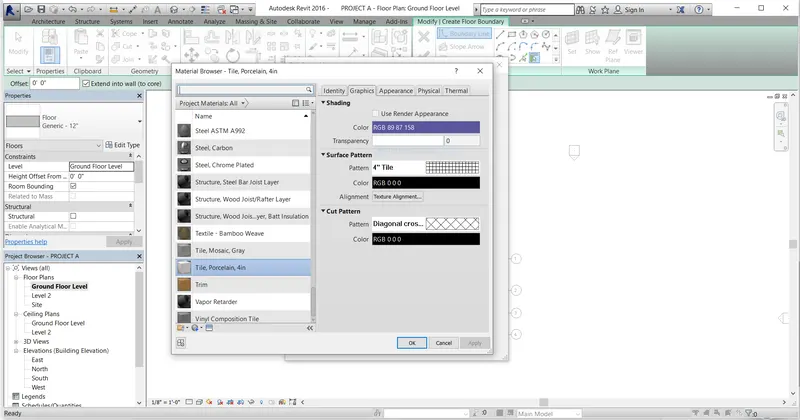
Now Edit the Thickness of floor by using thickness option
edit to 4 inch
Press OK button
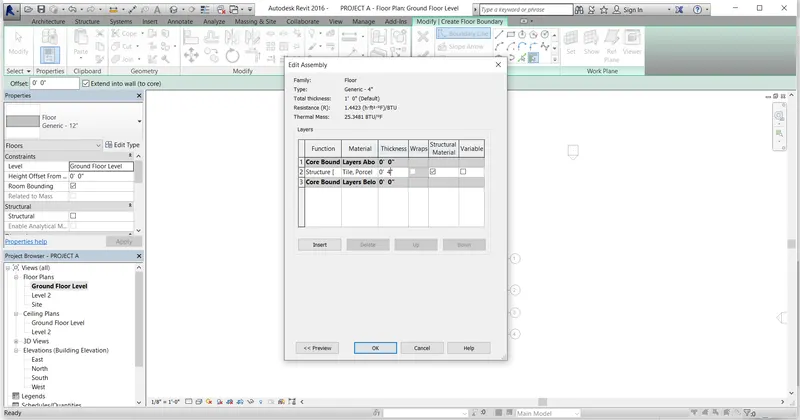
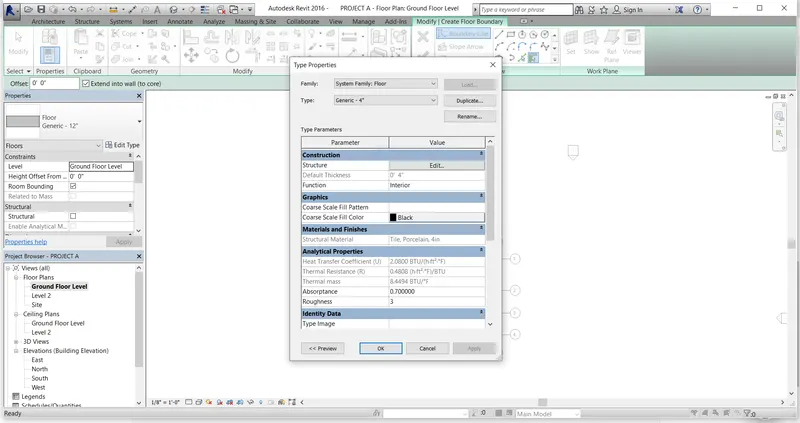
Floor type, material and thickness are selected as per our requirement.
Now go to Pick Lines tool from ribbon tab
Select the floor lines in the project
Click the Finish Edit Mode
Then floor will be created to the current project.
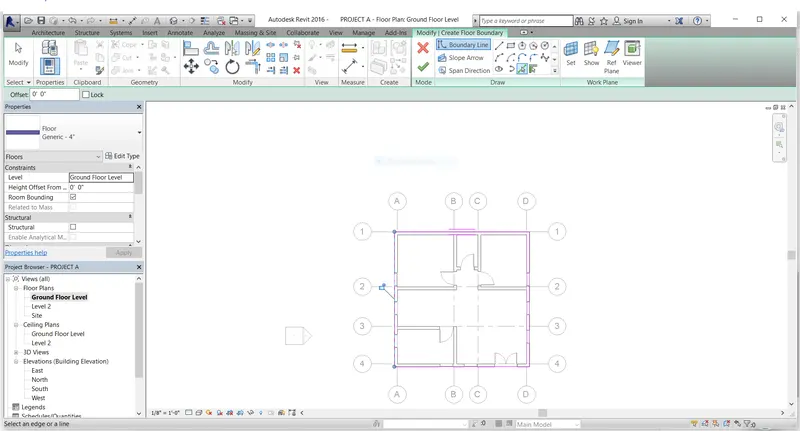
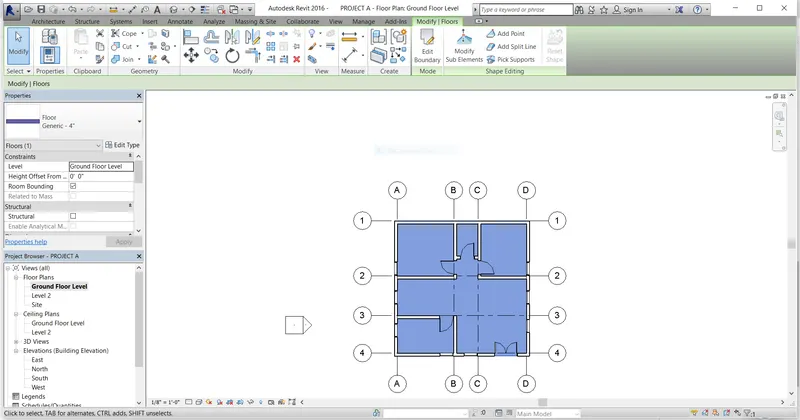
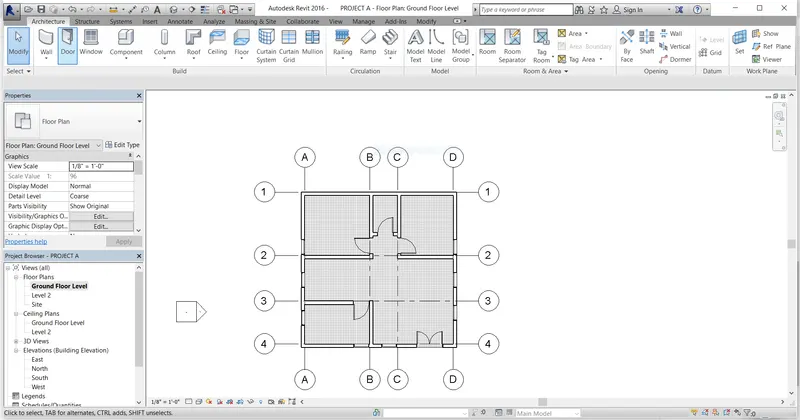
Thus finally floor is created with appropriate material and thickness in the Ground Floor Level of the Project A.
2.AIM: To add the walls as per the floor layout and to select appropriate material and thickness by using the properties browser.And also after creating the walls verify to see if the top and bottom walls are constrained by using the properties browser.
Procedure to select appropriate material and thickness for walls by using the properties browser:
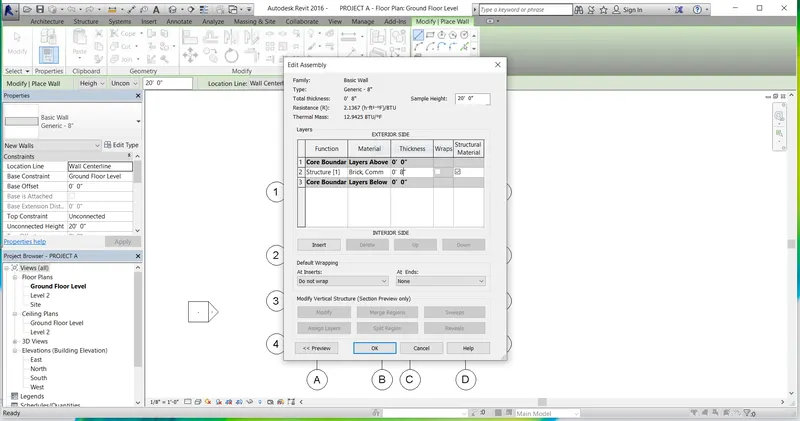
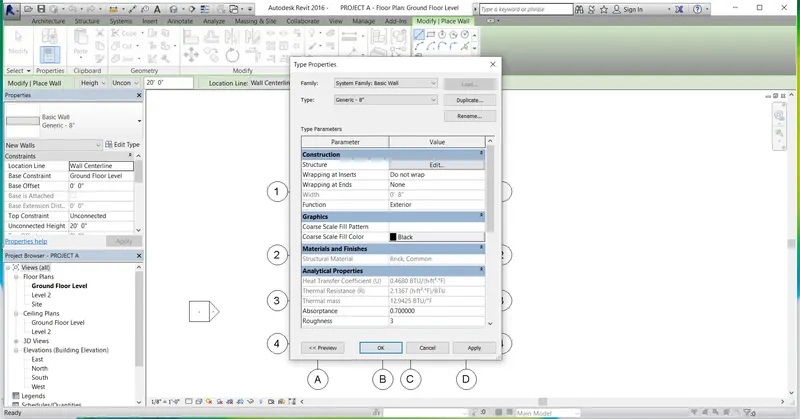
Go to wall architecture
Click on Edit Type in the properties browser
Click on Edit in Structure parameter
Click on Category material
Select material like Brick,common
Press OK button
Now give the thickness 8 inch in thickness option
Click OK button
Again Press OK buttton
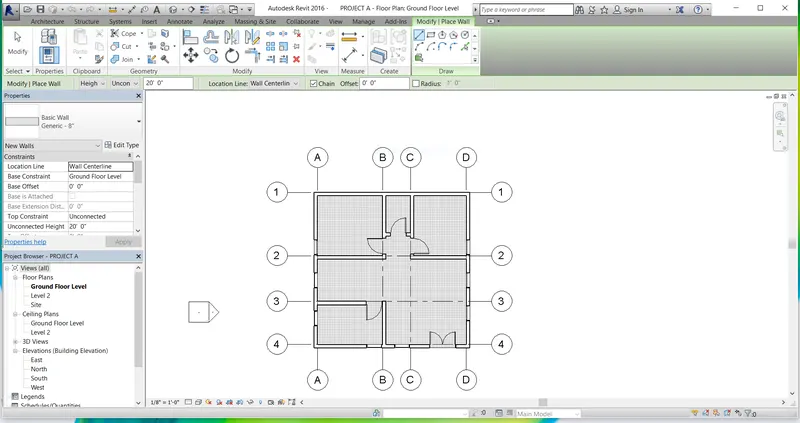
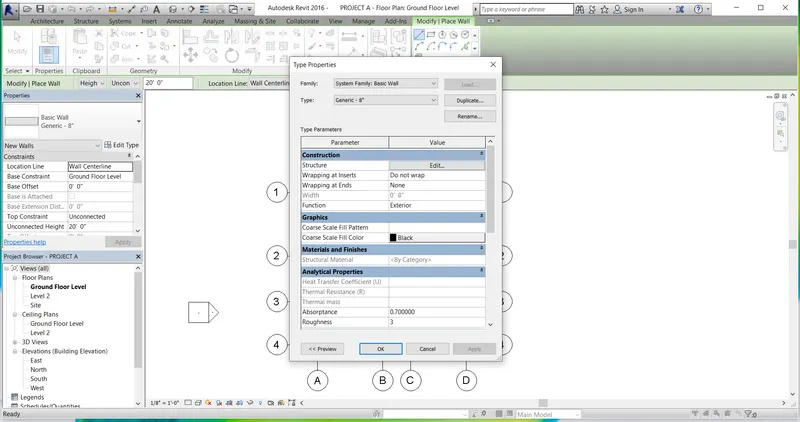
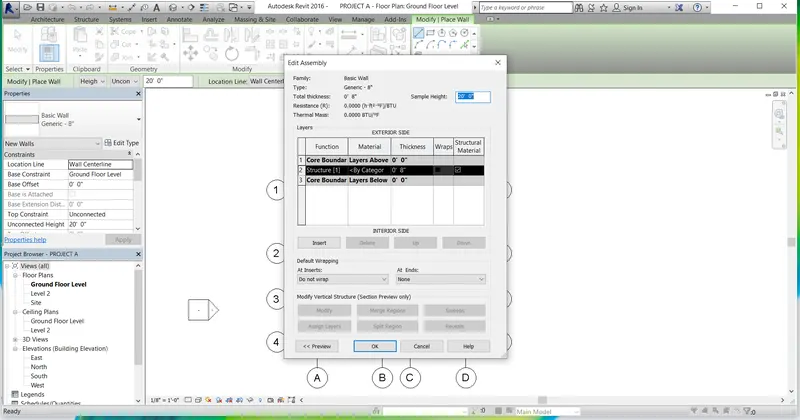
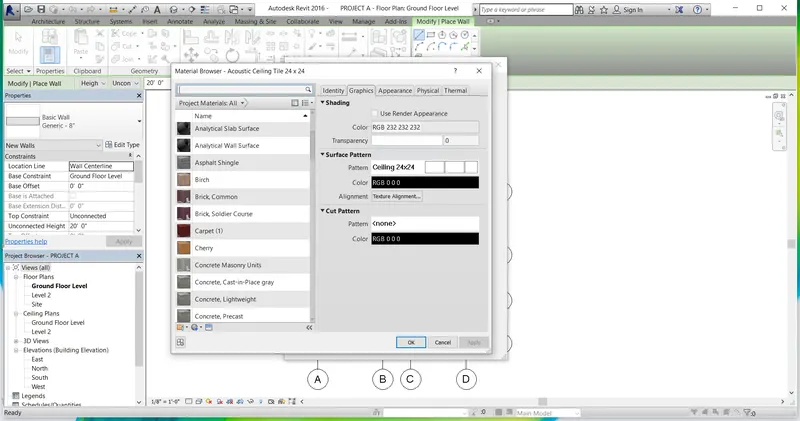
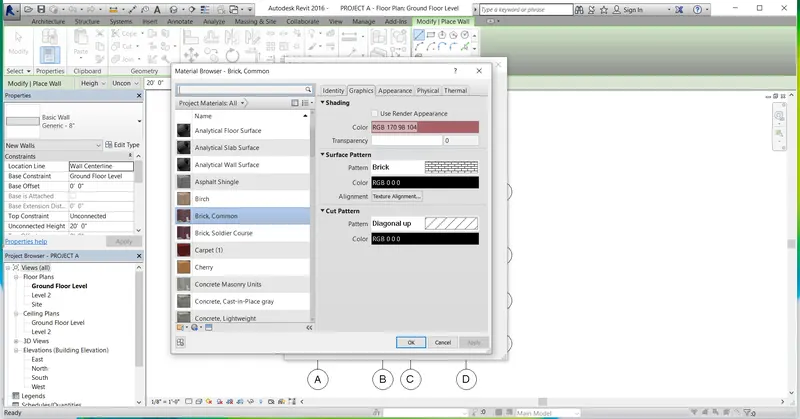
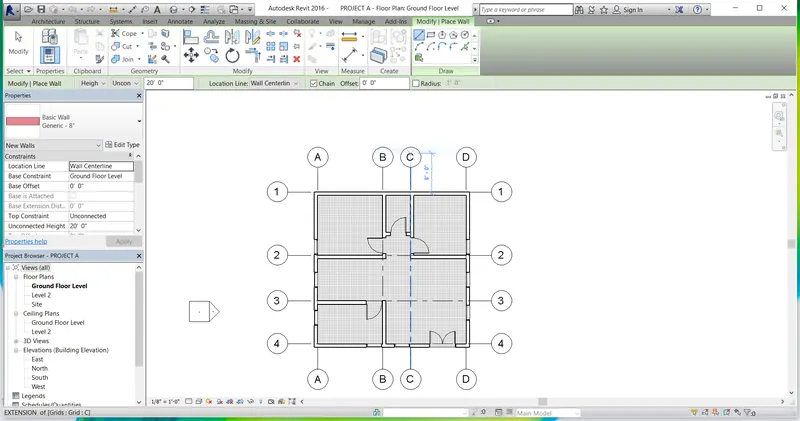
To check whether the material for wall selected or not
Go to 3D views in project browser
Double click on 3D
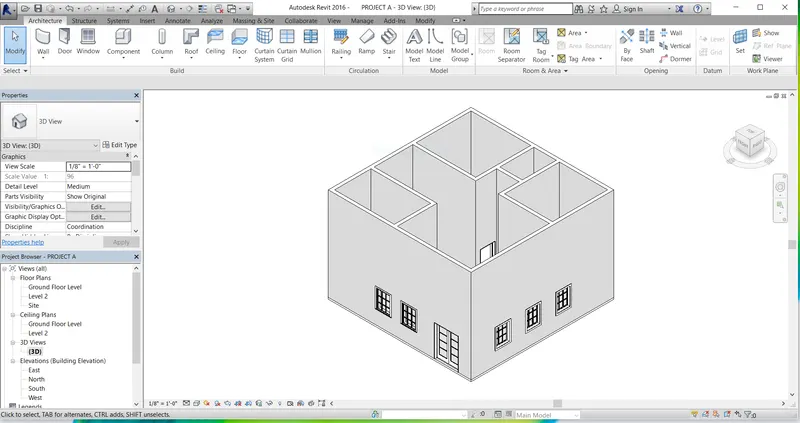
Now go to Visual Style icon
Select Realistic option
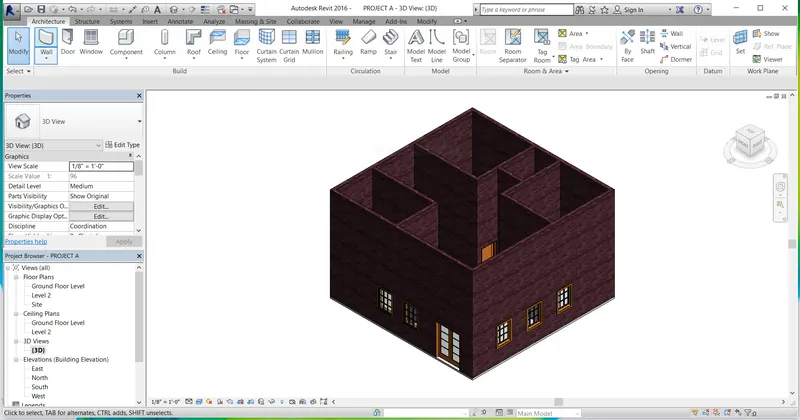
Finally Walls with Brick material had been generated successfully.
Procedure to verify to see if the top and bottom of the walls are constrained by using properties browser:
Click on any wall from the floor plan
Then in properties browser we can see the top constraint is unconnected
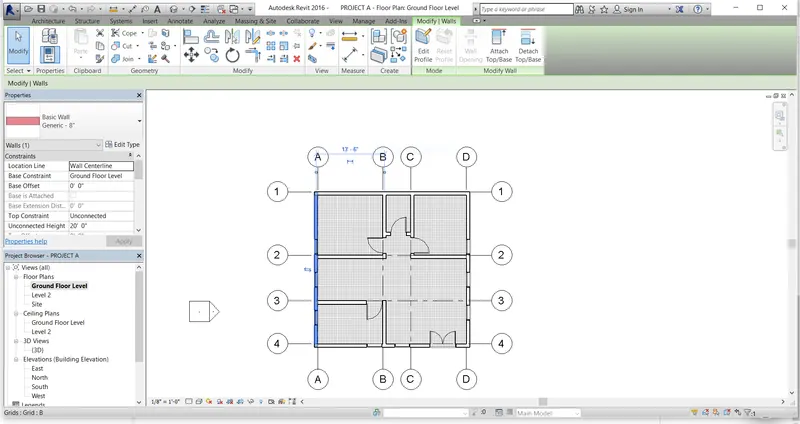
b. BY HEIGHT option is convenient for modelling walls.
3.AIM: To copy the model elements( wall,floor) modelled to Ground Floor and paste it aligned to First Floor Level by using Modify tab.
Procedure:
Select the whole ground floor plan
In modify tab click on clipboard tool
Now click on Paste tool
Select Aligned to selected levels option
Now select Level 2 option
Press OK button
Now go to 3D view to check whether the plan is aligned to selected level or not.
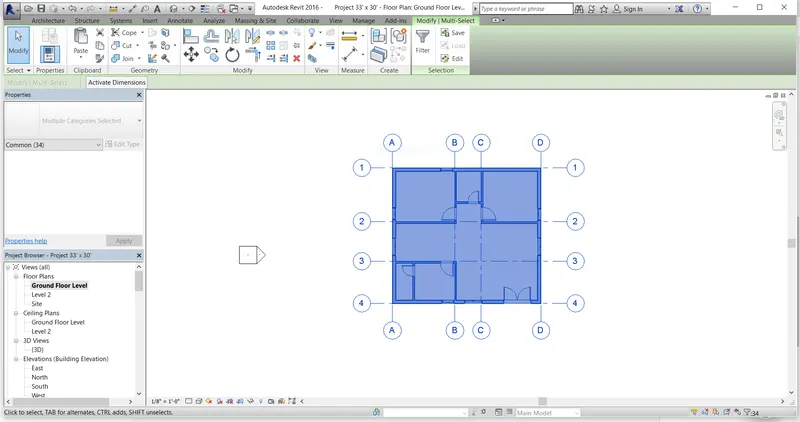
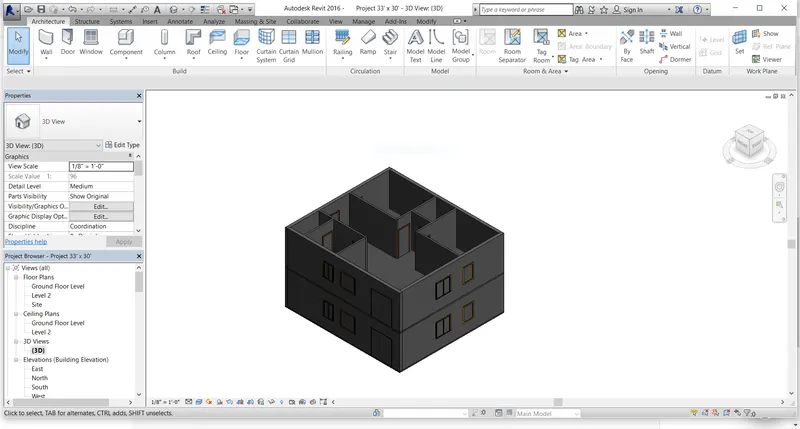
Finally the floor plan had been aligned to a selected level 2 means first floor level.
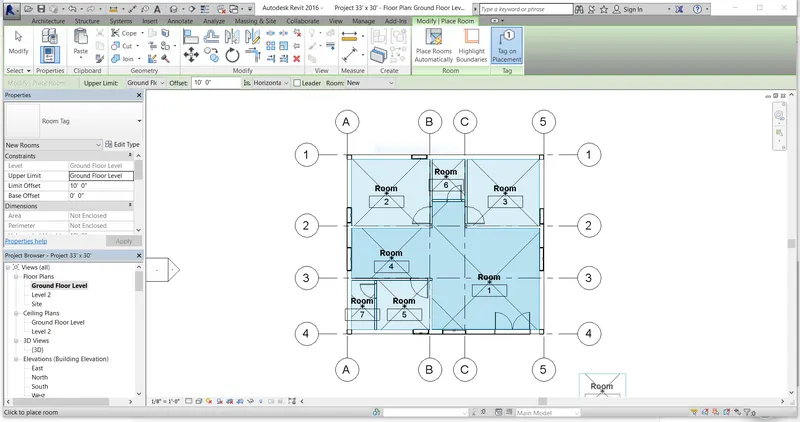
4.AIM: To create seperate rooms to the residential unit with the room texts and dimensions to my own residential unit.
Procedure:
Go to Room tool from ribbon tab
Click on each room
Now we can edit the names
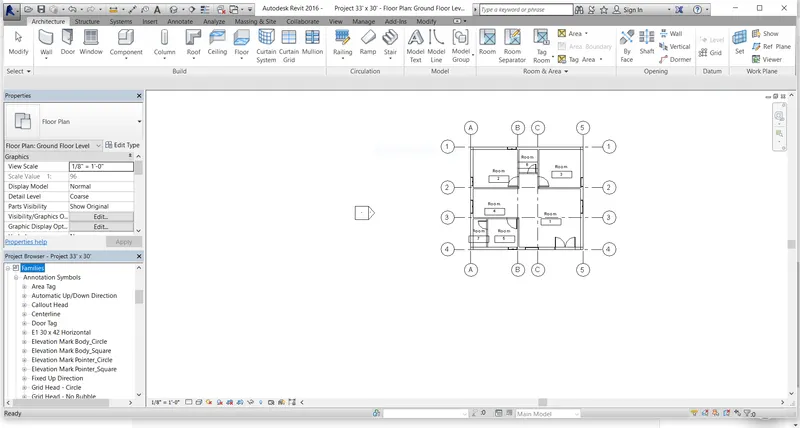
To change the size of the text
Then go to Families in project browser
Click on Annotation
Go to Room tag
Right click on room tag
Click Edit option
Now click on Room Name
Then click EDIT TYPE in properties browser
Edit the text size from 1/8" to 1/16"
Press OK button
Now click on 101
Click EDIT TYPE in properties browser
Click on Duplicate option
Give the name as 1/16"
Press OK button
Now edit the text size to 1/16"
Press OK button
Now click on Load Into Project tool from ribbon tab
Click on overwrite the existing version and its parameter values.
Now ROOM NAMES are changed to our required size
Now edit the each room with dimension
Like LIVING ROOM,MASTER BEDROOM,CHILDREN BEDROOM,DINING,KITCHEN,TOILET & WASH.
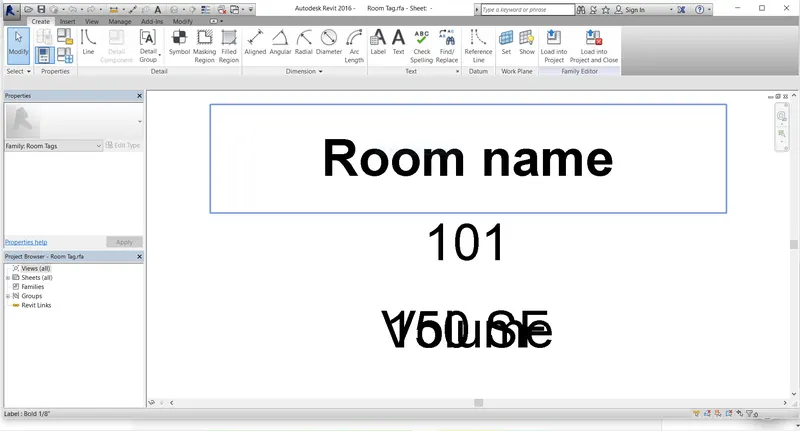
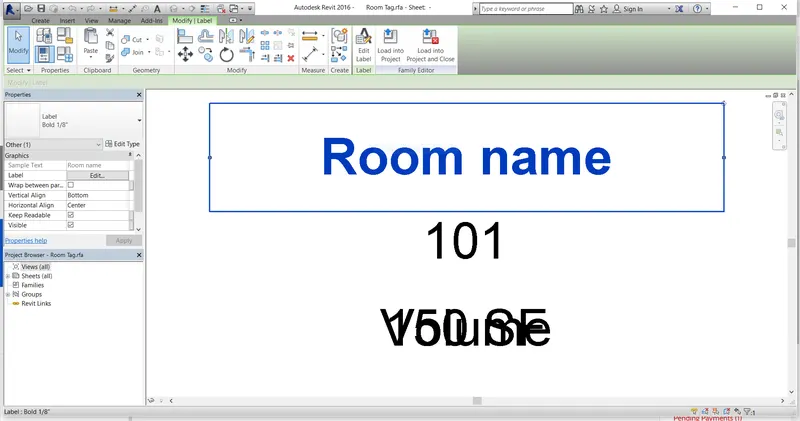
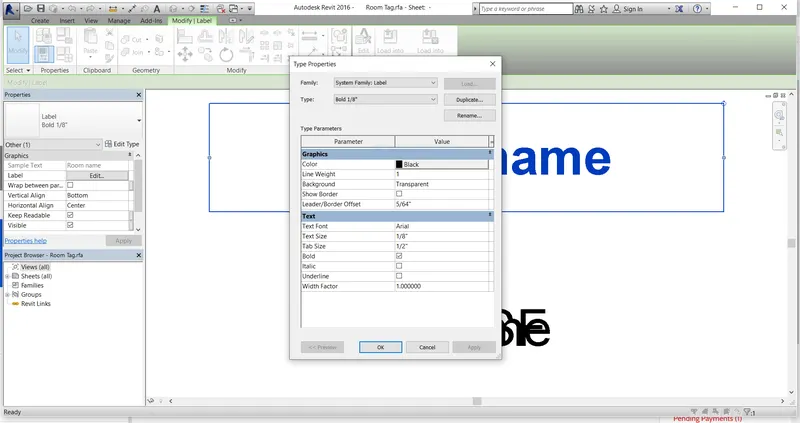
Edit the text size to 1/16"
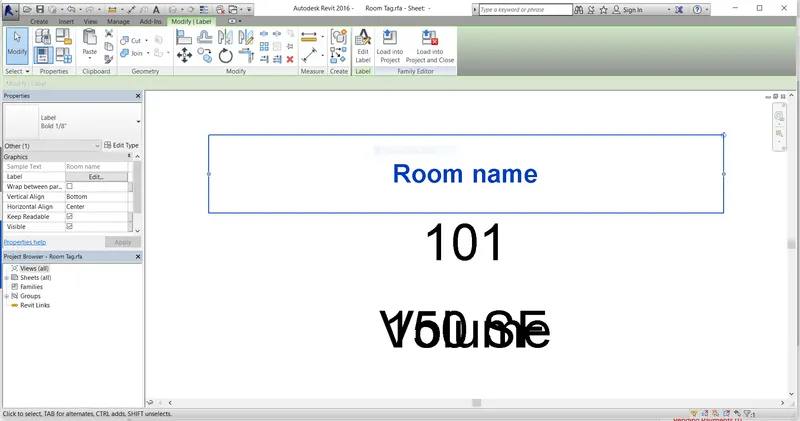
Now Room name size decreses to our required size.
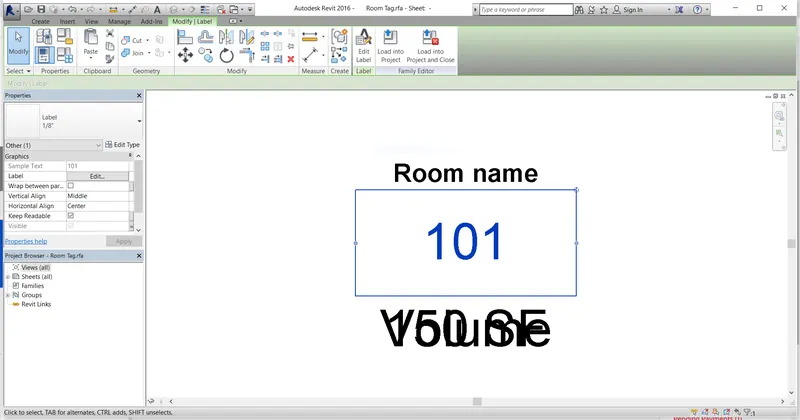
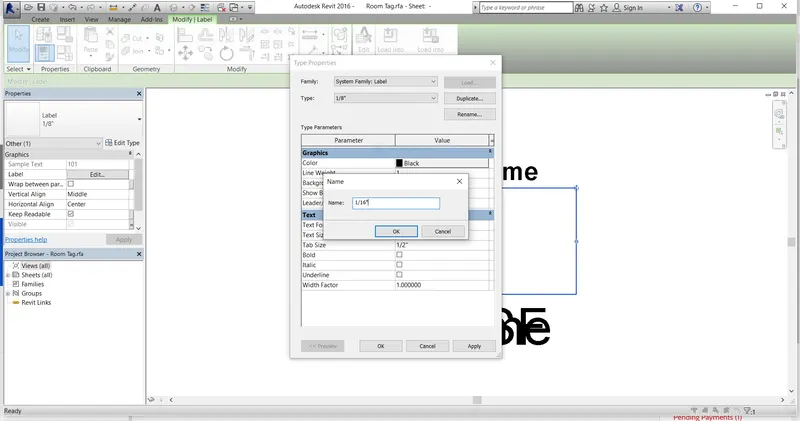
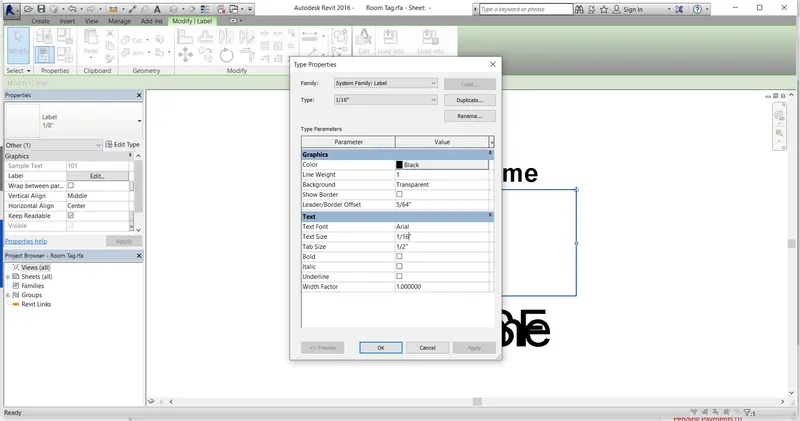
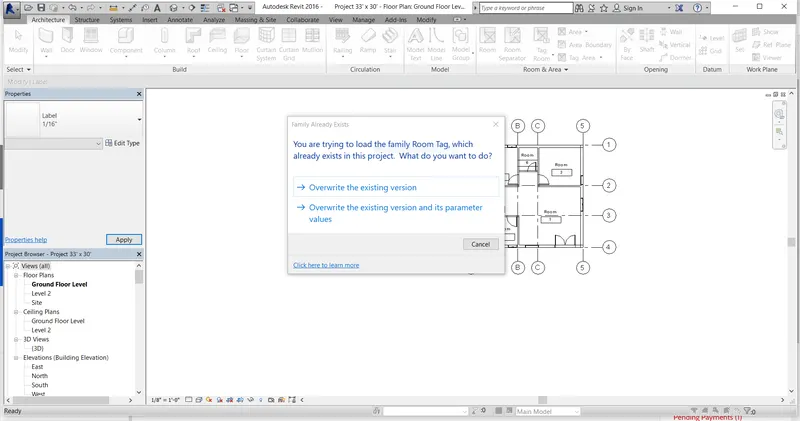
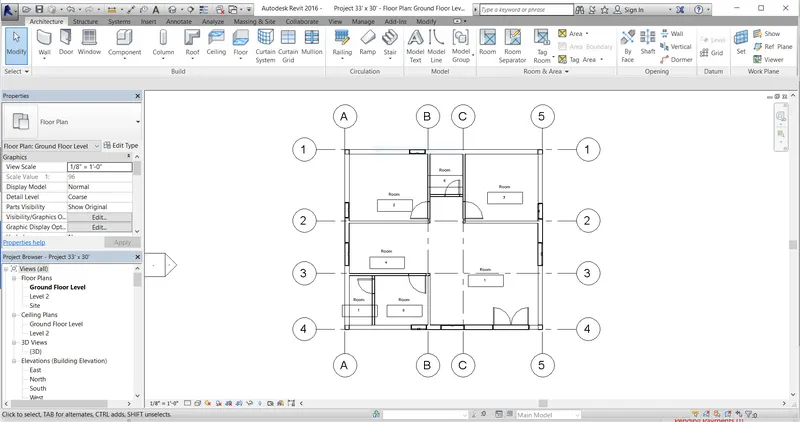
Then size of the all rooms will be changed to our required size by using Load into project tool.
Now edit the room names with dimensions.
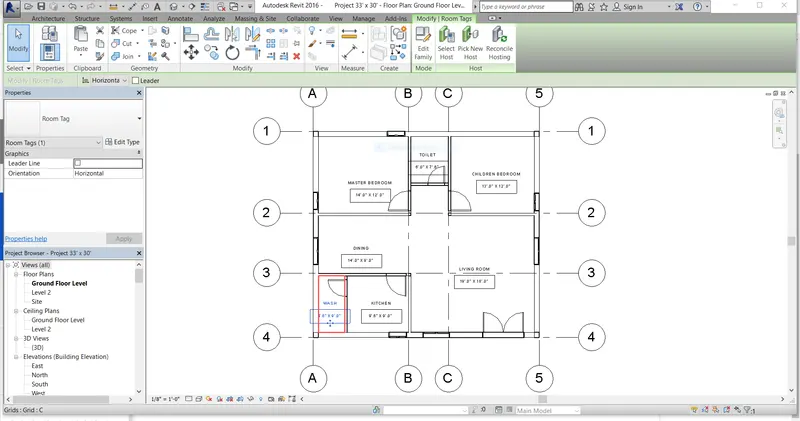
Finally room names with dimensions had been placed in the residential unit.
5.AIM: a.To place the doors and windows in the residential unit at appropriate locations.
b. To place the furniture set, couch table and TV desk and shelf cabinets in Living Room.
c. To place a dining table in Dining Room.
d. To place a bed set, shelf, lighting and individual study desk and chair in bedrooms.
e. To place a bath tub and plumbing fixtures in Toilet.
f. To place countertops, gas stove cabinet, shelves to store food items in Kitchen Room.
g. To place washing machines and shelves to store clothes in Wash/Storage Room.
And also to use 3D navigation to check the model and its authenticity on a real time basis to verify the model.
b. Procedure to place the furniture set, couch table, TV desk and shelf cabinets in Living Room:
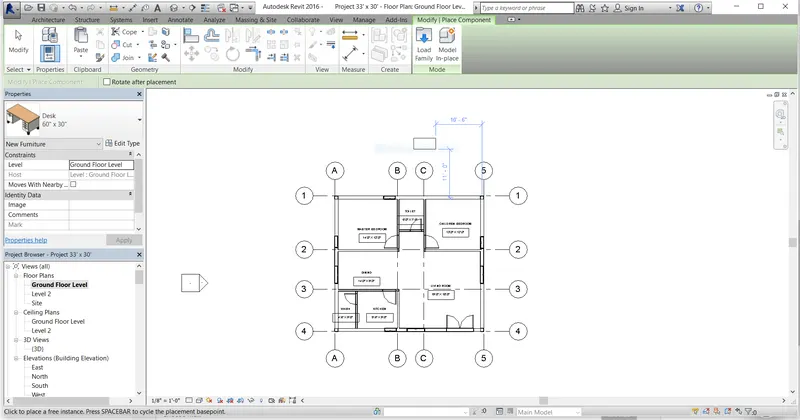
Go to Component tool
Select Place a Component tool
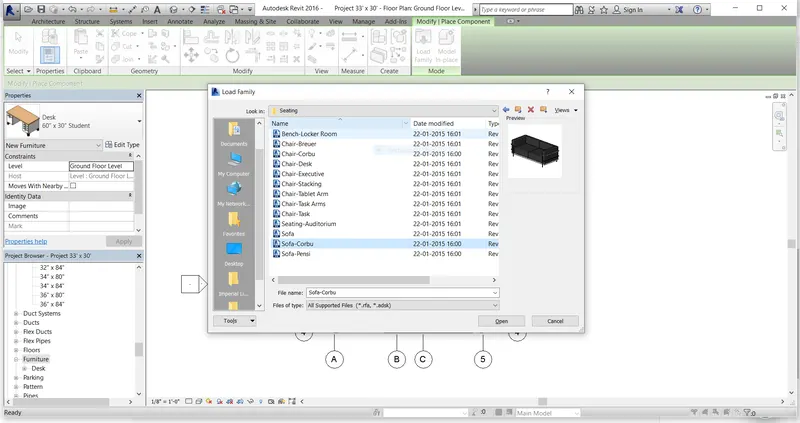
Click on Load the family tool from ribbon tab
Select Furniture
Click on Seating
Select sofa corbu
Click Open button
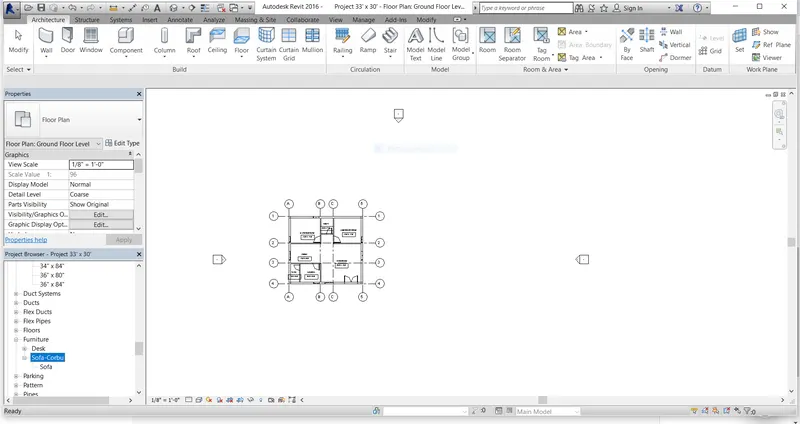
Now go to families in project browser
Click on Furniture
What I selected will be displayed in project browser
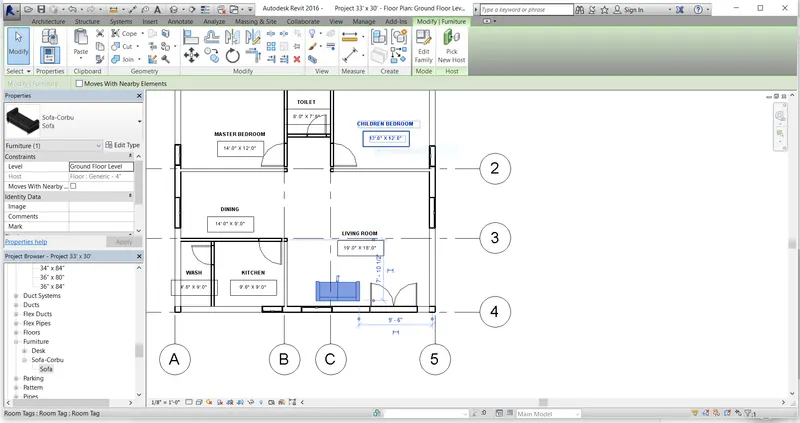
In furniture click on sofa corbu
Drag the sofa and place it at appropriate location
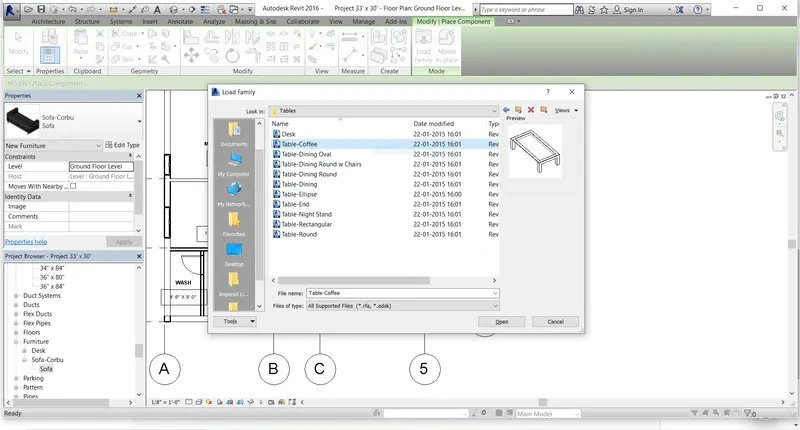
Now to place a Couch table
Go to place a component tool
Click Load the Family tool
Select furniture
Click tables
Select table coffee
Press Open button
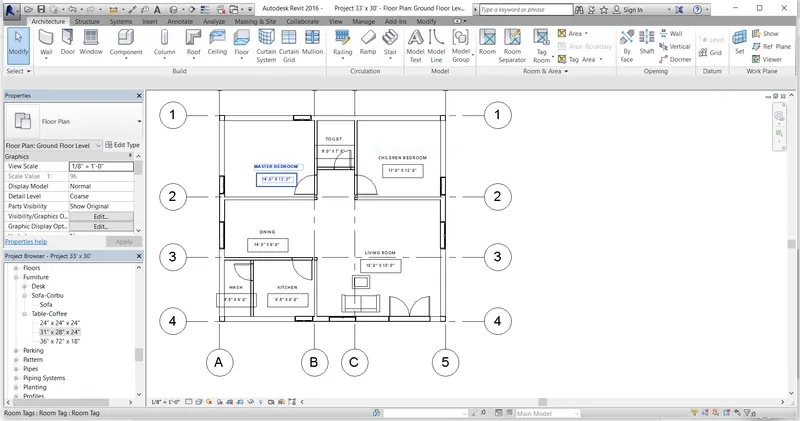
Then select the table coffee of any size displayed in project browser
Drag the table and place it at appropriate location.
Now to place TV DESK in Living Room
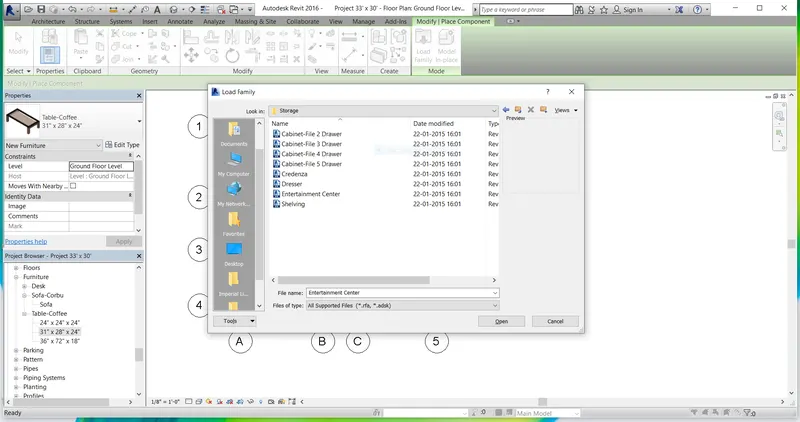
Select Storage family
Select Entertainment center element
Press Open button
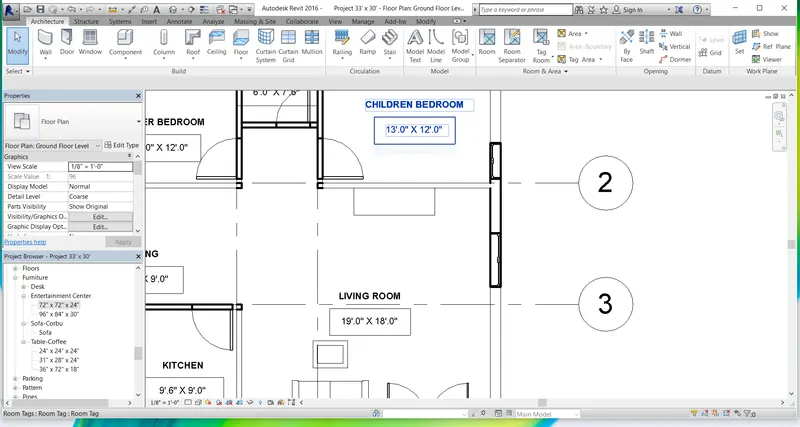
Now drag it from project browser and place it in living room at appropriate location.
Now to place shelf cabinet in living room
Select Storage family
Select Shelving element
Press Open button
Drag it from project browser and place it in living room.
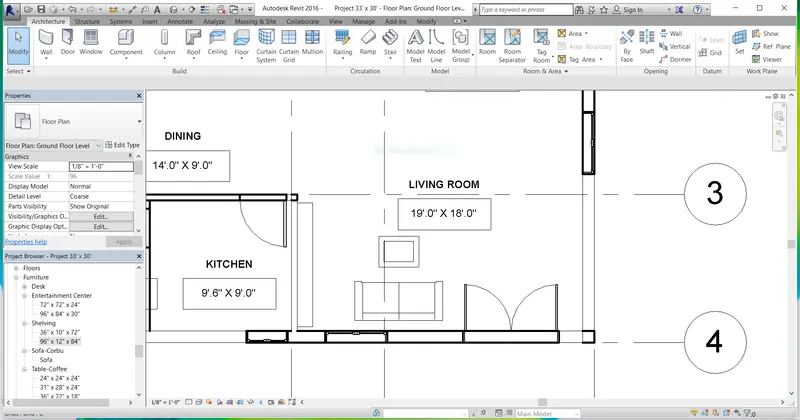
To Use 3D navigation and its authenticity on a real time basis to verify the model
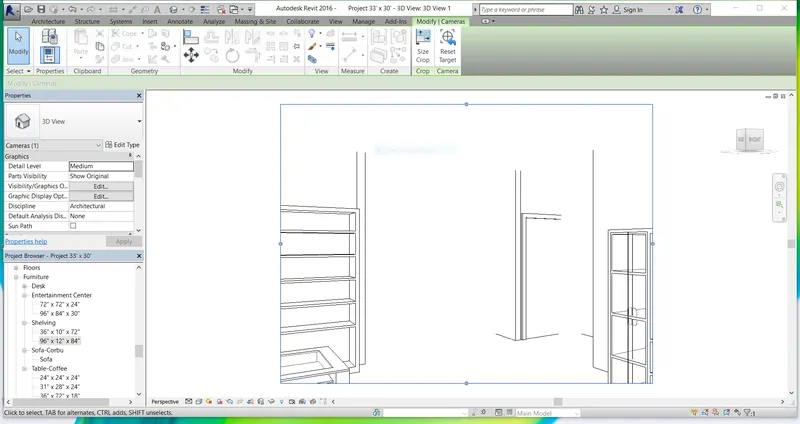
Go to View Icon
Select Camera option from 3D view tool
Place the camera in living room
Then we will get 3D image of the furniture
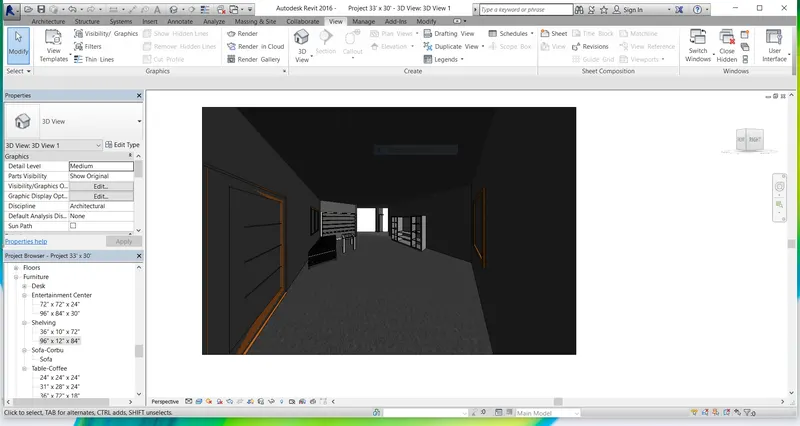
Select Realistic from visual styles icon
Now edit the 3D view 1 name to LIVING ROOM VIEW.
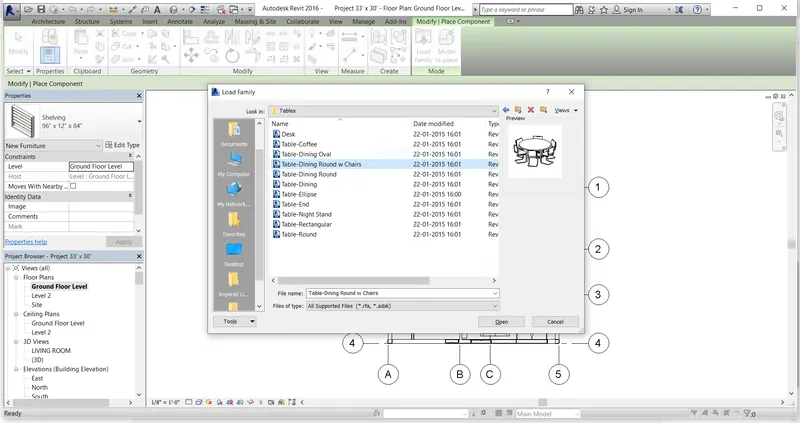
c.Procedure for placing the Dining Table for the purpose of eating in Dining Room
Go to Component tool
Select Place a component
Click Load Family
Select furniture category
Select table family
Select dining with chairs element
Press Open button
Now Select the dining table of size 60" dia from project browser
Drag it and place it in dining room at appropriate location.
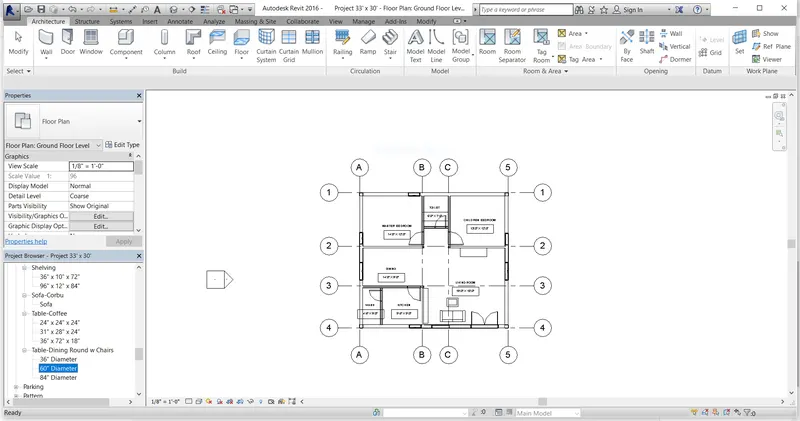
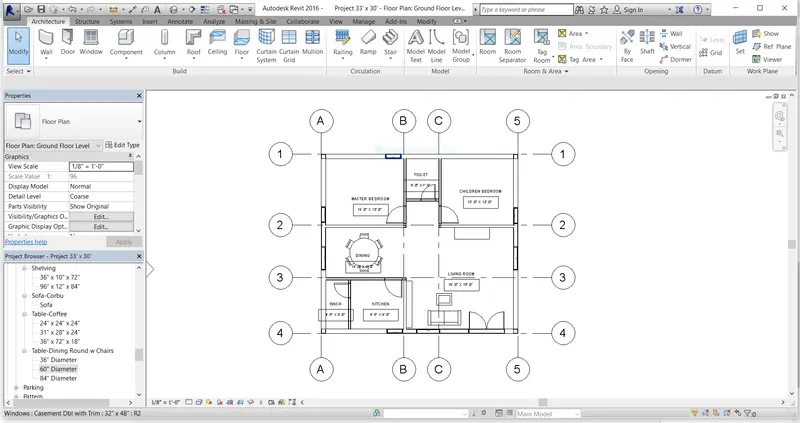
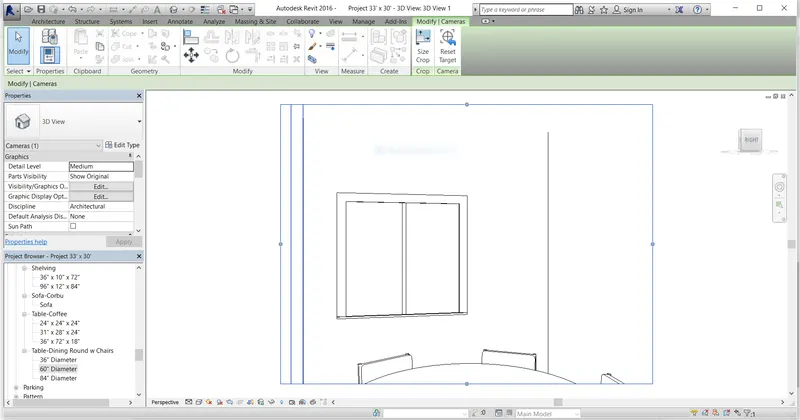
Now to use 3D navigation and its authenticity on a real time basis to verify the model
Go to View icon
Click on 3D view
Select Camera
Place it in dining
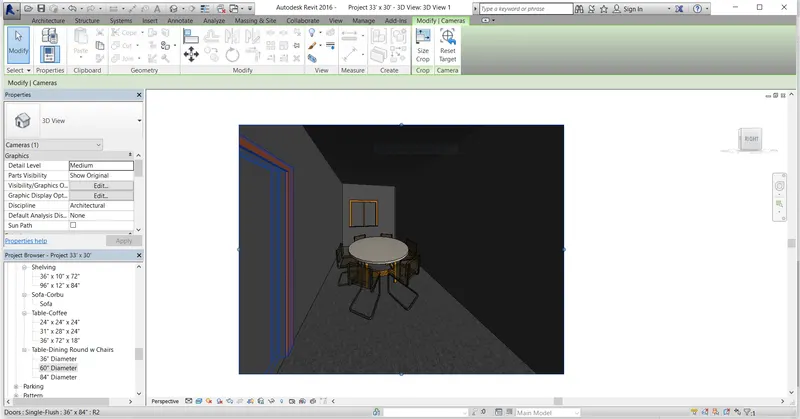
Then 3D camera view will be appeared
Select Realistic from Visual style
Now we can see the 3D view clearly and realistically
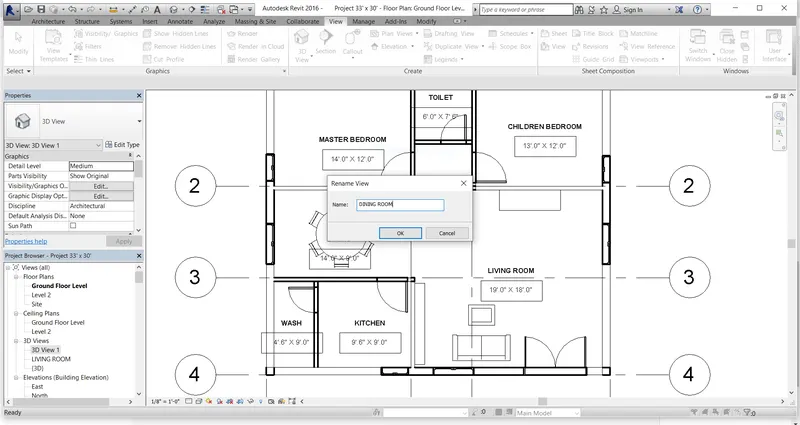
Now edit the 3D view1 to Dining room view and press OK button in project browser.
d.Procedure to include a bedset,shelf,individual study desk and chair, and lighting in bedrooms.
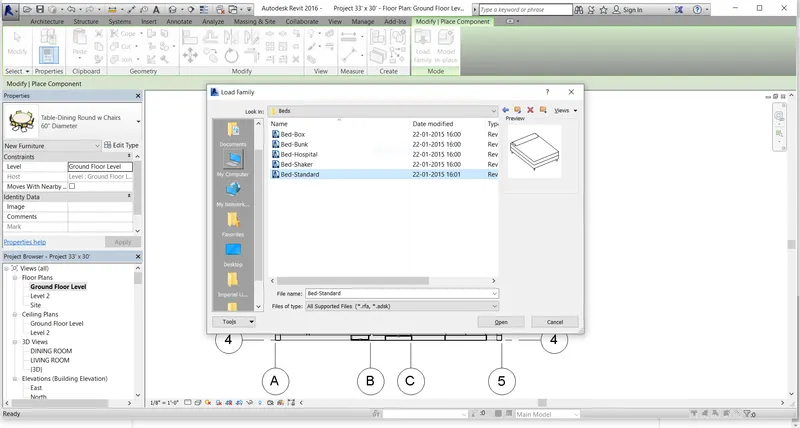
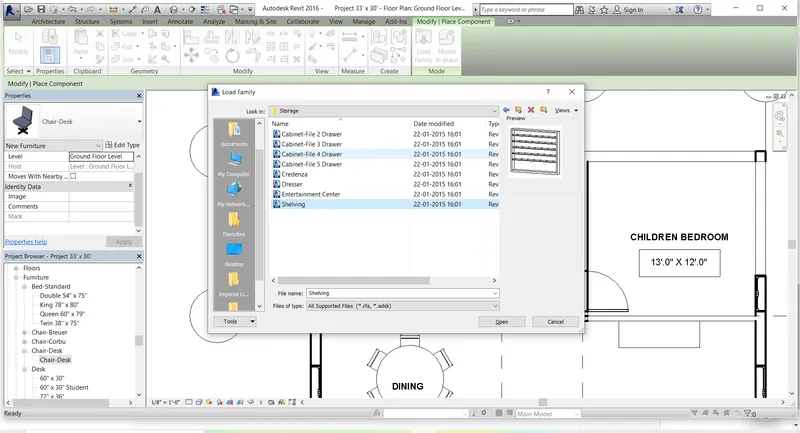
Go to Place a component tool
Click Load Family
Select Furniture Category
Select Beds Family
Select Bed Standard element
Press OPEN button
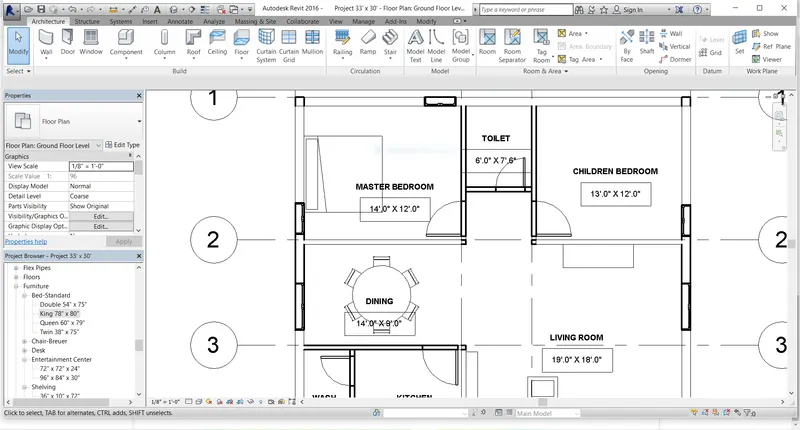
Now select king size bed from project browser
Drag it and place it in Master bedroom at appropriate place
Now for lighting in bedroom
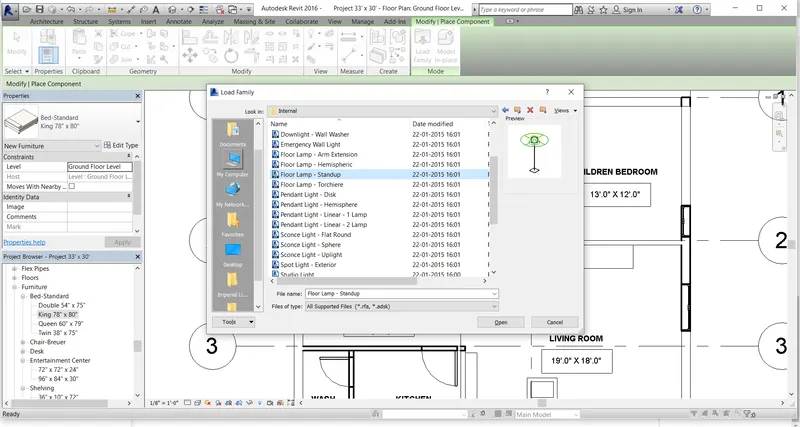
Select Lighting category
Select floor lamp standup element
Press OK button
Now select the floor lamp from project browser
Drag it and place it in bedroom
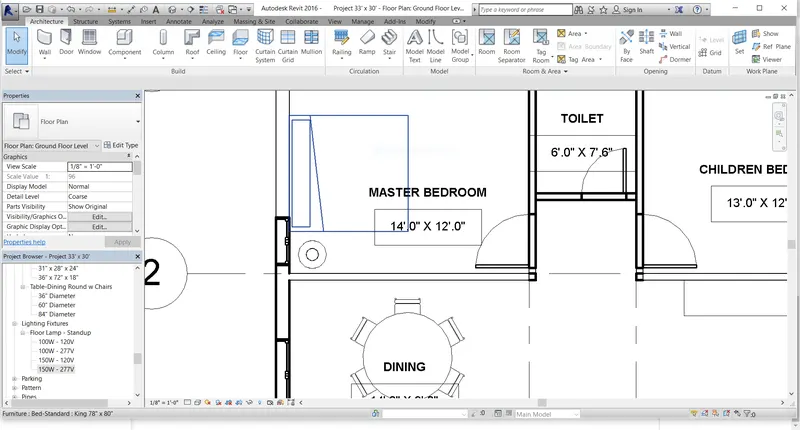
Now for placing the study desk with chair in bedroom
Select Furniture category
Select Tables family
Select Desk element
Press Open button
Select the desk from project browser
Drag it and place it in bedroom at appropriate location
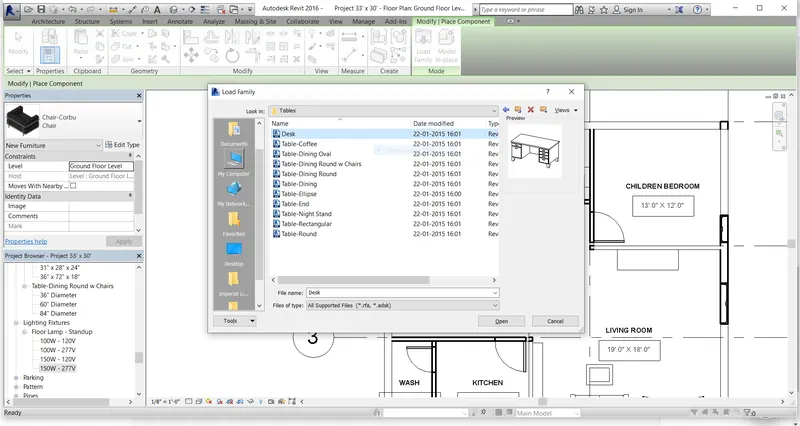
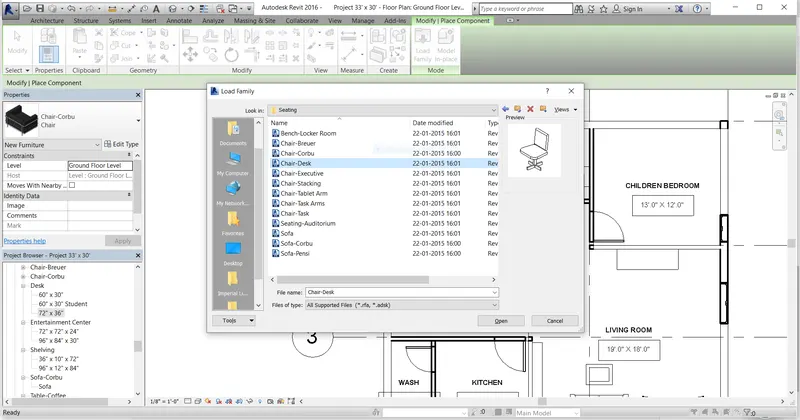
Now Select Chair desk from seating family
Press Open button
Now Click on chair from project browser
Drag it and place it in front of desk placed in bedroom
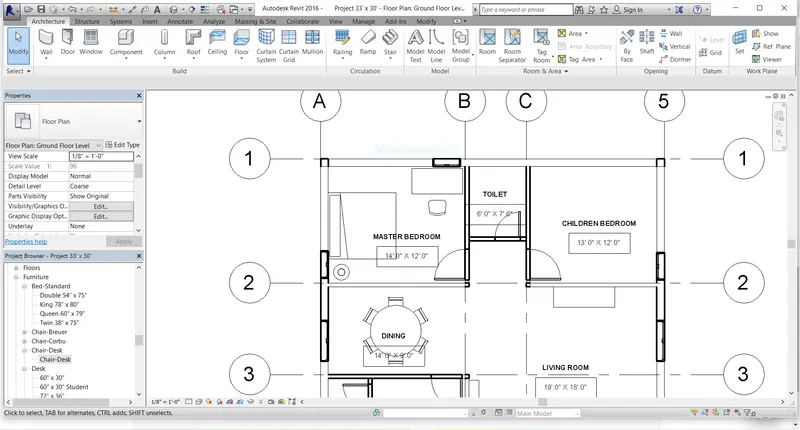
Now to place the shelf in bedroom
Select Shelving element from Storage family
Select the shelf from project browser
Drag it and place it in bedroom.
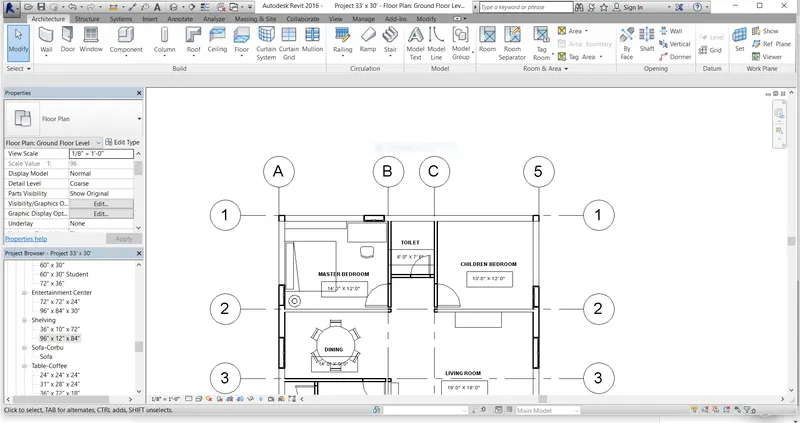
Same process for placing the bed set, chair and desk and lighting in children bedroom also.
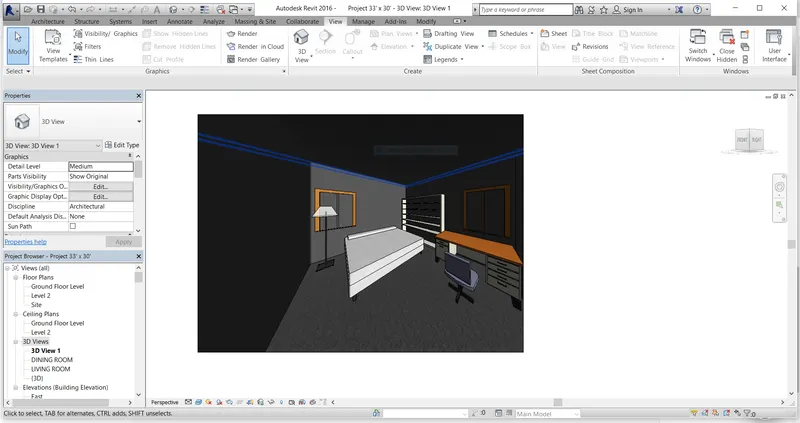
Now to verify the model on a real time basis
Go to View icon
Select Camera from 3D view tool
Now select Realistic view from visual style
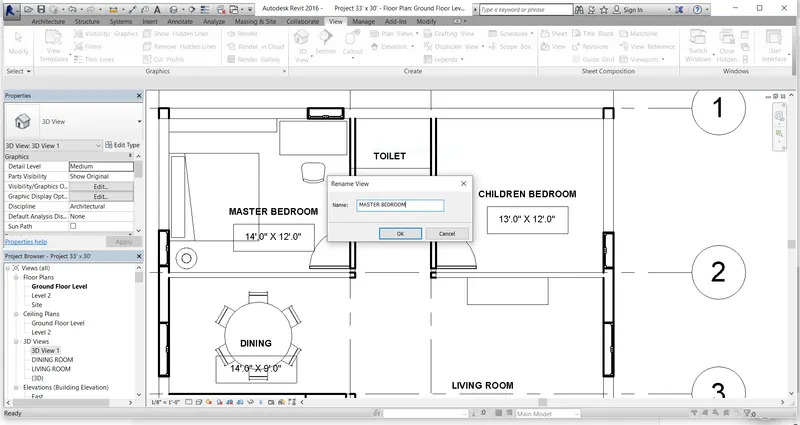
Edit the name 3d view1 as Master bedroom in project browser.
e.Procedure to place a bath tub and plumbing fixtures in rest room/toilet.
Go to Place a component tool
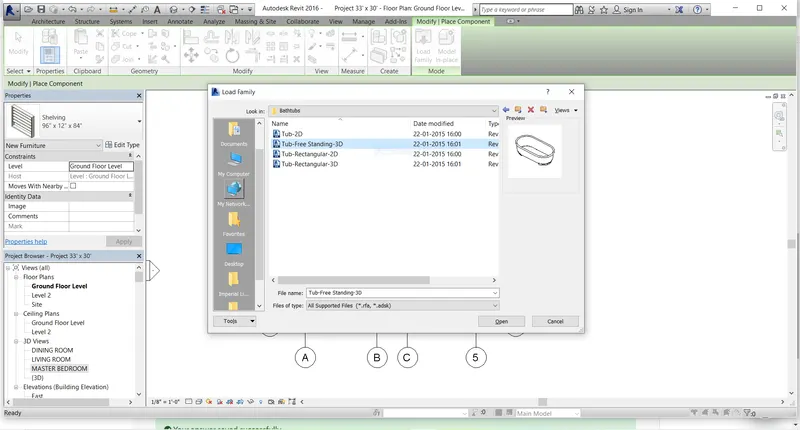
Click Load Family
Select Plumbing category
Select architectural family
Select Fixtures
Select Bath tubs
Select tub free standing 3d element
Press Open button
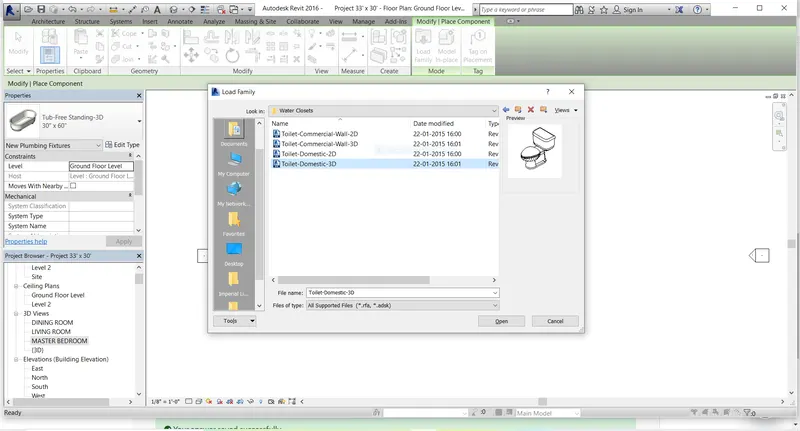
Now select water closets family
Select toilet domestic 3d element
Press Open button
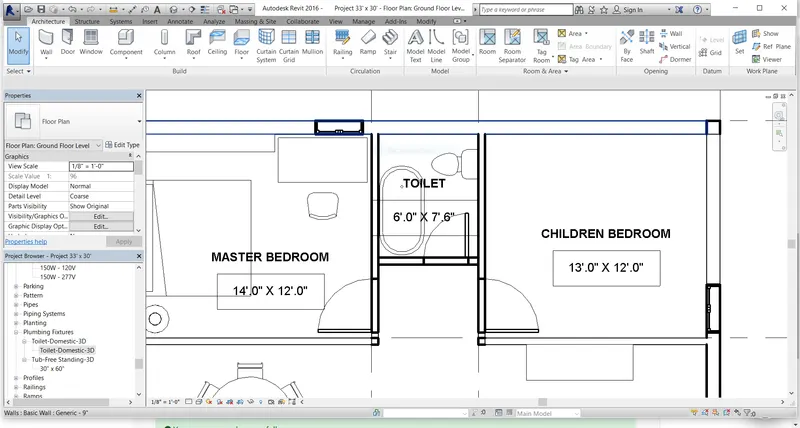
Now select Both toilet domestic and bath tub elements from project browser
Drag them and place them in toilet/rest room at appropriate location.
Now to verify the model on a rel time basis
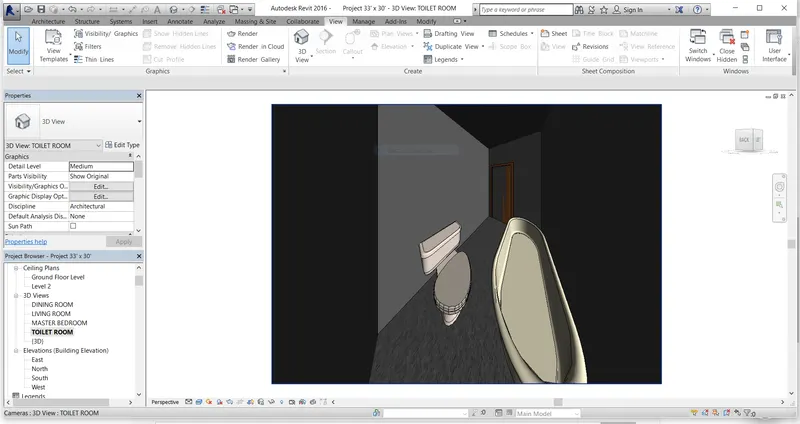
Go to View icon
Select Camera from 3D view tool
Select Realistic view from visual style
Edit the 3D view1 to Toilet room in project browser.
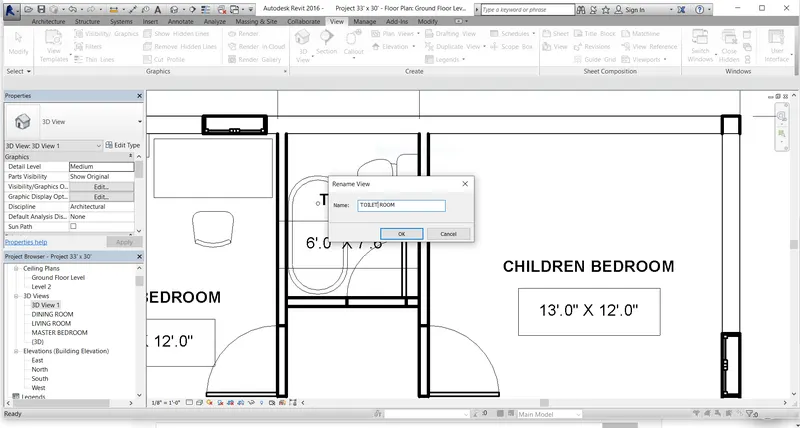
g.Procedure to place washing machine and shelves in wash room.
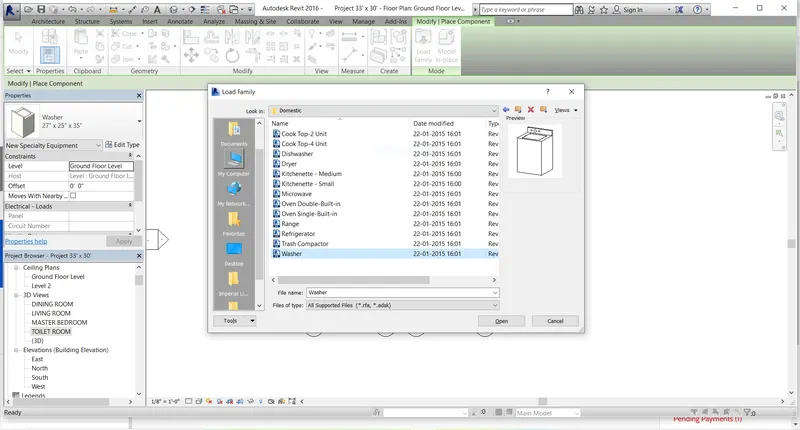
Go to place a component tool
Click Load Family
Select Speciality Equipment category
Select Domestic Family
Select Washer element
Press Open button
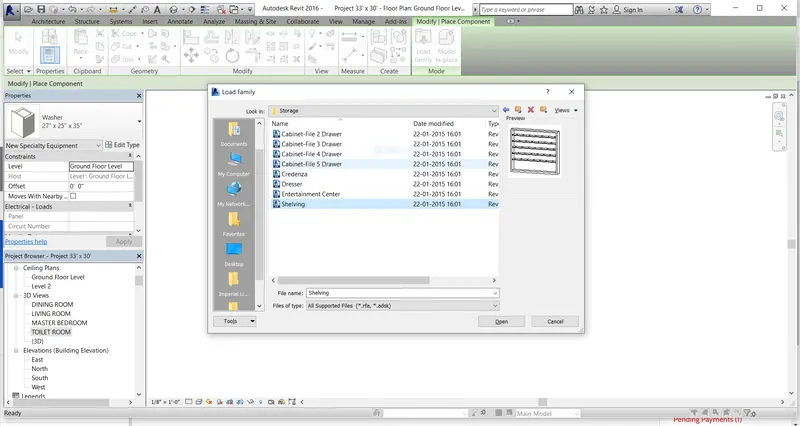
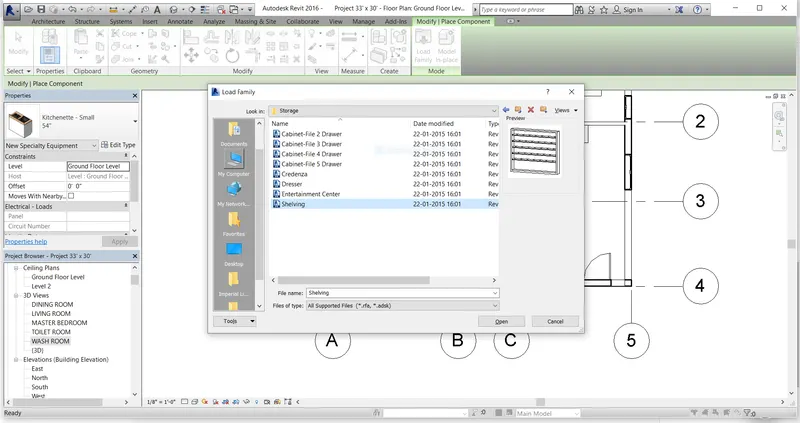
Now SELECT Shelving element from storage family in furniture category
Now select these both washer and shelf from project browser
Drag them and place it one by one in wash room at appropriate location
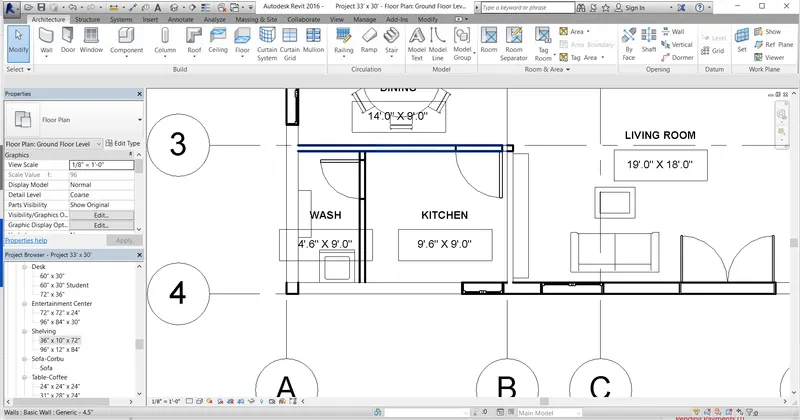
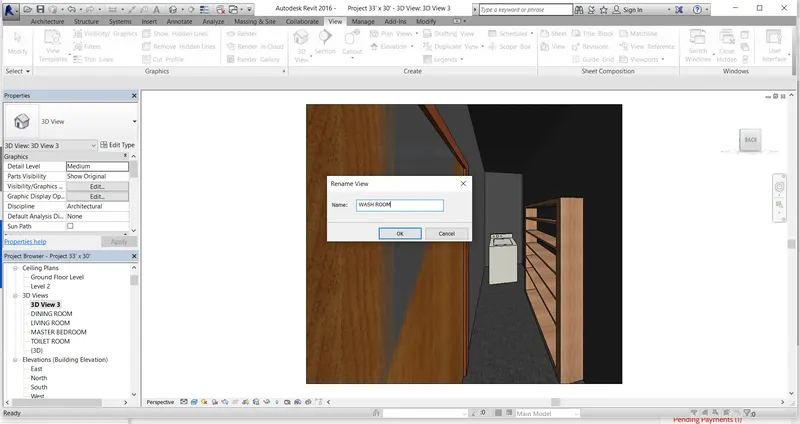
Now to verify the model on a real time basis
Go to View icon
Select camera from 3D view tool
select realistic view from visual style
Edit the 3D view to Wash room view in project browser.
f.Procedure to place the gas stove cabinet and shelves to store food items in kitchen room.
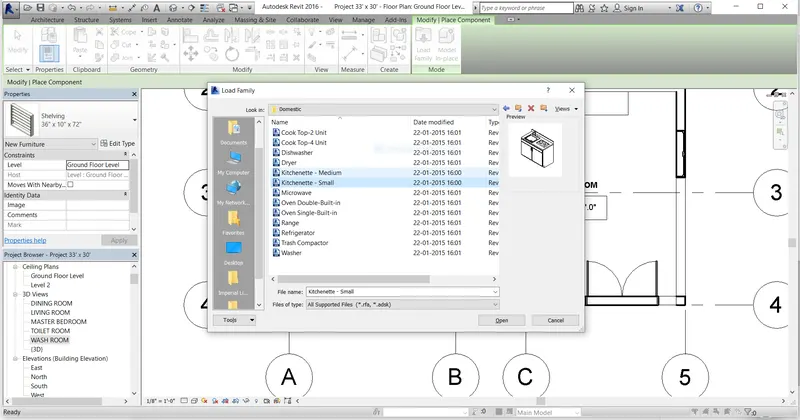
Go to place a component tool
Click Load Family
Select speciality equipment category
Select Domestic family
Select Kitchenette small element
Now SELECT Shelving from storage family in furniture category for storing food items
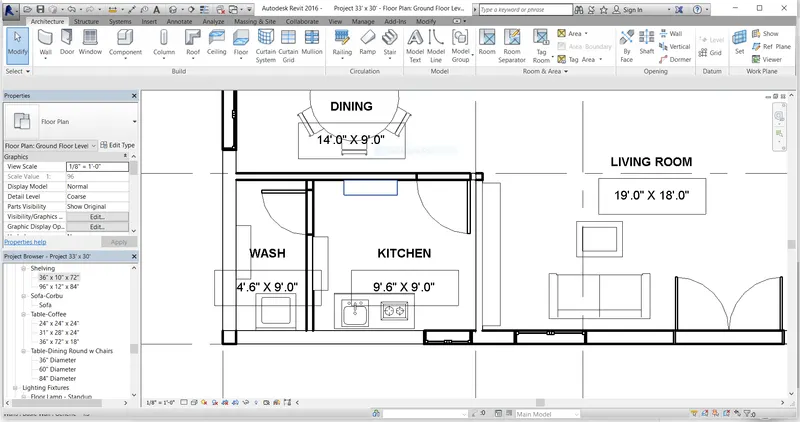
Now SELECT gas stove element and shelf from project browser
Drag them and place them in kitchen room at appropriate location.
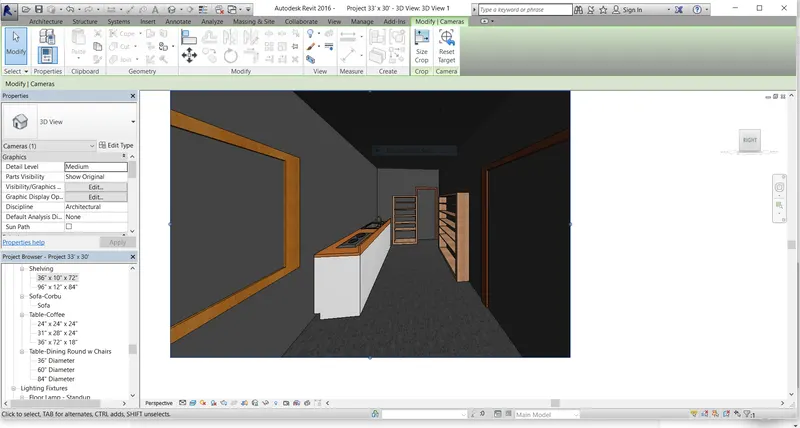
Now to verify the model on a real time basis
Go to VIEW icon
Select camera from 3D View tool
Select realistic view from visual style
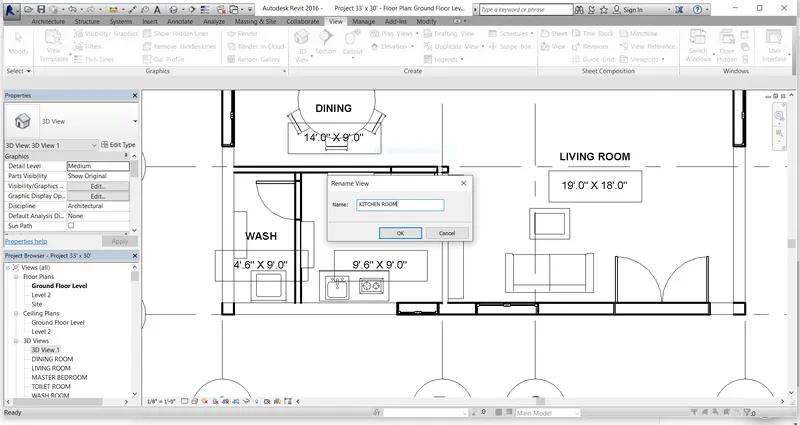
Edit the 3D view to Kitchen room