Creating Levels, Grids, Layout and model elements for a residential unit using REVIT
1) Aim: To create a levels, grids, layout and model elements for a resedential unit using revit
The revit platform for building information modelling is a design and documentation system that supports the design, drawings and schedules required for the building project
Revit building elements are of three types
- View elements
- Model elements
- Annotate elements (Annotation elements and Datum elements)
BIM is a wholstic process of creating and managing information for a built asset. Based on a intelligent model and enabled by a cloud platform, BIM integrates structure, multidisceplinary data to produce a digital representation of an asset across its life cycle from planning and design to construction operations. BIM is a visual representation of the physical and functional characterstics of a facility from inception onwards. As such, it serves as a shared information repository for colloboration throughout a facility's life cycle
BIM consists mainly of 3D modelling concepts, in addition of information data base technology and interpolate software in a desktop computer environment that architects, engineers and contractors can be used to design a facility and stimulate construction. So this technology allows members of the project team to generate a virtual model of the structure and all of us system in a 3D and to be able to share that information with each other
Features of BIM:
Easy access to information
Making the process more expressive
Comprehensive view of the project
a) Easy access of information: It is a physical and functional characteristics of the building process that provides very minute detail of the project.
b) Making the process more expressive: CAD software allows users to work accurately in three dimensions, i.e, length, breadth and depth. However BIM modelling services provide allow to work in a five dimensions , i,e, time and cost apart from length breadth and depth. They will able to produce accurate cost and material estimates precise time schedules of the project even as the design is being developed.
c) Comprehensive view of the project: It is the most important feature of the BIM, BIM model not only presents the 3D geometric view of the structure, they provide a more comprehensive view of the entire building process, actually it covers the every component of the process from geometrical aspects of the design to spacial relationship from light analysis to provision of various services from topographical informations to quantities on properties and so on.
Benefits of BIM:
Complete representation:
It takes more than the building core components to account
For ex: BIM allows us to design electrical and HVAC systems as well as the building itself
Instant updates:
BIM allows us to provide the instant updates of all the components
Time constraint: BIM allows us prefabricate important components ahead of time, we dont have to adjust them based on the building design instead such components are part of the initial design
Resource tracking: The models we give to our clients updates constantly as we work on our project clients can check in anytime which leads us to quicker approval of milestone and more efficient project development. resource tracking is actually a key component of BIM models, we will be able to figure out how much of each resources we need during the design stage. This improves the flow and efficiency of construction.
2) a) Category
It is one of the revit element heirarchy. Actually it controls the organization, visibility, graphical representations and scheduling options of families within the projects
b) Family:
A family is a group of 2D, 3D informations that serves to represent a discrete building or documentation element in the project. Actually it defines parametrical, graphical, and documentation requirement also,
c) Type:
Once we have entered into the family we have type option, type is specific representation in a family defined by distinct parametric, graphical and documentation characterstics which makes it unique from other types in the family
d) Elements/instances:
It is an individual representation of an type in the project that is defined by unique parametric, graphical and documentation characterstics which makes a unique from other intances from the project
Now open the revit software
Open the existing revit model
Now, we have to insert the families or instances or elements to our revit model
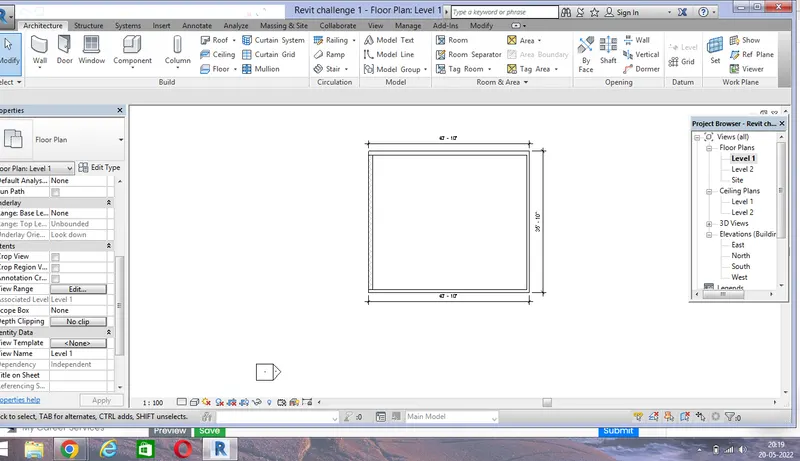
There are two option to insert the components inside the layout one is we have to go to insert tab and select the load family or we can also go to component option and select the place a component otion or we can directly choose the door option and then we will get the load family option choose that one
Then select the door categary
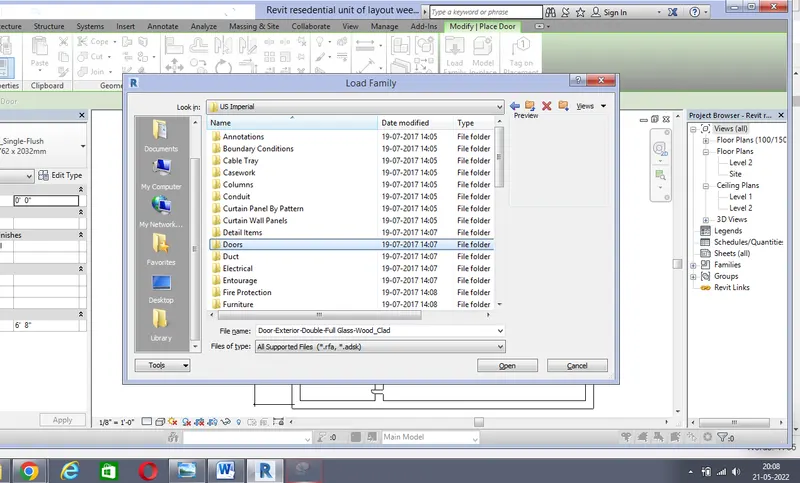
Then select the resedential family
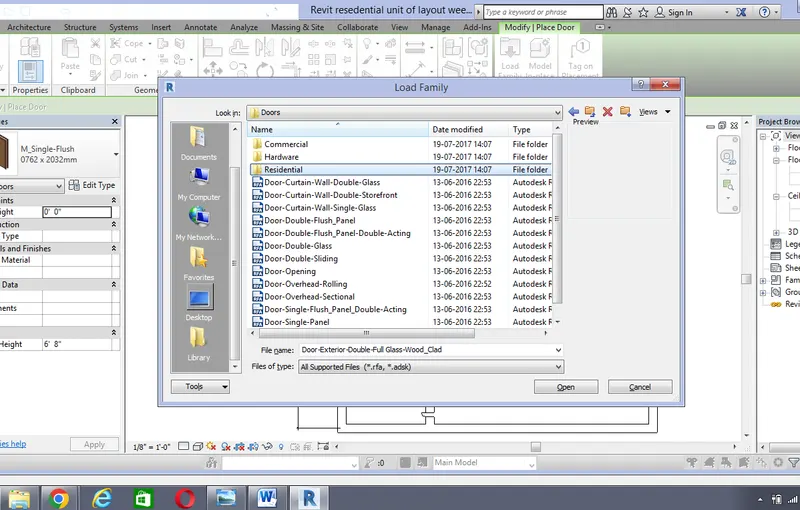
And then select the one of the door elements and then click open option
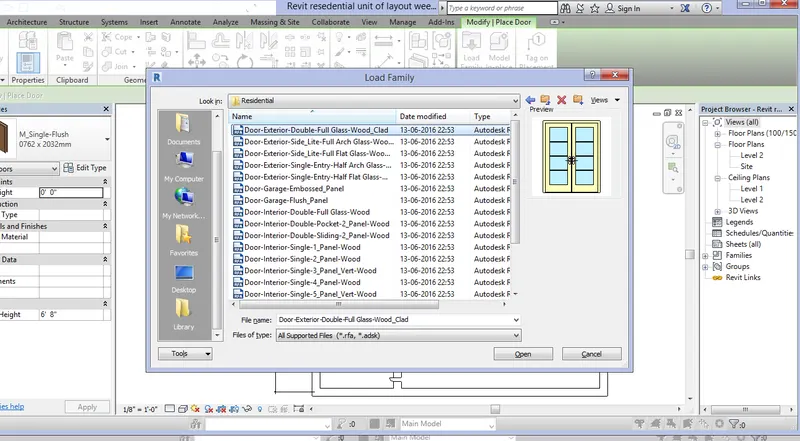
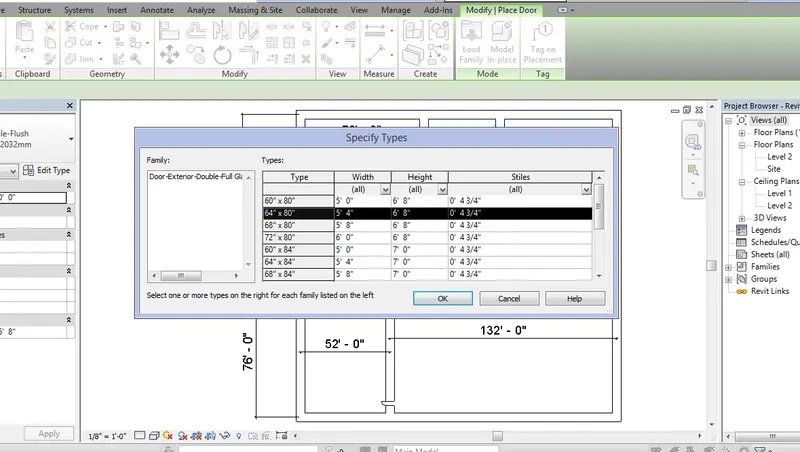
Then choose the size with an height from the specify types dialogue box
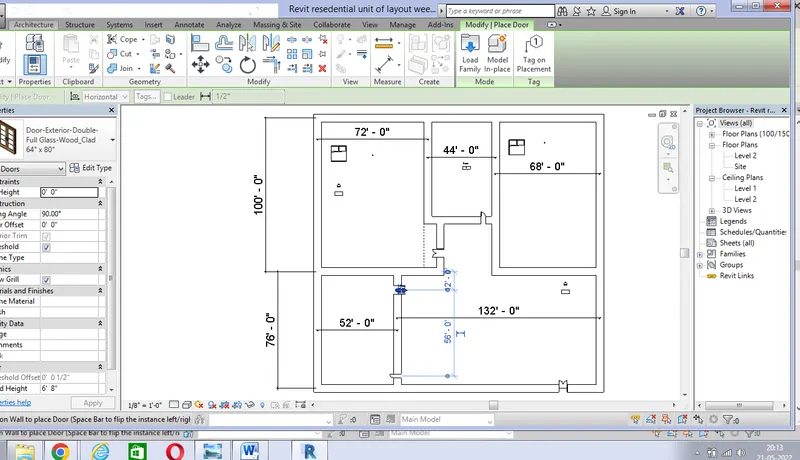
Then place the door as we want and where we want
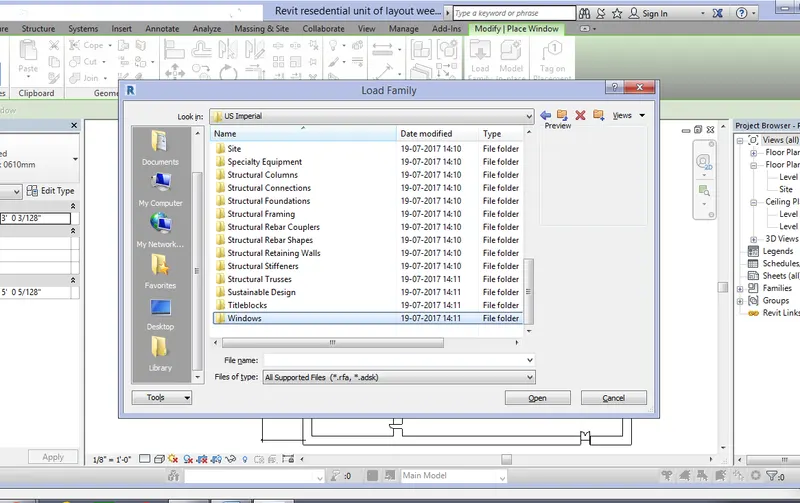
Now if we want to place the window, go to place a component and load family and select the window categaory
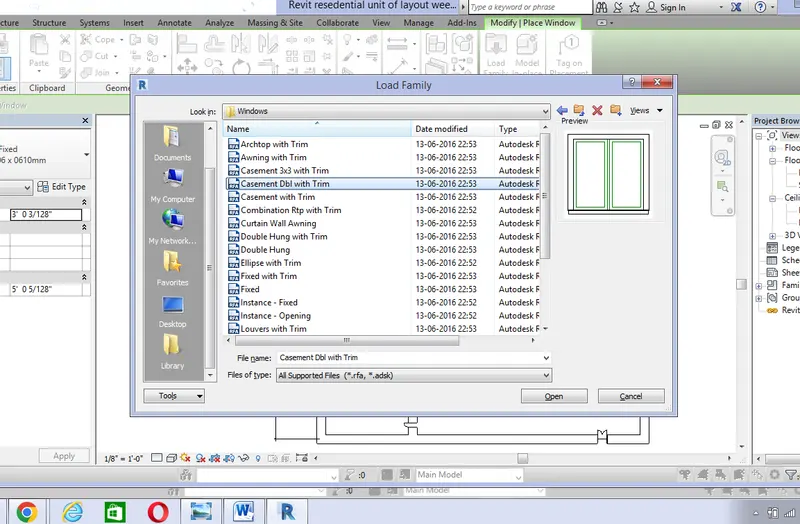
Select the instances that we want
Place the windows inside the layout as we want
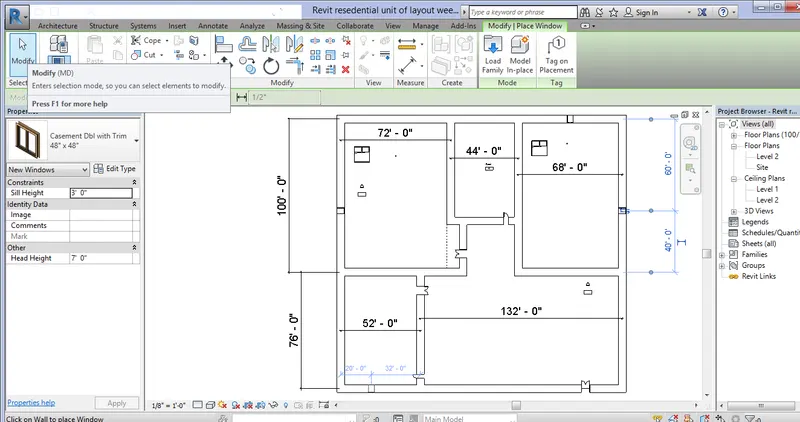
3) Open the revit software, go to file menu bar and click on save as option and choose project option
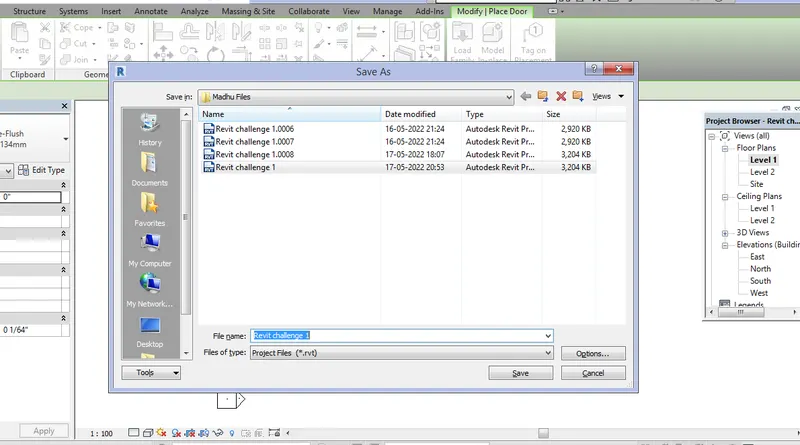
Choose the destination point in which the project has to be saved and save the file by giving approrpiate name
After saving the file, we need to add project information by using manage tab
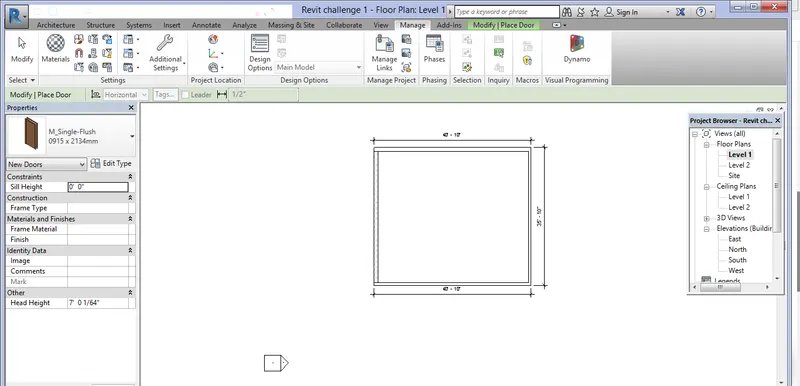
Go to manage tab and select the project information option to add the project details
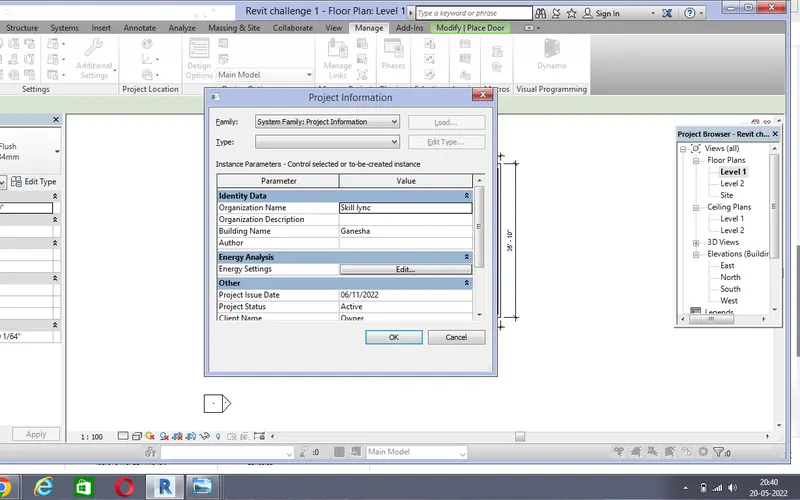
Here we can edit the project information like organiztion name etc
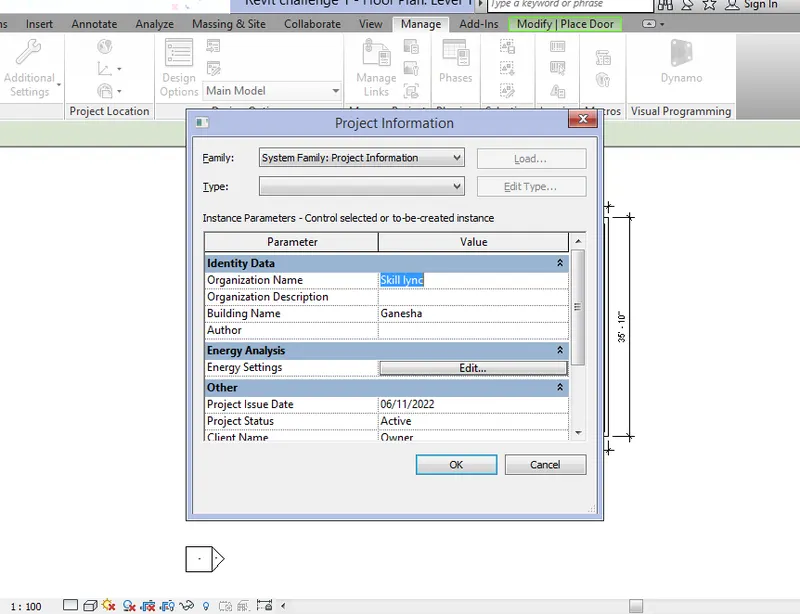
And also we can give the appropriate project name and project status and project number
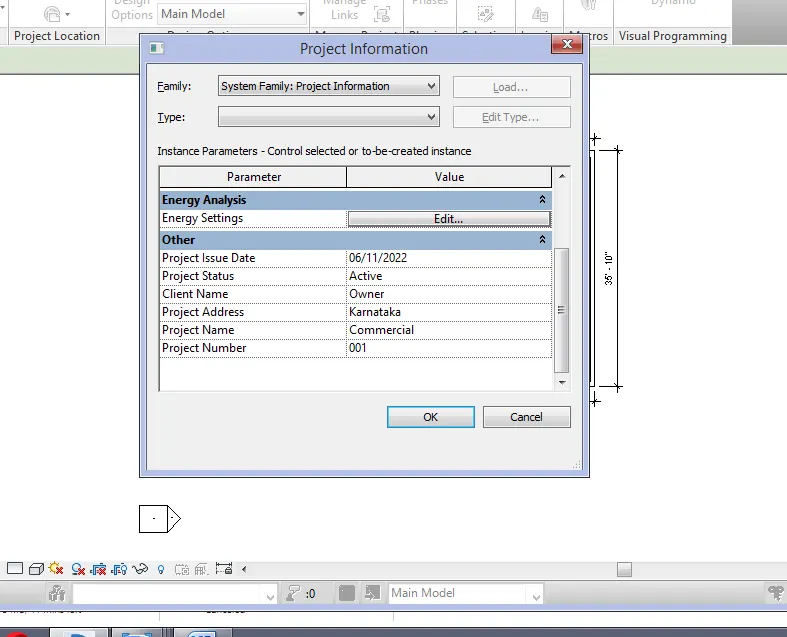
Finally we have to set the maximum backups upto 3
For this, go to file menu bar, click save as once again and select project
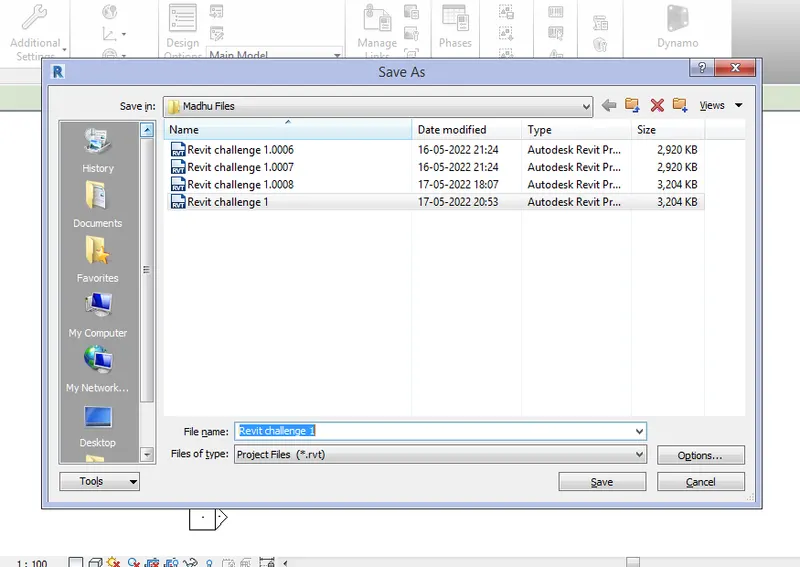
Then we have a option called options in the bottom right corner of the dialogue box
Click on that icon and save file options dialogue box appears
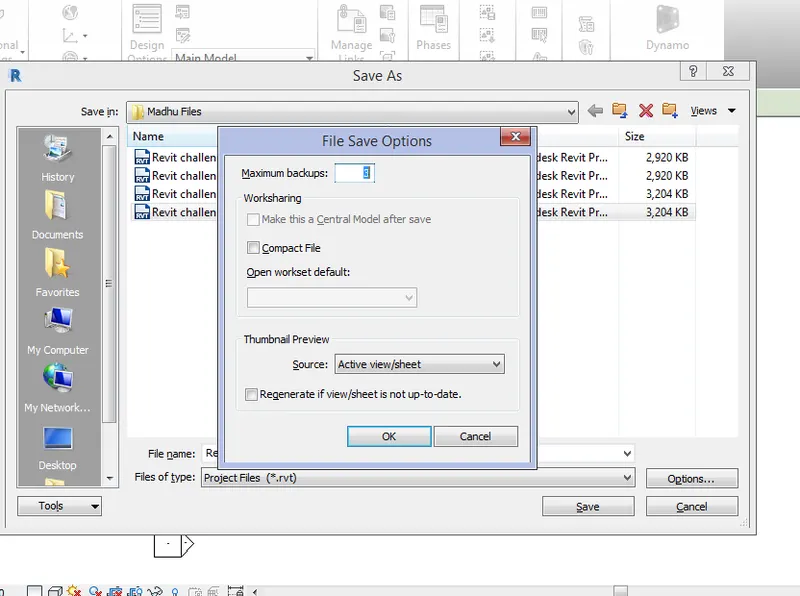
There we have maximum backup numbers, we can provide the backup numbers upto 99 from 1-99 we can provide backups
Existingly it is in 3 only and give 5 numbers
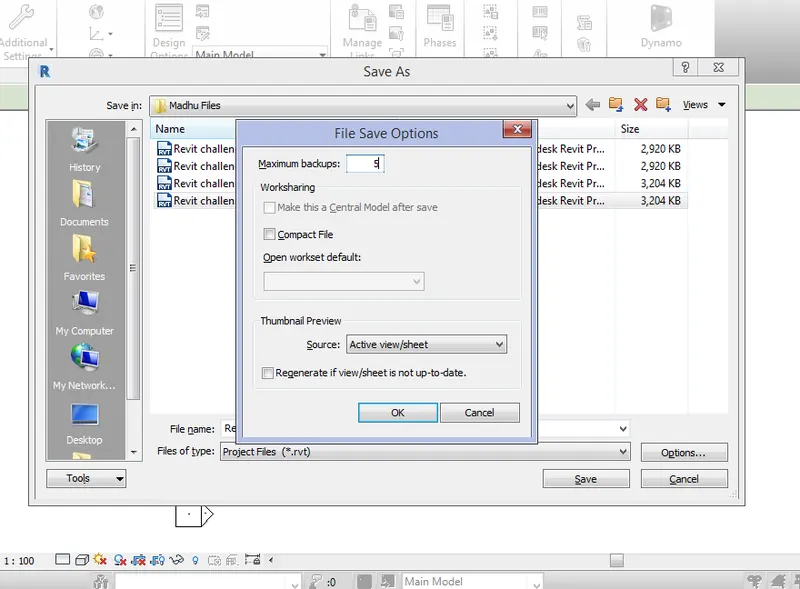
After giving the backup number just click the ok and then finally click save
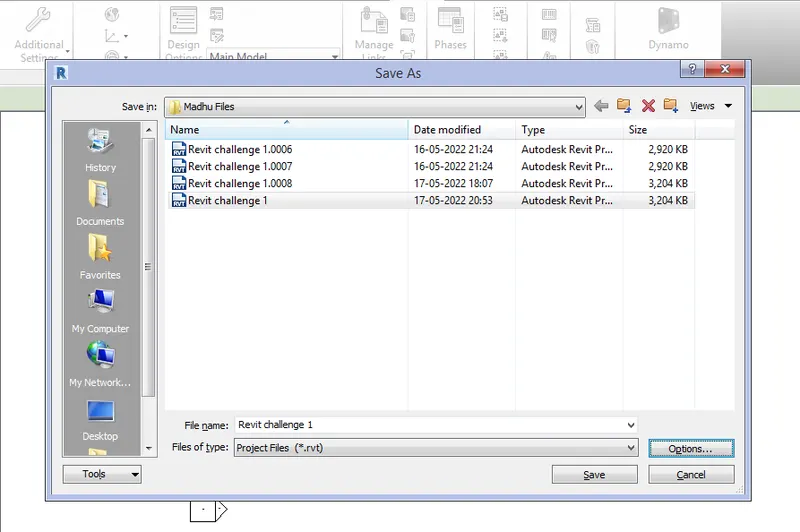
4) For this open a revit software and create a new architectural file
First we need to set the levels
So levels we can able to do only in the elevation view (east), we cant able to place a level or create a level using some other views
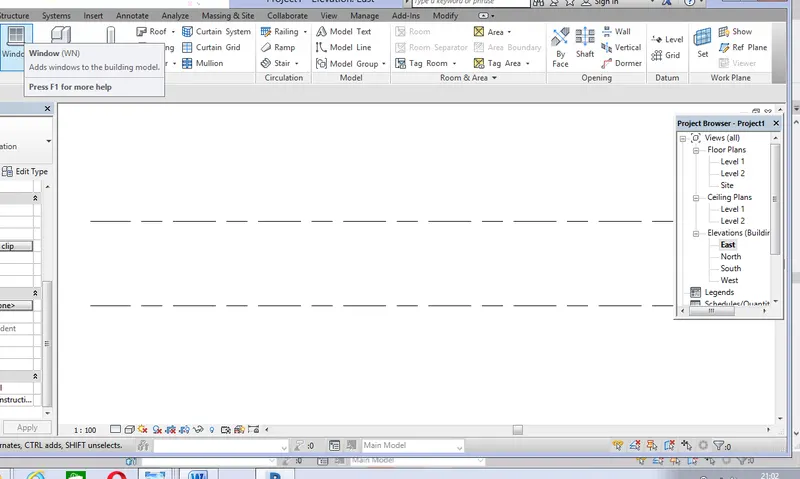
So here already two levels are created level 1 and level 2 and rename the level 1 as ground floor
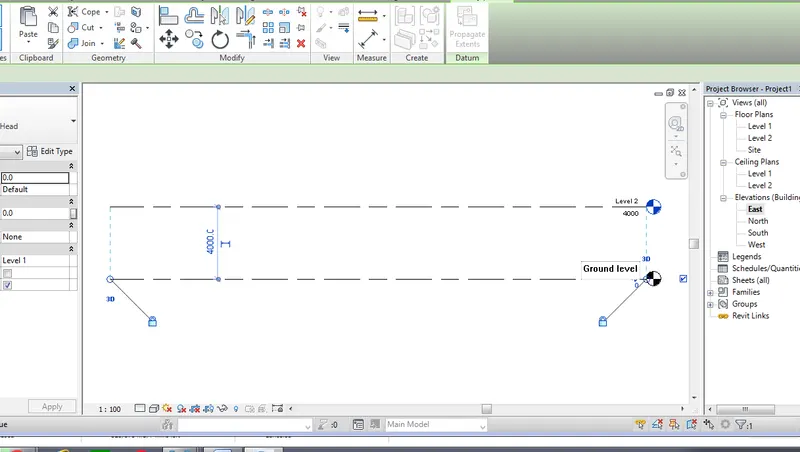
And also rename the level 2 as first floor
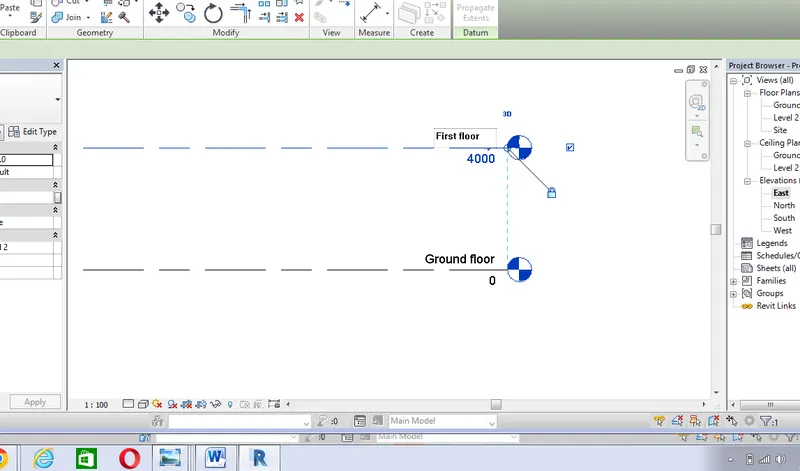
Now we need to create two more levels as second floor and roof at a distance of 10'
So go to architecture tab, then select level option
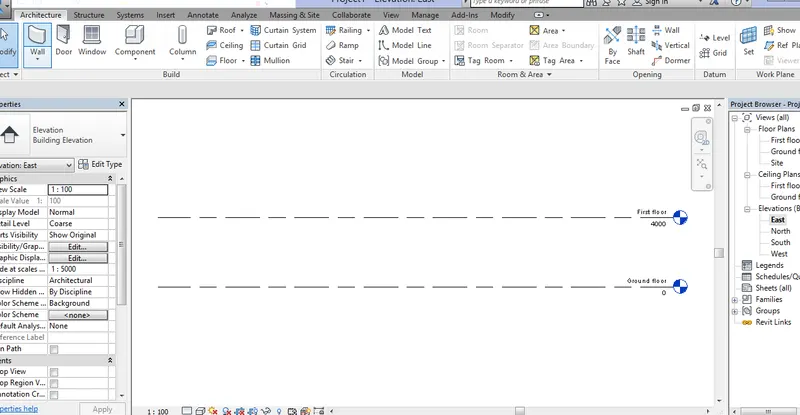
We have two option one is line option and other one is pick line option
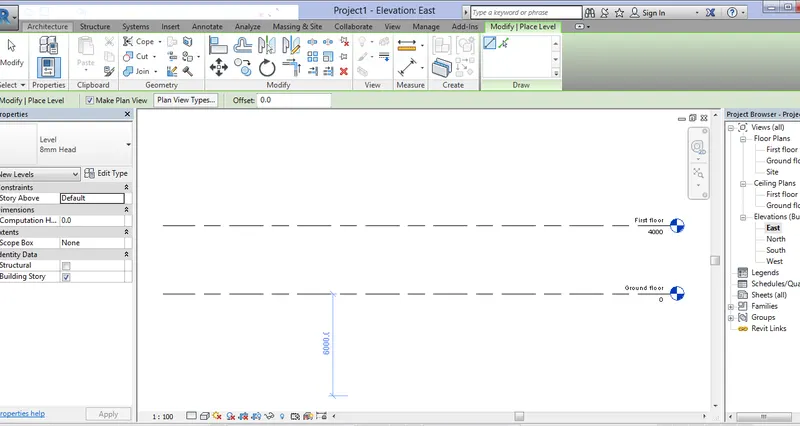
Just select the pick lines and give offset as 10' and press enter
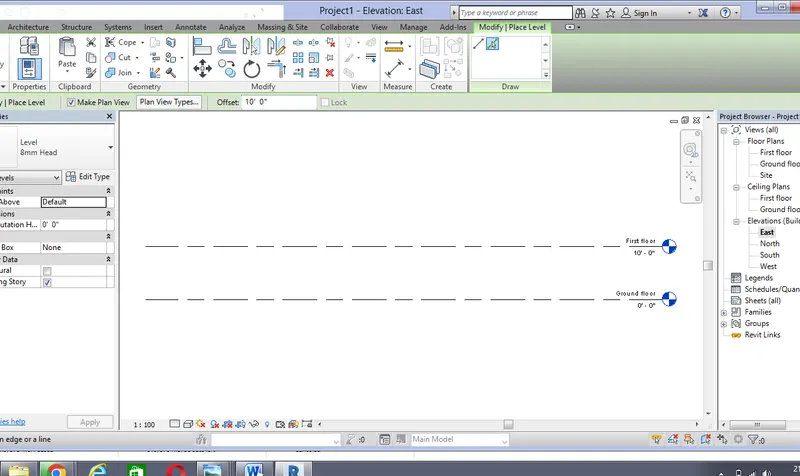
Just click the existing levels
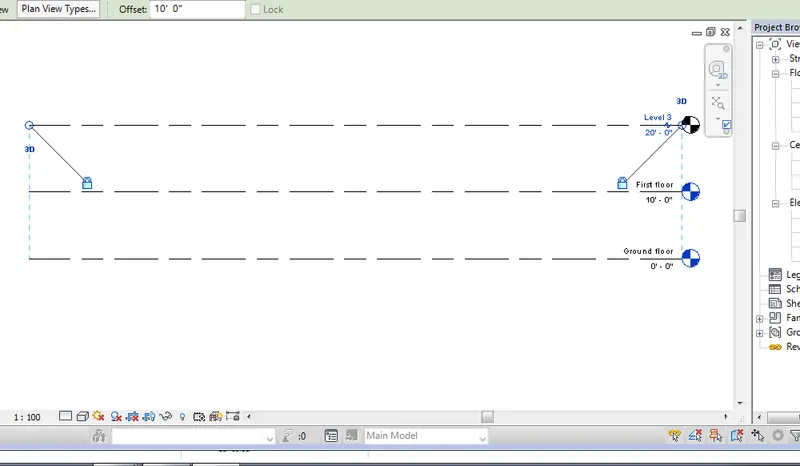
And automatically the level 3 has created at a distance of 10'
again click one more time at a distance of 10'
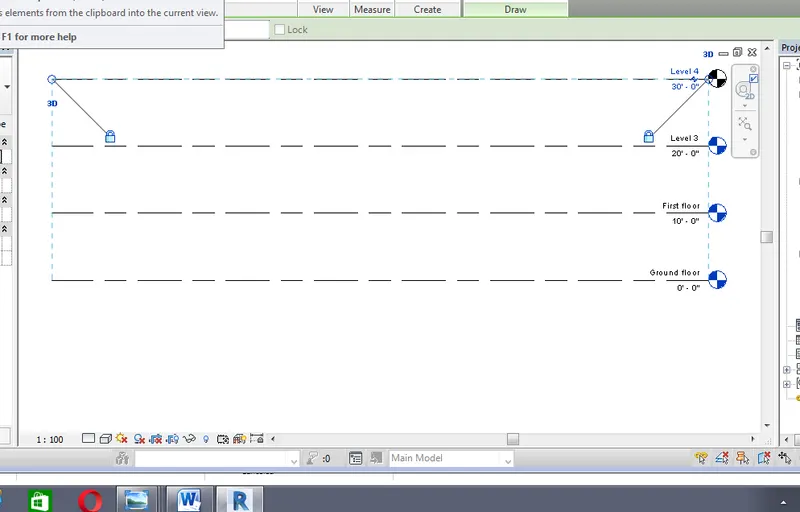
Level 4 has been created at a distance of 10'
Rename the level 3 as second floor
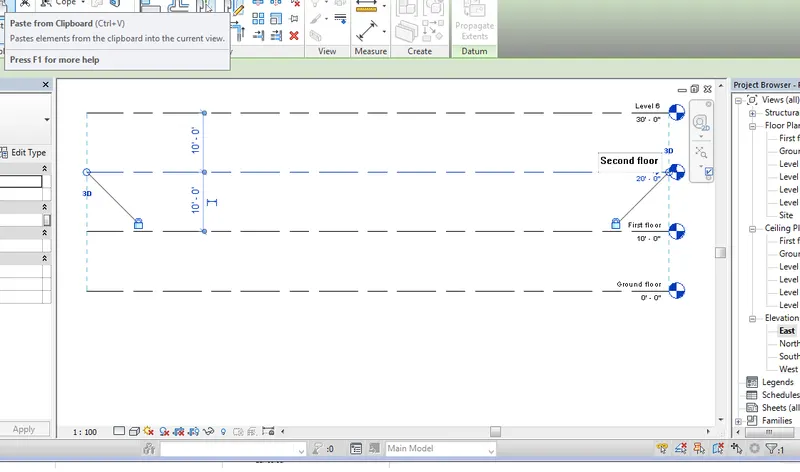
And rename the level 4 as roof
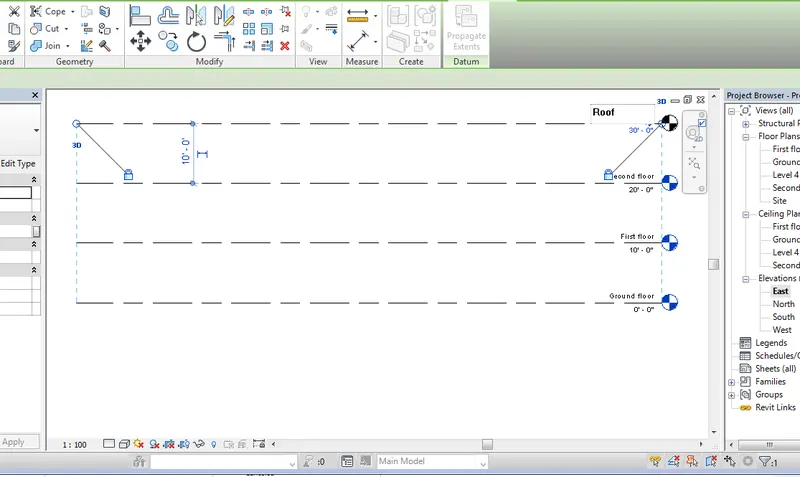
Finally the levels are created at a distance of 10' spacing
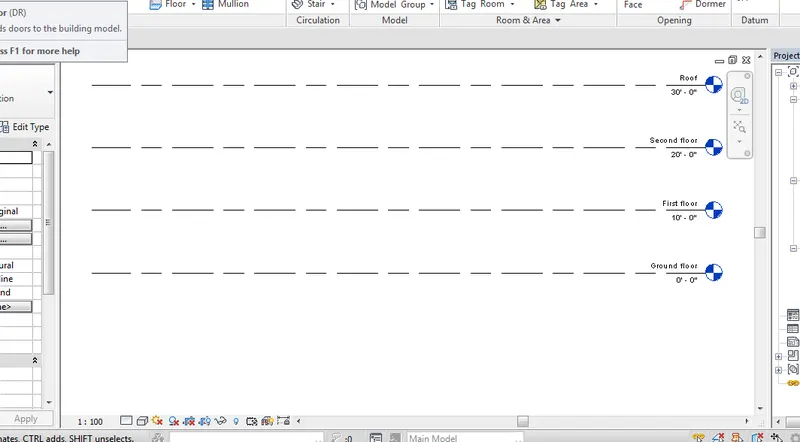
Now we need to create the grids
Just double click the first floor
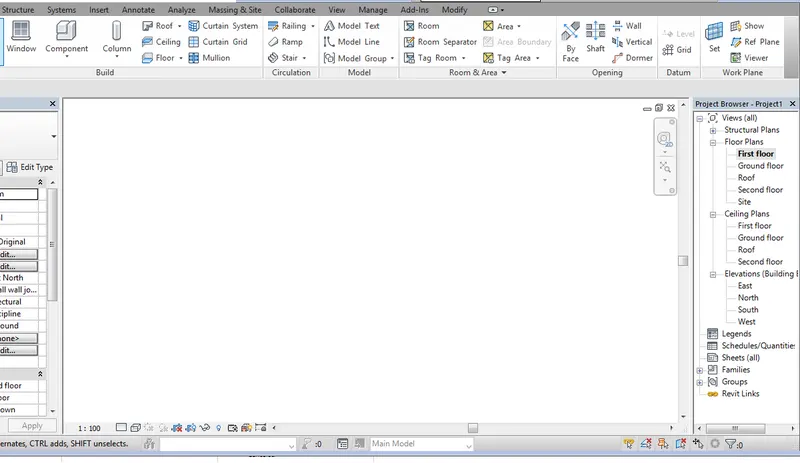
Grids can be created in any views either in floor plan , ceiling plans in any views
Go to architecture tab and click grids option
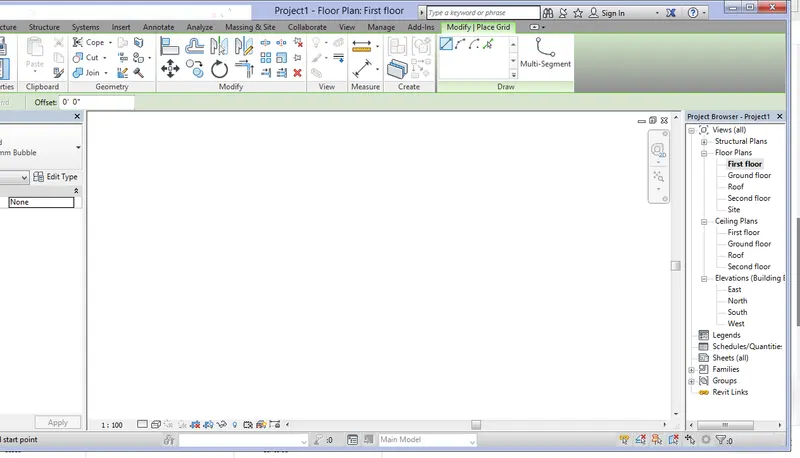
There are four optiions like line, pick lines etc so click on line option and draw a grid
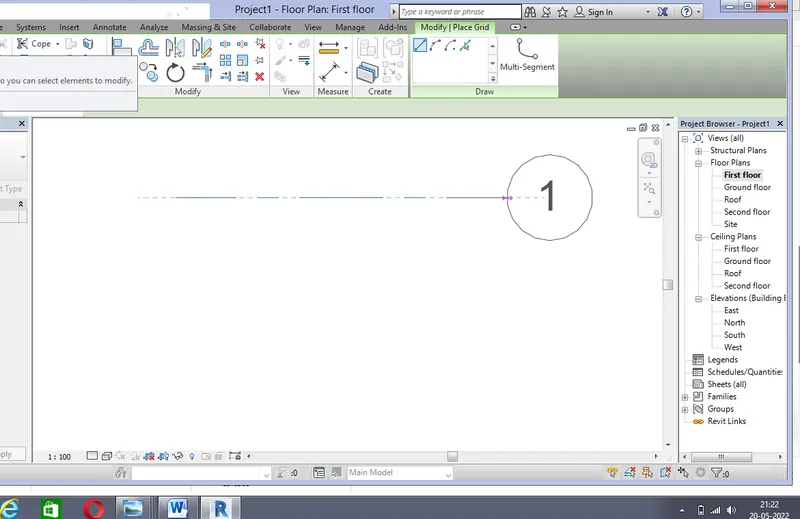
Then click pick line option and give offset value as 10'
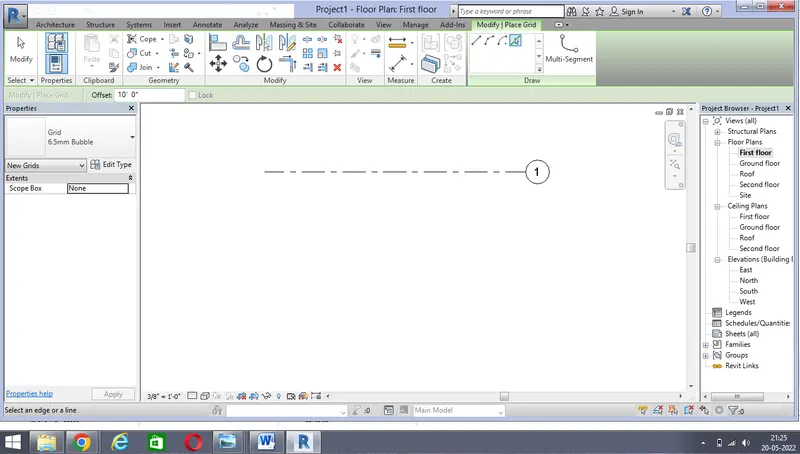
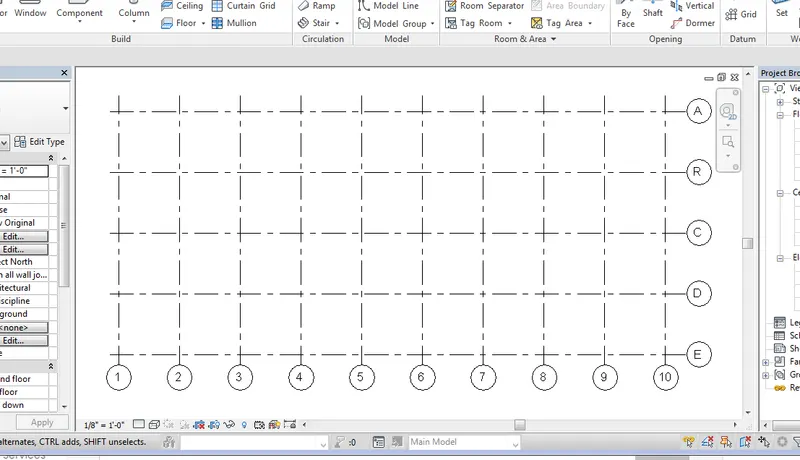
Create a grids of distance 10' spacing and name it as A, B, C, D, E
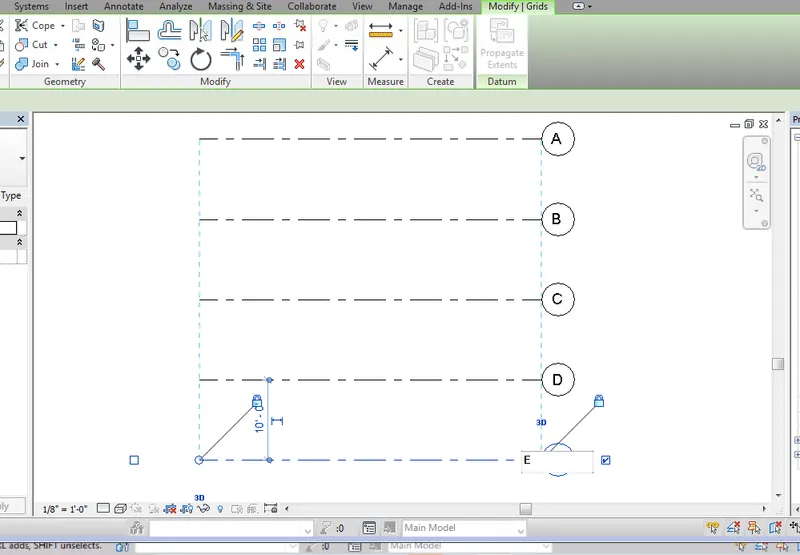
So now the transverse grids as been created at a distance of 10' spacing
So to create longitudinal grids, again go to grids and take a line option and draw a one longitudinal grid
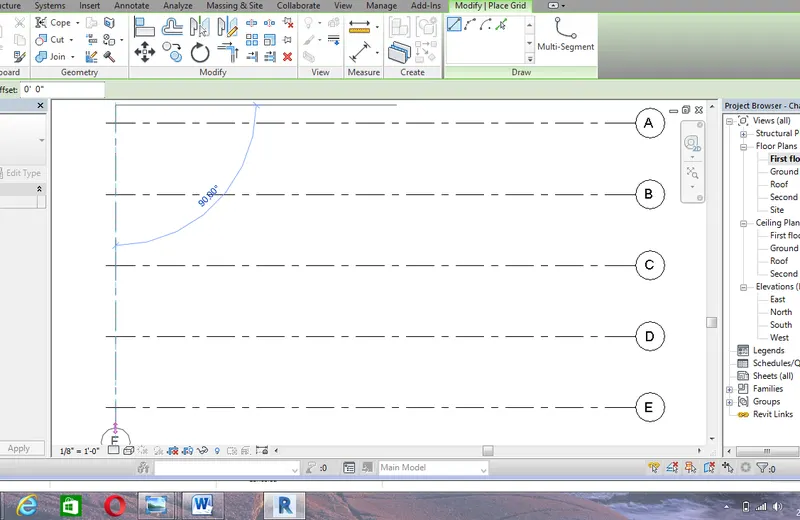
And press enter and again go to grids and select pick line option and give the offset as 10'
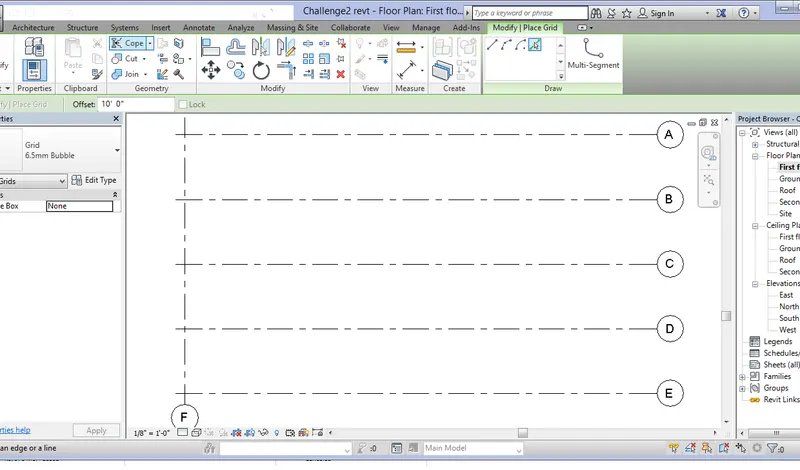
and draw a 10longitudinal grids and name it as 12345678910
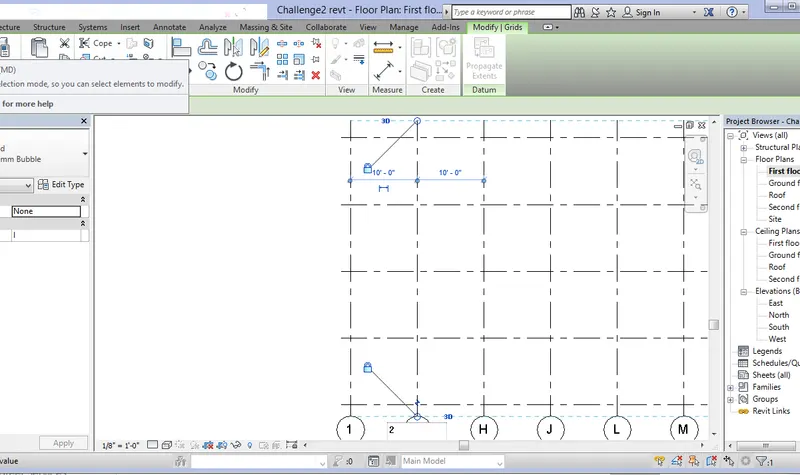
So finally the transverse grids and longitudinal grids are created at a 10' spacing
5) In order to create a resedential unit of our own house, we need to draw conceptual layout
For this, open the revit software
Take a floor command and select the line option and draw a boundary of the layout
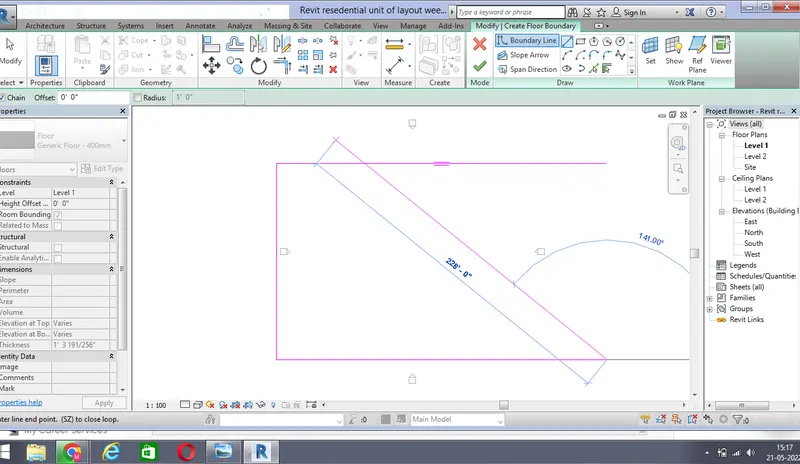
Go to wall command and draw a wall using pick line option
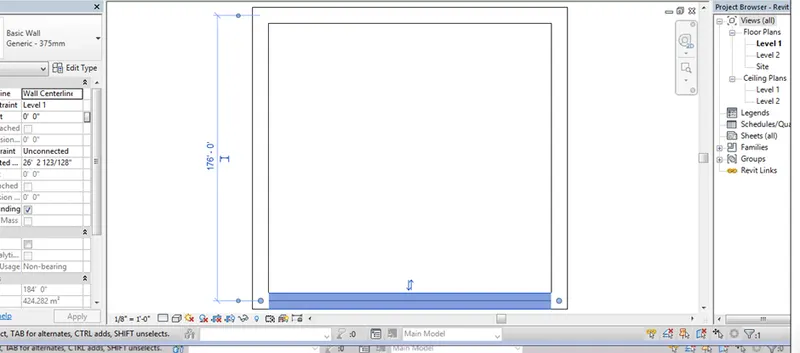
Finally the resedential layout has been created
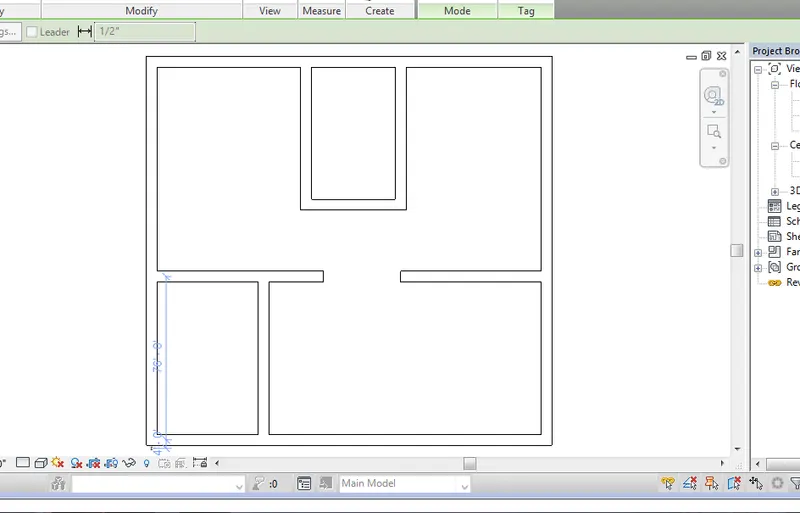
Go to room option in architecture tab and place this into a room
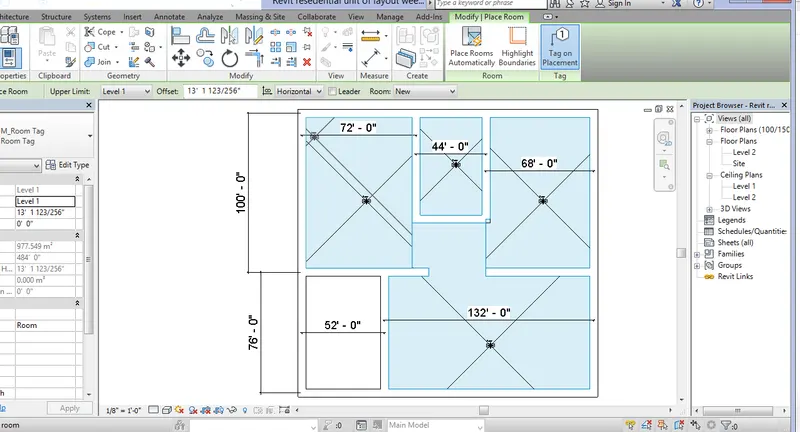
6) We need to annotate the created layout using annotate tab
For this, open the layout which is already created and go to annotate tab and select one of the linear, angular or aligned dimensions using these options
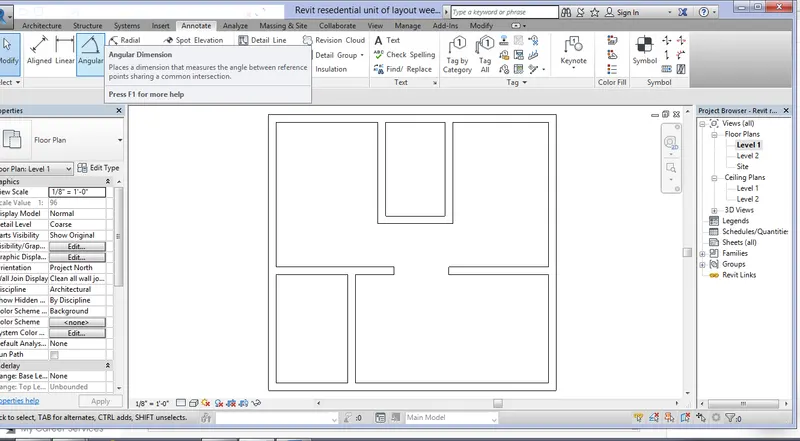
Select one of the annotate option like linear, alligned or angular dimensions
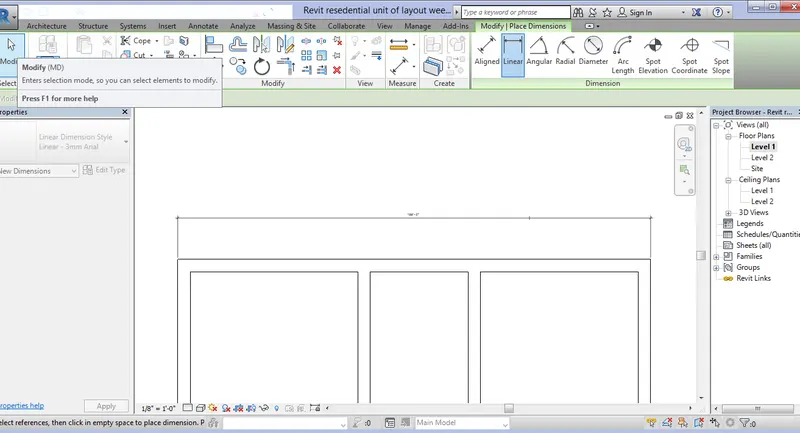
Similarly add the annotation to the room and other components using annotate tab, the layout using linear dimensions
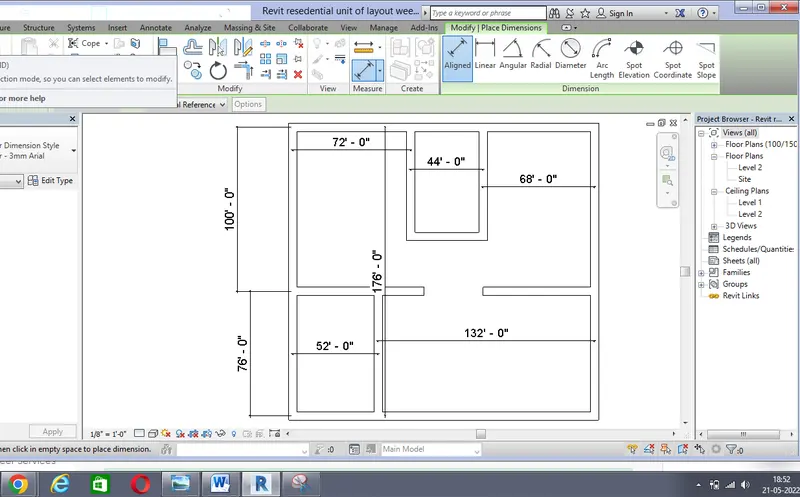
7) Go to component in menu bar and select place a component option
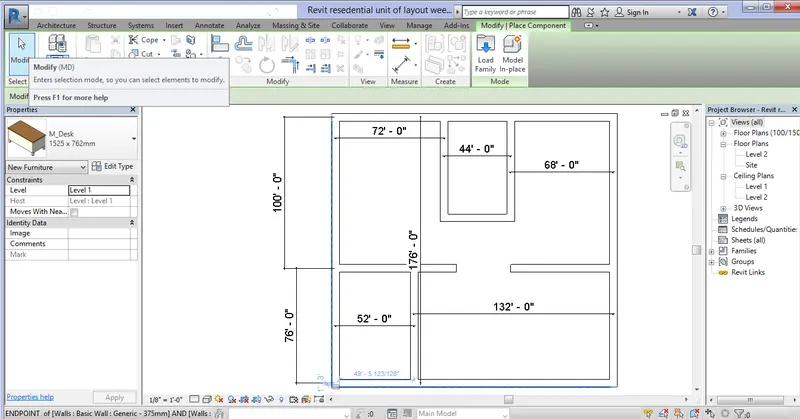
Choose the furniture from the properties then only we can place a components
Then go to component and place a component option
Then go to load family option, choose the program data option
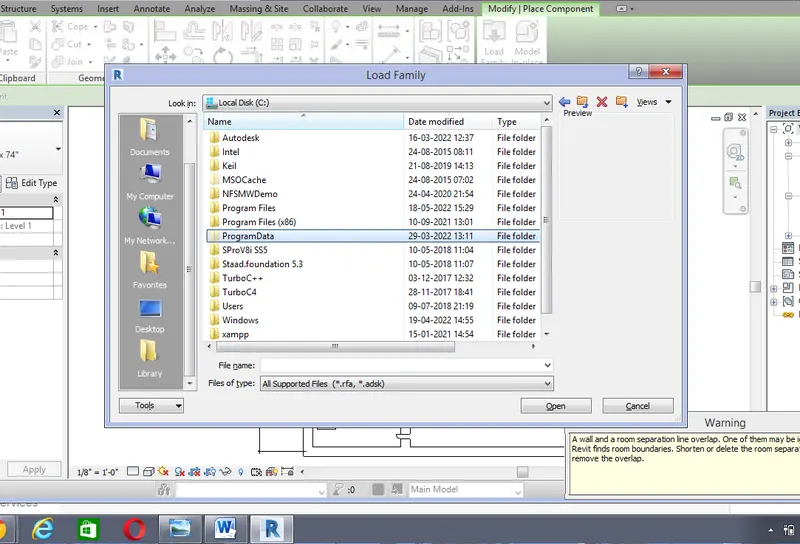
And select the program data option and select the autodesk option
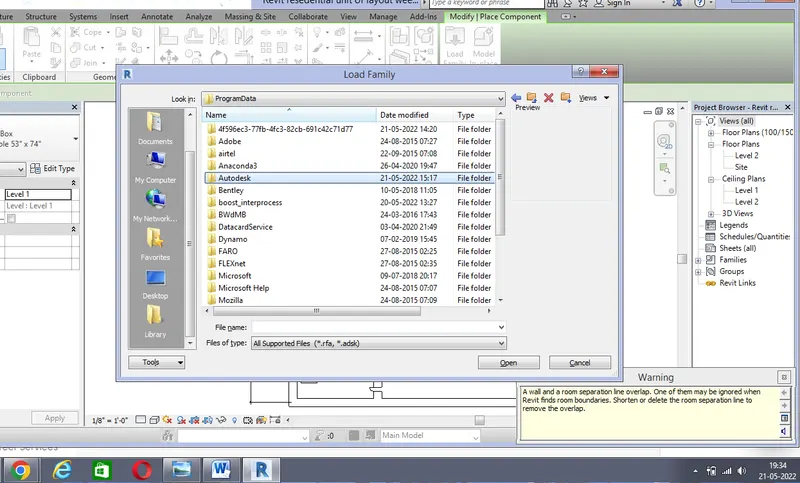
From this option select revit 2017 option
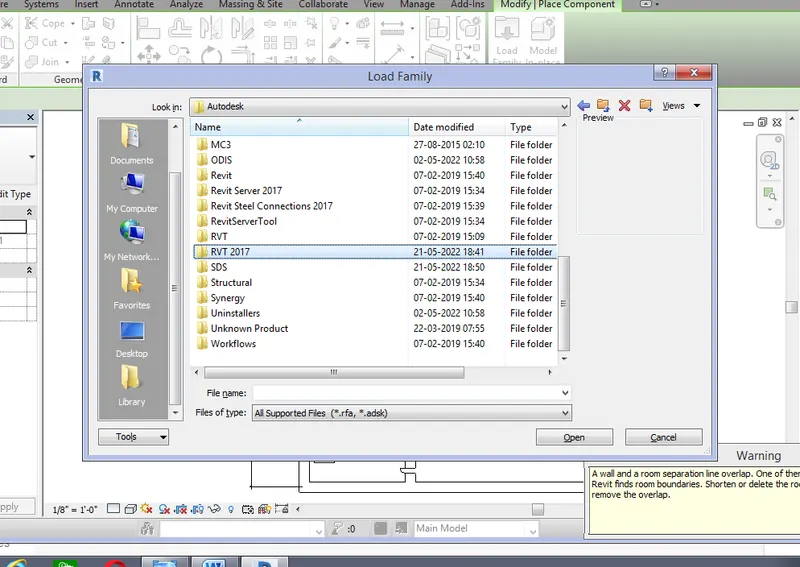
Select the libraries option
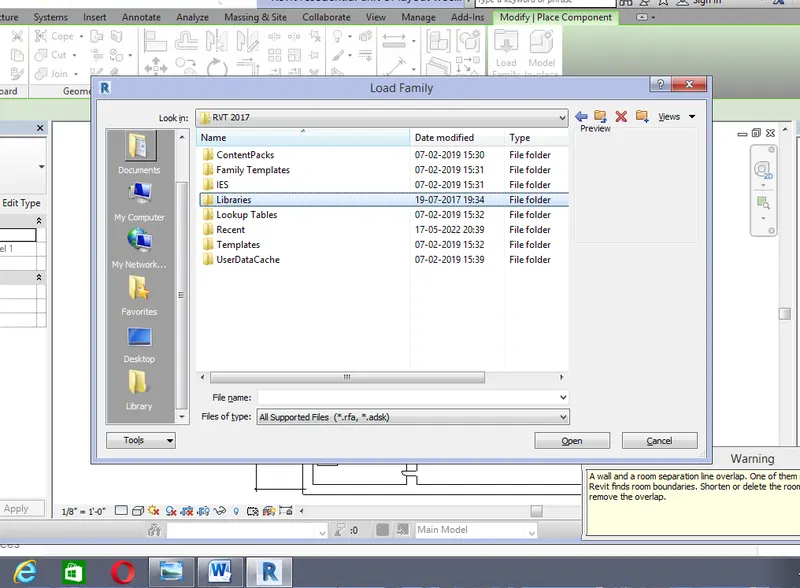
From the libraries select US imperial option and then select the rvt 2017 option
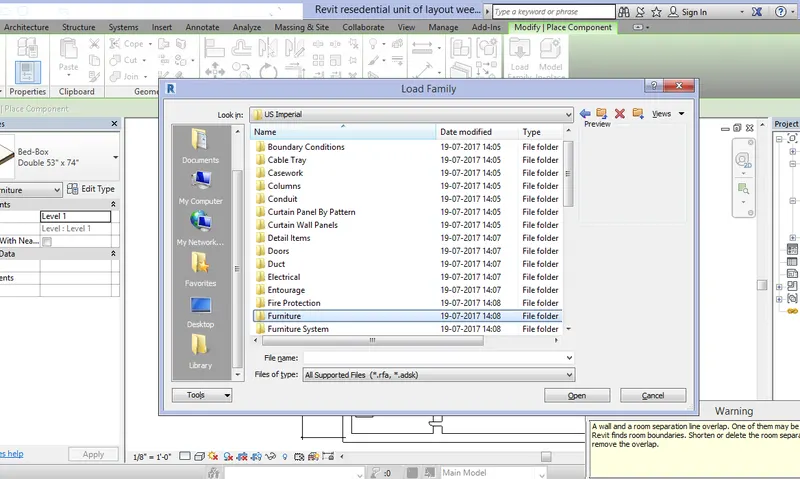
From the furniture option select bed option and then select the type of bed that is to be placed inside the layout
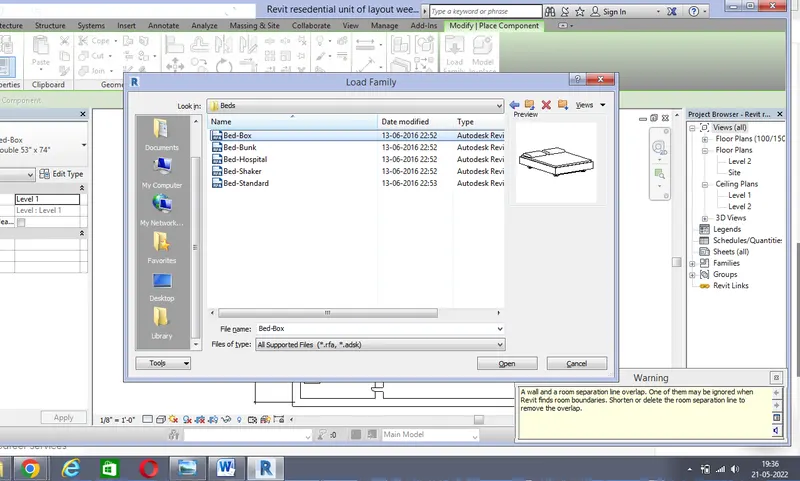
Then click open and place the component inside the layout room
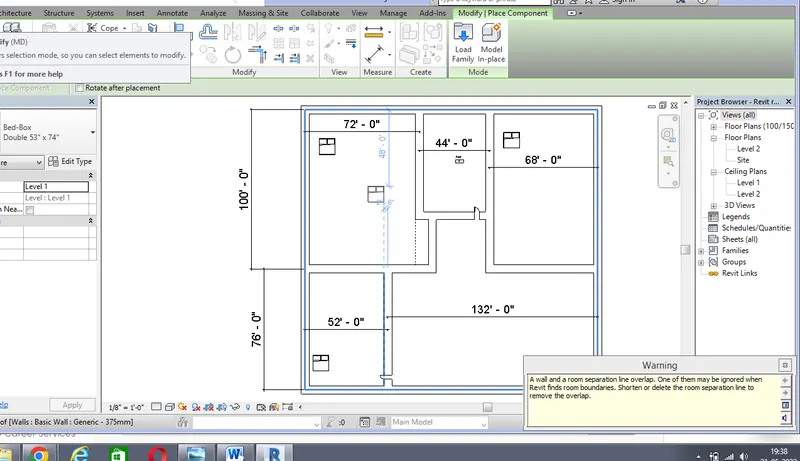
In order to lamps and tables again repeat the same procedure and place the components inside the layout
Select the tables option in furniture family
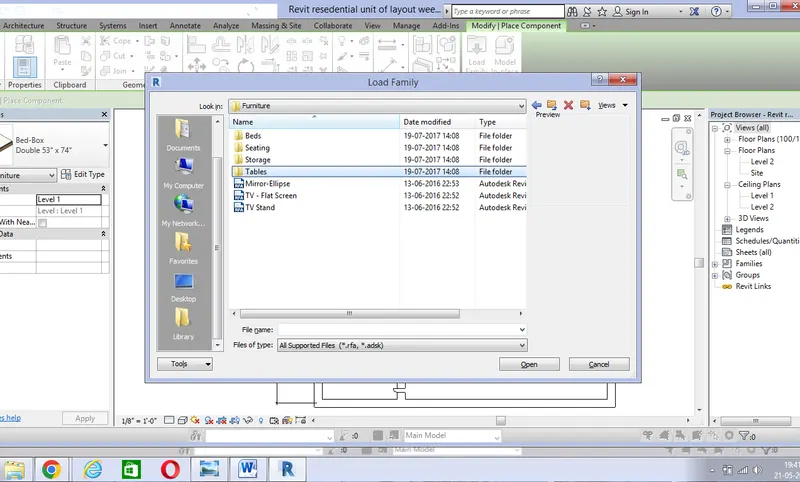
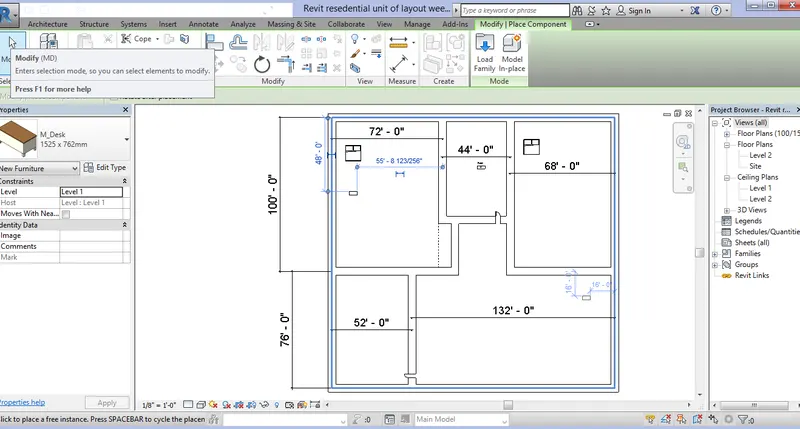
Place the component inside the layout
Before placing the component we need to select the tables from properties panel
Finaly we need to place a lamp fixtures inside the room and layout
For this again go to components and place a component option and go to load family
From load family option select lightings option
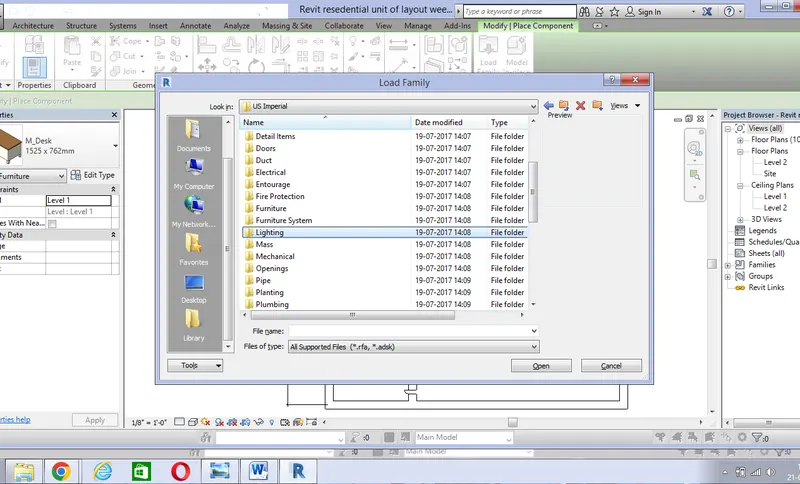
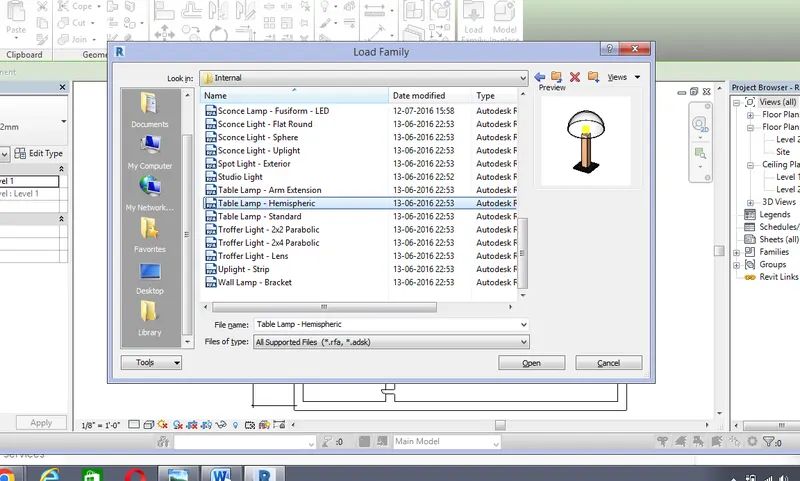
From lighting option select internal option from the architectural option
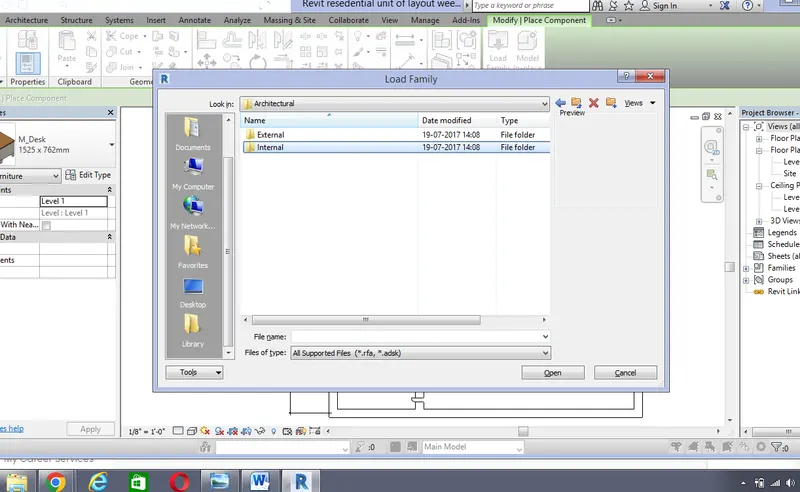
Select table lamp hemispheric option
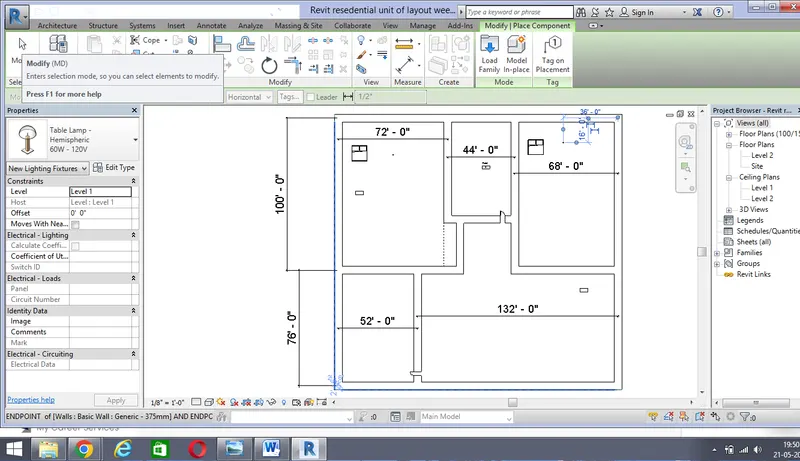
Place a table lamp inside the bedrooms
To place the chair inside a layout go to component tab and select the place a component option and select the load family option and there we can load the furnitures
In the furniture option select the seating option and select one of the type of chairs
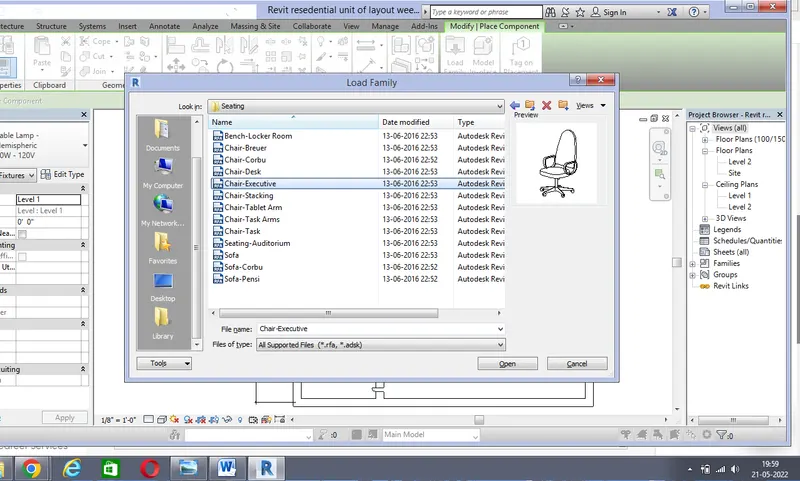
Place the chair innside the living room and bedroom
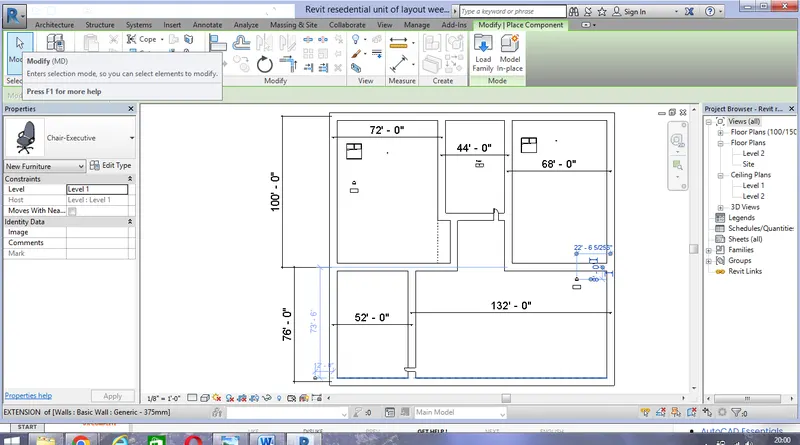
Like this we have to place a components inside the layout