Creating Architectural and Structural model with 3D rendering using REVIT
QUESTION 1) Select the type of structure you want to build from one of the three below
a. Multi Unit Residential Apartment
b. Office Buildings
c. School
ANS 1)
From the above given options the type of structure I want to select is office building .
Ans 2)
A. My project is Buisness building
B. Road width in front of my apartment is 18 m
C. My project is in plain area (geographical)
4.9.7 Height Limit
The Height and number of storeys shall be related to provisions of FAR as given in Chapter3 and the provisions of open spaces given in Building Bye-Laws and the following:
a) The maximum height of building shall not exceed 1.5 times the width of road
abutting plus the front open spaces.
So as per my design, the hight of my building is 25m and the width of the road in fron of the building is 18 m . So the height of building is less then the 1.5 times the width of road. My design is as per NBc guidline
II) Size of rooms, Area limitations , wall height, thickness based on fire life and safety as all as per the nbc guidline.
III) Area limitation- As per NBC - plot size should not be less then 30 sqm in metropolitan city . So my design plot size is 30m x 33.3= 999 sqm and it is as per the guidline
Vi) Fire and safety from NBC part IV
QUESTION 3) Using the structural model, include the following components based on the type of structure selected
a. Foundation – Isolated / Wall/Matt Foundation
b. Columns
c. Beams Connected to Columns
d. Roof Framing/ Truss
e. Floor / Decks
f. Floor Openings for Elevators and Stairs
ANS 3)
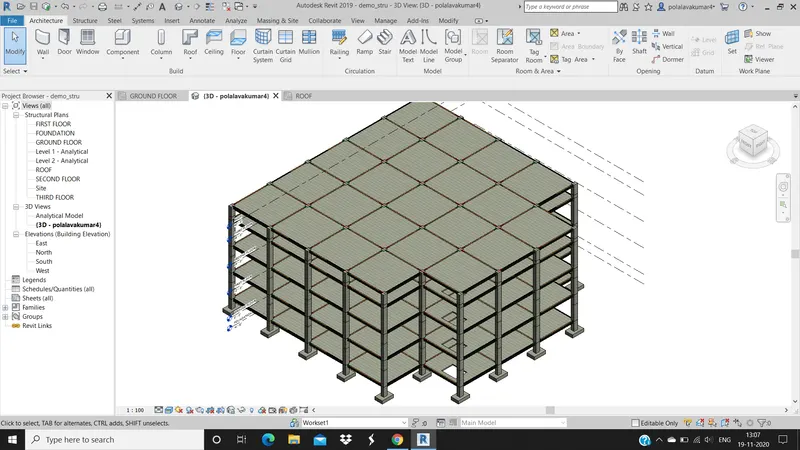
AIM : Using the structural model we have to include the following components based in the project like foundation, beams, columns, roof, floor and stairs.
TOOLS USED :
- Architecture.
- Structural.
- Grids.
- Columns.
- Shaft.
- Stairs.
- Foundation.
- Beams.
PROCEDURE :
1. First open a architectural tempate in revit and save it as residential building_architecture.
2. Then draw two grid lines and and specift the coordinates as 0'0" for both north-south and east-west.
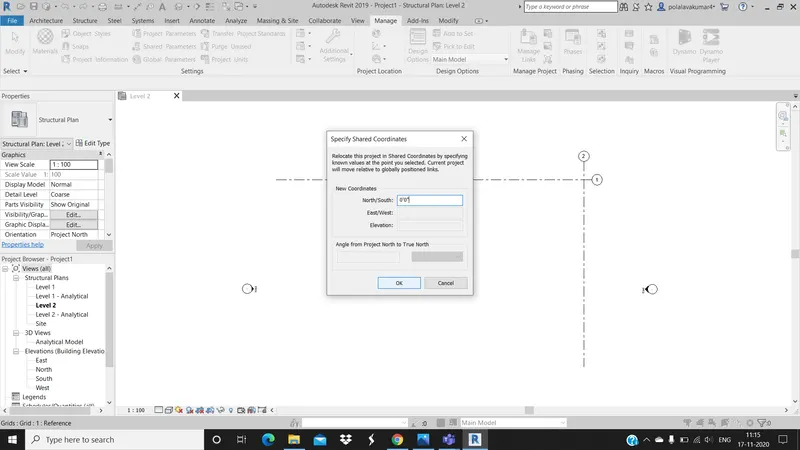
3. Click on collaborate and Save the project.
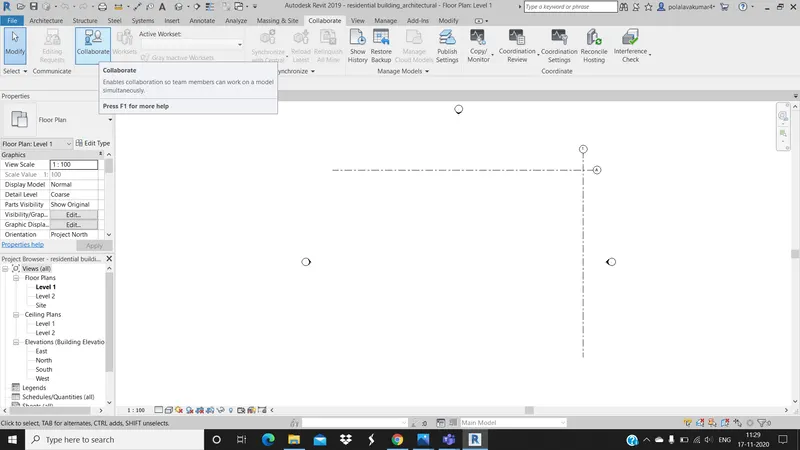
4. Next open a new structure template and save it as residential building_structural.
5. Repeat step 2 and 3 and save the project.
6. Create a new architectural template and add the architectural and structural links using manage links option.
7. Select acquired coordinates and set the links to the current link coordinates.
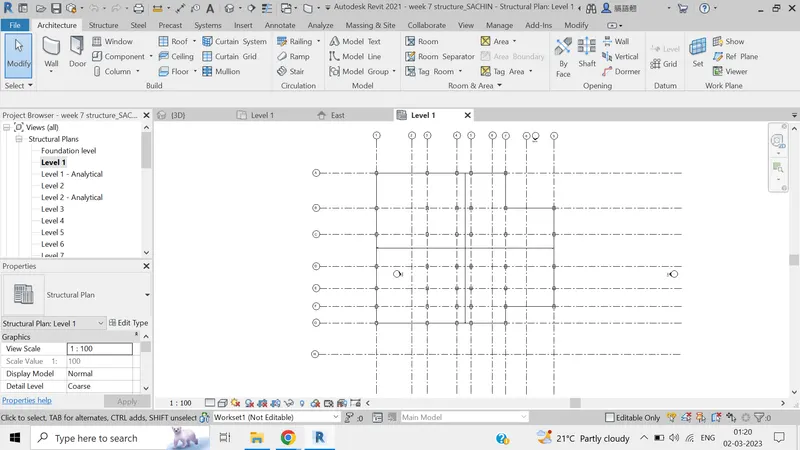
8. Now start drawing the structural components of the project in structural template.
9. Draw horizontal and vertical grid lines.
10. Select Column option from the structural tab and draw the columns at intersection points of the grids.
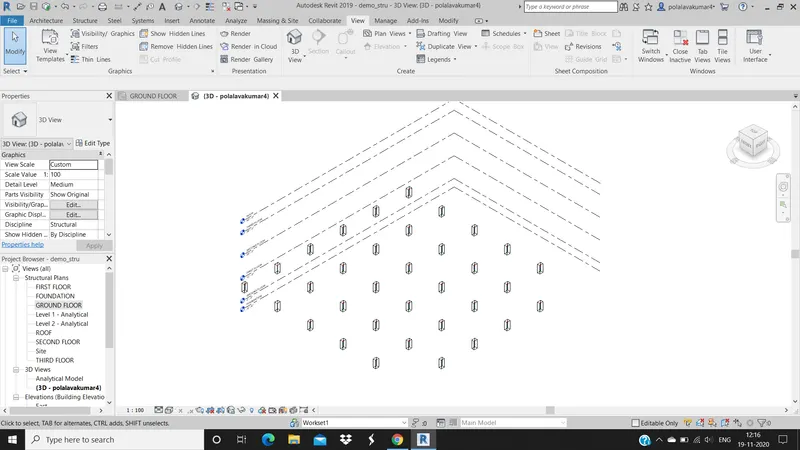
11. In the same way draw the other structural components like foundation, slabs, beams and save the project to central file.
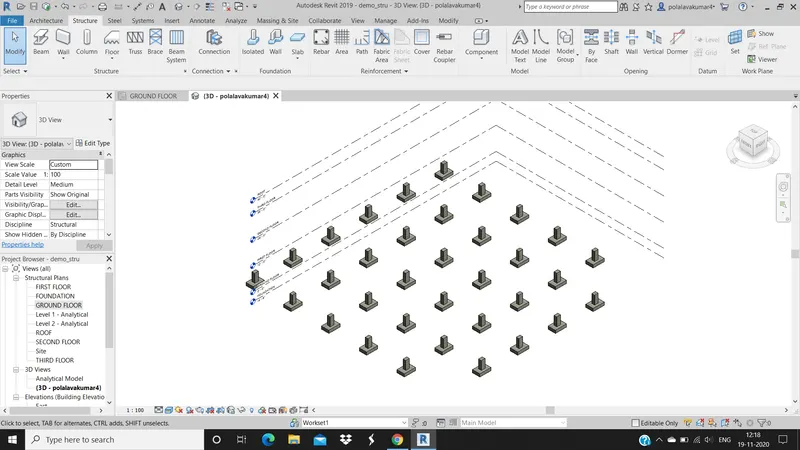
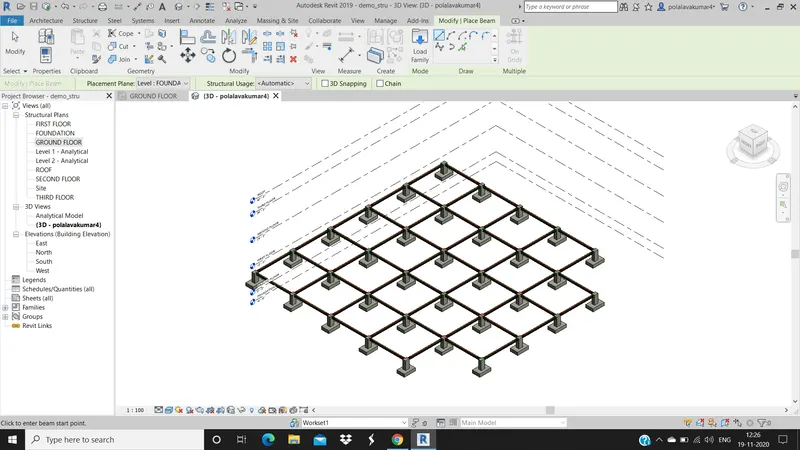
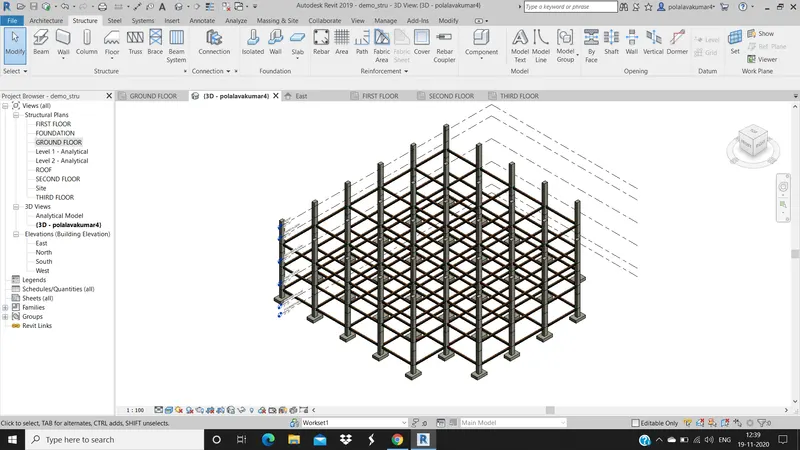
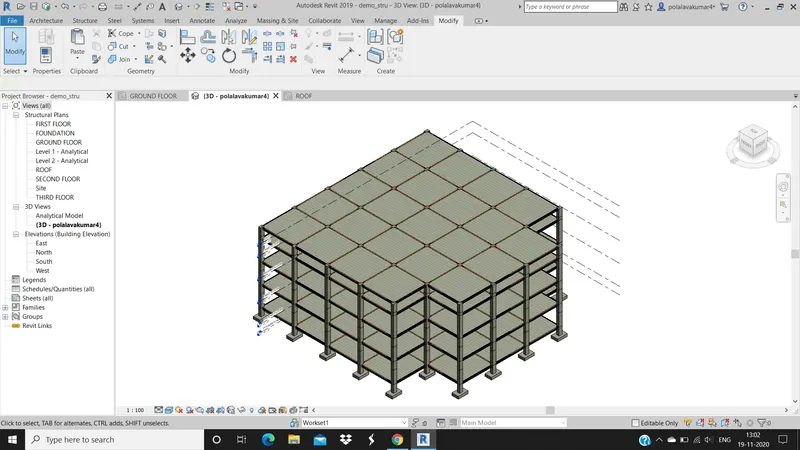
RESULT :
With the above steps we will be successful in collaborating the architectural and structural template to the central file and design the structural components in the project.
QUESTION 4) Using the architectural model, include the following components based on the type of structure selected
a. Wall Layout with appropriate material and finishing
b. Exterior façade with fancy finish
c. Interior partition walls to size rooms
d. Components to add details to room ( Desk, Chair, Lighting, Plumbing fixtures)
e. Add components such as stairs Elevators
f. Have at-least one side of building with curtain walls and glass panels
g. Include interior and exterior lighting fixtures
h. Place proper topographic components from outside ( Trees, Parking, Plants) to add details to the model
ANS 4)
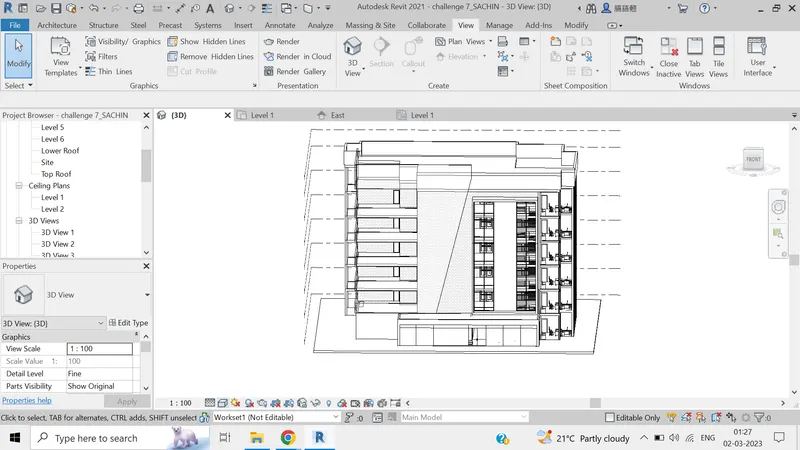
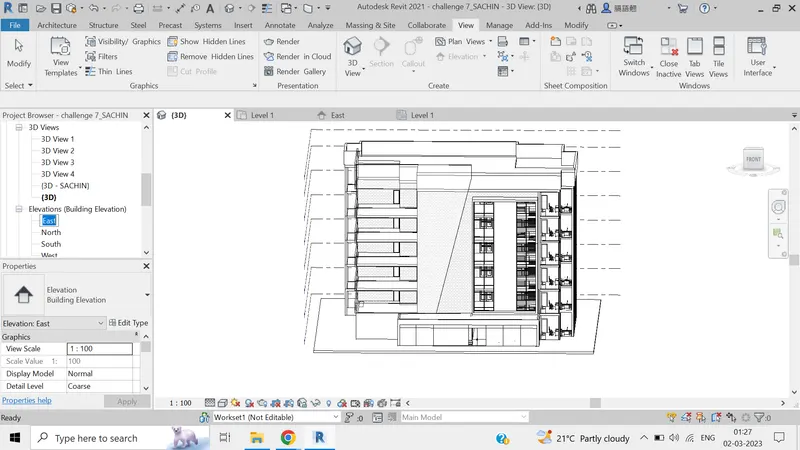
AIM : With the help of architectural template we have to include the architectural components to the previously created structural model like exterior and interior walls, components and plantiong.
TOOLS USED :
- Architecture.
- Walls.
- Components.
- Load family.
- Ceiling.
- Floor.
- Doors.
- Windows.
- Staircase.
- Railings.
PROCEDURE :
1. Now go to the architectural template which was created before.
2. Copy the grids which were created in the previous structure template and copy them.
3. With the help of paste from clipboard option paste the grids in the architectural template.
4. Select the grids and pin them so that they do not get disturbed while doing the project.
5. Now go to elevation and create the levels required from architectural tab.
6. Go to virtual graphics settings and select custom in annotation off the grids.
7. Now with the help of the grid lines start creating the exterior walls of the project.
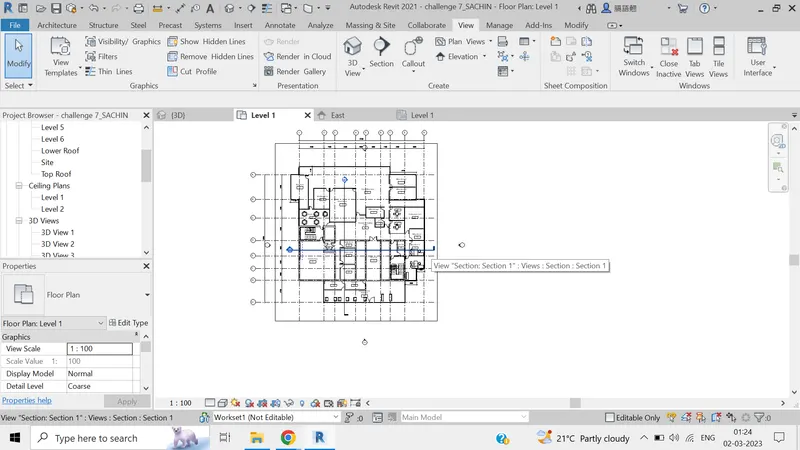
8. With the help of floor tool add floors to all the levels.
9. With the help of walls tool from the architectural tab add interior partition walls with thickness less than the exterior walls.
10. Add stairs with the help of stairs tool and copy them to all the required levels.
11. To the before created staircase add railings to make it more realistic.
12. Add windows and doors to the interior walls.
13. With the help of load family load the components required for the project and add them in the drawing using components tool and add the plantings.
14. At last with the help of camera view option take the ppictures of individual rooms.
15. Save the project and all the changed done in the architectural template will be saced to the central file.
QUESTION 5) Provide set of drawings in architectural and structural model to list the following details with categories and appropriate sheet templates included
a. Floor Plans with Annotations
b. Elevations
c. Sections
ANS 5)
AIM : To provide the structural and architectural models and views on the sheet template lie floor plans, elevations and section views.
TOOLS USED :
- Insert.
- Sheets.
- Load families.
- Edit sheets.
- load image.
- View.
PROCEDURE :
1. Go to the view tab and select sheet tool.
2. Sheet dialog box appears, A1 metric and click on ok button.
3. We can rename the sheets by double clicking on the name and use appropriate names to the sheets.
4. Go to insert tab and select on load image option.
5. With the help of load image we can add images into our the sheets and save them.
6. Follow the same process and add the structural and architectural models into the sheets.
7. Add floor plans with the same steps into the sheets.
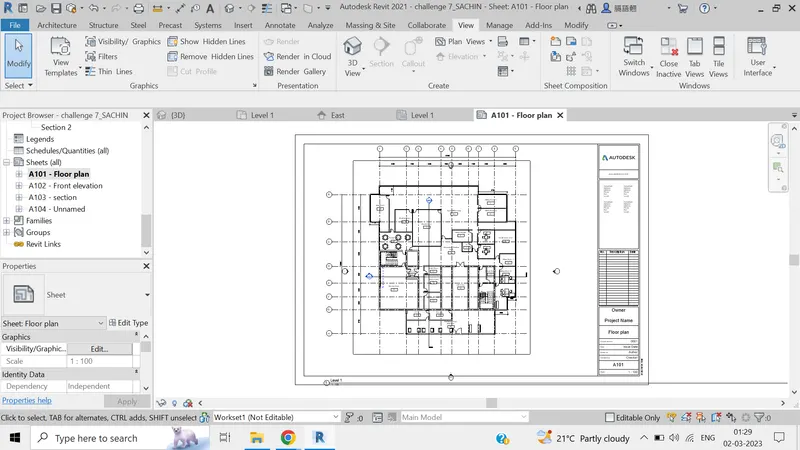
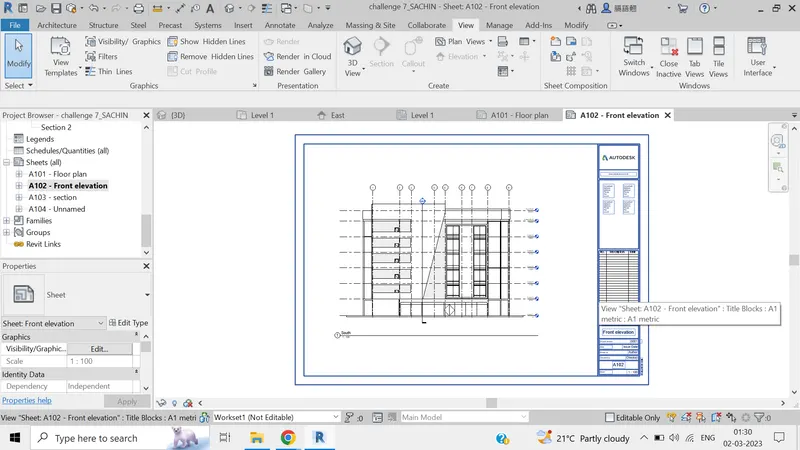
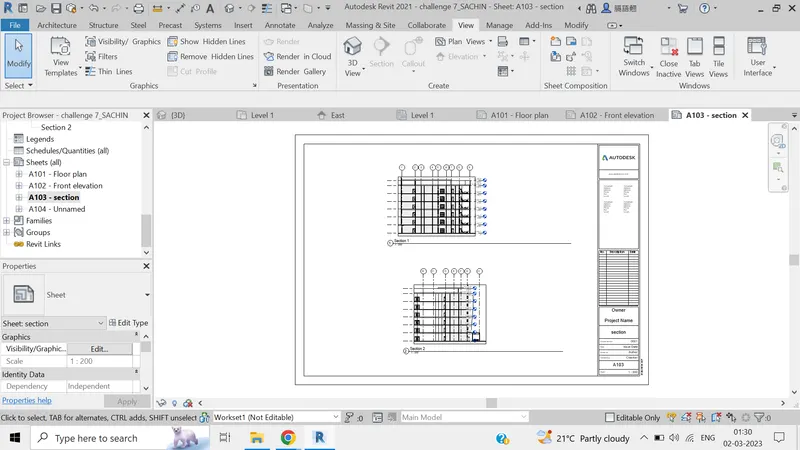
RESULT :
In this way we can add the structural and architectural models including the floor plan views, elevation views and section views onto the sheets.
QUESTION 6) Using the Rendering settings, Render images of 3D model produced and include the rendered images to the drawing sheets
a. Rendering from interior rooms
b. Rendering from out showing topographic features
c. Rendering through structural framing
ANS 6)
AIM : To render the images which were capture by the camera view, for example like the interior rooms, topographic views and structural framing.
TOOLS USED :
- Render.
- Region.
- Style.
- Scheme.
- Sheet.
PROCEDURE :
1. First open the 3D view and open the picture we want to render.
2. Next go to view menu and click on render option.
3. Render dialog box appears.
4. Select region option and crop the region we want for the image.
5. We can change the scheme, styles and lighting options and click on render.
6. We will get the rendered image which appears more realistic and can be used for better presentation of te project.
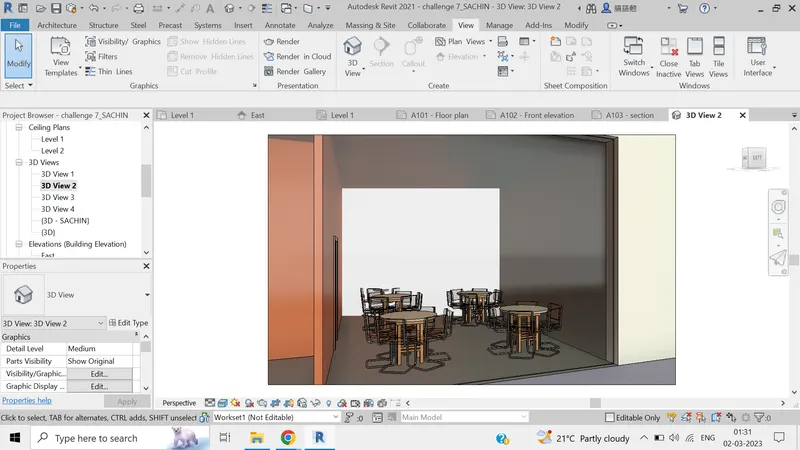
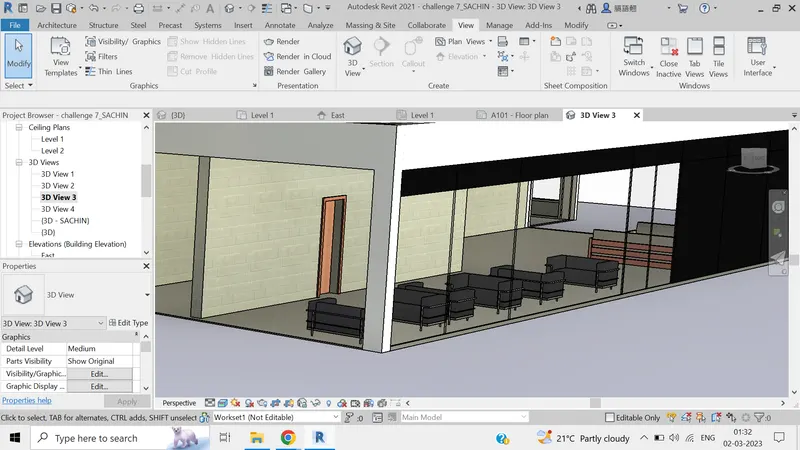
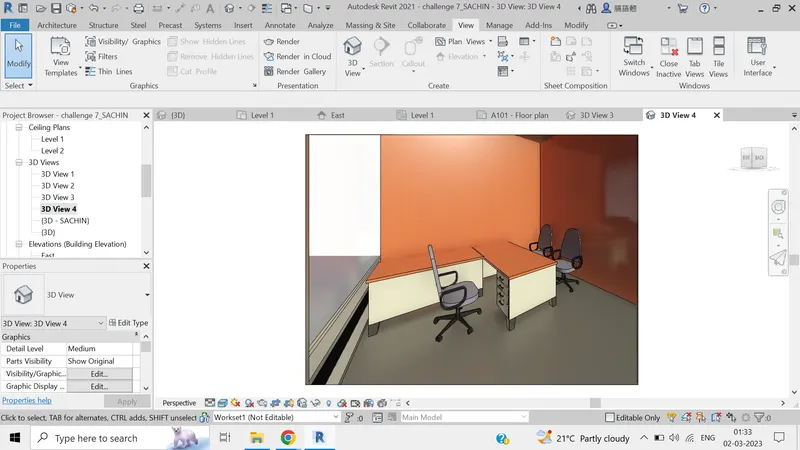
RESULT :
With the help of rendering option we can edit the pictures to realistic form adn can be use for effective way to present our project.
QUESTION 7) Print the set of drawing sheets created and submit the drawings from architecture and structure model.
ANS 7)
AIM : To print the set of drawing sheets created and submit the drawings from architectural and structural model.
TOOLS USED :
- File.
- Print.
- Setup page.
- Select the plotter.
- Print.
PROCEDURE :
1. select the views and go to file menu and click on print.
2. A print dialog box appears.
3. Change the settings on how we want the sheets to be printed and click on print option