Creating a Wardrobe detailed drawing, Floor Plan, Kitchen Layout and Column Detail using AutoCad
1. Draw the elevation and details of a wardrobe as shown in the Figure below. After sketching, you need to provide the dimensions and text with the use of layers. Use proper text styles and dimension methods to document it. Also, assume dimensions, wherever needed.
Note: All dimensions are in mm.
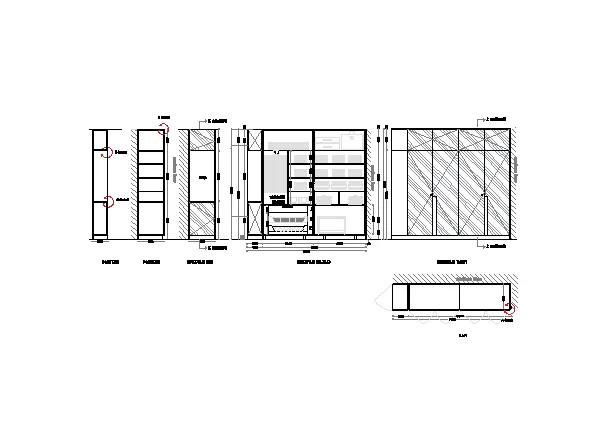
Answer:-
step1:- command a xl line and draw vertical line and again command xl line and draw a horizontal line, the two are trim negative directions and use offset with above daigram have dimensions and draw a residential plan.
step2:- command a circle tool used the door shape.
step3:- command a dimlinear and show the dimensions.
step4:- select the separted parts like walls (exterior, interior), doors , caboards, steps, are select individual and apply a different colour for each item.
Q2. Draw the floor plan as shown in the Figure. Use the proper drafting tools to sketch the plan. Do not hatch or draw the furniture. You need to draw the floor plan with the following:
Note: You can also import the Floor_Plan.pdf into your current drawing and start working on the project. You need to scale the imported pdf file using reference option. All dimensions are in mm.
- Walls (Exterior and Interior)
Wall Thickness: Exterior Wall- 230mm, Interior Wall: 150 mm (Wherever Required)
- Doors and Windows: Assume the size of the doors and window.
2.1 Stairs: Tread-300mm, Riser-150mm
- Insert Text wherever required
- Insert the dimensions using proper dimension techniques
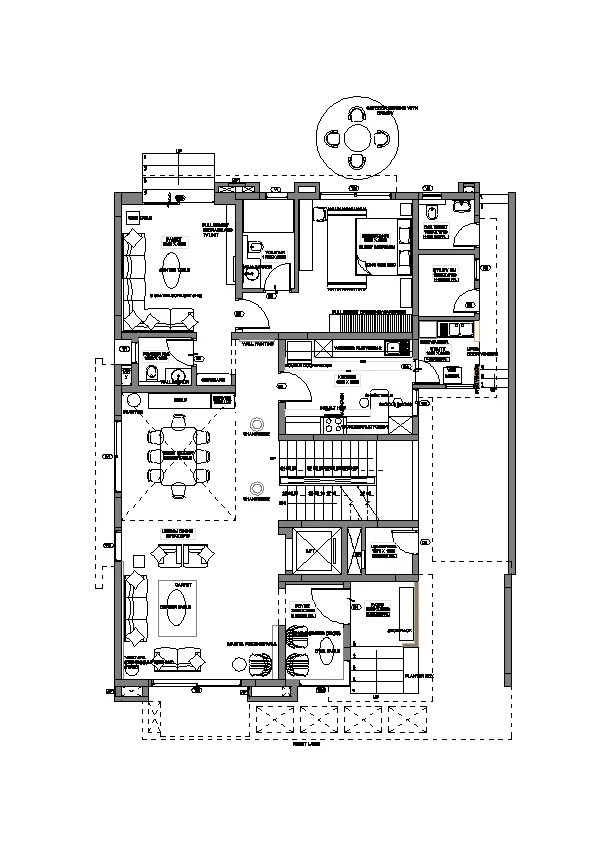
Answer:-
step1:- command a xl line and draw vertical line and again command xl line and draw a horizontal line, the two are trim negative directions and use offset with above daigram have dimensions and draw a residential plan.
step2:- command a circle tool used the door shape.
step3:- command a dimlinear and show the dimensions.
step4:- select the separted parts like walls (exterior, interior), doors , caboards, steps, are select individual and apply a different colour for each item.
Q3. Create the Kitchen Layout as shown in the Figure below. Also, use proper dimension techniques to dimension the kitchen layout. Also, insert text wherever required. All dimensions are in mm.
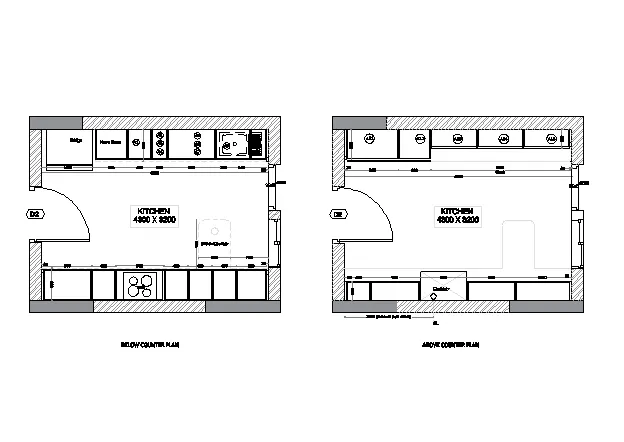
Answer:-
step1:- command a xl line and draw vertical line and again command xl line and draw a horizontal line, the two are trim negative directions and use offset with above daigram have dimensions and draw a residential plan.
step2:- command a circle tool used the door shape.
step3:- command a dimlinear and show the dimensions.
step4:- select the separted parts like walls (exterior, interior), doors , caboards, steps, are select individual and apply a different colour for each item.
Q4. Sketch the column details as shown in Figure. Insert dimensions and text in the figure. Refer to the bar sizes from the schedule.
8mm ---- 0.31 Inches
25mm--- 1 inches
16mm—0.62 inches
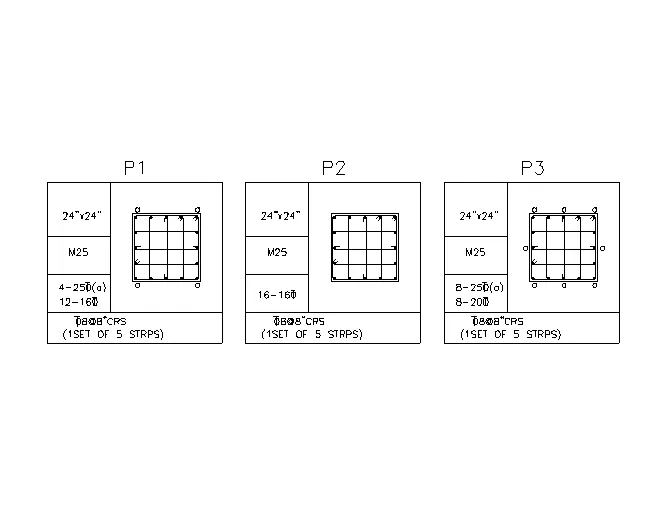
Answer:-
step1:- command a xl line and draw vertical line and again command xl line and draw a horizontal line, the two are trim negative directions and use offset with above daigram have dimensions and draw a residential plan.
step2:- command a circle tool used the door shape.
step3:- command a dimlinear and show the dimensions.
step4:- select the separted parts like walls (exterior, interior), doors , caboards, steps, are select individual and apply a different colour for each item.
Q 5. Draw the Raft Layout as shown in the Figure. Assume the column size as per your knowledge. You can take the sizes as: 24”x24”, 9” x 24”, 9” x 18”, and 9’ x 24”. You can import the raft_foundation.pdf to ensure the missing dimensions.
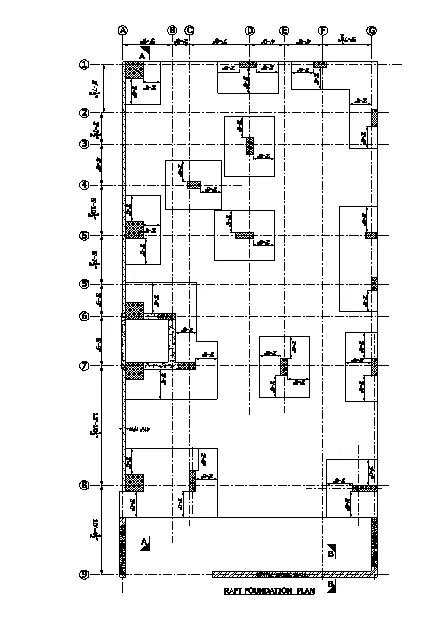
Answer:-
step1:- command a xl line and draw vertical line and again command xl line and draw a horizontal line, the two are trim negative directions and use offset with above daigram have dimensions and draw a residential plan.
step2:- command a circle tool used the door shape.
step3:- command a dimlinear and show the dimensions.
step4:- select the separted parts like walls (exterior, interior), doors , caboards, steps, are select individual and apply a different colour for each item.