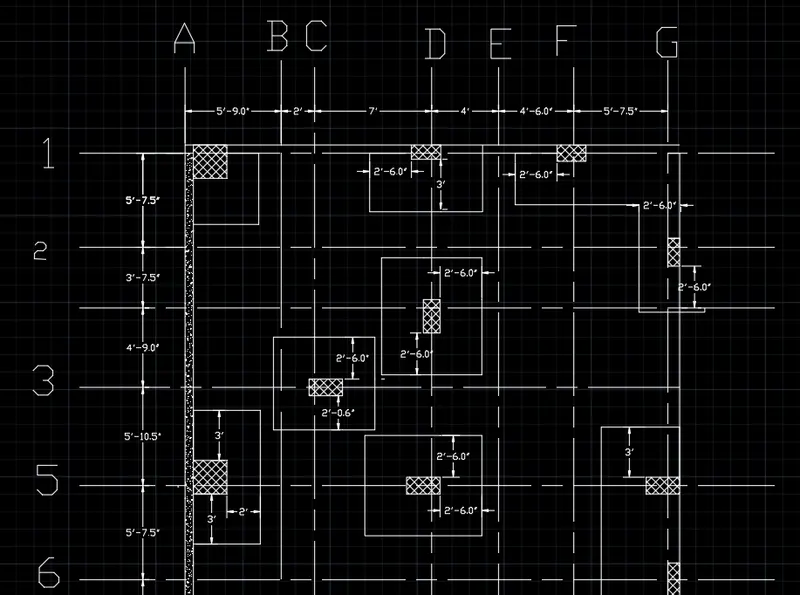
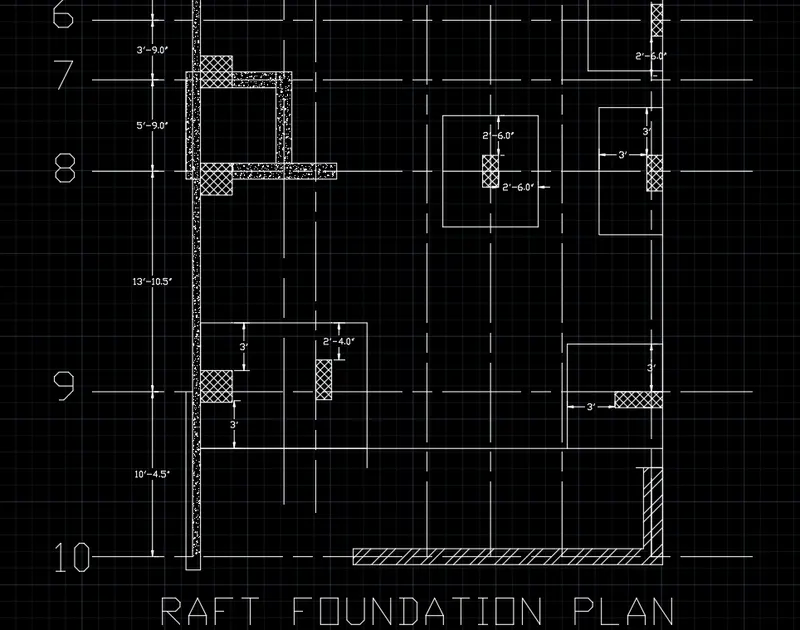
Creating a Wardrobe detailed drawing, Floor Plan, Kitchen Layout and Column Detail using AutoCad
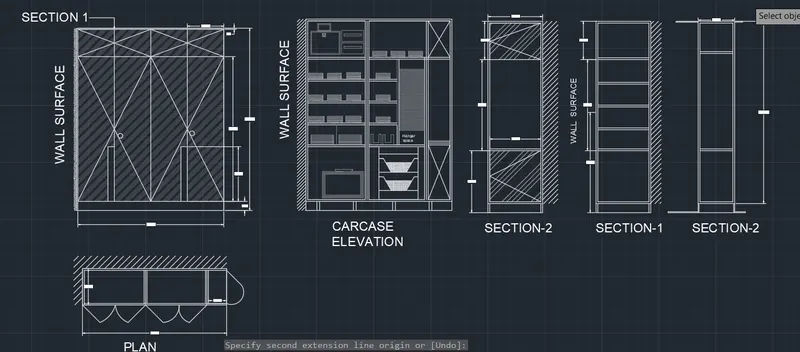
1.AIM: To draw the elevation and details of a wardrobe as shown in the figure.
PROCEDURE:
STEP 1
- In the command box type units and set to mm.
- In the command box type limits and lim-max are also set.
- In the command box type zoom
- In the command box type rec 1000X800
- In the command box type offset
- In the command box type dim of offset 6
- In the command box type offset and a distance of 200
- In the command box type hatch and specify one
- go to properties and select the transparent for hatch
- In the command box type dimensions and text
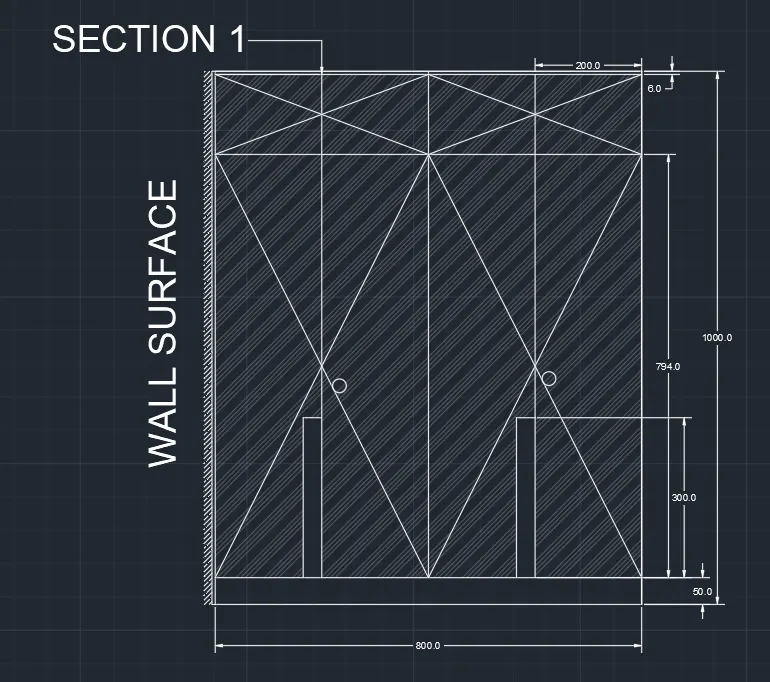
STEP 3:
- In the command box type rec and specify the dimensions 800X200
- In the command box type offset.
- And give the distance.
- In the command box type HATCH at the wall surface.
- In the command box type dimensions and text.
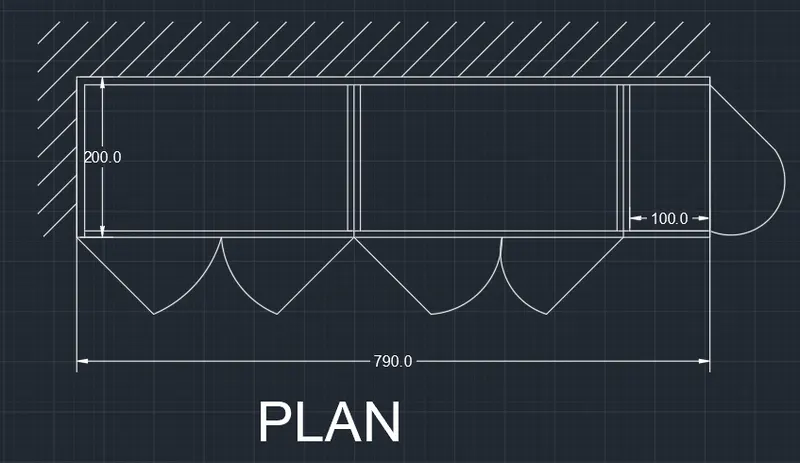
STEP 4:
- In the command box type rec and specify 800X1000
- In the command box type offset
- In the command box type dim of offset 6
- In the command box type offset and a distance of 200
- In the command box type hatch at the wall surface.
- go to properties and select the transparent for hatch
- In the command box type dimensions and text
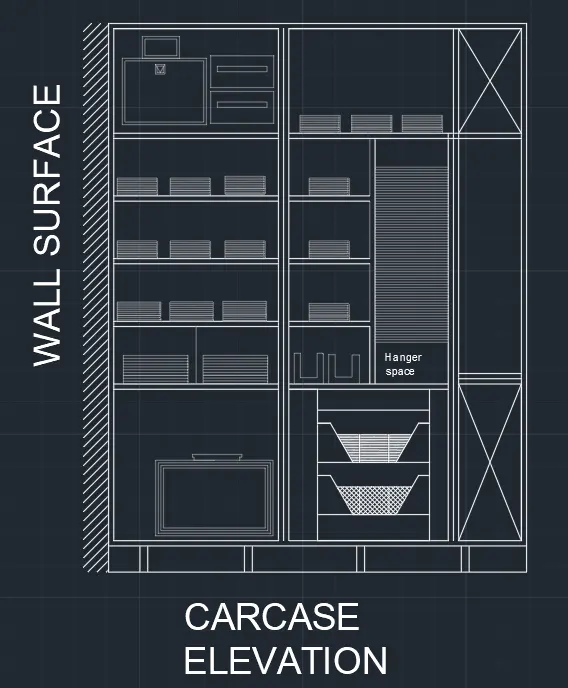
STEP 4:
- In the command box type rectangle as 300X100, 300X1000, 200X1000
- In the command box type offset give at specify distance.
- In the command box type dimensions and text.
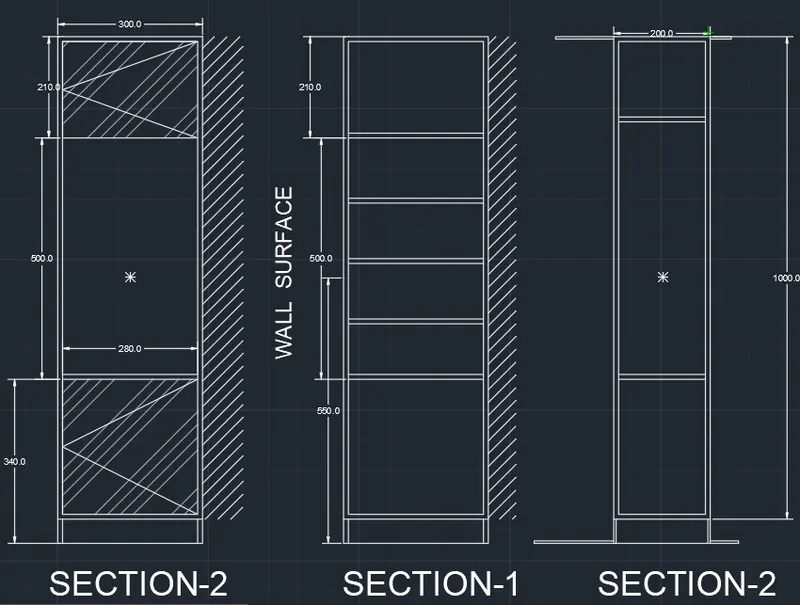
FINAL RESULT:
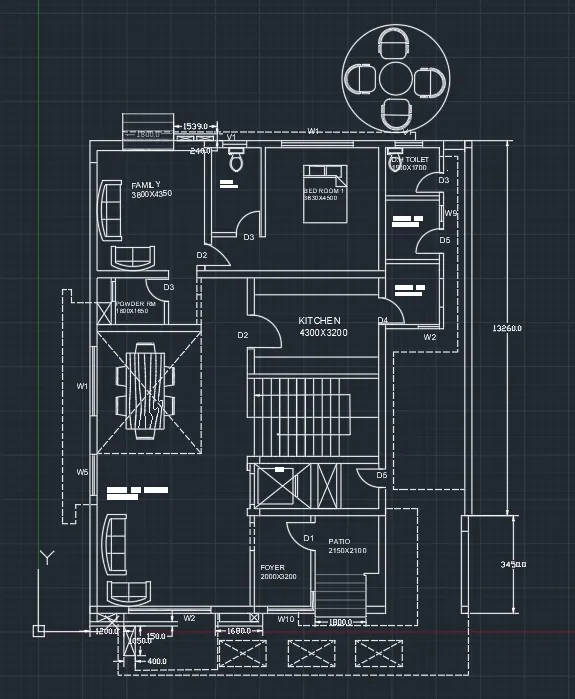
2. AIM: To draw the given floor plan.
PROCEDURE:
- In the command box type units and set to mm.
- In the command box type limits and lim-max are also set.
- In the command box type zoom
- In the command box type XL to draw the lines of horizontal and vertical.
- In the command box type offset the line for a particular distance.
- Using arc command doors are created.
- In the command box type circle.
- By using the circle and rectangle create a seating table.
Doors:
- D1-1000X2000mm
- D2-900X2100mm
- D3-800X2100mm
- D4-750X2100mm
- D5-700X2100mm
- SD-2256X2100mm
Windows:
- W1-2700X1500mm
- W2-2500X1500mm
- W3-900X1500mm
- W5-1000X1500mm
- W9-800X1500mm
Ventilators:
- V1-800x500MM
- V2-750x500mm
RESULT:
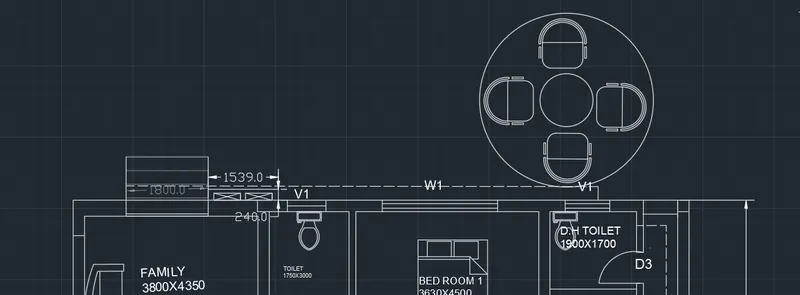
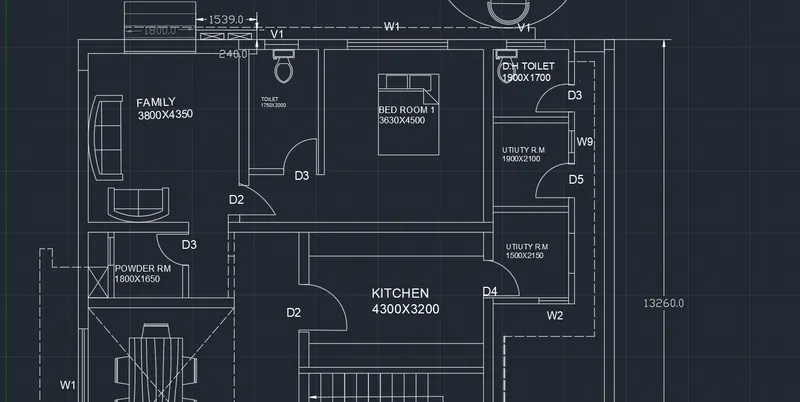
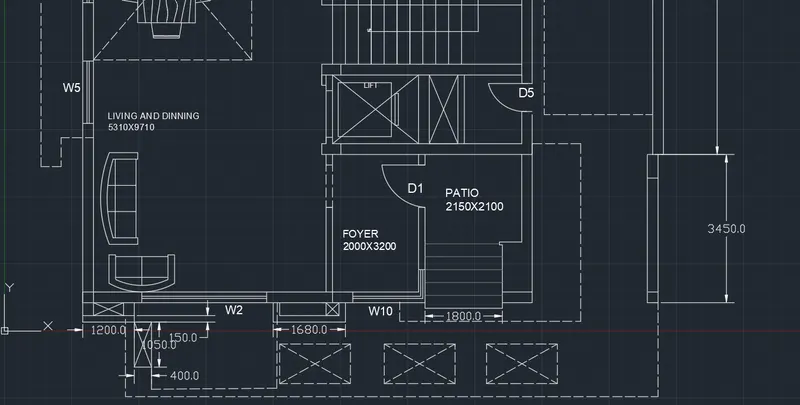
FINAL RESULT:
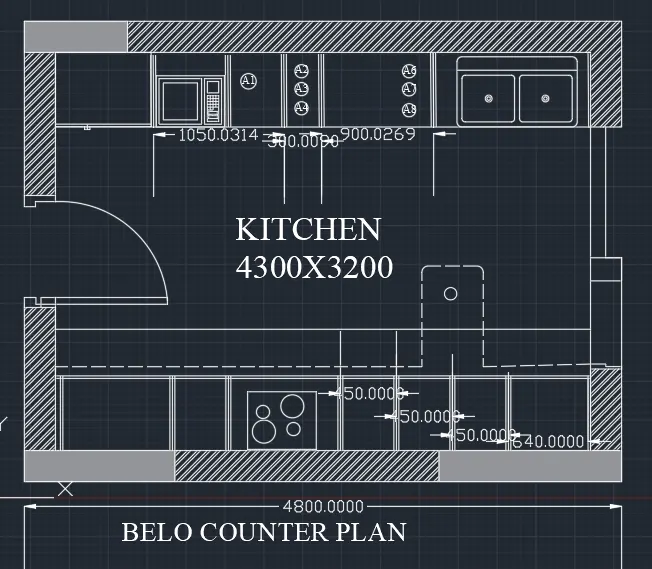
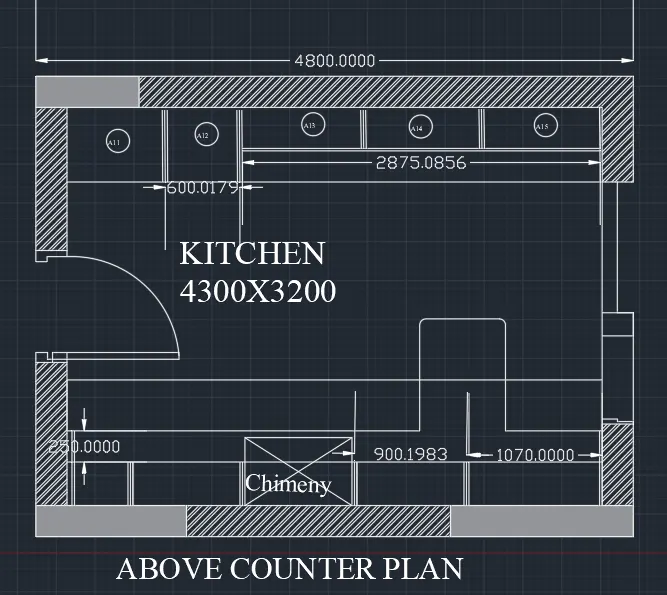
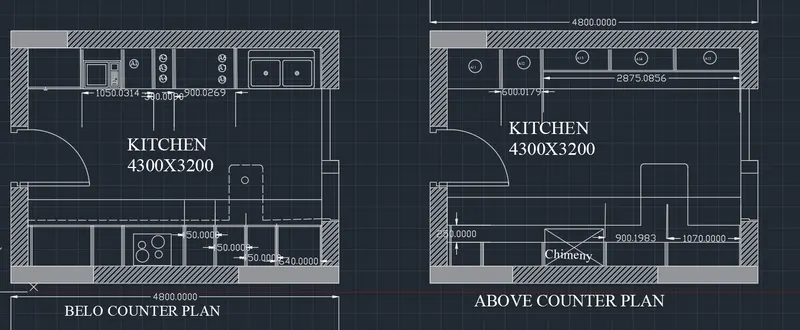
3. AIM: To create the kitchen layout.
PROCEDURE:
- In the command box type units are set to mm.
- Limits and lim-max are also set.
- Zoom command is also used.
- In the command box type rec and the dimensions are 4300x3200
- In the command box type offset and offset is a distance are 250
- In the command box type arc and lines to draw the door.
- In the command box type hatch to hatch the model.
- In the command box type DC and select fridge and micro oven.
- In the command box type offset and offset of horizontal distance of 600mm
- In the command box type offset and offset of vertical distance of 350,450,900,450,450,and 560.
- In the command box type line type and load the dotted line.
- In the command box type text and text the given annotations.
- In the command box type even the leader command is used to name the dimensions.
RESULT:
4. AIM: To sketch the columns:
PROCEDURE:
- In the command box type units are set to feet.
- Limits and Lim-max are also set.
- Zoom command is also used.
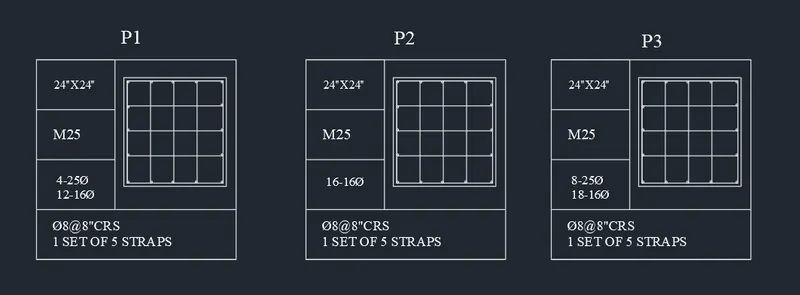
- In the command box type line and create a table.
- using rectangle and line command the table and draw.
- using text command, the text is given.
- In the command type lines to draw the reinforcement.
- In the command box type circles to draw the reinforcement.
RESULT:
5. AIM: To create the raft layout.
PROCEDURE:
- In the command box type units are set to feet.
- Limits and lim-max are also set.
- Zoom command is also used.
- In the command box type rectangle-size-29'-7" and 60'
- To get dotted lines click on line type and load the dotted line and set current.
- With the help of dotted lines give the offset command
- In the command box type Hatch and select the AR-CON.
- In the command box type rec .2'and 2'
- In the command box type rec and draft the columns.
- In the command box type hatch and select -ANS137 for columns.
- In the command box type hatch and select -ANS133 for walls.
- In the command box type dimensions and text'
RESULT: