Creating a Wardrobe detailed drawing, Floor Plan, Kitchen Layout and Column Detail using AutoCad
-
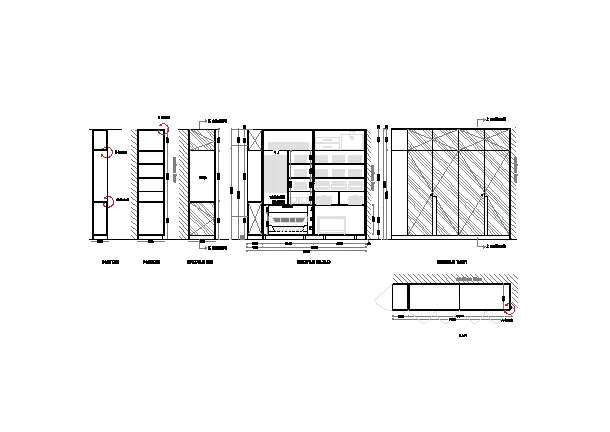
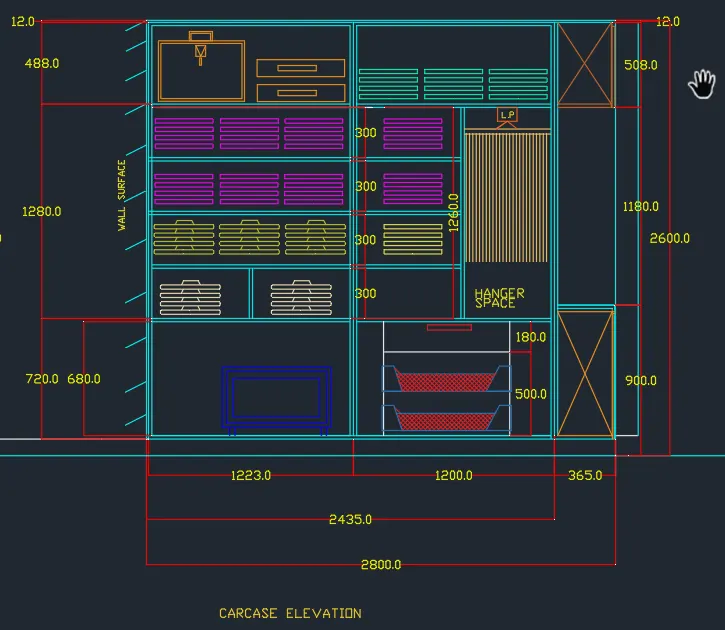
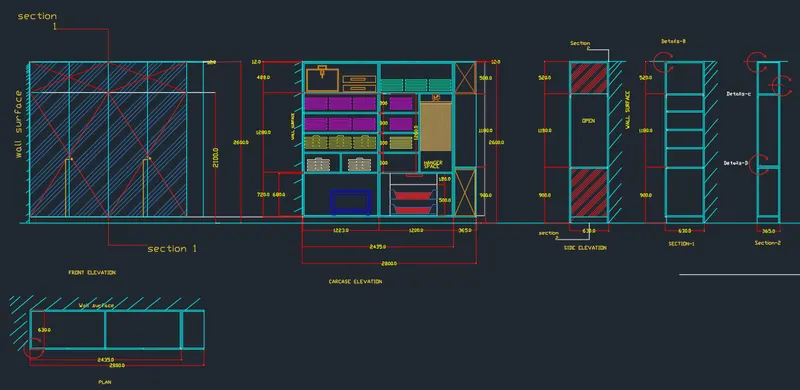
1. Draw the elevation and details of a wardrobe as shown in the Figure below. After sketching, you need to provide the dimensions and text with the use of layers. Use proper text styles and dimension methods to document it. Also, assume dimensions, wherever needed.
Note: All dimensions are in mm.
- SOFTWARE USED : AUTODESK AUTOCAD 2021
- PROCEDURE :
- first the open the software
- give the command QNEW and press the ENTERE key
- click on imperical templete
- select ADVANCE SETUP
- unit : decimal , precision :0.00
- angle :decimal degree , precision :0.00
- angle measure : East
- angle direction : closkwise
- area : 20*20
- and finished , lets start
- Command : limmax and set the limets
- command : z ( for zoom )
- enter A for all
- command : rec (for rectangle )
- length :2800
- width 2600
- press : ENTER
- command : o ( for ofset )
- ofset distance :100 ,488, 12, 640
- and give the ofset
- command :L ( for line )
- and draw the the internal lines
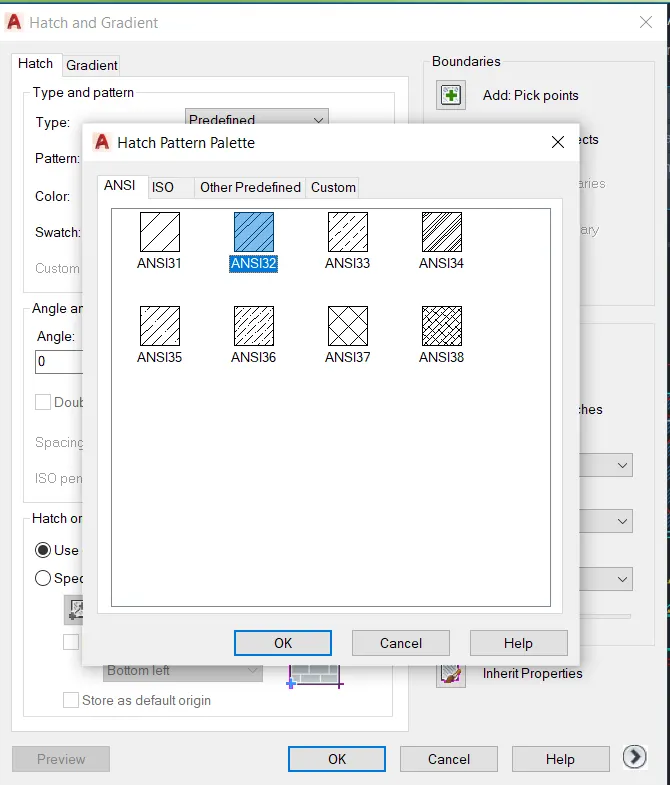
- command : hatch
- select the hatch and give scale of hatch
- press : ENTER
- Command : DIMLIN ( for dimensition )
- give all dimension
- command :DT ( for text )
- write all text
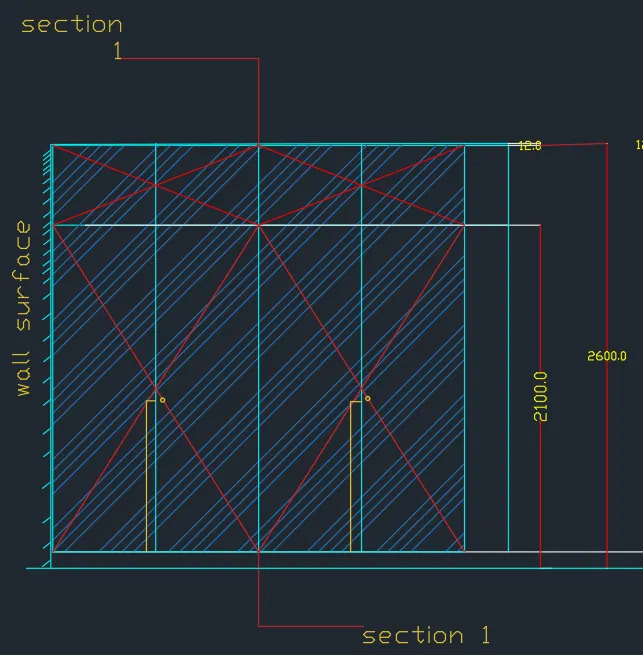
- command : REC ( for rectangle )
- length :2800
- width :2600
- command :o ( for ofset )
- distance :100
- again ofset :
- distance 2435
- then give the 20 mm ofset
- again ofset
- distance : 300 and 20 mm thickness ofset
- then draw the internal parts
- command : DIMLIN ( for the dimension )
- and give the all dimension
- command : DT ( for text )
- write all text
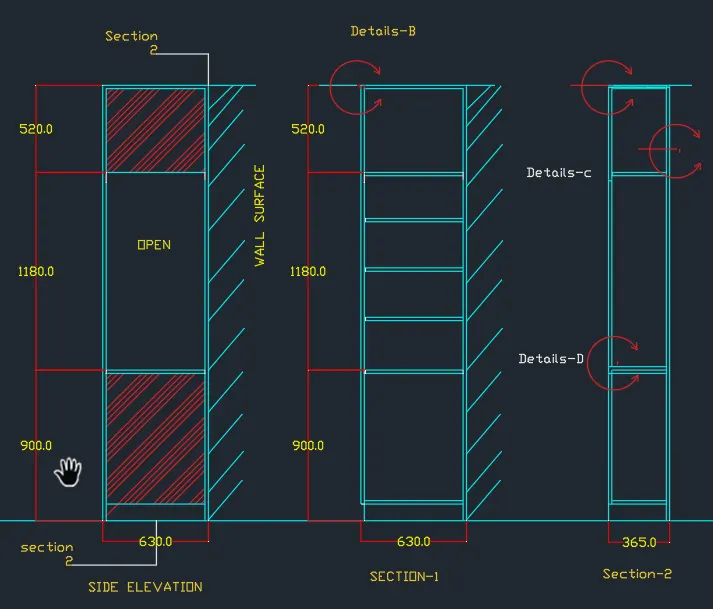
- command : REC ( FOR RECTANGLE )
- length :630
- width :2600
- press :ENTER
- command :o ( for ofset )
- distance :20 mm
- again
- command : o (for ofset )
- distance:900
- command :o
- distance :1180
- command : 0
- distance :520
- command :hatch
- command :DIMLIN (for dimension )
- give the dimension
- command : DT ( for text )
- write all text
- command :REC ( for rectangle )
- length :2800
- width :630
- command :o ( for ofset )
- again ofset
- distance :2435,20,365,20
- command : DIMLIN ( for dimension )
- give all dimension
- command : DT ( for text )
- write all text there
- RESULTS :
- COMMAND USED :
- TEXT : DT
- DIMENSION : DIMLIN
- START : QNEW
- LIMITS : LIMMAX
- UNITS : UN
- TRIAM : TR
- RECTANGLE : REC
- OFSET : O
-
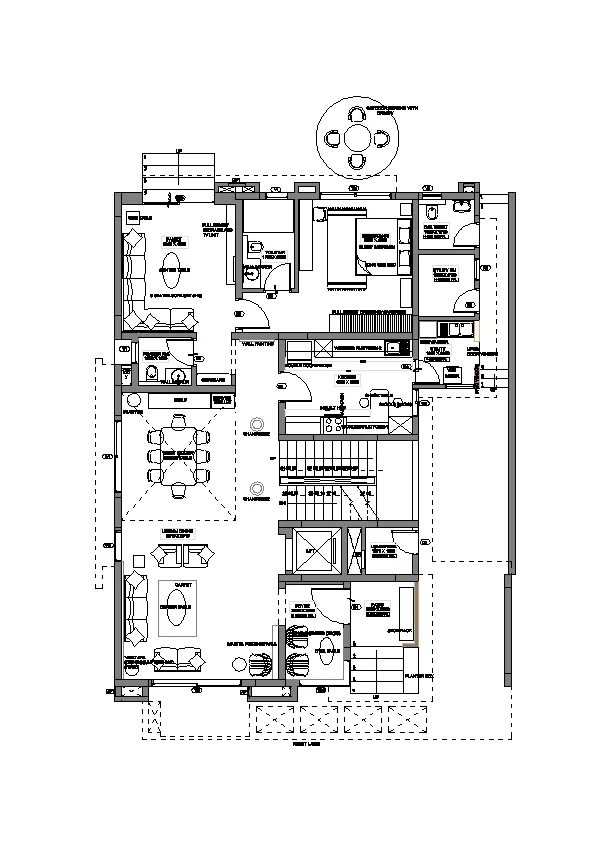
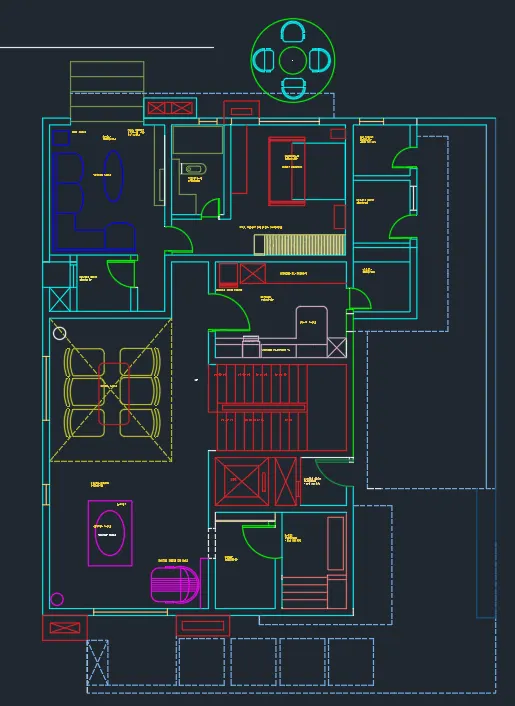
Q2. Draw the floor plan as shown in the Figure. Use the proper drafting tools to sketch the plan. Do not hatch or draw the furniture. You need to draw the floor plan with the following:
Note: You can also import the Floor_Plan.pdf into your current drawing and start working on the project. You need to scale the imported pdf file using reference option. All dimensions are in mm.
- Walls (Exterior and Interior)
Wall Thickness: Exterior Wall- 230mm, Interior Wall: 150 mm (Wherever Required)
- Doors and Windows: Assume the size of the doors and window.
2.1 Stairs: Tread-300mm, Riser-150mm
- Insert Text wherever required
- Insert the dimensions using proper dimension techniques
- SOFTWARE USED : AUTODEST AUTOCAD 2021
- PROCEDURE :
- first the open the software
- give the command QNEW and press the ENTERE key
- click on imperical templete
- select ADVANCE SETUP
- unit : decimal , precision :0.00
- angle :decimal degree , precision :0.00
- angle measure : East
- angle direction : closkwise
- area : 20*20
- and finished , lets start
- Command : limmax and set the limets
- command : z ( for zoom )
- enter A for all
- command : XL
- mark horizontal and vertical lines
- command : O ( for ofset)
- distance :230
- again ofset :
- distance :5310 and 230
- command : ofset
- distance :9710 and 230
- draw the furtinature
- also draw window
- command : tr ( for triam )
- triam the extra lines
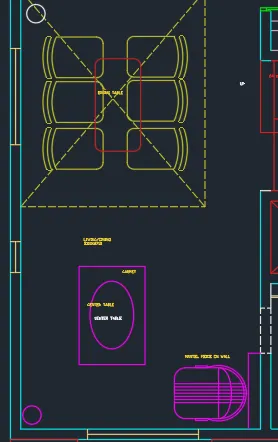
- command : O ( FOR OFSET )
- Distance : 1800, 230
- ofset :
- distance :1650, 230
- draw the window and internal part
- command : c ( for circle )
- mode 2 point circle
- and draw the door portion
- command : tr ( for triam )
- and erase the extra part
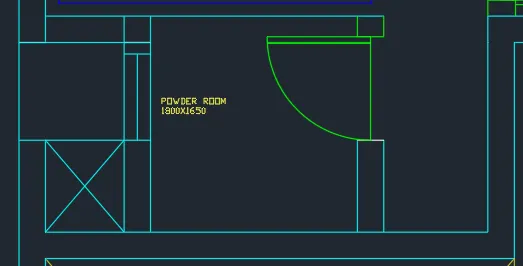
- command : o (for ofset )
- distance : 3880 ,230
- command : o ( for ofset )
- distance :4350, 230
- draw the interior part
- command : tr ( for triam )
- for extra parts
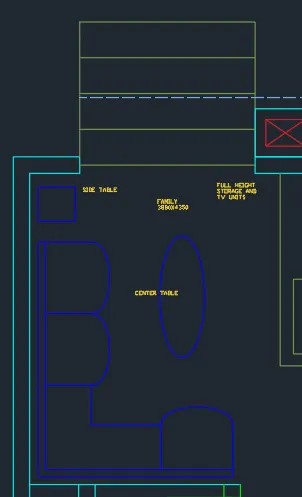
- command : o ( for ofset )
- distance :1175 and 230
- again ofset :
- distance 300 , 230
- command : c ( for circle )
- and draw the door
- command : tr ( for triam )
- remove extra
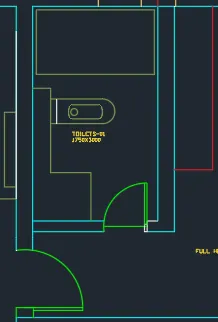
- command : o ( for ofset )
- distance :3830,230
- command : o
- distance : 4500 ,230
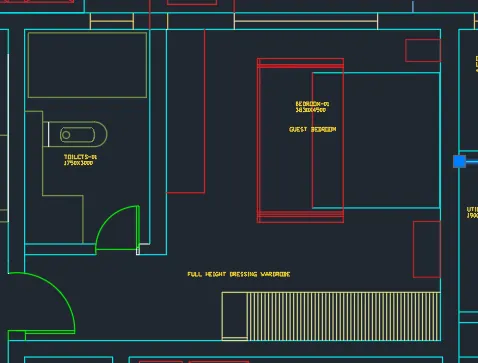
- draw the window of bed room
- and also furniture
- command : tr ( for triam )
- triam the extra parts
- command : 0 ( for ofset )
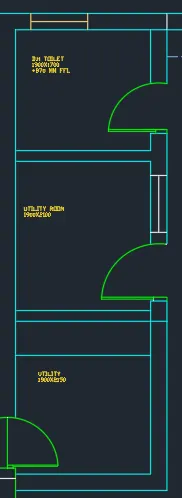
- distance :1900,230
- again command : o
- distance :1700 ,230
- again distance :1900,2100,1900,2150
- and draw the toilets and other utilites
- command : tr ( for triam )
- remove the extra lines
- command : c( for circle )
- for doors and draw the doors
- extract the extra lines by using triam command
- command : o ( for ofset )
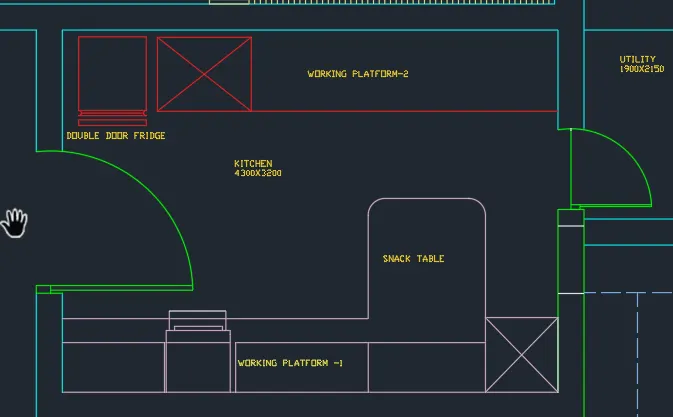
- distance :4300 ,3200 230,230
- for kitchen
- command : c ( for circle )
- for doors part
- also draw the furniture and kitchen
- command : O ( for ofset )
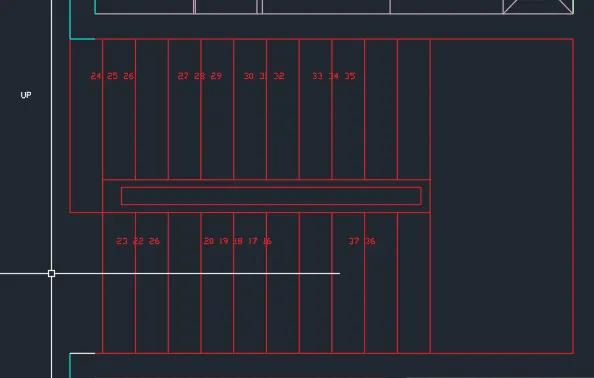
- distance : 300 select MUILTIPLE option
- and give the ofset
- for staircase portion
- command :0( for ofset )
- distance : 1570,230,1600,230
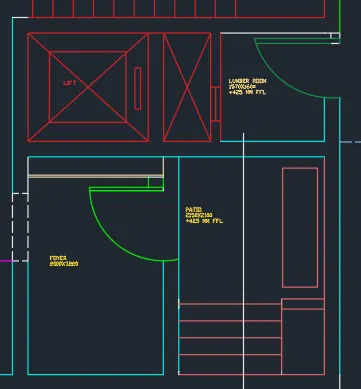
- and draw the lift and lumbeer room
- again
- command : o ( for ofset )
- distance :2000,230,3220,230
- command : c ( for circle )
- for doors
- command : tr ( for triam )
- triam the extra lines
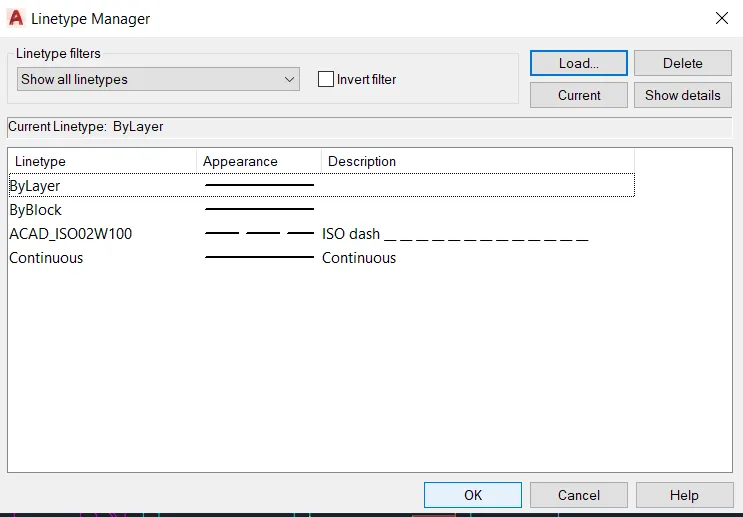
- go to the ribben click on line type
- click on LOAD
- select the dash line
-
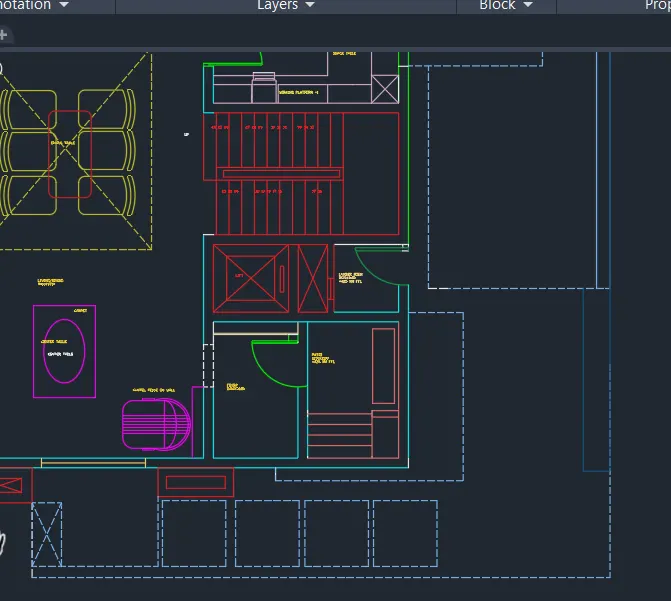
- and draw the dash line portion
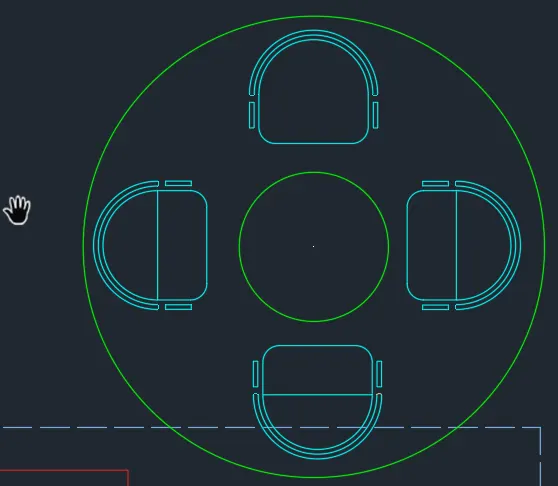
- command : C ( for cirlce )
- mode : circle ,radius
- starting point : midpoint of inner circle
- radius :1398
- press : ENTER
- command : REC ( for rectangle )
- select starting point
- click on DIMENSION
- length :662.3
- width :298
- press :ENTER
- commad : F (filite )
- click on radius
- radius :100
- select the two line and give the filite at a radius of 100
- command : c ( for circle )
- mode : 2 point circle
- click on the endpoint of top horizontal line
- and mark the circle
- command : TR ( for triam )
- triam the extra portion
- comamnd : c ( for circle )
- mode : circle ,diameter
- click on midpoint of topline of rectangle
- diameter :719
- again
- command :C ( for circle )
- starting point : midpoint of top horizontal line
- diameter : 777.2
- mark a circle :
- command : TR ( for triam )
- triam the extra and half circle
- then
- command : F ( filite )
- mode :blend curves
- and give the filite
- command : REC ( rectangle )
- click on DIMENSION
- lenght :155.2
- width :27.3
- use the copy and rotate the command
- place this rectangle below the filite
- again
- select the object and rotate and place the iner size of large circle
- RESULTS :
- COMMAND USED :
- START : QNEW
- UNITS : UN
- LIMIT : LIMMAX
- COMMAND : XL
- CIRCLE : C
- TRIAM : TR
- ERASE : ER
- RECTANGLE : REC
- LINE : L
- DT : TEXT
- DIMLIN : DIMENSION
-
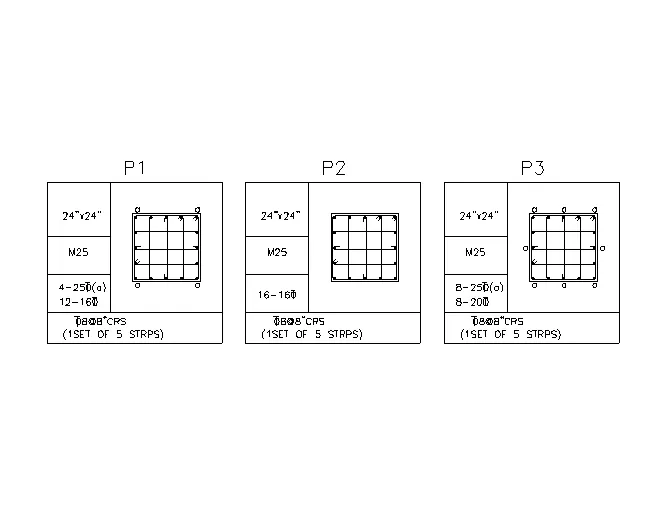
Q4. Sketch the column details as shown in Figure. Insert dimensions and text in the figure. Refer to the bar sizes from the schedule.
8mm ---- 0.31 Inches
25mm--- 1 inches
16mm—0.62 inches
- SOFTWARE USED : AUTODESK AUTOCAD 2021
- PROCEDURE :
- first the open the software
- give the command QNEW and press the ENTERE key
- click on imperical templete
- select ADVANCE SETUP
- unit : ENGINEERING , precision :0.00
- angle :decimal degree , precision :0.00
- angle measure : East
- angle direction : closkwise
- area : 100',100'
- and finished , lets start
- Command : limmax and set the limets
- command : z ( for zoom )
- enter A for all
- Command : XL
- and draw the vertical and horizontal line
- command : o (for ofset )
- Distance :2" and 15"
- prepare a table
- command : DT (for line )
- select the point
- height : 3"
- angle :o degree
- write all text

- command : c (for circle)
- mode : Tan tan radius
- radius :3"
- command : MI (for mirror )
- and mirror the circle
- command :DO (DONET)
- INNER DIAMETER :0
- OUTER DIAMETER :6"
- Command : DT (for text)
- give the text to the strips
- RESULTS :
- COMMAND USED :
- START : QNEW
- UNITS : UN
- LIMETS : LIMMAX
- ZOOM : Z
- TEXT : DT
- COMMAND : XL
- DONUT : DO
- RECTANGLE : REC
- OFSET : O

-
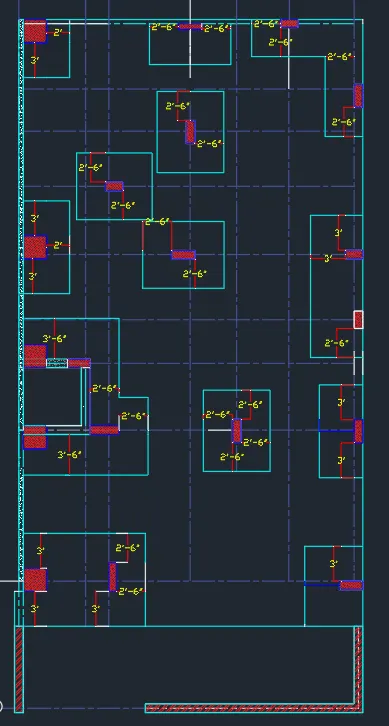
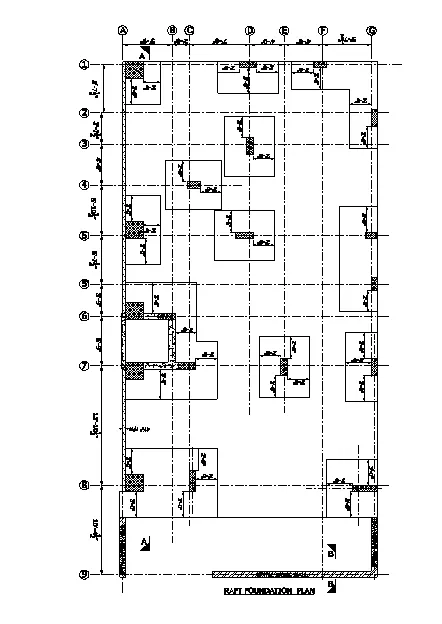
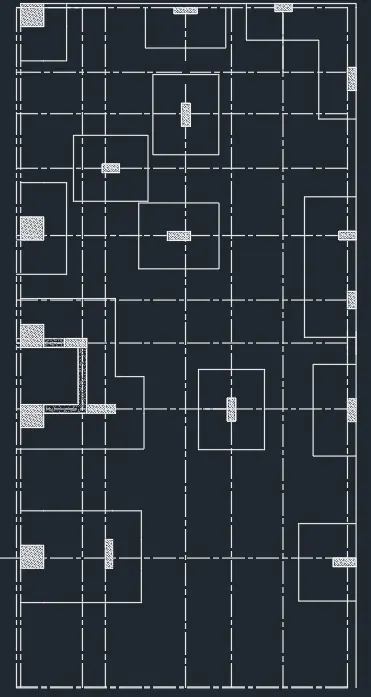
Q 5. Draw the Raft Layout as shown in the Figure. Assume the column size as per your knowledge. You can take the sizes as: 24”x24”, 9” x 24”, 9” x 18”, and 9’ x 24”. You can import the raft_foundation.pdf to ensure the missing dimensions.
- SOFTWARE USED : AUTODESK AUTOCAD 2021
- PROCEDURE :
- first the open the software
- give the command QNEW and press the ENTERE key
- click on imperical templete
- select ADVANCE SETUP
- unit : ARCHITECTURAL , precision :0'-0"
- angle :decimal degree , precision :0.00
- angle measure : East
- angle direction : closkwise
- area : 20*20
- and finished , lets start
- Command : limmax and set the limets
- command : z ( for zoom )
- command :xl
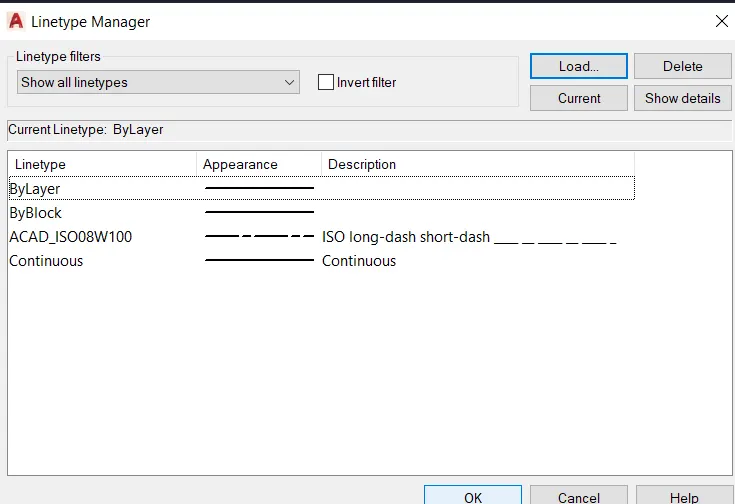
- first go to the line proporties
- click on load
- select the dach line
- press :ENTER
- Command : o (for ofset )
- give the all ofset distence as per the plan
- command :REC ( FOR rectangle )
- rectance for column
- column size used :
- 9",18"
- 24",24"
- 9",24"
-
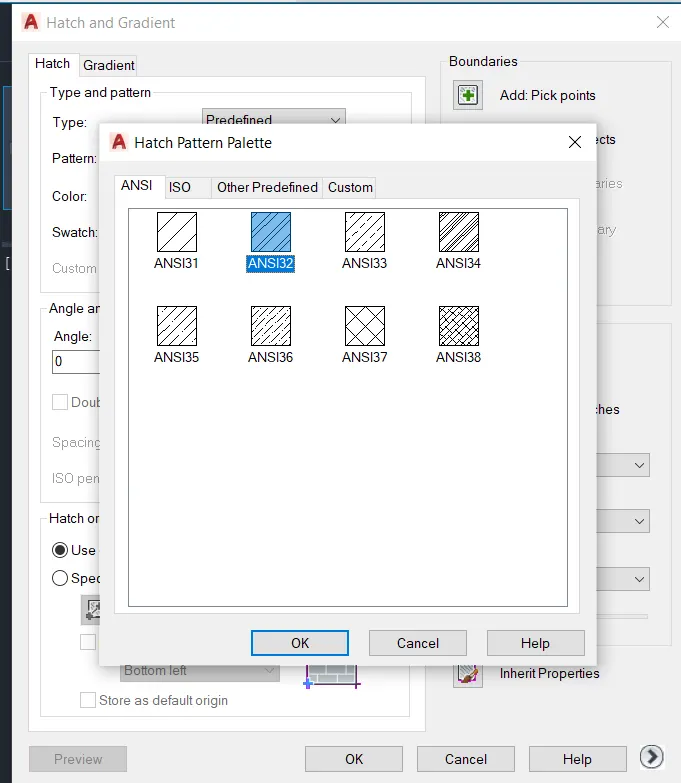
- command : hatch
- and give the hatch to the all columns
- command :DIMLIN ( FOR DIMENSION )
- give all dimension to the all columns
- RESULTS :
- CPMMAND USED :
- START :QNEW
- UNITS :UN
- LIMETS : IMMAX
- ZOOM : Z
- LINE : L
- COMMAND : XL
- HATCH : HATCH
- DIMENSION : DIMLIN
- RECTANGLE : REC
- TRIEM : TR
- TEXT :DT