Creating a Residence Layout, Seating plan, Toilet and Utility room plan using AutoCad
CHALLENGE 1 :
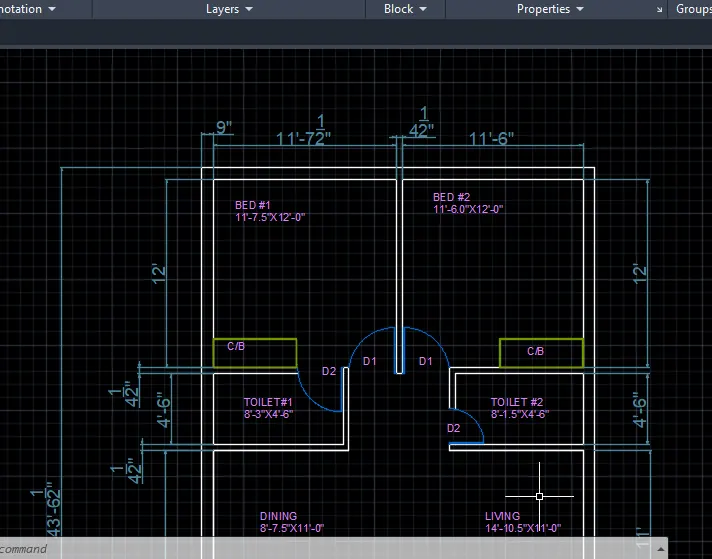
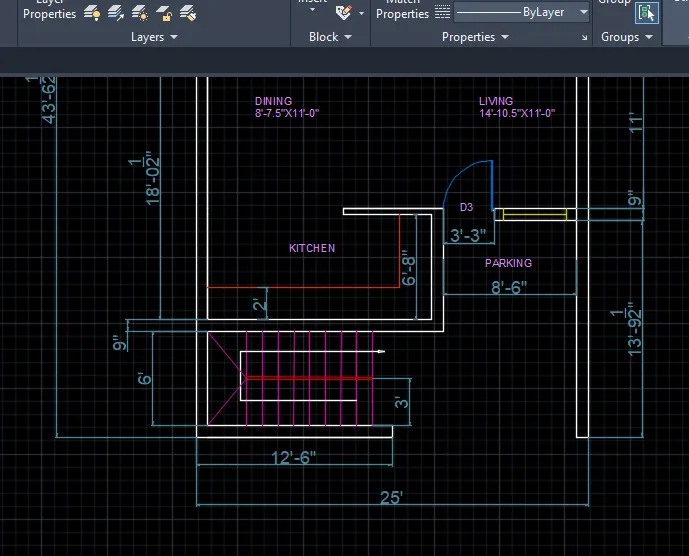
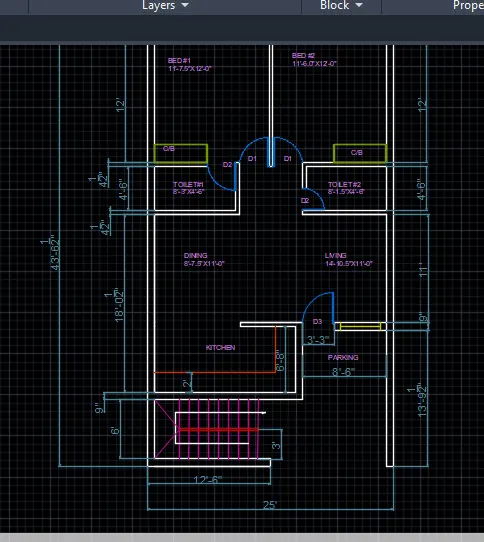
AIM : To Sketch the layout of a residence Considering all dimensions as reference to sketch the unit plan.
PROCEDURE :
- At first we need to check the units and set them as required
- Then using line "L"command or rectangle "REC" command layout of the plan is sketched
- Now by using offset command "O" the outer walls are drawn
- Using offset "O" command and by considering inner wall thickness as 4.5" and outer wall thickness as 9" also using given room dimensions all the rooms are sketched
- Create new layers so that we can identify all the layers easily (say doors,windows ,stairs, dimensions etc.., )
- Assign differnt colours to all the layers
- Now create doors and windows according to given dimensions
- Stair case is created by using line command and then offset the line as per the steps provided considering equal distance to each step
- Now provide furniture at the specified areas
- Give the dimensions using "DIM" command
- Provide text to specify each room and its dimensions
- Finally ,using snipping tool screen shot the figure .
RESULT:
Sketched the layout of a residence
CHALLENGE 2 :
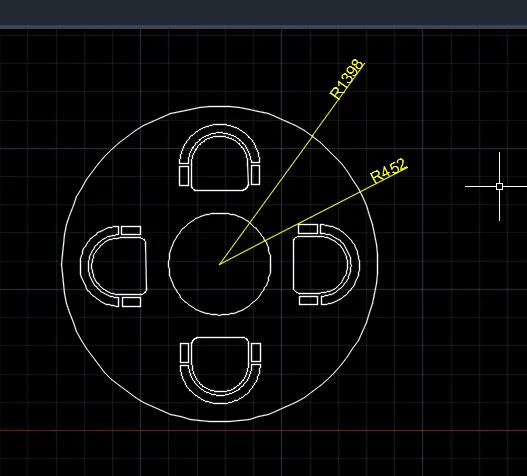
AIM : To Sketch the seating plan for an outdoor canopy. Assuming the dimensions for the seating. Also, considering the dimensions in mm.
PROCEDURE :
- First we need to check the units "UN" enter and set them to decimal
- Then using circle "C" command with reference to radius a circle of radius 452mm is drawn
- With reference to the same centre draw another circle with radius 1398mm using circle command "C".
- Now create seats using fillet "F" tool . Create two lines "L" with distance 500mm .
- Using fillet tool considering radius 250mm join the two lines at the other
- Now by using fillet tool considering radius 50mm fillet both the ends of opposite side
- Offset the upper part of seat at distance 30mm and trim as required
- Copy "CO" the seat and place it in three diffrent points
- By using rotate "RO"and move "M"command place the other seats in the positions as shown in the figure
- Provide the dimensions using "DIM" command
- Finally using snipping tool screenshot the figure
RESULT:
Sketched the seating plan for an outdoor canopy. Assuming the dimensions for the seating. Also, considering the dimensions in mm.
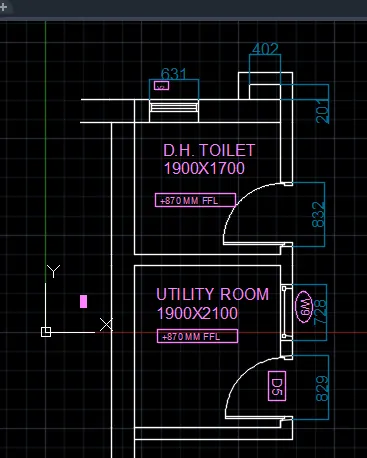
CHALLENGE 3 :
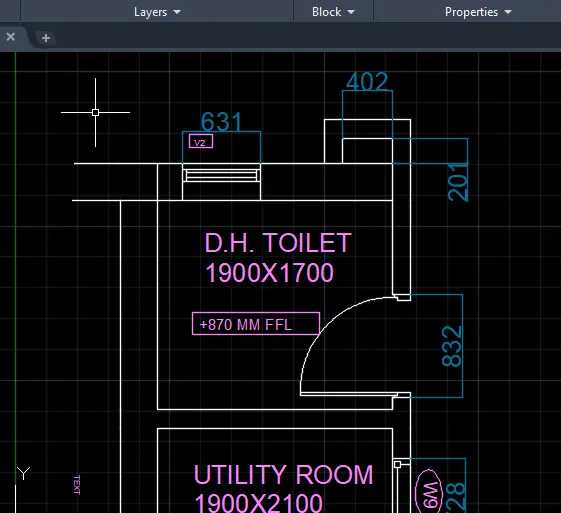
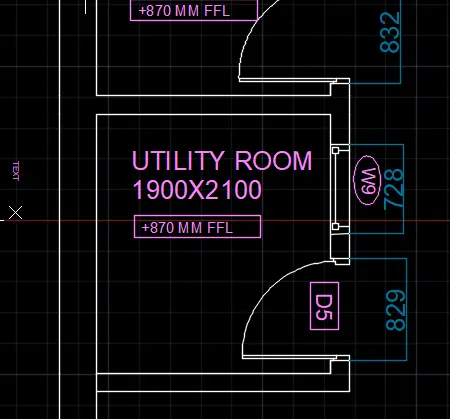
AIM : To Sketch the part plan for the toilers and utilities room.
PROCEDURE :
- First we need to set the units to decimal
- Using line "L" command sketch the out lines of the figure
- Now ,using offset "O" tool considering innerwall thickness as 150mm and outer wall thickness as 300mm sketch the walls and also rooms according to given dimensions .
- Also using Offset "O" and trim "Tr" tools windows are plotted
- Using circle "C" command ,offset "O" and Trim "Tr" command doors are sketched according to the dimensions provided
- Provide dimensions using "DIM" command
- Text is provided using "text" command to specify the Rooms and its dimensions
- Finally, snipping tool is used to screenshot the figure
RESULT :
Sketched the part plan for the toilers and utilities room. Considering the outer wall thickness as 300mm and inner wall thickness as 150mm.