Creating a Residence Layout, Seating plan, Toilet and Utility room plan using AutoCad
1. AIM : To draw the given residential plan with the details given
COMMAND USED :
- Limits
- Zoom
- Xline
- Line
- Dimlinear
- MT Command
- Unit command
- LW command
- Extend command
- Trim command
STEP WISE PROCEDURE :
Step - 1
- Enter the xline command : 10,10
- Draw the line in both x and y axis
- Run command offset (O) and create 9" wall
- Main wall is made of thickness 9"
- Internal wall are made of 4.5" thickness
- Next enter the offset command in the command box, then press enter. And select the lines which we have drawn previously and offset the lines to 9"
- After providing walls, remove the extra lines using the trim command
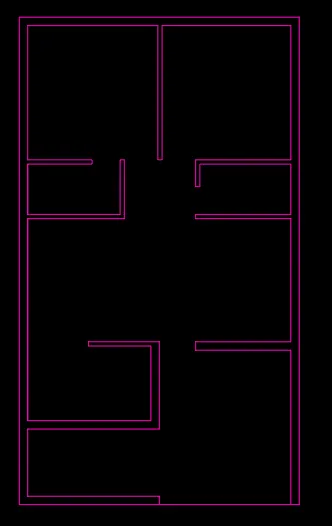
- In the same way offset command is used to partition the rooms, toilet living and dinning hall as per the dimensions given in fig.
Result Step-1
Step - 2
- Draw the stairs left side of parking enterance with 1' tread that is shown in figure clearly
Step - 3
- Next we have to draw the doors with the given dimensions fo D1, D2 and D3
- Provide the dimensions
- Differentiate the wall, doors, window and staircase using different colours and different layers
- Also give the names for the rooms, kitchen, parking and toilets in the residential building
- To provide the names with (MT) command is used
FINAL RESULT :
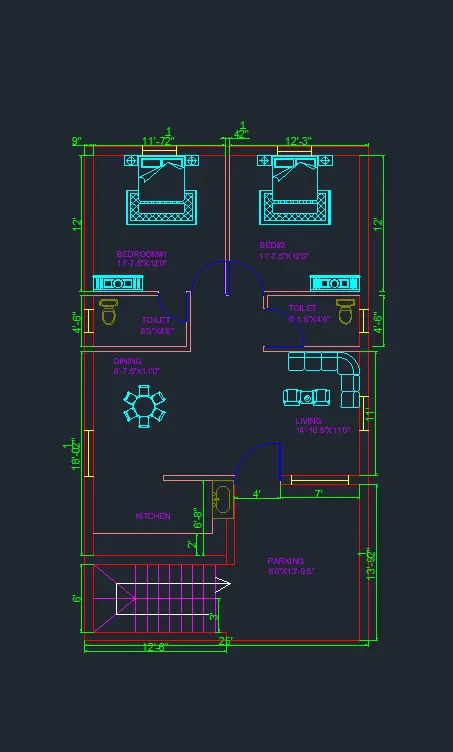
The given residential plan is drawn using autocad
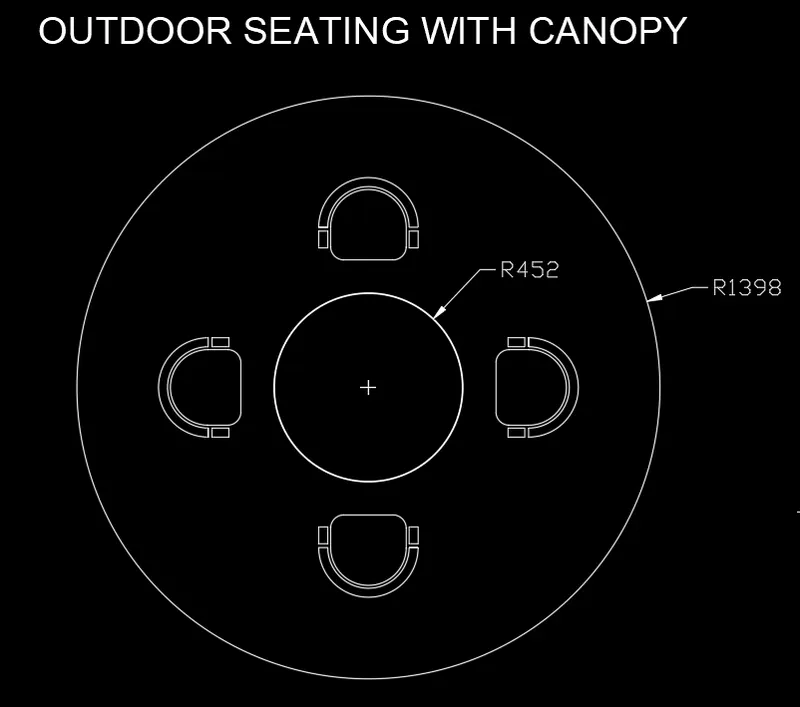
2. AIM : To draw the given seating plan for an outdoor conopy in details
COMMAND USED :
- Limits command
- Zoom
- Circle
- Arc
- Arraypolar
- DIMRADIUS
- Unit
- Text (MT) command
STEP WISE PROCEDURE :
Step -1
- Command : UN
- Units set (Decimal)
- Make a circle using command : C
- Circle
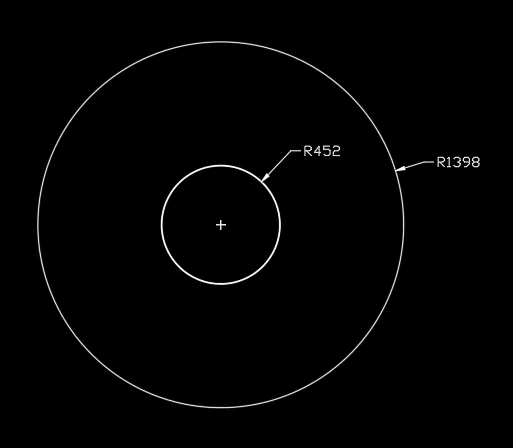
- Specify center point for circle and radius of circle : 1398
- Other circle specify center point of circle radius of circle : 452
Step - 2
- Next here we have to draw the rectangle box inside the first circle (R1398) and outside the circle (R452) then we have to enter the fillet command and select the rectangle corner to fillet it.
- Next we select the ARC command to create are left side of the rectangle and using offset command of multiple arc
- Create a rectangle box of the left side of chair and copy, paste the other side of chair
- Copy the created chair and use arraypolar command
- And providing the number of items as 4 chairs are created as shown below.
Final RESULT :
An outdoor conopy is created as per the details given using autocad
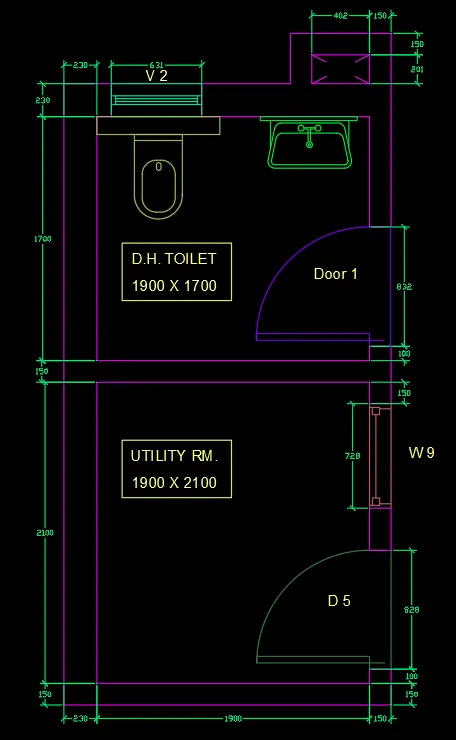
3. AIM : To draw the part plan for the toilet and utilities in details
COMMAND USED :
- Limits command
- Zoom
- Arc
- Unit
- Text (MT) command
- Trim
- Extend
- Fillet
STEP WISE PROCEDURE :
Step - 1
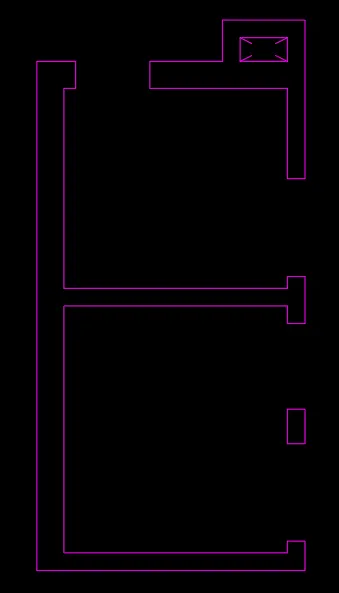
- Enter the xline command and draw the line in both x and y axis
- Make wall thickness is provided as 300mm for the outer wall
- Command : Offset
- Offset Distance : 300
- Make wall thickness for the internal wall are provided as 150mm
- Command : Offset
- Offset Distance : 150
- The Walls are provided as per the dimensions given
- The extra lines are trimmed using TRIM command
Result Step-1
Step - 2
- The Door are provided using line and ARC and C command
- Doors are created as per the dimensions
- The Toilet washbasin is created
- Commands used to create the toilet and washbasin are line, arc, rec, circle, fillet
- Trimmed and extend command wherever required
- Ventilation for the bathroom is created
- Commands used were line, trim, extend
- Text is added to the drawn using MT command
- Dimensions of the washroom is provided
- Window for Utility room is created
- Commands used were line, trim, rec
- All size are mensioned as per drawing
- Differentiate the wall, doors, window, toilet, washbesin, using different colours and different layers
FINAL RESULT :
As per the given plan of the toilet andutilities are crated successfully using Autocad.