Creating a Residence Layout, Seating plan, Toilet and Utility room plan using AutoCad
1. Aim: To sketch the layout of a residence building.
Procedure:
Step1:
- open AutoCAD.
- In the command box type QNEW-IMPERIAL TEMPLATE
- In the command box type UNITS-ENGINEERING -PRECISION-0'-0"
- In the command box type LIMMAX-100'-100'
- In the command box type LIMITS-0',0'-UPPER RIGHT CORNER-70'70'
- In the command box type ZOOM-A
Step2:
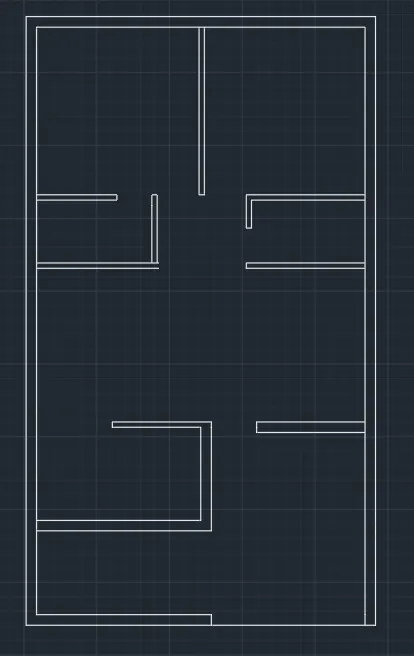
Exterior and interior walls:
- In the command box type XL-horizontal.
- In the command box type XL-vertical
- In the command box type TRIM to trim the excess line.
- In the command box type offset-distance 9.0" for vertical and horizontal lines.
- In the command box type TRIM to trim the excess line.
- In the command box type offset-distance 6' for horizontal line
- In the command box type offset-distance 0.9 for horizontal line.
- In the command box type offset-distance 6'-8" for horizontal line at the kitchen.
- In the command box type offset-distance 4.5" for horizontal line at the kitchen.
- In the command box type offset-distance 13'-9.5" horizontal line for parking
- In the command box type offset-distance 9" horizontal line
- In the command box type TRIM to trim the excess line.
- In the command box type offset-distance 11' horizontal line for living and parking.
- In the command box type offset-distance 4.5" horizontal line.
- In the command box type offset-distance 4'-6" horizontal line for the toilet
- In the command box type offset-distance 4.5" horizontal line
- In the command box type offset-distance 12" horizontal line for bedroom
- In the command box type offset-distance 9" horizontal line
- In the command box type TRIM to trim excess lines.
- In the command box type offset-distance 11'-7.5" for bedroom1
- In the command box type offset-distance 4.5"
- In the command box type offset-distance 11'-6.0" for bedroom2
- In the command box type offset-distance 9"
- In the command box type offset-distance 8'-3" toilet 1 from left side
- In the command box type offset-distance 4.5"
- In the command box type offset-distance 8'-1.5" toilet 2 from right side
- In the command box type offset-distance 4.5"
- In the command box type offset-distance 11'-3" for kitchen
- In the command box type offset-distance 9"
- In the command box type offset-distance 14'-10.5" from kitchen to living
- In the command box type offset-distance 9"
Step2:
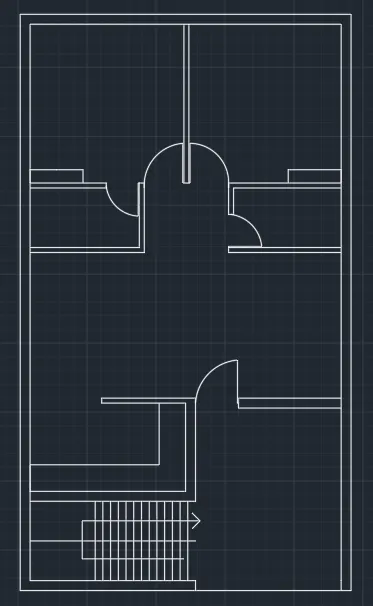
Doors, Staires, windows, slab, and cupboards:
- For doors offset the required distance and draw doors using ARC COMMAND-start, center, length.
- For doors offset required distance and trim the extras.
- The sabs the offset command is used of distance 2'
- and for cupboards rectangle, REC command is a distance of 2'*1'
- In the command box type offset of 3'
- In the command box type offset of distance 7" for showing riser of approx of 12 steps.
Step3:
Text and dimension
- Dimension and text is done by dimension and text command.
Step4:
Layer properties:
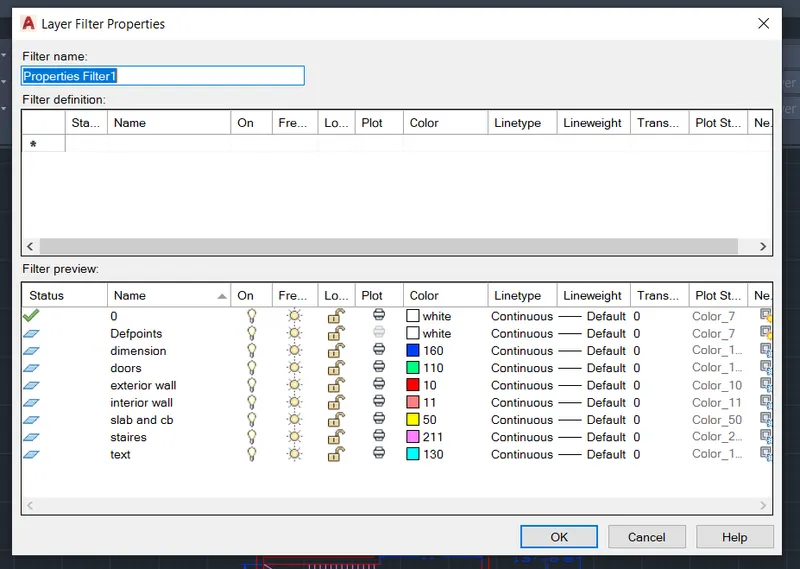
- Go to layer command and specify the new layer and specify that part to these layer
- Change the each layer by colour.
Result:
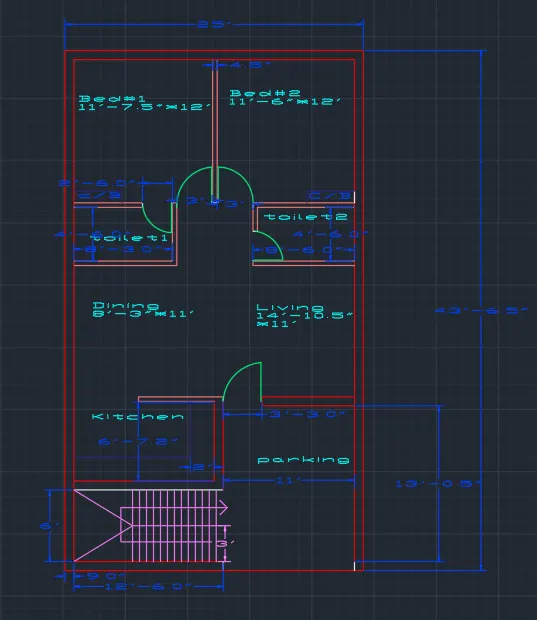
2. Aim: To sketch the seating plan for outdoor with canpoy.
Procedure:
Step1:
- open AutoCAD.
- In the command box type QNEW-IMPERIAL TEMPLATE
- In the command box type UNITS-decimal-PRECISION-0.00
- In the command box type LIMMAX-100'-100'
- In the command box type LIMITS-0',0'-UPPER RIGHT CORNER-70'70'
- In the command box type ZOOM-A
Step2:
Circles:
- In the command box type circle and select center and radius.
- In the command box type specify the point at anywhere
- In the command box type circle radius of 452
- In the command box type circle and select center and radius.
- In the command box type specify the point at the center of the previous circle.
- In the command box type circle radius of 1398
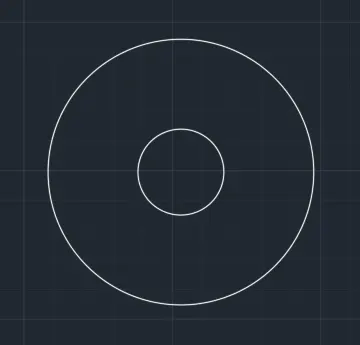
Step3:
chair:
- In the command box type rectangle (REC)
- In the command box type length as 700
- In the command box type width as 320
- In the command box type circle and select as center and radius.
- In the command box type select point at the midpoint of length of the circle.
- In the command box type trim the excess lines
- In the command box type fillet select line of the rectangle
- In the command box type fillet radius as 100
- In the command box type offset of the semi-circle of distance as 50 and width of the rectangle.
- In the command box type trim the excess line
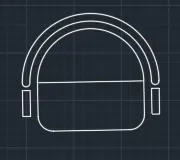
Step4:
- With the help of move, rotate, and copy command align the set in the circles.
Result:
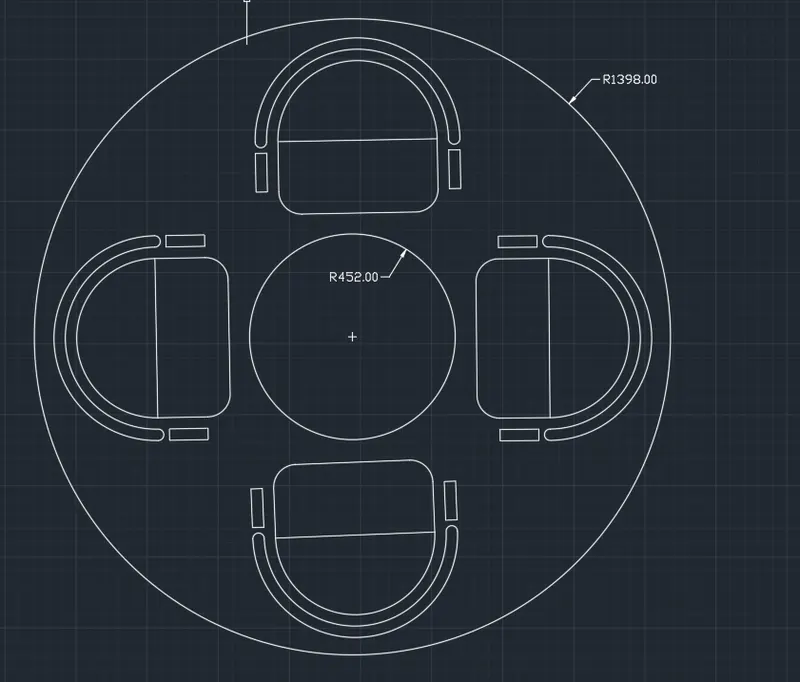
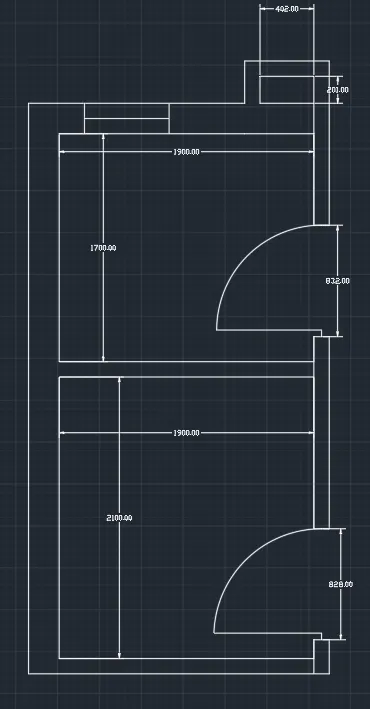
3. Aim: To sketch then plan for toilets and utilities room
Procedure:
Step1:
- open AutoCAD.
- In the command box type QNEW-IMPERIAL TEMPLATE
- In the command box type UNITS-decimal-PRECISION-0.00
- In the command box type LIMMAX-100'-100'
- In the command box type LIMITS-0',0'-UPPER RIGHT CORNER-70'70'
- In the command box type ZOOM-A
Step2:
- In the command box type XL-horizontal.
- In the command box type XL-vertical
- In the command box type TRIM to trim the excess line.
- In the command box type offset-distance 9.0" for vertical line.
- In the command box type offset distance 4.5" for horizontal line
- In the command box type TRIM to trim the excess line.
- In the command box type offset-distance 1900mm of a vertical line.
- In the command box type offset-distance 4.5"
- In the command box type offset distance 2100 of horizontal line
- In the command box type offset distance 4.5"
- In the command box type offset distance 1700mm of horizontal line
- In the command box type offset distance 9"
- In the command box type trim the excess lines.
- In the command box type offset distance 201mm of horizontal line
- In the command box type offset distance 4.5"
- In the command box type offset distance 405mm of vertical line from right side
- In the command box type offset distance 4.5"
- In the command box type trim the excess lines
- In the command box type offset 828mm for door 1
- In the command box type offset 832mm for door 2
- In the command box type arc and select the start, center length and make doors
Resuit: