Creating a Layout, Section and Elevation with dimensions using AutoCad
-
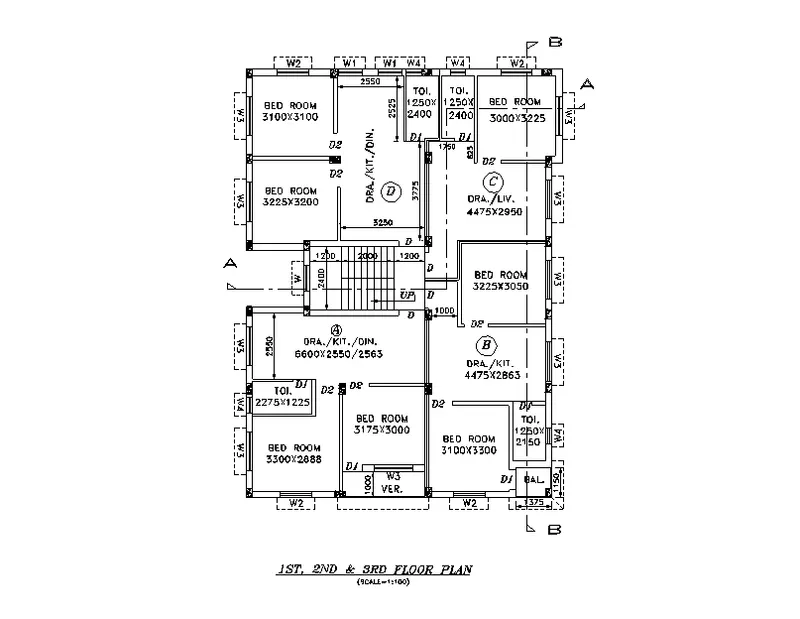
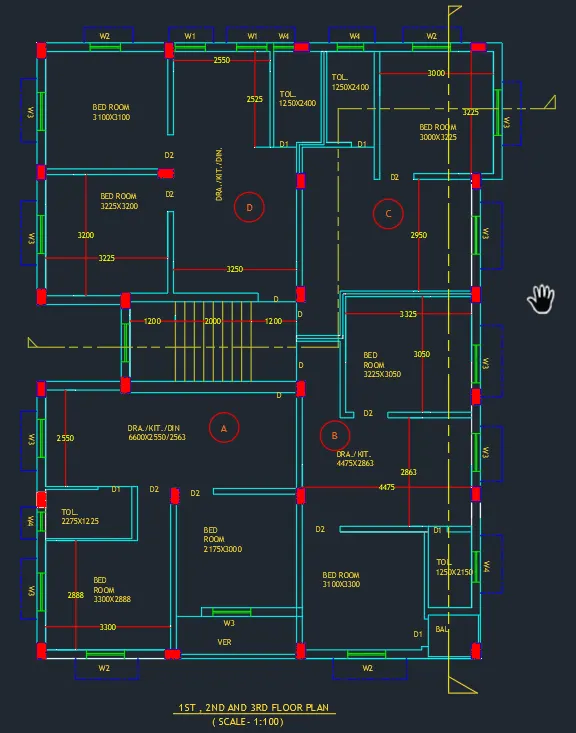
1. Create the Plan and Sections as shown in the Figures. Use proper dimension techniques and dimension styles to document the project. Assume the sizes of the doors and windows as per construction standards. Refer to sections for stair details if required
-
- SOFTWARE USED : AUTODESK AUTOCAD 2021
PROCEDURE :
- first the open the software
- give the command QNEW and press the ENTERE key
- click on imperical templete
- select ADVANCE SETUP
- unit : decimal , precision :0
- angle :decimal degree , precision :0.00
- angle measure : East
- angle direction : closkwise
- area : 20*20
- and finished , lets start
- Command : limmax and set the limets
- command : z ( for zoom )
- enter A for all
- Command : XL
- and mark horizontal and vertical linecommand : o ( for ofset )
- distance : 230
- mark ofset both horizontal and vertical line
- command : o
- distance : 3300, 230
- command : o
- distance : 2888 , 150
- command : o
- distance : 2275,150
- command : o ( for ofset )
- distance : 1225,150
- command : TR ( for triam )
- triam the extra part
- command : o
- distance : 3175,150
- command : ofset
- distance : 3000 ,150
- command : o
- distance : 6600,150
- command : o ( for ofset )
- distance : 2563
- command : tr ( for triam )
triam the extra portion 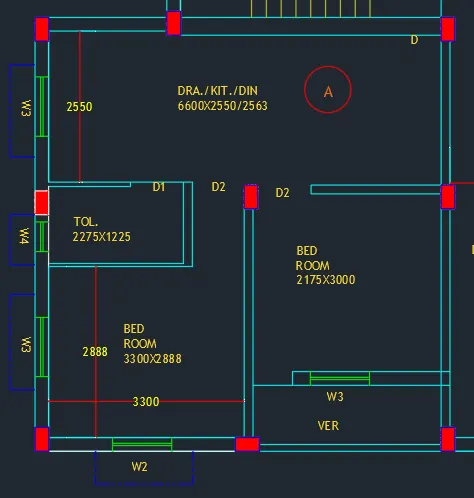
- command : o (for ofset )
- distance : 2400 and 230
- again
- command : o ( for ofset )
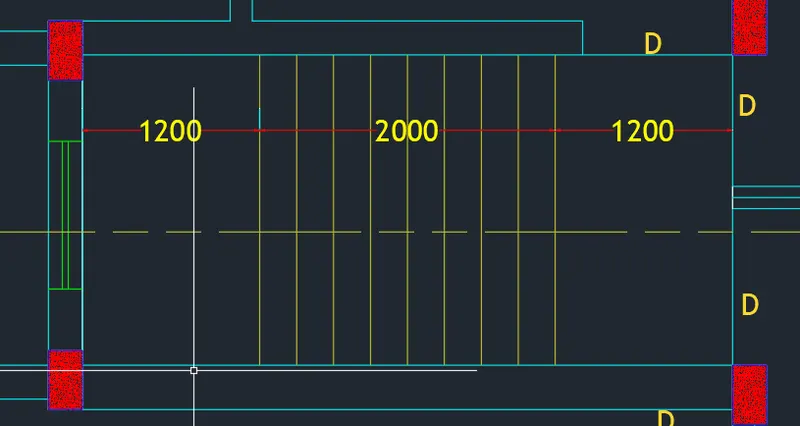
- distance : 250
- select MULTIPLE option and mark 9 lines for staircase
- command : o ( for ofset )
- distance : 3225,150
- command : o
- distance : 3200,150
- command : o
- distance : 3100,230
- command : o ( for ofset )
- distance : 3100,150
- command : ofset
- distance : 3250,150
- command : ofset
- distance : 2550,150
- command : TR ( for triam )
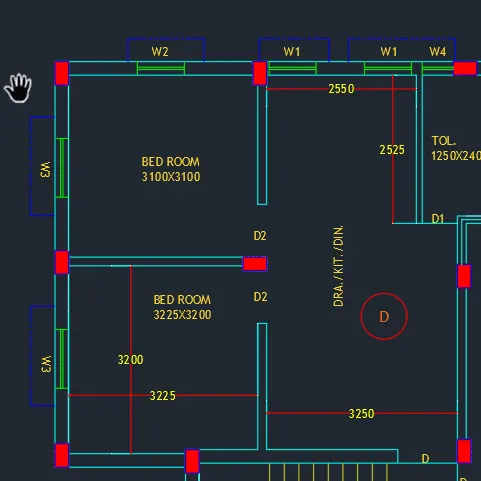
- command : o (for ofset )
- distance : 1250,150
- command : o (for ofset )
- distance : 2400
- again same distace mark for another toilet unit
- command : o (for ofset )
- distance : 3000,230
- command : ofset
- distance : 3225,150
- command : o (for ofset )
- distance : 4475,230
- command : o (for ofset )
- distance :2950,150
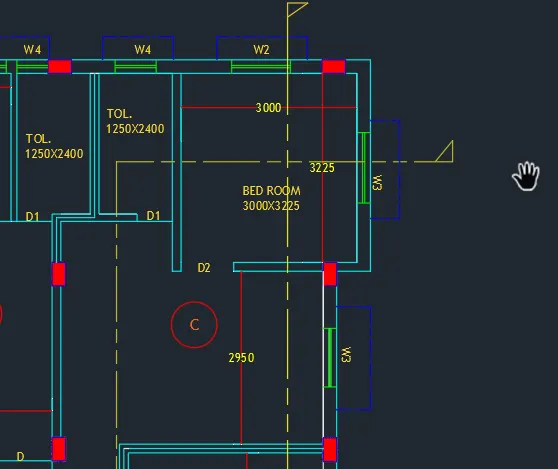
- command : o (for ofset )
- distance : 3225,150
- command : o
- distance : 3050,150
- again ,
- command : o (for ofset )
- distance : 4475,230
- command : ofset
- distance : 3100,150,
- then draw the toilet portion
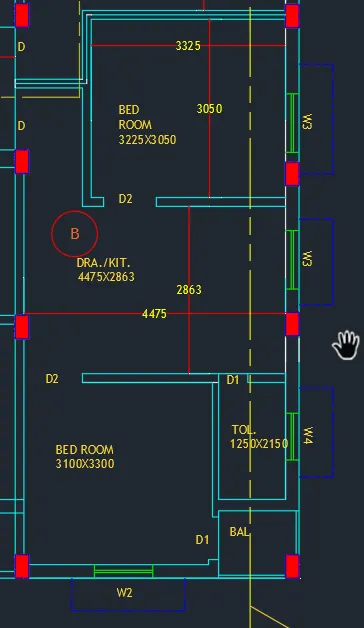
- command : REC (for rectangle )
- length 230
- width 400
- for column selction
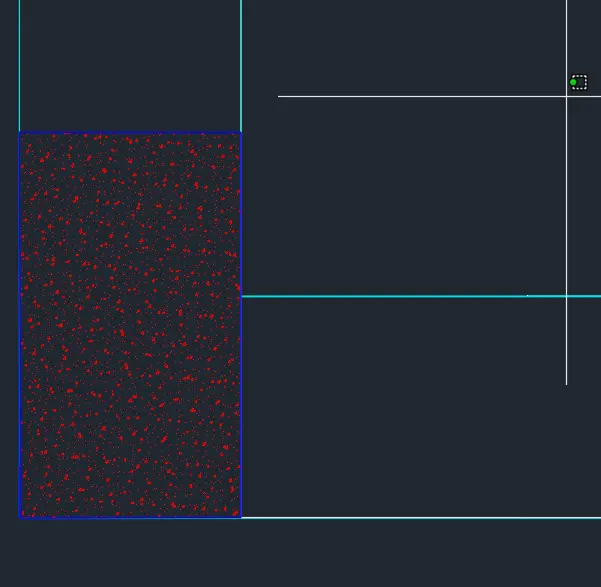
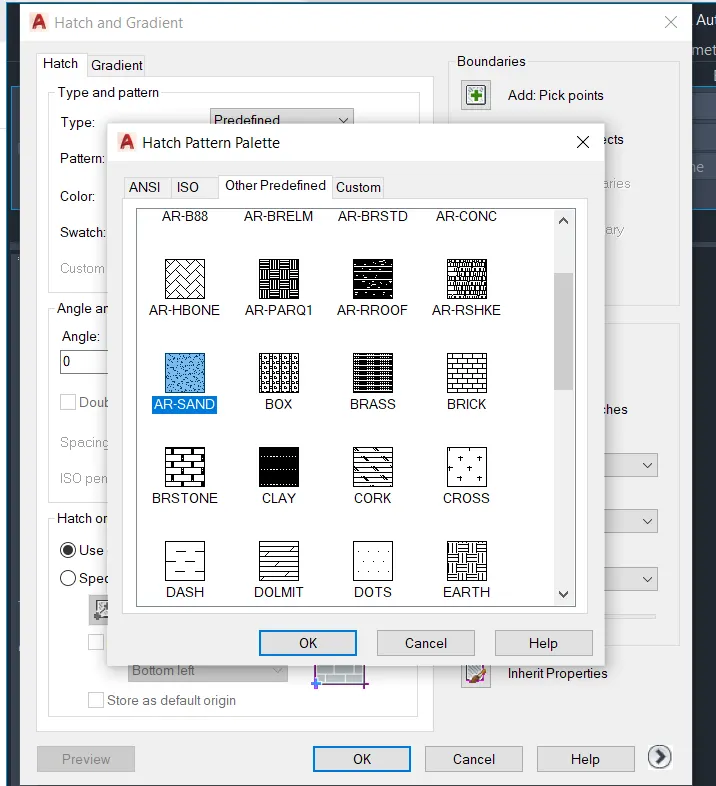
- command : hatch
- select the hatch patern
- and give the hatch to the column section
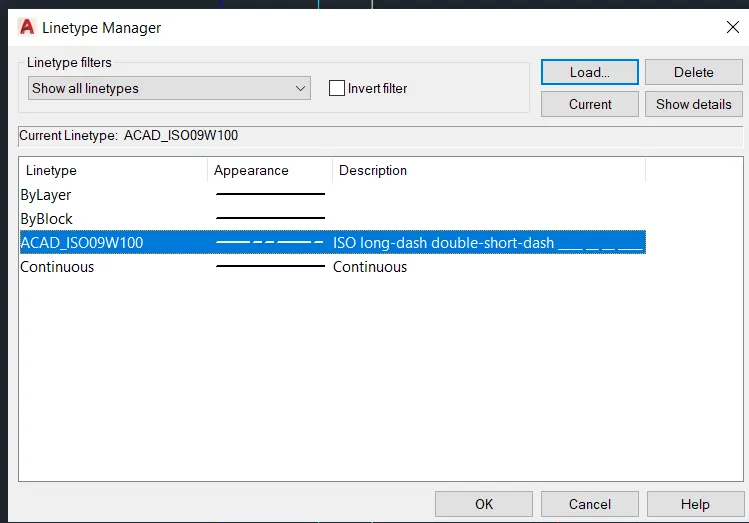
- command : line type
- click on LOAD tab
- Select the dash line
- click and CET CURRENT
- PRESS: ENTER
- FOR window
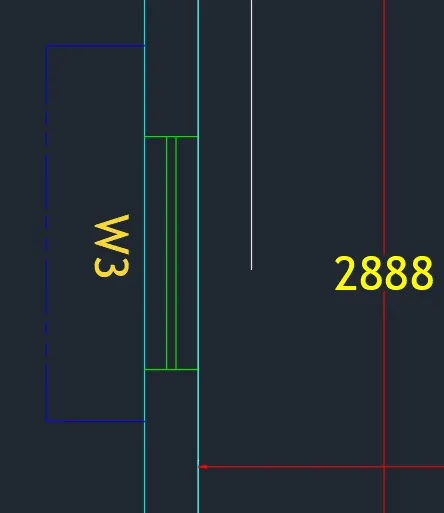
- command : DIMLIN ( for dimension )
- give the dimension for all units
- command : MTEXT : (For text )
- write all the text by mtext command
- Give the window and door to all units
- RESULTS :
- COMMAND USED :
- START : QSTART
- COMMAND : XL
- LINE : L
- OFSET : O
- LIMET : LIMMAX
- UNITS : UN
- ZOOM : Z
- HATCH : HATCH
- DIMENSION : DIMLIN
- TRIAM : TR
- COMMAND : MILTILADDER
- AIM :
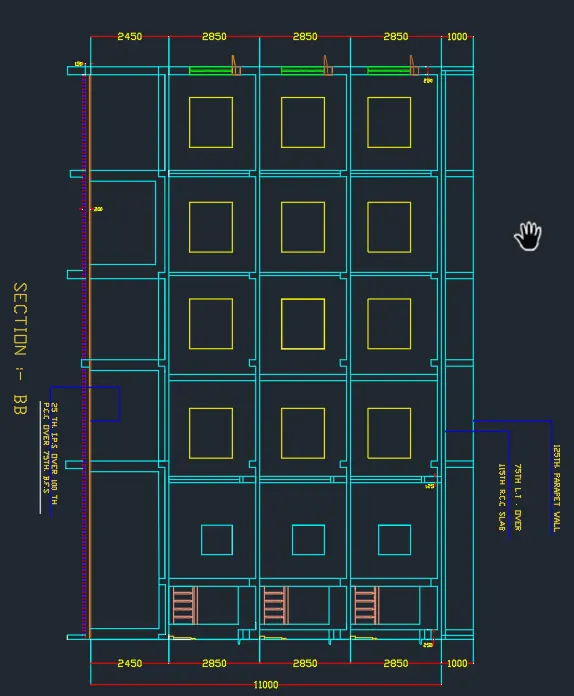
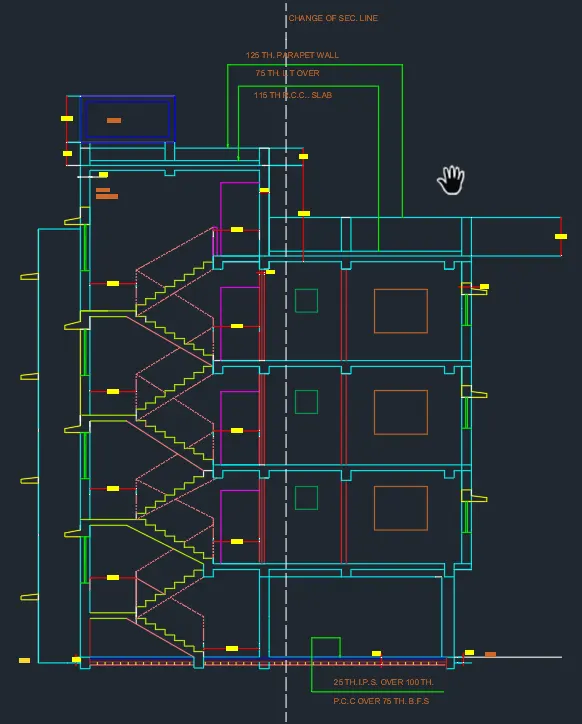
- 2. Create the Plan and Sections as shown in the Figures. Use proper dimension techniques and dimension styles to document the project. Assume the sizes of the doors and windows as per construction standards.
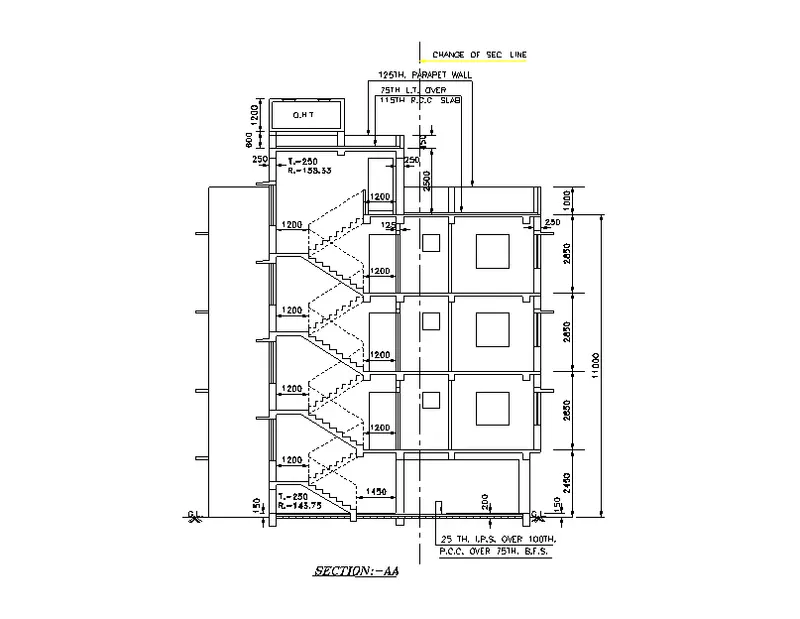
- SOFTWARE USED : AUTODESK AUTOCAD 2021
- PROCEDURE :
- first the open the software
- give the command QNEW and press the ENTERE key
- click on imperical templete
- select ADVANCE SETUP
- unit : decimal , precision :0
- angle :decimal degree , precision :0.00
- angle measure : East
- angle direction : closkwise
- area : 20*20
- and finished , lets start
- Command : limmax and set the limets
- command : z ( for zoom )
- enter A for all
- Command : XL
- and mark horizontal and vertical line
- command : o ( for ofset )
- distance : 250
- command : o (for ofset )
- distance : 200
- command : o
- distance : 2450,2850,2850,2850,1000
- mark the line as per ofset
- command : o
- distance :1200
- command : line
- and draw the portion of staircase
- command : o
- distance :1200
- for door units
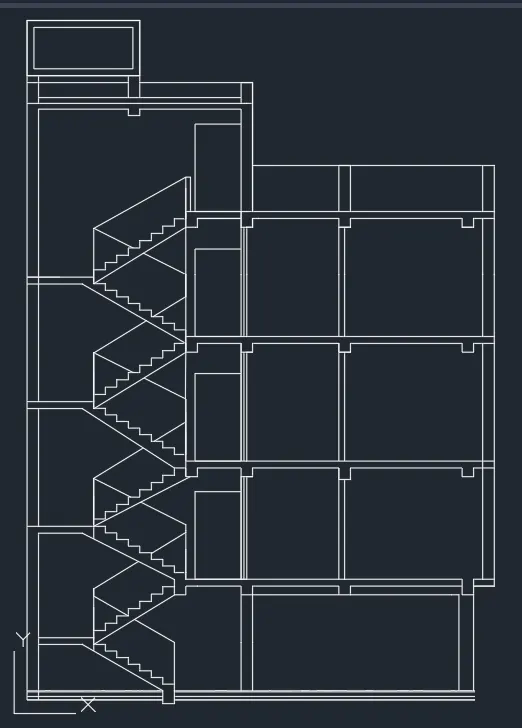
- command : LINETYPE
- click on LOAD
- select ISO DASH LINE
- press : ENTER
- FOR STAIRCASE
-
- COMMAND : MULTITEXT
- write all text in plan section
- command : DIMLIN ( for dimension )
- give all dimension over all units in plan
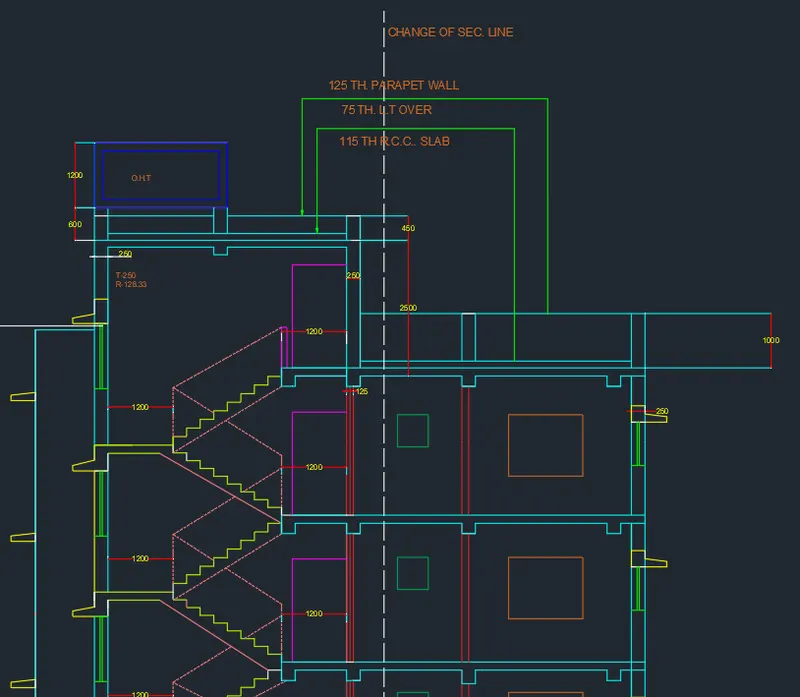
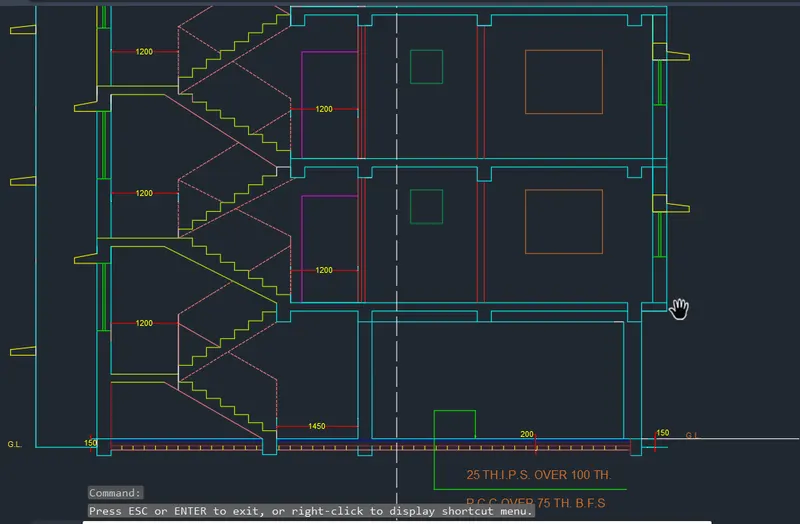
- RESULTS
- COMMAND USED :
- START : QSTART
- UNITS : UN
- LIMETS: LIMMAX
- ZOOM : Z
- COMMAND : XL
- LINE : L
- TRIAM : TR
- DIMENSION : DIMLIN
- TEXT : MTEXT
- AIM
- 3.. Create the Plan and Sections as shown in the Figures. Use proper dimension techniques and dimension styles to document the project. Assume the sizes of the doors and windows as per construction standards
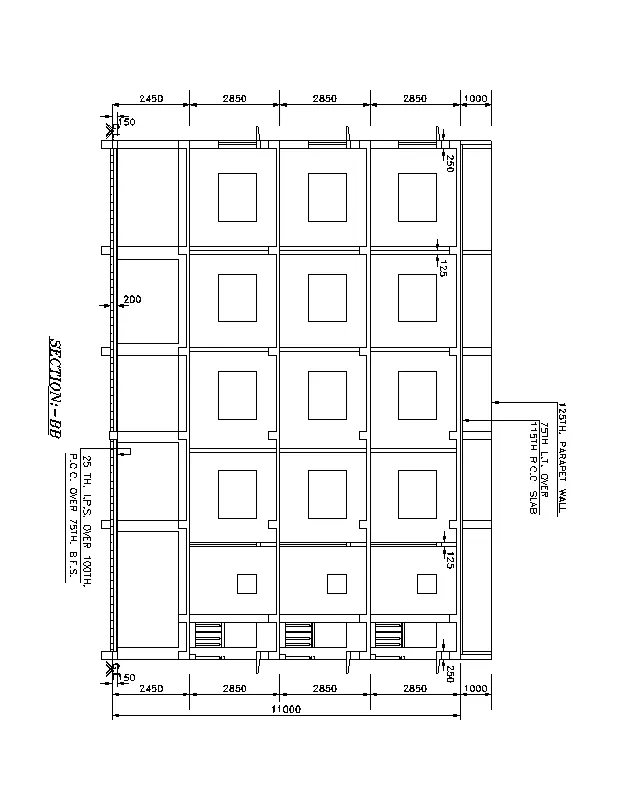
- SOFTWARE USED : AUTODESK AUTOCAD 2021
- PROCEDURE :
- first the open the software
- give the command QNEW and press the ENTERE key
- click on imperical templete
- select ADVANCE SETUP
- unit : decimal , precision :0
- angle :decimal degree , precision :0.00
- angle measure : East
- angle direction : closkwise
- area : 20*20
- and finished , lets start
- Command : limmax and set the limets
- command : z ( for zoom )
- enter A for all
- Command : XL
- and mark horizontal and vertical line
- command : o (for ofset )
- distance : 200
- command : o (for ofset )
- distance : 250
- command : o
- distance : 2450
- command : o
- distance : 2850
- command : o
- distance : 2850,2850,1000
- mark line as per ofset
- command : o (for ofset )
- distance :125
- mark ofset 125 all over where requried
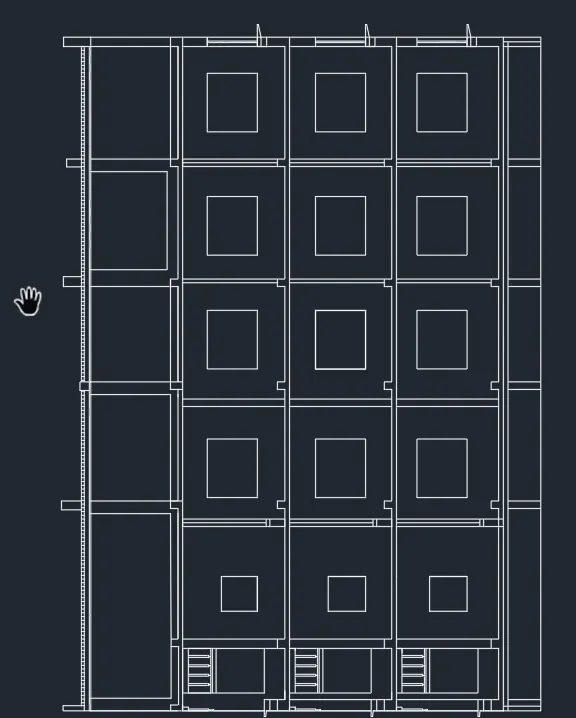
- command : DIMLIN (FOR DIMENSION )
- give all dimensions to all units
- command : MTEXT ( for text )
- write all text where needed
- RESULTS :
- COMMAND USED :
- START : QNEW
- UNITS : UN
- LIMETS : LIMMAX
- ZOOM : Z
- COMMAND : XL
- OFSET : O
- TRIAM : TR
- DIMENSION : DIMLIN
- TEXT : MTEXT
- RECTANGLE : REC
- LINE : L
- QLADER :QL