Creating a Layout, Section and Elevation with dimensions using AutoCad
AIM:
To draw the floor plan and section using the proper dimensions techniques and dimension style to document the project.
Introduction :
- plans and section are different types of drawing used by archietects to graphicaly used by the technichal drawing design and construction
- a plan drawing is the drawing on the horizontal plane showing a view from above
- an elevation drawing is drawn on the vertical plane showing a vertical depiction
- a section drawing is also a vertical depiction but one that cuts through space showing what lies within.
Commands used :
- limits
- line
- offset
- hatch
- dimlinear
- dimstlye
- units
- extend
- fillet
- trim
- join
- line weight
- line type
- opject snap
Procedure :
step 1:
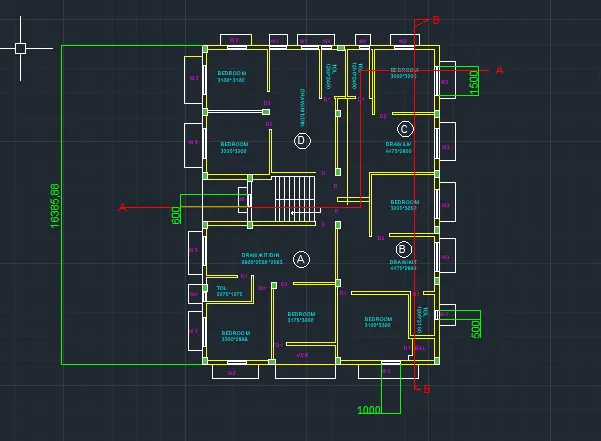
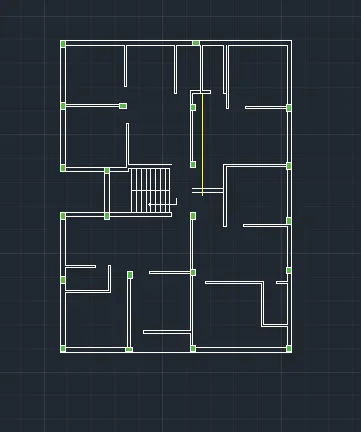
1ST & 2ND & 3RD Floor plan
- open the auto cad , set the limits, using limits command
- next draw the line with the length of 16388mm from down to up horizontally
- draw thre line with the length 12150mm horizontally towards
- offset of distance 12150 using offset command vertically
- offset the distance 16388mm using offset command horizontally
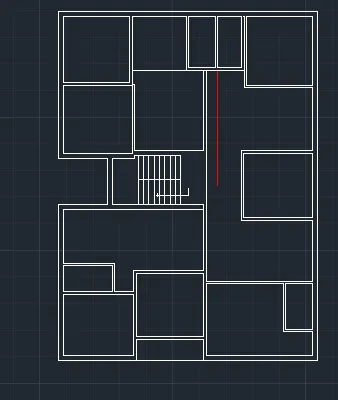
- now draw the rooms using the above commands
- bedroom with the length of 3100 as length and as well as width
- another bedroom 3225 as length and width 3100
- now draw draw/kit/dinning room 2550*2775*3250 in mm.
- now draw living room with the size of 4475*2950
- now to draw two toilets with the size of 1250*2400
- another bedroom in partc with size 3000*3225
- next we draw kit room with size of 4475*2863
- now draw toilet room 1250*2150
- another bedroom 3100*3300
- now draw bolcony 1375*1100
- draw the bedroom in part A with size 3175*3000
- leave some space for the varanda with length 3175mm
- another bedroom size 3300*2888
- now draw the toilet size 2275*1225
- now draw kit/din of size 6600*2550*2563
- finally draw the staircase with size 3200*2400, the tread is 250mm and riser 143.75mm and 158,33 mm
- trim uneccessary lines and objects
- draw columns with size 250*350mm
- columns are placed wherever they required for floor plan
- we specify the column layer with sky blue colour
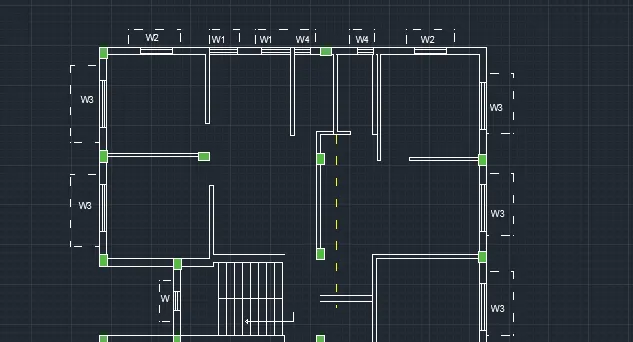
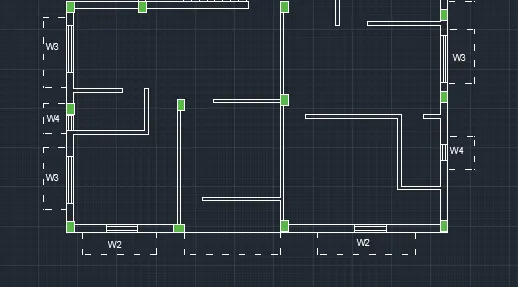
- we have to draw windows and doors with dimensions:
- w1 = 900*1200 mm
- w = 600*1200 mm
- w2 = 1000*1200 mm
- w3 = 1500*1200 mm
- w4 = 500*500 mm
- d = 1000*2100 mm
- d1 = 700*1200 mm
- d2 = 900*2100 mm
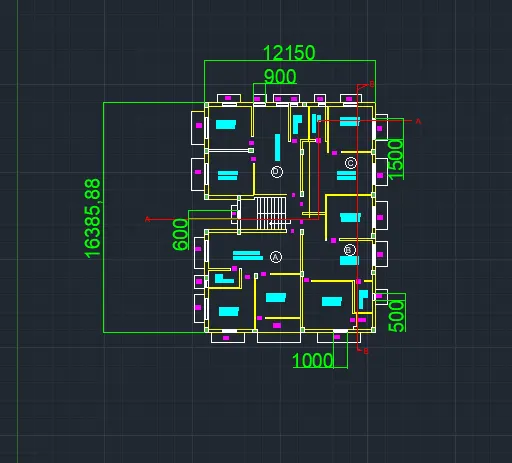
- finally indicate the rooms in single text command
- proviode dimension to given floor plan
- draw the section lines as given in the fig.
- and indicates doors and windows
step 2 :
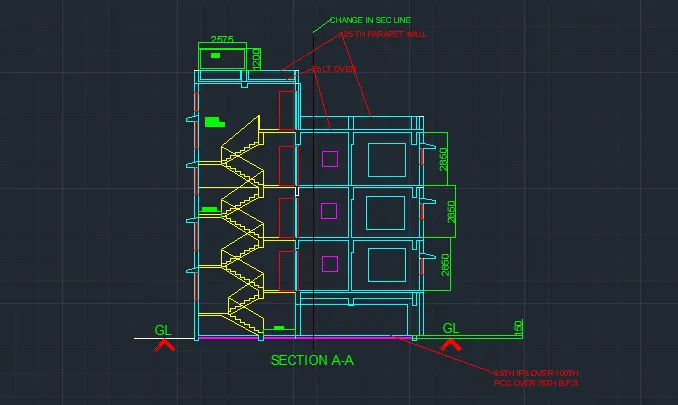
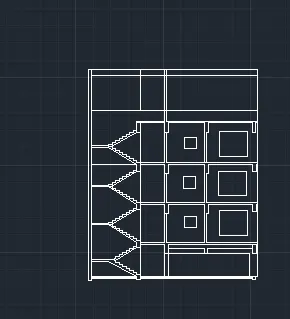
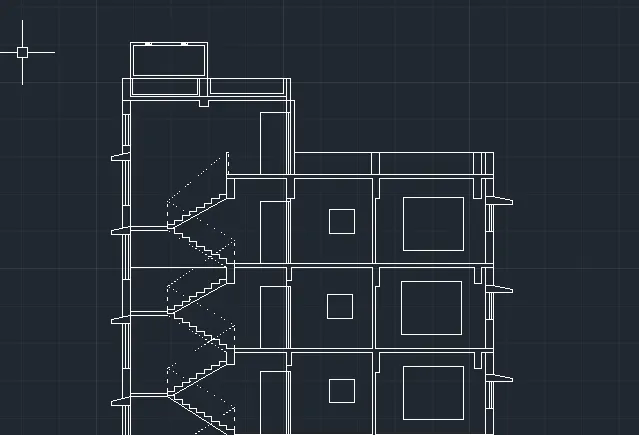
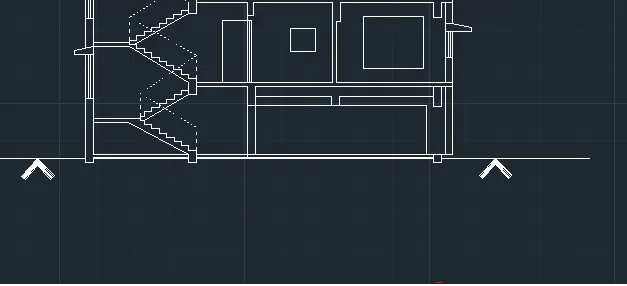
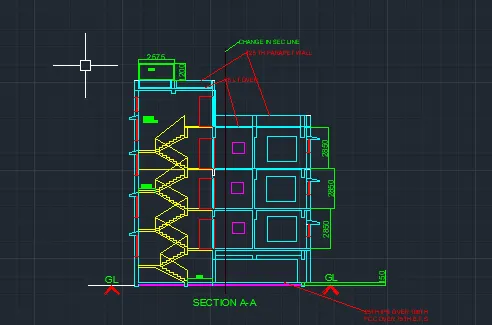
section A-A
- First we have to draw the line with length of 8900 mm horizontally farword
- draw another line from the previous line vertically with the length of 1mm
- next again draw the line from the previous line with the length of 11000mm horizontally backwords from the previous line drawn line.
- next draw the line from the first line and last line we drawn previous line
- offset the particular line with the given offset
- the inner wall offset 125mm outer wall thickness 250mm
- ground level thickness 150mm and 200mm
- next we have to darw the windows where in the required places
- next draw the staircase with the tread 250mm and riser 143.75 & 158.33 mm
- take the line type as dashed lines and set into the particular values of the dadshed line of the structure
- we have to draw the remaining parts , we draw the parapet wall and water tank @ the top of the building
- we have to draw the doors @required placesin first , second and third floors
- next remaining we have to draw the window and shunsade in the particular places
- select layers and make them into diff layers
- next put the dimensions wherever required
- select the single text command to indicate the parts and sections
- finally darw the section line as the section plan
Step 3:
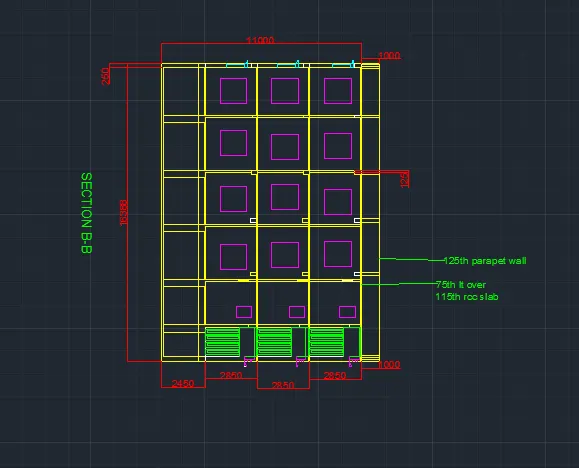
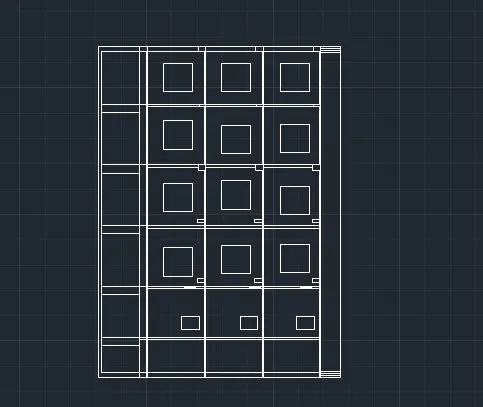
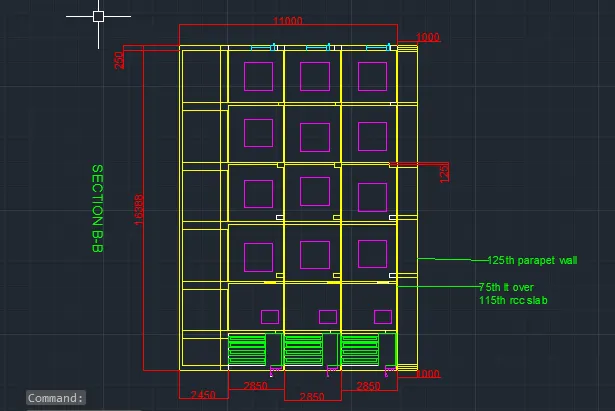
section B-B
- line with the length of 11000mm horizontallyu forward
- next we have to draw another line from the previous line vertically with the lenght 16388 mm
- offset as the same distance with particular direction
- the inner wall offset are 125mm and outer wall offset are 250mm
- ground level thickness 200mm and 150mm
- next we have to draw the windows wherever required in 1st , 2nd and 3rd floor
- next draw the sunshades to protect window from sun light
- we have to select diff colur layers for diff parts in the section as shown below
- next we have to put dimensions wherever required
- write the text to denote the parts in section plan using the single text command
RESULT :
1st , 2nd , and 3rd floor plan and sections using the proper dimensions techniques are drawn succesfully in autocad in detailed manner.