Challenge 4 : Concept Modelling of Alloy Wheel
CHALLENGE: 4
CONCEPT MODELING OF AN ALLOY WHEEL
OBJECTIVE: TO MAKE A MODEL OF AN ALLOY WHEEL USING ONE VIEW.
INTRODUCTION:
Concept modeling is modeling where 3d data starts to take shape.it is a crucal part of the process as every part invovled in the design process depends on this to actually visualize, how the design has come out, the shape and feel of it.This process starts from the point where the design has come up to a point finalization.
DESIGN METHODOLOGY:-
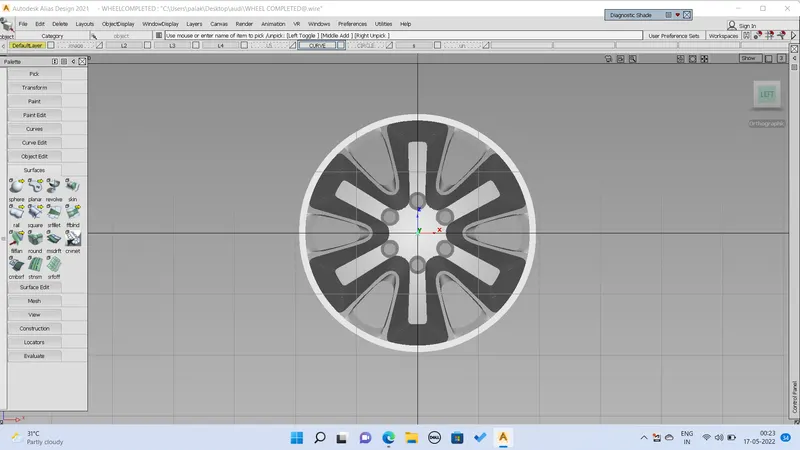
- insert the canvas image in the side plane from the import canvas option under file menu.scale it accordingly,either up or down.Make sure the centre of the image is properly matched.
- Decrease the visibility of the image from the plane editor option.once the image is set do not distrub it futher and assgn it to a new layer.
- read and understand the image properly to get an idea about the model. it is very important to understandng how the various surface are flowng. This is very crucial as the model is to be made from visualization.
- looks for symmetry in the model and follow the further steps accordngly. you just have to make a part of a model as everythng else can be achieved by symmetry.
- once everything is sorted out, start making the curve network by visulization and approximation, keep on assigning the curve to a new layer and hiding it to reduce confusion.
- Create surface on the curve network according to the visualized model by using the best method so that you get a vontinuous surface with one span.
- It is very obvious to get more than one span surface, in such case the surface has to be maniupulated by either forcing it to be span with a small deviation or by convertng it to Bezier surface.
- Ensuring the continuity of is also very important.the surface should be aligned properly using required position contnuity to make it continuous.It can also be manipulated by varying the degree if required.
- Once everythimg is taken care of, assign the surface to a new layer and make it symmetry to get a part of an entire model.
- Now, duplicate the party the part.Enter the required number and how to transform it in which direction and hit go to get the required model.
DESCRIPTION:
1. Import canvas image under fle option
This option is listed under file menu.It allows user to insert a canvas image in the workspace which can be traced out and a curve network can be generated.
2. View cube or layouts option
By using the cube of the upper right corner we can switch to various views and also change the percetion according to the user.
layouts option in the upper toolbar enables user to choose specifc view.
3.Markng menus
These shortcuts helps user to save time and the work is made ledd complicated.
Shft+Ctrl+Imb:Picking tools
This tool helps user to pick anything. specfic tools which are useful while making a model are listed below:
1. Pick cv
2.Pck curves
3.Pck object
4.Pck surface
5.Pickcurve on surface
6.Pick nothing
This tool is very important, as picking anything before transforming is is necessary. And this has to be done numerous times so the shortcut comes in handly.
Shift+ctrl+mmb: transformation tools
This tool helps user to transform the thing he has picked. Tools Which are very useful while making a model are listed below:
1.Move
2.Move pivot
3.Scale
4.Centre pivot
5.Rotate
Shift+ctrl+rmb: information tools
This toolbox has tools which provide information of anything picked, to the user.
Tools, which comes in handy while making a model are listed below
1.Toggle model
2.Toggle grid
3.Plane editor
4.Navigating in workspace
Whileworking on any model this option comes in hardy as it allows user to watch the model according to his wish.By using the following shirtcuts, the user can navigate in the workspace
Tumble:Shift+alt+imb
Zoom: Shift+alt+rmb
Track:Shift+alt+mmb
5.CV curve under curve tool box option in the palette .
CV curve tool is used to make curve. This is one of the primary tools available for the user to make any desired shape.
ep curve tool can also be used for similarly.
6.Blend curve toolbox
This tool is used to blend two two curves to make the corners round so that the resulting curve is proper and continuous.
Further edit tool in the same tool box enables the user to manipulate the resulting the blend curve to a desired shape.
7.Snapping the curve
This option can be accessed by pressing crtl+alt+imb for snapping on the curve. This tool helps to maintainb continuity by allowing users to join two curves end to end.
8.Layers
This option is located in the upper tool bar. Layer toolbar has to toggle and then new layers can be made. This option allowsnuser to hide or show the curves which are assigned to that specific layer to reduce the mess while modeling.
9.Display option in the control panal(left hand side bar)
This tool enables the user to toggle control verticles(CVs) in order to either edt when necessary or hide them when not needed.In addition to this it also has other options.
10.Oject edit toolbox: tools used under this are
A.Extend tool: it is used to extend or reduce the size of the curvs.
B.Query edit tool: it is used to check and vary the construction history of a surfacde.
C.Detach tool: it is used to detech say a part of a curve or surface from the rest of the shape.
D.Align : It is used to align two surfaces with each each other according to their positional requirement.
11.Surface toolbox:
The most important toolbox for surfacing is this toolbox. it has various tools for the user to make a surface.A surface can be made by using different tools according to the reuirement of the user. The used onces in this model are listed below:
1.Skin : used between two curves to make a surface
2.Rail: It is used to as make a surface by assigning generation curves and rail curves.
3.Square: four curves in continuity are necessary to make this surface.
4.Planer: it create a planer surface for a closed curve.
Free from bend tool: this makes surface between chosen curves
12.Surface edit toolbox: this box is usedto edigt the surface when reqquired. used tools are listed below:
1.Project tool:this is used to project a curve on a surface which is necessary to further use trim command.
2.Intersect tool: this tool is used to create an intresection between two surface which is further used to trim the surfaces.
3.Trim tool: it deletes the unnecessary part from a surface.
4.Untrim tool: it undo the trim tool.
13.Diadnostic shading :
It can either be accessed from the control panel or from object display option in the upper toolbox.This has various shading option for the user to check the continuity of the surfaces created.commonly used diagnostic shades are:
1.Shading off listed as shadnon.
2.Multicolor listed as mulcol.
3.Horizontal /vertical listed as horver.
14.Surface continuity tool under evalute toobox:
this tool is used to check the the continuity ofa surface a the boumdaries.
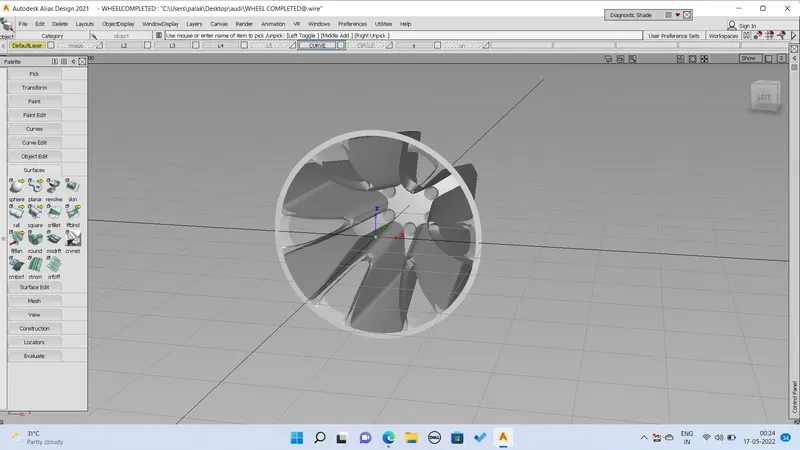
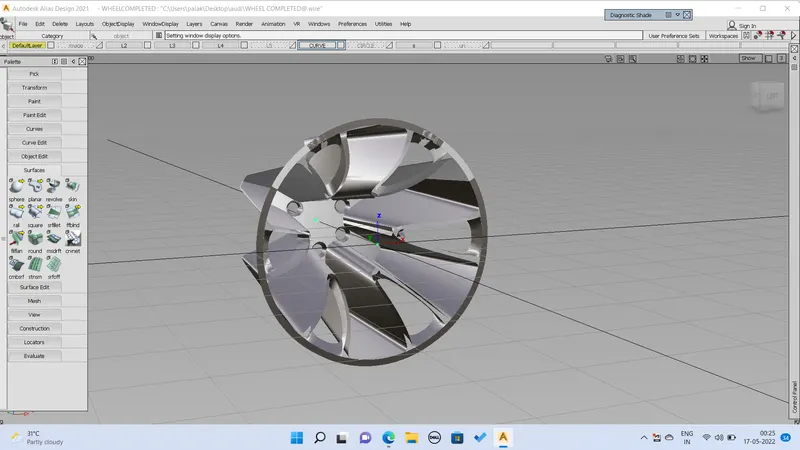
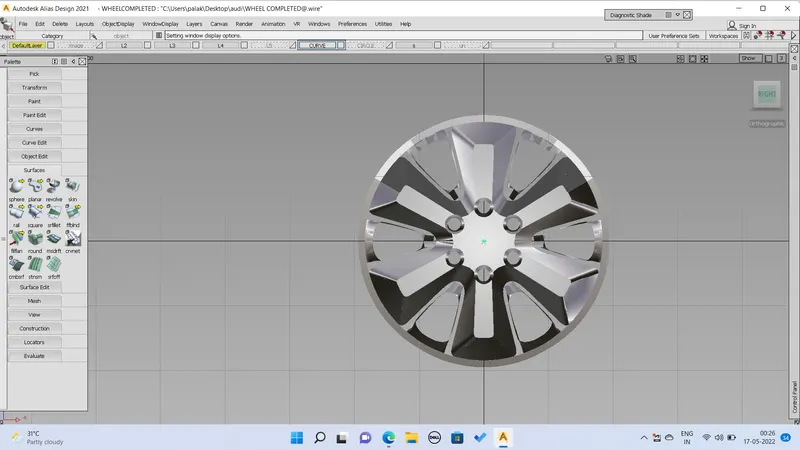
IMAGES:
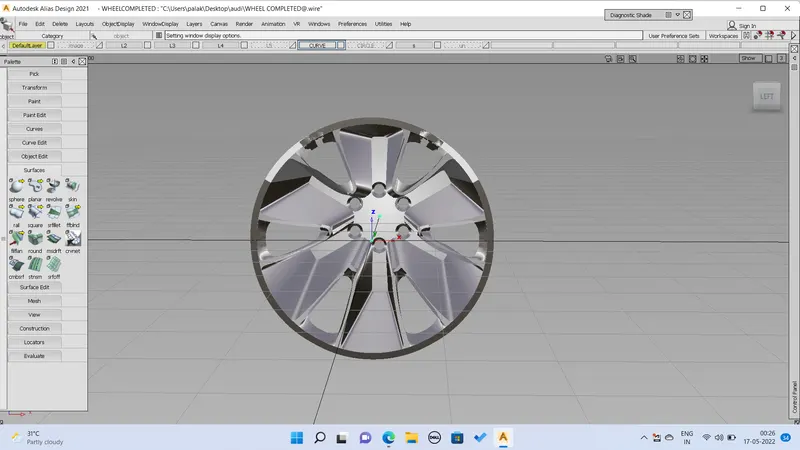
CONCLUSION: A good and continuous surfaces resulted into a good concept model of a car alloy wheel.