Assignment 5-RADIOSS Interfaces & Study of Effect of Notches Challenge
Assignment 5-RADIOSS Interfaces & Study of Effect of Notches Challenge
Objective: Simulate the given crush tube model with the given different case parameters and meshing of the given bumper assembly.
Meshing of Bumper Assembly:
- Importing of Bumper_System hm file into Hypermesh and cleaning of the imported geometery
Intially the Bumper_System;hm file is opened into Hypermesh from File -> Open -> model
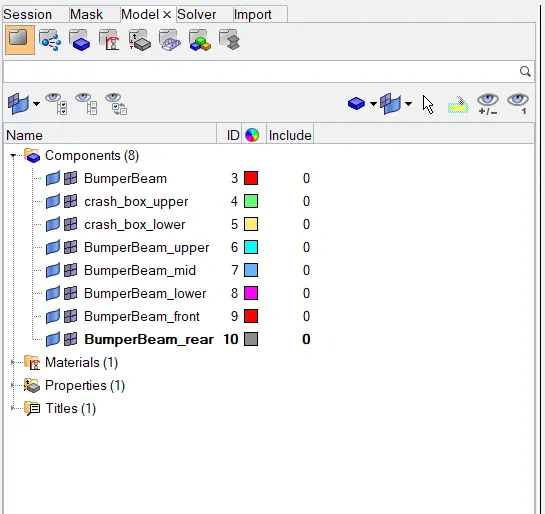
After opening the hm file, the components are seen from Model Browser, cleaning of geomtery is done by isolating the components which are in contact.
Intially the free nodes are removed using Geomtery -> temp nodes -> Selecting them with Shift + LMB drag and confirming it with clear, then the crash_box_upper and crash_box_lower are isolated by using toools -> mask -> surfaces na selecting all the surfaces except these two components.
Then the above marked areas are toggled using Geometry -> quick edit -> toggle and are connected therby eleminating the disconnected surfaces.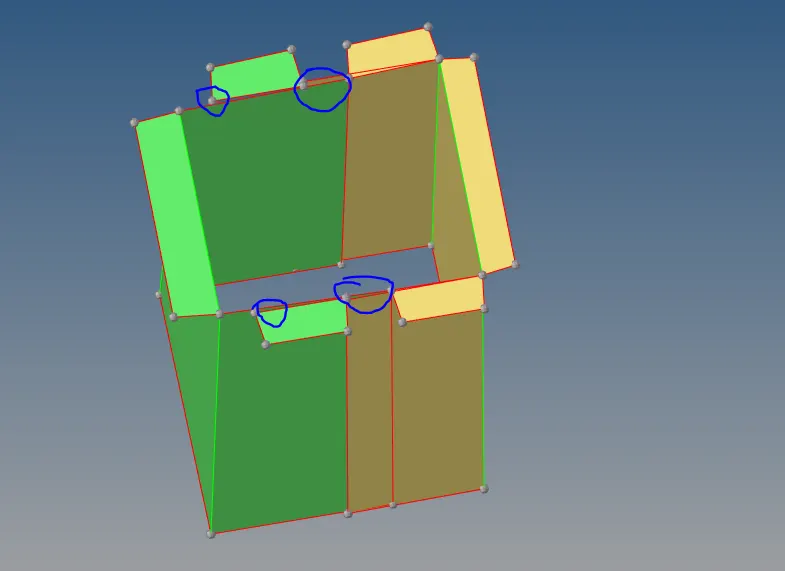
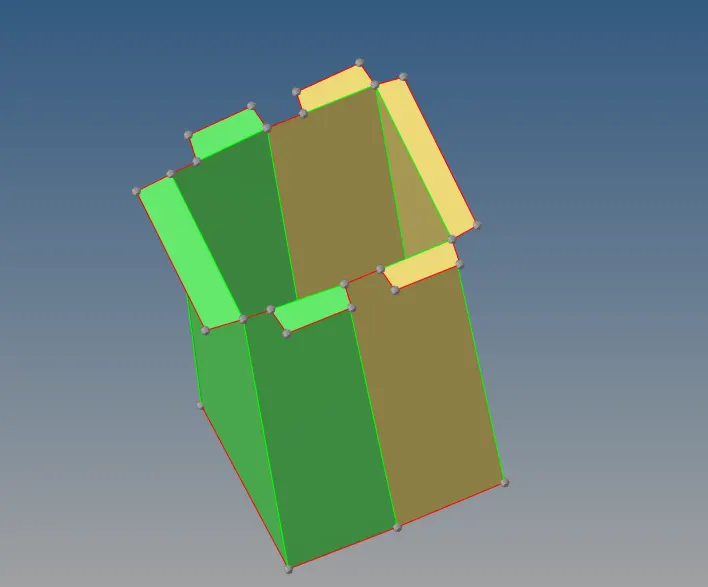
After the geomtery cleaup of the above two surfaces are done, then using mask -> reverse, the other components are displayed.
These edges are intesecting the with the top and bottom large surfaces, this is cleaned using geometry -> Surface edit -> trim eith surfs -> self intersecting surfs and selecting top, middle and bottom large surfaces and confirming it.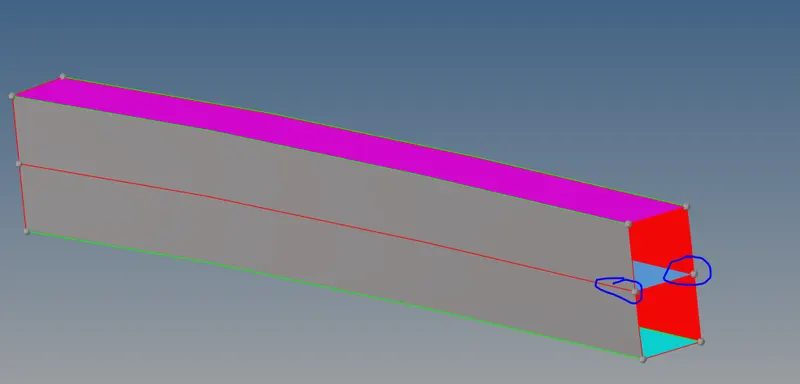
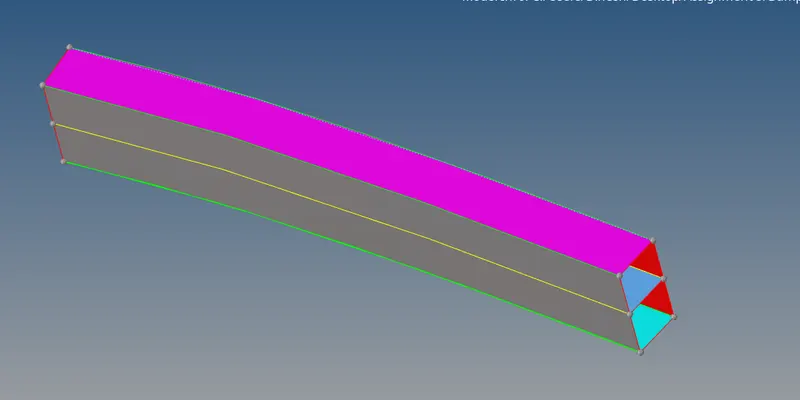 The cleaned geometry is shown below.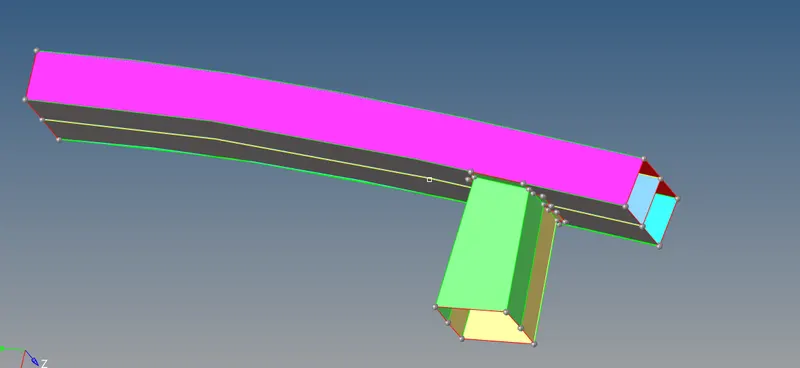
- Meshing of the cleaned geomtry using automesh
Thes cleaned geomtery is the meshed using 2D -> automesh -> surfs displayed and changing element size to 6 mm and confirming it the meshing is done and adjusting the node number the mesh is uniformly done.
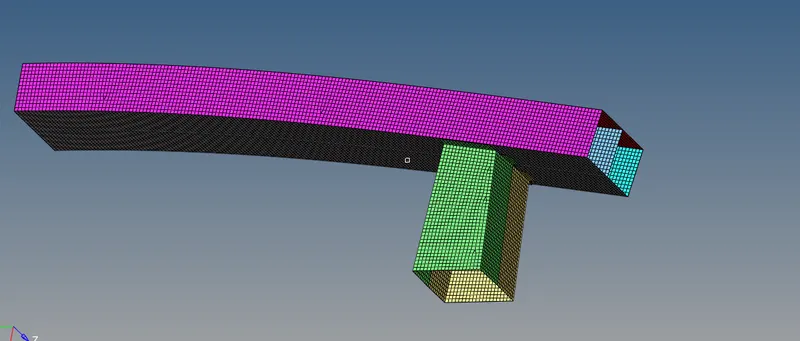
- connecting using 1D RBE2 elements
After the 2D meshing is done the bottom crash box and bumper beam are connected using 1D RBE2 elemts by using -> 1D elements -> Spotweld -> using nodes selecting the nodes alternatively between nodes on crush box flanges egge nodes and the bumper beam bottom surfaces edge nodes, the 1D elemets are generated.
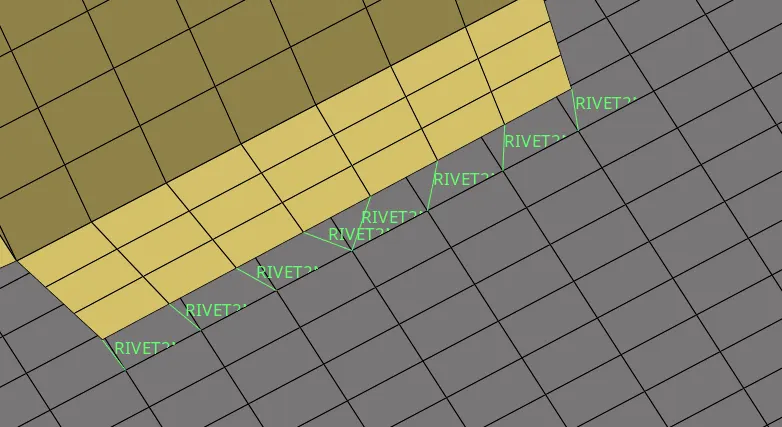
Case Setup and Execution:
The initial crush_tube_0000.rad file is imported into Hypermesh from File -> Import -> Solver Deck and selecting the file.
After importing,
for Case 1, the simulation is run keeping the contact parameters present as they are and the ouput required additionally for contact forces and /TH/PART for parts are added from SOlver Brower -> TH -> RMB -> Create -> Part and Inter.
Simulation is started from Analysis panel -> Radioss
Keeping the export options, run option and run number as default, confirming it the simulation is started.
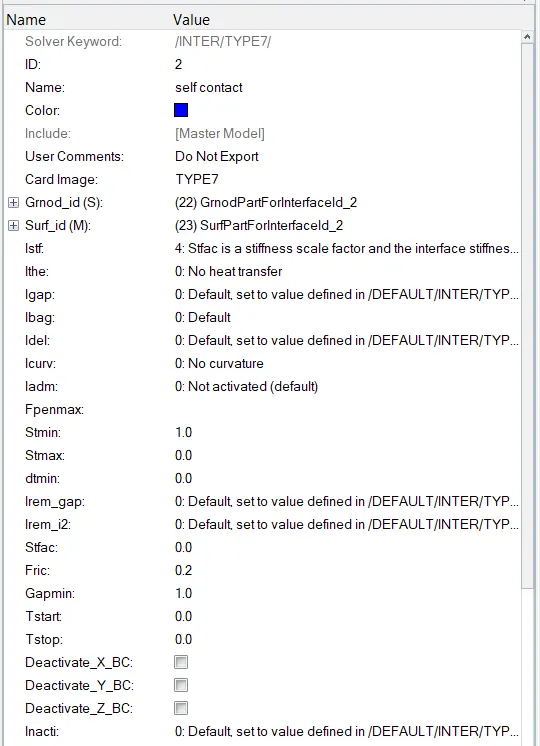
In Case 2, the Case 1 rad file is taken and the Interface Type 7 contact card is edited from Solver Browser -> Inter -> Type 7 -> self contact with parameters given
Inacti =6
Simulation is started from Analysis panel -> Radioss
Keeping the export options, run option and run number as default and saving it as Inacti_0000.rad, confirming it the simulation is started.
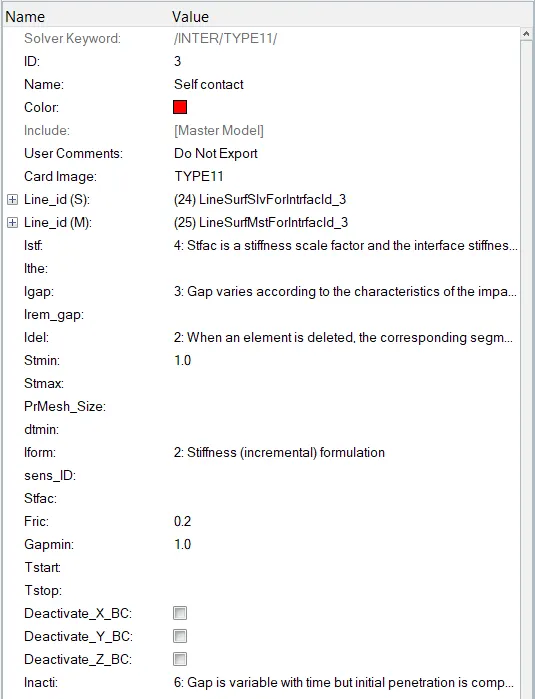
In Case 3, the Case 2 rad file is taken and a new interface card of Type 11 is created with the recommended parameters as shown below from Solver Browser, RMB in solver Browser -> Inter -> Type 11
Here Line_id(S) and Line_id(M) components are chosen similar to given Type 7 contact.
Simulation is started from Analysis panel -> Radioss
Keeping the export options, run option and run number as default and saving it as Contact_11_0000.rad confirming it the simulation is started.
Other parameters are kept default.
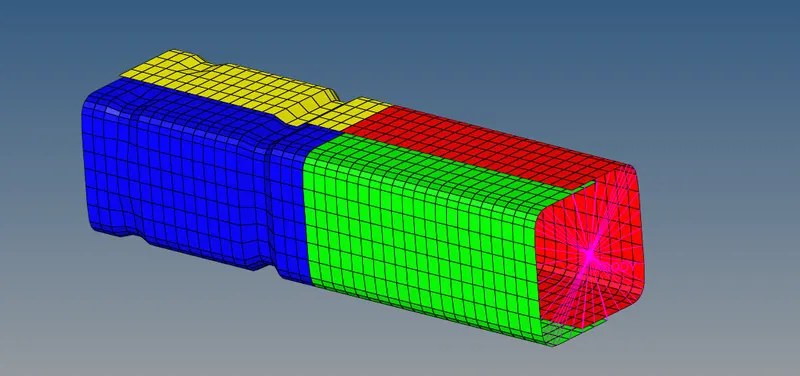
The below shown model for Case1, Case2 and Case 3
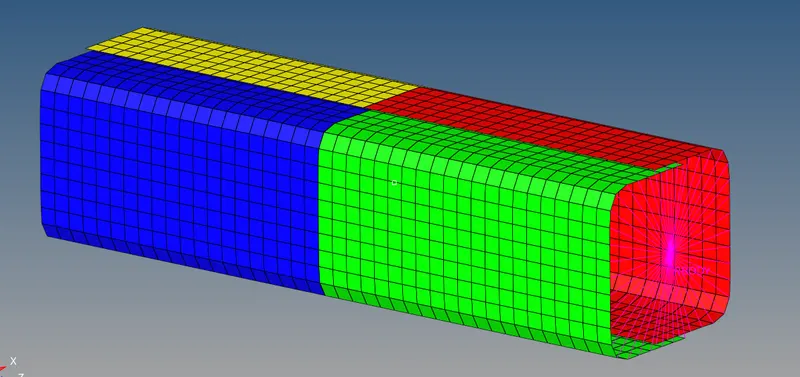
In Case 4, the Case 3 rad file is taken and the model is edited to remove the notches by using geometry panel -> nodes edit -> align and selecting the nodes on the level to which the nothes are to be brought and confirming it the notches are flattened, Similarly te other nodes are taken care.
Here the Boundary Conditions for the rigid body is deleted from Solver Browser -> BCs -> RMB -> delete
Changed model is as shown below
Simulation is started from Analysis panel -> Radioss
Keeping the export options, run option and run number as default and saving it as Center_Notch_NoBC_0000.rad confirming it the simulation is started.
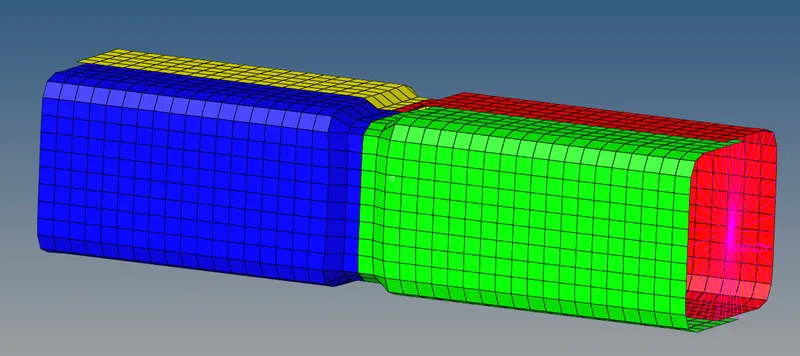
In Case 5 a center notch is to be fomed in addtion to Case 4 criteria So, the Case 4 rad file is taken and a nodes at the central nodes and a adjacent node on either side of the center node are selected on any one plane,
Using Tool panel -> Translate -> the selected nodes are translated by 4.0 units magnitude which is similar to the distance the previous notches are, this is done by selecting three nodes N1, N2 and N3 on the plane the nodes are selected in clockwise direction and confirming it with translate +, the nodes are translated.
This is done throught out the section and the nodes on fillets which doesn't cone in any of the chosen planes are brought to the same depth using Geometry panel -> nodes edit -> align and selecting nodes that are translated on either side of this node on fillet.
The modified model is shown below:
Simulation is started from Analysis panel -> Radioss
Keeping the export options, run option and run number as default and saving it as Law36_0000.rad confirming it the simulation is started.
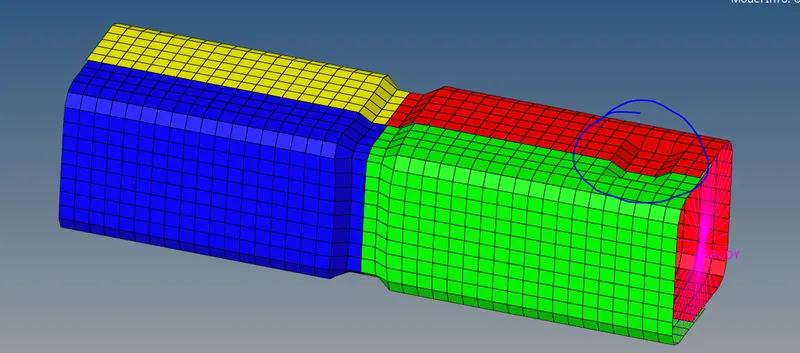
In Case 6 a new noth in addition to case 5 is to be done only on the faces on opposite sides, we start with taking the case 6 rad file and similar to case 5 the nodes on face where the intersection of the two surfaces are chosen and are translated by 4.0 unit distance depth. The modified model is shown below:
Simulation is started from Analysis panel -> Radioss
Keeping the export options, run option and run number as default and saving it as Notch_NoBC_0000.rad confirming it the simulation is started.
Results:
Case1: Crush_tube.h3d
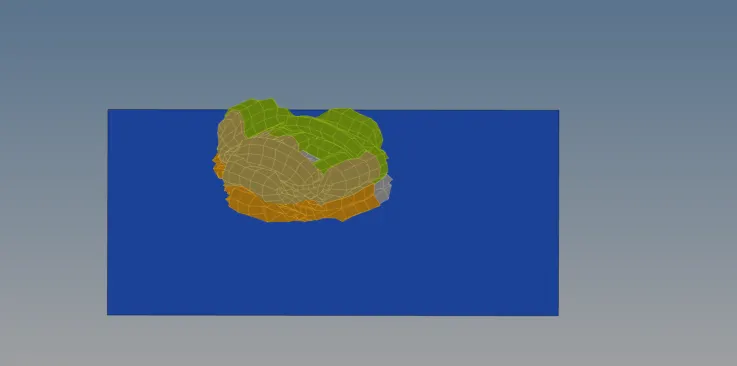
The plots for Simulation is taken from Hypergraph 2D
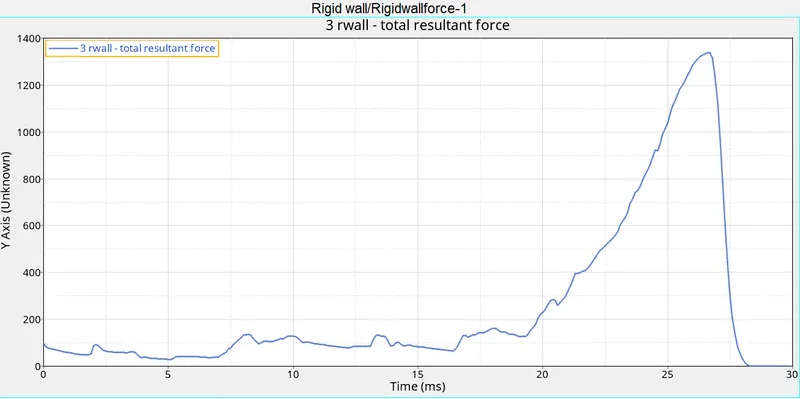
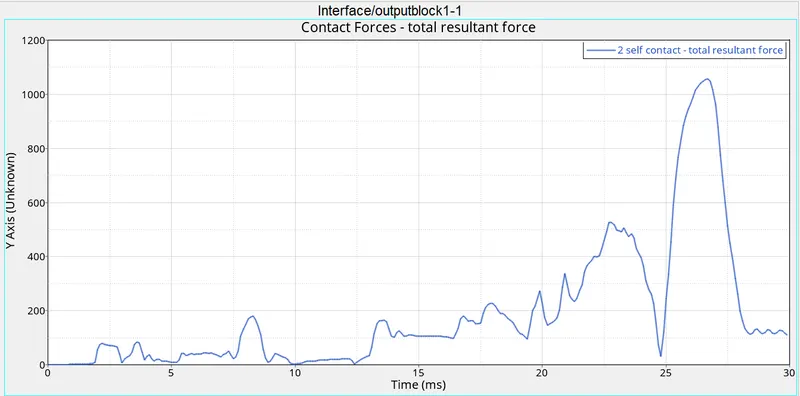
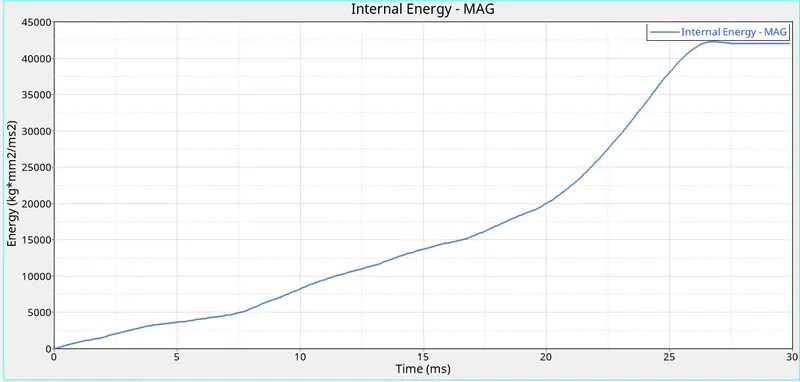
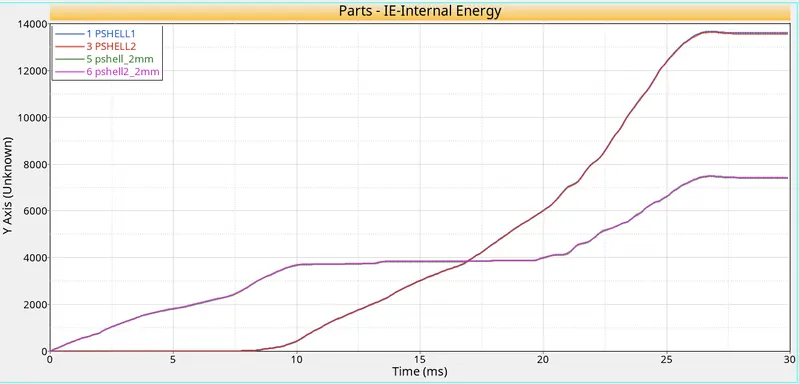
In this case since the Johnson cook and johnson failure laws are taken together, so the elements are deleted when they reached failure and after the elements in contact are deleted, the internal energy stabilizes.
Case2: Inacti.h3d
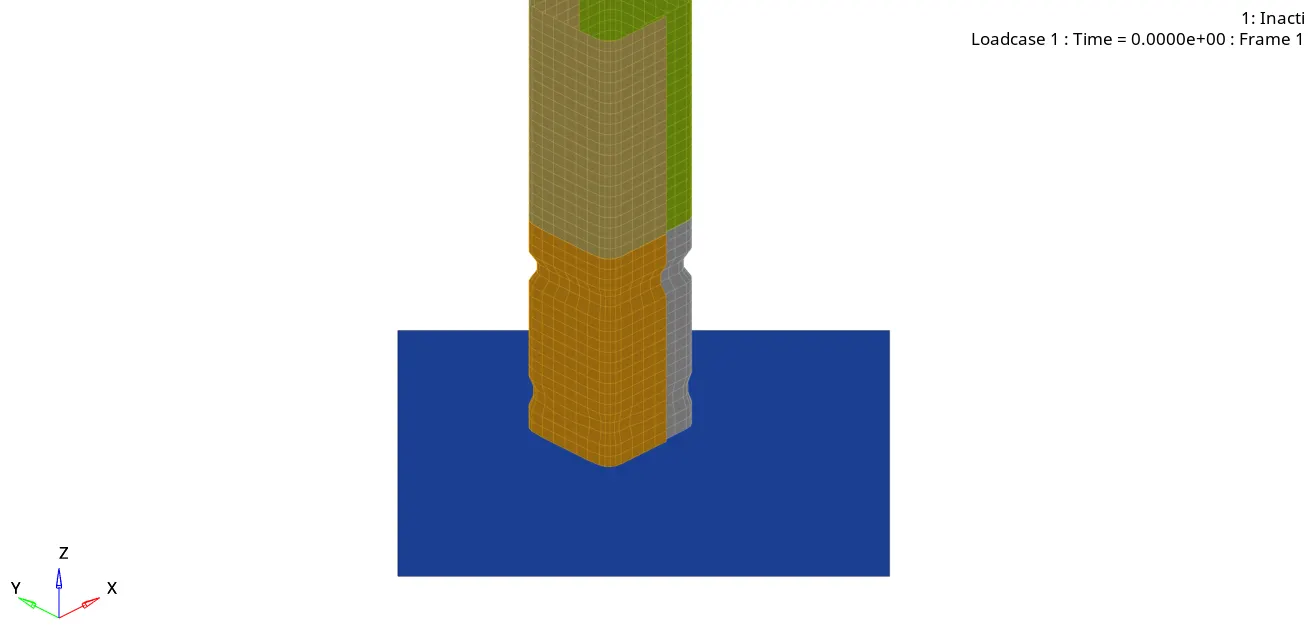
The plots for Simulation is taken from Hypergraph 2D
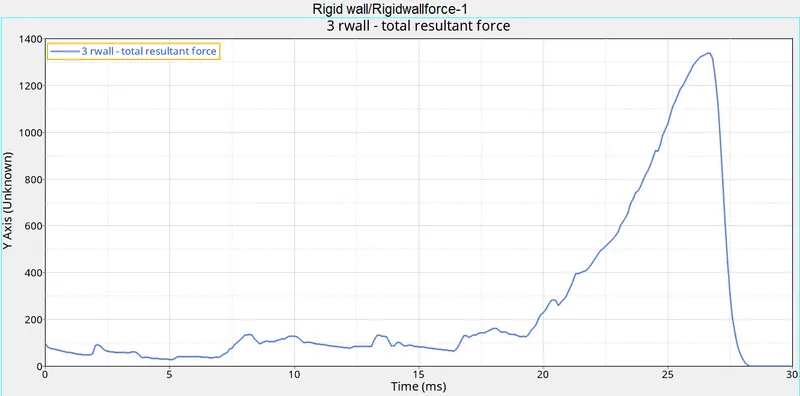
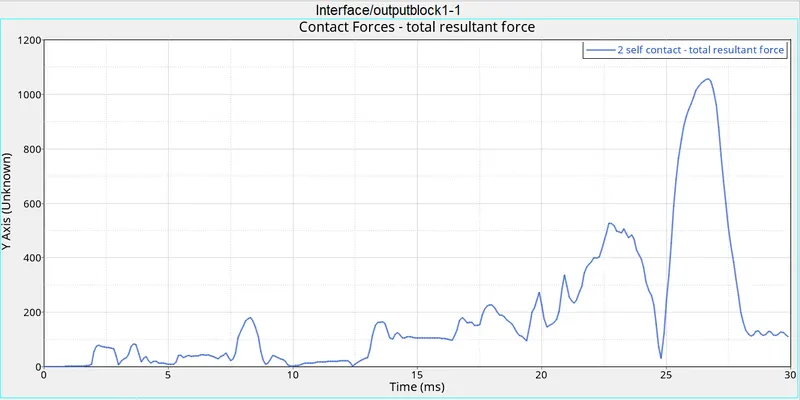
This vibration is due to having gap contact.
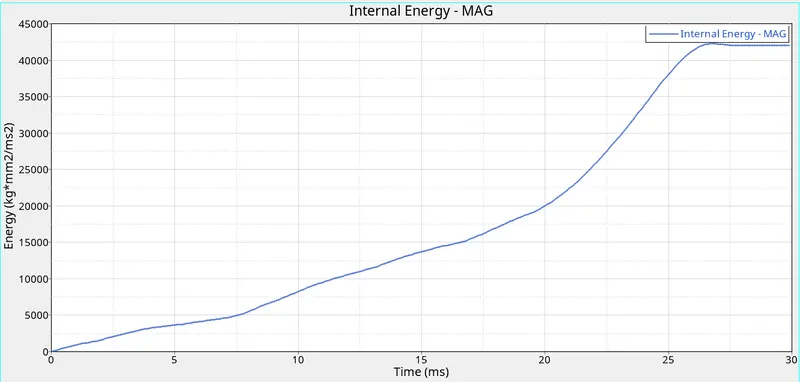
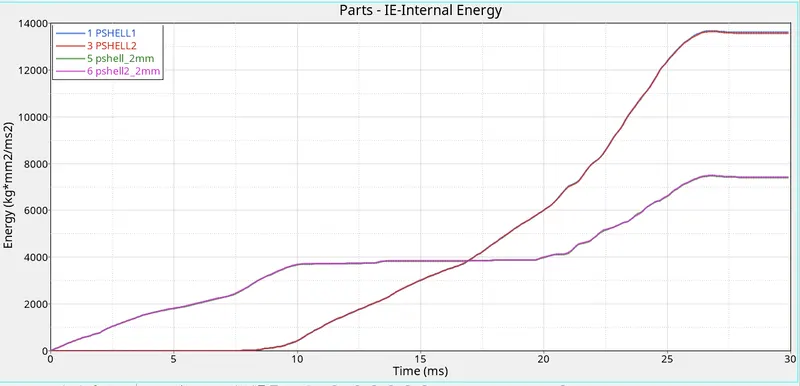
In this case the Johnson cook and johnson failure laws are taken together with changes made to Johnson failure in Ixfem and Dadv and since Xfem is activated, the elements are cracked with the defined crack growth and deleted when they reached failure, so the time taken increases for the internal energy to stabilize and also higher when Xfem is not chosen.
Case3:Law2_epsmax_nofail
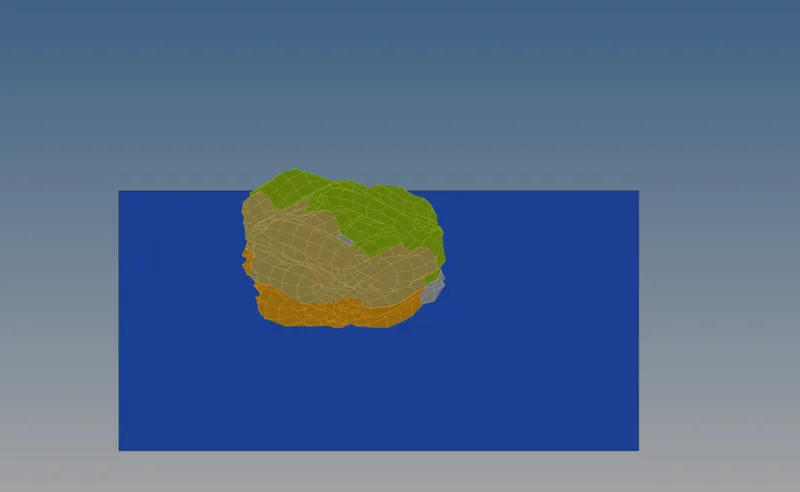
The plots for Simulation is taken from Hypergraph 2D
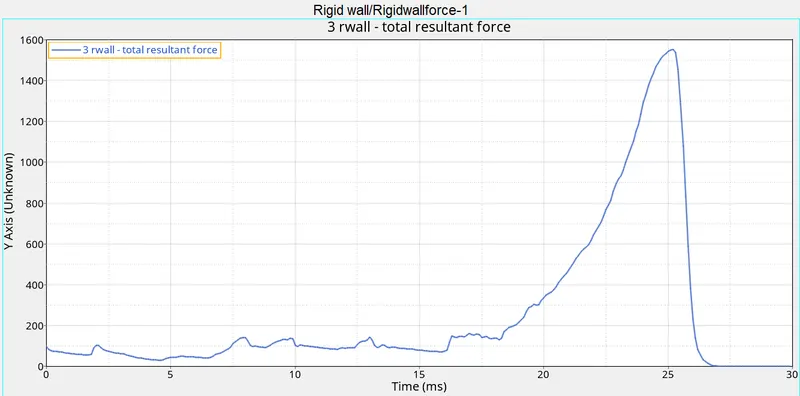
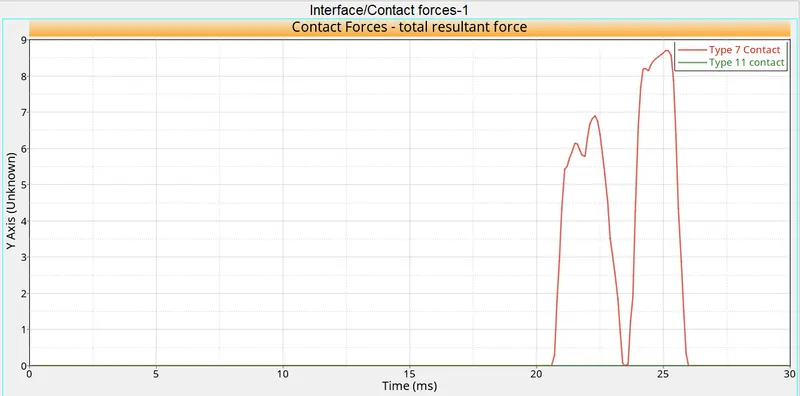
Spike in contact forces is due to two notches present and smoothness due to inacti is changed to gap is variable.
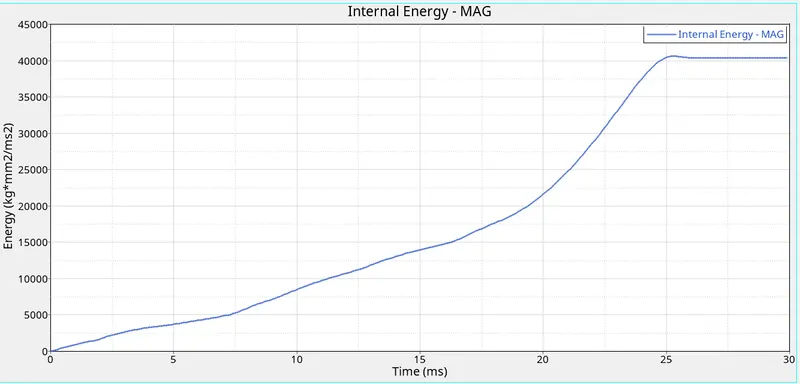
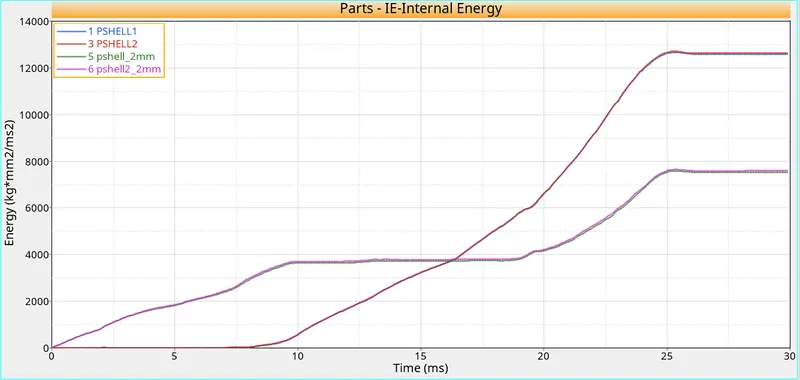
Case4: Law2
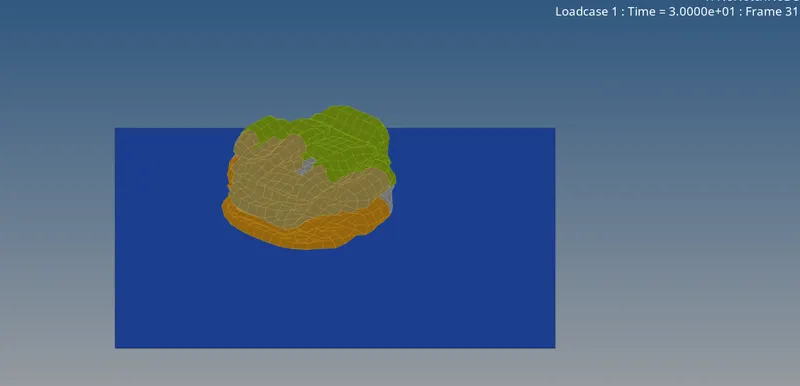
The plots for Simulation is taken from Hypergraph 2D
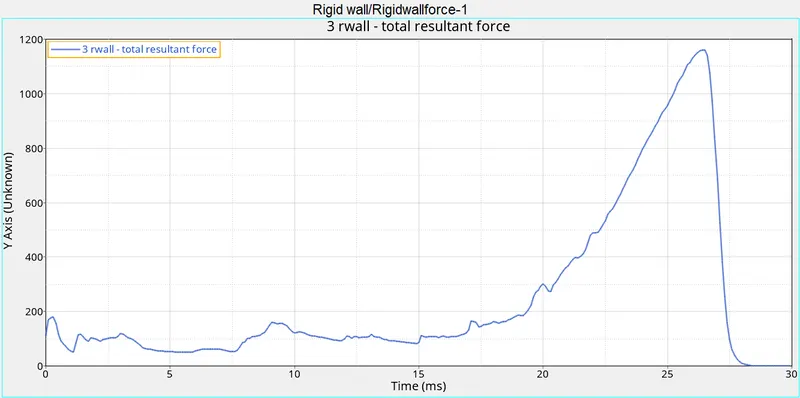
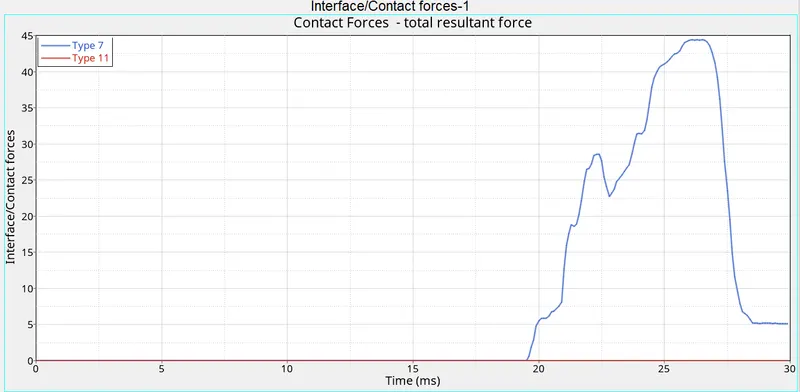
Having no notches, contact forces appear only at the end when every part is crushed.
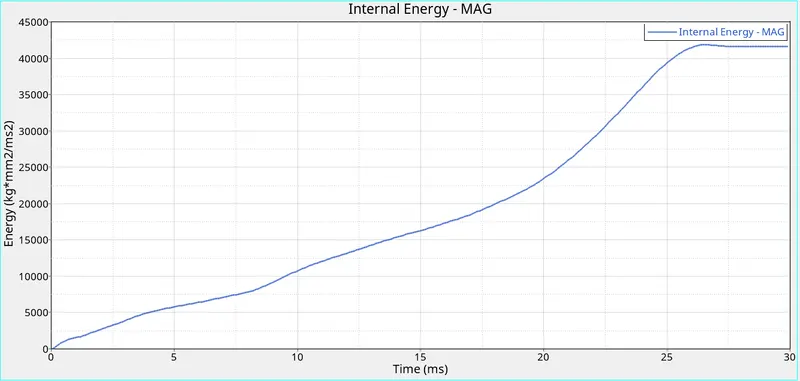
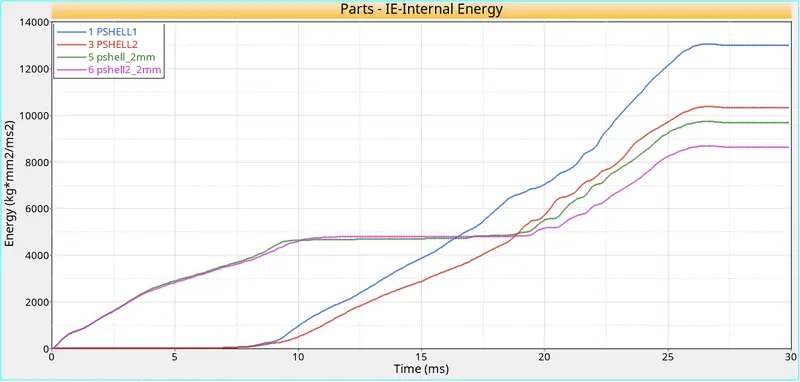
Due to having no notches, energy varieson the position of the parts from the Rigid wall, farther away it is more internal energy it ahs.
Case 5: Law1
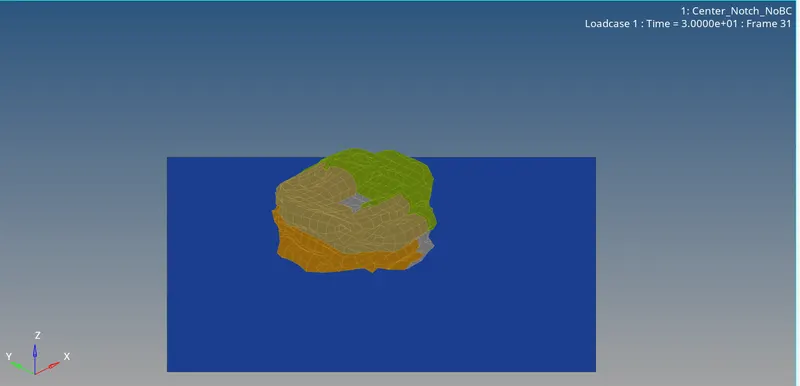
The plots for Simulation is taken from Hypergraph 2D
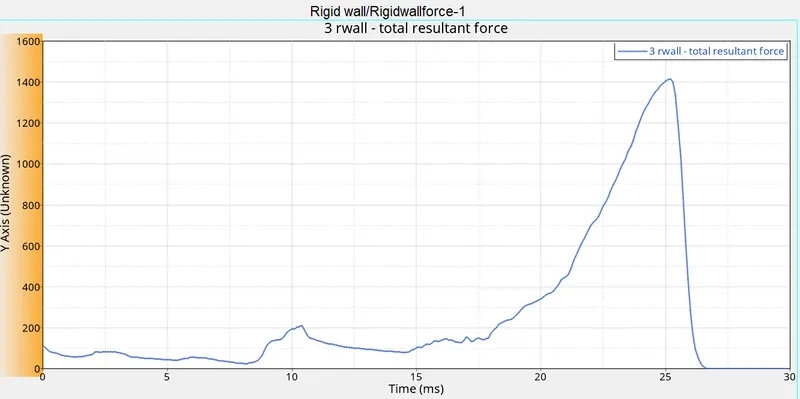
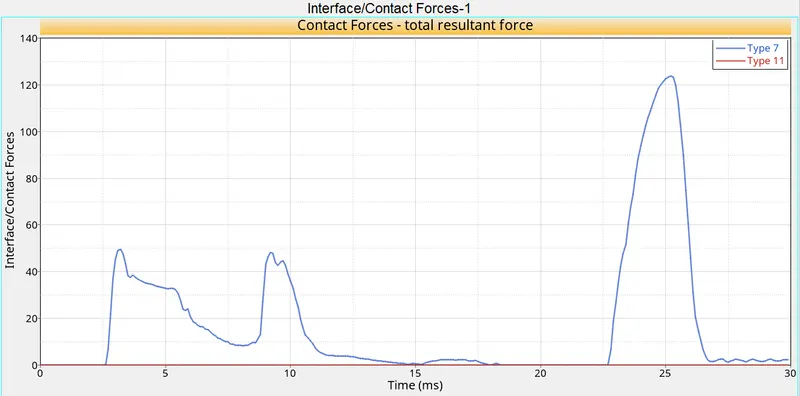
Having center notch increase the contact forces experienced.
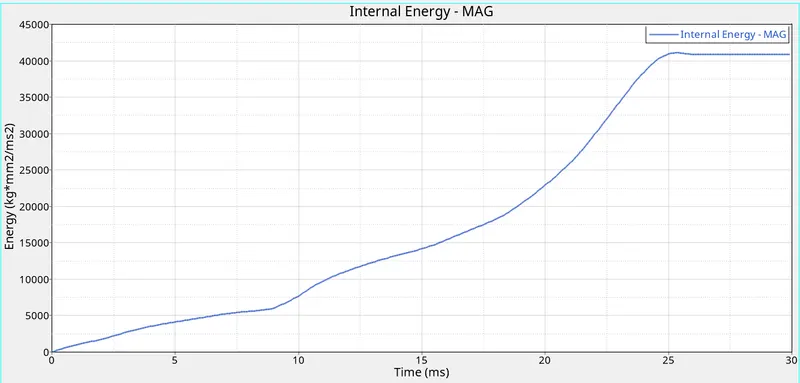
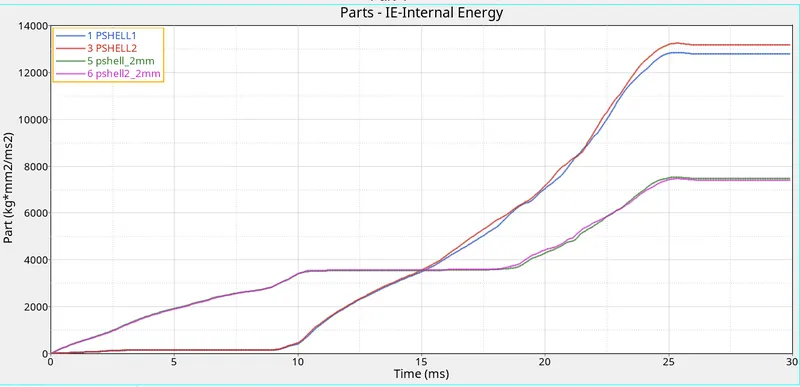
Having center notch increase the internal energy of the parts.
Case 6: Law 36
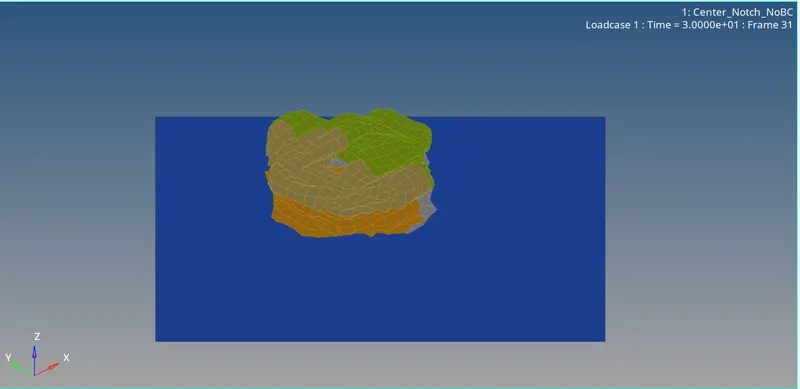
The plots for Simulation is taken from Hypergraph 2D
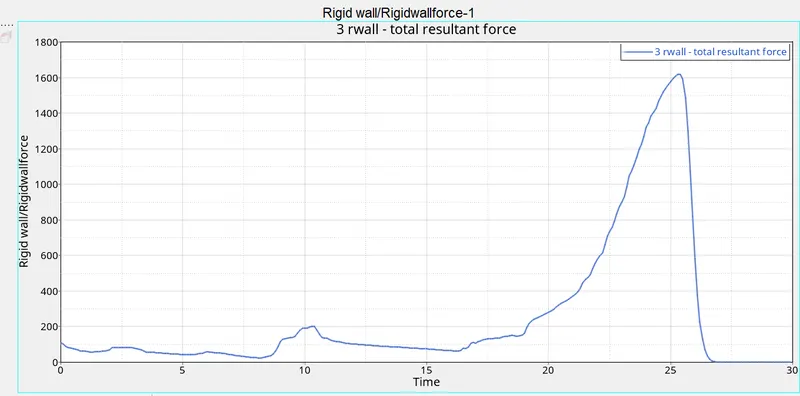
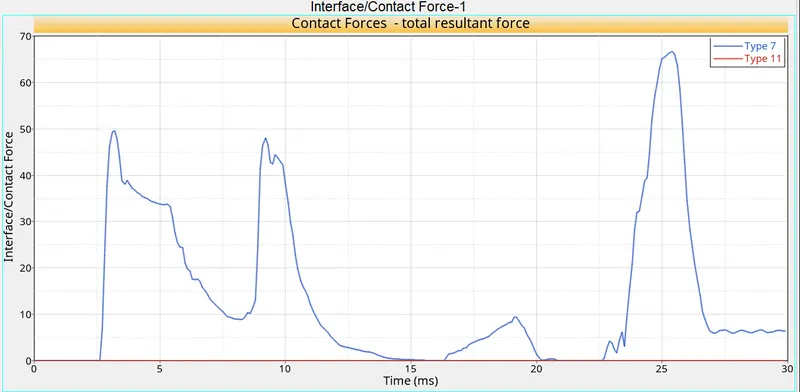
Contact forces reduces having the face notches.
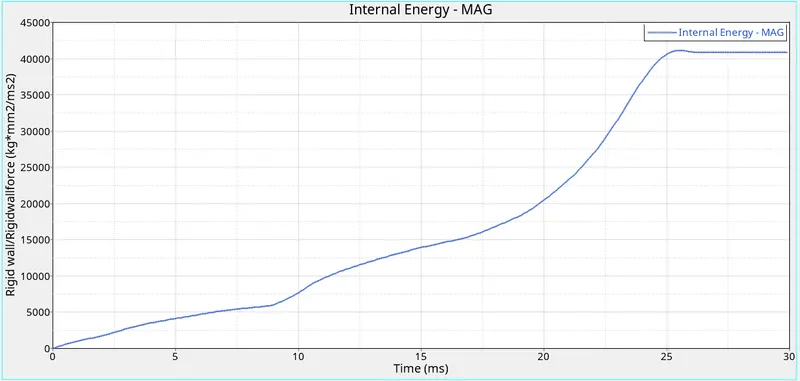
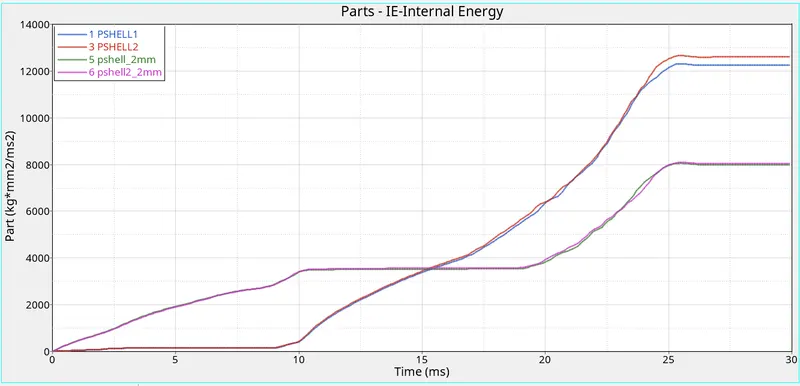
Having notches on faces causes the internal energy to decrease.
Conclusion:
Comparison of Internal Energies
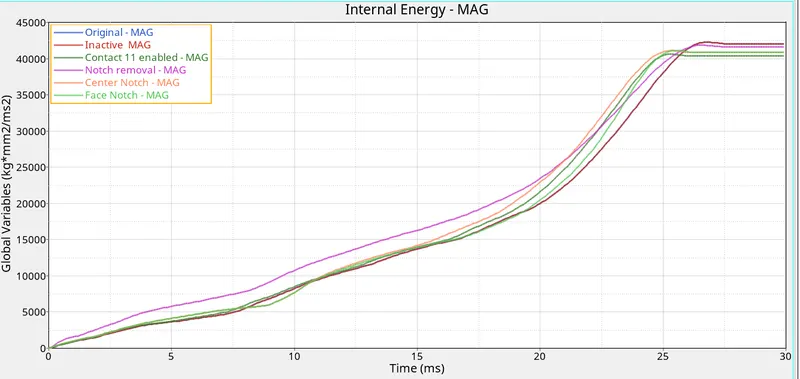
From above graph
Internal energy intially increases and then decreases with notch removal than having notches.
Final internal energy of Notches with only node to surface contact is higher, then having no notches, then Notches with both the contacts, then others.
By this having notches on fillets increases internal energy than having notches on faces.
Comparison of Rwall Forces
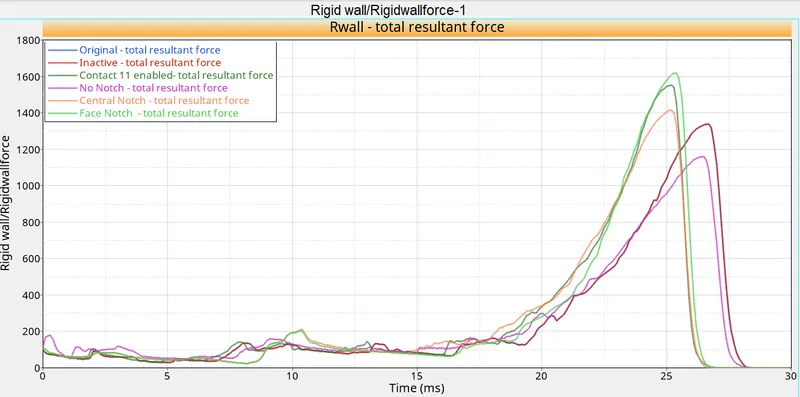
From above graph we can see,
Having no notches decreases the forces on Rigid wall
Enabling line contact in addition to nodal contact increases forces on Rigid wall
Having notches with Line contact enabled generates more force than having notches on fillet areas.
Enabling Line contact forces with notches forces the crush box to be crushed faster.
The rad files are successfully simulated with different case scenarios in Radioss 2021