Assignment 3-2D Element Formulation Challenge
OBJECTIVE
To Comparison of results with base simulation and improved shell element properties under the given criteria by
- CASE 1-Run the base simulation without any modification to element properties.
- CASE 2-Run the base simulation with element properties.
PROCEDURE
CASE 1
- First, create a new folder on the desktop.IN that create a case 1 and case 2 folder.
- Then copy-paste the engine file and starter file in it.
- Open the Hypermesh software with Radioss.
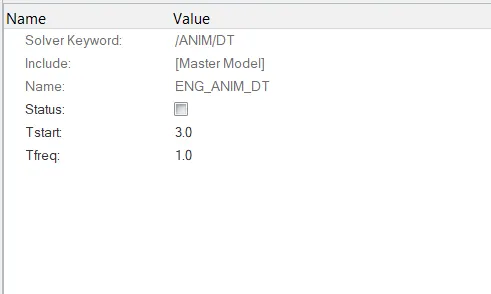
- Import by using the import solver desk option.
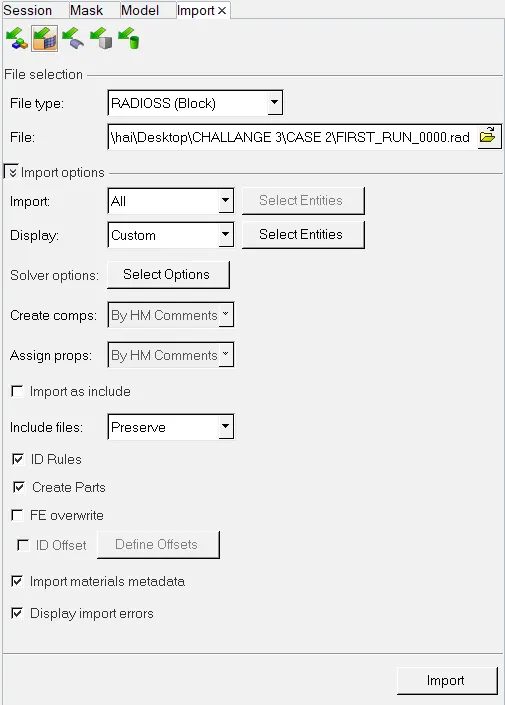
- Then change the Tstop time to 55ms in the cards engine run-time option.
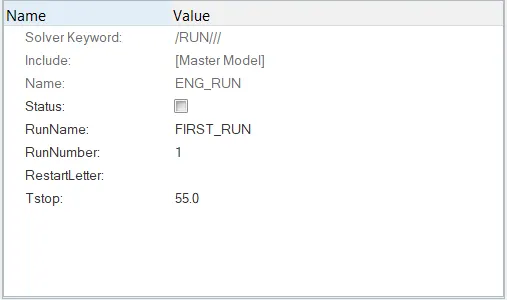
- And change Tstart-3ms and Tfreq-1ms in the cards engine animation time option.
- Then go to Radioss in the analysis panel.

- And save as the input file in the case 1 folder starter file.
- And give radioss to solve the file.
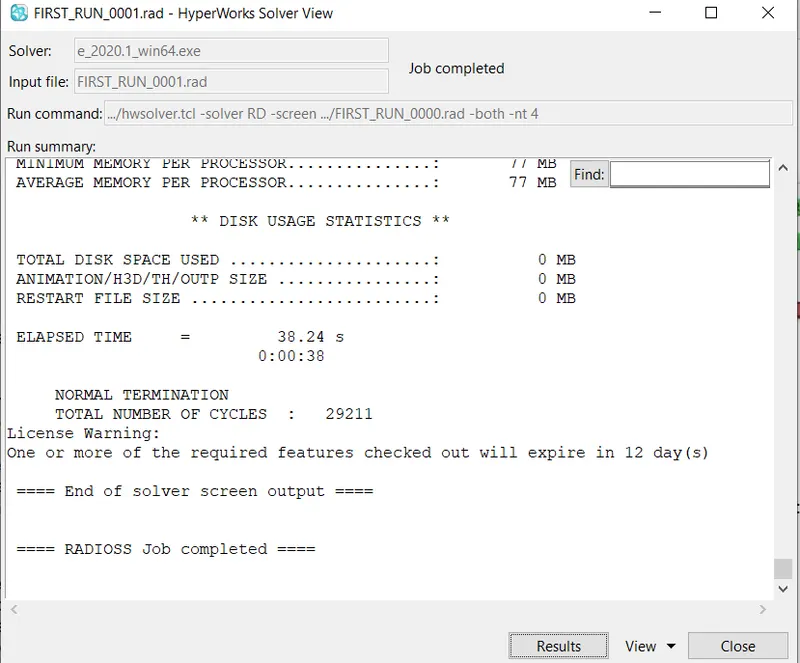
- At the end of the simulation, do the energy error and mass error checks.
- For that go to the case 1 folder in that starter file is open in the note pad.
- Error <0 to -15 is acceptable.other than this is not acceptable.
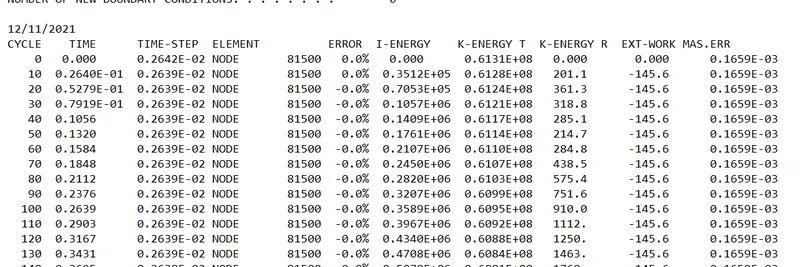
- After the radioss job is completed click the result option. and it takes to the hyper view software.
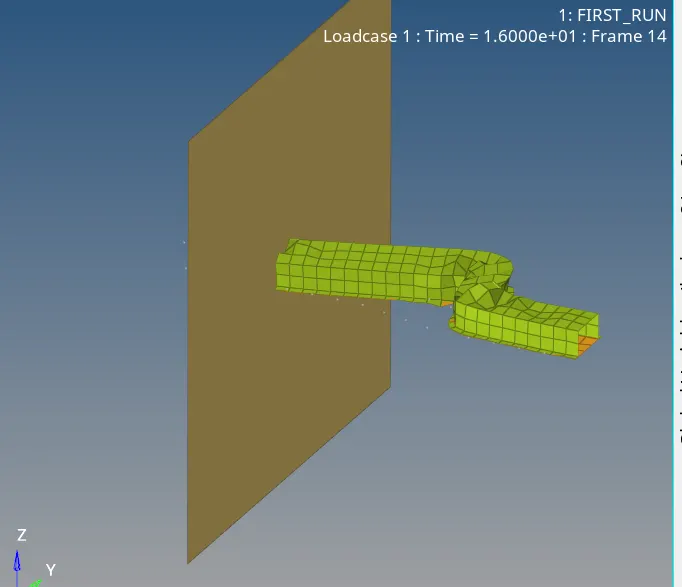
- The collision of the beam on the wall can be shown in it.
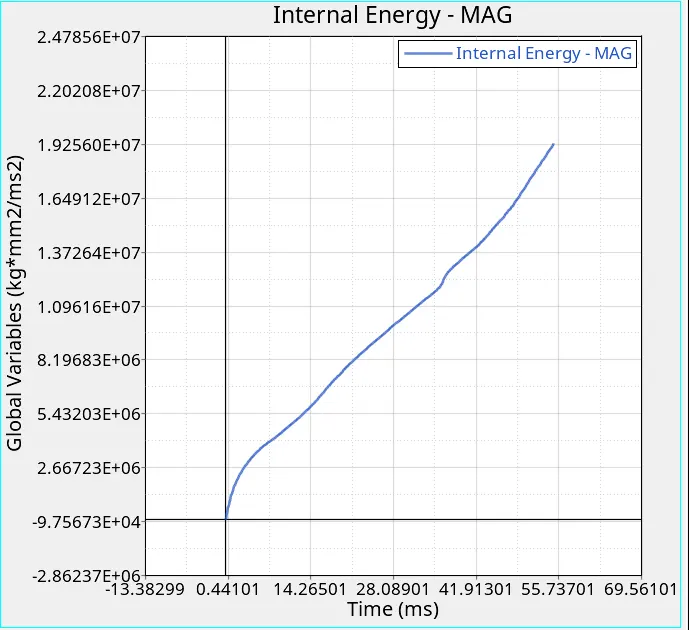
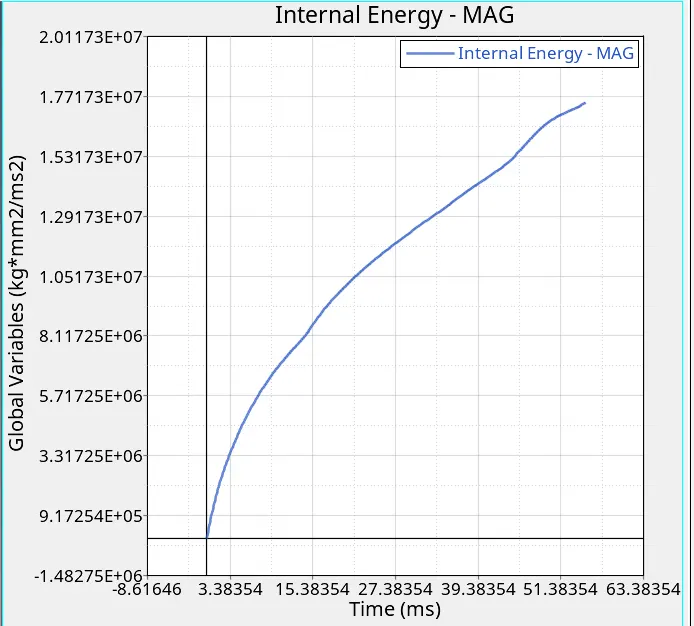
- After that, we want to Plot rigid wall forces, internal energy, hourglass energy, contact energy, the total energy of the simulations in the hypergraph 2D option.
CASE 2
- First, create a new folder on the desktop.IN that create a case 1 and case 2 folder.
- Then copy-paste the engine file and starter file in it.
- Open the Hypermesh software with Radioss.
- Import by using the import solver desk option.
- Then change the Tstop time to 55ms in the cards engine run-time option.
- And change Tstart-3ms and Tfreq-1ms in the cards engine animation time option.
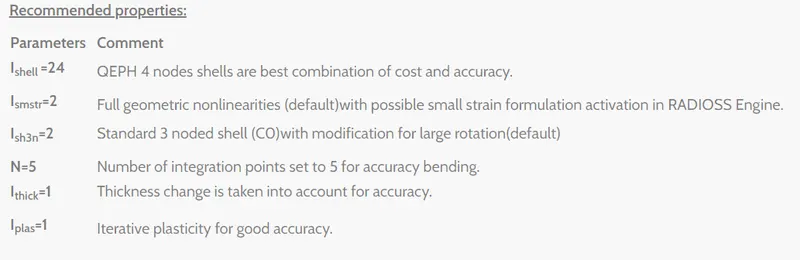
- Then give the element property to components.
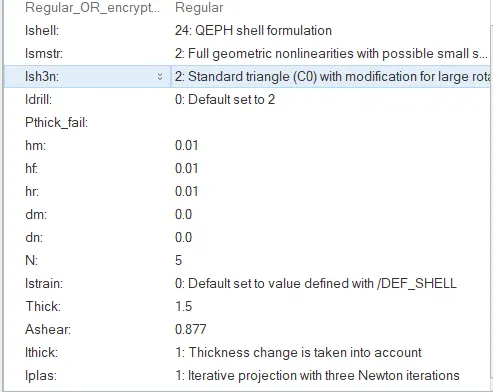
- Then go to Radioss in the analysis panel.
- And save as the input file in the case 1 folder starter file.
- And give radioss to solve the file.
- At the end of the simulation, do the energy error and mass error checks.
- For that go to the case 2 folder in that starter file is open in the note pad.
- Error <0 to -15 is acceptable.other than this is not acceptable.
- After the radioss job is completed click the result option. and it takes to the hyper view software.
- The collision of the beam on the wall can be shown in it.
- After that, we want to Plot rigid wall forces, internal energy, hourglass energy, contact energy, the total energy of the simulations in the hypergraph 2D option.
COMPARISION
CASE1 CASE 2
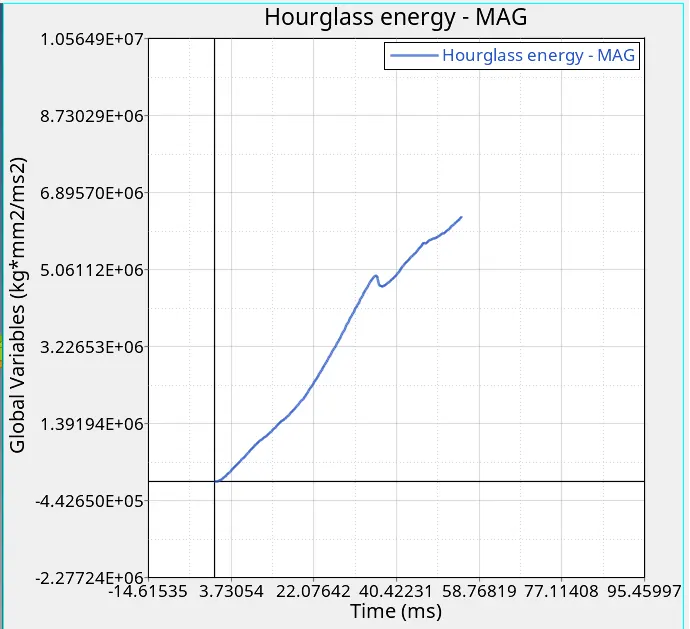
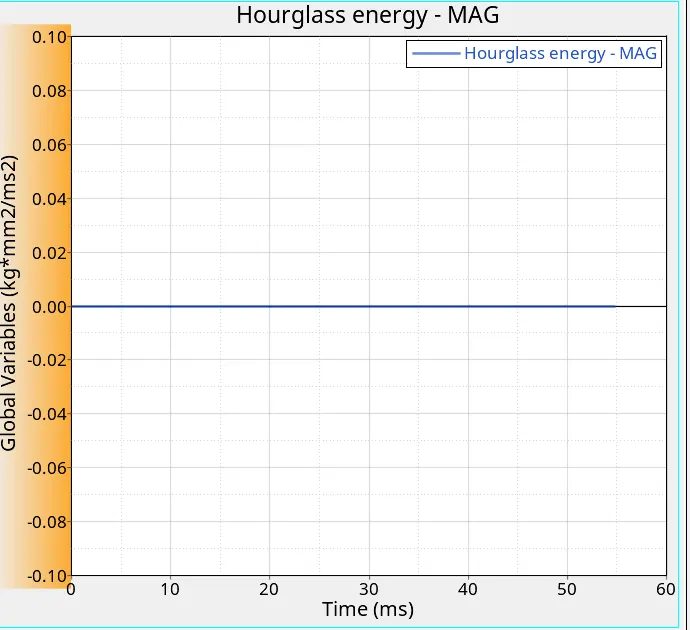
- Hour glass energy
- Case1 without element property and case2 with element property.
- We can see the high in case 1 because of QEPH ELEMENT formation.
- This has be improve using physical stabilization to reduce the hourglass energy.
- case 2 energy is all most equal to zero because of Ishell24.
- RIGID WALL
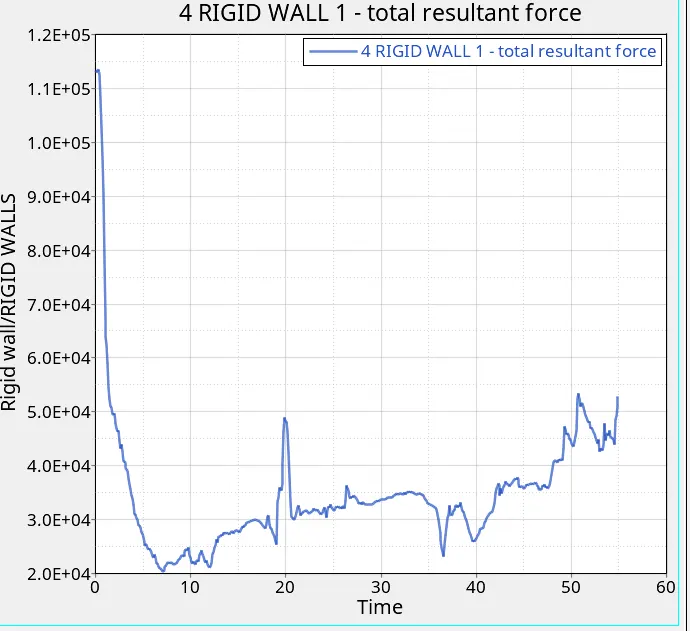
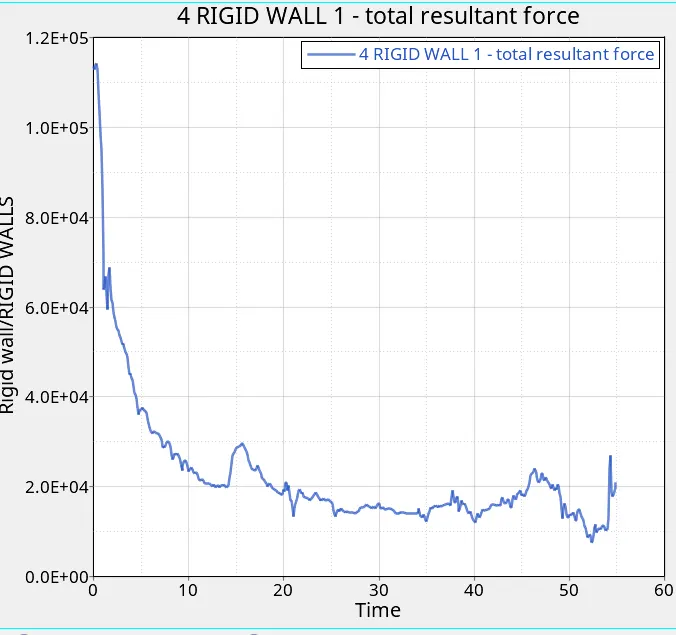
- In case1 without element property the force decrease is uneven.
- In case2 the force decrease is constantly reduce due to the Iplas and Ismstr.
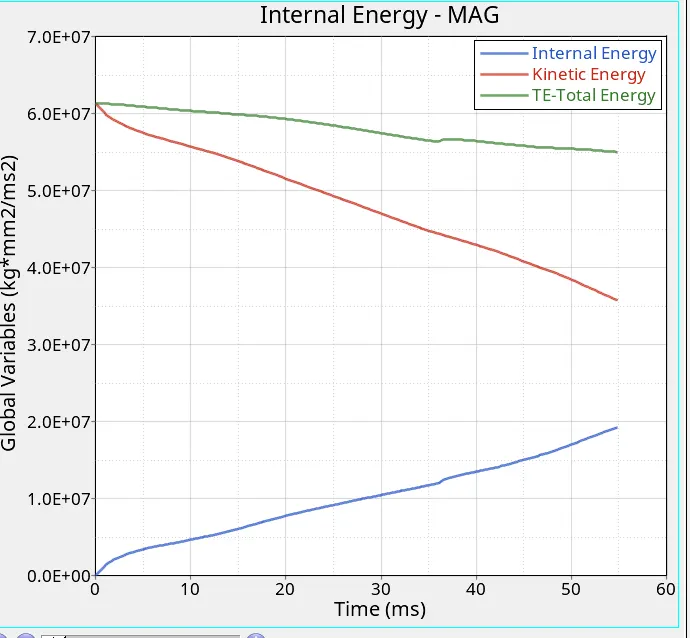
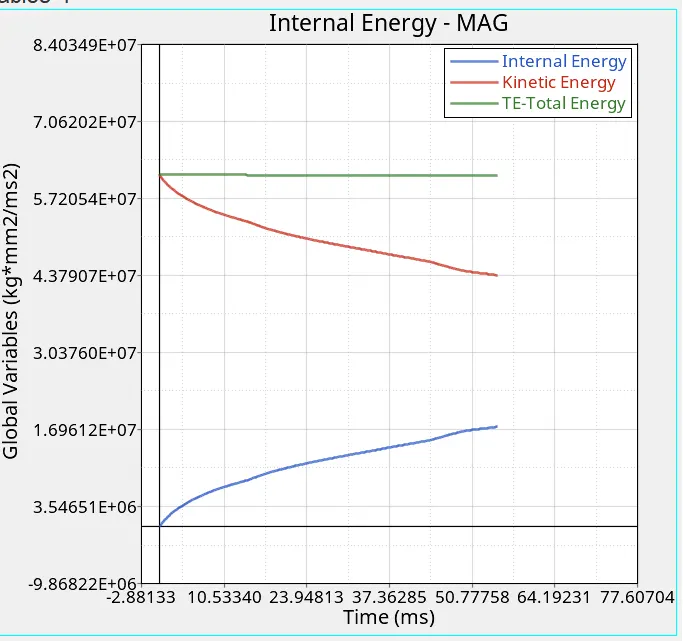
- TOTAL ENERGY
- In case1 we clearly see that the total energy loss is more because of high hourglass energy.
- But in case2 it is almost flattering because of less hourglass energy.
- While using element property the loss is very minimum.
- CONTACT ENERGY
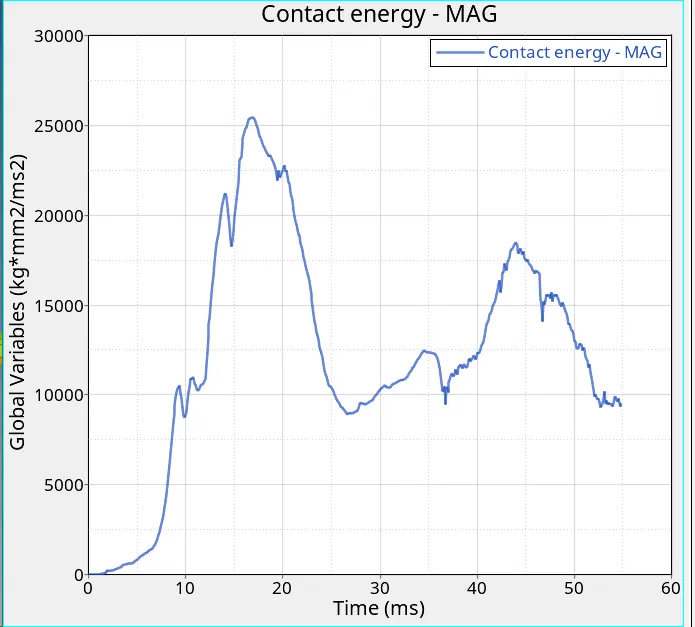
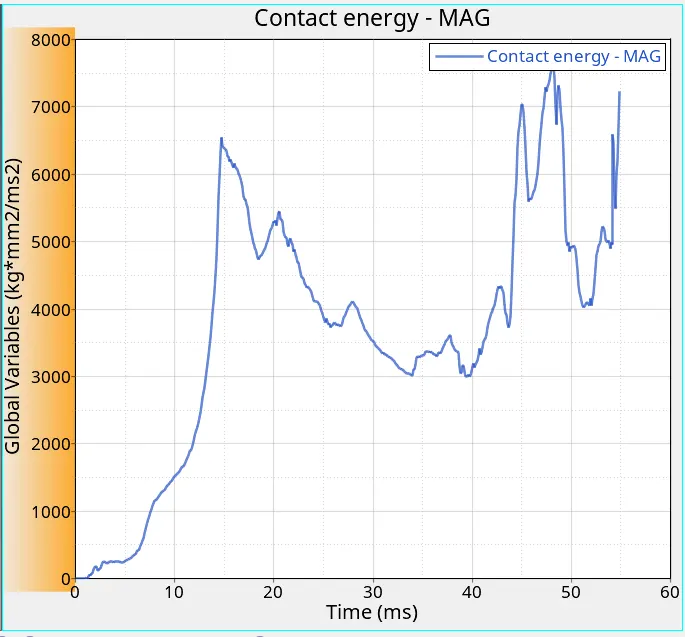
- In case 2 the Iplas is not taken it only capture the yield point only.
- In case 2 we use the Ismstr 2 and Iplas is 1 thus it capture the large deformation with high accuracy so capture all deformations.
- And due to Iplas is 1 solver calculate the strain deformation even though after the yield point is reached.
- Thus the graph differs to each other.
CONCLUTION
Thus the Comparison of results with base simulation and improved shell element properties under the given criteria. And compared the energy graph.