3D Creation of Ceiling, Roof, Architectural plan, Structural plan, Sectional view, Elevation view and Camera specific view for a house plan using REVIT
1Q
A:
Aim: To Model a Ceiling to the first-floor
Introduction:
A ceiling is an overhead interior surface that covers the upper limits of a room. It is not generally considered a structural element, but a finished surface concealing the underside of the roof structure or the floor of a story above.
Procedure:
Step 1:
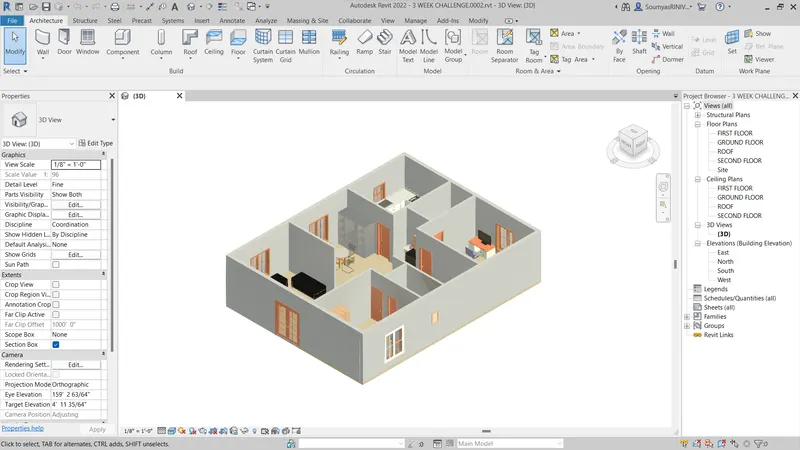
Opening Week 3 Project
Open Revit Software
From recent projects Open 'week 3 challenge’
Step 2:
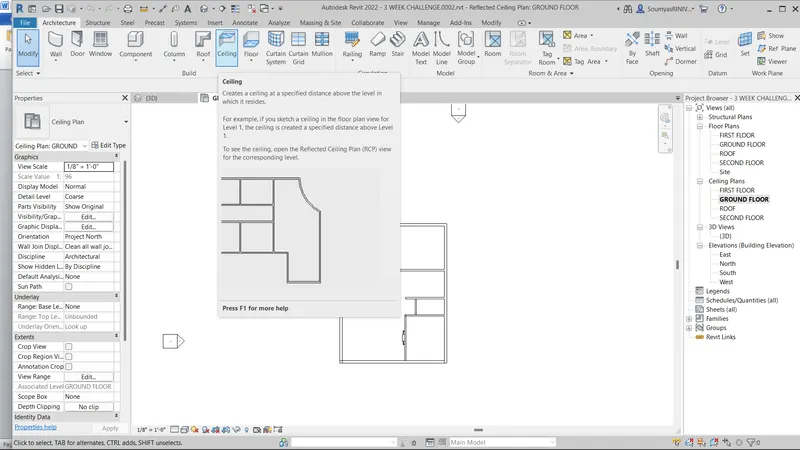
Creating a ceiling
From the project, browser click and open the Ground-floor plan view
Go to Architectural Tab
Click on Ceiling to model the ceiling for the Ground floor
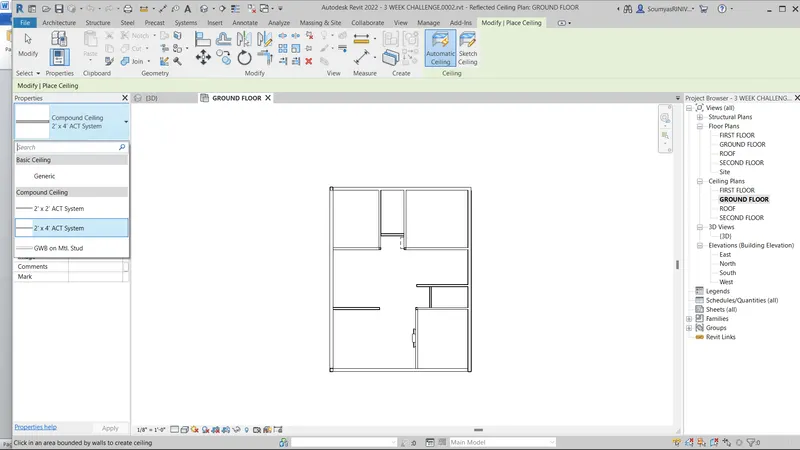
Select the type as 2'X4' ACT System
Select the required area of the ceiling as shown below
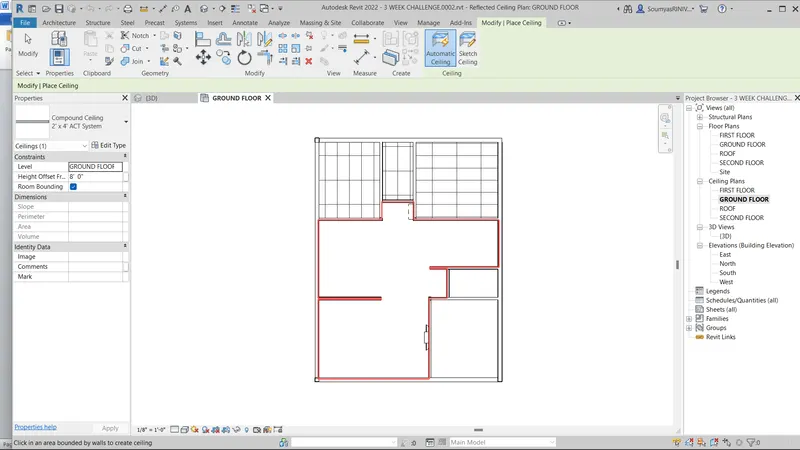
Similarly, select all the required ceiling area
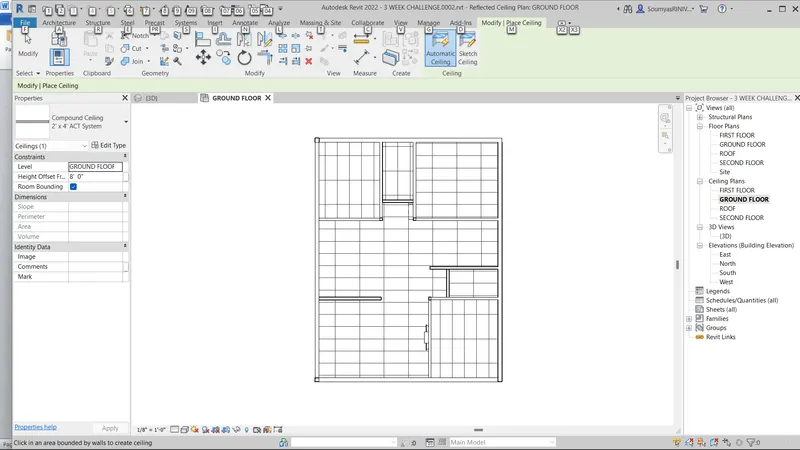
The height offset of the ceiling is changed from the properties of the ceiling.
Result:
ceiling for ground floor is created
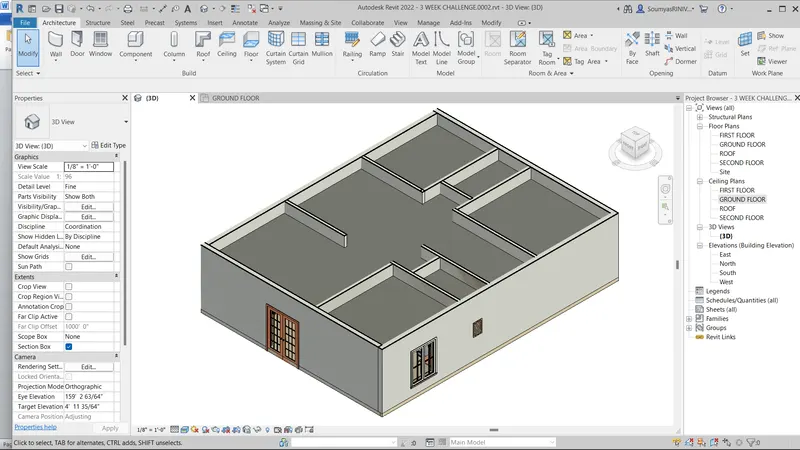
2Q
A:
Aim: To Model a Roof to the building
Introduction:
A roof is a top covering of a building, including all materials and constructions necessary to support it on the walls of the building or uprights, protecting against rain, snow, sunlight, extremes of temperature, and wind. A roof is part of the building envelope.
Procedure:
Step 1:
Opening Week 3 Project
Open Revit Software
From recent projects Open the Project
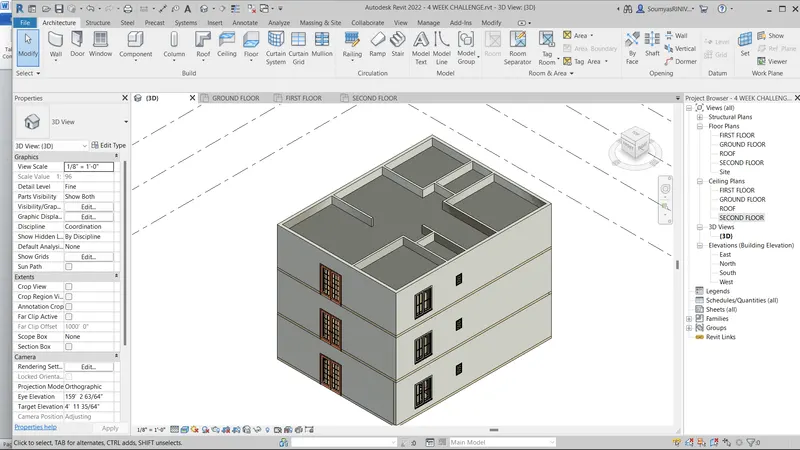
Step2:
Creating Roof
Open roof Plan in the Project Browser
From the project browser click and open the roof plan view
Go to Architectural Tab
Click on the Roof tab to model the roof
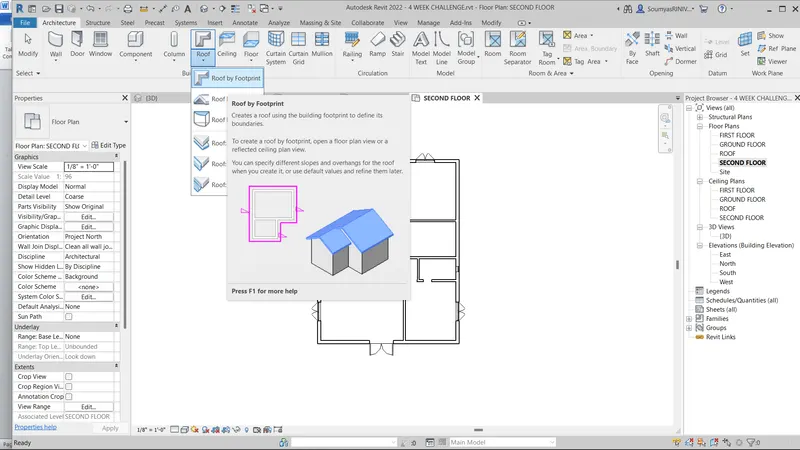
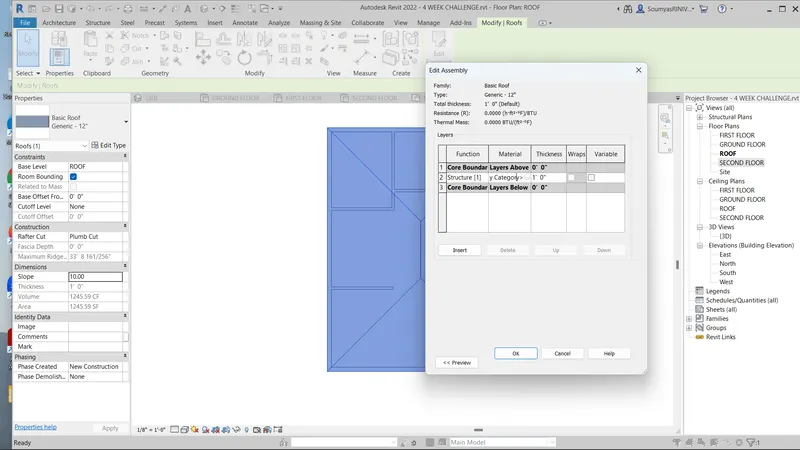
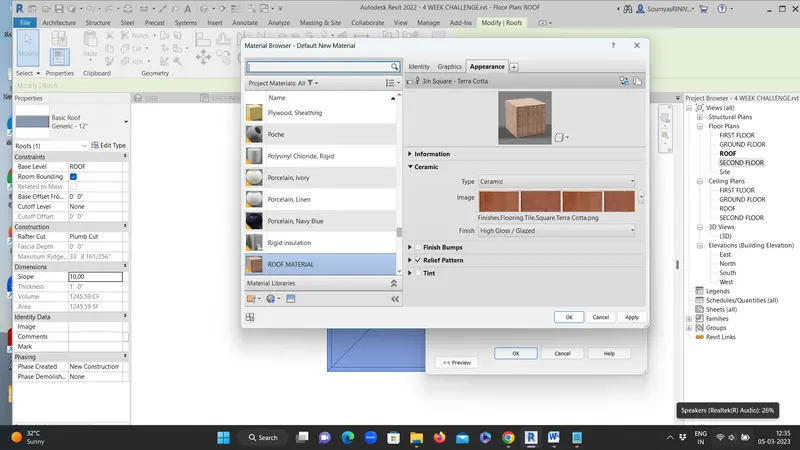
Select the type as 'Generic 12" Roof'
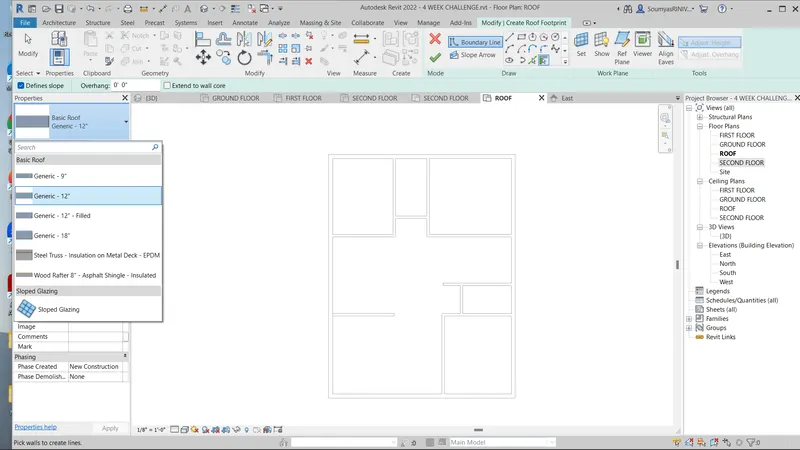
Do the required modifications to the roof like material and slope using Edit type
then draw the roof using required draw tools
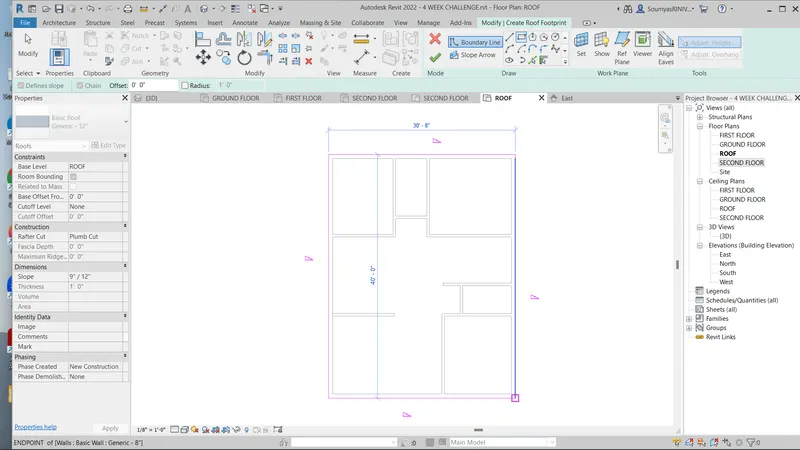
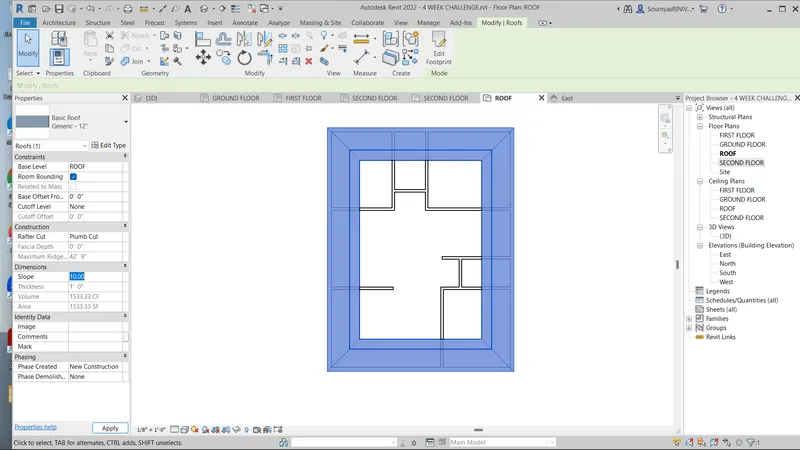
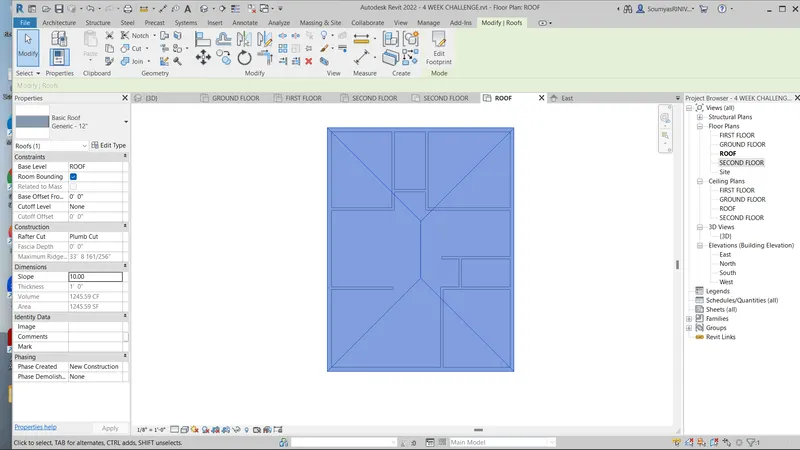
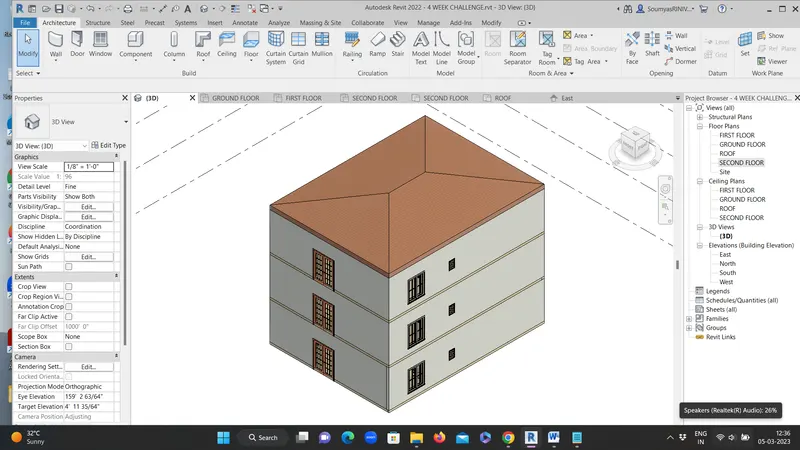
Result:
Roof is created
3Q
A:
Aim: To create Architectural and Structural Plans
Introduction
In the field of architecture, an architectural plan is a design and planning for a building and can contain architectural drawings, specifications of the design, calculations, time planning of the building process, and other documentation
A structural drawing, a type of engineering drawing, is a plan or set of plans and details for how a building or other structure will be built. Structural drawings are generally prepared by registered professional engineers, and based on information provided by architectural drawings.
Procedure :
Step 1:
Opening Project
Open Revit Software
From recent projects Open the project
Step 2:
Creating Architectural Plan
Go to Properties browser and open Floor Plans as required
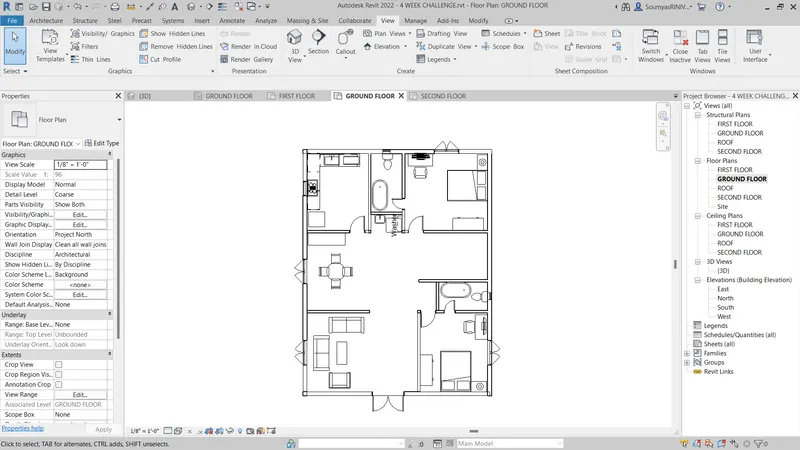
Click on Ground Floor Plan to open 2D layout Floor plan of ground floor
• The architectural plan of the ground floor consists of walls, stairs, windows, doors
• Components of kitchen, living room, bedroom, toilet, storeroom.
• Ground Floor Plan is shown below
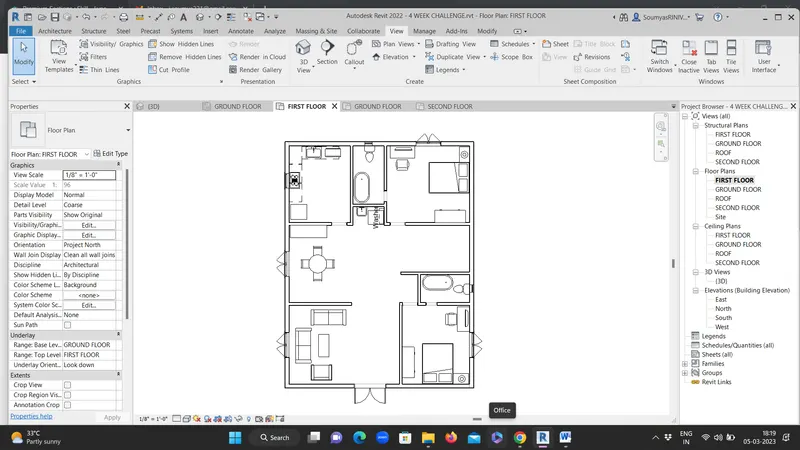
Click on First Floor Plan to open 2D layout Floor plan of the first floor
• The architectural plan of the First floor consists of walls, windows, doors
• Components of a bedroom, living room, toilet.
• The first Floor Plan is shown below
Step 3:
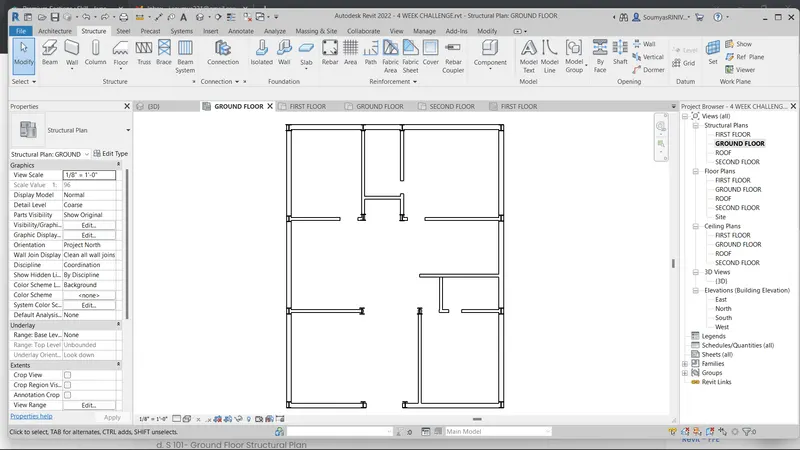
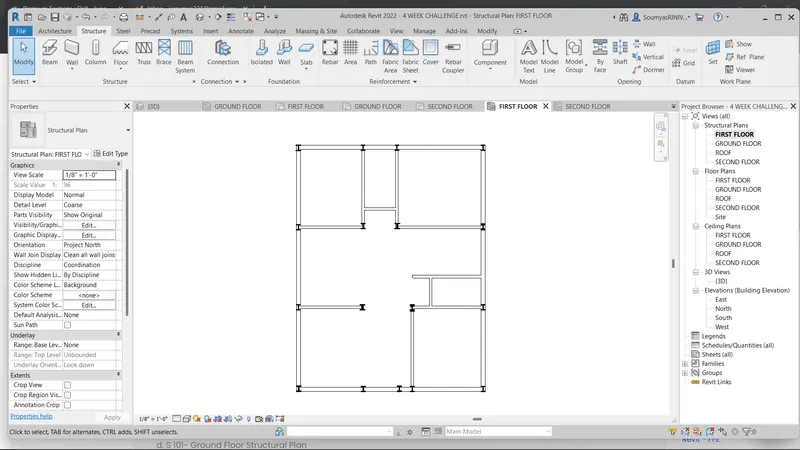
Creating Structural Plan
structural plan consists of columns walls floors
Go to the Structural tab
Click on a column to add structural columns to the layout where the column us required
and then go to the project broswer , in structural plans click on the ground floor for the structural plan for the ground floor
structural plan of the second floor
Result:
Architrctural and structural plans are created
4Q
A:
Aim: To Annotate the project concerning the Grids created
Introduction:
An architectural plan is a design and planning for a building and can contain architectural drawings, specifications of the design, calculations, time planning of the building process, and other documentation.
A structural drawing, a type of engineering drawing, is a plan or set of plans and details for how a building or other structure will be built. Structural drawings are generally prepared by registered professional engineers, and based on information provided by architectural drawings.
Procedure:
Step 1:
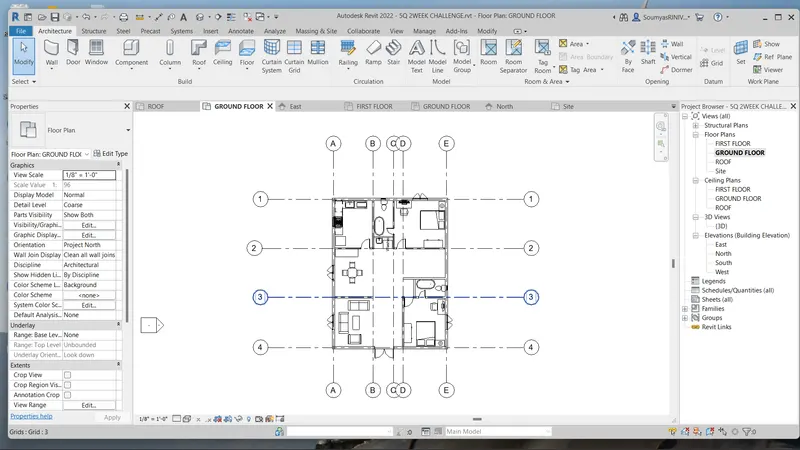
Creating Grids
Go to Architectural Tab
• Click on GRIDS on the right corner
• Draw the grids as shown below
• Horizontal Grids are name - 1, 2, 3, 4
• Vertical Grids are named - A, B, C, D,E
Step 2:
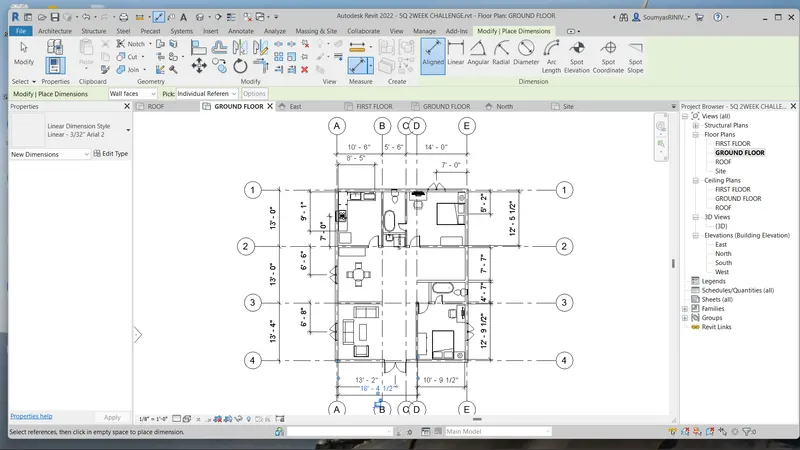
Architectural Annotations
Annotations are created for components concerning the grid line created as shown below.
Step 3:
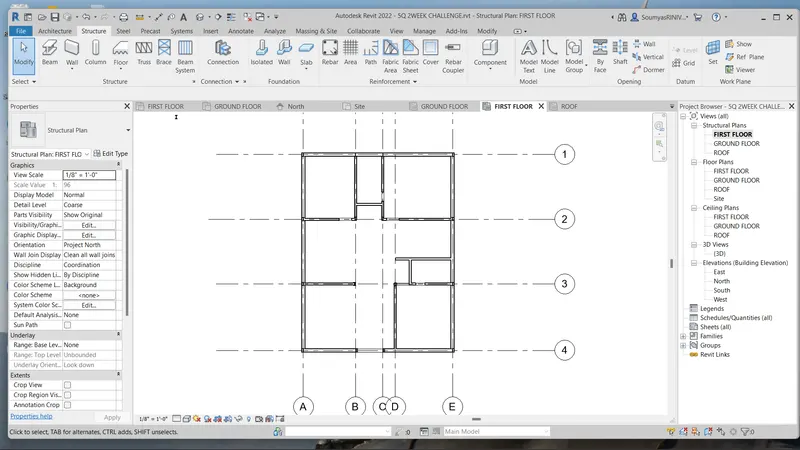
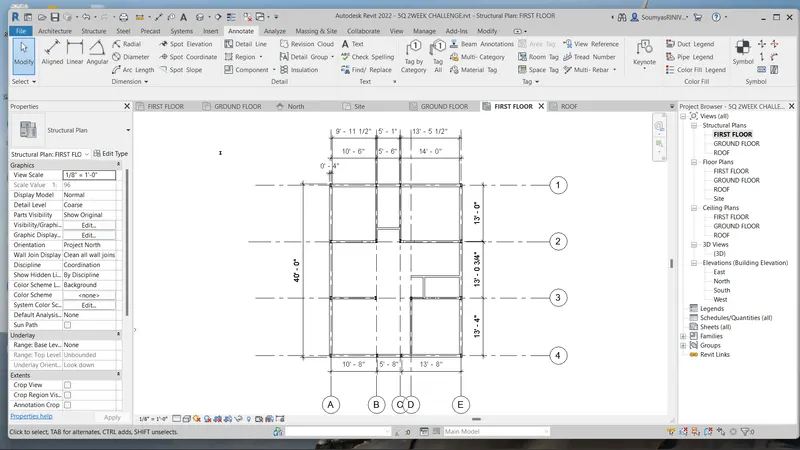
Structural Annotations
Annotations are created for wall center lines concerning the gridline created as shown below.
annotations of the wall, centerlines , Column placememt are shown below
Result:
1. Architectural Annotations: Show distance for Architectural components of the residential house with respect to the grid lines
2. Structural Annotations: Show distance for Structural components of the residential house with respect to the grid lines
5Q
A:
Aim : To create a sheet template and adjust the parameters
Introduction:
In Revit, you create a sheet view for each sheet in the construction document set. You can then place multiple drawings or schedules on each sheet view
Procedure:
Step 1: Opening Project and Sheet Layout
Open the Project
Go to Inset tab
Click on Load Family
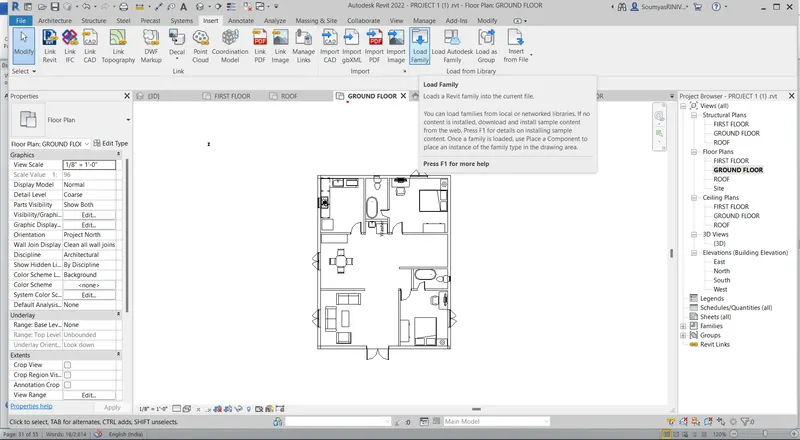
Click on title block
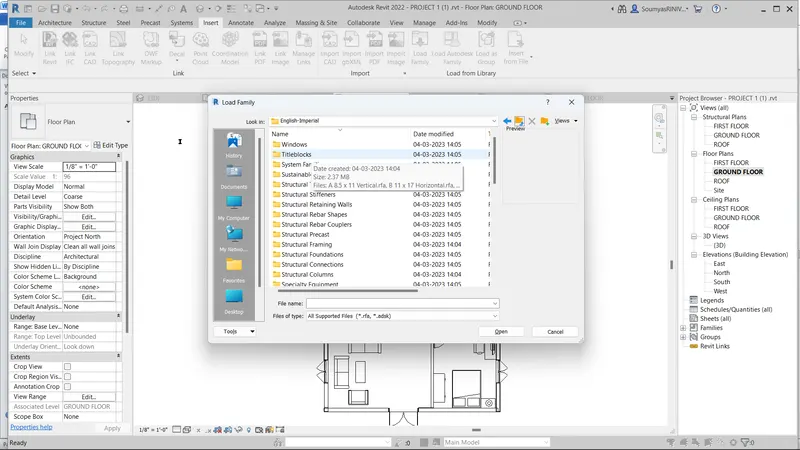
Select any template as needed
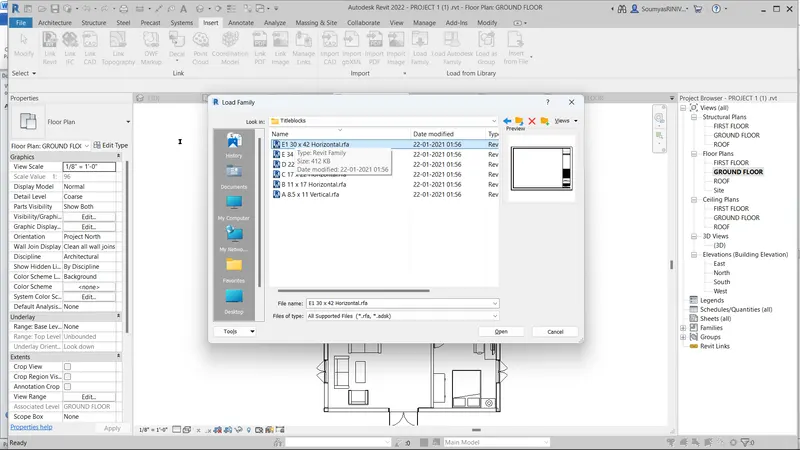
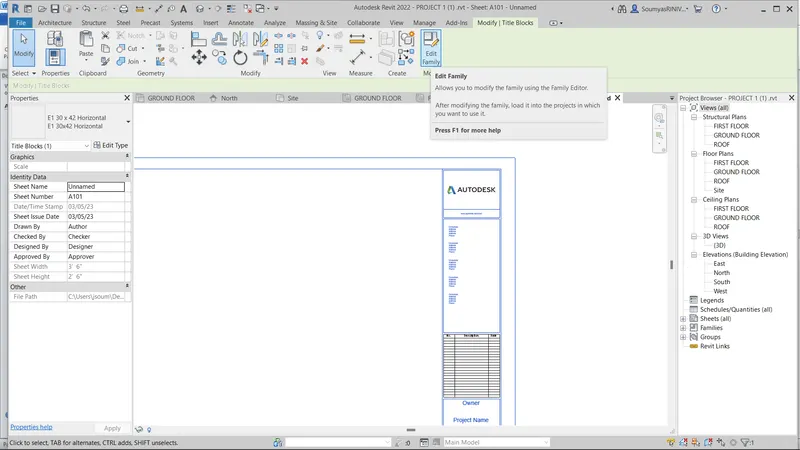
Go to Project browser and right click on sheet
• Click on Add new sheet
• Select the template E1 30X42 Horizontal
Step 2:
Changing parameters
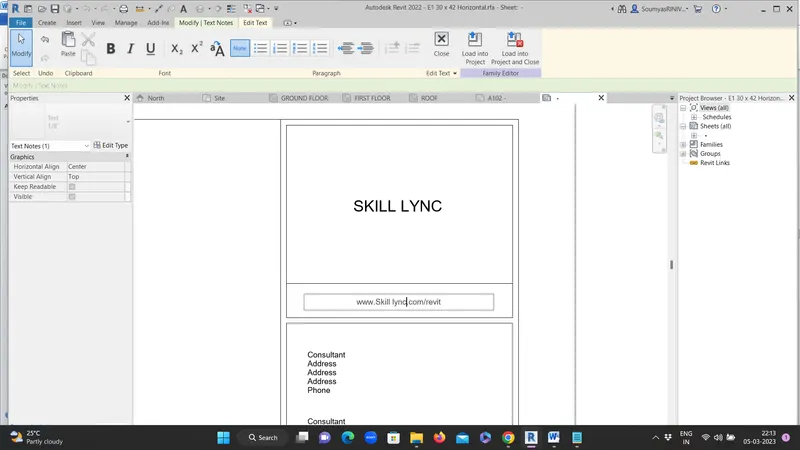
Parameters such as Name of project. consultants Involved are changed/ edited as per our project
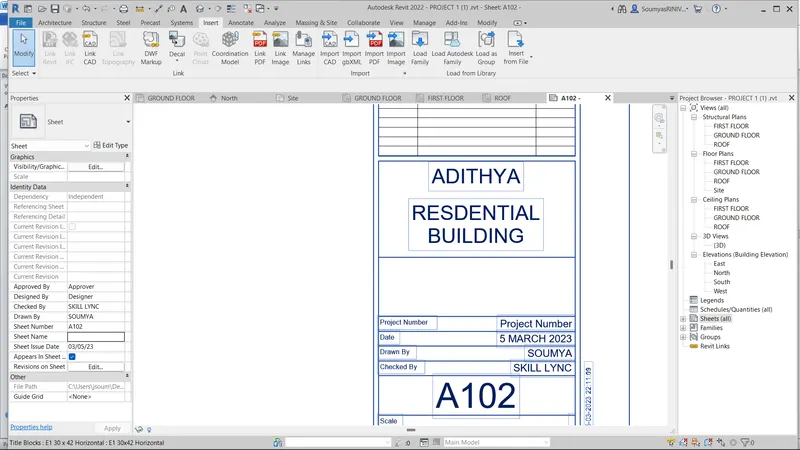
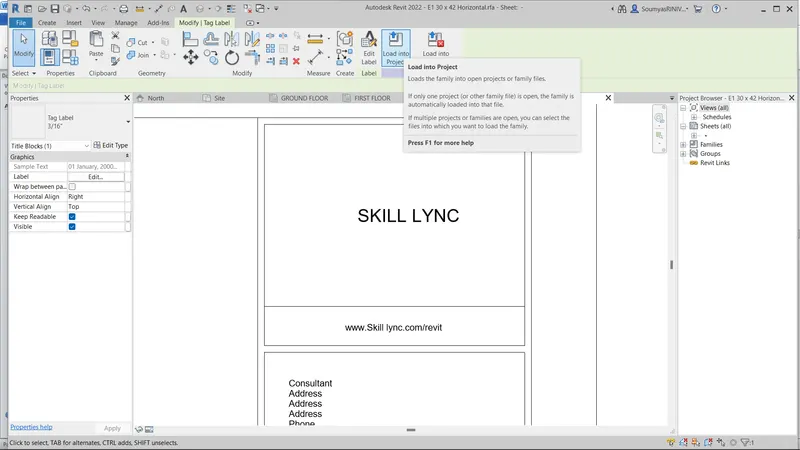
Changing parameters using Edit family
Result:
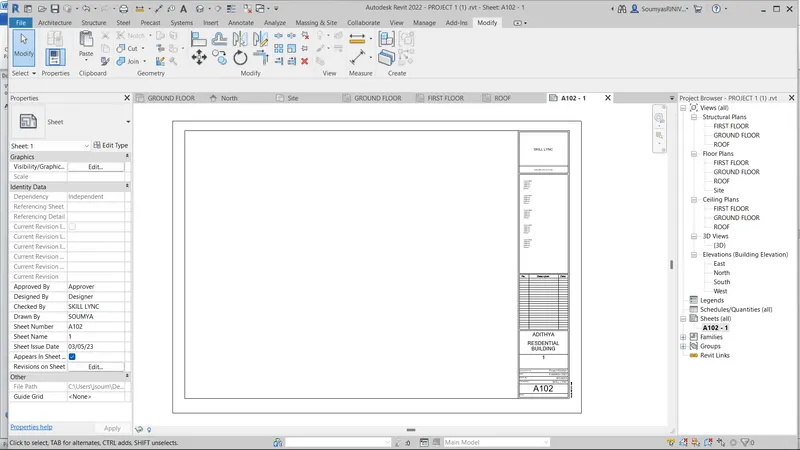
The title block after changing / editing all parameter is as follows
6Q
A:
Aim: To create elevation views for the project
Introduction:
The elevation view is a side view of the structure. This view can convey information that includes vertical dimensions, elevations, locations of doors and windows, and outside finishes.
Procedure:
Step 1:
Creating Views
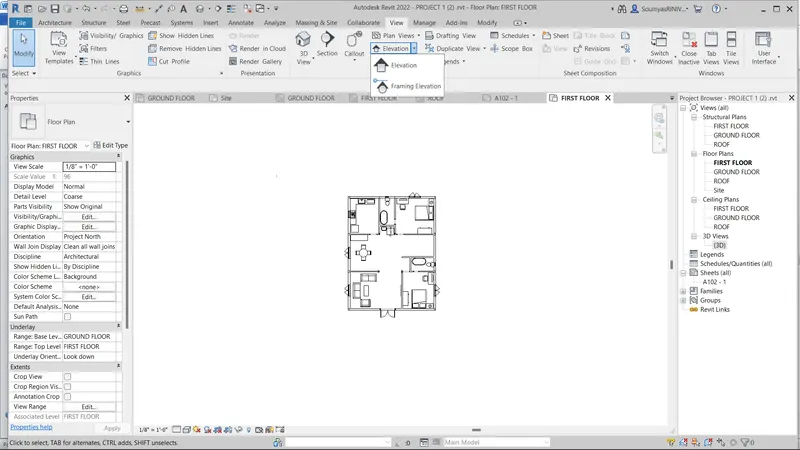
Go to the View tab
Click on 'elevation'
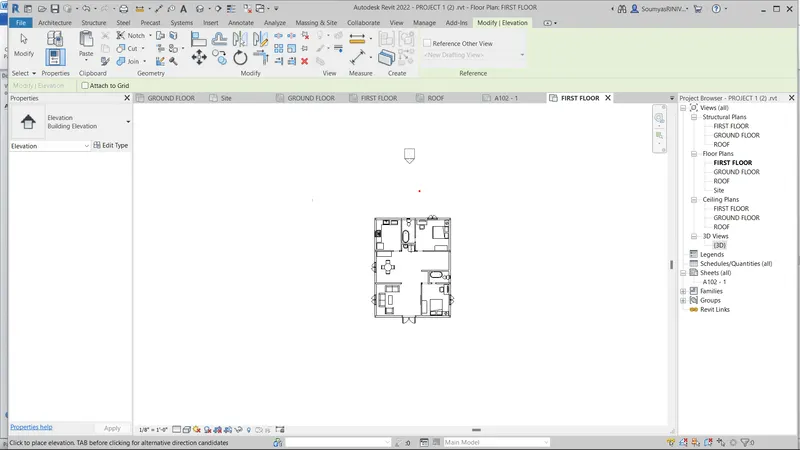
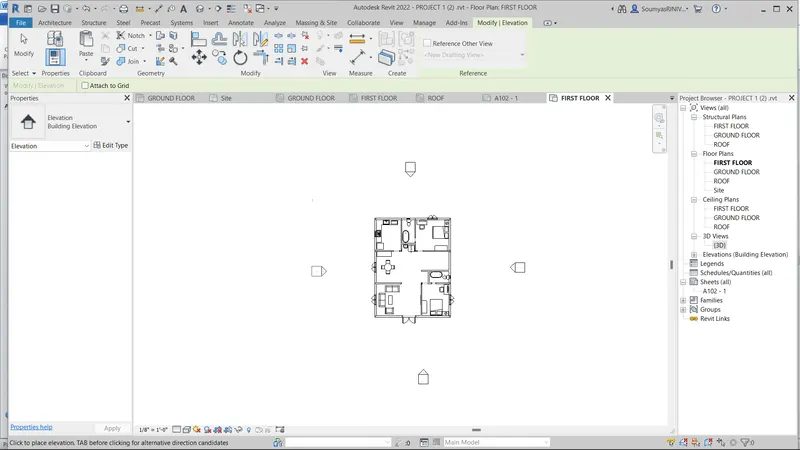
Step 2: Creating Elevation Points
Go to Floor Plan view in Project Browser
• Place the elevation marker point in the specified location/direction(i.e. East) as follows
Step 3: Opening Elevation View
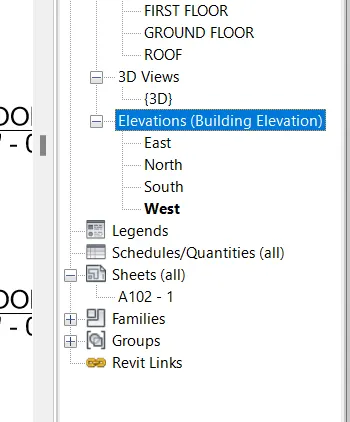
Go to Project browser
Click on + of 'elevation' to see all the elevation view And change the name if nedded and click on the one view to open it
Result:
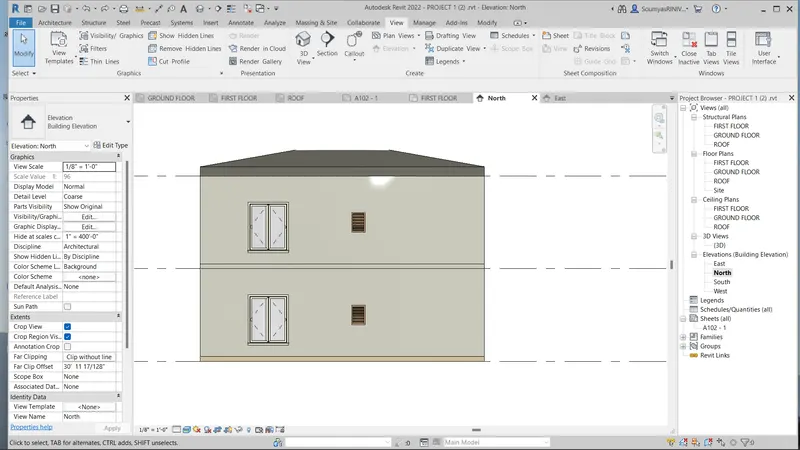
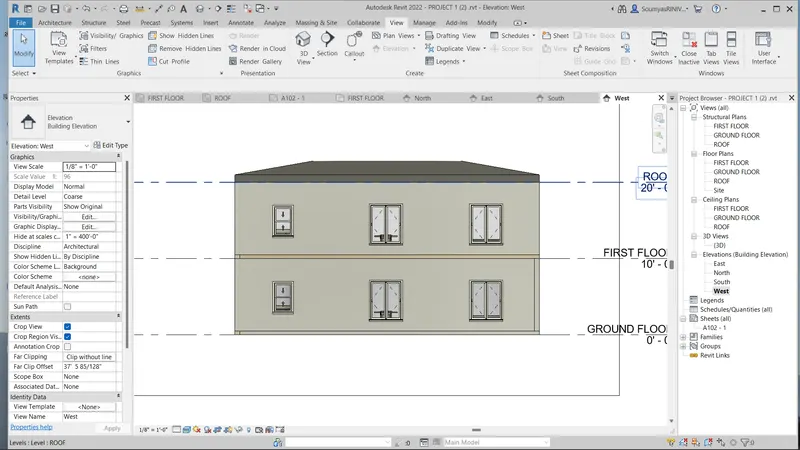
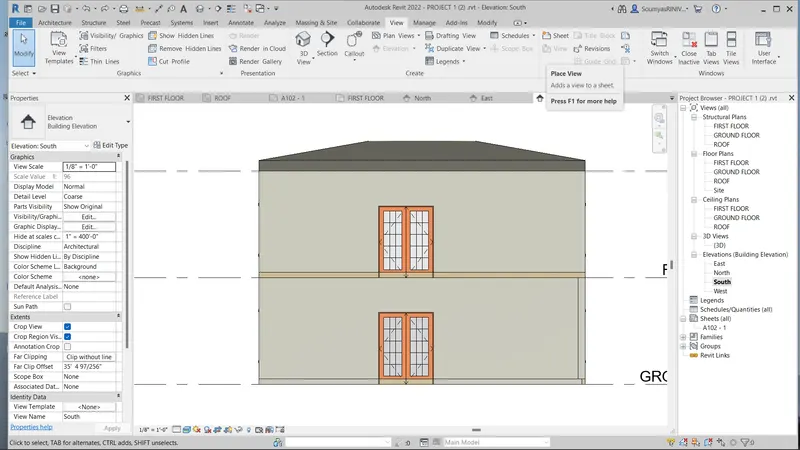
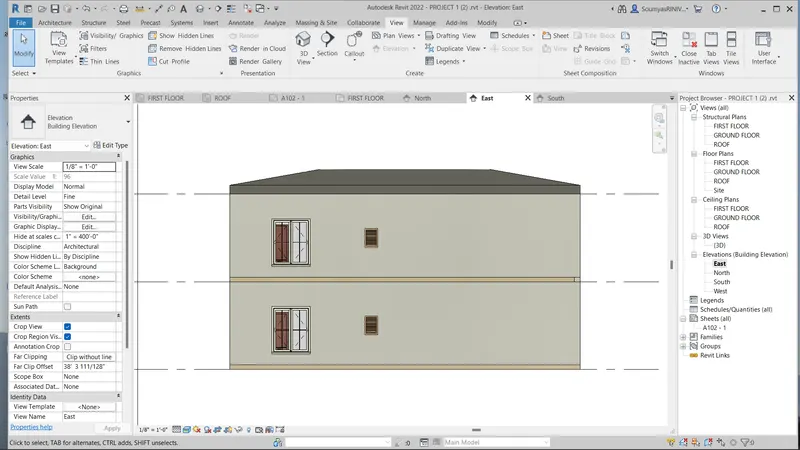
Elevation views for four directions are created and each view is shown below
North
West
South
East
7Q
A:
Aim: To create a Section cut through view
Introduction:
A section view provides architects and contractors another way of understanding how construction will stand up, as it reveals details of the construction of walls and the thickness and height of beams and other supports. While a floor plan allows for a view of how the walls stand in relation to each other, a section shows where the wall meets the floor and the distance that separates one floor from another.
Procedure:
Step 1:
Creating Section Line.
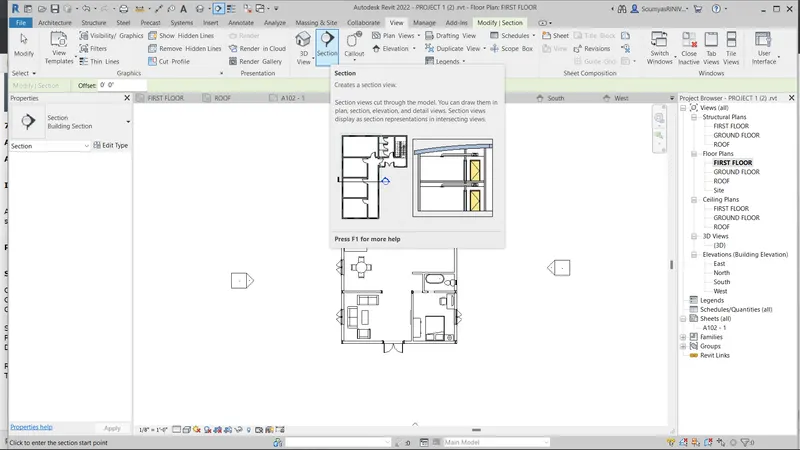
Go to View Tab
Click on 'Section'
Step 2:
Drawing Section Line
Place the curse on the one side of the section line location
Draw the vertical line to click the second point on another end
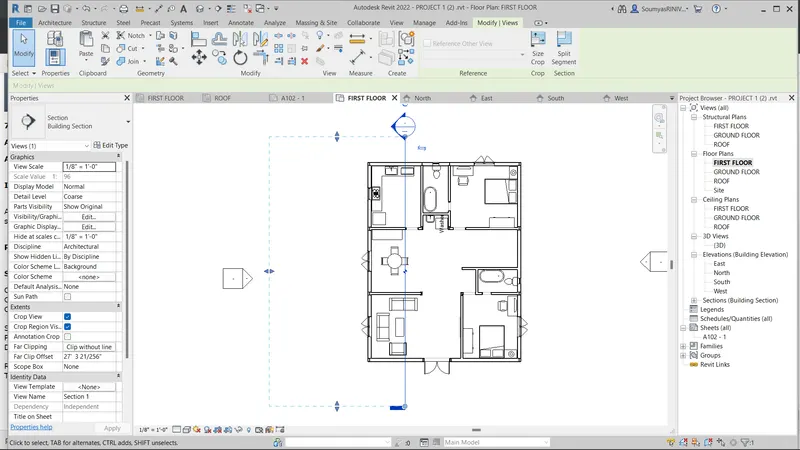
Click on go to view to see the section view
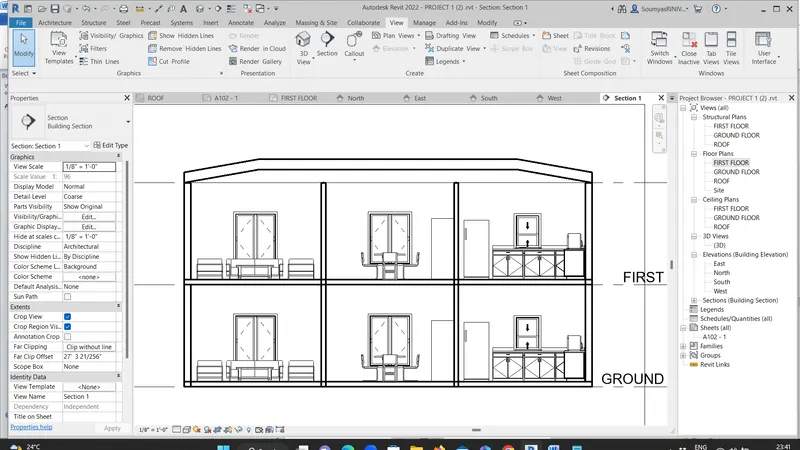
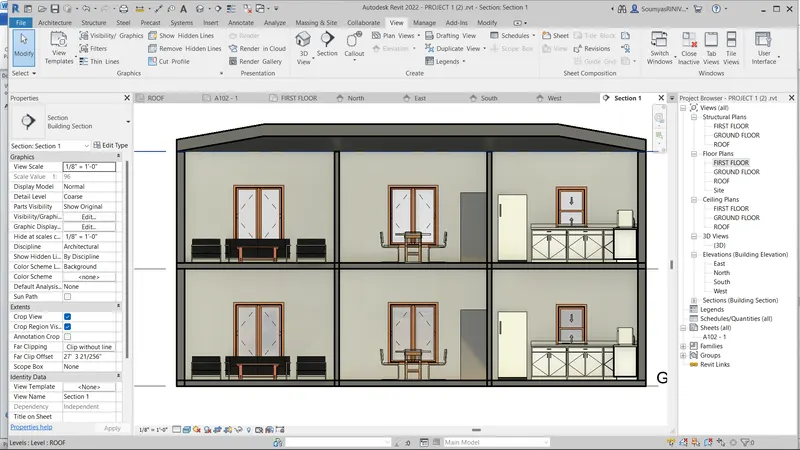
Result:
The Resultant section view of the Section line created is as follows
8Q
A:
Aim:
To classify different Views
Introduction:
Use view types to quickly apply certain graphics properties and view templates to new views, or to change graphics properties for existing views. Do one of the following: Note: When changing the view type for an existing view, only the graphics properties are applied to the view.
1. Floor Plans:
Floor Plans are 2D view of the residential building showing the components of the house with dimensions and tags
a. Ground Floor Plan
b. First Floor Plan
c. Roof Plan
2. structural Plans:
structural plans consits only structure elements
a. Ground Floor Plan
b. First Floor Plan
c. Roof Plan
3. Ceiling Plans:
Ceiling of different floors just below the roof
a. Ground Floor Plan
b. First Floor Plan
4. 3D- Views:
3D View of different rooms of the residential house
a. Living Room
b. Master Bedroom
c. Kitchen
d. Bathroom
d. 3D view of the residential house
5. Elevation:
These views are helpful in determining extract height components of the residential house and components location
a. East
b. North
c. West
d. South
6. Section Views:
Shows interior configuration of the components such as walls, architectural features e.t.c.
a. Section 1
7. Sheets:
Different sheets created for the presentations to the client
a. A101-103
b. A201-203
c. 3D101-106
d. C101
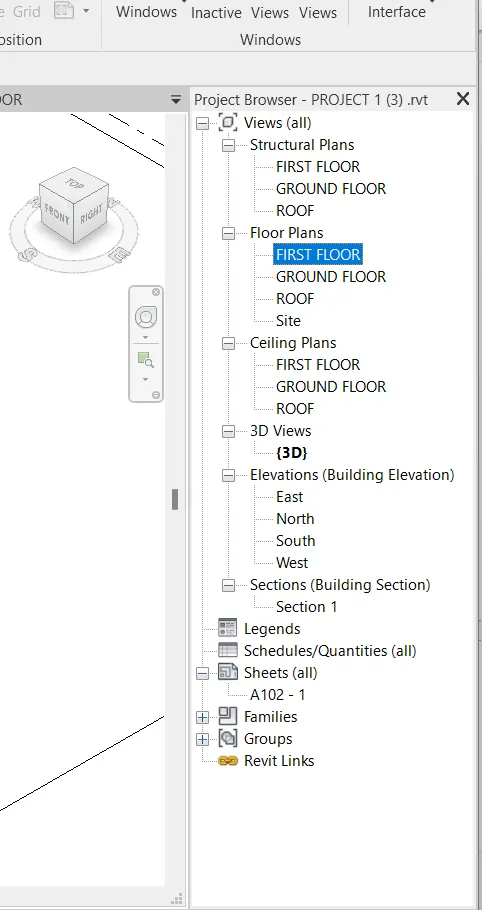
Result:
Views classified above are as per the Project browser shown below
9Q
A:
Aim: To Create multiple sheets for different views
Introduction:
In Revit, you create a sheet view for each sheet in the construction document set. You can then place multiple drawings or schedules on each sheet view
Procedure:
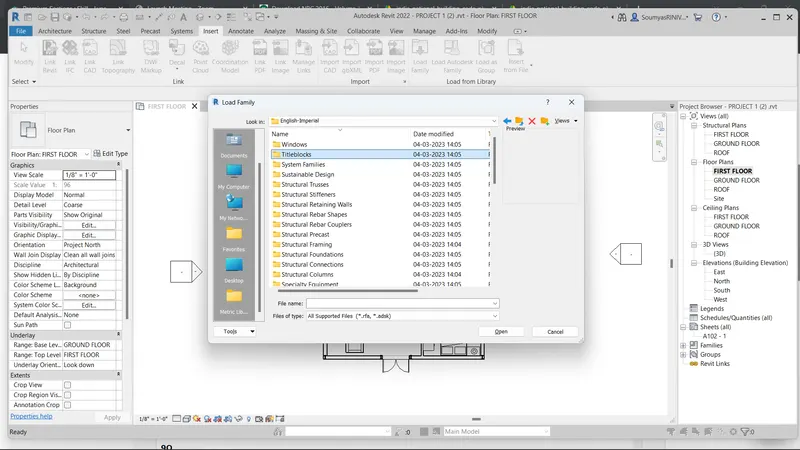
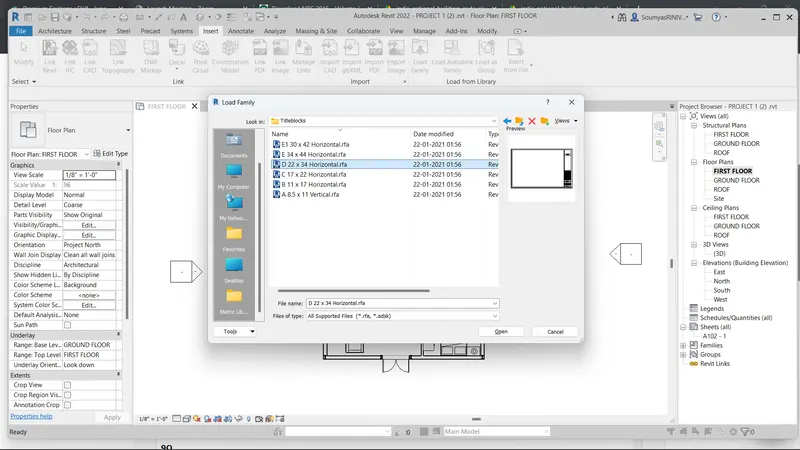
Step 1:
Open the Project
Go to Inset tabClick on Load Family
Click on title block
Select any template as needed
do the required modifications
Step 2
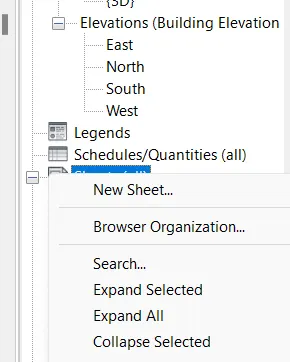
Opening Sheet Template
Go to Project Browser
Click on Sheets(All)
• Right Click to add a new sheet or
• Click on + to open previously produced sheets
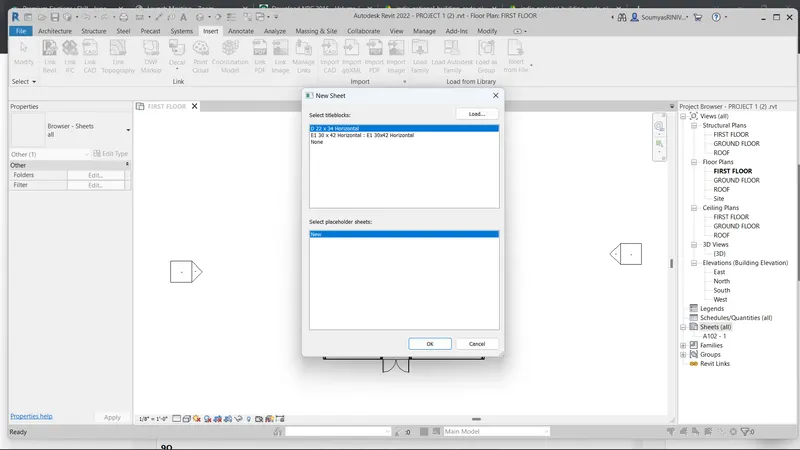
Step 3:
Adding Views to template
Go to Project Browser
Click on Sheets(All)
• Right Click to add a new sheet or• Click on + to open previously produced sheets
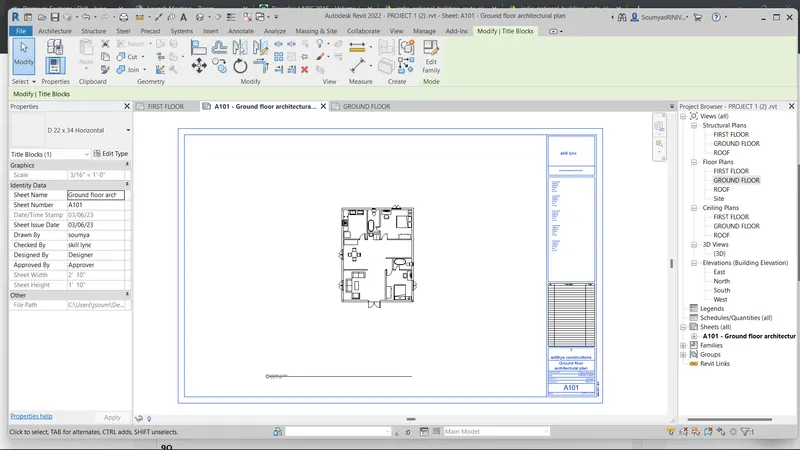
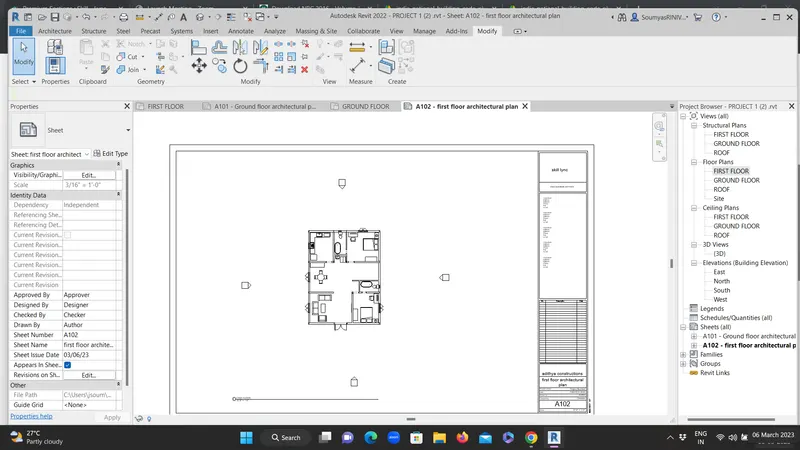
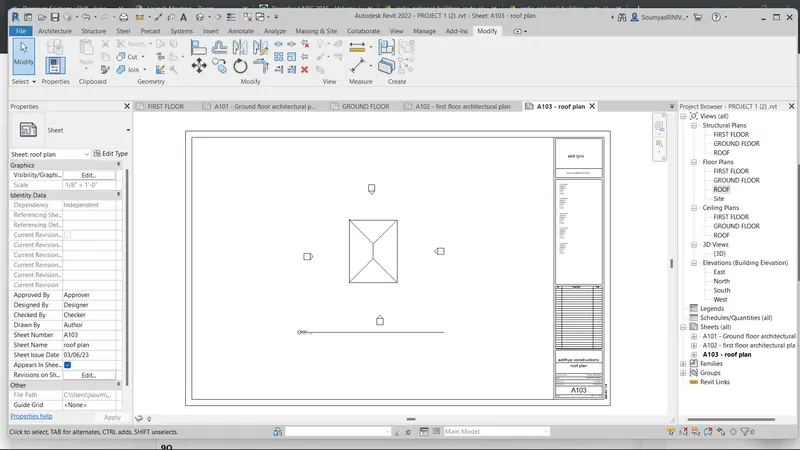
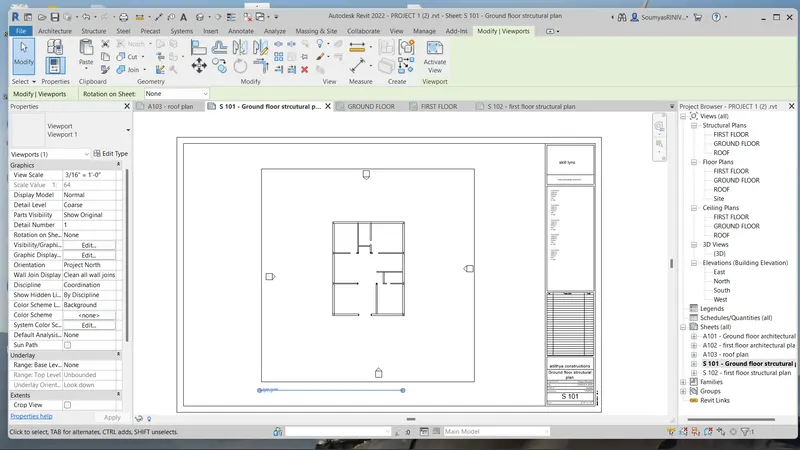
• Right-click on the sheet to add a view to the sheet as shown below
• Select the respective view to the template
• Rename the template with the respective view
• Right-click on the sheet to add a view to the sheet as shown below
• Select the respective view to the template
• Rename the template with the respective view
A101- Ground Floor Architecture Plan
A 102- First Floor Architecture Plan
A 103- Roof Plan
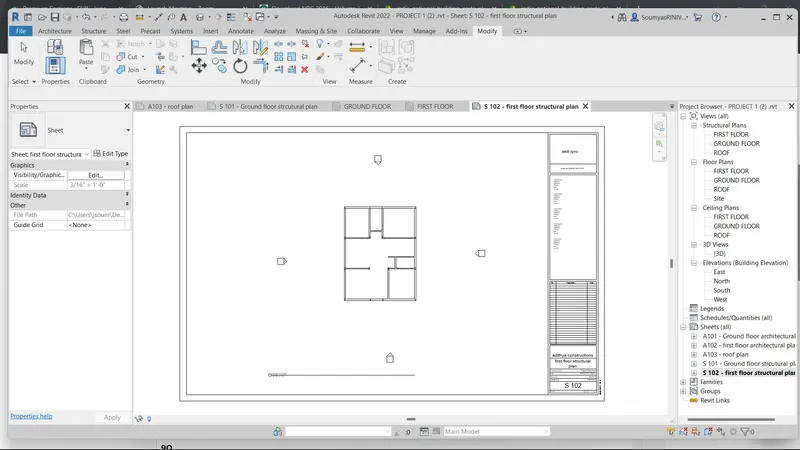
S 101- Ground Floor Structural Plan
S 102- First Floor Structural Plan
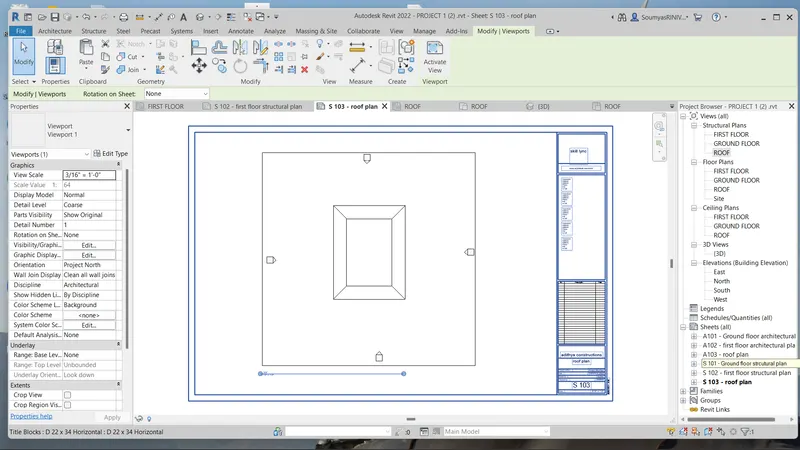
S 103- Roof Framing Plan
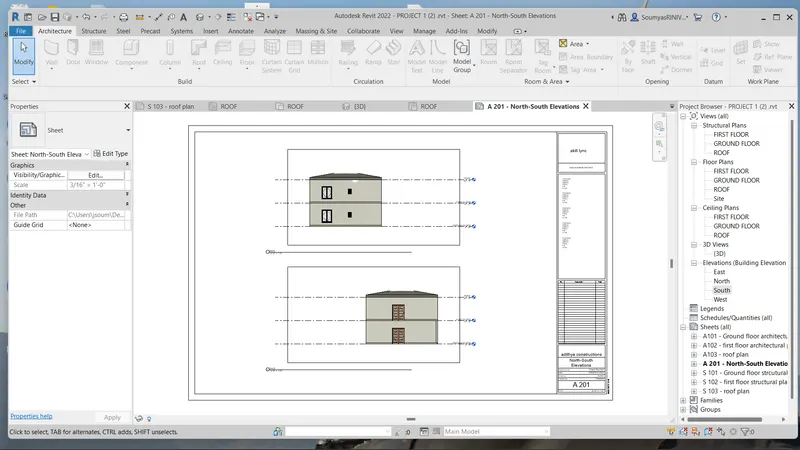
A-201- North-South Elevations
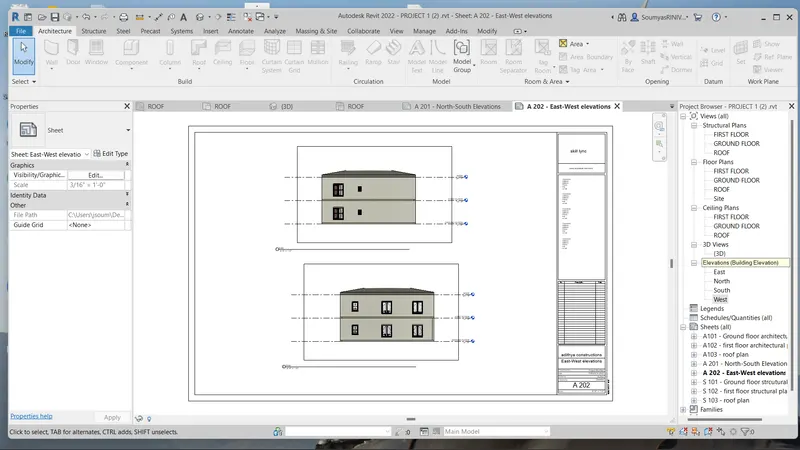
A-202- East-West Elevations
Result:
All the sheet templates created with their respective views
10Q
A:
Aim:
To Create multiple sheets for different views
Procedure:
Step 1:
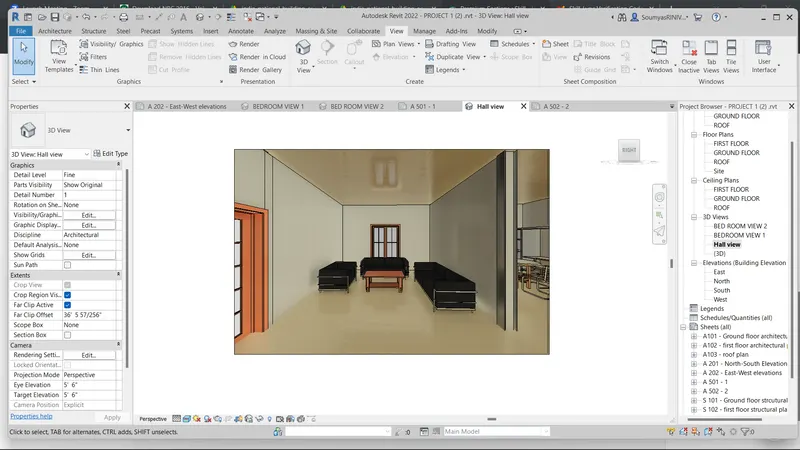
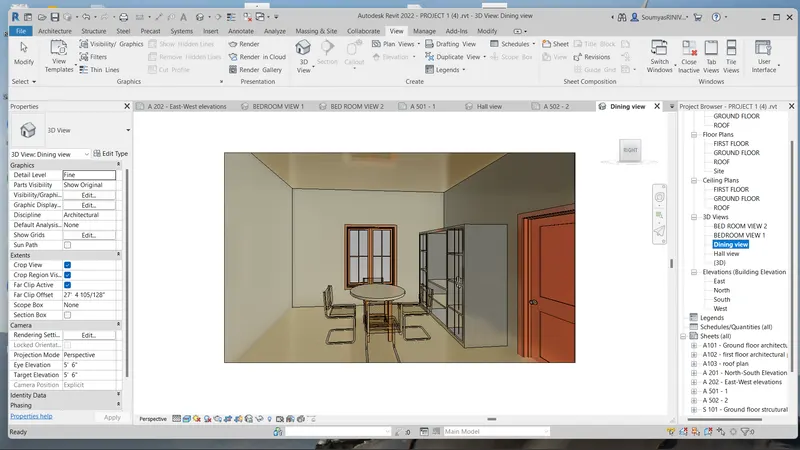
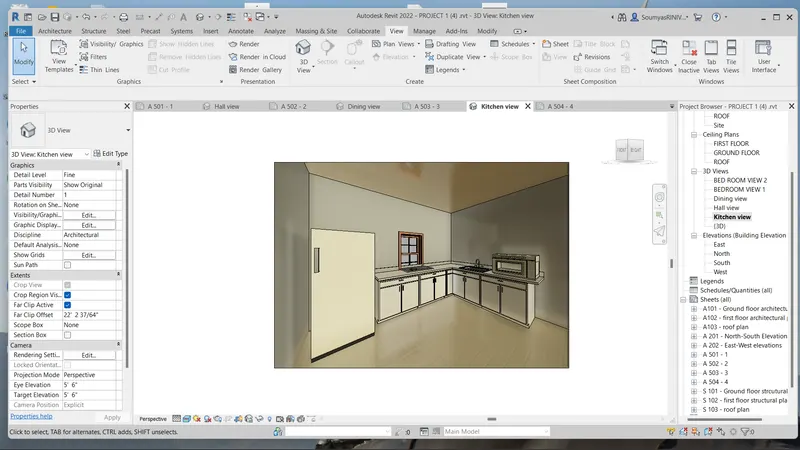
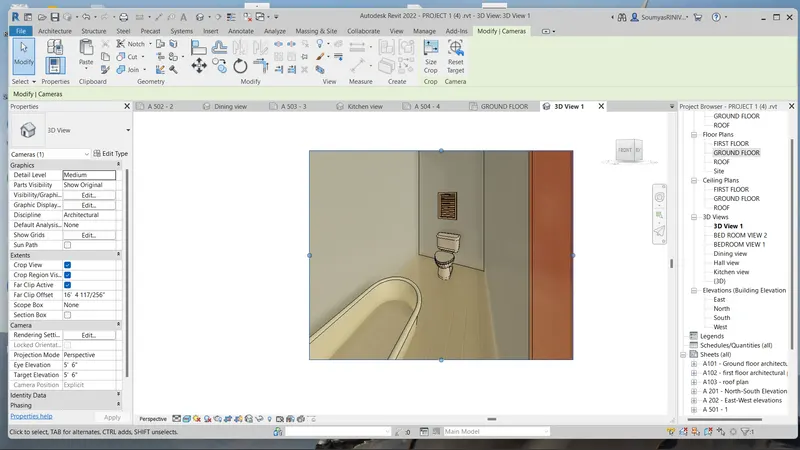
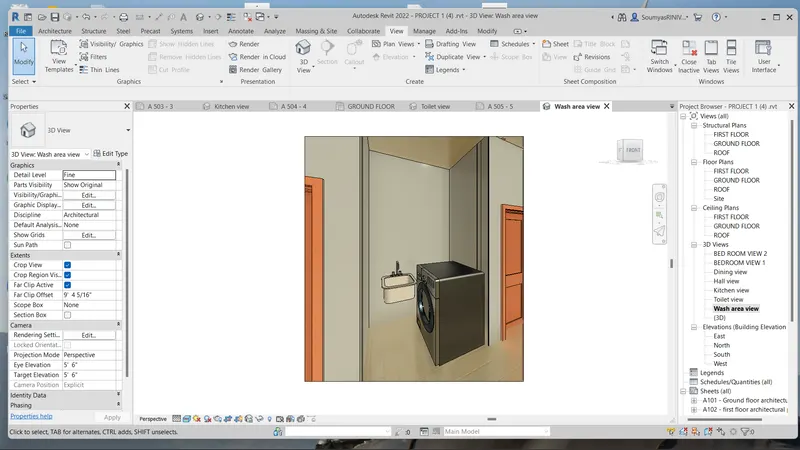
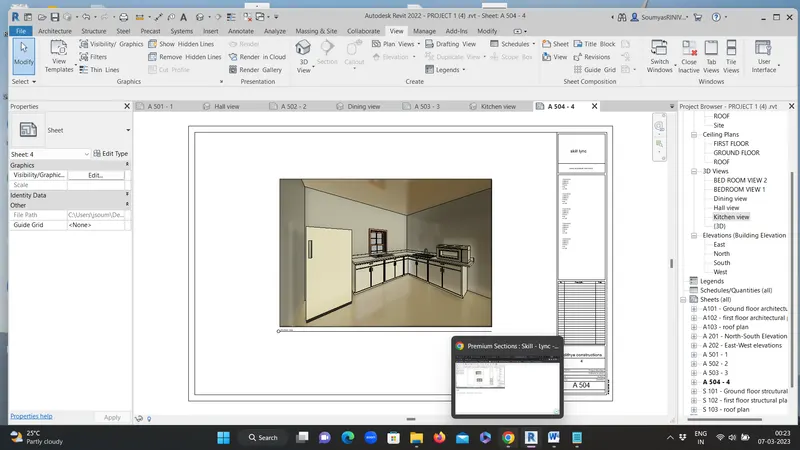
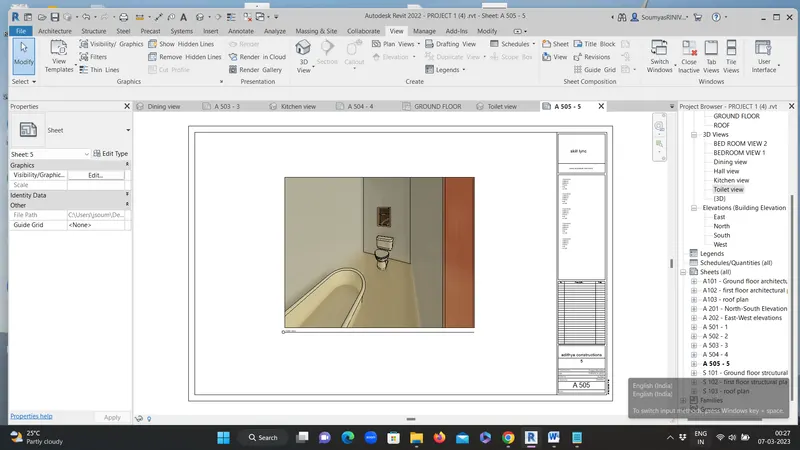
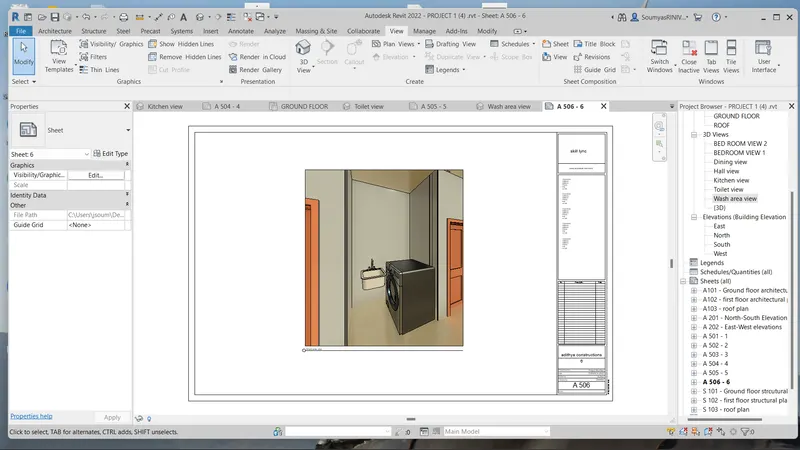
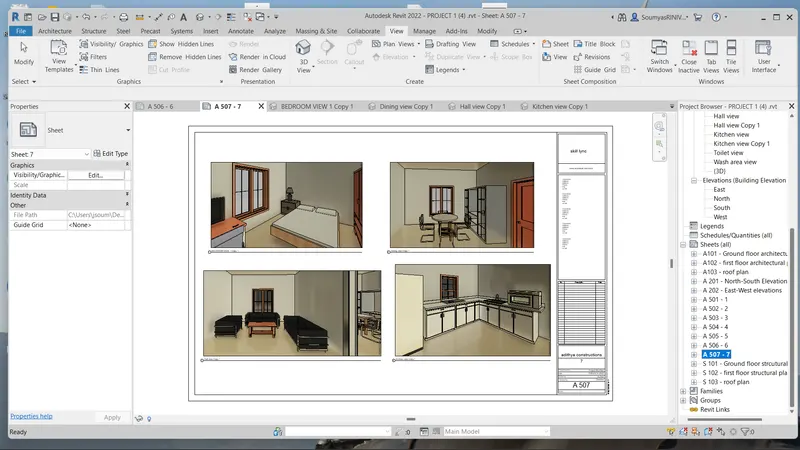
Creating 3D Cam View
Go to View Tab
Click on 3D view and click on Camera
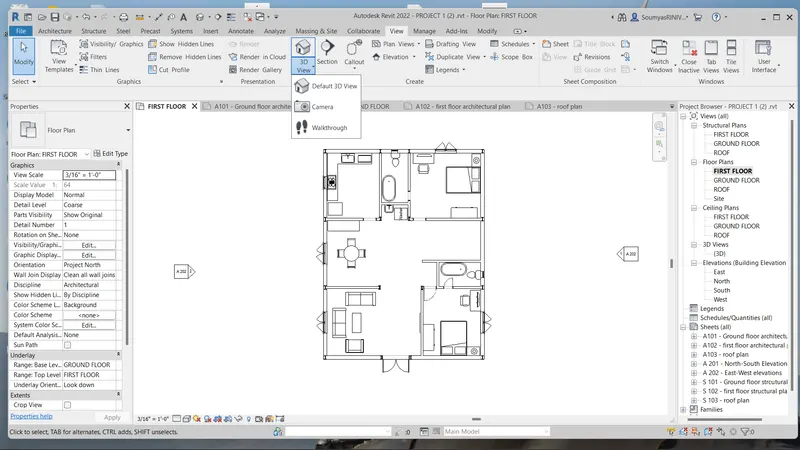
Set the Point for the camera on the required location and give the direction to the camera as shown in figure
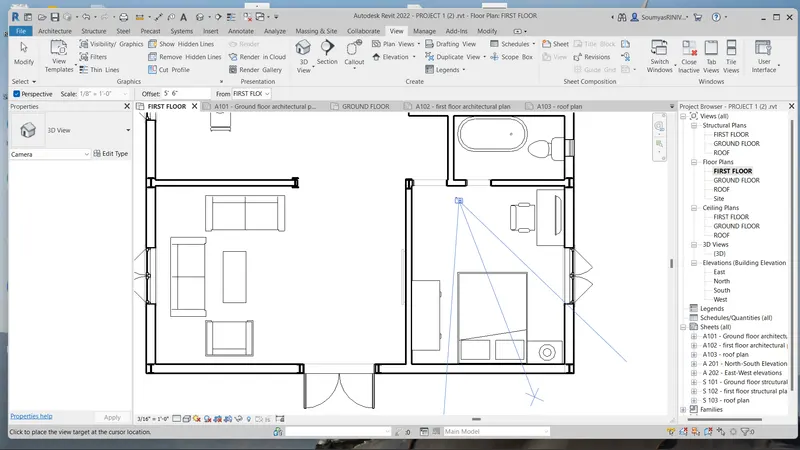
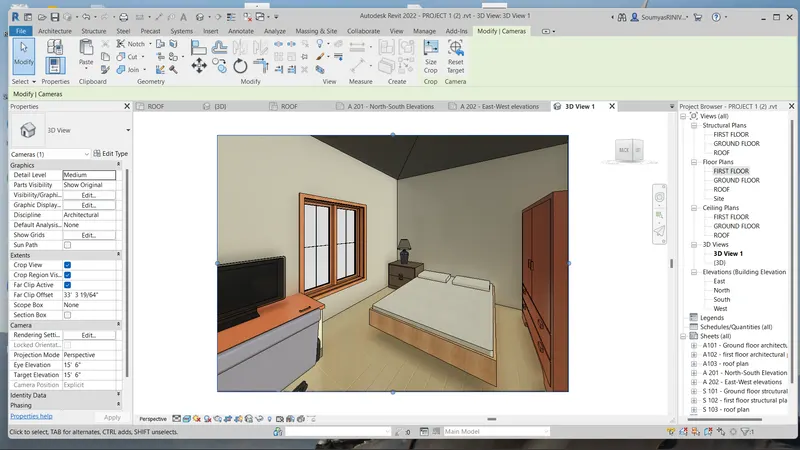
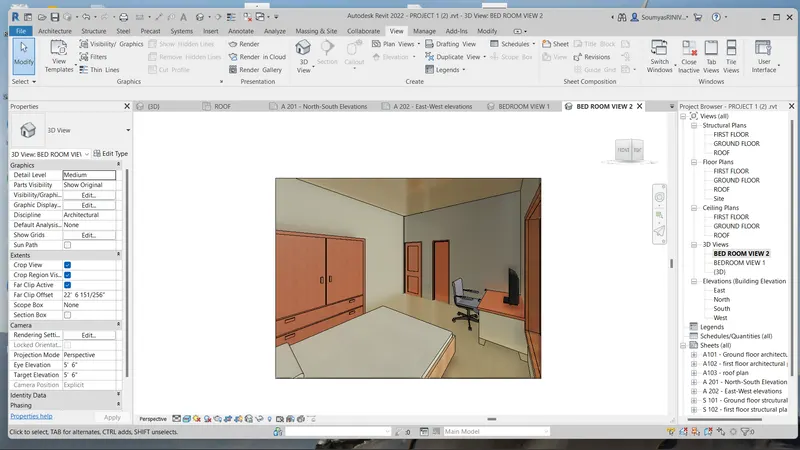
create the 3d views as your requirement
BEDROOM
HALL
DINING
KITCHEN
TOILET
WASH AREA
Step 2:
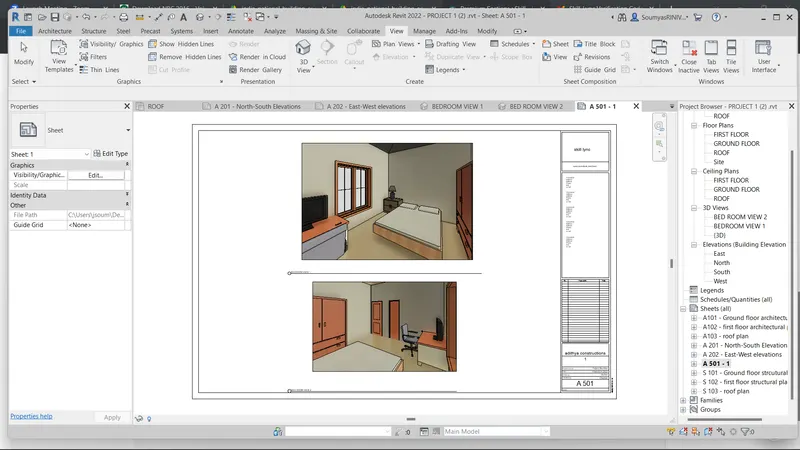
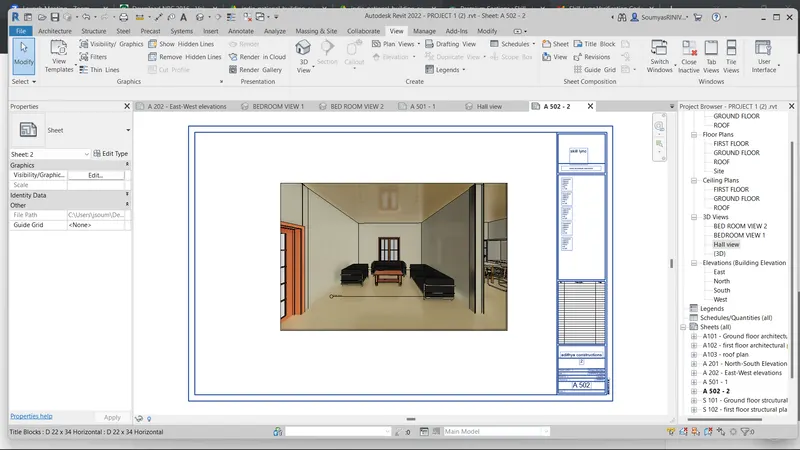
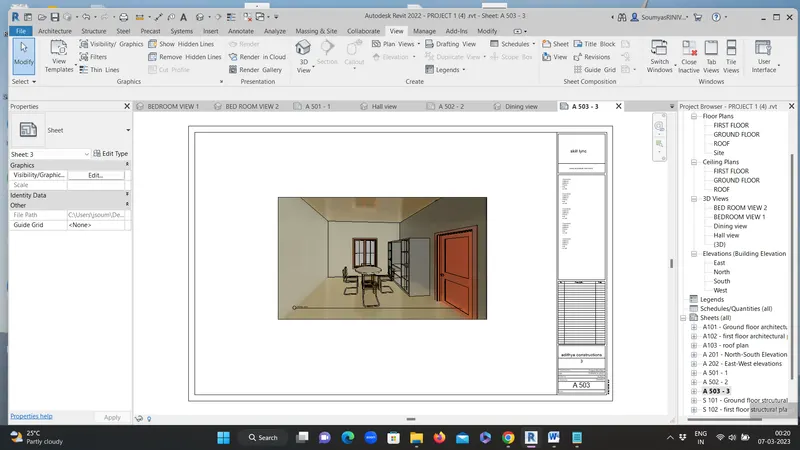
Adding Views to template
Go to Project Browser
Click on Sheets(All)
• Right Click to add a new sheet or
• Click on + to open previously produced sheets And do the required modifications
• Right-click on the sheet to add a view to the sheet OR drag and place view from project broswer to the sheet then name the sheet
A-501
A-502
A-503
A-504
A-505
A-506
A-507
RESULT
Different 3d camera views are created and and sheets of 3d camera views are produced