3D Creation of Ceiling, Roof, Architectural plan, Structural plan, Sectional view, Elevation view and Camera specific view for a house plan using REVIT
1)
AIM: To Model a Ceiling from the architecture tab above the walls at the first-floor level.
PROCEDURE:
- First open the revit software.
- draw the residential building with own dimensions.
- after that provide the doors & windows.
- next we will use the annotate tab to provide dimensions.
- after that using floor tab, we will provide the required floor.
- next we will provide the wall thickness with required elevation.
- after that we will separate the residential layout by interior walls
- i.e living,dining,kitchen,wash rooms etc. with required dimensions.
- next we will use the insert tab to provide the components to different rooms.
- after that will provide the ceiling at the first floor by using architecture tab.
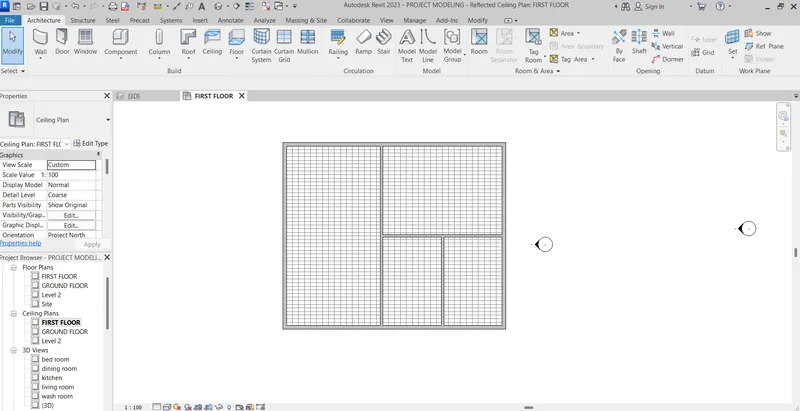
RESULT: I understand the how to provide ceiling.
2)
AIM: To Model a roof above the ceiling by selecting the footprints of the ceiling.
PROCEDURE:
- First open the revit software.
- draw the residential building with own dimensions.
- after that provide the doors & windows.
- next we will use the annotate tab to provide dimensions.
- after that using floor tab, we will provide the required floor.
- next we will provide the wall thickness with required elevation.
- after that we will separate the residential layout by interior walls
- i.e living,dining,kitchen,wash rooms etc. with required dimensions.
- next we will use the insert tab to provide the components to different rooms.
- after that will provide the ceiling at the first floor by using architecture tab.
- using the roof tab we will provide the roof by selecting footprints.
- and also adjust the roof slope to 10 degrees
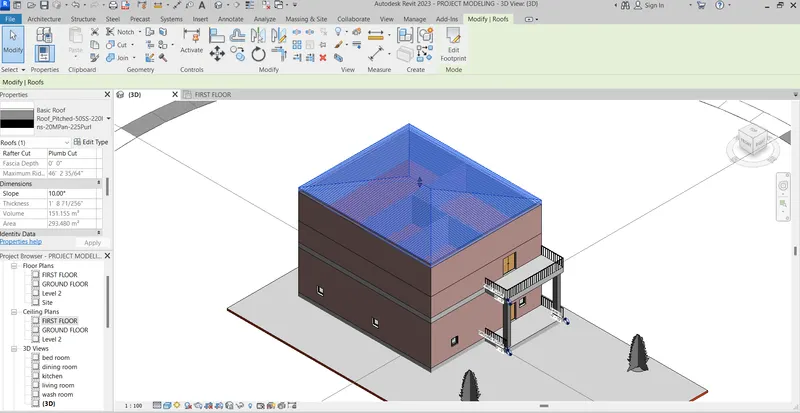
RESULT: I understand the how to provide roof.
3)
AIM: To create plan views for ground floor level and first-floor level including all the walls, floors, and components. Separate them to architecture and structural plans.
PROCEDURE:
- First open the revit software.
- draw the residential building with own dimensions.
- after that provide the doors & windows.
- next we will use the annotate tab to provide dimensions.
- after that using floor tab, we will provide the required floor.
- next we will provide the wall thickness with required elevation.
- after that we will separate the residential layout by interior walls
- i.e living,dining,kitchen,wash rooms etc. with required dimensions.
- next we will use the insert tab to provide the components to different rooms.
- after that will provide the ceiling at the first floor by using architecture tab.
- using the roof tab we will provide the roof by selecting footprints.
- and also adjust the roof slope to 10 degrees
- next using the view tab we will separate the architecture and structural plans.
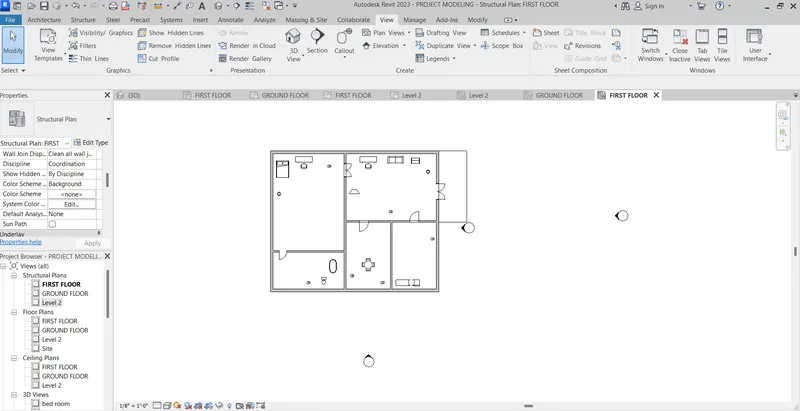
RESULT: I understand the how to Separate them to architecture and structural plans.
4)
AIM: To Using annotate toolbar add dimensions to all the walls and floors with reference to the longitudinal and transverse grids created in the project file.
PROCEDURE:
- First open the revit software.
- draw the residential building with own dimensions.
- after that provide the doors & windows.
- next we will use the annotate tab to provide dimensions.
- after that using floor tab, we will provide the required floor.
- next we will provide the wall thickness with required elevation.
- after that we will separate the residential layout by interior walls
- i.e living,dining,kitchen,wash rooms etc. with required dimensions.
- next we will use the insert tab to provide the components to different rooms.
- after that will provide the ceiling at the first floor by using architecture tab.
- using the roof tab we will provide the roof by selecting footprints.
- and also adjust the roof slope to 10 degrees
- Using annotate toolbar add dimensions to all the walls and floors with reference to the longitudinal and transverse grids created in the project file.
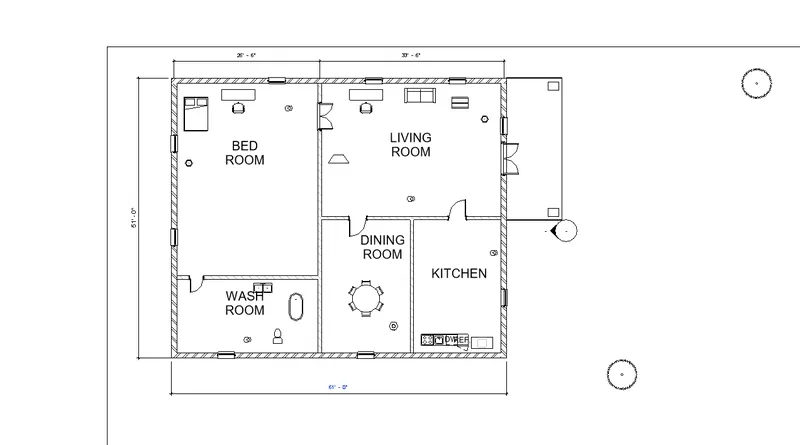
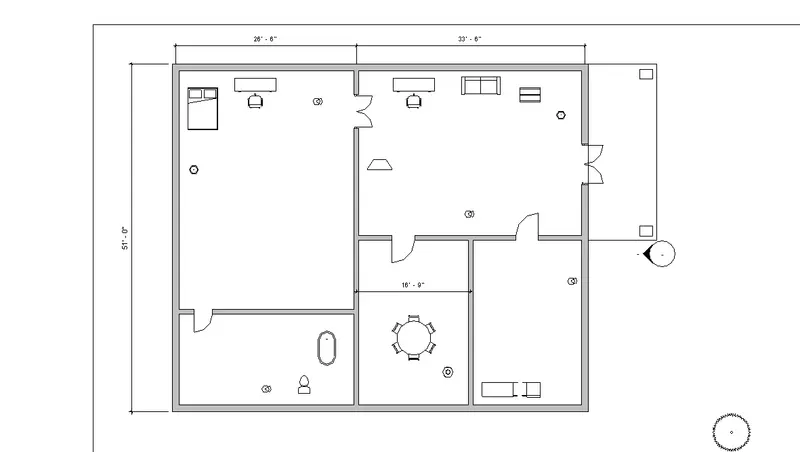
RESULT: I understand the how to provide the dimensions.
5)
AIM: To Create a sheet template from the view tab and adjust the parameters on the sheet to add appropriate views
PROCEDURE:
- First open the revit software.
- draw the residential building with own dimensions.
- after that provide the doors & windows.
- next we will use the annotate tab to provide dimensions.
- after that using floor tab, we will provide the required floor.
- next we will provide the wall thickness with required elevation.
- after that we will separate the residential layout by interior walls
- i.e living,dining,kitchen,wash rooms etc. with required dimensions.
- next we will use the insert tab to provide the components to different rooms.
- after that will provide the ceiling at the first floor by using architecture tab.
- using the roof tab we will provide the roof by selecting footprints.
- and also adjust the roof slope to 10 degrees
- Using annotate toolbar add dimensions to all the walls and floors with reference to the longitudinal and transverse grids created in the project file.
- next we will create a sheet template from the view tab and adjust the parameters on the sheet to add appropriate views.
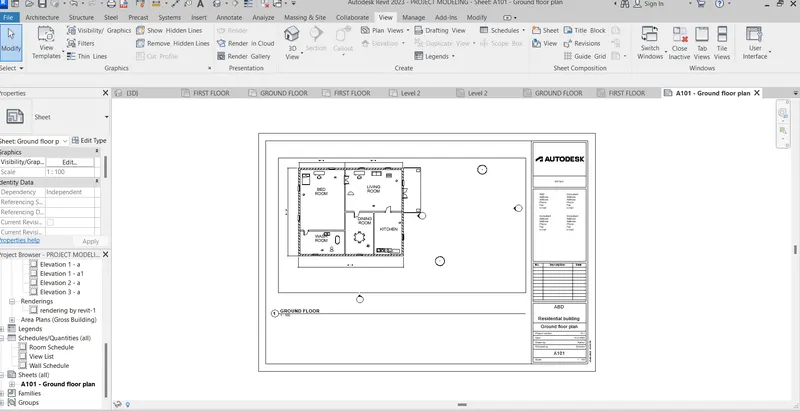
RESULT: I understand the how to create a sheet template.
6)
AIM: To Using the elevation tab create the elevation views, looking at your building from East, North, South, and West.
PROCEDURE:
- First open the revit software.
- draw the residential building with own dimensions.
- after that provide the doors & windows.
- next we will use the annotate tab to provide dimensions.
- after that using floor tab, we will provide the required floor.
- next we will provide the wall thickness with required elevation.
- after that we will separate the residential layout by interior walls
- i.e living,dining,kitchen,wash rooms etc. with required dimensions.
- next we will use the insert tab to provide the components to different rooms.
- after that will provide the ceiling at the first floor by using architecture tab.
- using the roof tab we will provide the roof by selecting footprints.
- and also adjust the roof slope to 10 degrees
- Using annotate toolbar add dimensions to all the walls and floors with reference to the longitudinal and transverse grids created in the project file.
- after that using elevation tab to create the elevation views.
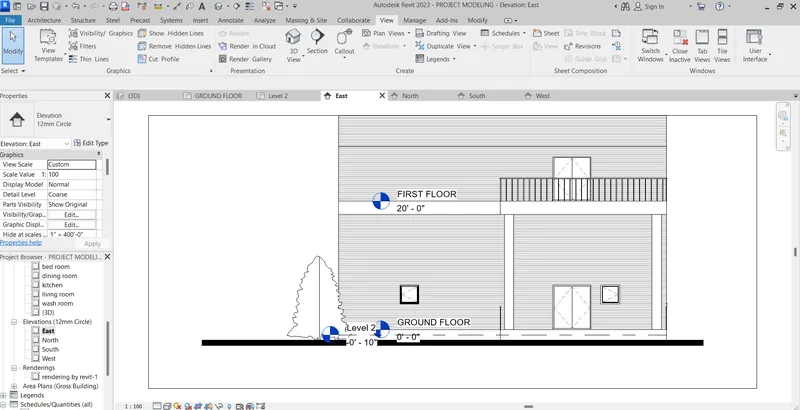
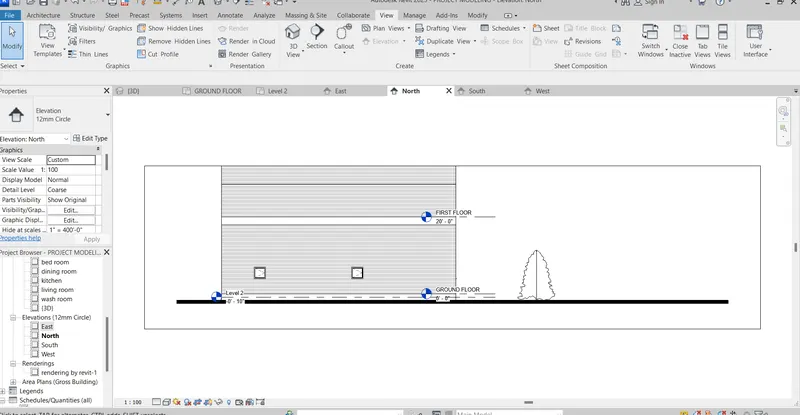
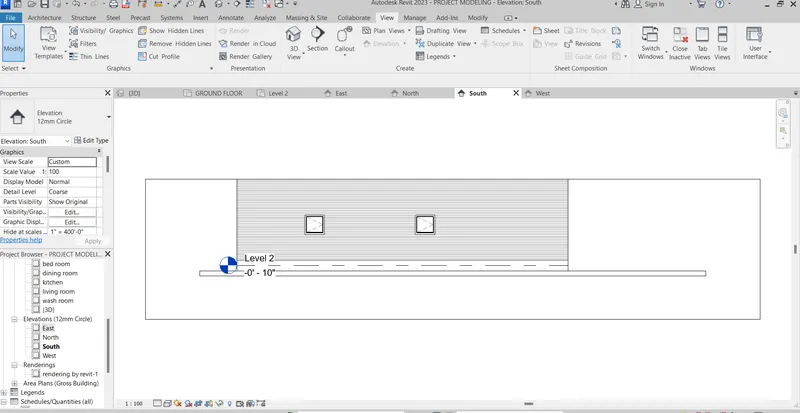
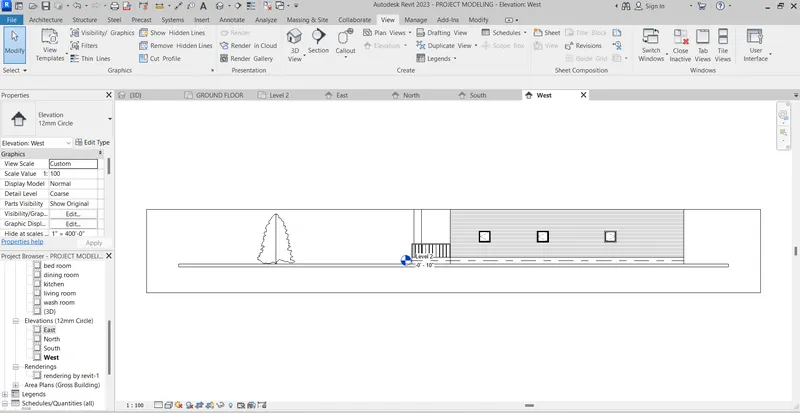
RESULT: I understand the how to create the elevations.
7)
AIM: To Produce section cut through each room either cutting across longitudinally or in a transverse direction.
PROCEDURE:
- First open the revit software.
- draw the residential building with own dimensions.
- after that provide the doors & windows.
- next we will use the annotate tab to provide dimensions.
- after that using floor tab, we will provide the required floor.
- next we will provide the wall thickness with required elevation.
- after that we will separate the residential layout by interior walls
- i.e living,dining,kitchen,wash rooms etc. with required dimensions.
- next we will use the insert tab to provide the components to different rooms.
- after that will provide the ceiling at the first floor by using architecture tab.
- using the roof tab we will provide the roof by selecting footprints.
- and also adjust the roof slope to 10 degrees
- Using annotate toolbar add dimensions to all the walls and floors with reference to the longitudinal and transverse grids created in the project file.
- after that using the section tab to create the sectional views.
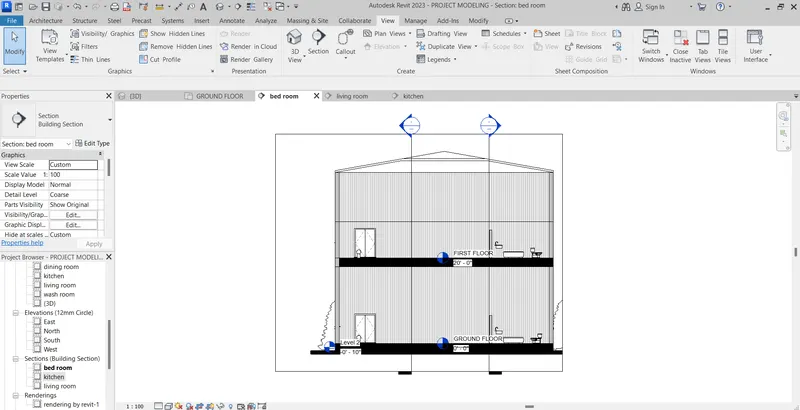
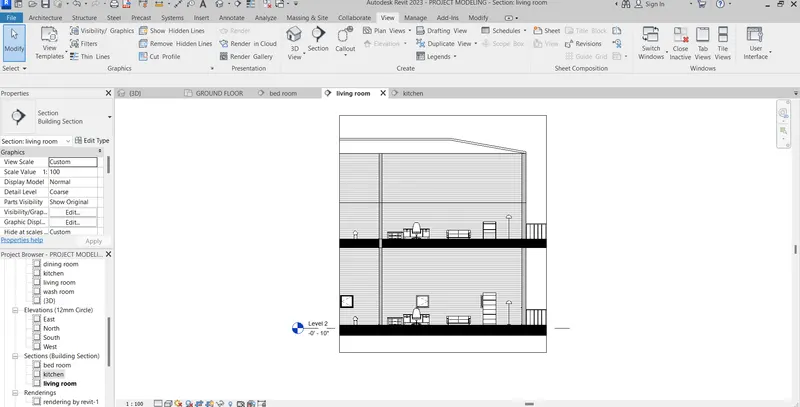
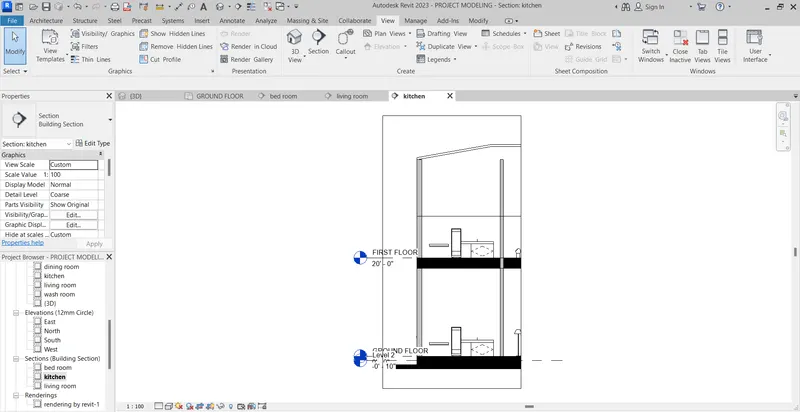
RESULT: I understand the how to create the sectional views.
8)
AIM: To Classify the views, Plan Views, Section Views, and Elevation views to either Design or Documentation category using Properties browser.
PROCEDURE: I had Classify the views, Plan Views, Section Views, and Elevation views to either Design or Documentation category using Properties browser.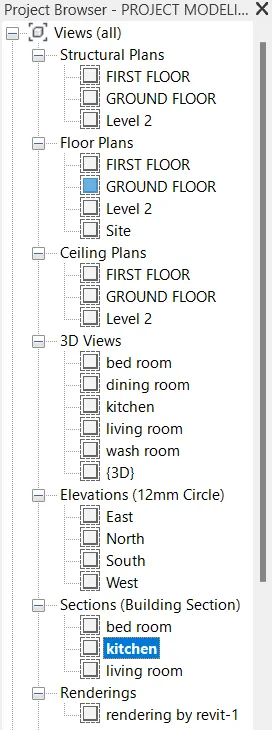
RESULT: I understand the how to classify the views by properties browser.
9)
AIM: To Using the sheet template produced create multiple sheets
PROCEDURE:
- First open the revit software.
- draw the residential building with own dimensions.
- after that provide the doors & windows.
- next we will use the annotate tab to provide dimensions.
- after that using floor tab, we will provide the required floor.
- next we will provide the wall thickness with required elevation.
- after that we will separate the residential layout by interior walls
- i.e living,dining,kitchen,wash rooms etc. with required dimensions.
- next we will use the insert tab to provide the components to different rooms.
- after that will provide the ceiling at the first floor by using architecture tab.
- using the roof tab we will provide the roof by selecting footprints.
- and also adjust the roof slope to 10 degrees
- Using annotate toolbar add dimensions to all the walls and floors with reference to the longitudinal and transverse grids created in the project file.
- next i will provide the different sheets for given plans.
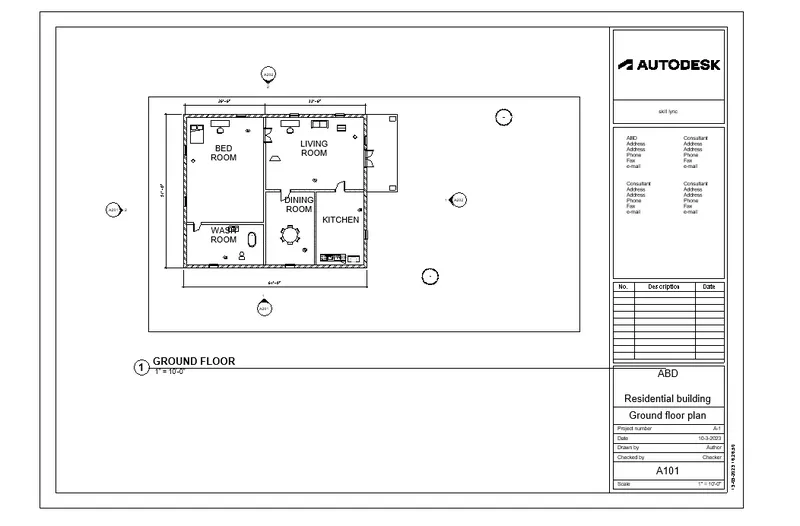
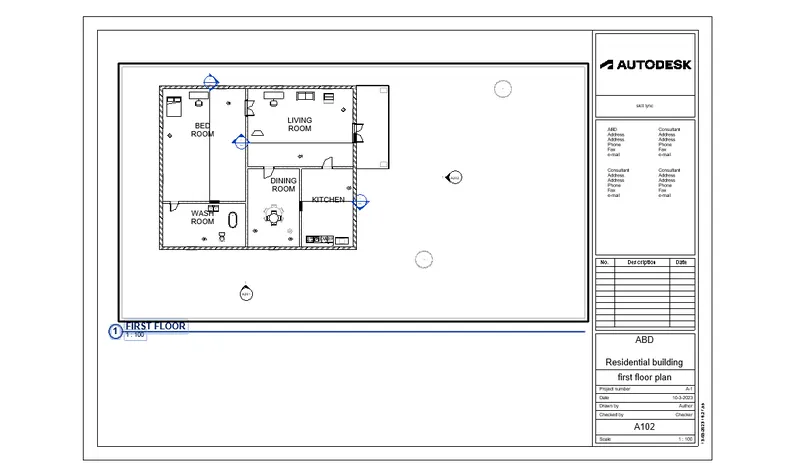
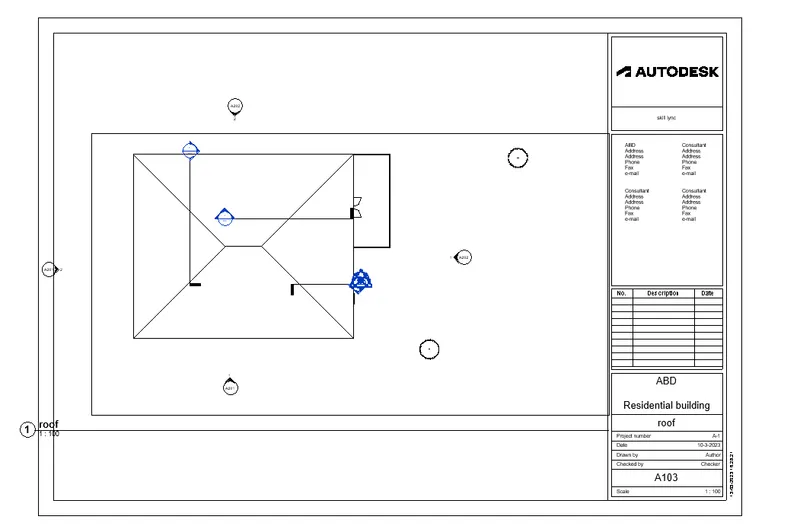
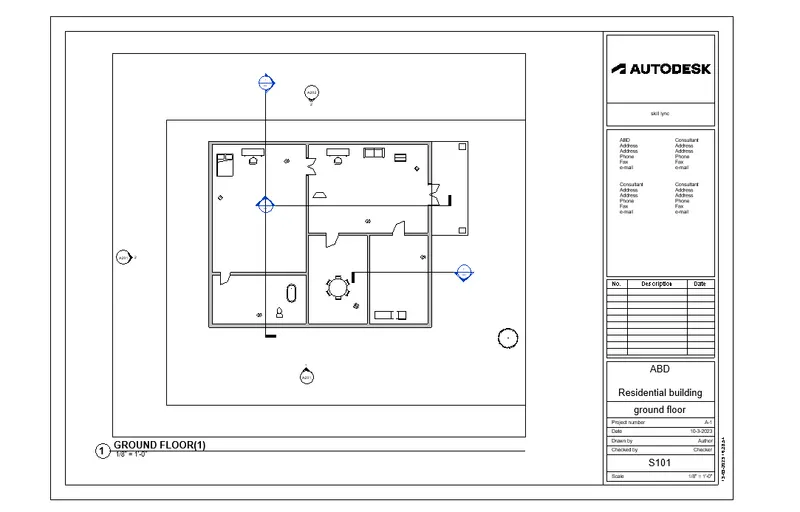
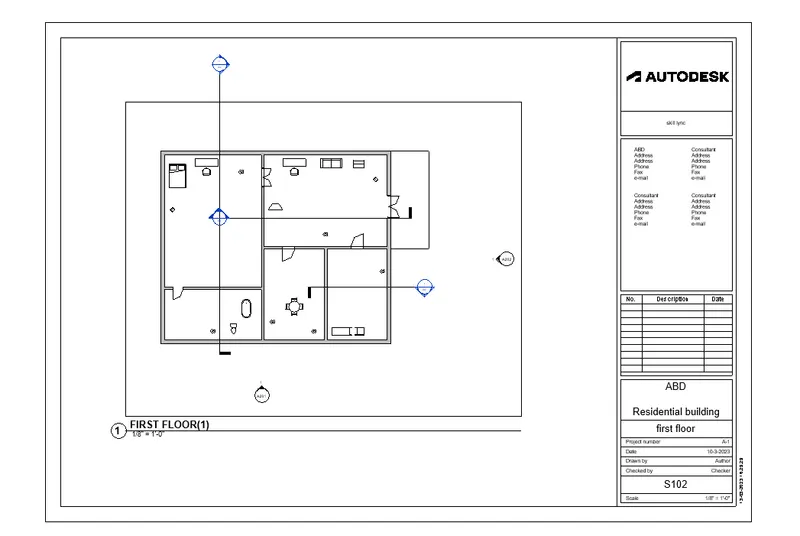
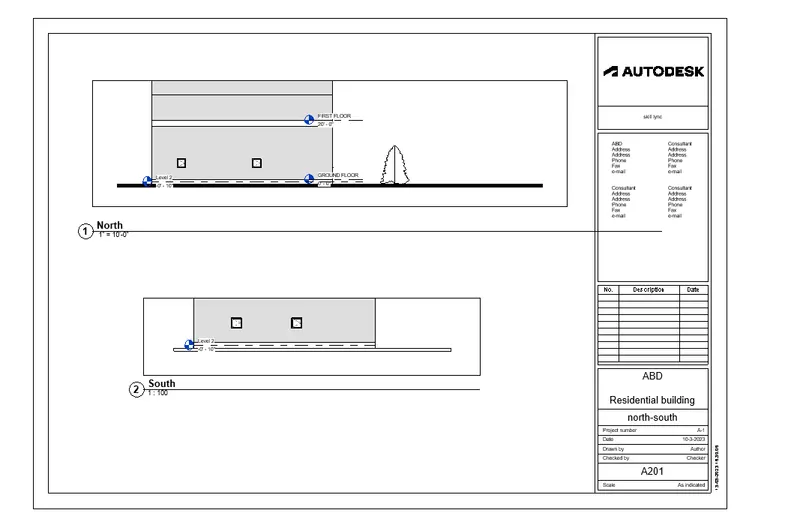
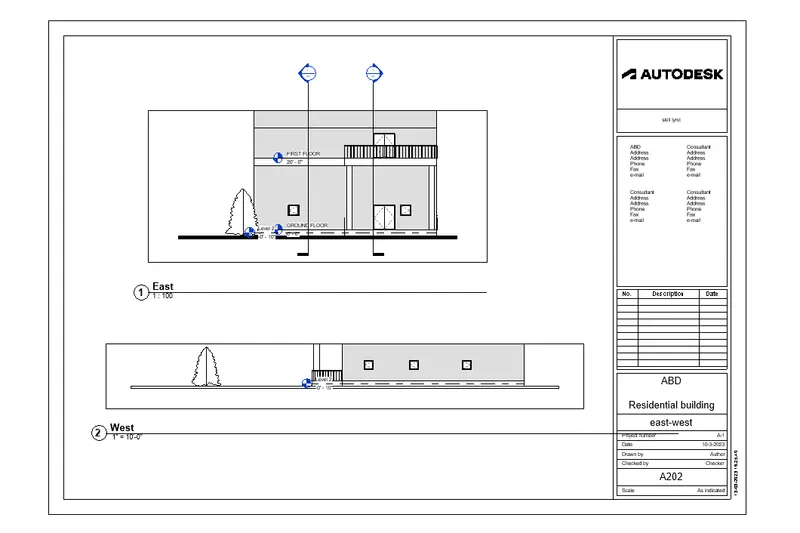
RESULT: I understand the how to create the sheets.
10)
AIM: To Create a camera-specific view or a 3D view in each room ( living, dining, bedroom).
PROCEDURE:
- First open the revit software.
- draw the residential building with own dimensions.
- after that provide the doors & windows.
- next we will use the annotate tab to provide dimensions.
- after that using floor tab, we will provide the required floor.
- next we will provide the wall thickness with required elevation.
- after that we will separate the residential layout by interior walls
- i.e living,dining,kitchen,wash rooms etc. with required dimensions.
- next we will use the insert tab to provide the components to different rooms.
- after that will provide the ceiling at the first floor by using architecture tab.
- using the roof tab we will provide the roof by selecting footprints.
- and also adjust the roof slope to 10 degrees
- Using annotate toolbar add dimensions to all the walls and floors with reference to the longitudinal and transverse grids created in the project file.
- after that using view tab we will provide the camera views for each room.
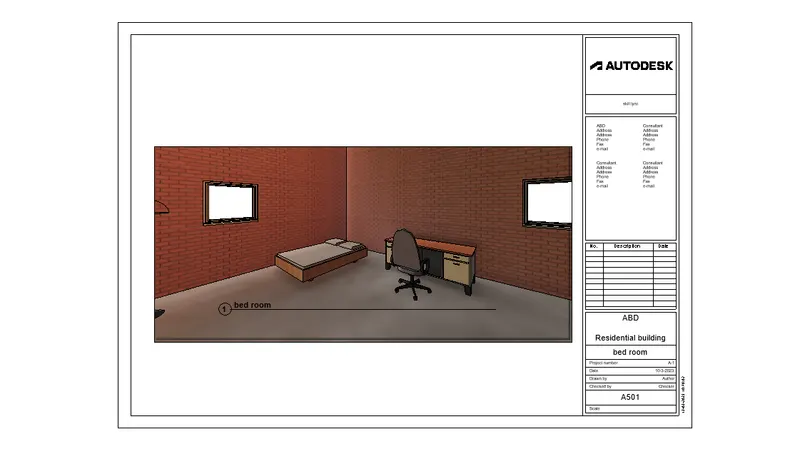
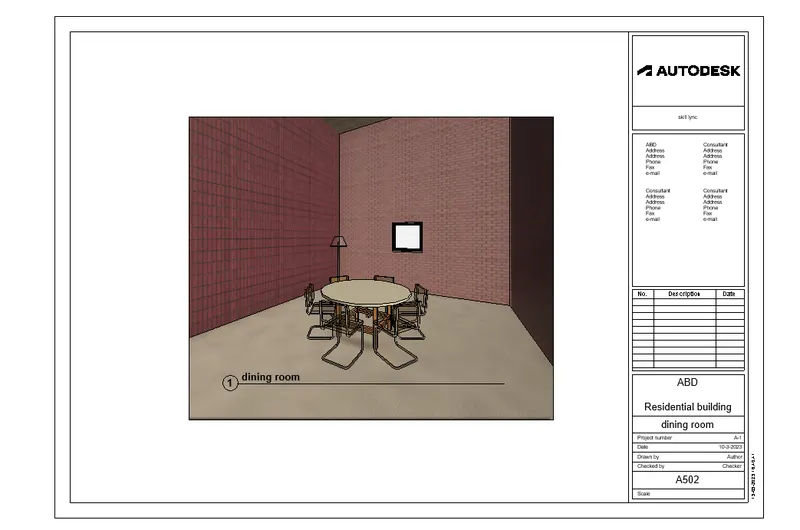
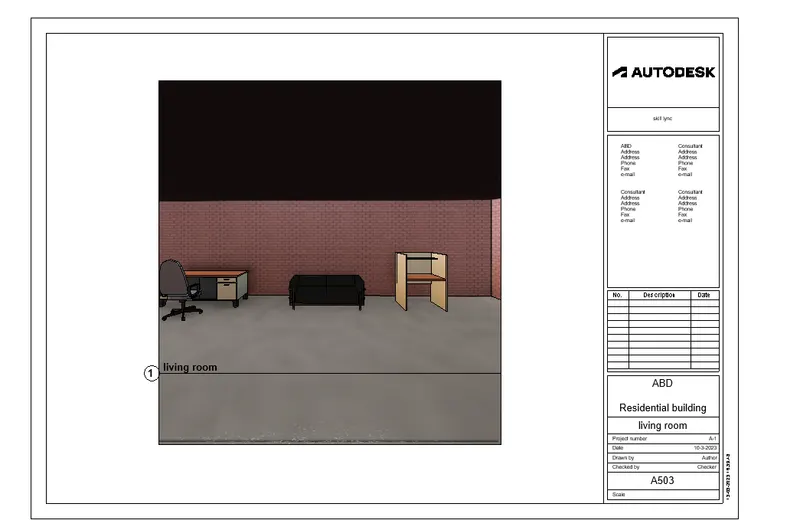
RESULT: I understand the how to create the camera view.