Wiring harness routing & packaging Rules Week 3 Challenge
INTRODUCTION TO WIRING HARNESS DESIGN USING CATIA V5
OBJECTIVE :
- To Download P Clamp cad data & define it as Electrical support using Electrical Part design Workbench and to define all the necessary properties.
- To Download Back Shell cad data & define it as Electrical support using Electrical Part design Workbench and to define all the necessary properties.
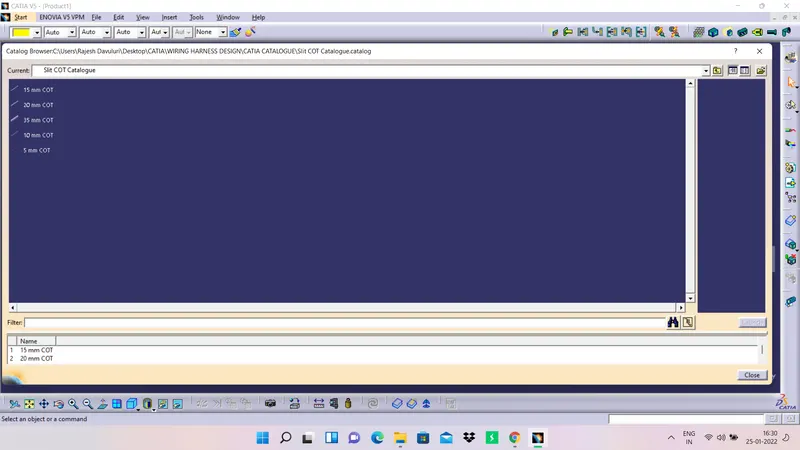
- To Create various Corrugated tubes of different diameters & Add them in Catalogue under “Slit COT” family.
- To prepare a detailed report explaining all the procedures by ading suitable images.
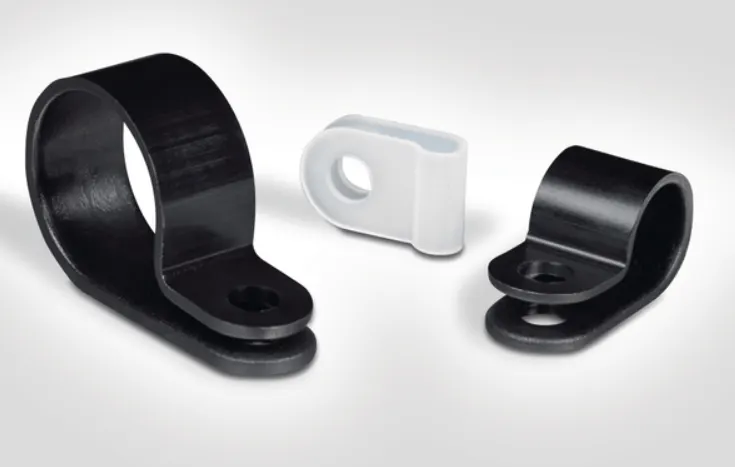
P CLAMP : P-clamps lock cables and hoses in place and help ensure that machinery, vehicles and equipment keep running. They bracket wires, cables or hoses together mechanically and are fastened securely to an anchor point – usually with a screw or a bolt.
Generally these clips and clamps are plastic molded parts with mounting or snapping feature. These clips are widely used for harness clamping in every area of the vehicle.
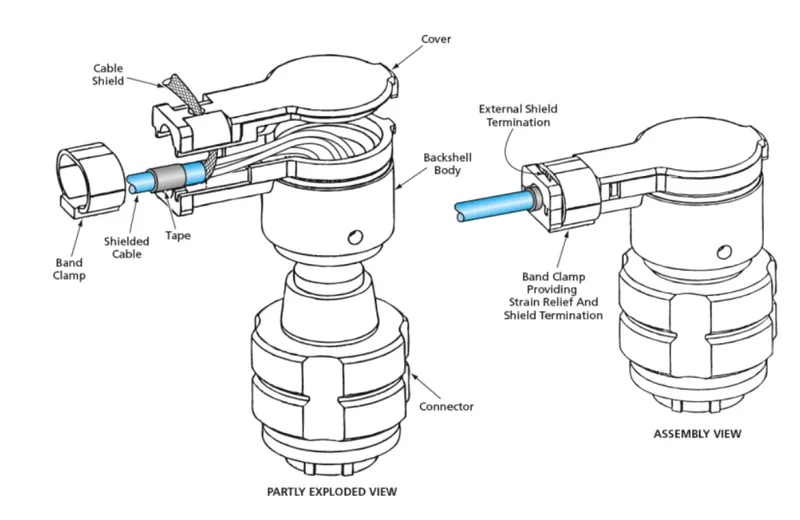
BACK SHELL : Backshells are the components that attach to the back of connectors often designed to guide the wires and cables that are terminated at the connector. The backshells are often mated with strain relief components, environmental seals, the shielding.
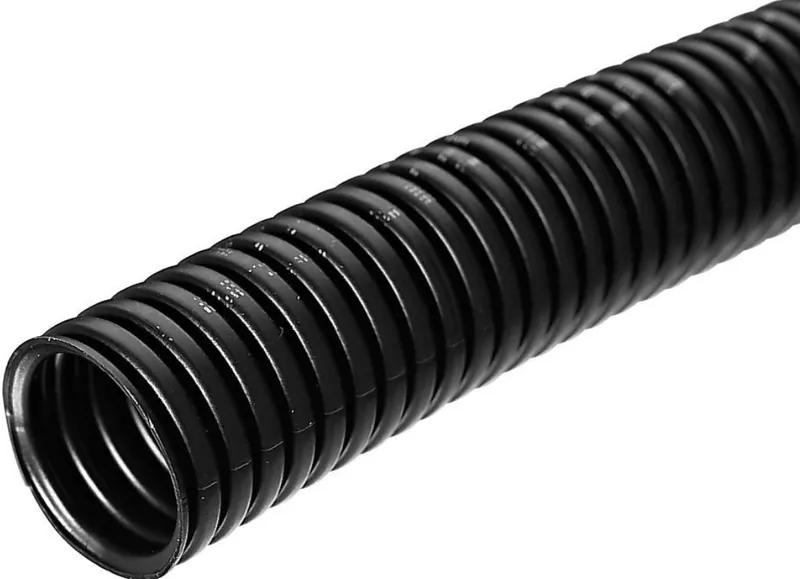
CORRUGATED TUBES : A corrugated pipe is a pipe with a series of ridges and grooves running parallel to each other on its surface. The ridges and grooves follow a pattern that is perpendicular to and bisecting the centerline of the pipe. Corrugated pipes are made of different materials such as iron, steel, polyvinyl chloride (PVC), or high-density polyethylene (HDPE).
Corrugated pipes are used where flexibility is an important factor other than strength and durability, such as in storm drains and culverts. Flexibility makes corrugated pipes more useful and suitable for a wide variety of uses compared to rigid and non-corrugated pipes.
P CLAMP :
1. First let us download the igs or step file of the P Clamp and open it in catia software
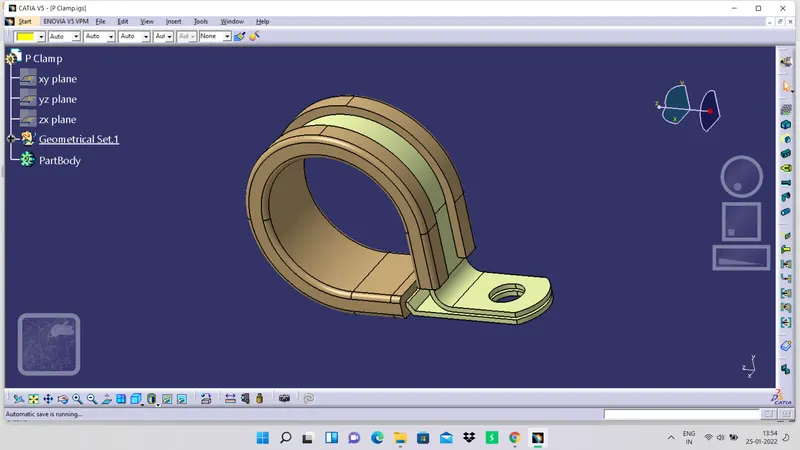
2. Create points on the entry side and exit side of the clamp using point command in part workbench
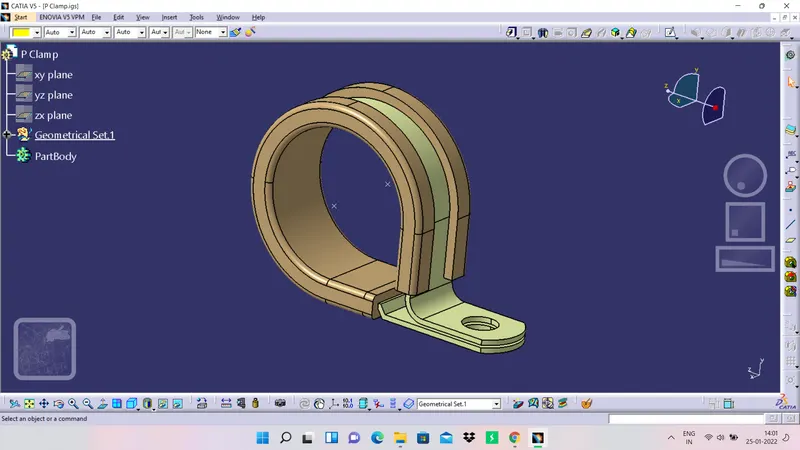
3. Create entry plane, exit plane and base plane by using points which we have created and faces as the reference planes.
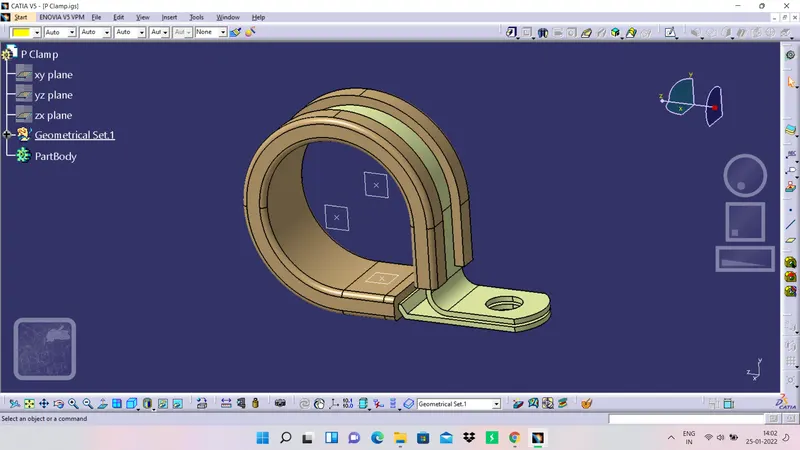
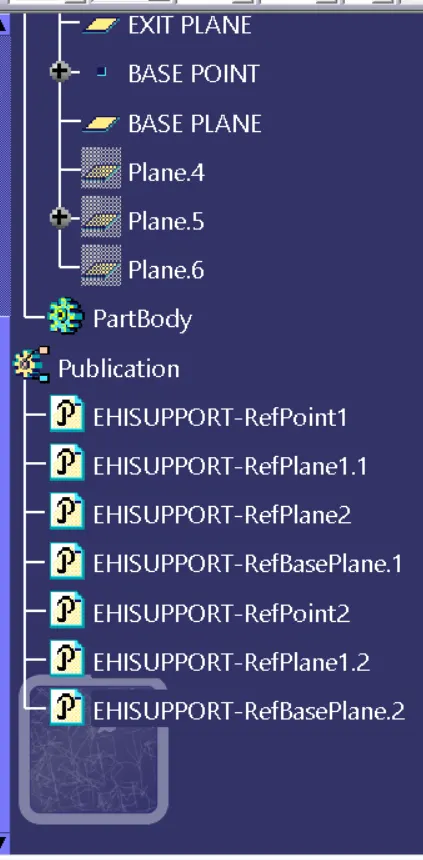
4. After that go to electrical part workbench and define the object as a support by selecting the proper planes and points.
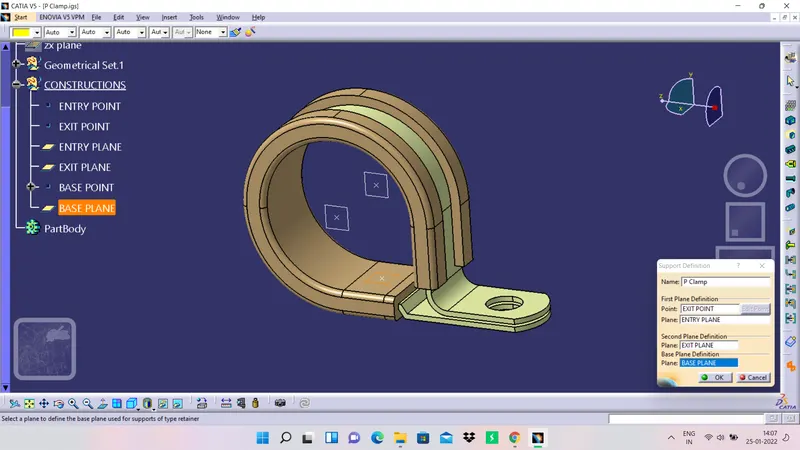
5. Since the wire can enter from two different side in two different ways repeat the step 4 for other side. The catia will automatically select the exit plane after selecting the entry plane.
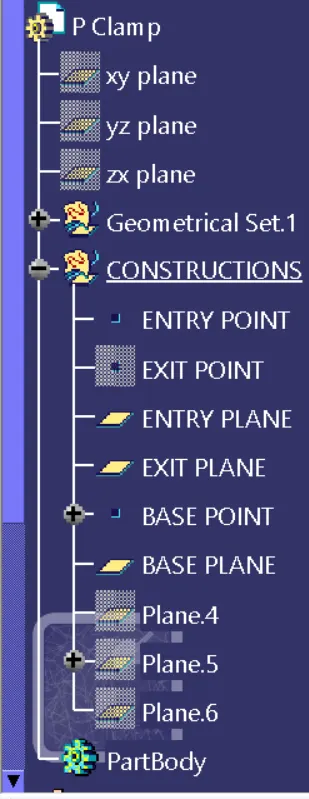
6. Save the P Clamp object and add it to the respective catalogue and the tree structure is shown in below figures,
BACK SHELL :
1. First download the cad data and open it in catia software.
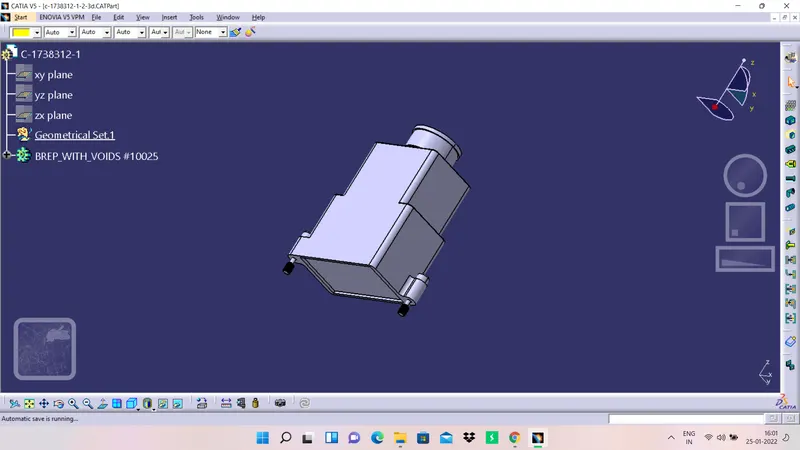
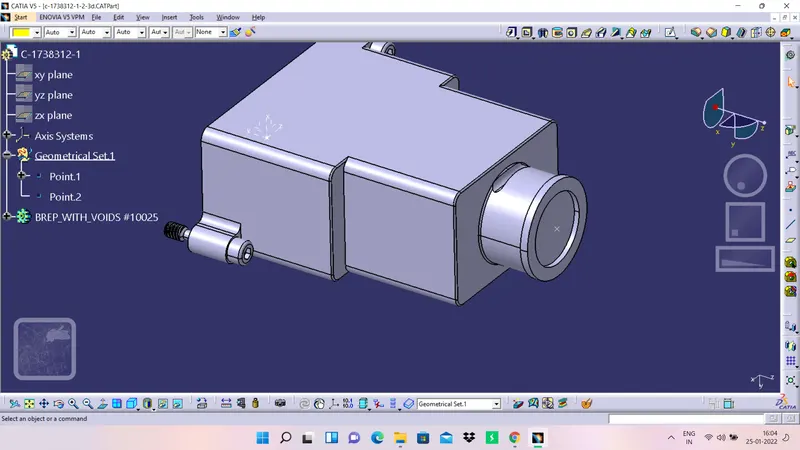
2. Create a point at the center of the surface and create an axis system make sure the axis system is similar to the axis system which the mating connector bundle entry side had and then create a point at the opposite side of the back shell.
3. Go to electric part workbench and define the object as back shell by using define back shell command and then by using backshell connecting command select the faces and points.
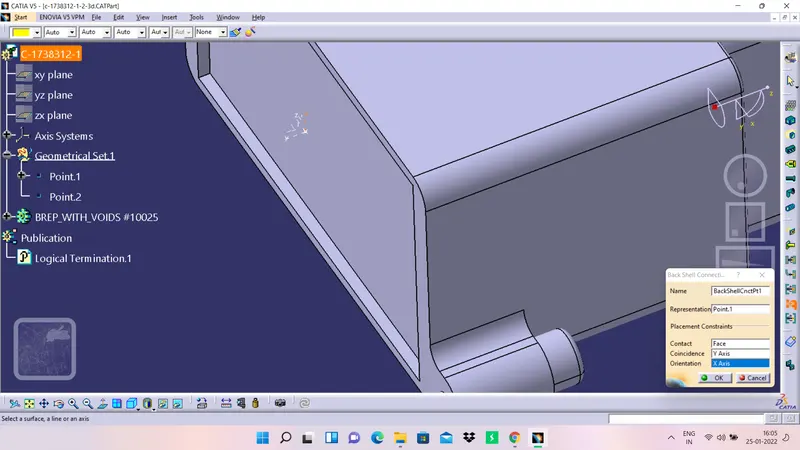
4. By using define bundle connecting point command define the point on the opposite side.
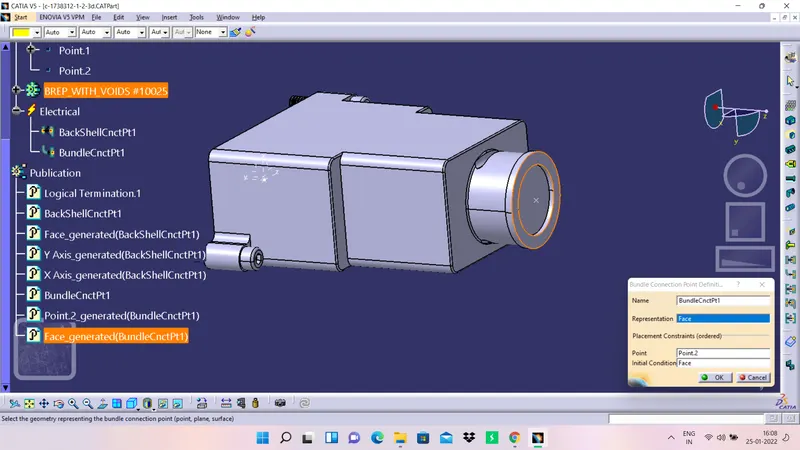
5. Finally save the part and add to the respective catalogue. The tree structure of the back shell is given in the below images,
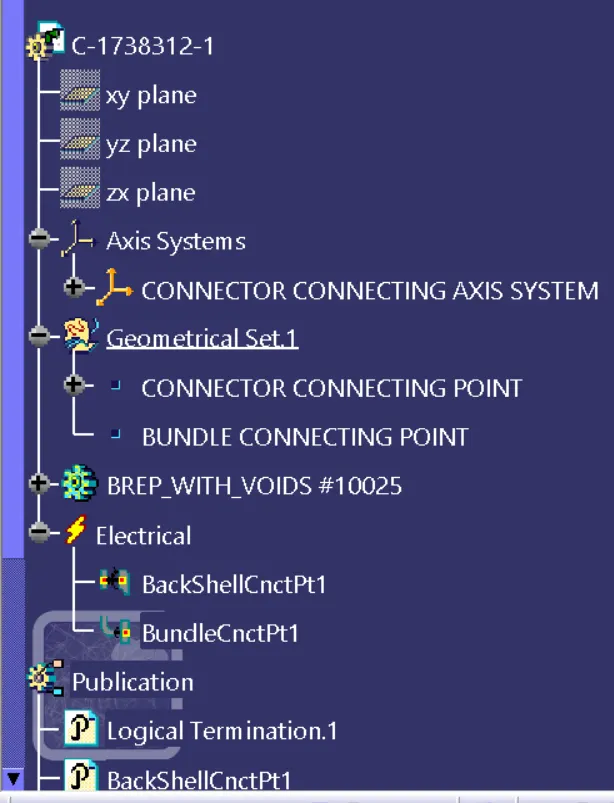
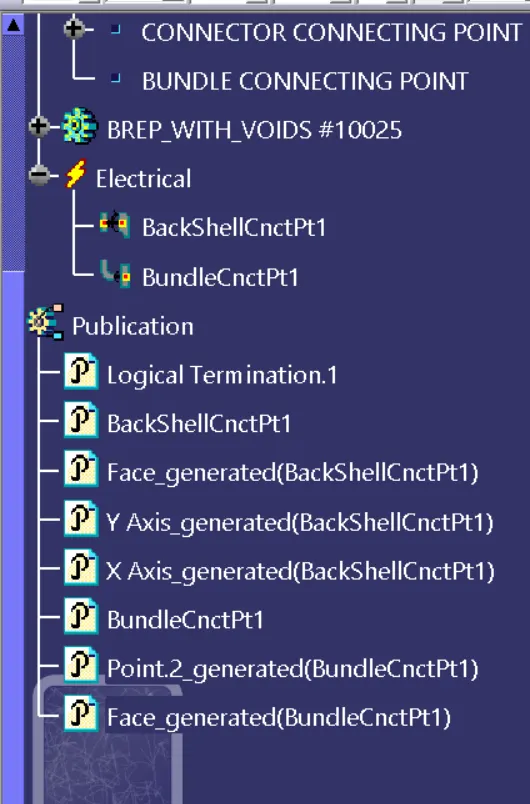
CREATING CORRUGATED TUBE :
1. In the challenge we have given with the dimenssions which we have to create and they are shown in below figure,
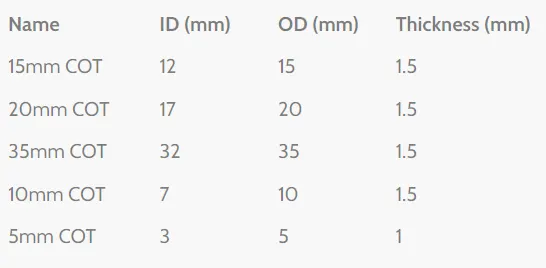
2. For this go to electrical part design workbench and click on the define suppport object option and click on the part and give the inputs and required corrugated tube is created , the images of the tubes are given below,
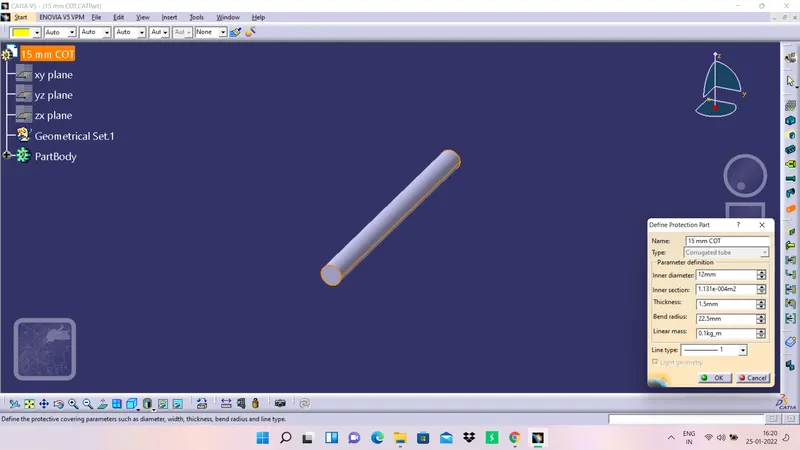
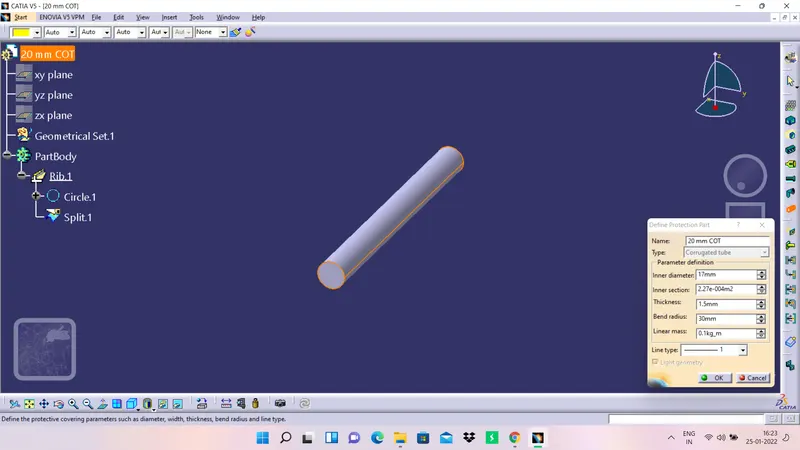
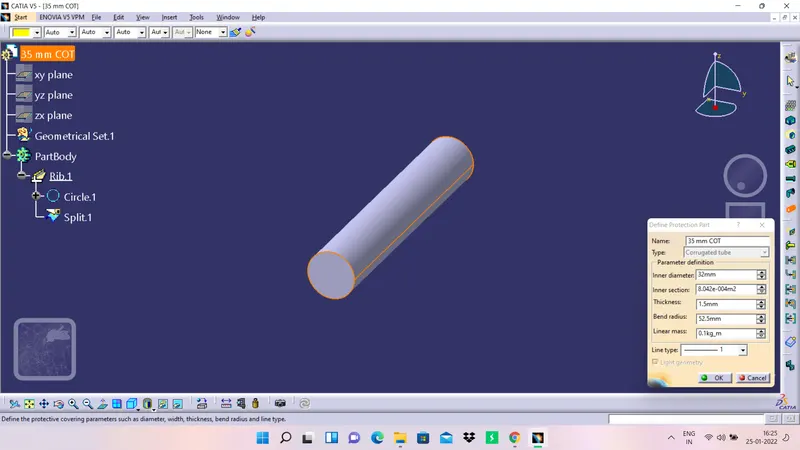
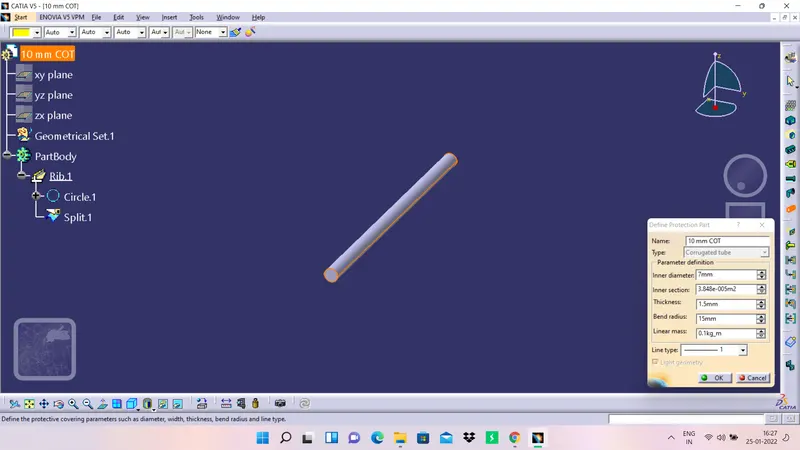
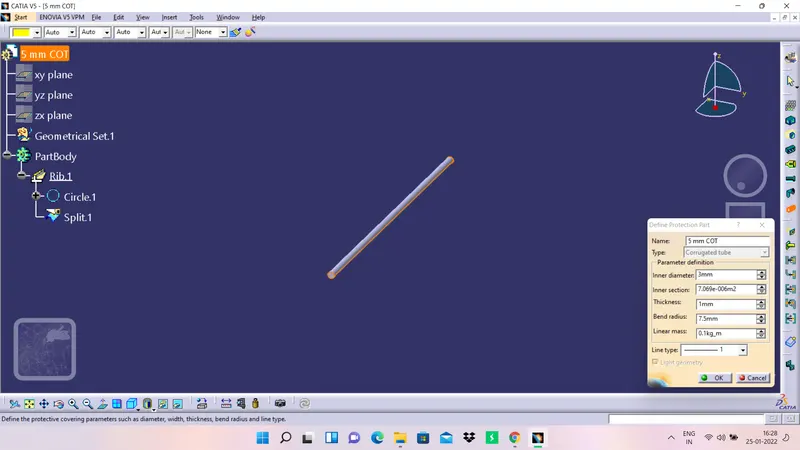
3. Create a catalogue for the corrugated tubes and add all the tubes into the catalogue.
CONCLUSSION
And hence, the objective of this challenge has been accomplished and all the images are attached to the report successfully.