Wiring harness design in CATIA V5 - 3D modeling Week 7 Challenge
AIM:
Flatten the harness assembly completed in “week 4 challenge”. Place the flattened view on drawing sheet. Ensure bundles with protective covering has different visuals on drawing.
Objectives:
- · To flatten the harness assembly created in the challenge week-4
- · Create the drawing sheet of the flattened assembly
- · To ensure the protective covers of bundle should different visuals in drawing sheet
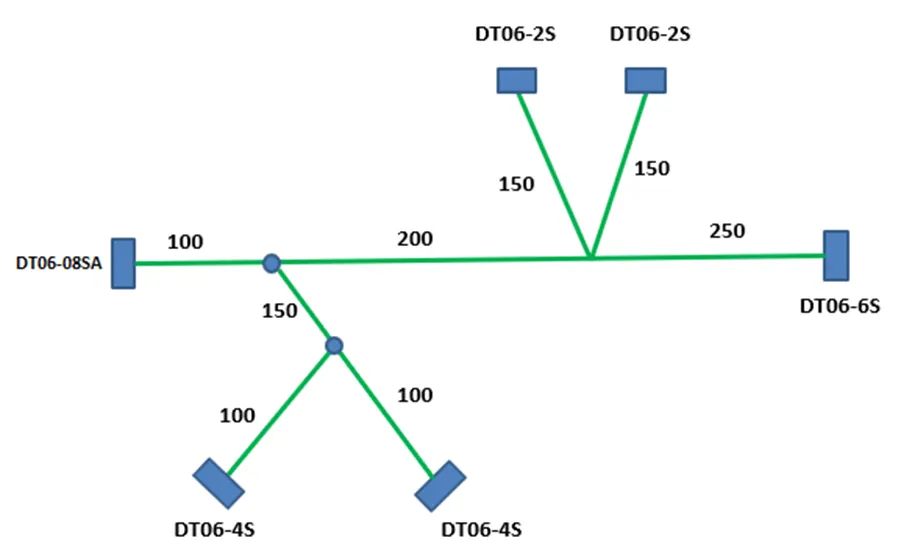
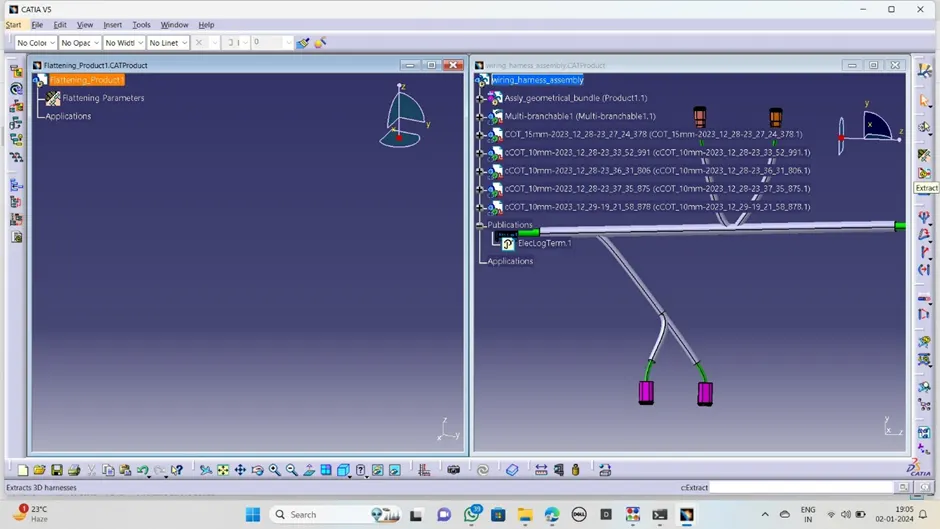
- · The week-4 challenge wiring harness as shown below
Flattening harness methodology and procedure:
Step-1:
· Open the harness flattening work bench and create the new product file in the flattening work bench and save that file where we saved the harness routing assembly file.
· To define the product file into harness flatten click on the “harness flattening parameters “in the work bench.
· Then the below mentioned dialogue box will be displays on the screen.
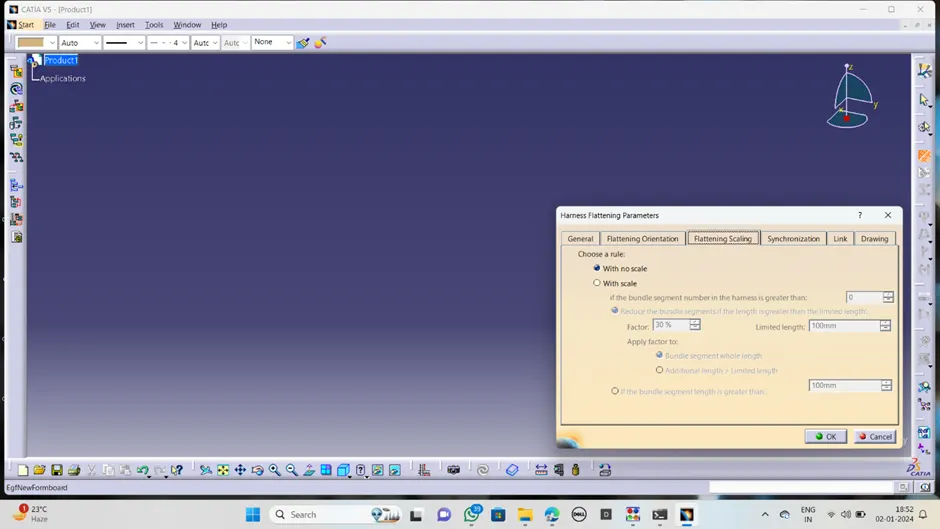
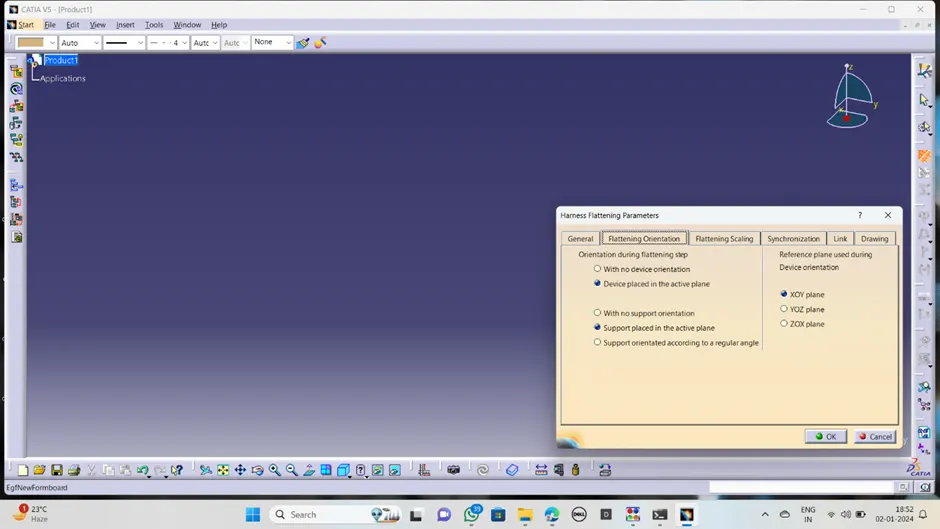
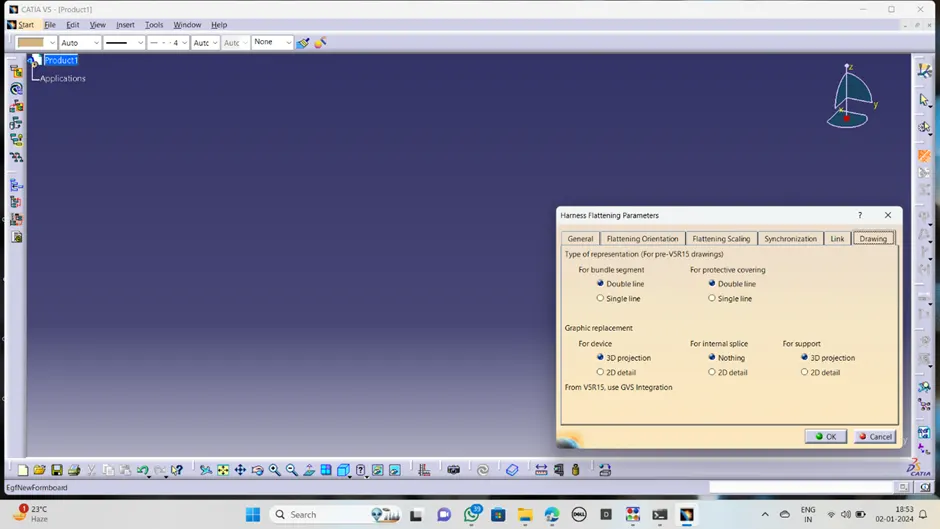
· All the design consideration and required parameters have to enable before click on ok.
Step-2:
· Select the extract option available in the tools bar an select the geometrical bundle of the routing assembly product file in wiring harness assembly.
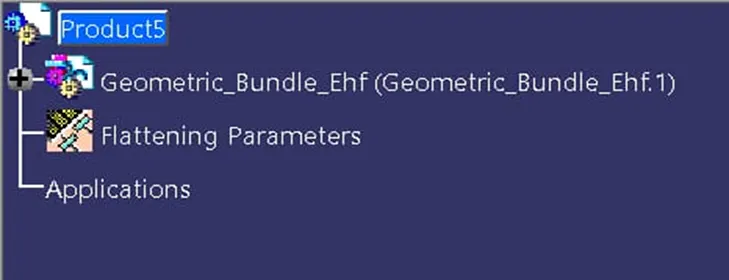
· The wire harness assembly is imported into the harness flattening product file with extension of “EHF”.it added to the geometrical bundle.
Step-3:
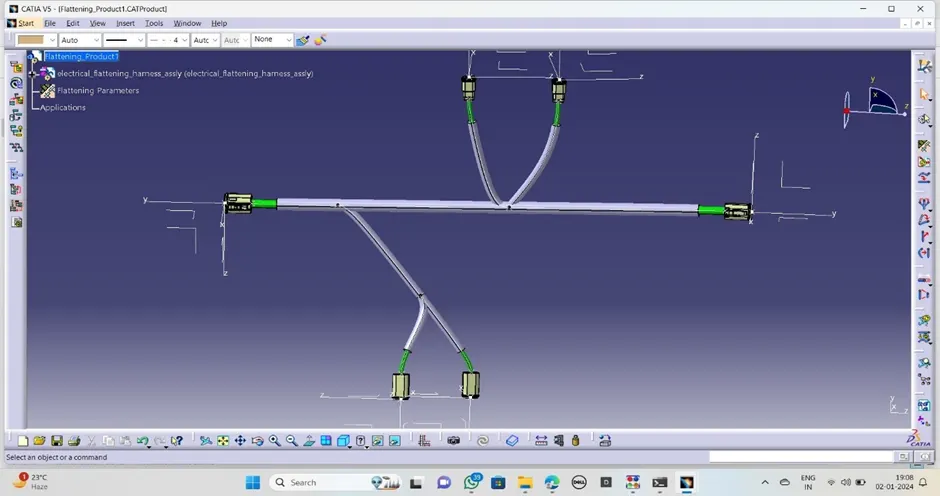
· Now select the “flatten” option in the work bench
· Then select the active plane, then select any branch and select the “select all branches”.
· If all bundle segments are fully connected then click on ok. then flatten assembly will displays on screen.
Rotate the bundle segments:
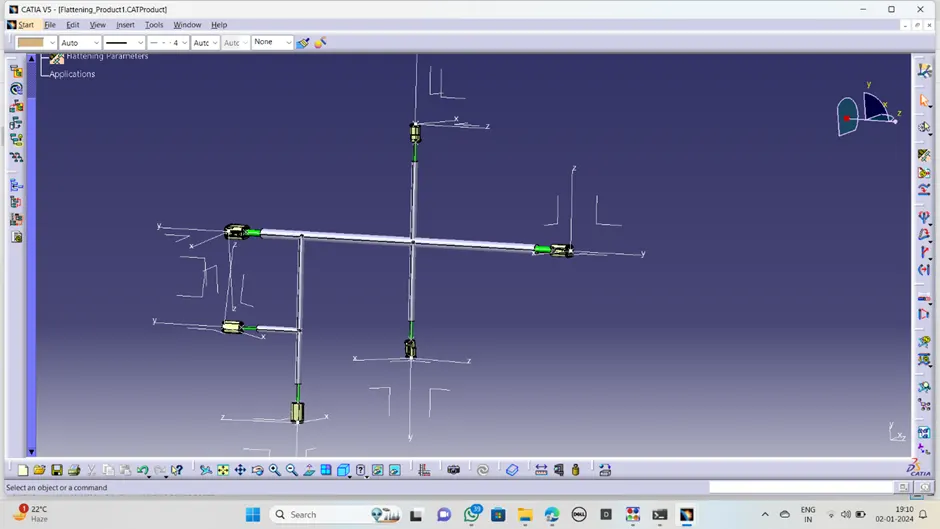
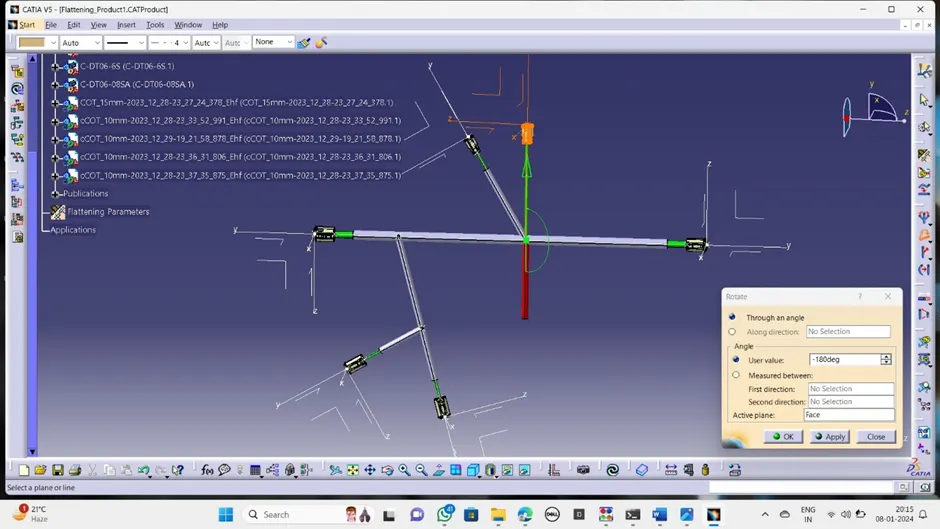
· The above flatten assembly is not as per our requirements, so have to rotate the bundle segments as per our consideration in challenge.
· For that click on the rotation option available in the flatten work bench, click on the bundle segment where we have to rotate with respect to flatten plane.
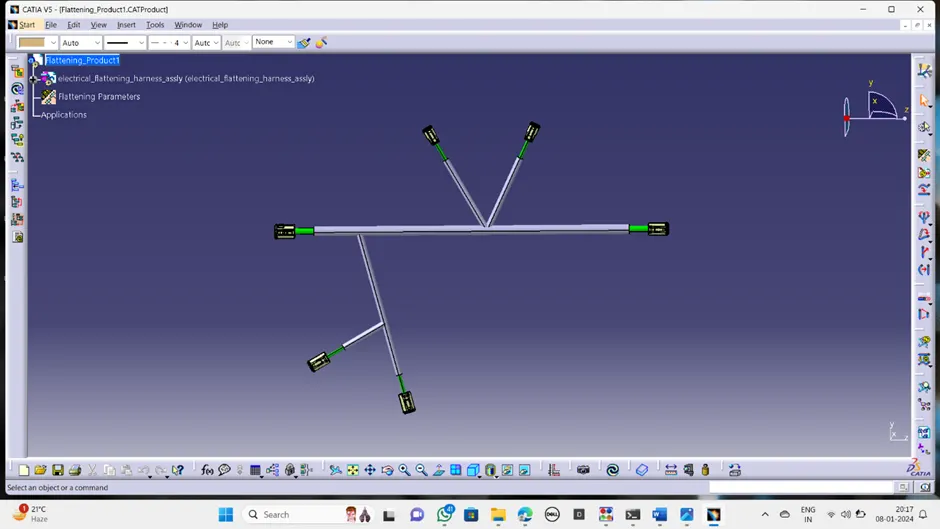
· Select the angle required, for top segment need to rotate about 30 degrees and its opposite segment take reverse -180 degrees and set into again 20-25 digress inclined.
· Same way the first bundle segment rotates to 25-30 degrees towards right side.
· After result will be aw below
· 
Step-4:
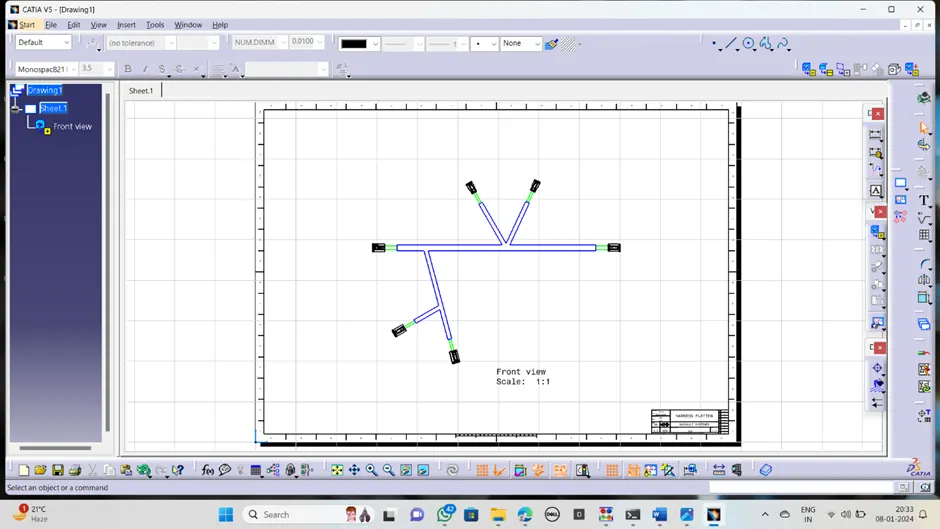
Now create the drafting of the flatten harness assembly.
· Go to the new drawing file and save it in the same folder where the flatten assembly saved
· Insert the title block and required data in the sheet
· Click on the front view option and go to the flatten assembly and select the proper surface of the assembly .then it goes to the drafting work bench automatically, rotate the drawing required position and click on sheet to save.
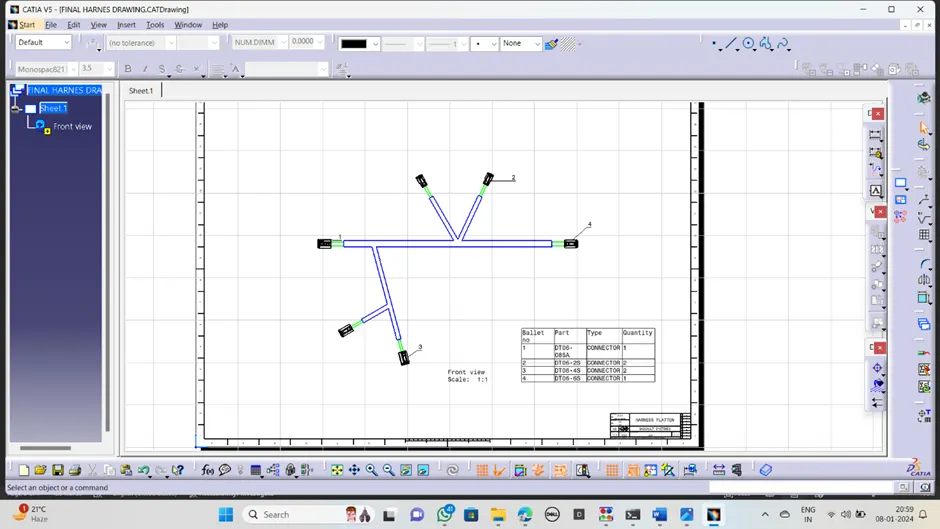
· Then we get the drafting of the flatten assembly as below.
Conclusion:
From the above assignment we learnt how to flatten a given wire harness assembly and how to place the flattened view on a drawing sheet and show all its components.