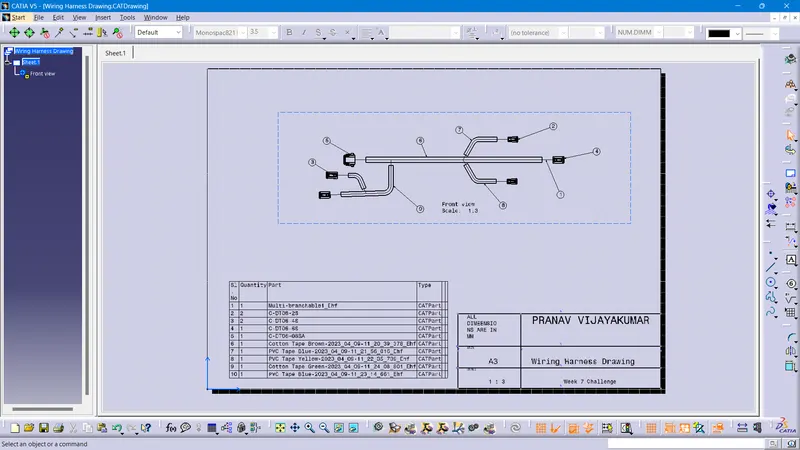
Wiring harness design in CATIA V5 - 3D modeling Week 7 Challenge
Protective Covering Creation
A new CatalogueDocument is created. Two families of PVC Tapes(Conduit type), and Cotton Tapes are defined.
Tapes of required dimensions and different colours are created in the electrical part design workbench and are added to the respective family of the catalogue.
Electrically defining the connectors
The connectors are downloaded from the provided link and is opened in the Catia V5 software. Referance points and axis system are created which are necessary for defining the connector connection point and bundle connection point of the connector. In the Electrical part design workbench, the parts are defined as electrical connectors. The connector connection point and bundle connection point of the connector are defined with the help of previously defined points and axis systems. The connectors are added to the catalogue in the connector family.
Electrical Harness Assembly Creation
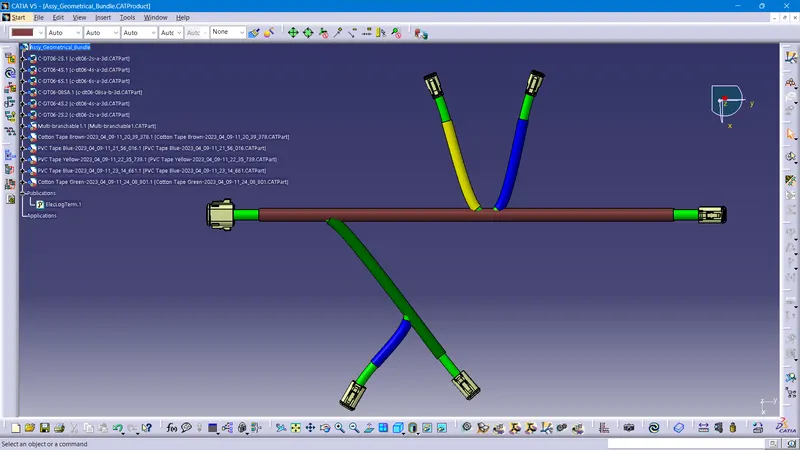
A new product file named 'Assy_Wiring_Harness_Context' is created. A product file named 'Assy_Geometrical_Bundle' is added to the product file. All the connectors which are electrically defined are inserted to 'Assy_Geometrical_Bundle' product. This product is electrically defined as Geometrical bundle in the Electrical Harness Assembly workbench. The connectors are moved to the and oriended as given in the picture in question using tools in Assembly workbench.
A multibranchable document is created in the geometrical bundle. A main branchable is created to connect the DT06-08SA and DT06-6S. And branch points and other branches are added to connect the connector as given in the question. Main branch is given 12mm thickness and the sub branches are given 10 mm thickness
The protective coverings are given to different bundle segments.
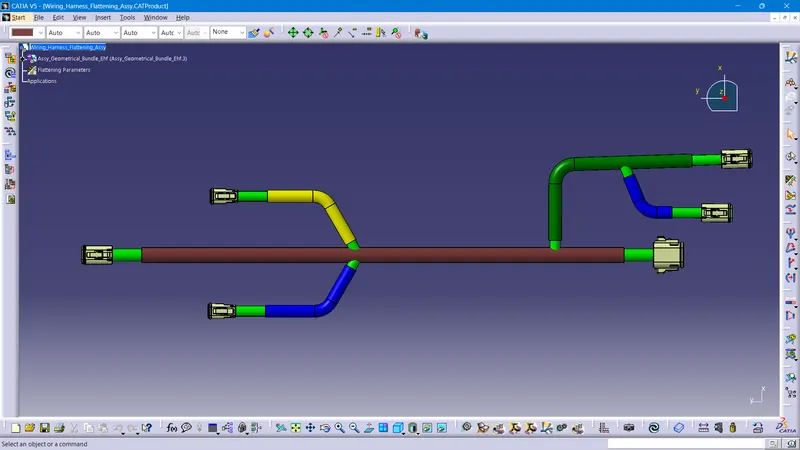
Electrical Harness Flattening & Drawing
A new product file for Electrical Harness flattening is created and opened in the Electrical Harness Flattening workbench. Harness Flattening parameters are defined. Then the Harness Assembly is extracted to the flattening product. Then it is flattened. Using different tools, the bundles are rotated and rolled.
Then a drawing file created with the flattened assembly product file. The Title frame and Bill of materials are added to the drawing.