Wiring harness design in CATIA V5 - 3D modeling Week 4 Challenge
INTRODUCTION TO WIRING HARNESS ROUTING USING CATIA V5
OBJECTIVE: The main objectives of this challenge are as given below
- To understand how routing has to be done on catia v5.
- To download the required connectors from TE.COM.
- To define the connectors electrically.
- To create a routing between the connectors as per the image given in the challenge.
- To prepare a detailed report explaining all the procedures by attaching required images.
The procedure or steps to accomplish this challenge are given below:
STEP 1 : Download required connectors from the internet.
STEP 2 : Define them electriclly and save them in a single folder.
STEP 3 : Create an assembly structure and add all the comonents to the assembly.
STEP 4 : Arrange all the connectors in such a way that the bundle segment has to connect and make sure all the connectors lie in the same plane.
STEP 5 : Create a bundle segments for connectors.
STEP 6 : Apply protecting coverings on the bundles by using the protective covering option.
First after downloading the connectors, we need to define them electrically.
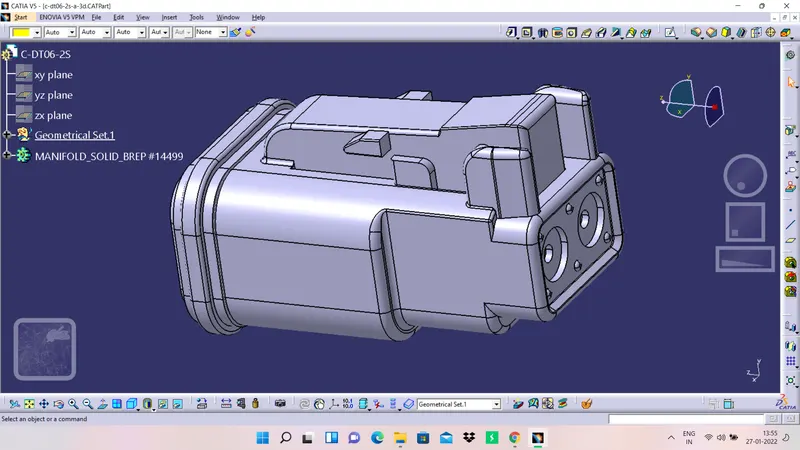
DEFINING DT06-2S CONNECTOR:
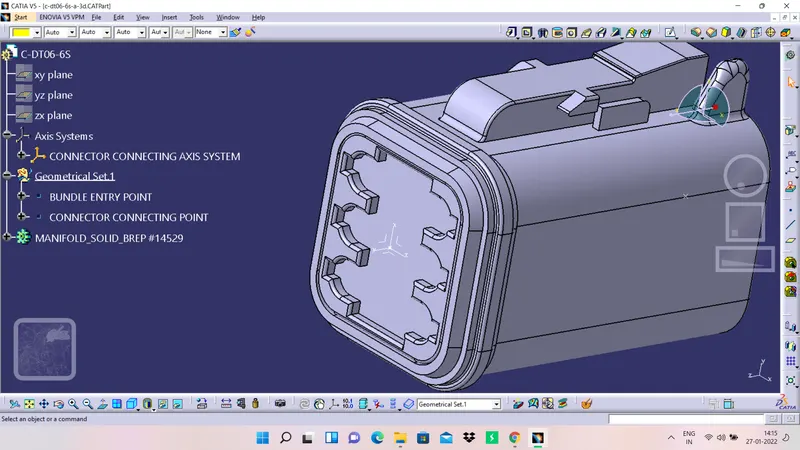
1. The connector is looks alike as shown in below figure and decide which is the bundle entry side and connector connecting side,
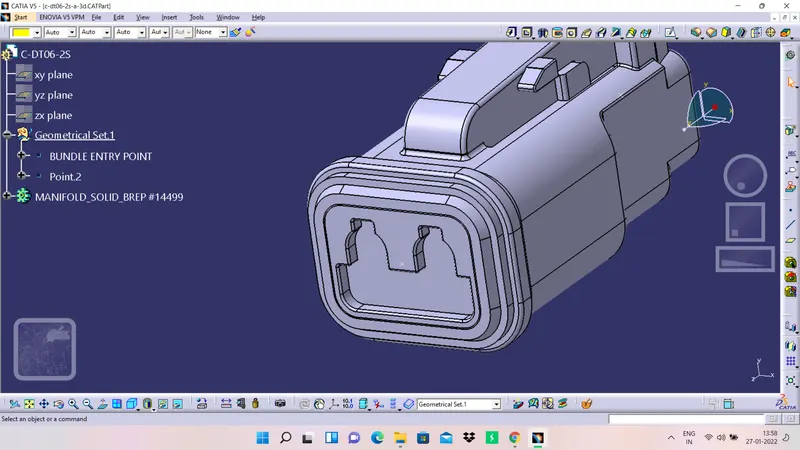
After that create a point on the bundle entry side as well as conector conecting side and make sure the point is at the centre.
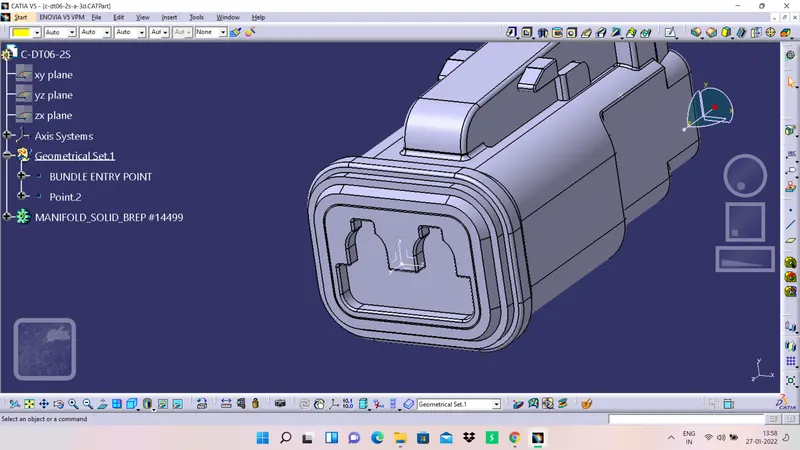
Create an axis system on the connector connecting side and take the point which we have created as the origin point.
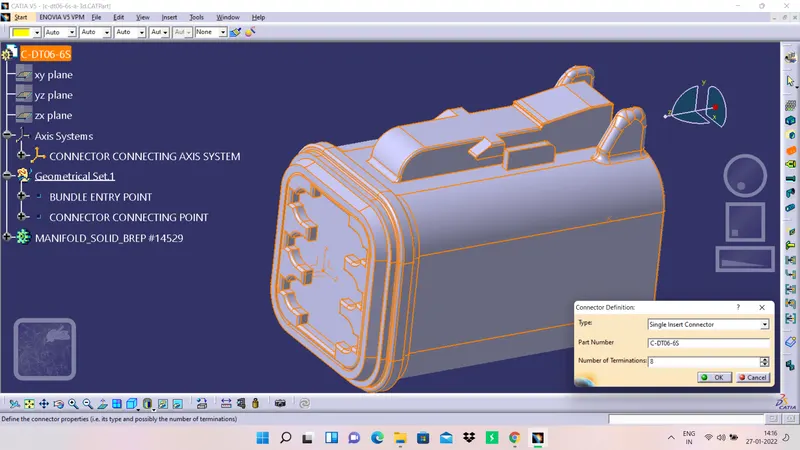
Now go to electrical part design workbench and define the part as a connector,
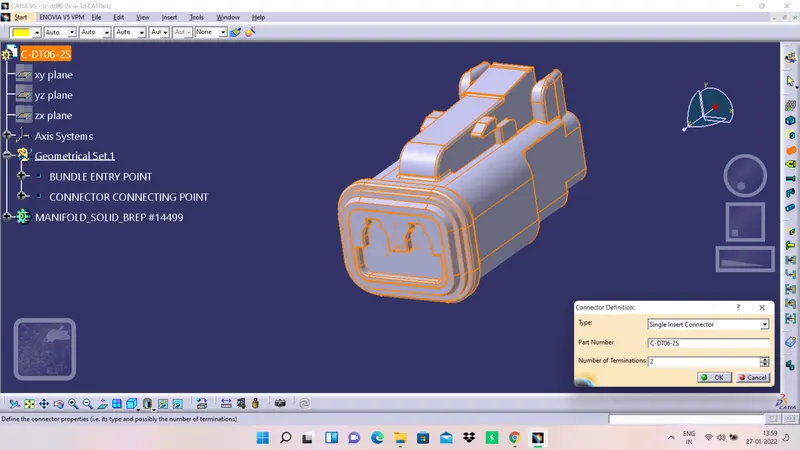
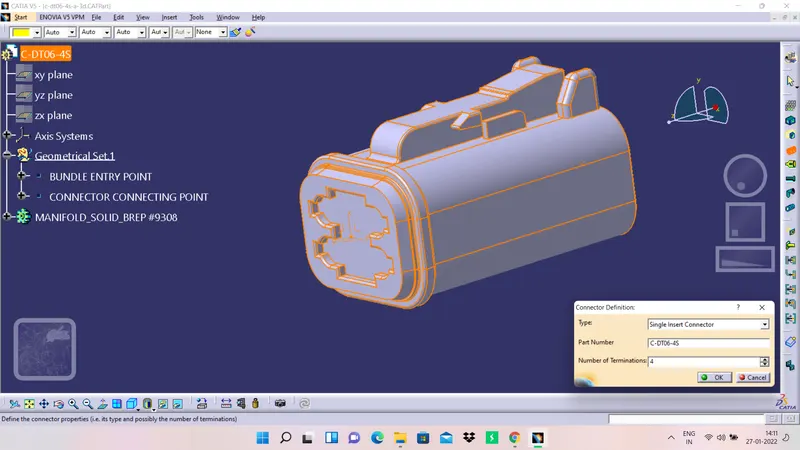
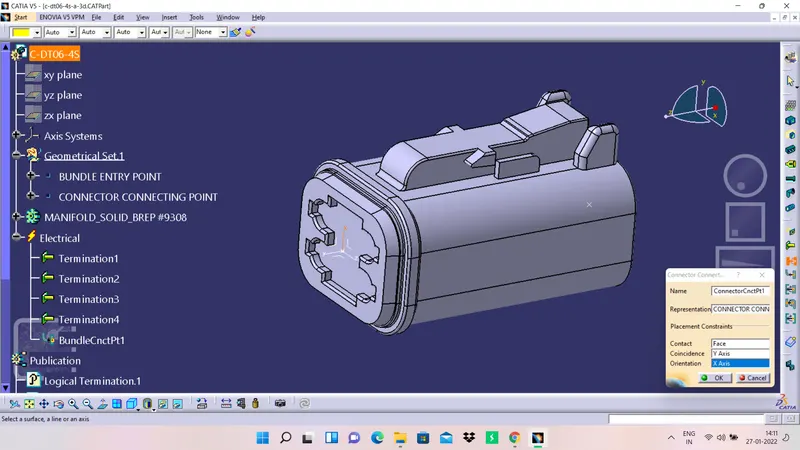
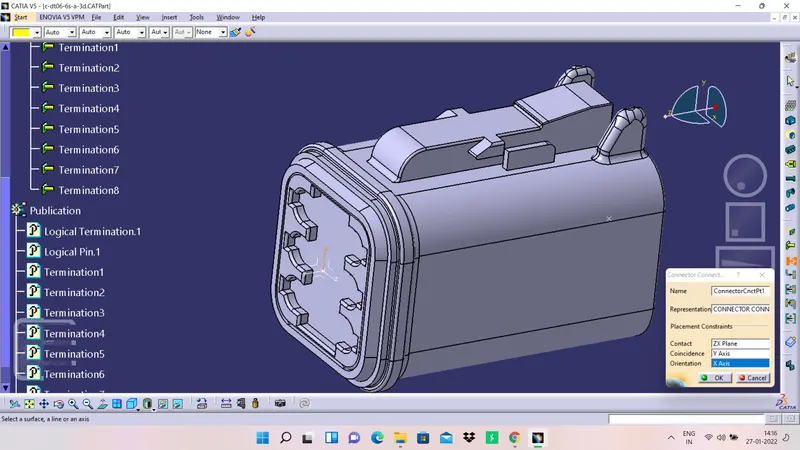
By using define connector connecting point feature in the electric part design workbench define the connetor connecting point.
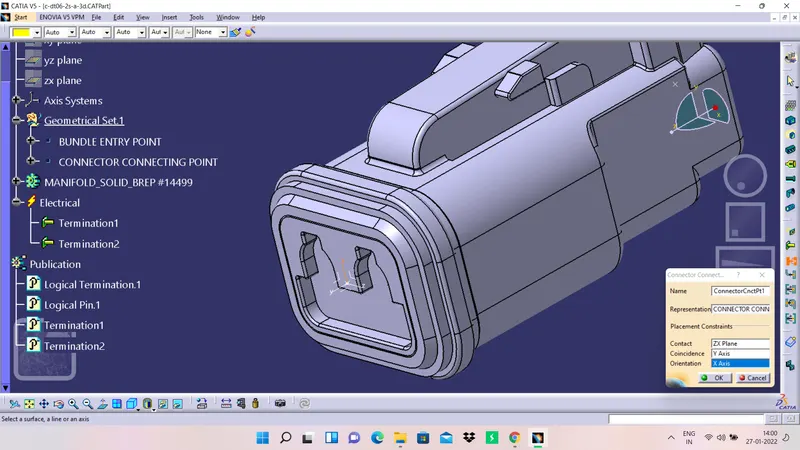
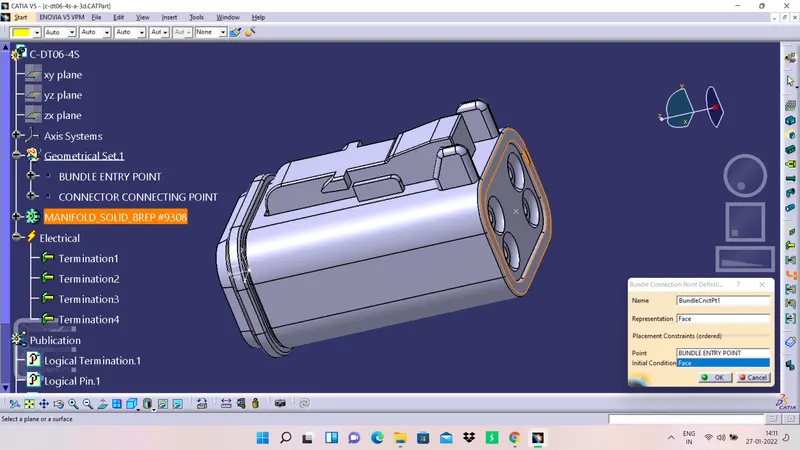
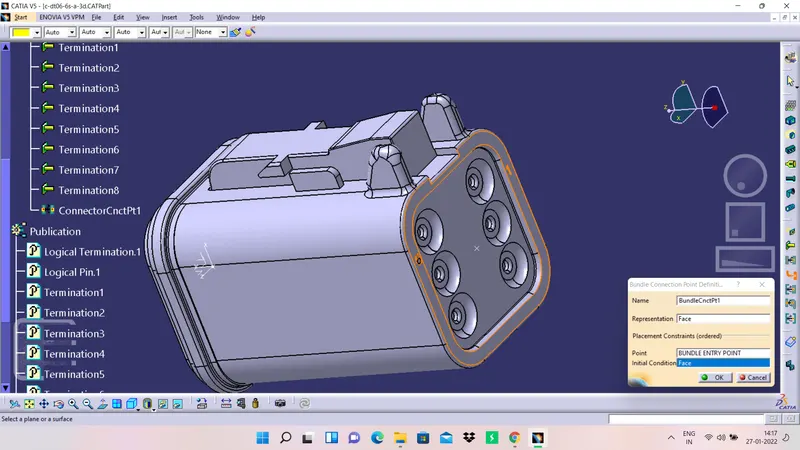
By using define bundle entry point command define the entry point of the bundle on the rear side of the connector.
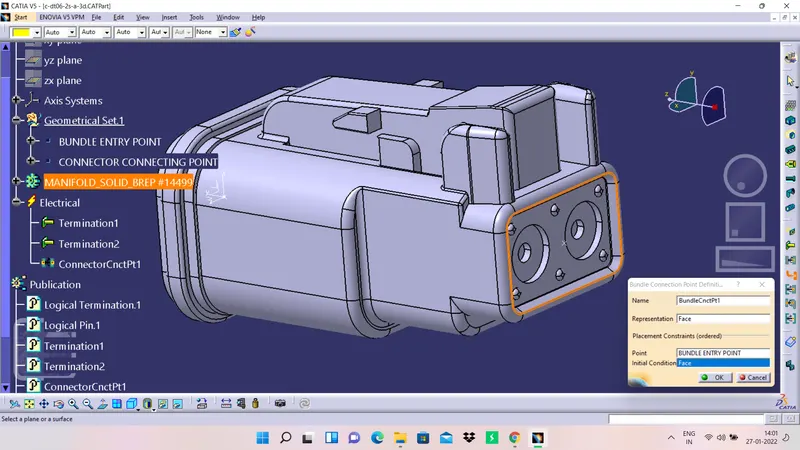
DEFINING DT06-4S CONNECTOR:
Here repeat the same procedure as we did for our DT06-2S connector and images for this connector are added below,
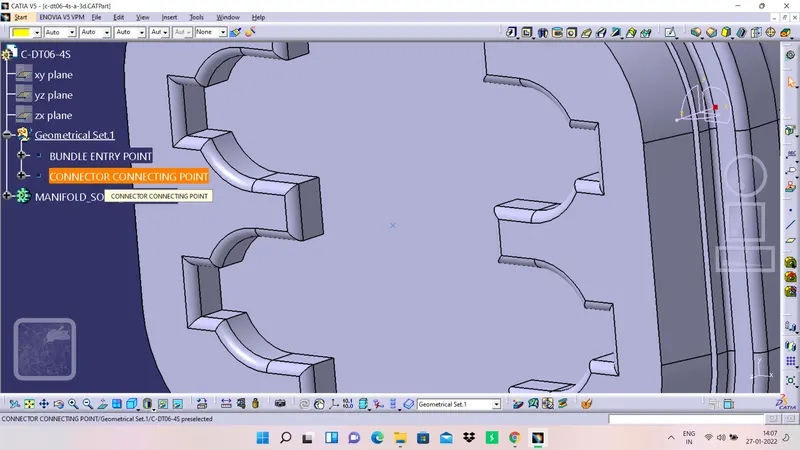
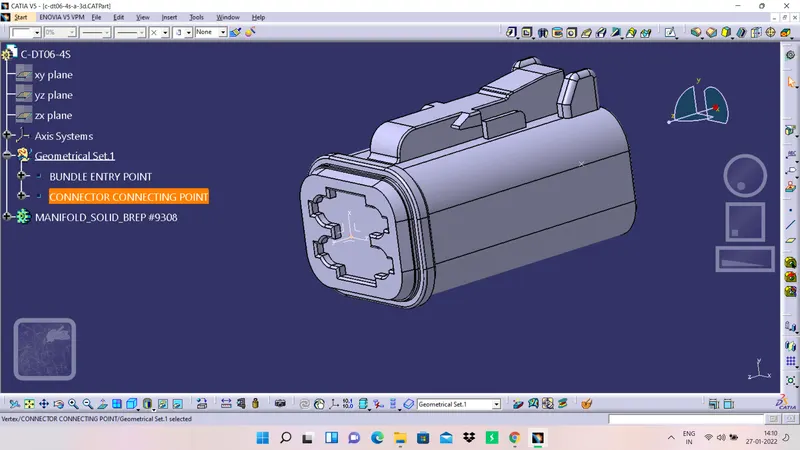
DEFINING DT06-6S CONNECTOR:
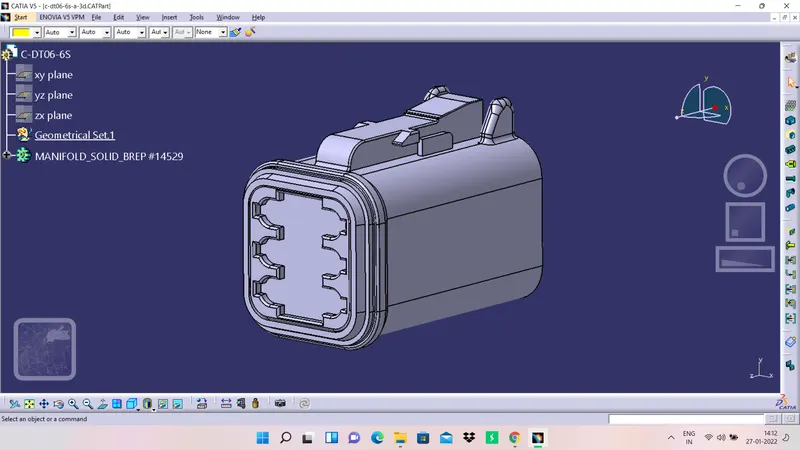
Here repeat the same procedure as we did for our DT06-2S connector and images for this connector are added below,
DEFINING DT06-8S CONNECTOR:
Now let us observe the given part of the connector,
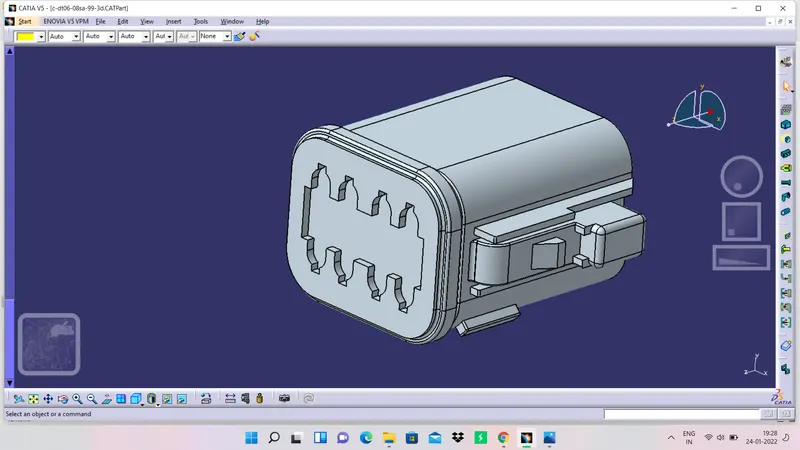
Create a connector connecting point on the front side of the connector by using point command in the part workbench and make sure the point is at the centre.
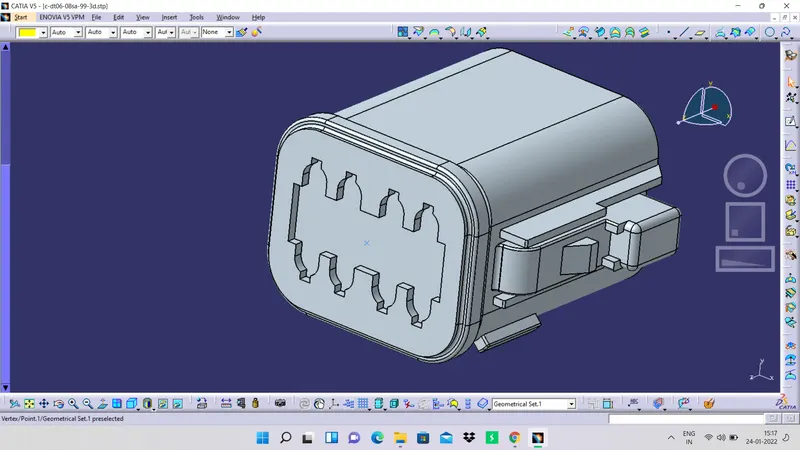
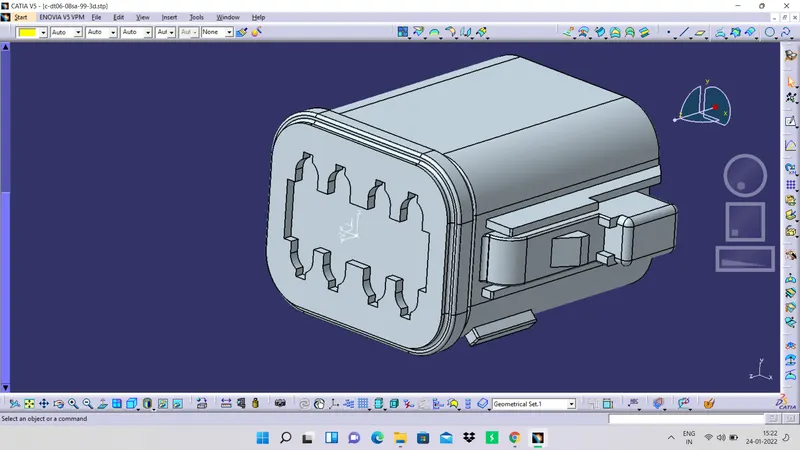
The next step in this process is to create an axis system and rename the axis system as connector cavity axis system. There is no specific rule for the direction of the axes, the axis which i have created is shown in below figure,
Now create a centre point on the rear side of the connector and rename that as bundle entry point.
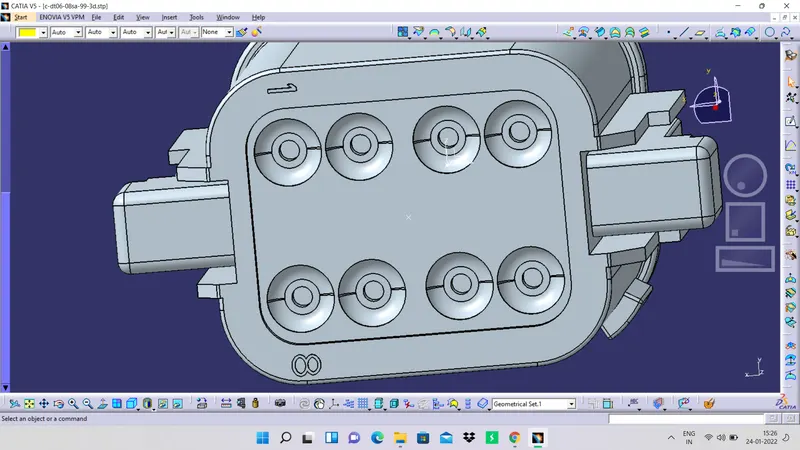
Go to electrical part design workbench and define the connector by selecting the body and by giving proper number of terminals.Use define bundle connection point and select the required profies
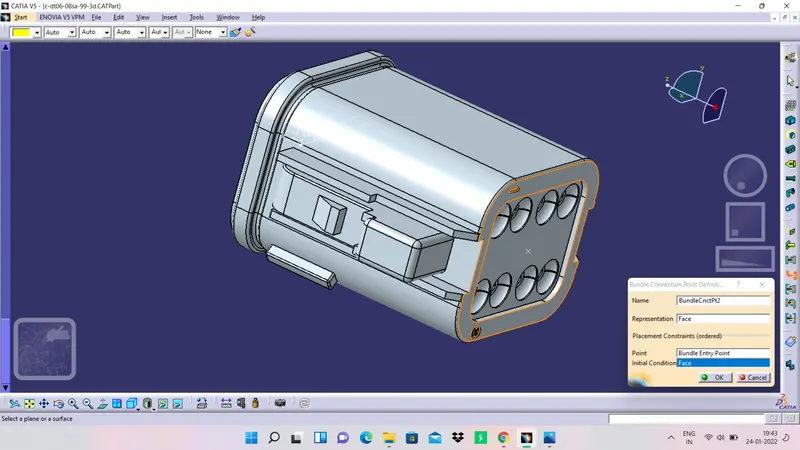
By using define connector connecting point command, select the body first and then made selection as given in the below image.
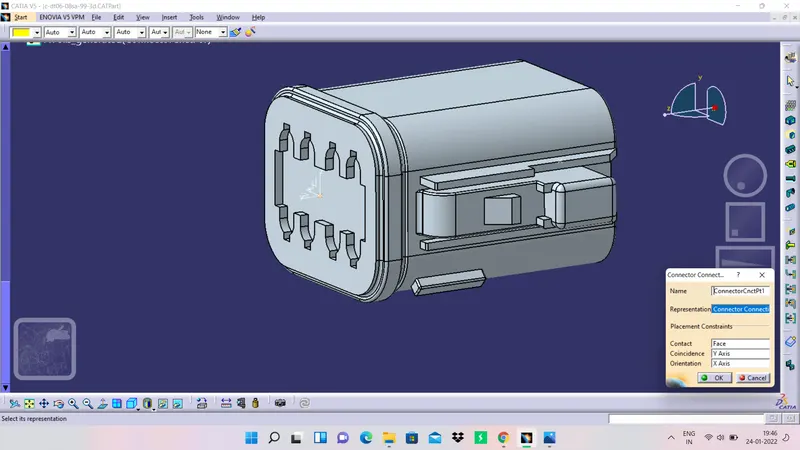
Till now we have defined all the connectors electrically and the next step is to assemble them as per the layout given to us,
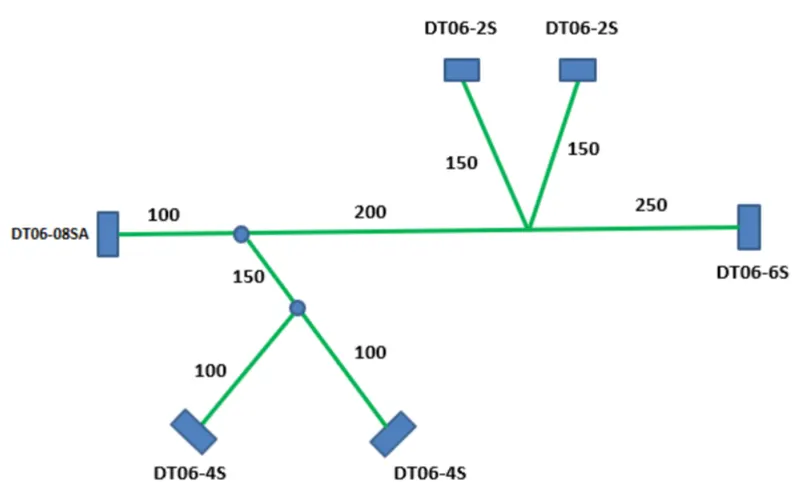
Arrange all the connectors in a simalar fashion and by using compass or by using manipulation tools,
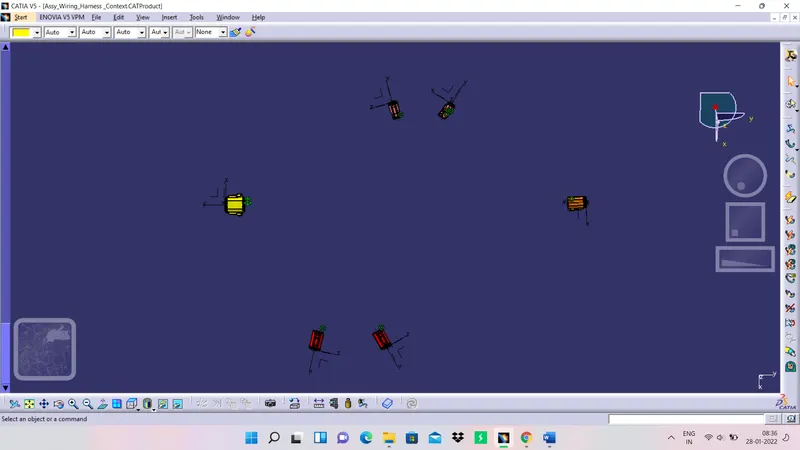
Now by using multi branchable document command in the electrical harness assembly workbench create routings and create branchable points to creates bundles for other branches of connectors.
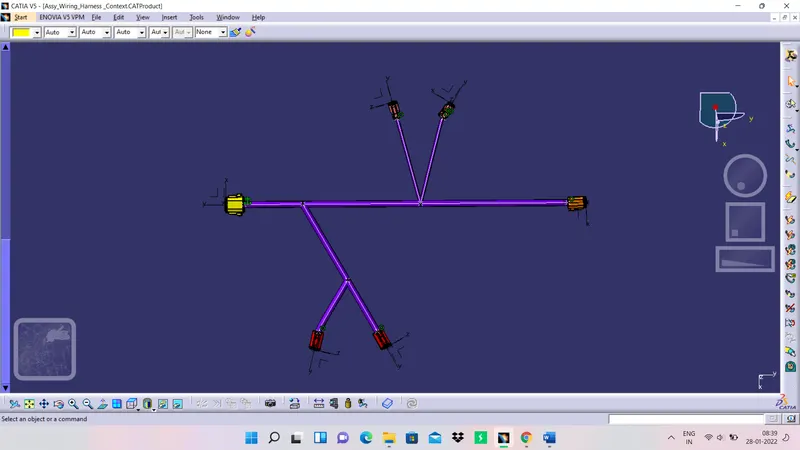
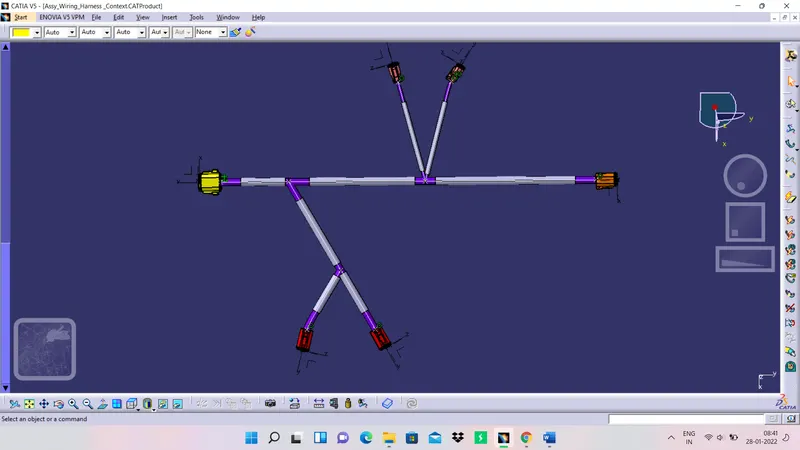
The final step in the challenge is to create a protective coverings on the routings. This can be done using protecting covering feature command in the same workbench that is wiring harness assembly workbench and use the catalogue which we have created previously for that and save the files.
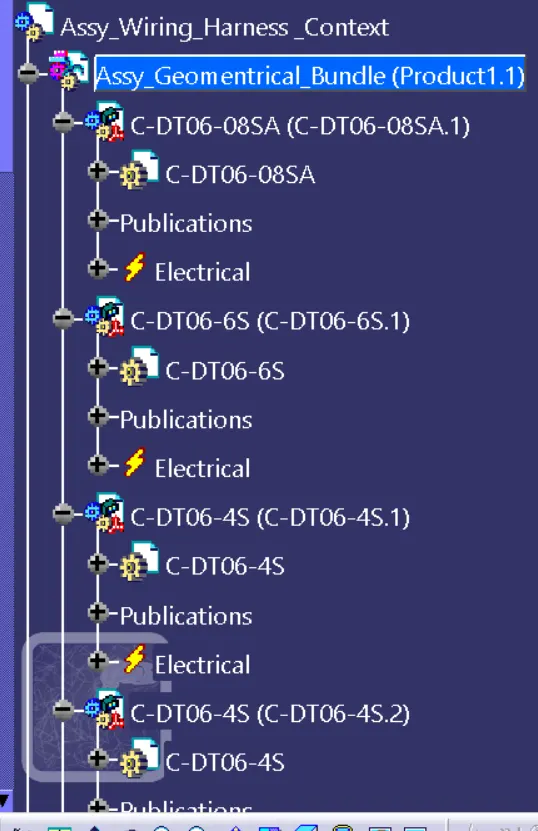
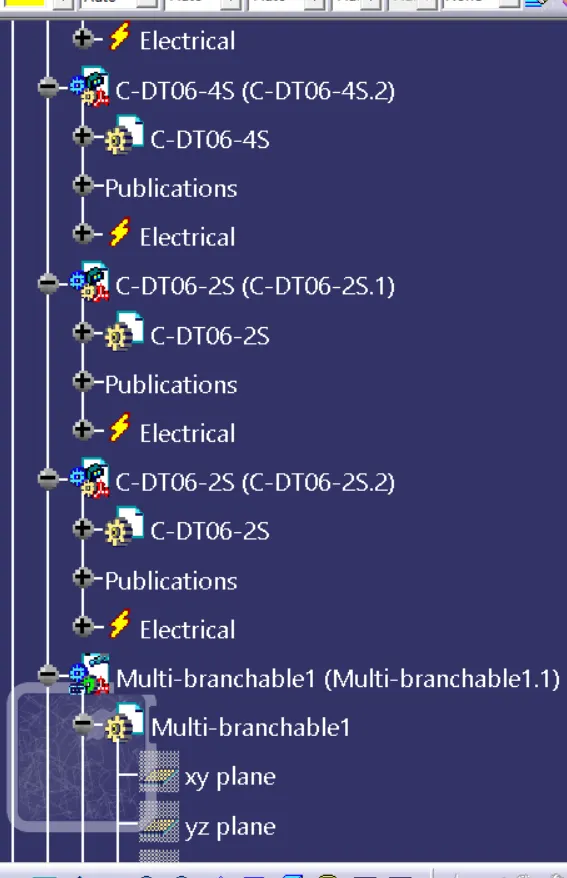
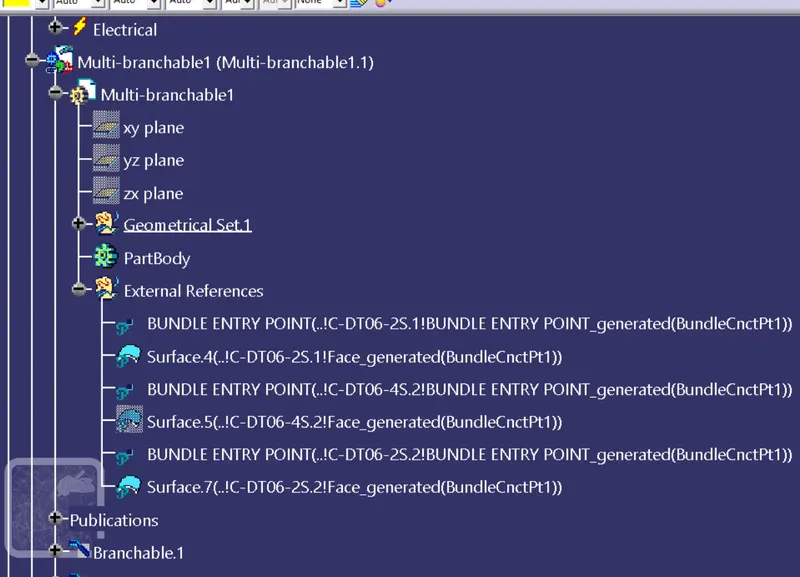
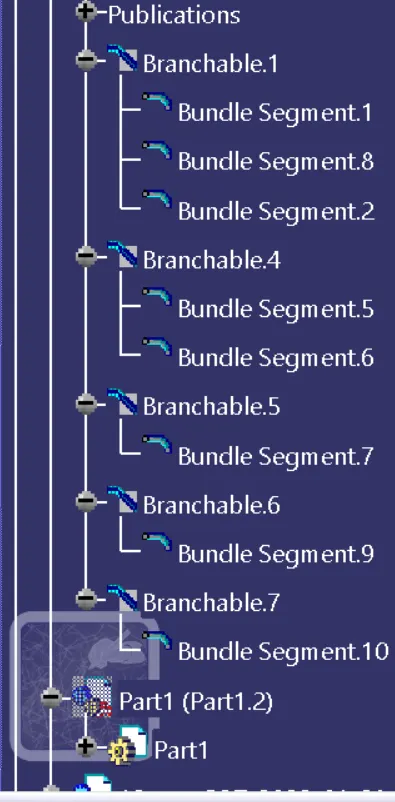
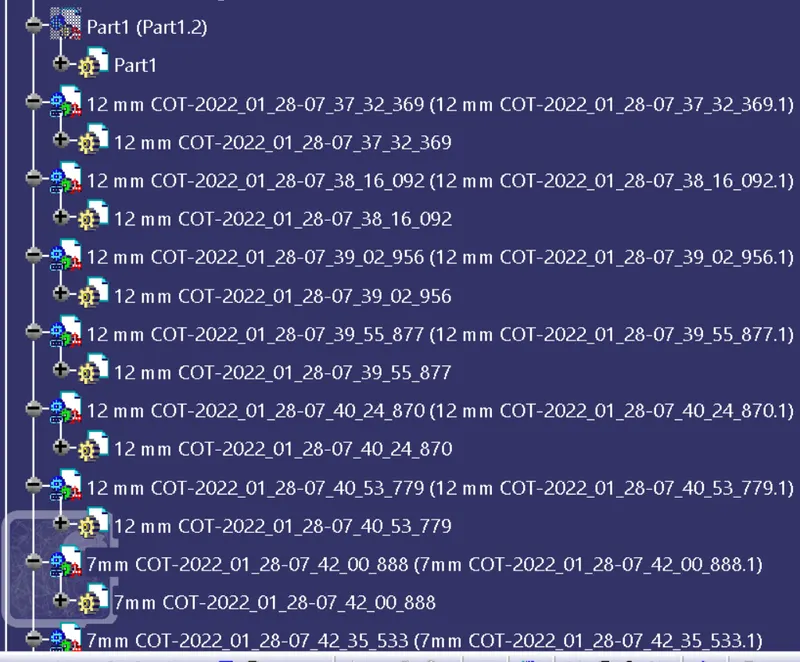
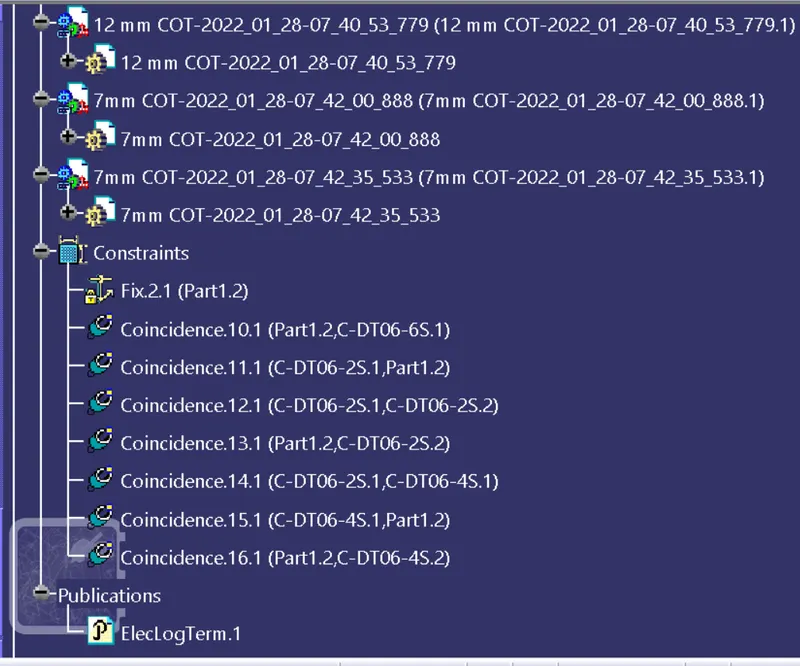
PART NAVIGATOR: The tree structure for this challenge is given in the below images.
CONCLUSION
And hence, the objectives of the challenge have been accomplished and a detailed report has been prepared and cat parts are attached to the challenge successfully.