Week 9-Challenge
Aim:
To use different types of connection techniques and implement on the given model.
Given Data :
Create connector and Attach the various parts of the given model
1. Right_Rail_2 & Front_truss_1:- Seam-Quad(angled+capped+L)
2. Left_Rail_2 & Front_truss_1:- Quad elements
3. Front_truss_2, Front_truss_1 & Right_Rail_1:- Spot weld with 3 Layers and 5 mm Diameter
4. Front_truss_2, Front_truss_1 & Left_Rail_1:- Hexa (Adhesive)
5. Rear_truss_2 & Right_Rail_2:- Bolt Connector
6. Rear_truss_2 & Left_Rail_2:- Bolt Connector
7. Right_Rail_1 & Right_Rail_2:- Spot-weld with Rigid Elements
8. Left_Rail_1 & Left_Rail_2:- Spot-weld with Spring Elements
9. Rest all the component left Join them with suitable connectors
Procedure:
Step 1 :
Import the given model into hypermesh using the import command.
IMPORT SOLVER DECK > IMPORT GEOMETRY > SELECT FILE TYTPE > IMPORT
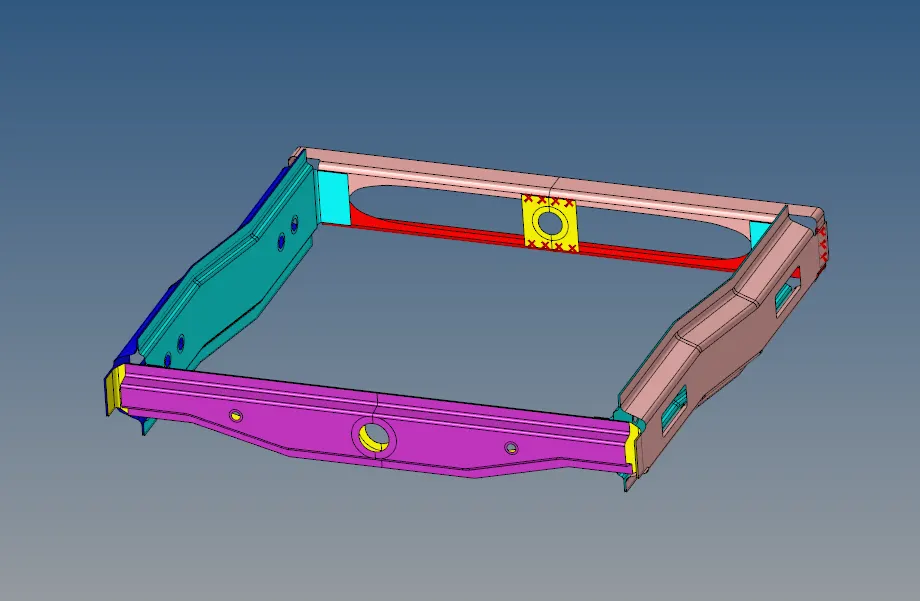
The mid surface is already extracted for the model.
Step 2:
Meshing the component :
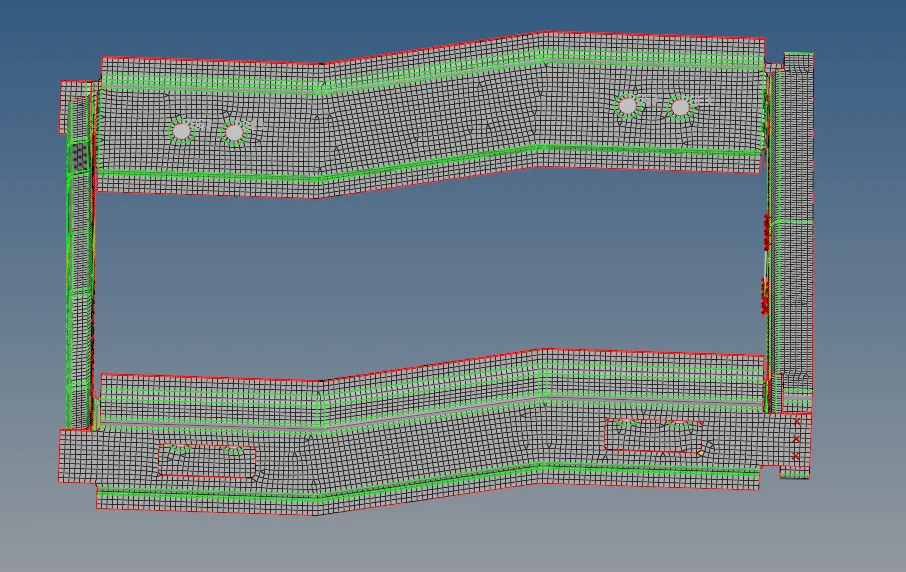
Use the Automesh option to generate a mesh of plate elements using surface geometry or existing shell elements to define the mesh area.
Set the options in the panel in any order that you feel comfortable using. Moving from subpanel to subpanel will not cause you to lose work. When you are finished making all your selections, click mesh to start the meshing process.
- Set the panel mode by selecting the appropriate subpanel.
- Select the meshing method by setting the entity selector to surfs or elems.
- Make the required element criteria settings.
- Set any algorithm options.
- Select the area to be meshed using the entity selector and any extended selection methods.
2D > AUTOMESH > SURFACE > MIXED/QUADS > ENTER ELEMENT SIZE > MESH
Step 3 :
Connections of components :
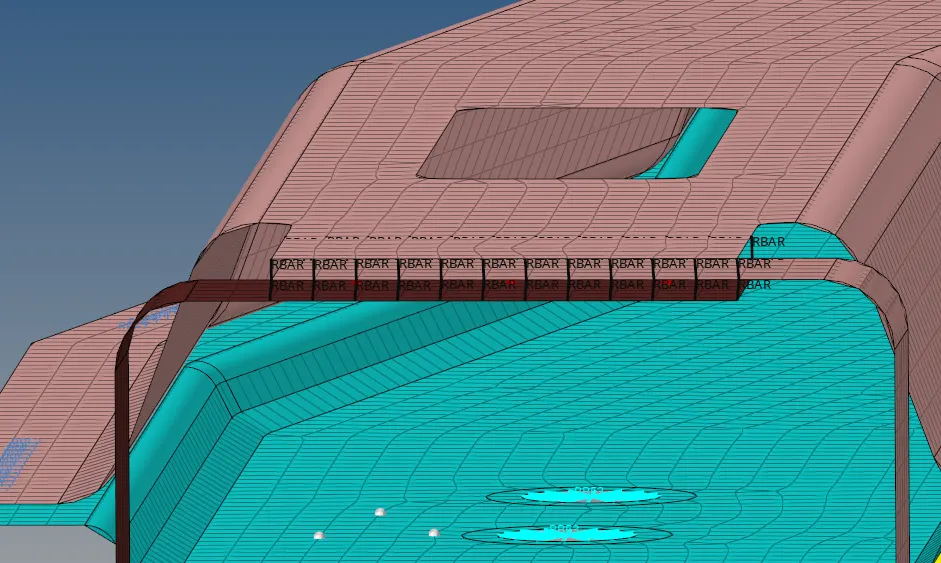
To realise seam and adhesive connection :
Use the Seam panel to create connectors that represent line connectors such as seam welds. These connectors can later be realized as standard or custom weld representations.
When the Seam panel is active, only seam-type connectors display in the modeling window; graphics for other connector types are suppressed until you exit the panel.
1D/2D > CONNECTORS > SEAM > NODE LIST > SELECT COMPONENT > ENTER TOLERANCE VALUE > SELECT SEAM TYPE > CREATE
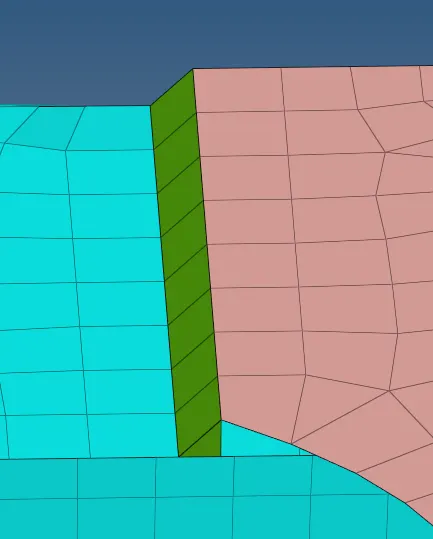 Seam weld connection
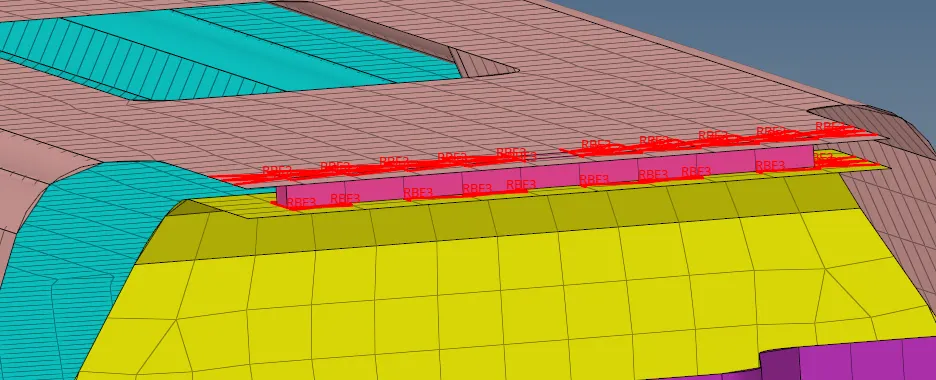 Adhesive connection

To realise spot weld :
Use the Spot panel to create connectors that represent point connectors such as spot welds. These connectors can be realized as standard or custom weld representations.
When the Spot panel is active, only spot-type connectors display in the modeling window; graphics for other connector types are suppressed until you exit the panel.
1D/2D > CONNECTORS > SPOT > SELECT NODES > SELECT COMPONENT > ENTER TOLERANCE VALUE > SELECT SPOT TYPE > CREATE
 Spot connection

To realise Bolt connection :
Use the Bolt panel to create connectors which will be represented as a 1D element construct.
There are three base methods to determine the nodes to be connected: hole detection, cylinder definition, and a combination of both. Shell holes can be connected by their edges and/or any washer nodes. The default behavior for bolt holes is to connect every node within the solid hole, but if you add the line *ce_fe_solid_bolt_setup(0) to your hm.cfg file, then only the nodes of the top and bottom rings are connected.When the Bolt panel is active, only bolt-type connectors display in the modeling window; graphics for other connector types are suppressed until you exit the panel.
1D/2D > CONNECTORS > BOLT > SELECT NODES > SELECT COMPONENT > ENTER TOLERANCE VALUE > SELECT BOLT TYPE > CREATE
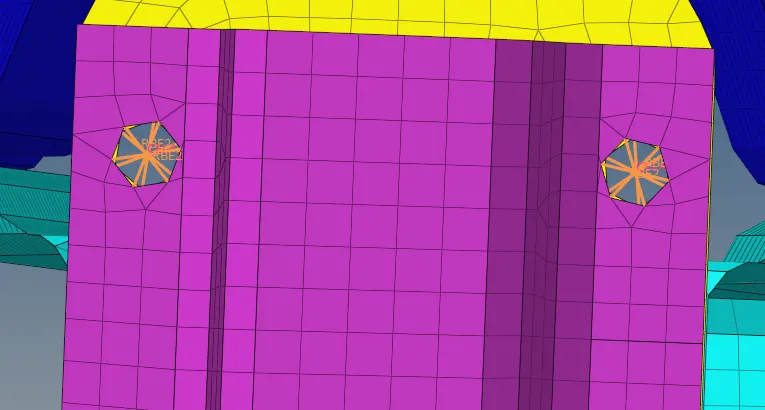 Bolt connection

Result :
The above component was meshed and appropiate connections were given.