Week 8 - Challenge 3 - Coin Holder Design
TITLE :
Coin Holder Design Using CATIA V5
AIM :
To Create the Coin Holder Plastic component through the given Class-A surface. To begin with, the tooling axis for the given Class-A Surface should be created meeting the requirements of the draft angle and at the end perform the Draft analysis on the model.
Take the Thickness of the component to be 2.5 mm
INTRODUCTION :
A Coin Holder is an accessory provided to keep some small items such as coins, Jewelry, phones, etc. which is placed behind the Gearbox of the vehicle. When the driver needs something which cannot be kept deep inside the pocket, handbag, or glove box, then the coin holder is the best option to keep things handy.
SPECIFICATIONS :
- Coin Holder Thickness = 2.5mm
- Minimum Draft Angle = 3 Degrees
THEORY :
- CLASS A SURFACE :
In automotive design, a Class A surface is any of a set of freedom surfaces of high efficiency and quality. Although strictly, it is nothing more than saying the surfaces have curvature and tangency alignment – to ideal aesthetical reflection quality, many people interpret class A surfaces to have G2 (or even G3) curvature continuity to one another.
- CLASS B SURFACE :
Class B surfaces are the secondary surfaces that you can see sometimes, but are less important, such as the inside of your glovebox, etc. These must be smooth and "error-free" as well but are not held to the standards that class A surfaces are.
- CLASS C SURFACE :
Class C surfaces are the backside surfaces that can have tool marks, flashes, and other imperfections without hurting appearance, function, etc.
- DRAFT ANGLE :
Draft angle (the degree of taper of the side wall of the mold or the angle of clearance designed to aid removal of a part from a mold) increase causes a linear decrease of the force required to remove a molded object from a mold. It is also used to avoid one of the plastic defects while casting is said to be a Dragline.
- TOOLING AXIS :
The tooling axis is a direction along which the core and cavity tend to move. Here the tooling axis is created in a direction, which is normal to one of the Flat surfaces of the Coin Holder
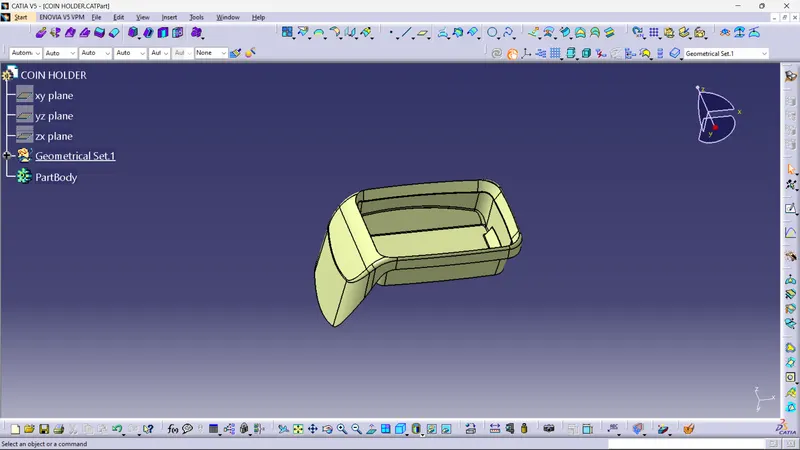
- CREATED CLASS A SURFACE :
Class A Surface is already created by the designer, there are shown below as an image.
CREATING TOOLING AXIS :
Class-A surface is first analyzed to create tooling axis or tooling direction that molds pull apart in injection molding. Tooling direction is vital for plastic product design as it decides direction for mold separation.
The class A surface is then checked for the connectivity of the surface and ensures it is completely joined and there will be no gap between the surfaces.
If it is not joined together make it with a minimum tolerance of 0.001 to 0.003 and check for connectivity of the surface.
Connectivity of the surface can be done in two ways, the join method and the boundary method.
Split the surfaces into multiple profiles then Identify the surface where it is not possible to create a tooling axis and check on which direction is the best fit for the tooling axis and then define the tooling axis and draft direction.
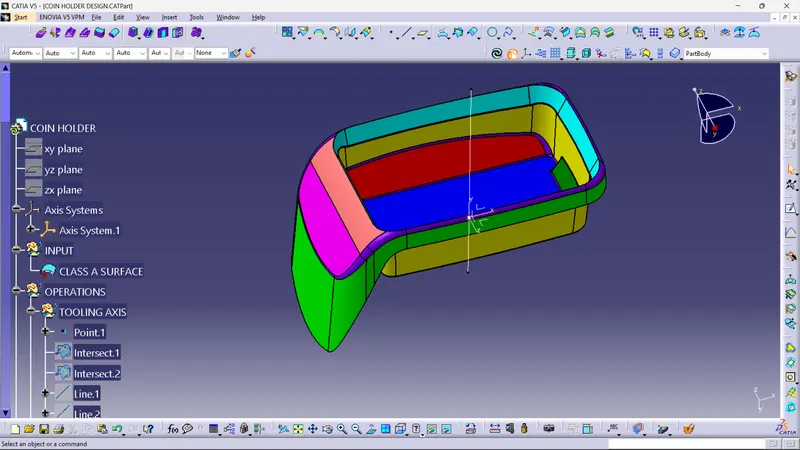
Here for defining the tooling axis first we have to create a point in the middle of the base surface and create an axis with respect to that point. After creating an axis on the point create the intersection as shown below in fig.
(Here I have colored all the surfaces in order for better understanding)
Now we will draw lines on the intersection and create two tooling axis in both directions with the bisecting method, as shown below in fig.
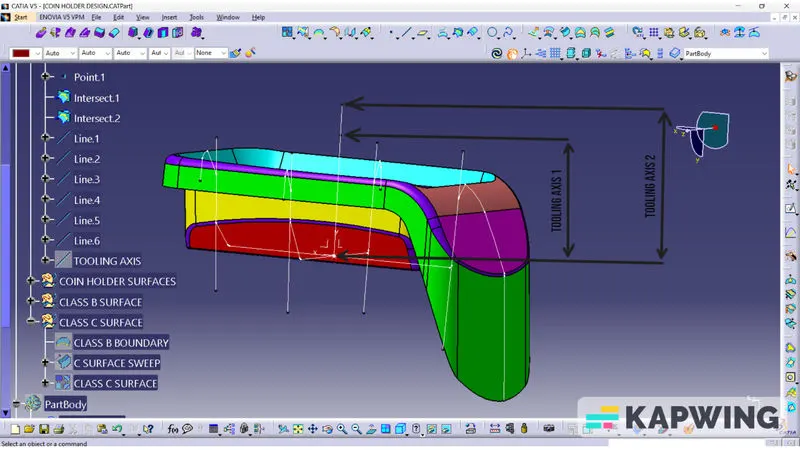
As we can see both the tooling axis comes on each other this is because there is no inclination in the intersection lines. Now for creating the main tooling axis on which we are going to work, we have to draw a line bisecting this two tooling axis.
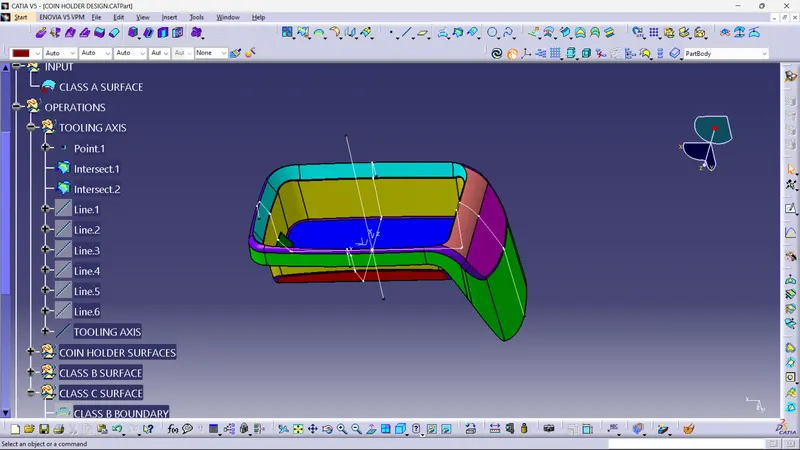
Our main tooling axis will also come over these 2 tooling axis as all the lines are perpendicular to the base. Define the tooling axis using the intersect method by creating a bisecting line.
Tooling axis creation :
The direction in which the mould open and closes is called the tooling axis direction.
Check the connectivity of the surface and ensure there will be no gap between the surfaces and then define the tooling axis.
While creating a tooling axis please ensure to give the tooling axis on a flat length surface or the surface which have a hole on it.
Create a point on the middle of the base surface by using point on the surface command then create a intersection for the surface and extract the reference lines which will be helpful for creating the dummy tooling axis using the intersect method by creating a bisecting line..
Use the line command and draw the lines which is aligned with the extracted lines and extended it to the required length.
Bisecting method :
Identify on which plane we have to do more operations and create the plane or axis on the component area define it on the dummy tooling axis direction.
Intersect the class A surface with that plane then we will get a intersection sketch. Look for the profile (inclined line) which will create a problem and extract it then extending it by using line command.
Then create a bisecting lines with reference to the lines we have extended and this will be our main tooling axis.
In this case we have created tooling axis along with Y direction with reference to the base surface.
Then do a draft analysis on the class A surface and identify the draft angle then give the nominal value for the draft.
DRAFT ANALYSIS :
Draft allows for the component to release from the mould, most parts or applications require a minimum of 0.5 to 1 degree draft angle and 3 dgree draft angle is widely used as per the norm.
Change the material mode to customize mode before moving to the draft analysis.
Insert –analysis-feature draft analysis
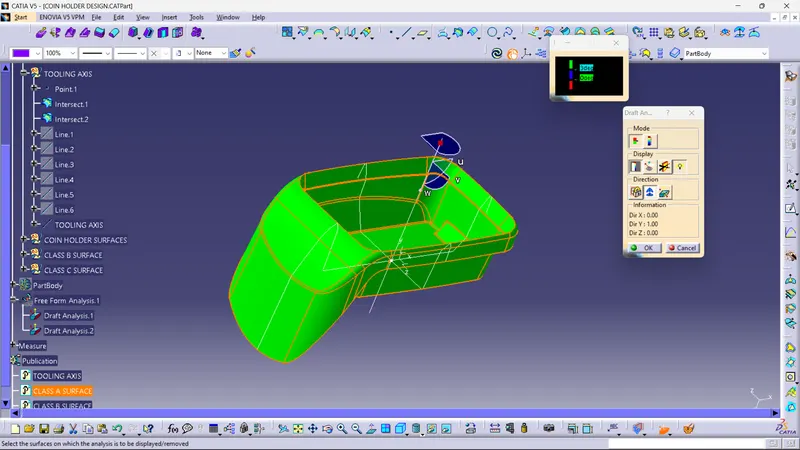
Defining the draft direction Select draft analysis from the tool bar and click on the compass symbol and pull the compass from the right side top corner of the workbench and place it on the component where want to do the draft analysis. ‘W’ of the compass and tooling axis should be aligned on the same line.
Once the compass is aligned with the tooling axis click on the lock symbol and drag on the surface we will get a wrong mark then select that point a table will appear it shows the draft value on the table we can adjust the draft value and analysis it for all the edges and surfaces.
By clicking the on the surface and using the flipping tool we can assign the Flipping direction, the color of the surface change as per the flipping direction.
Analysis under running point and move the mouse on the surface and it will show the details of the surface deg direct at each and every point of the surface.
CLASS B SURFACE :
In the Class A, surface below is called core and the surface above is called cavity. Class A is an aesthetics surface and class B is an engineering surface. B surface should be inside the class A surface.
The B surface of coin holder can be divided into Seven surfaces and they are Base, Side walls, Inclined base, Top walls, Outer flange, Front flange, and Base block surface and later trim them altogether.
First step is to create the side wall surfaces by extracting the required surface from Class A and untrimmed it thus we will get a single surface which will be extrapolated to get the required size and finally offset it to the inner side of class A as per the thickness of the material and trim them together and apply the required fillet by measuring the values from class A.
Base surface of the component is then extract, untrimmed, extrapolated, offset and trimmed.
The top walls can be directly extrapolated from the extracted surfaces and offset it for the required size of the material.
Then join the base, side wall and top wall by trim operations.
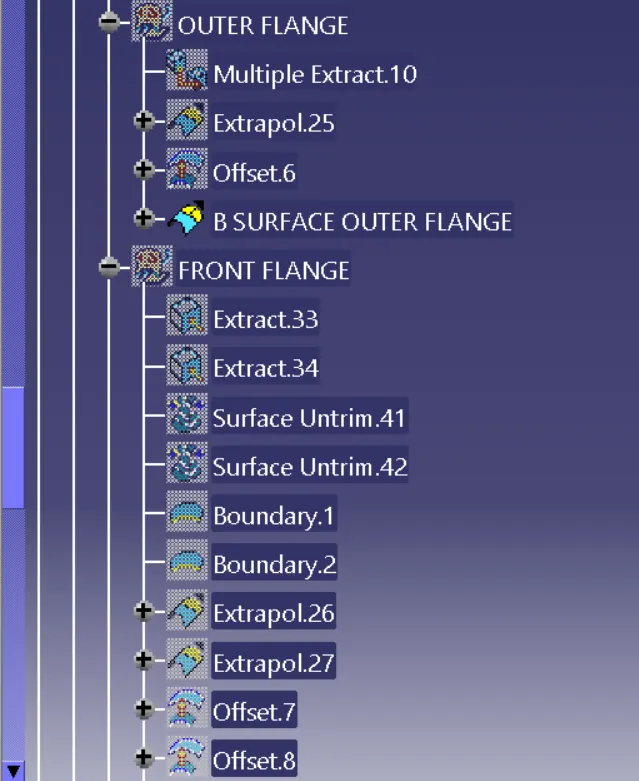
As the Outer flange is surface complex it can be divided into two parts and extract them then go for extrapolation, offset, split and join operations and finally check the for the connectivity by intersecting method.
Now all the geometries are trimmed together to get the B surface.
Fillet is applied to the required surfaces by measuring the fillet value from the class A surface.
Following images shows the creation of Class B Surface :
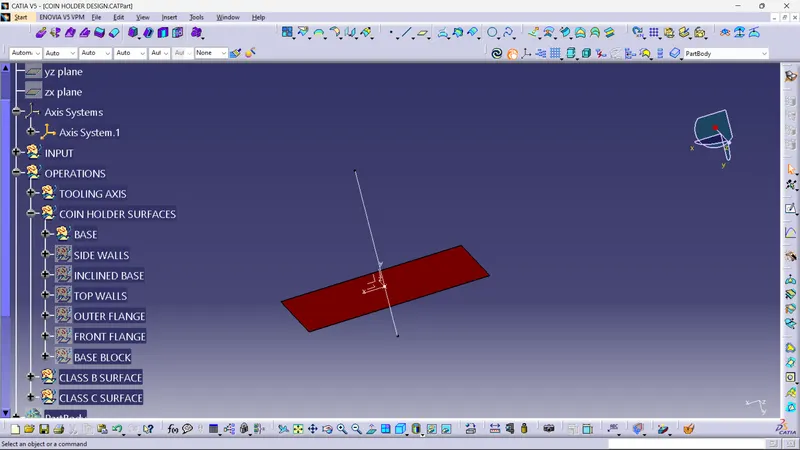
STEP 1 : BASE
Extracting, Untrimming, and Extrapolating the Base. Offsetting the base surface by 2.5 below the Class A surface.
STEP 2 : SIDE WALLS
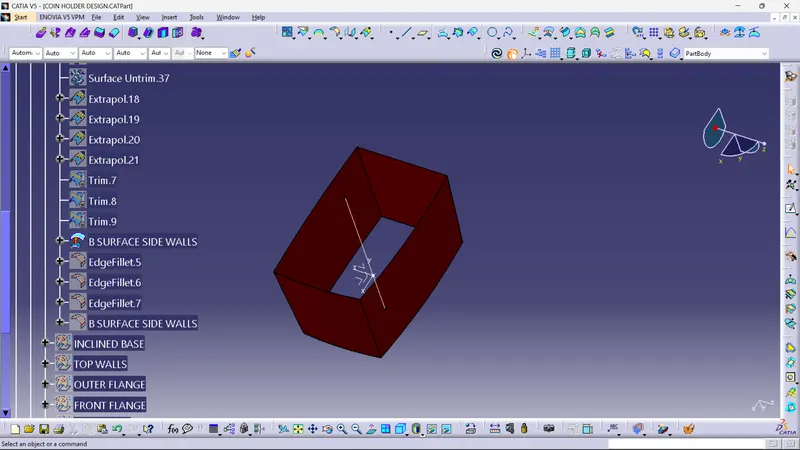
Extracting, Untrimming, and Extrapolating the side walls. Here extraction is done with the Multiple Extract command. After the extrapolation, Trimming is done to form a proper box with open top and bottom surface as shown in the fig below. Offsetting the side walls by 2.5 outside the Class A surface.
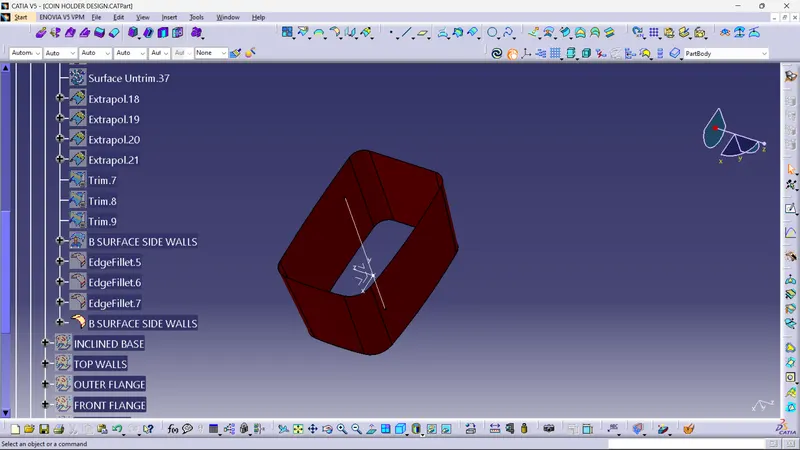
After the offsetting we have to fillet the edges with edge fillet command. Before filleting the edges we need to measure the fillet radius and add 2.5 while edge filleting in order to get the thickness 2.5 (as shown in fig below)
STEP 3 : INCLINED BASE
Extracting, Untrimming, and Extrapolating the Inclined base. Offsetting the Inclined base by 2.5 below the Class A surface.
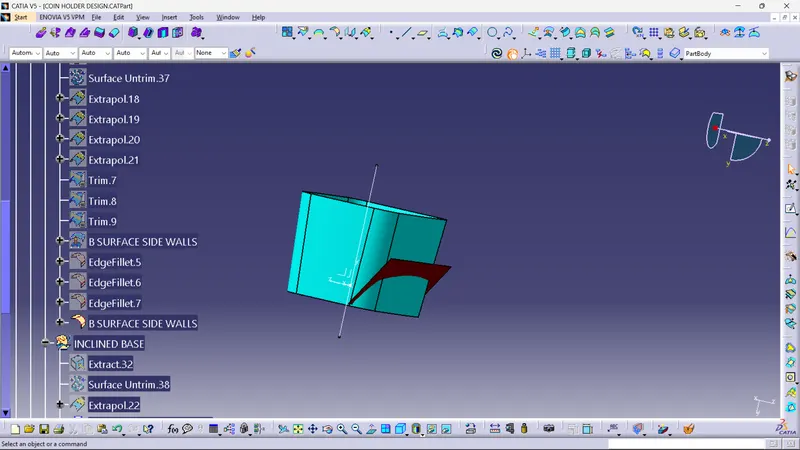
STEP 4 : TOP WALLS
Extracting, Untrimming, and Extrapolating the Top walls. Here extraction is done with the Multiple Extract command. After the extrapolation, Offsetting the Top walls by 2.5 outside the Class A surface.
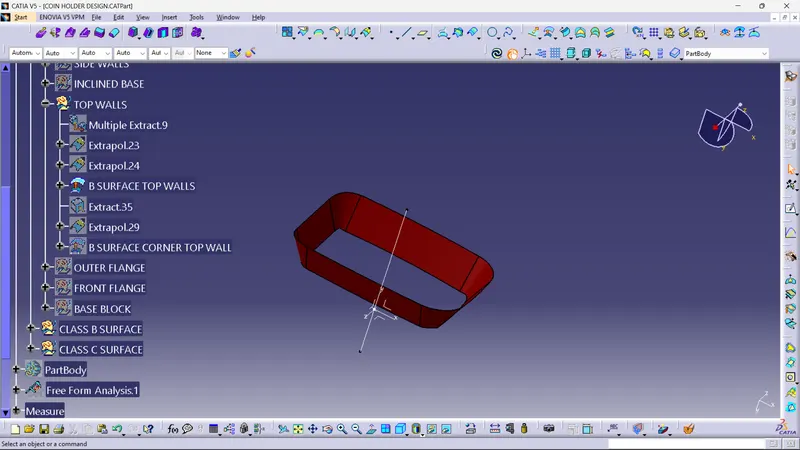
As we can see there is a small surface on the top wall. we have to do the same procedure to top wall as well i.e. Extraction, Untrim. Extrapolate and Offset. Offset is done below the A surface
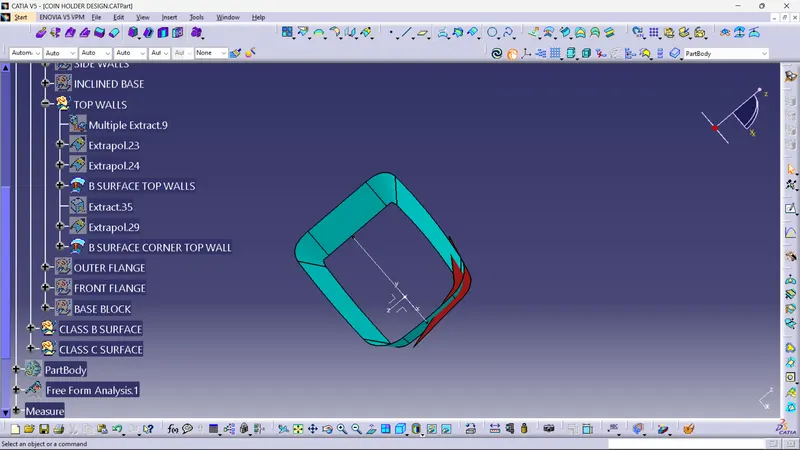
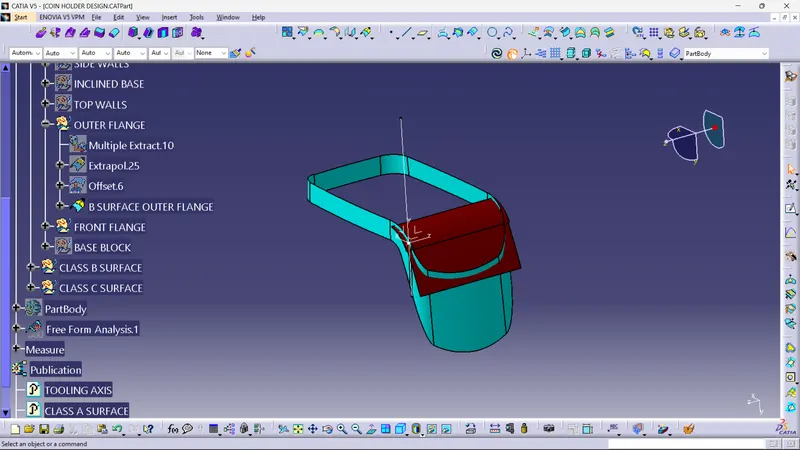
STEP 5 : OUTER FLANGE
Extracting and Extrapolating the Outer Flange. Here extraction is done with the Multiple Extract command and we dont need to untrim because we need the exact dimen of the outer flange.
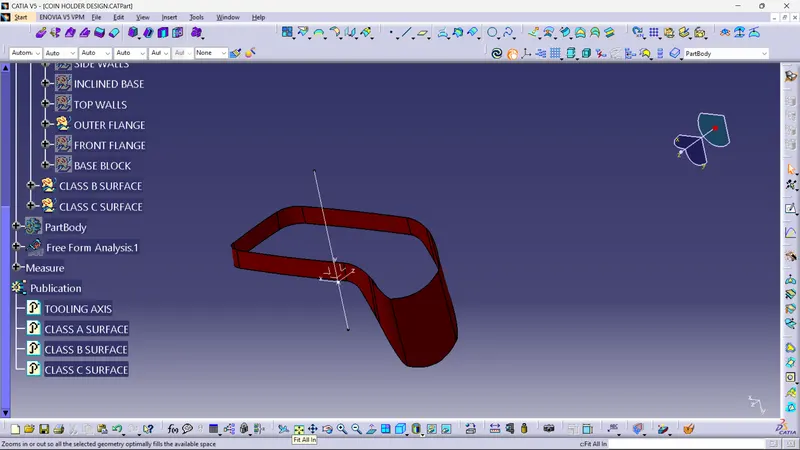
STEP 6 : FRONT FLANGE
Extracting, Untrimming, giving boundary and Extrapolating the Front Flange. After the extrapolation, Offsetting the front flange by 2.5 below the Class A surface.
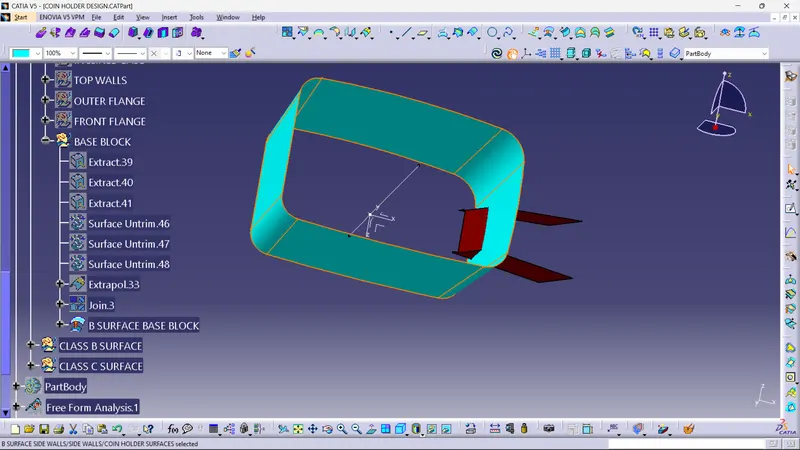
STEP 7 : BASE BLOCK
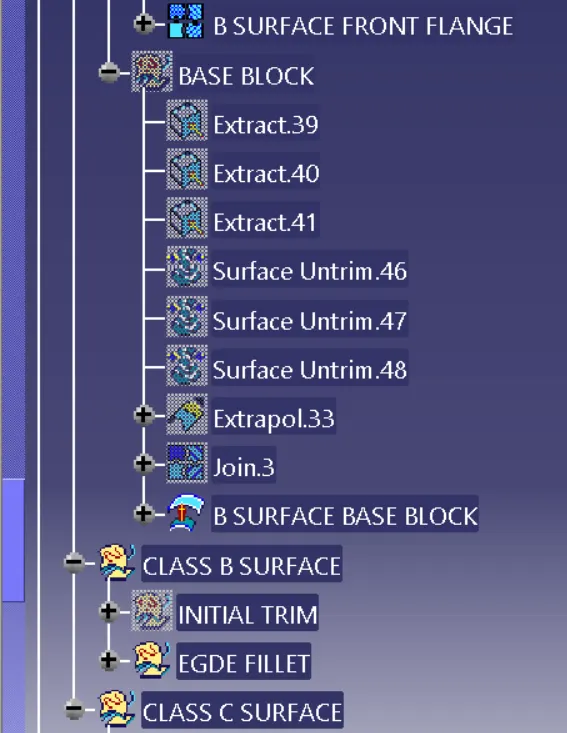
Extracting, Untrimming, and Extrapolating the Base block. After extrapolating we have to join the surface in order to trim it with respect to the base and side walls.
STEP 8 : INITIAL TRIM
Now all the surfaces are ready with the all the commands performed i.e. Extraction, Untim, Extrapolate, Join, Boundary and Offset.
We have to trim all these surfaces one by one in order to create a Class B Surface.
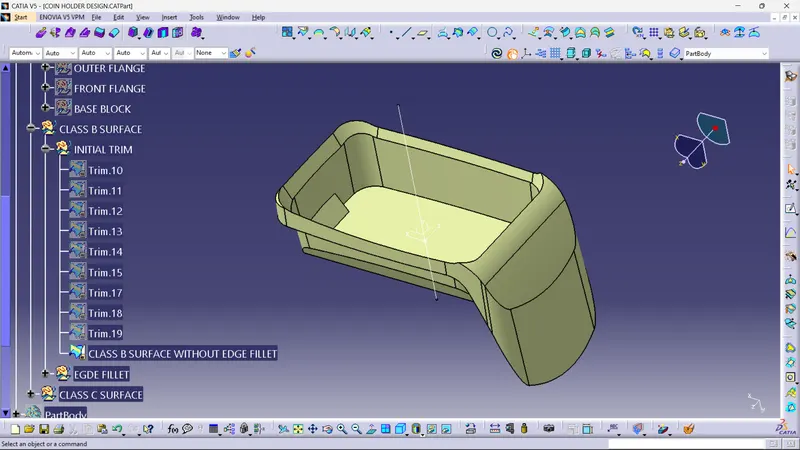
NOTE : All the trimming is performed under the INITIAL TRIM Geometrical Set.
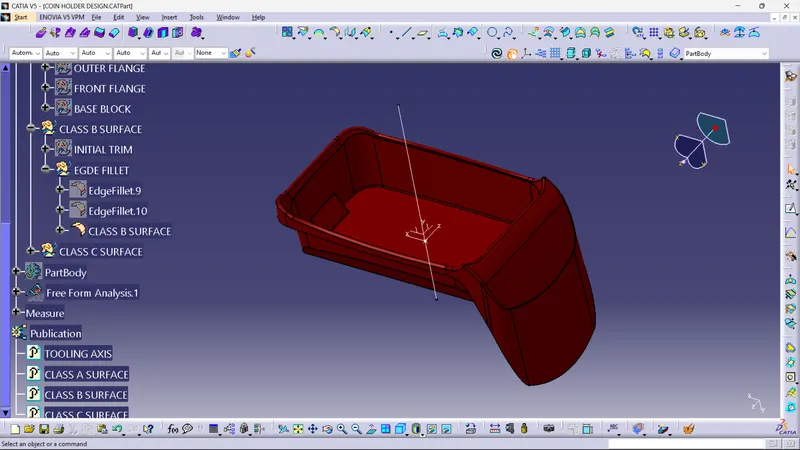
STEP 9 : EDGE FILLET
As you can see the difference between the above step, the edges are sharp and pointy. So in this step we have to give fillet to the edges and the radius of the edge fillet is firstly measured from Class A Surface and then given to the Class B surface. Here we have the Class B surface.
CLASS C SURFACE :
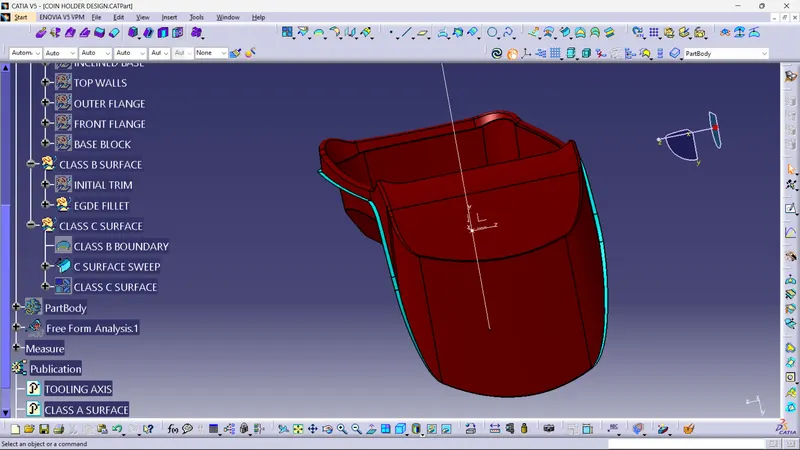
Class C surface has been created from the boundary lines of class A surface and by extracting the supporting surfaces then sweep the boundary lines with reference to the extracted surfaces.
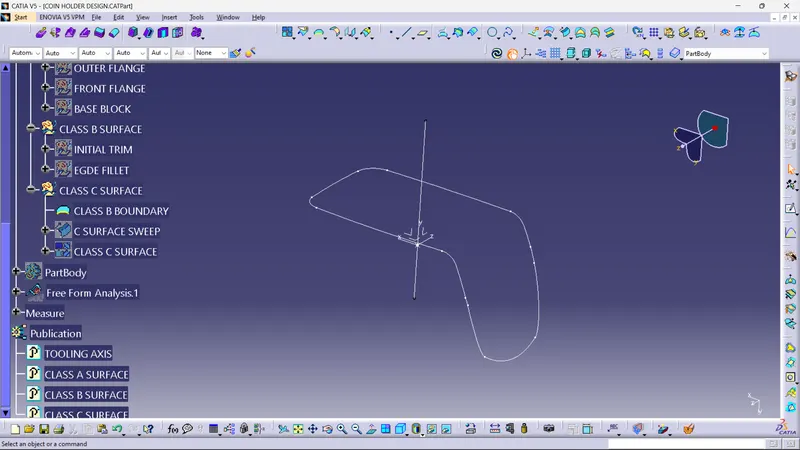
In order to get the C surface first we have to create a boundary lines of class A surface or by using multiple extrapolated command and check for the continuity of it.
Create a sweep with reference to the curve and the reference surface with a 90 degree angle and give the inside direction Check for the continuity of the surfaces if there is any gap go for extrapolated and trim all together now we will get the class C surface.
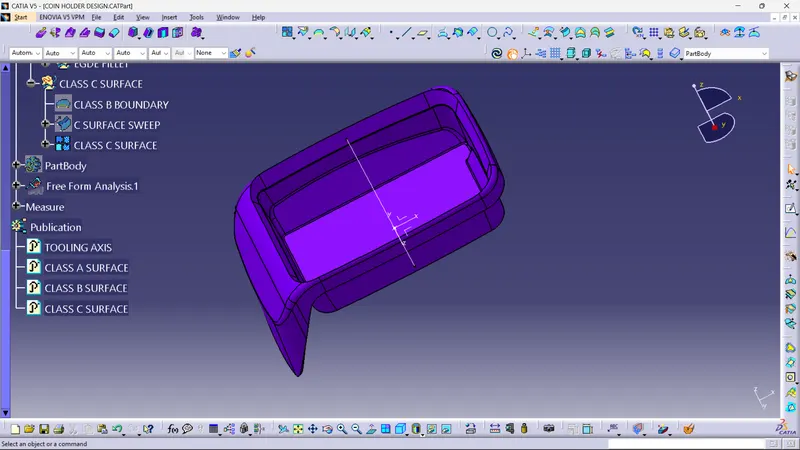
Then join the class A surface and C surfaces together by join command then check it for connectivity of the surfaces if it is ok then finally trimmed it with B surface we will get the final component again check whether the final body is closed by using boundary command.
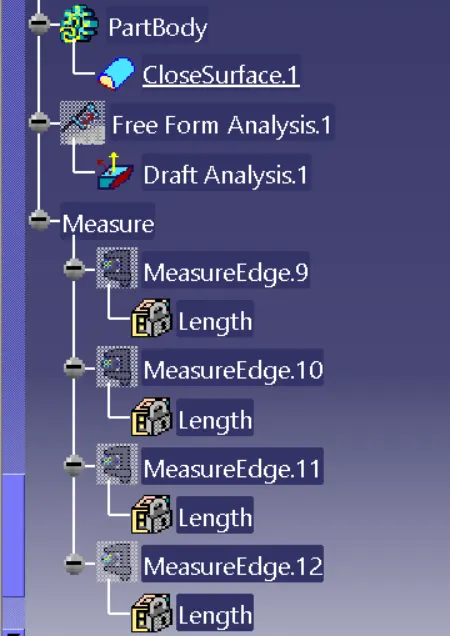
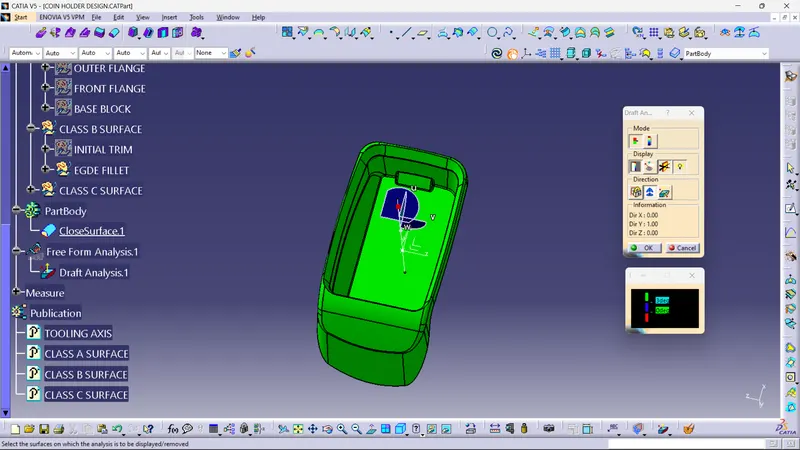
Closed solid body is created by using the close surface on part workbench by selecting the final Trimmed component and do the draft analysis for the same.
Following images shows the creation of Class C Surface :
STEP 1 : CREATING BOUNDARY
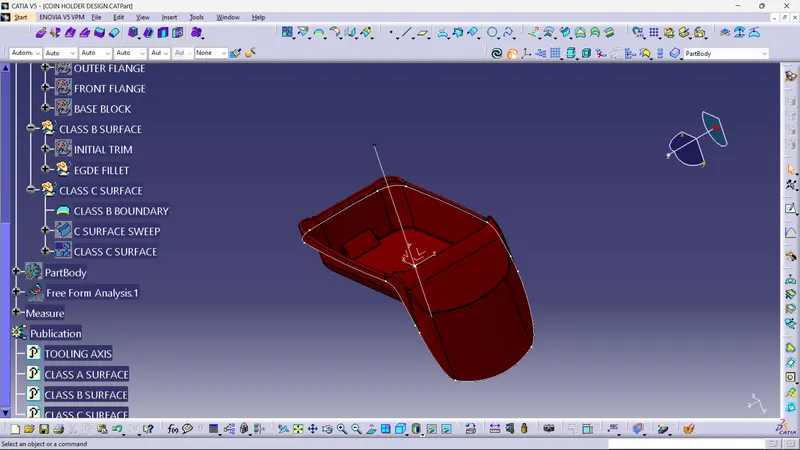
We have to create a boundary with the boundary command to the B surface as shown in the figs below.
Boundary without the surface :
Boundary with the Class B surface :
STEP 2 : SWEEP
We have to create a C surface with the Sweep command on the boundary which we made on the B surface as shown in the fig below.
STEP 3 : JOIN
Now we have to join all the surface i.e. Class A Surface, Class B Surface, and Class C Surface (i.e. the sweep surface shown in the fig above).
Here we have the Class C Surface shown in the fig below.
CREATING A CLOSE SURFACE AND PERFORMING THE DRAFT ANALYSIS :
For creating a close surface we need to check weather the surface is properly closed or have any open ends. This operation can be performed with the boundary command.
After this checking we have to go in the part design and use the close surface command and close our part as shown in the fig below.
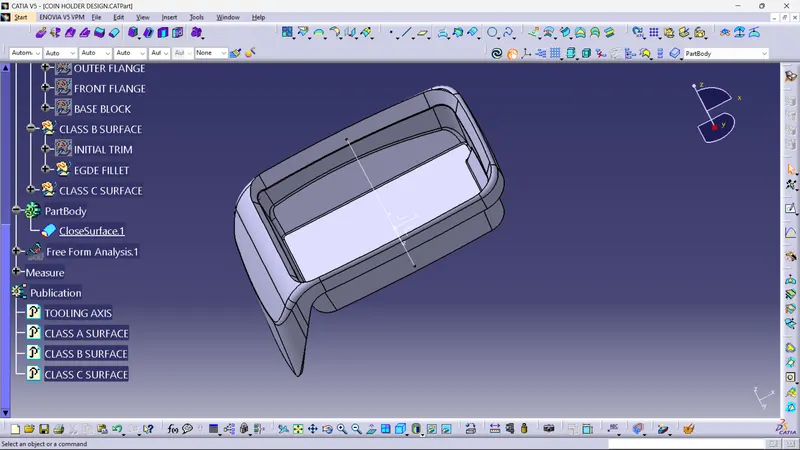
Here the surface is closed, noe performaing the Draft Analysis as shown in the fig below.
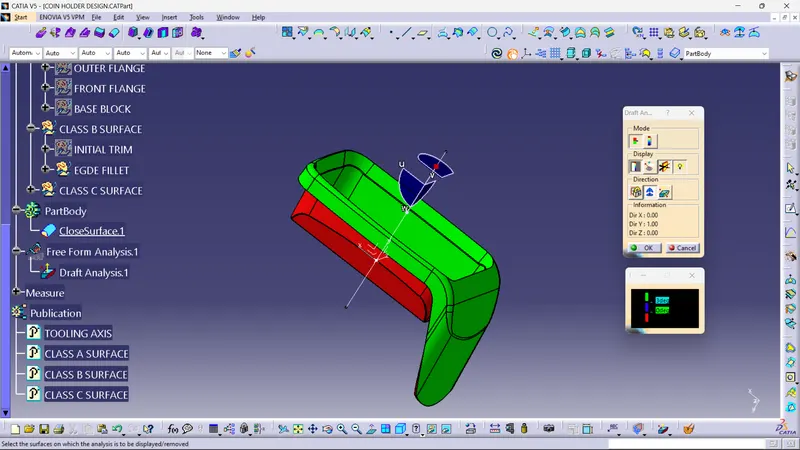
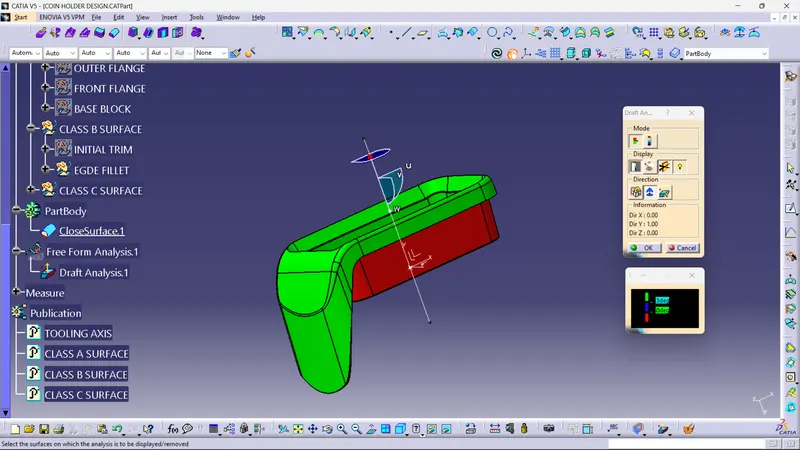
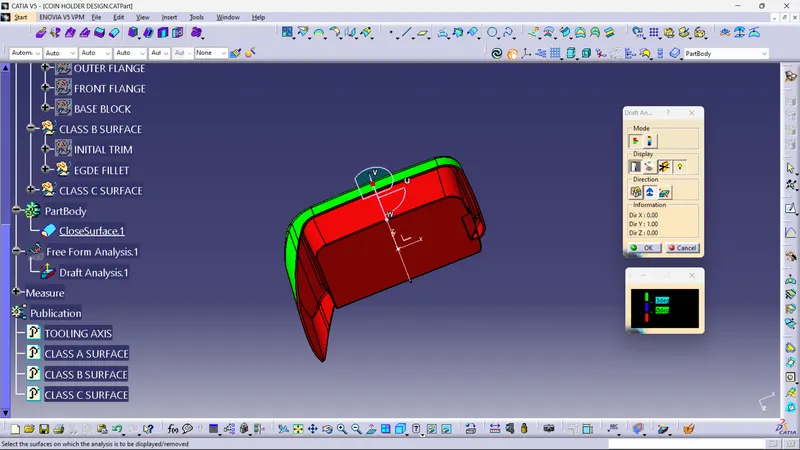
CONCLUSION:
The drafting also take place over here weather the part is maufactureable are not as shown in the above figs.
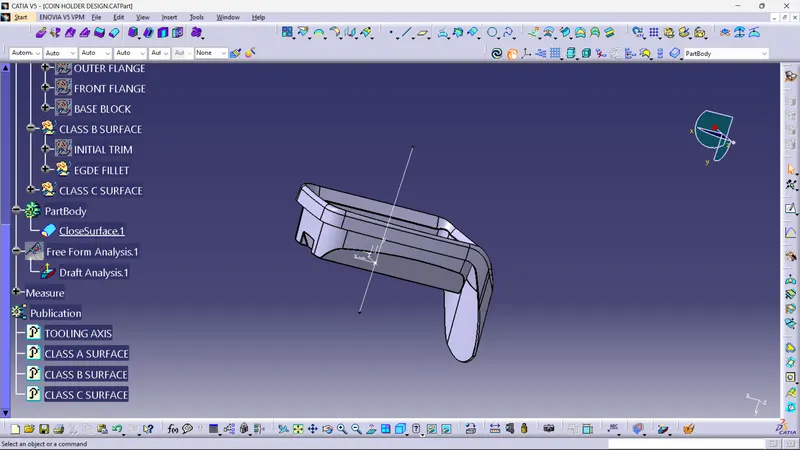
The part is coverted to soild as shown in the above figs.
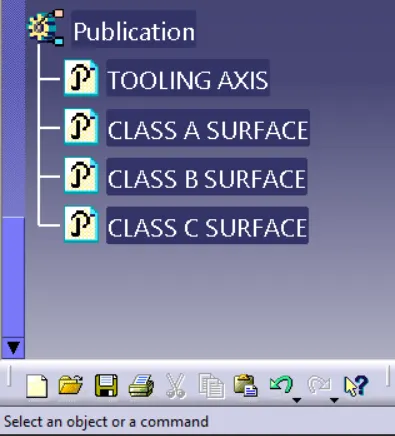
Now the Class A, B & C surfaces with the Tooling Direction have been Published and the Coin Holder Plastic can be moved on to the designing of the next operation i.e. the creation of B-side features.
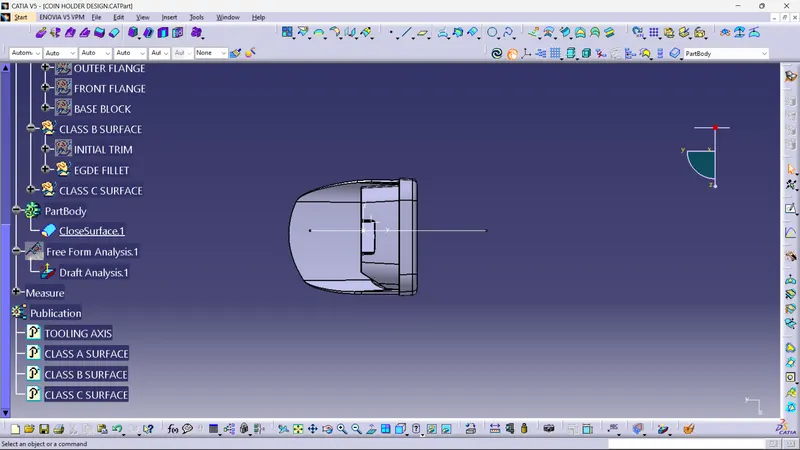
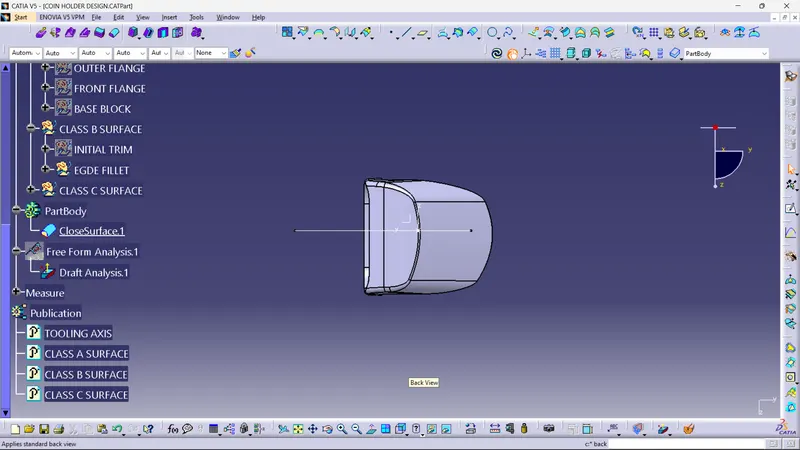
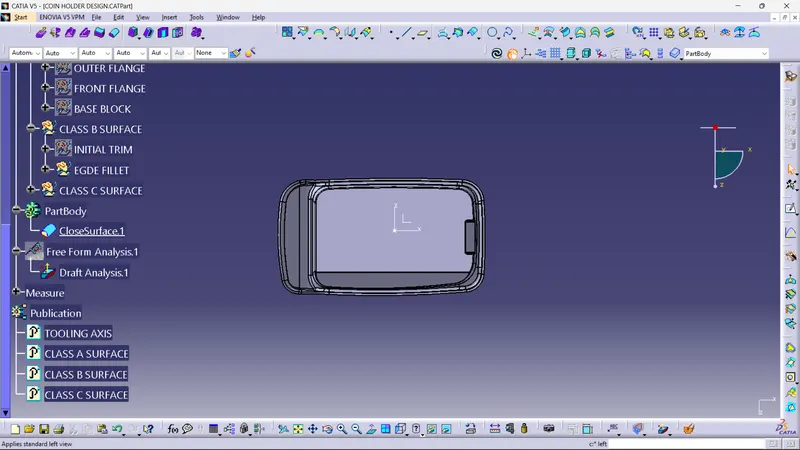
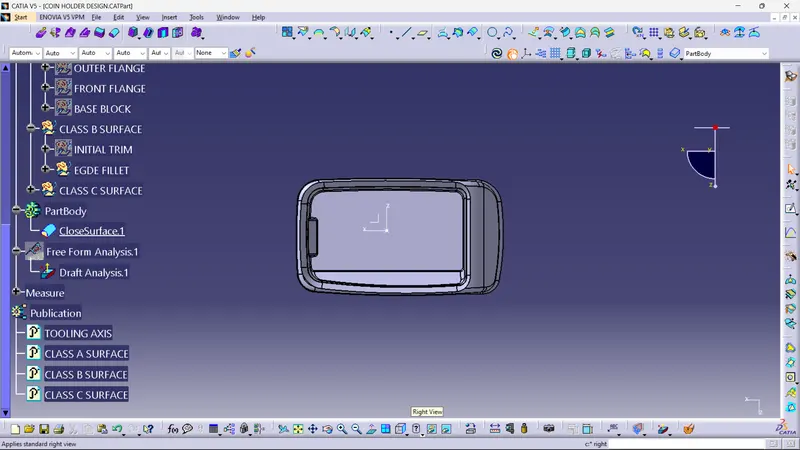
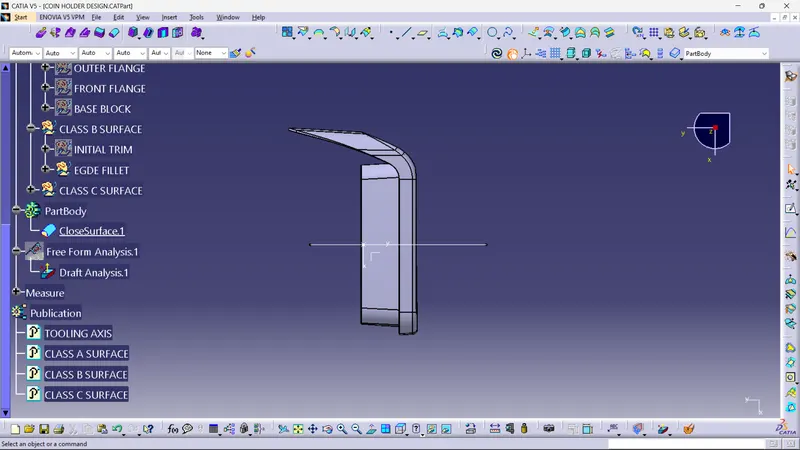
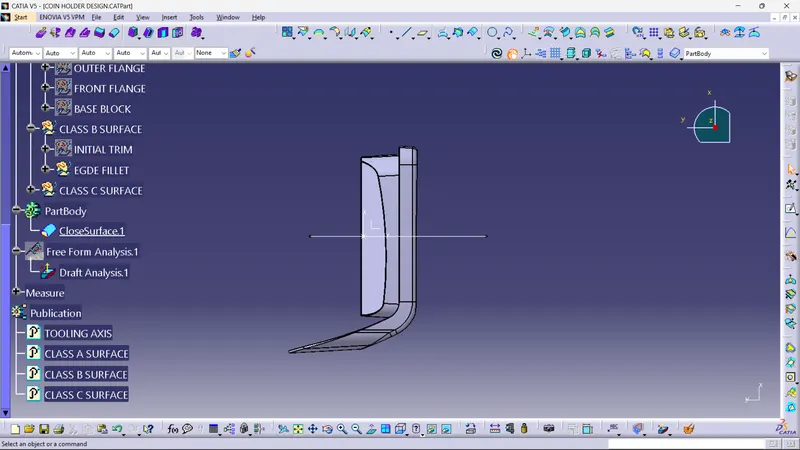
Screenshots of the solid model in various orientations (Isometric, Front, Back, Both Sides, Top & Bottom Views) are as follows :
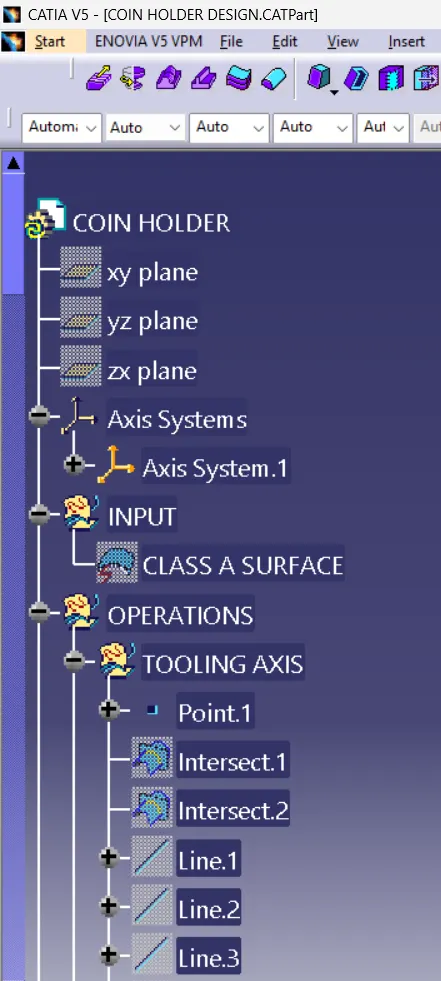
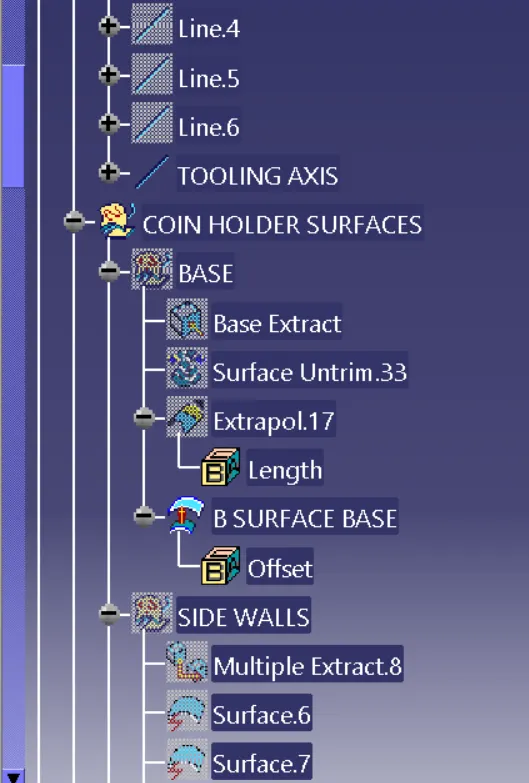
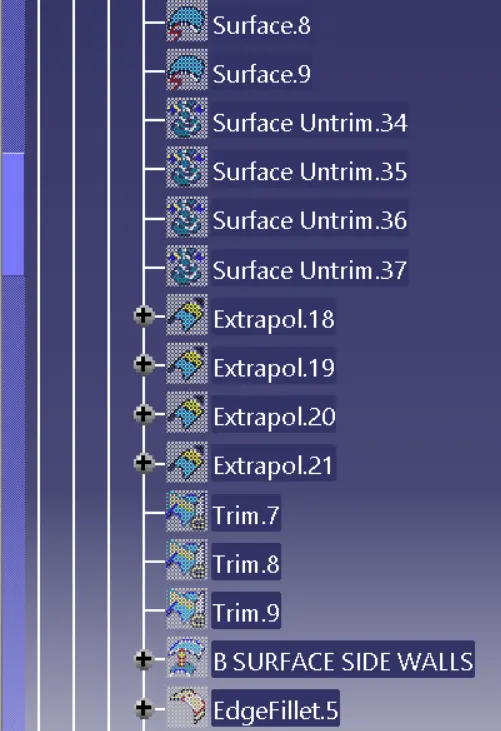
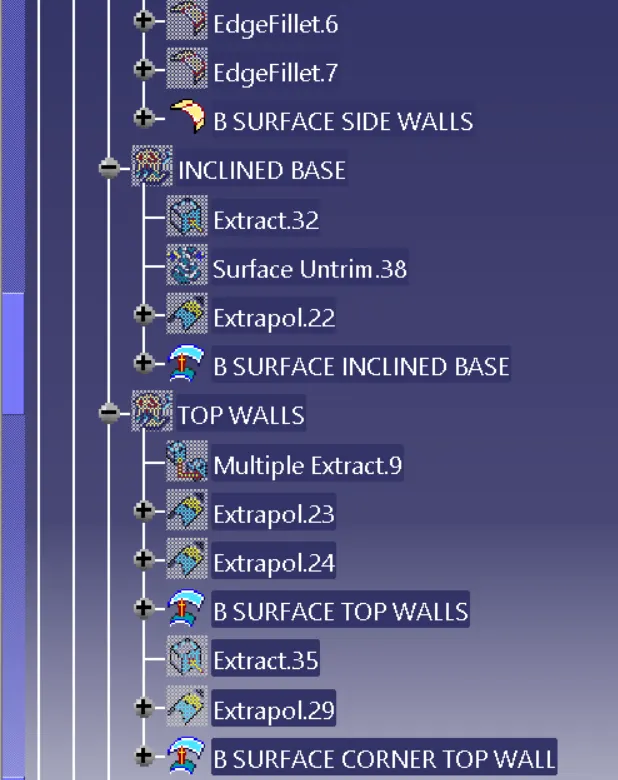
Screenshots of the solid model Tree Structure is as follows :